div>
Hello Hive Diy!
Many people have a space, but do not have the idea of how to make it beautiful, this new post is to give you an option and that that place has that spectacular detail that you want, and it is some beautiful flowers called Allamanda cathartica also known as Copa de Oro , Trumpet Amarilla and also Jazmín de Cuba, in this case they were made in foam material.
We all like flowers, but personally, I prefer that they follow their natural cycle in the garden, in their little plants. I don't like cutting them; I love to see them grow and bloom in their garden and it is good that the place is well taken care of and looks like a movie garden or how they are seen in animated stories.
However, when it comes to decorating our home, artificial flowers also have their charm, there are some that look very natural and I like how they work with foam.

In this post, I will show you how the process of making these flowers was. I will show you step by step so you can enjoy this creative project.

Materials

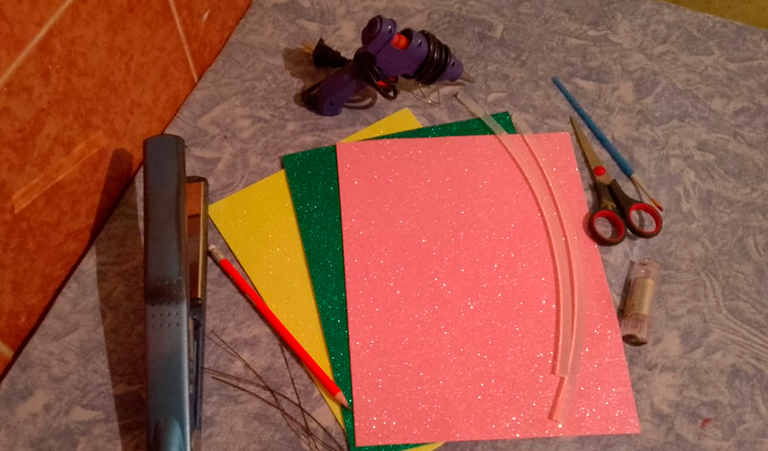
Green, yellow and pink foami
Scissors
Paint or chalk for foam (in my case I went to recycling and used lipstick)
Wire
Silicone
silicone gun
Pencil
Paper
Brush
Iron
Vase for flowers
Step by step
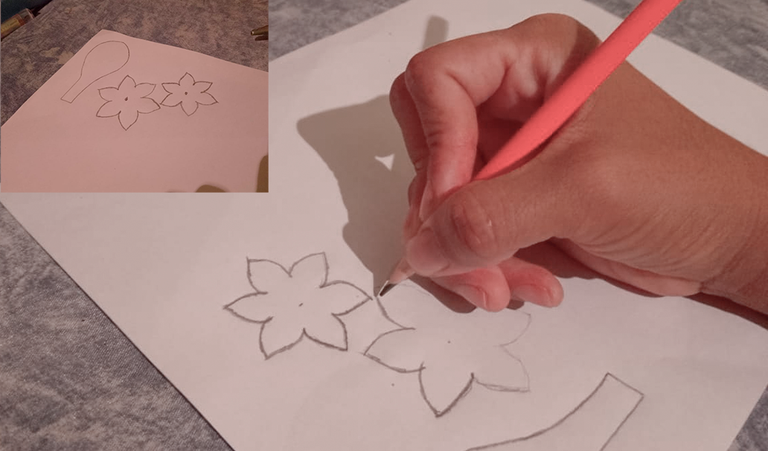
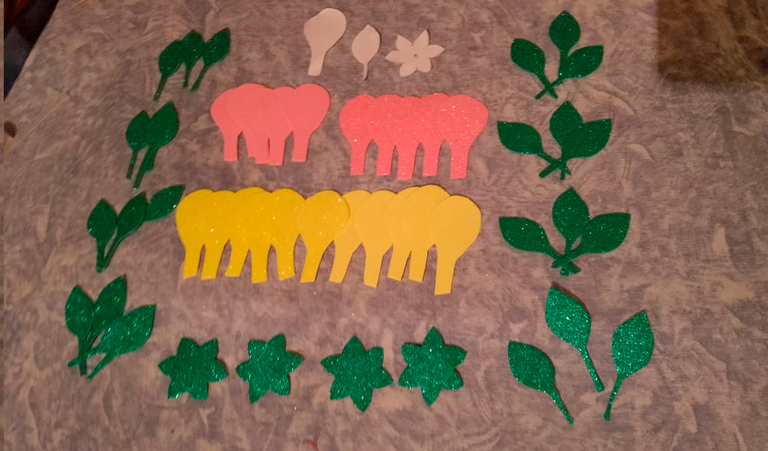
Passed 1: We draw and cut out some molds of petals, sepals and leaves like the ones you see in the image.
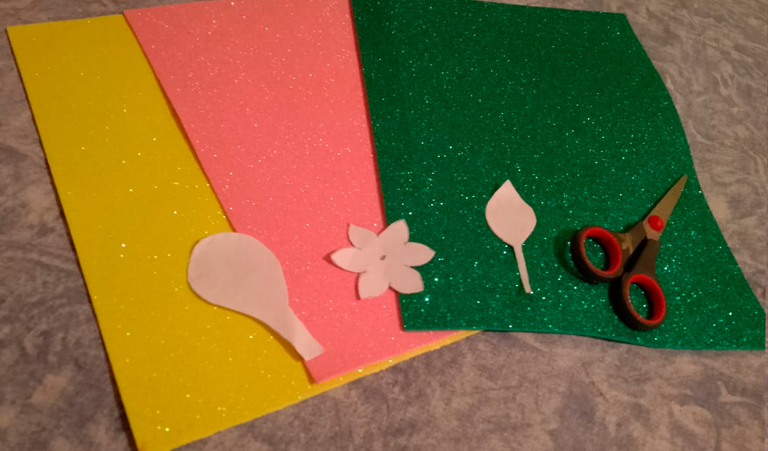
Passed 2:Then we cut out the foam molds, that is, 10 yellow petals, 10 pink petals, 4 sepals, 24 leaves.
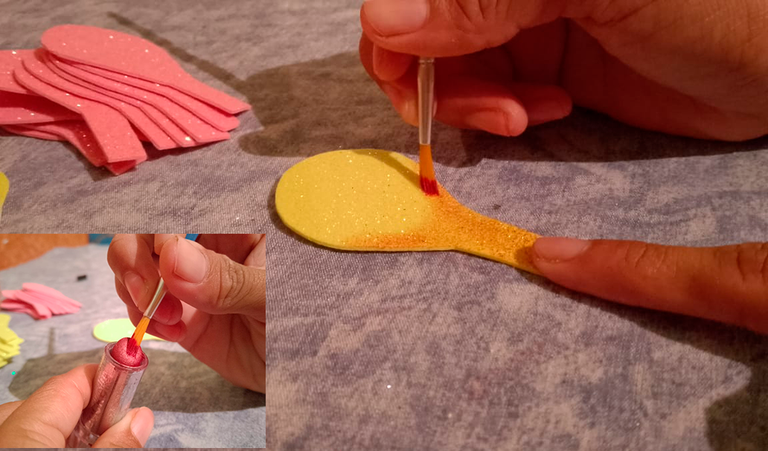
Passed 3:We start painting and blending only the bottom part of the petal as you see in the image (in my case I used lip paint, but the ideal is to use foam chalk).
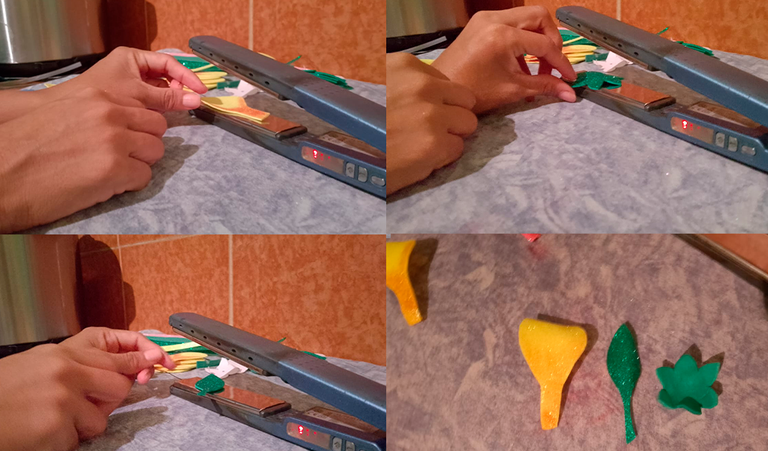
Passed 4:Now with the help of an iron we heat each of the petals, sepals, leaves and shape them.
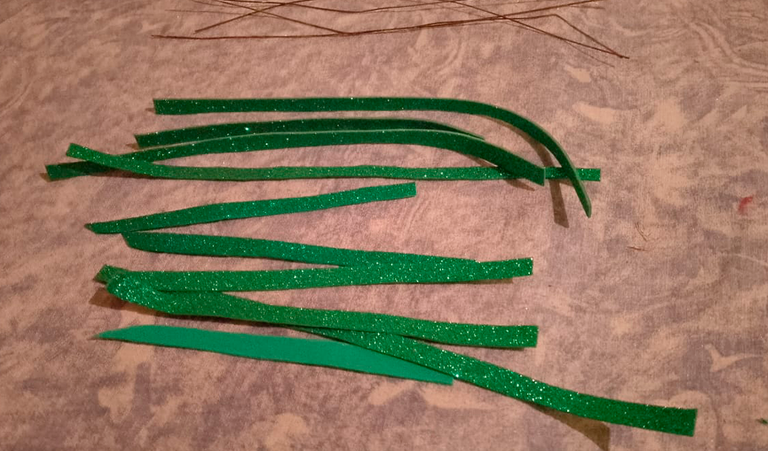
Passed 5:We cut out several 1/2cm strips of green foam to cover the wire that would form the stem.
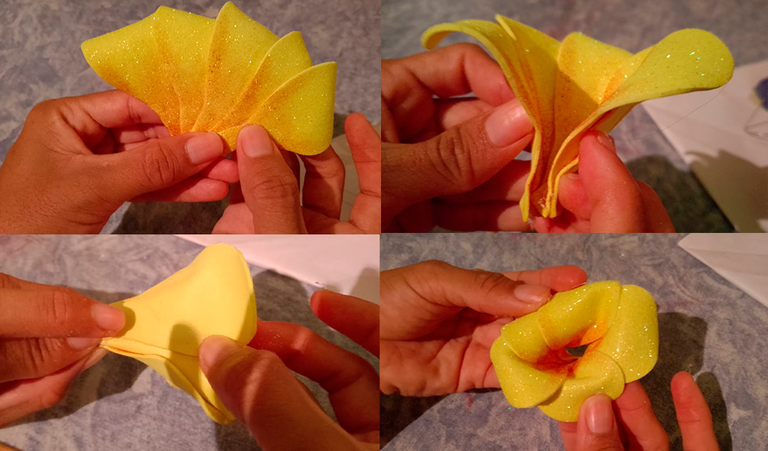
Passed 6:We begin to assemble each of the flowers. In this case, here I am going to show you the representation of a yellow flower, I used five yellow petals, and we will pay them in this way:
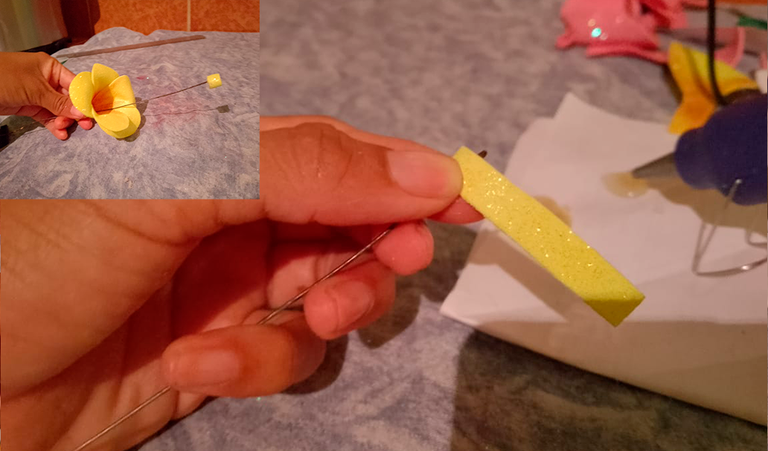
Passed 7:Then we cut a small strip 1/2 cm wide and 5 cm long, glue it to the tip of the wire and insert the wire into the middle of the flower, thus forming the center.
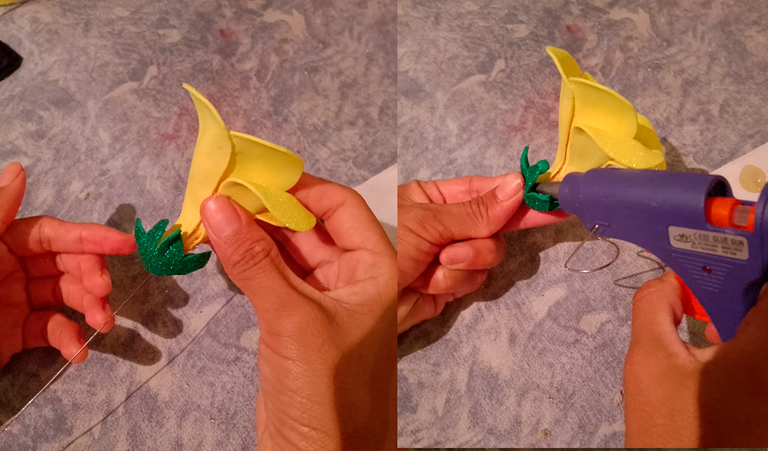
Passed 8:Now we proceed to insert the sepal through the wire until we reach the base of the flower.
Passed 9:We began to cover the stem by incorporating six little leaves along its entire length and this is how some of the flowers looked.

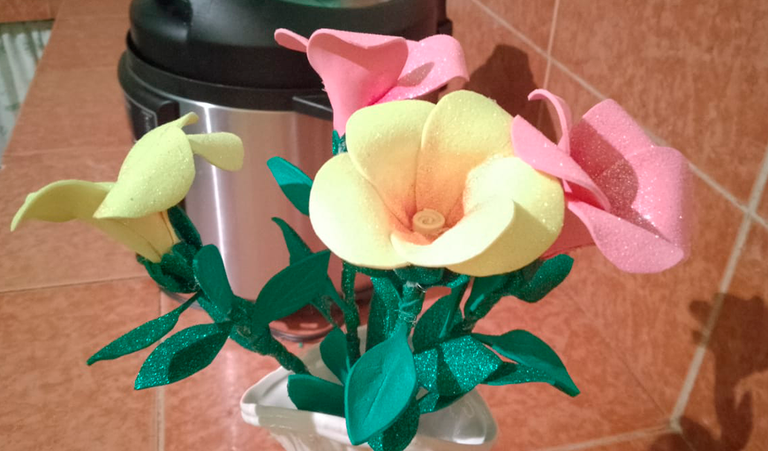
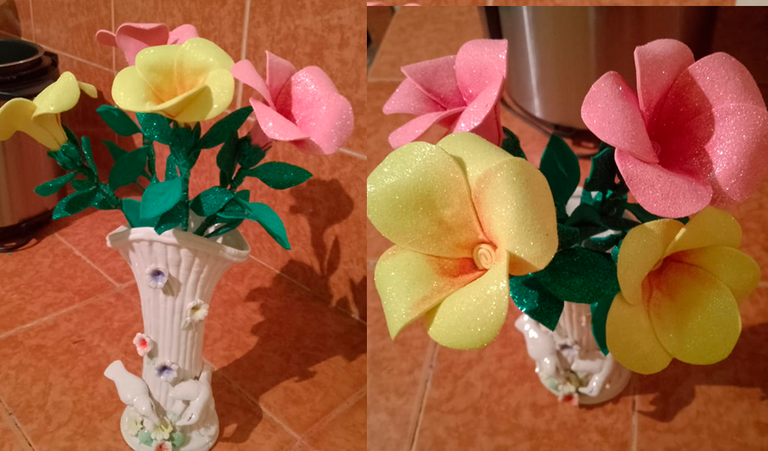
Passed 10:Once the four flowers were made, I placed them in a vase and they were that beautiful to recreate and give life to the spaces.
We must always have that hint of joy in every area of our lives, and the spaces in our homes also represent who we are and that is why we must not forget to take care of them as well, since every time you see them you will feel happy and pleasant.
💖Until next time Hivers!💖

ESP
Recrea tus espacios con unas deslumbrantes flores en foami
¡Hola Hive Diy!
Muchas personas tienen un espacio, pero no tiene la idea de cómo ponerlo bien bonito, este nuevo post es para brindarte una opción y que ese lugar tenga ese detalle espectacular que quieres, y es unas hermosas flores llamadas Allamanda cathartica también conocida como Copa de Oro, Trompeta Amarilla y también Jazmín de Cuba, en este caso se realizaron en material de foami.
A todos nos gustan las flores, pero personalmente, prefiero que sigan su ciclo natural en el jardín, en sus plantitas. No me gusta cortarlas; me encanta verlas crecer y florecer en su jardín y bueno que el lugar sea bien atendido que se vea como un jardín de películas o como se ven en los cuentos animados.
Sin embargo, cuando se trata de decorar nuestro hogar, las flores artificiales también tienen su encanto, hay unas que se ven muy naturales y me gustan como las trabajan en foami.
En este post, te mostraré cómo fue el proceso de elaboración de estas flores. Te mostraré paso a paso para que puedas disfrutar de este proyecto creativo.
Materiales
Foami verde, amarillo y rosado
Tijera
Pintura o tiza para foami (en mi caso acudí a reciclaje y usé labial)
Alambre
Silicón
Pistola de silicón
Lápiz
Papel
Pincel
Plancha
Jarrón para flores
Paso a Paso
Paso 1: Dibujamos y recortamos unos moldes de pétalos, sépalos y hojas como los que ves en la imagen.
Paso 2:Luego recortamos los molden en foami, es decir, 10 pétalos amarillos, 10 pétalos rosados, 4 sépalos, 24 hojas.
Paso 3:Iniciamos a pintar y difuminar solo la parte de abajo del pétalo así como lo ves en la imagen (en mi caso yo utilicé pintura labial, pero lo ideal es utilizar tiza para foami).
Paso 4:Ahora con la ayuda de una plancha calentamos cada uno de los pétalos, sépalos, hojas y vamos moldeando.
Paso 5:Recortamos en foami color verde varias listas de 1/2cm para forrar el alambre que formaría el tallo.
Paso 6:Comenzamos a armar cada una de las flores. En este caso aquí te voy a mostrar la representación de una flor amarilla, utilicé cinco pétalos amarillos, y los pagaremos de esta forma:
Paso 7:Luego cortamos una pequeña lista de 1/2 cm de ancho y 5 cm de largo, pegamos en la punta del alambre e iremos introduciendo el alambre en el medio de la flor, y así formar el centro
Paso 8:Ahora procedemos a insertar el sépalo a través del alambre hasta llegar a la base de la flor.
Paso 9:Comenzamos a forrar el tallo incorporando seis hojitas en todo lo largo y así quedó unas de las flores.
Paso 10:Una vez elaboradas las cuatro flores, las coloqué en un jarrón y así de bonitas quedaron para recrear y darle vida a los espacios.
Siempre debemos tener esa pisca de alegría en cada área de nuestras vidas, y los espacios de nuestras casas también representan como somos y por eso no debemos olvidar cuidar de ellos también, ya que cada vez que los veas vas a sentir contenta y agradable.
💖¡Hasta una próxima oportunidad Hivers!💖
