Saludos queridos amigos creadores de esta linda comunidad!
El dia de hoy estoy muy feliz, por presentarles finalmente esta fácil pero muy bonita manualidad que fue la de personalizar un plato para mi lindo Julián, como saben el y yo somo ecológicos asi que usamos los envases vacios de otros productos para nuevos usos, es así como el envase de la mantequilla ha servido de plato de Julián, pero queríamos que tuviera algo de personalidad, asi que decidí grabar su nombre en el plato, aqui te muestro como fue el proceso.
Greetings dear friends, creators of this beautiful community!
Today I am very happy to finally present you this easy but very nice craft that was to personalize a plate for my cute Julian, as you know he and I are ecological so we use the empty containers of other products for new uses, this is how the butter container has served as Julian's plate, but we wanted it to have some personality, so I decided to engrave his name on the plate, here I show you how was the process.


Materials
A 200gr. container of butter.
Resin and monomer liquid
Acrylic paints
Sandpaper
Pencils
Brushes
Adhesive tape
Foami
Materiales
Un envase de Mantequilla de 200gr
Resina y liquido monomer
Pinturas acrilicas
Lijas
Lapices
Pinceles
Cinta adhesiva
Foami

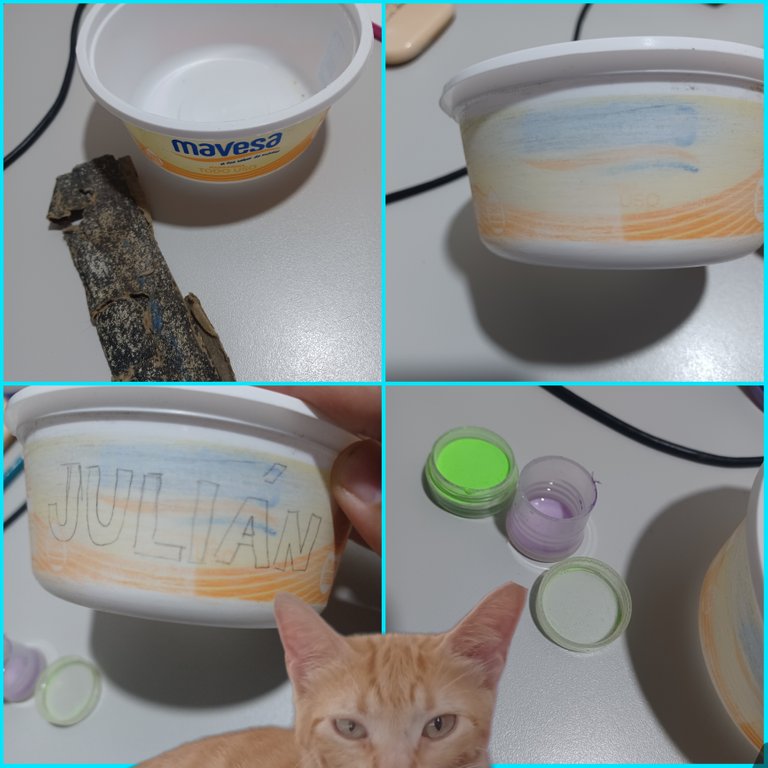
Lo primero que hice fue lijar muy bien la zona donde iba a pintar y grabar el nombre de mi gatito, la cual fue toda la franja donde esta dispuesto el nombre del producto, luego con un lápiz de grafito dibuje el nombre justo en el medio.
The first thing I did was to sand very well the area where I was going to paint and engrave the name of my kitten, which was all the strip where the name of the product is arranged, then with a graphite pencil I drew the name right in the middle.

Luego usando algo de resina para uñas y liquido monomer, comencé a cubrir toda el áreas de las letras tratando que que quedase lo mas prolijo posible, para usar este producto primero se carga el pincel del líquido y luego se toca la superficie del polvo hasta que se forme un gota que quedará pegada al pincel, luego se va distribuyendo por la superficie a trabajar, se que es un producto específico para uñas, pero quise experimentar un poco y la verdad me gusto el resultado, he usado este producto también por su durabilidad, se que este grabado sera resistente al lavado.
Then using some resin for nails and monomer liquid, I began to cover the entire area of the letters trying to make it as neat as possible, to use this product first load the liquid brush and then touch the surface of the powder until a drop is formed that will be stuck to the brush, then it is distributed by the surface to work, I know it is a specific product for nails, but I wanted to experiment a little and I really liked the result, I have used this product also for its durability, I know that this engraving will be resistant to washing.

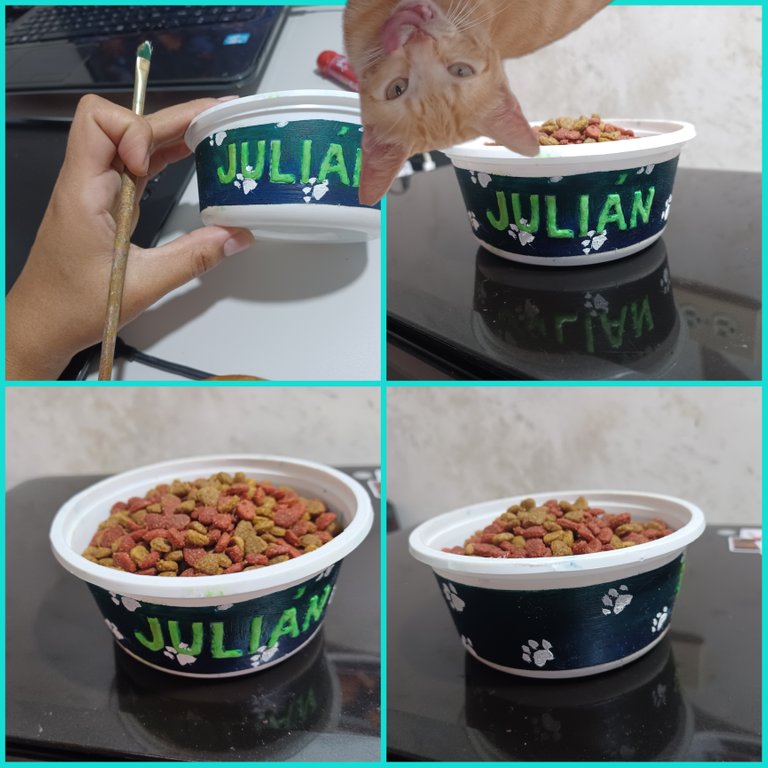
A continuación, coloque cinta de papel para delimitar el área a pintar, que como comenté seria solo la parte donde esta impreso el nombre del producto, comence entonces a pintar con azul oscuro y verde haciendo un degradado en el centro, aunque los colores son tan oscuros que apenas se nota jajaja, pero me gusto de esta manera.
Seguidamente pinte algunas huellitas de gato por todos lados usando pintura blanca y deje reposar hasta que estuviese bien seco y retire la cinta de papel.
Next, I put paper tape to delimit the area to paint, which as I said would be only the part where the name of the product is printed, then I started to paint with dark blue and green making a gradient in the center, although the colors are so dark that you can hardly notice hahaha, but I liked it this way.
Then I painted some cat prints all over using white paint and let it sit until it was dry and removed the paper tape.

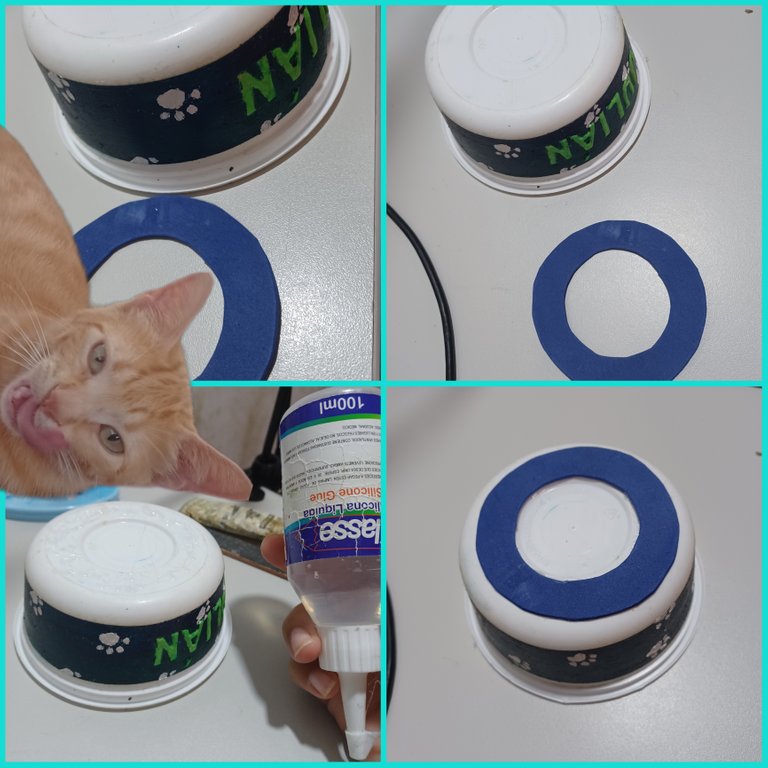
Uno de los problemas a resolver con el plato era la poca fricción que tiene el plastico en el suelo, asi que para contrarestar un poco esto recorte una circunferencia de foami o goma eva con un diámetro de 7.6 centimetros con un espesor de 1.5cm estas medidas tomadas directamente del envase.
One of the problems to solve with the plate was the little friction that the plastic has on the ground, so to counteract this I cut a circumference of foam with a diameter of 7.6 centimeters with a thickness of 1.5cm these measures taken directly from the container.

Y este ha sido el resultado, aun tengo que perfeccionar mi técnica con la resina, pero me siento muy feliz con el resultado, se que sera algo duradero y estamos reutilizando un envase plástico en lugar de arrojarlo a la basura y Julián es muy feliz comiendo en el, bueno donde sea realmente
And this has been the result, I still have to perfect my technique with the resin, but I feel very happy with the result, I know it will be something long lasting and we are reusing a plastic container instead of throwing it in the trash and Julian is very happy eating in it, well anywhere really.

Espero que esta manualidad haya sido de su agrado Julián y yo les deseamos un feliz dia y los esperamos en un próximo post!
I hope you enjoyed this craft Julian and I wish you a happy day and we hope to see you in a future post!


Traducción en Deepl.com • Pngs Photoroom.app • Collages Picsart.app


