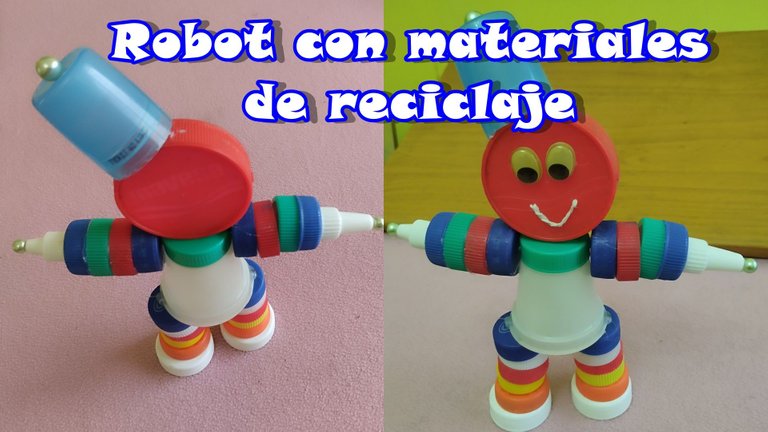
Hola, hola, mi gente bella. Espero que se encuentren bien. Hoy les voy a compartir un proyecto que estuve realizando para los niños de la escuela donde trabajo, se trata de un simpático robot hecho con tapas de botellas. Estos muñecos elaborados con materiales de reciclaje sirven para que los niños jueguen y decoren sus habitaciones. Son originales de materia prima reciclada y nos hacen recordar aquellas series infantiles de los ochenta.
A mis hermanos les encantaban y mi abuelo los ayudaba a fabricarlos, recuerdo que pasaban horas haciéndolos porque no era uno sino varios. Mis pequeños hermanos pasaban su tiempo jugando y era tan impresionante ver sus caritas de alegría que me contagiaban. Lo más asombroso era que el juguete preferido era un simple muñeco de tapas plásticas, allí se valoraba el esfuerzo del abuelo. Quise llevar este proyecto al aula, pues en un mundo con tantos avances tecnológicos, colocamos de prioridad un teléfono. Aprendí hace mucho tiempo que no necesitamos de muchos lujos para ser felices, sobre todo, cuando descubrimos que con materiales de provecho podemos crear juguetes increíbles.
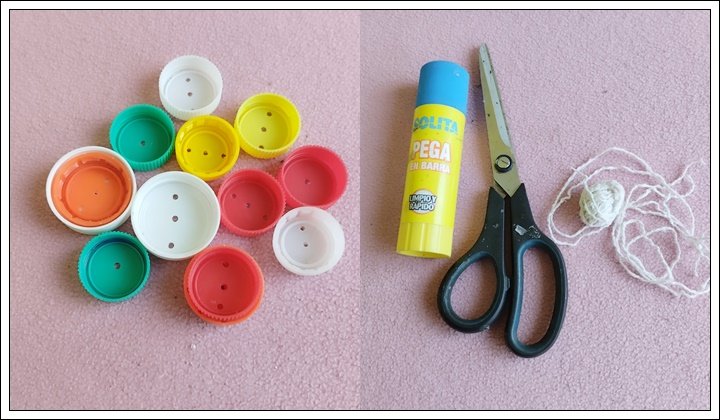
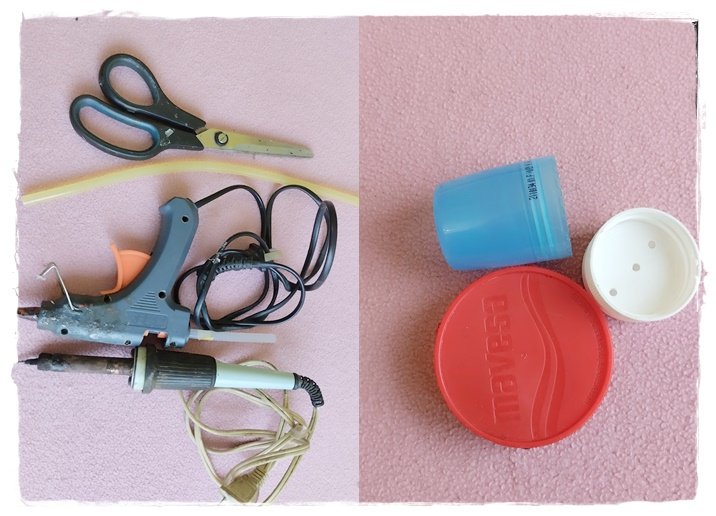
Vamos a colocar manos a la obra, necesitaremos los siguientes materiales:
- Tapitas de plástico de varios tamaños y colores
- Hilo de algodón, lana o limpia pipa
- Tijera
- Cinta métrica
- Pistola de silicona
- Barra de silicona
- Cautín
- Ojos movibles, pueden sustituirlo por cuencas o pintarlos
- Cuentas
- Pega
Hello, hello, my beautiful people. I hope you are feeling well. Today I am going to share with you a project I have been doing for the children at the school where I work, it is a nice robot made with bottle caps. These dolls made with recycled materials are useful for children to play and decorate their rooms. They are made from recycled raw materials and remind us of those children's series from the eighties.
My brothers loved them and my grandfather helped them to make them, I remember that they spent hours making them because they were not one but several. My little brothers spent their time playing and it was so impressive to see their little faces of joy that it was contagious. The most amazing thing was that the favorite toy was a simple doll made of plastic lids, there the grandfather's effort was valued. I wanted to take this project to the classroom, because in a world with so many technological advances, we prioritize a telephone. I learned a long time ago that we don't need many luxuries to be happy, especially when we discover that with useful materials we can create incredible toys.
Let's get to work, we will need the following materials:
- Plastic caps of various sizes and colors
- Cotton, wool or pipe cleaner thread
- Scissors
- Measuring tape
- Silicone gun
- Silicone rod
- Soldering iron
- Movable eyes, you can substitute them for eye sockets or paint them
- Beads
- Glue
Procedimiento:
Primero empezamos colocando las tapitas una sobre otras para darnos una idea de como queremos nuestro robot.
Luego, cortamos cuatro hebras de hilo de 30 centímetros.
Enchufamos el cautín, cuando esté caliente, procedemos hacerle dos agujeros a veinte tapas.
Procedure:
First we start by placing the caps one on top of the other to give us an idea of how we want our robot.
Then, we cut four strands of thread of 30 centimeters.
When the soldering iron is hot, we proceed to make two holes in twenty caps.
Manos a la obra
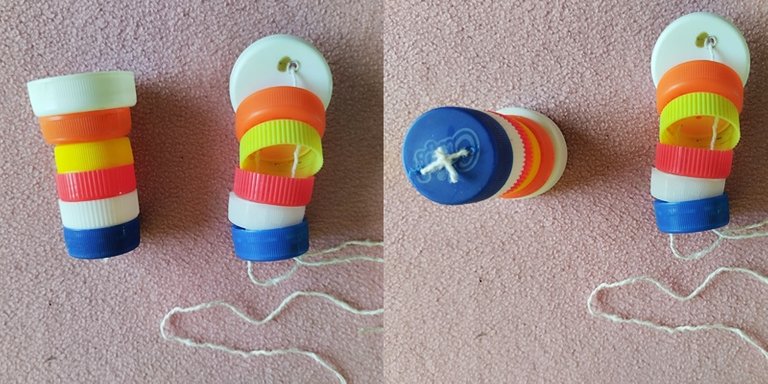
Tomamos una hebra de hilo y le colocamos un poco de pegamento en cada extremo para facilitar el trabajo de pasar por los agujeros de cada tapa.
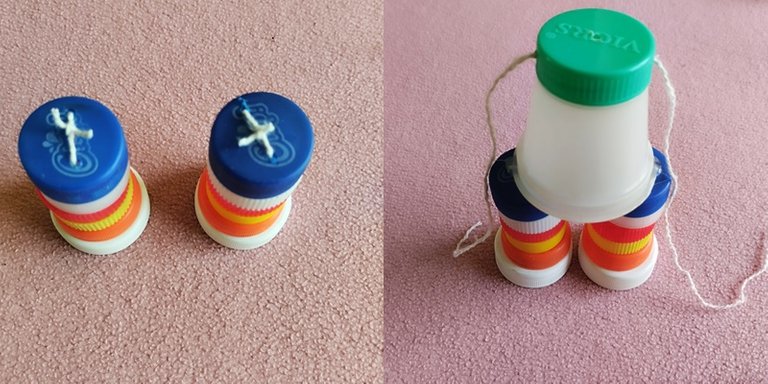
Empezamos armando las piernas, tomamos una tapa mediana y se le pasa una hebra por un agujero de adentro hacia fuera y seguimos con las cinco tapitas restantes y hacemos lo mismo con el otro extremo y amarramos, es importante amarrar para darle firmeza. Repetimos el procedimiento con la otra pierna.
Ya listas las piernas, con la ayuda de la pistola de silicona pegamos la tapa más alta sobre las piernas y sobre ella seguimos con una mediana, pero primero le hacemos dos agujeros por cada lado para armar los brazos. Tomamos una hebra de hilo y colocamos pegamento por los extremos, pasando la hebra de adentro hacia afuera y hacemos lo mismo con el otro extremo, amarramos y repetimos el procedimiento para el otro brazo y al final le colocamos unas tapitas pequeñas muy bonitas con una cuenta, es decir, una perla para un toque de elegancia.
Let's get to work
We take a strand of yarn and put a little glue on each end to make it easier to pass through the holes of each lid.
We start assembling the legs, we take a medium size lid and pass a thread through a hole from the inside out and continue with the remaining five lids and do the same with the other end and tie it, it is important to tie it to give it firmness. Repeat the procedure with the other leg.
Once the legs are ready, with the help of the silicone gun we glue the highest cap on the legs and on top of it we continue with a medium one, but first we make two holes on each side to assemble the arms. We take a strand of thread and place glue on the ends, passing the thread from the inside to the outside and do the same with the other end, we tie and repeat the procedure for the other arm and at the end we place some very pretty little caps with a bead, that is to say, a pearl for a touch of elegance.
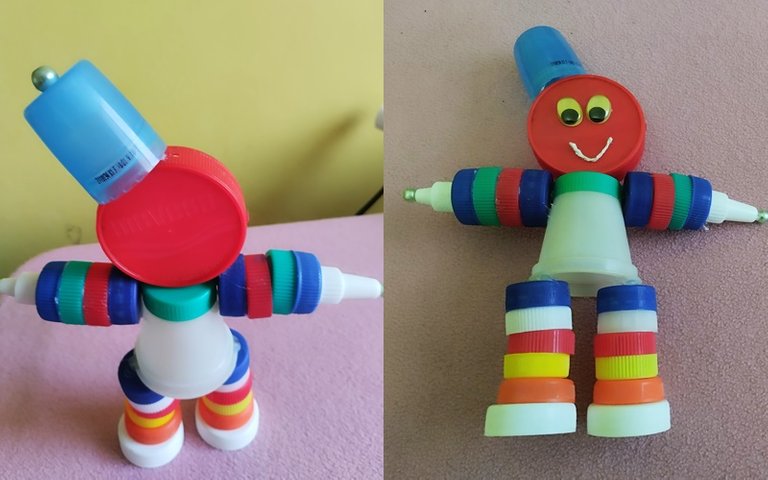
Luego, con la pistola pegamos la tapa más grande que será nuestra cabeza y le colocamos otra tapa larga con una cuenta. Por último, los ojos y la boca. Lo puedes decorar a tu gusto.
De esta forma, concluye mi proyecto, espero que les haya gustado y lo realicen con sus pequeños, les aseguro que los harán muy felices. Hasta una próxima oportunidad, Dios les bendiga.
Then, with the gun we glue the larger cap that will be our head and we place another long cap with a bead on it. with a bead. Finally, the eyes and mouth. You can decorate it as you like.
This concludes my project, I hope you liked it and do it with your little ones, I assure you that you will make them very happy. Until next time, God bless you.
Todas las fotos son de mi galería personal.
Traducido con DeepL.
All photos are from my personal gallery.
Translated with DeepL.