.jpg)
Espero que todos se encuentren muy bien, después de unos cuantos días me complace estar compartiendo con ustedes nuevamente, algunas veces nosotras las mujeres cuando salimos de casa bien sea para dar un paseo o salir de viaje solemos algunas veces llevar nuestros cosméticos en los cuales también llevamos nuestros esmaltes de uñas y algunas veces se nos pierde dentro de la cartera o de la maleta y la encontramos al rato, hoy quiero compartir esta linda bolsita organizadora para nuestros esmaltes, es una manera muy cómoda de llevarlos sin que se puedan romper o perder, veamos el paso a paso.
I hope you are all very well, after a few days I am pleased to be sharing with you again, sometimes we women when we leave home either for a walk or go on a trip sometimes we usually carry our cosmetics in which we also carry our nail polishes and sometimes we lose them inside the purse or suitcase and we find them soon, today I want to share this nice little organizer bag for our nail polishes, it is a very comfortable way to carry them without breaking or losing them, let's see the step by step.
.jpg)
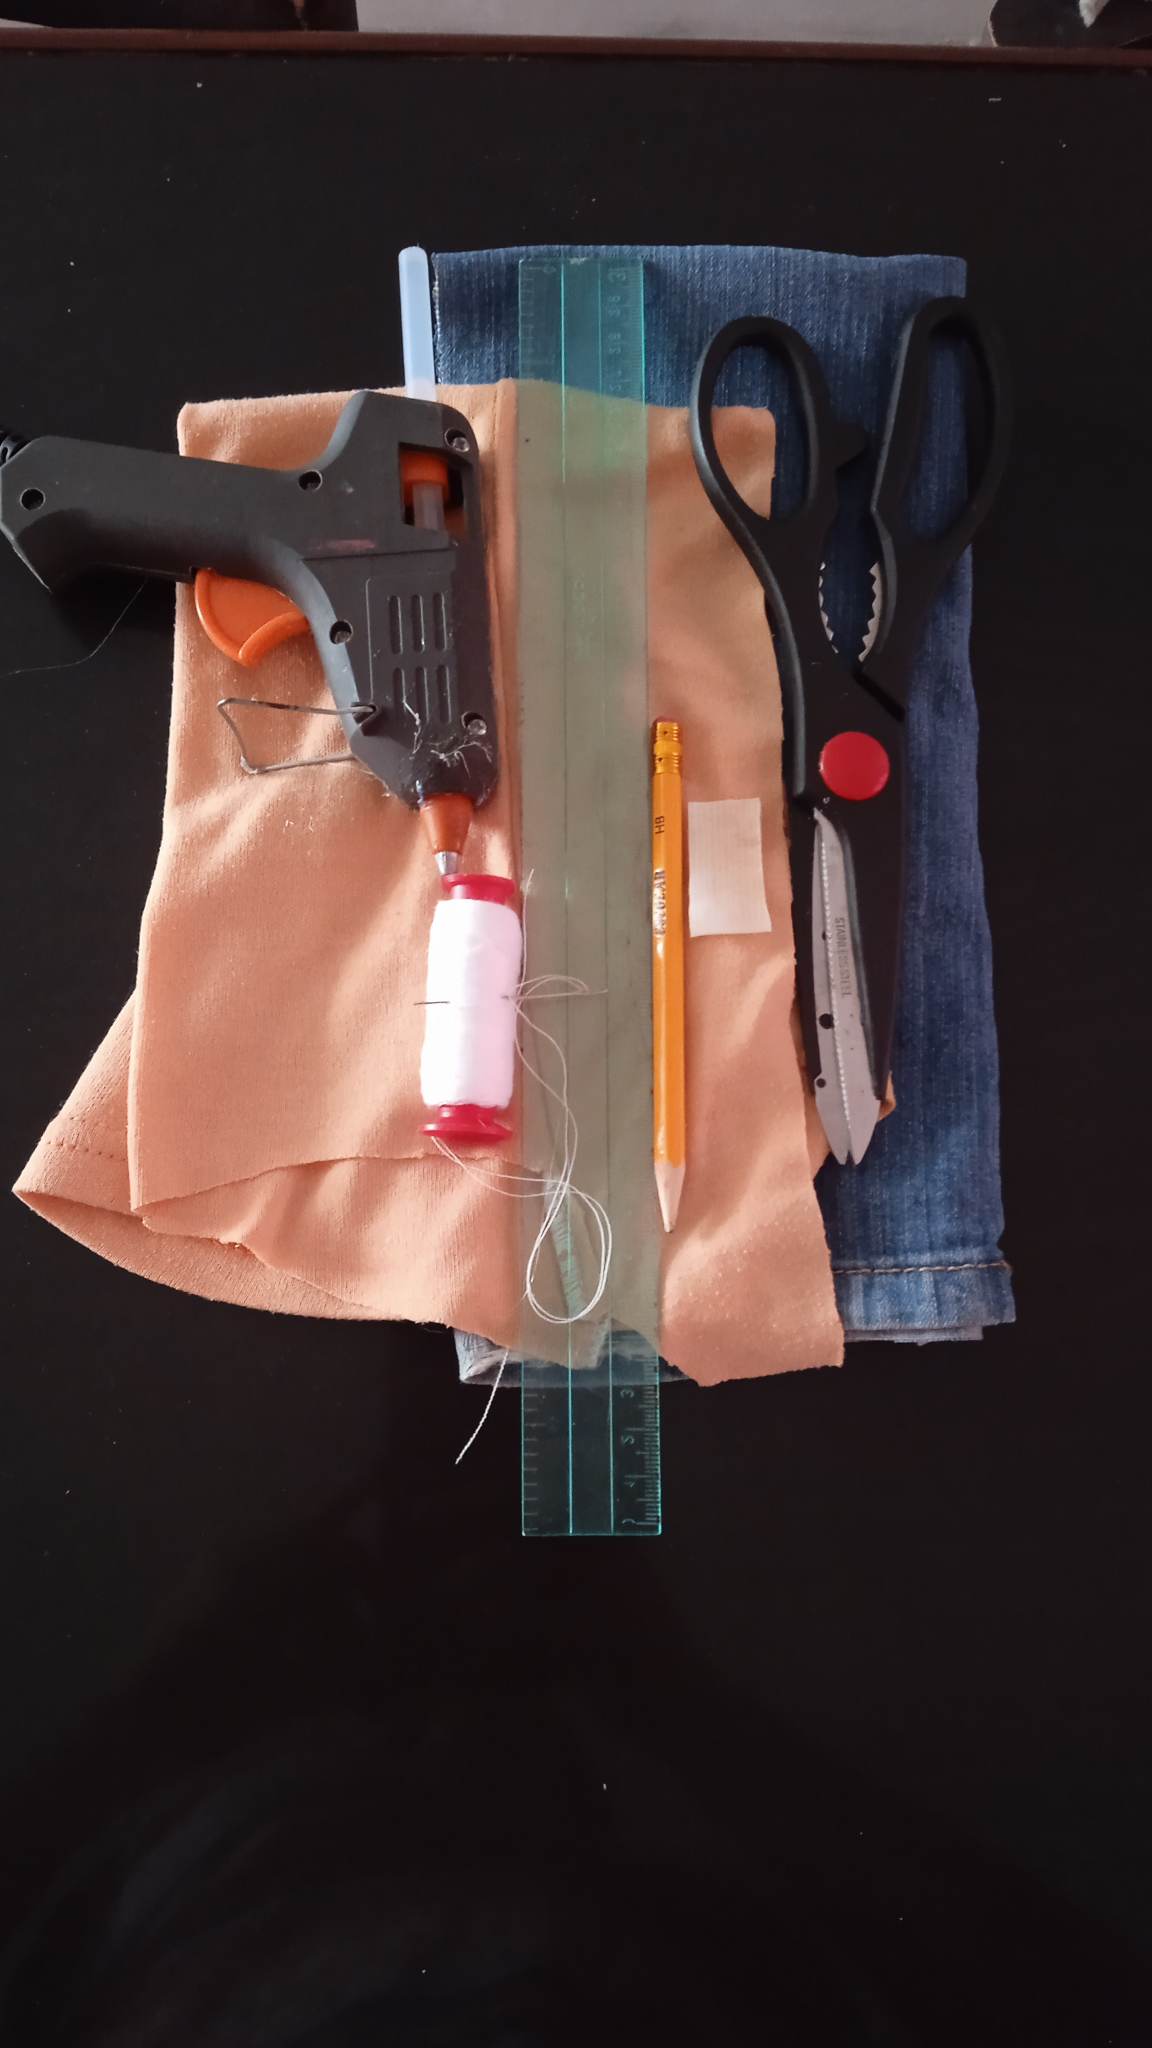
- Los materiales a utilizar son:
- Retazos de tela.
- Tijera.
- Regla o cinta métrica.
- Cierre mágico.
- Silicón en barra.
- Lápiz.
- Hilo y aguja de coser.
- The materials to be used are:
- Fabric scraps.
- Scissors.
- Ruler or tape measure.
- Magic clasp.
- Silicone stick.
- Pencil.
- Thread and sewing needle.
.jpg)
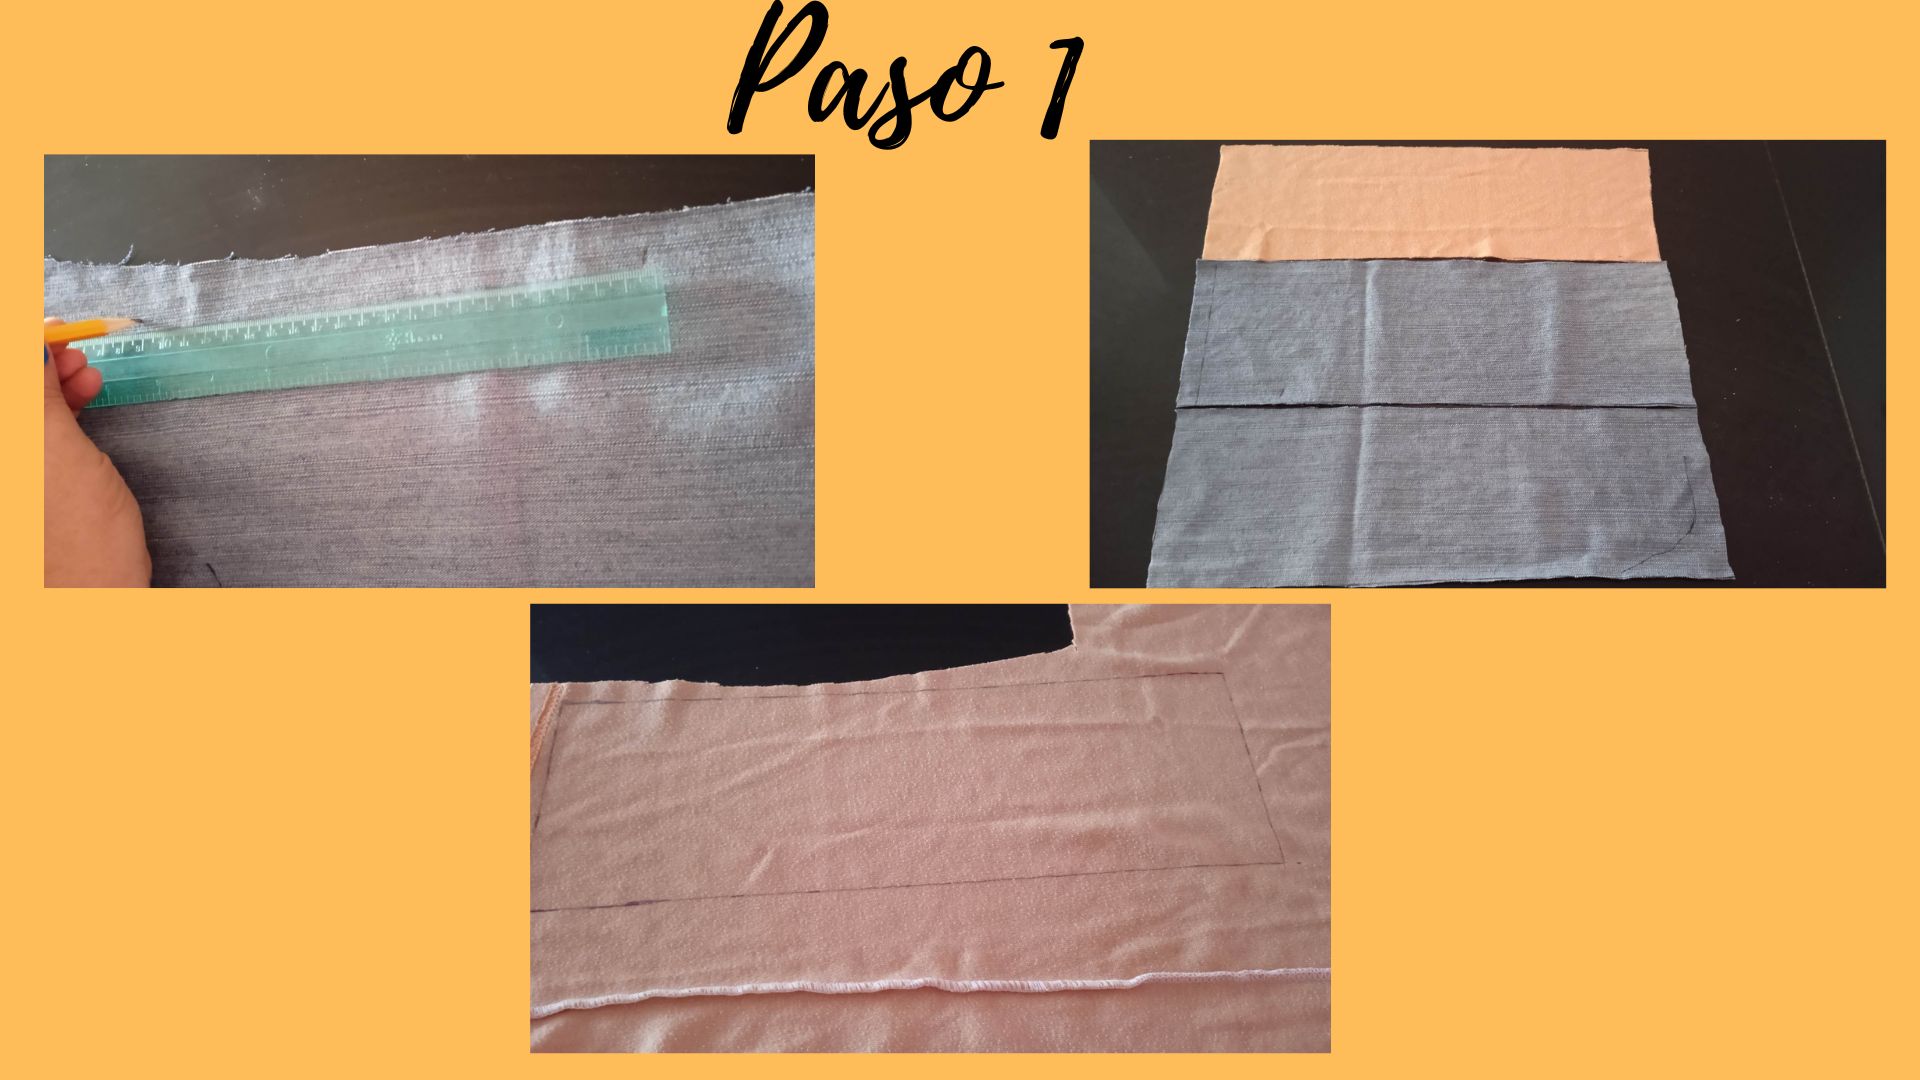
- Paso 1: Lo primero que debemos hacer es marcar en los retazos de tela las medidas de 35 cms de largo por 12 cms de ancho, luego recortamos, debemos sacar 3 partes iguales las cuales pueden ser de la misma tela o de telas diferentes.
- Step 1: The first thing to do is to mark on the fabric scraps the measures of 35 cms long by 12 cms wide, then cut, we must cut out 3 equal parts which can be of the same fabric or of different fabrics.
.jpg)
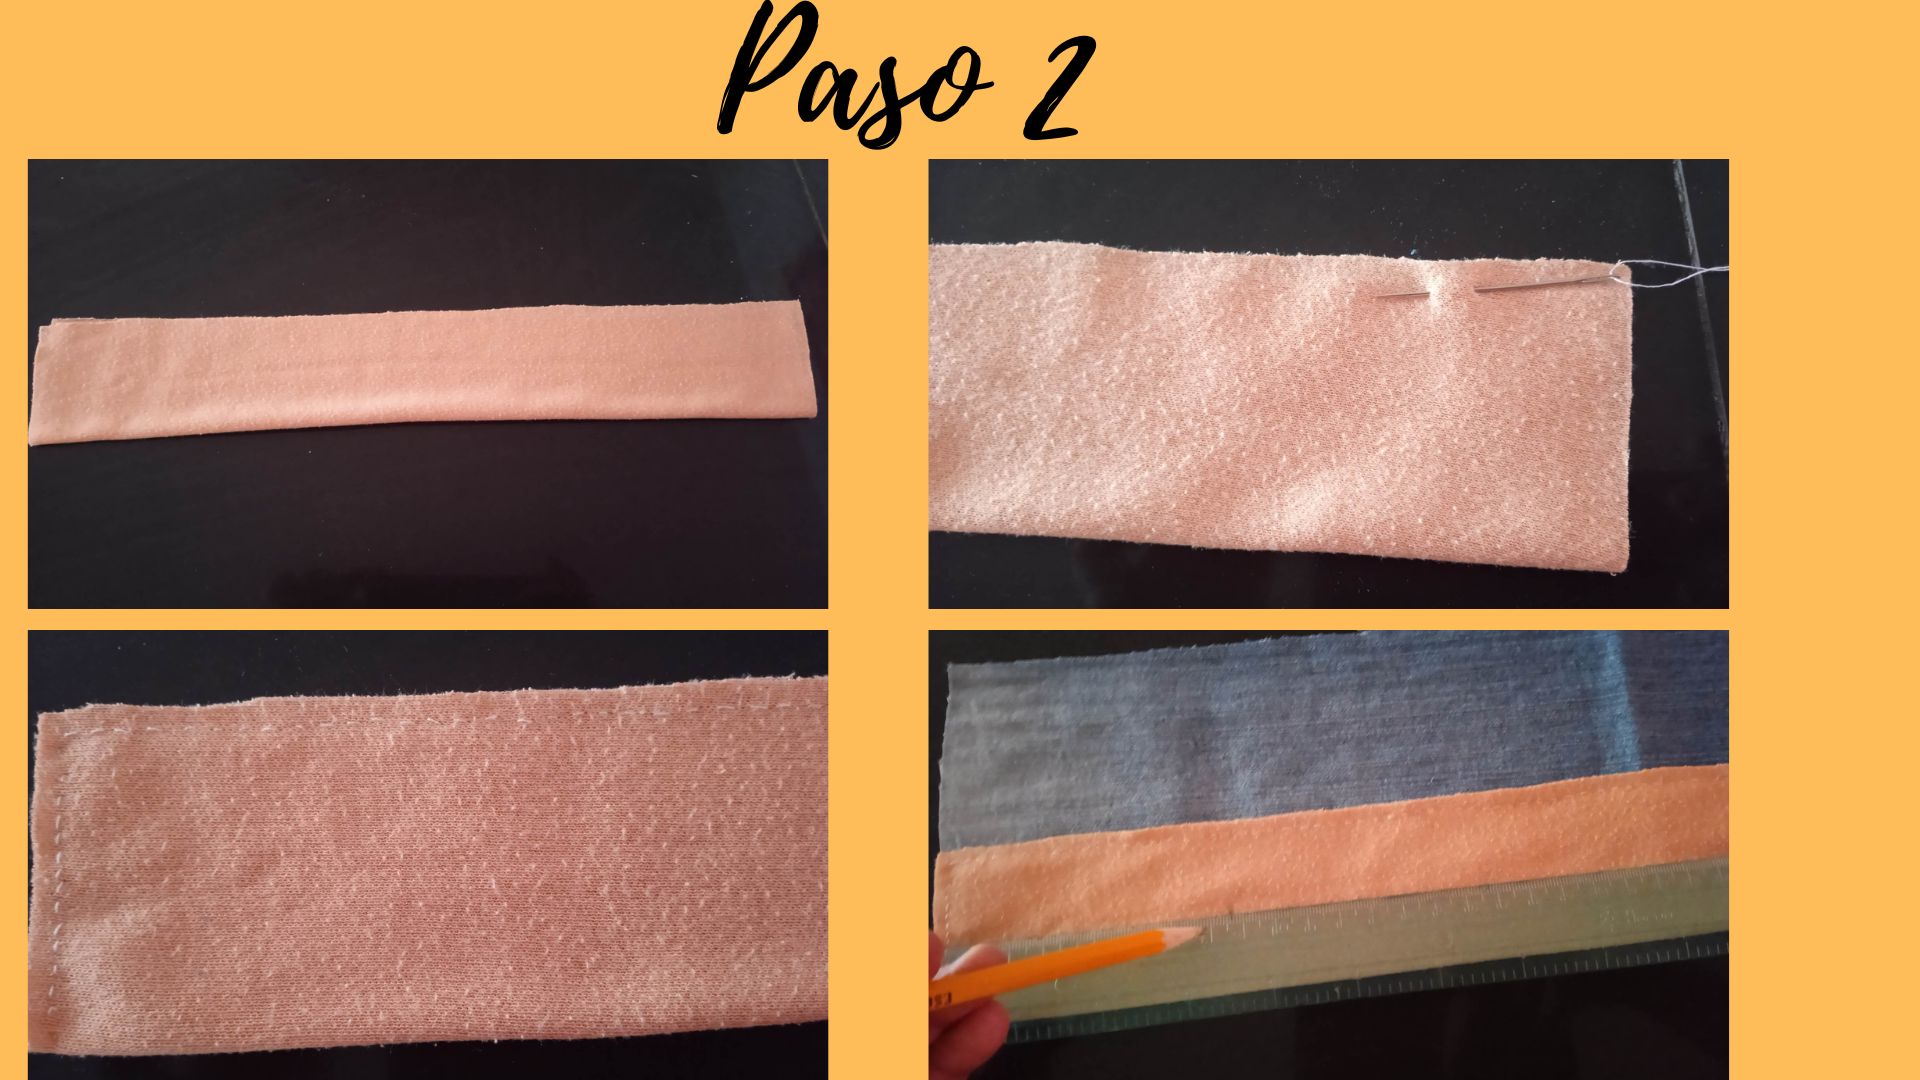
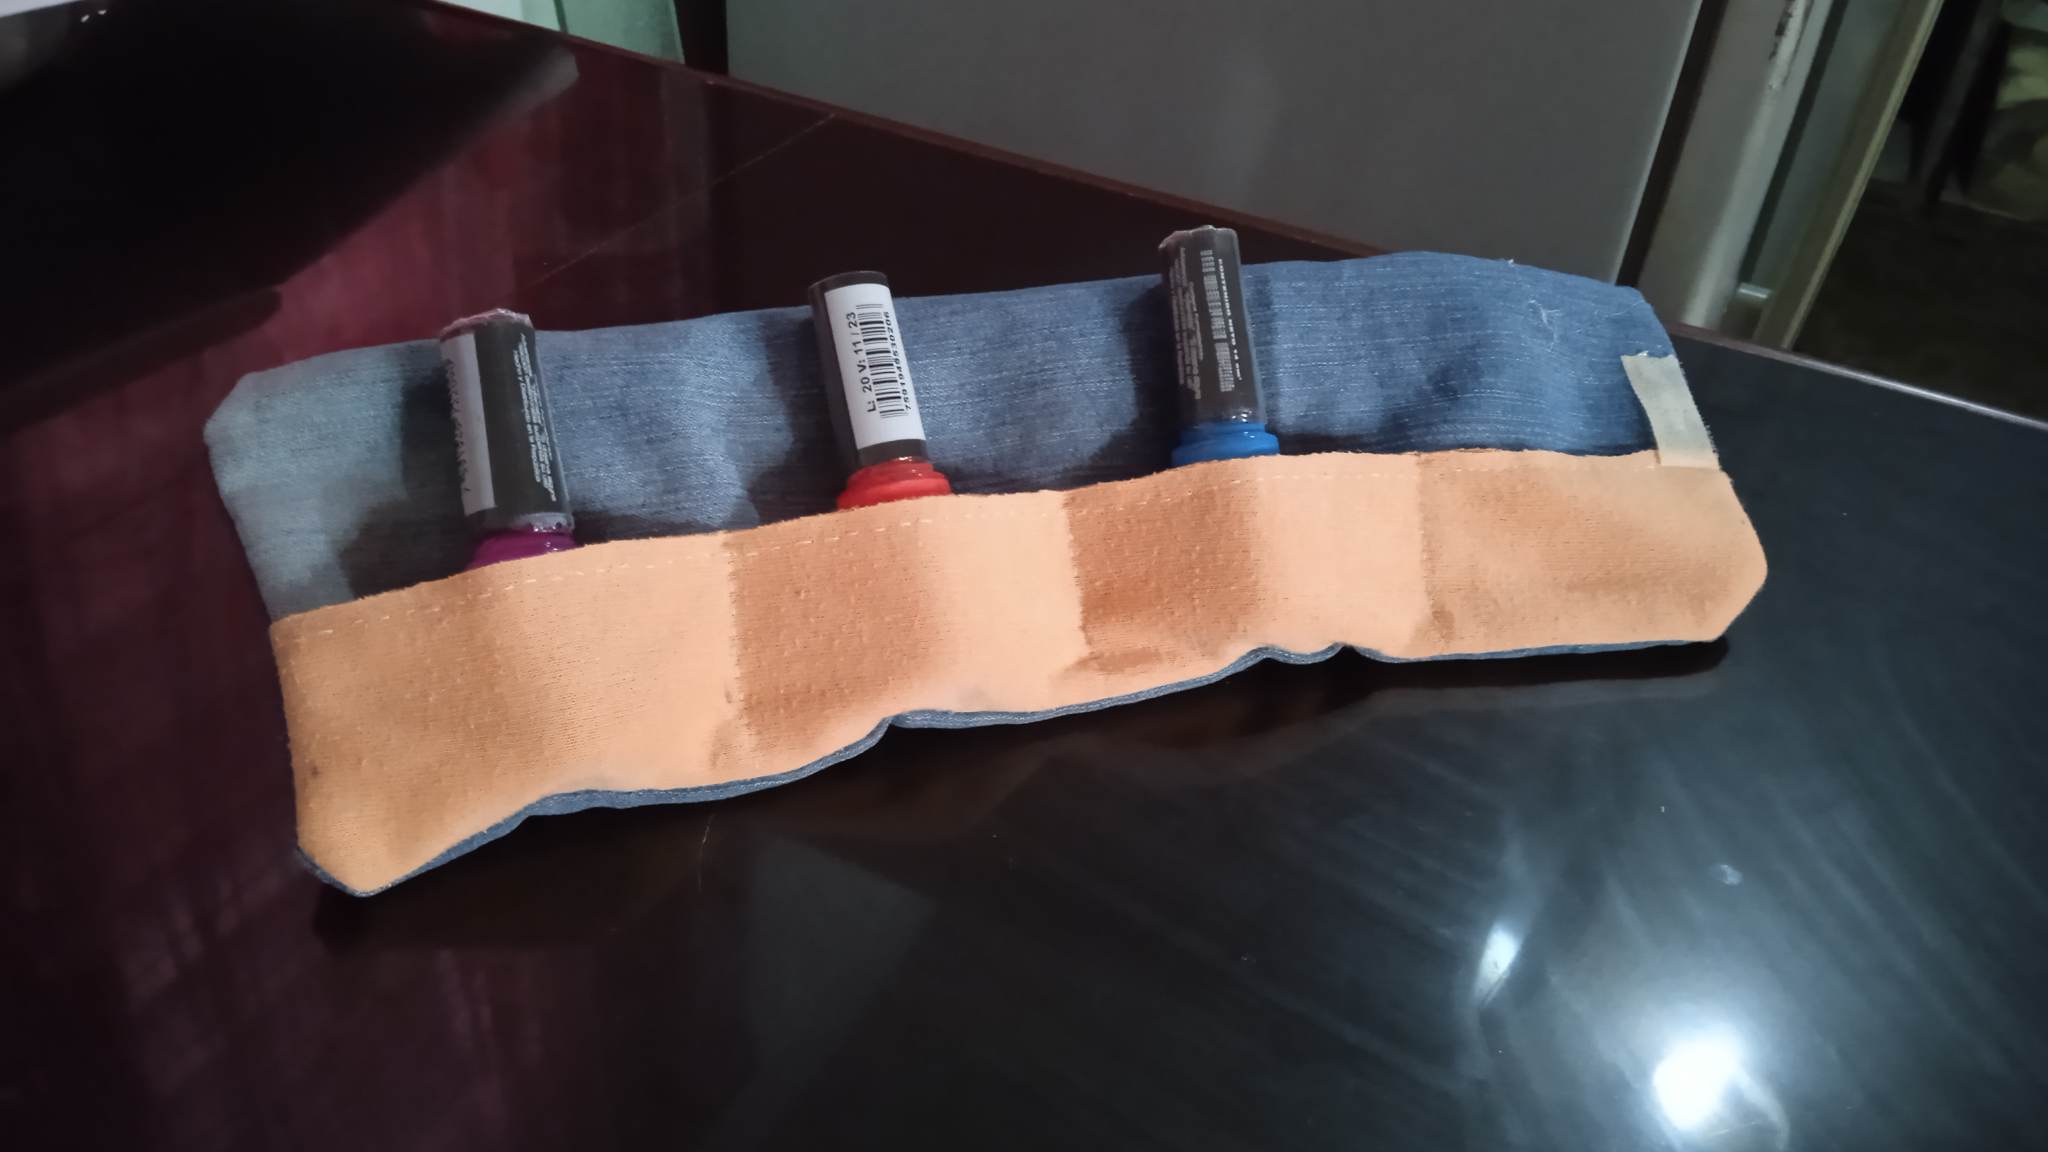
- Paso 2: Tomamos una de las partes y la doblamos a la mitad la cual coseremos por toda la orilla, una vez cosida la colocamos sobre el lado derecho de la otra parte de jean, dejamos 1 cms de ambos extremos, y comenzamos a marcar cada espacio de 8 cms para un total de 4 espacios.
- Step 2: We take one of the parts and fold it in half which we will sew along the edge, once sewn we place it on the right side of the other part of the jean, we leave 1 cm from both ends, and we start marking each space of 8 cm for a total of 4 spaces.
.jpg)
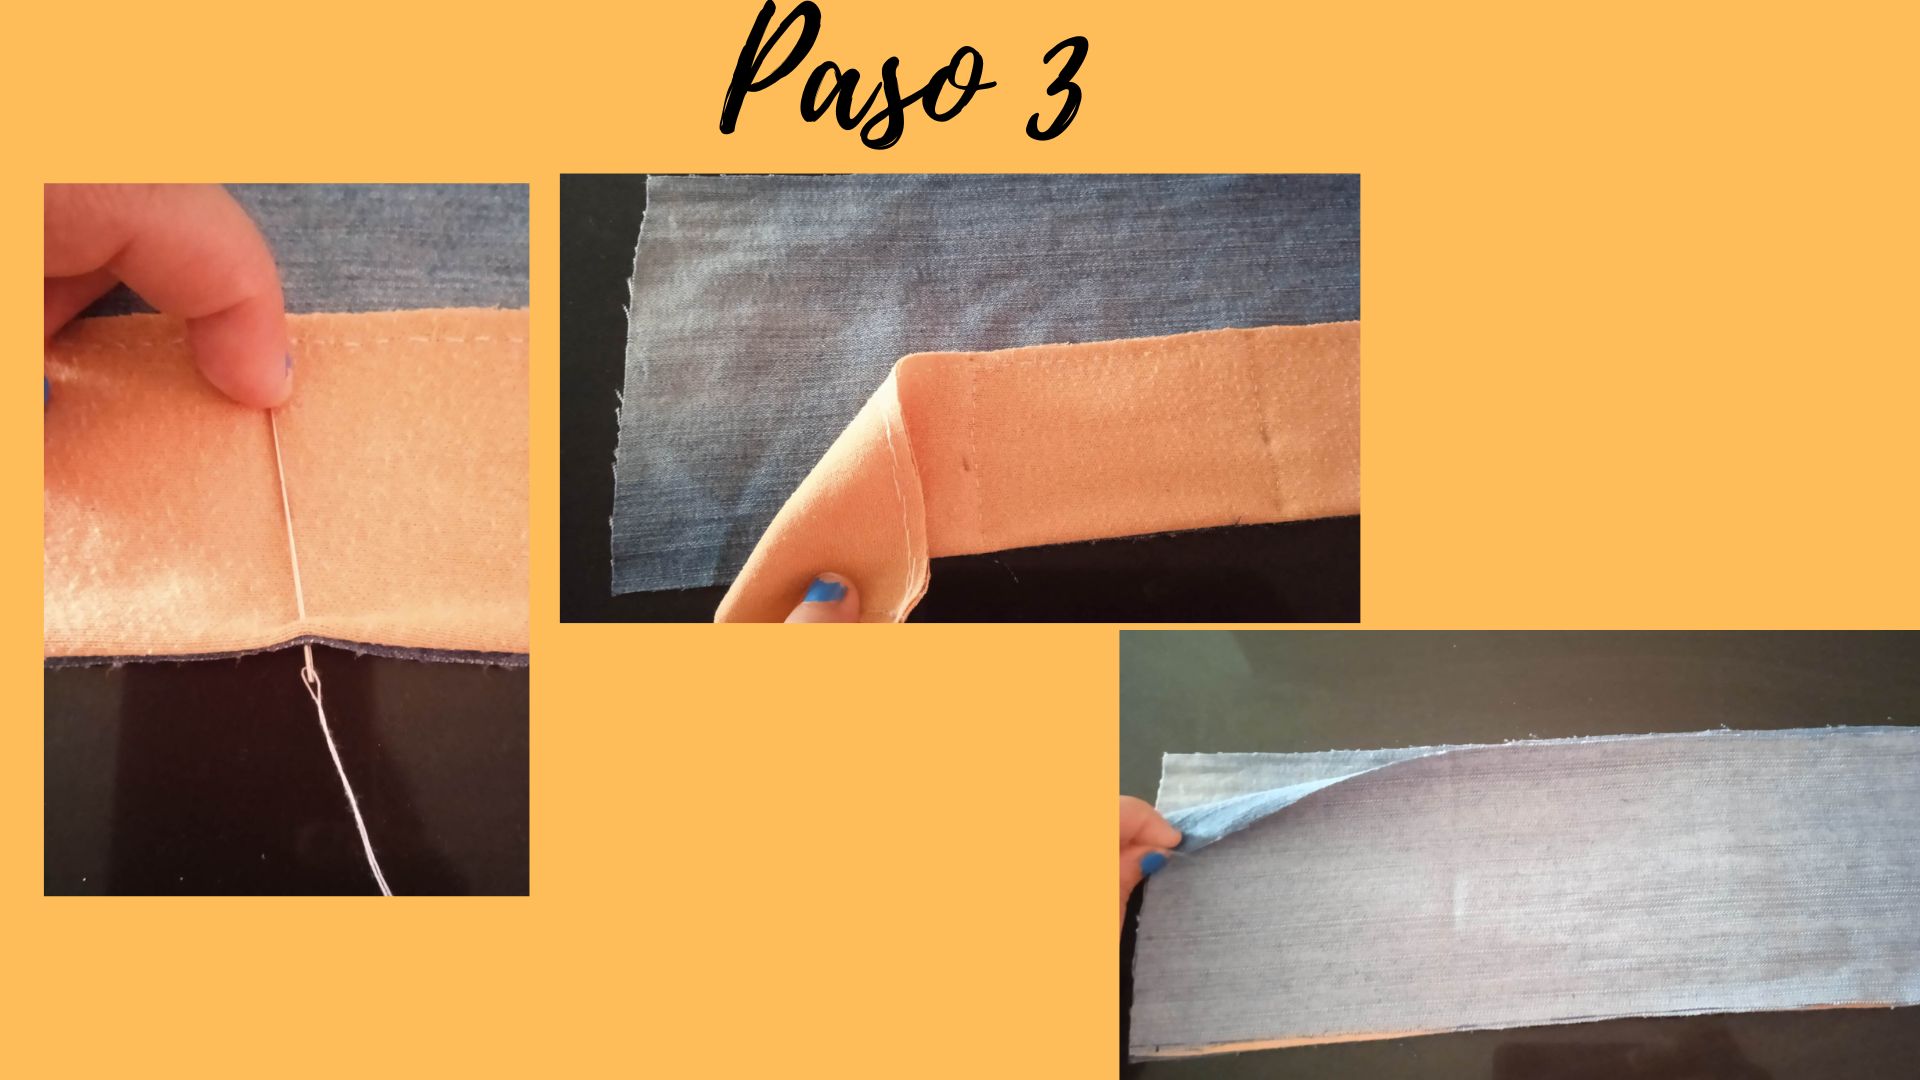
- Paso 3: Luego de marcar los espacios, cosemos en linea recta sólo hasta donde cubre la tela de color sin coser los extremos, luego colocamos la tercera parte derecho con derecho.
- Step 3: After marking the spaces, we sew in a straight line only up to where the colored fabric covers without sewing the ends, then we place the third part right side to right side.
.jpg)
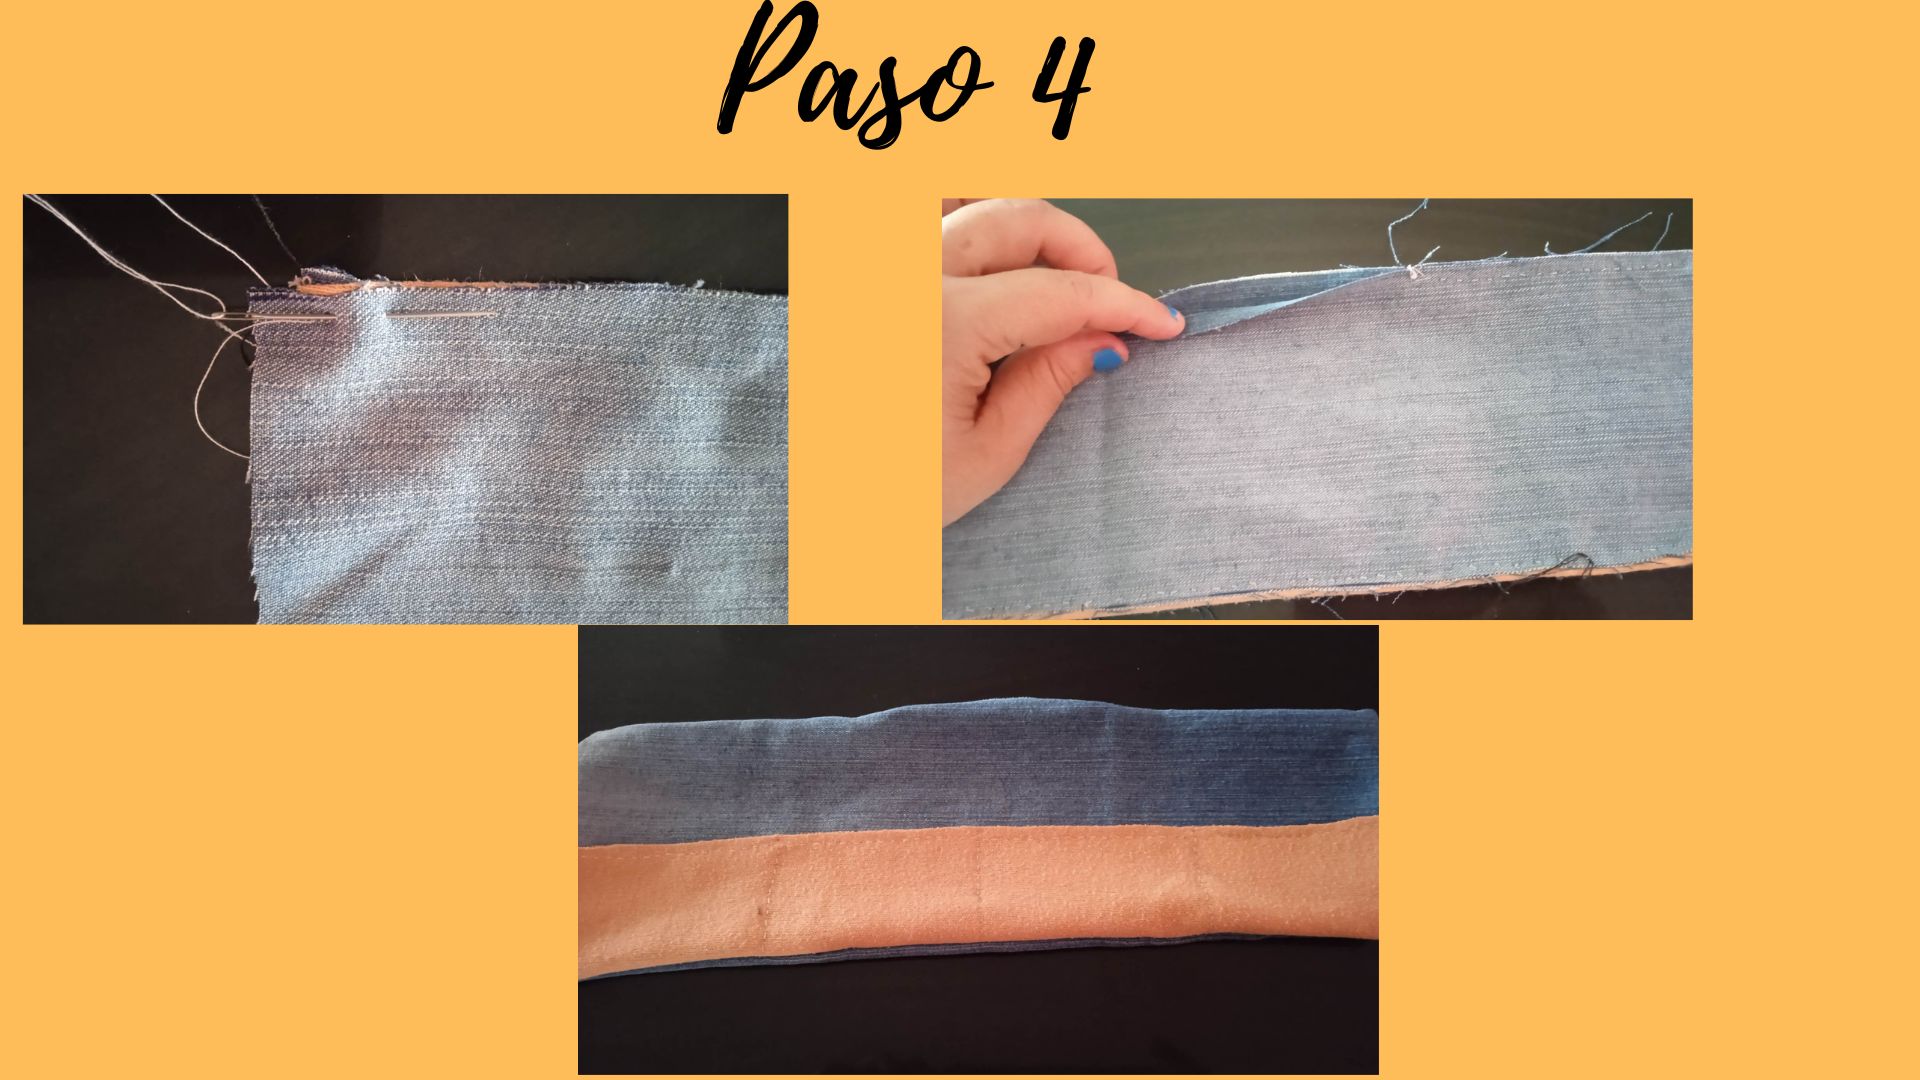
- Paso 4: Una vez colocada las partes derecho con derecho cosemos por toda la orilla dejando una pequeña abertura en la parte de arriba, luego volteamos del lado derecho.
- Step 4: Once the parts are placed right sides together, sew along the edge leaving a small opening at the top, then turn right side out.
.jpg)
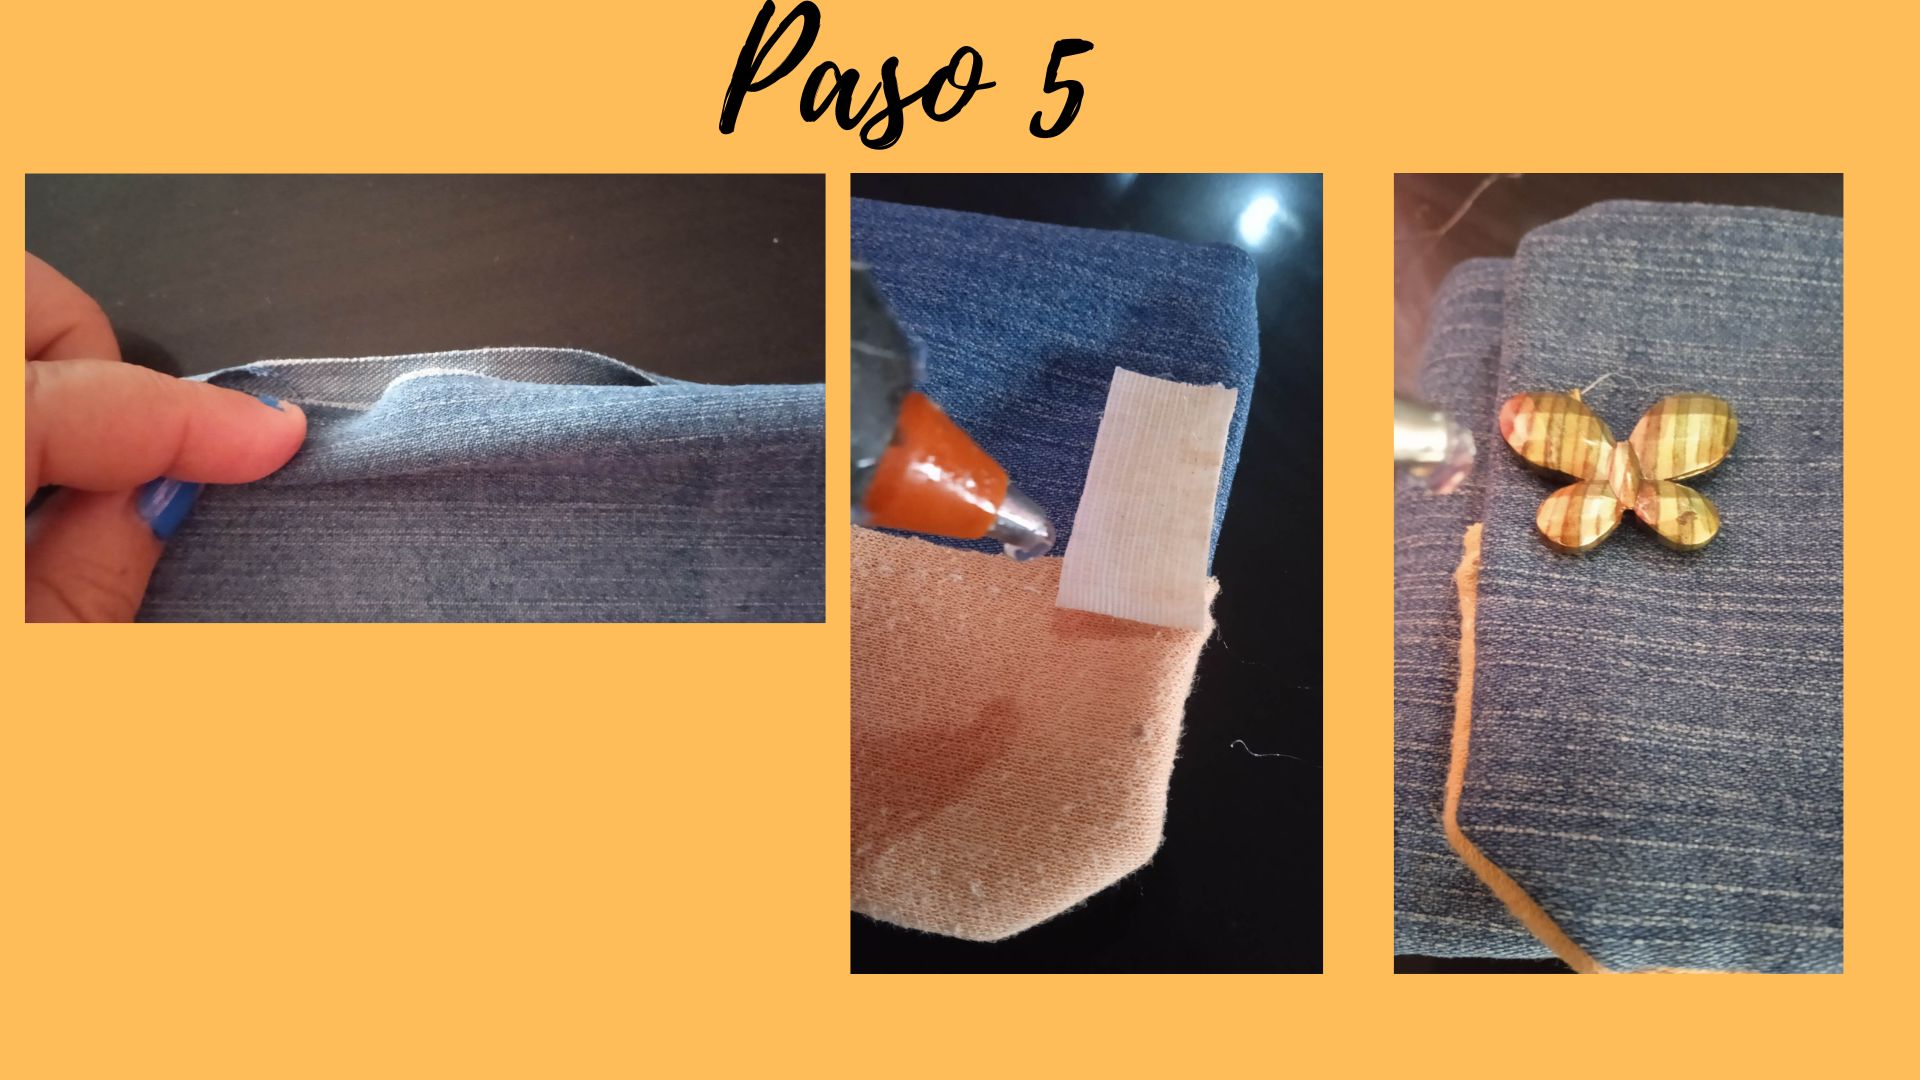
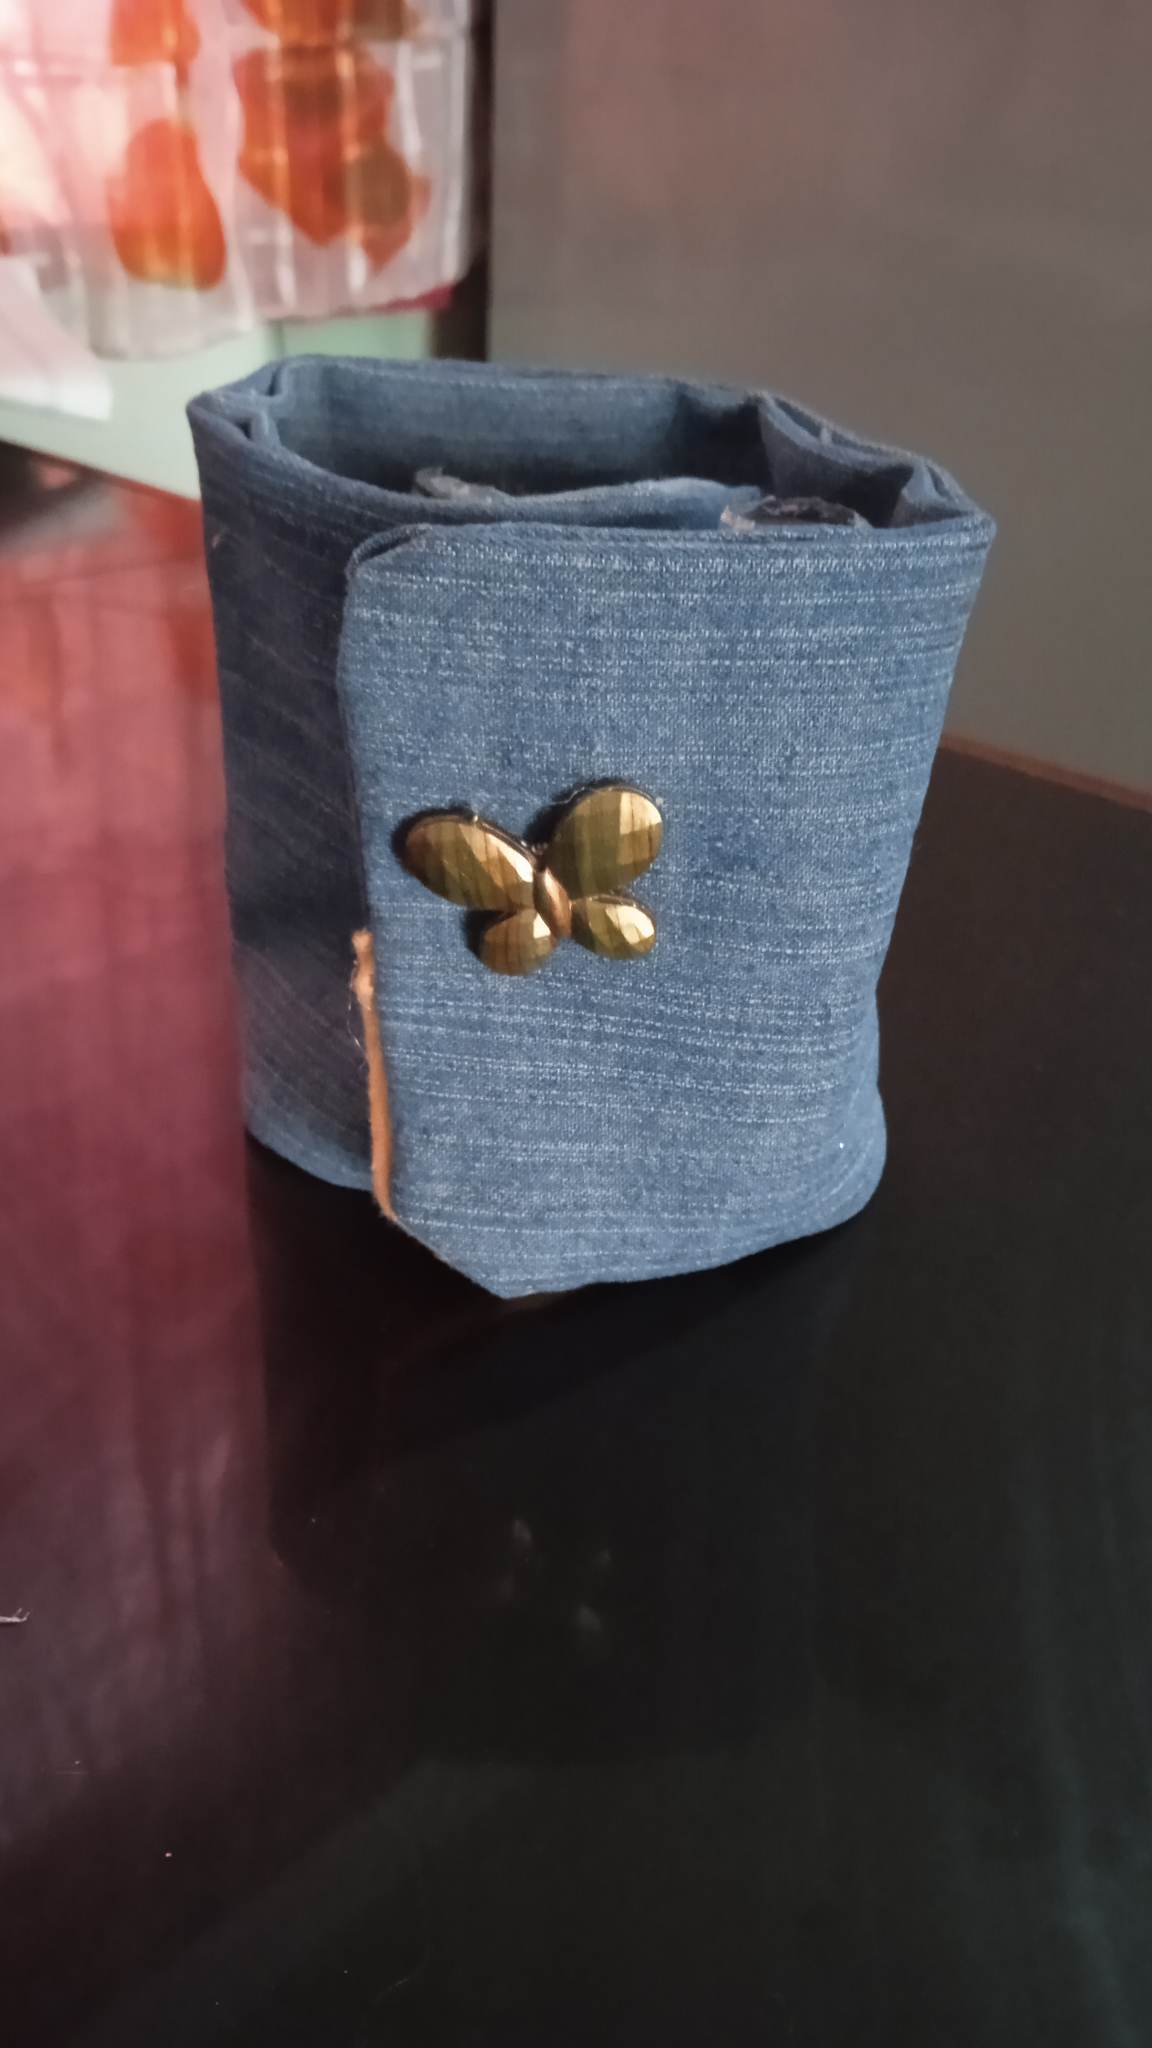
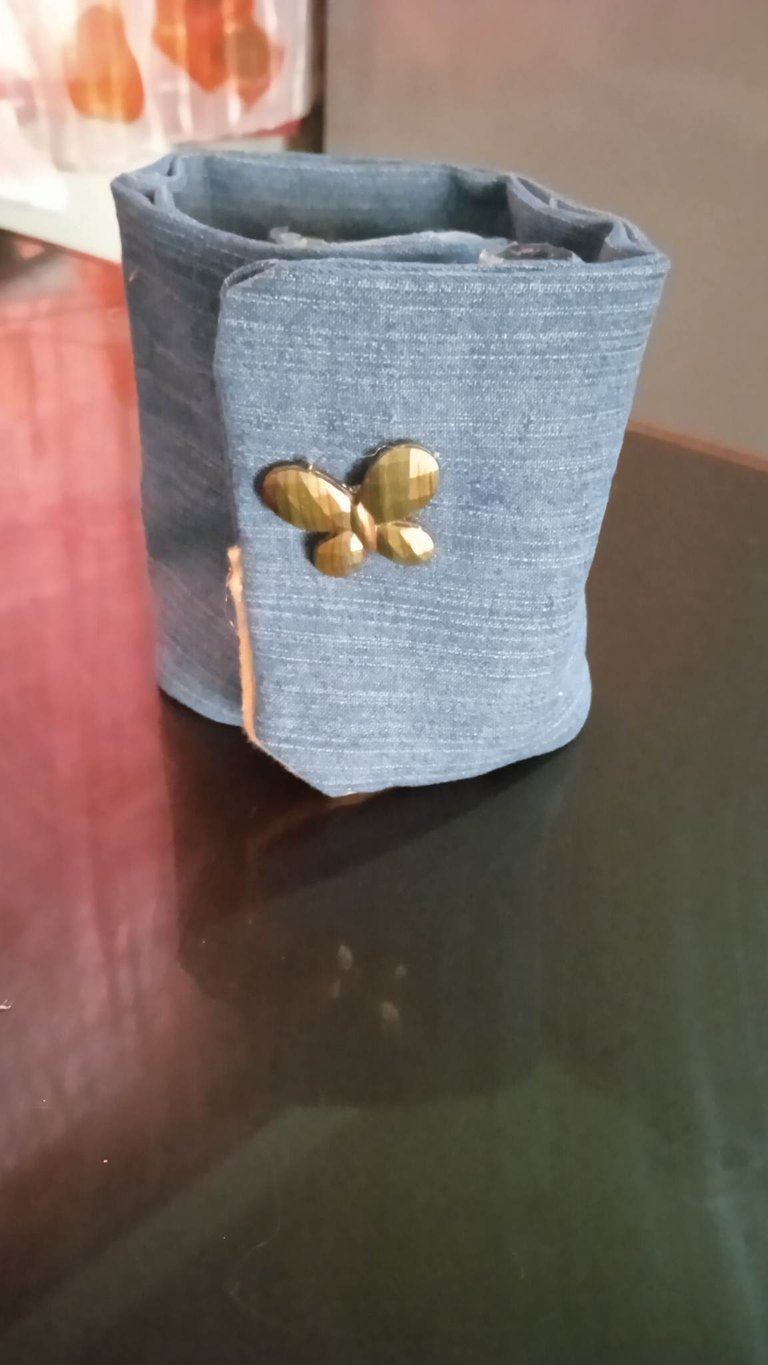
- Paso 5: Cosemos la parte de arriba después de voltear el organizador, pegamos en las orillas el cierre mágico y decoramos con una linda mariposa.
- Step 5: Sew the top part after turning the organizer upside down, glue the magic clasp on the edges and decorate with a cute butterfly.
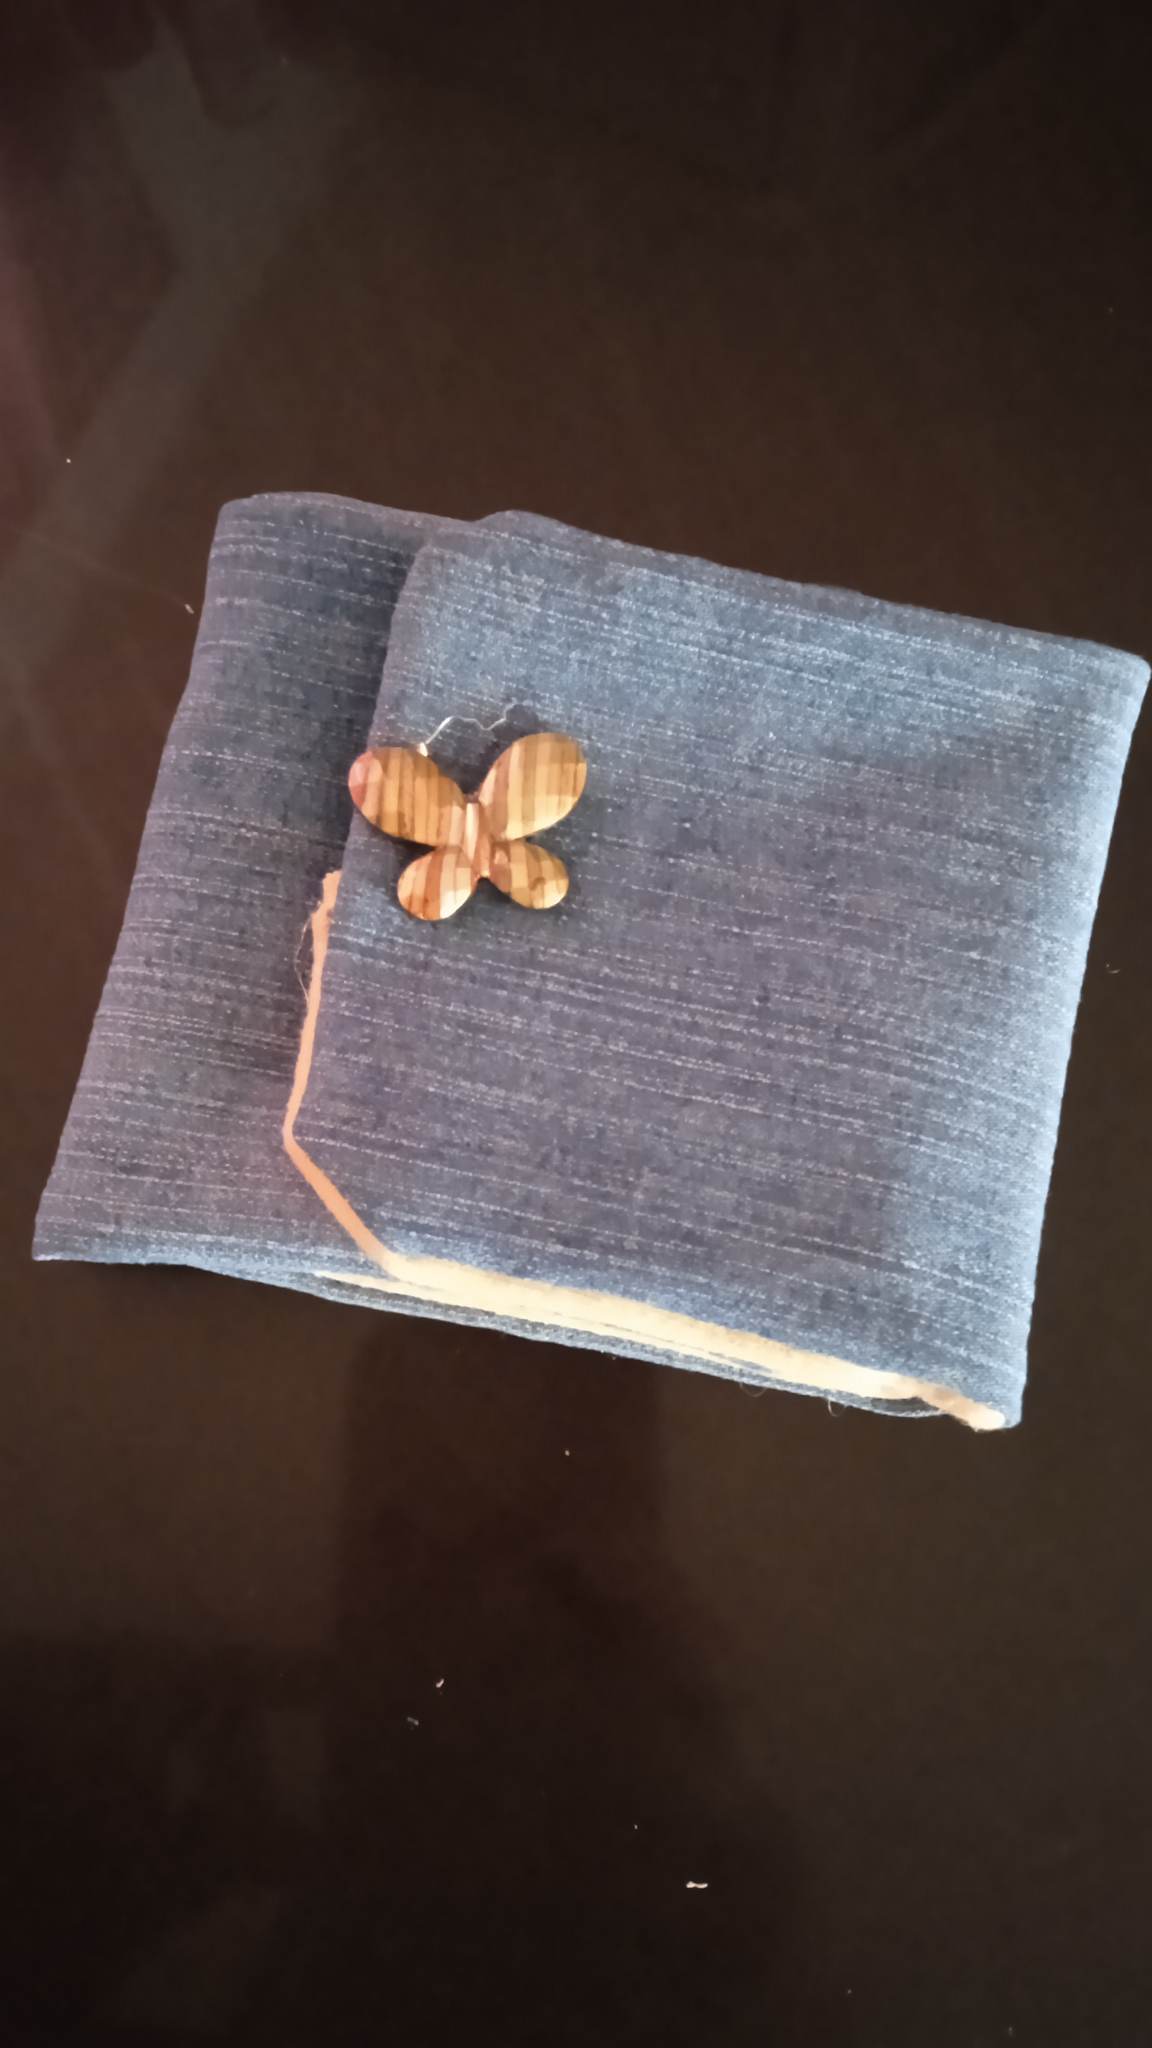
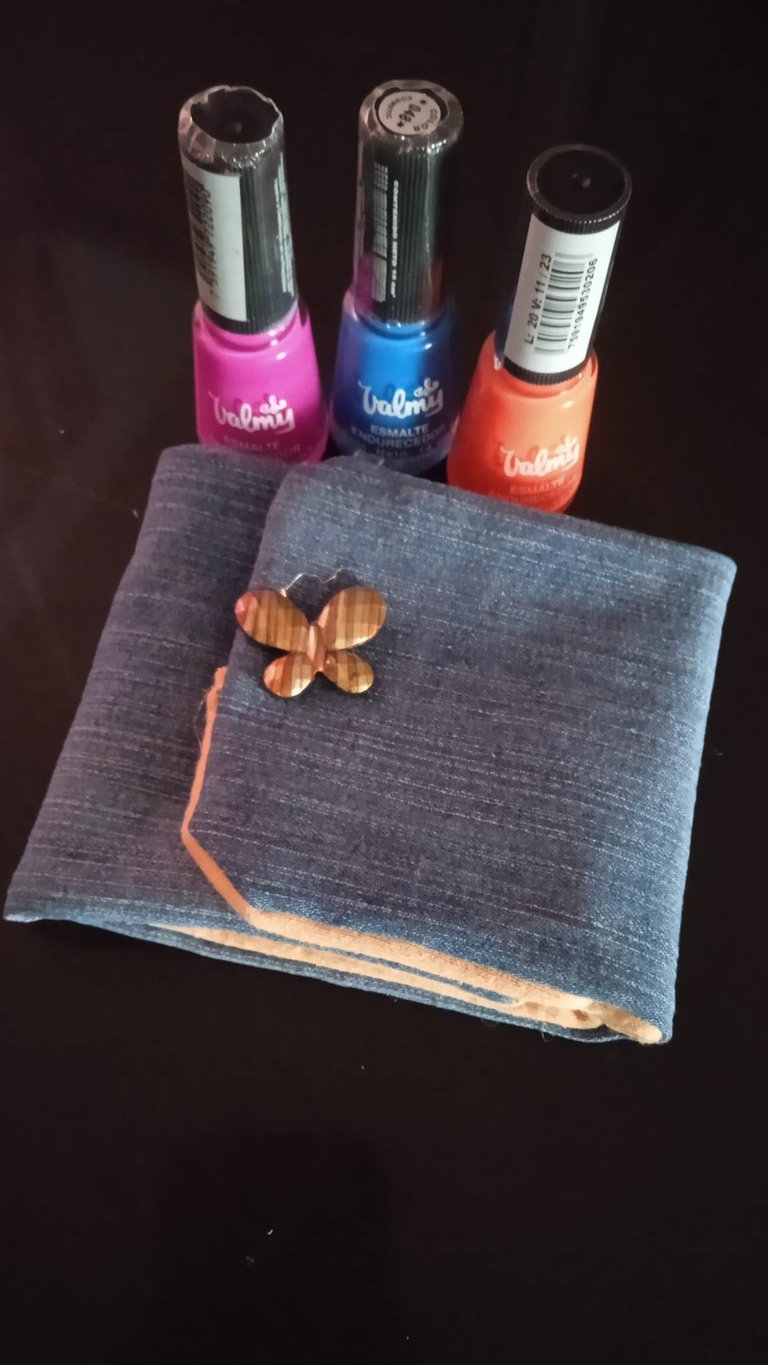
Aqui tenemos nuestro resultado final.
Here we have our final result.
.jpg)
 Todas las fotos son de mi autoría, y editadas desde canva.
All photos are of my authorship, and edited from canva.
Todas las fotos son de mi autoría, y editadas desde canva.
All photos are of my authorship, and edited from canva.
.jpg)
.jpg)


