Hola queridos amigos de esta comunidad un gusto saludarlos a todos espero que se encuentre muy bien diciéndoles Un fin de semana lleno de muchas bendiciones alegría y prosperidad para nuestras vidas.
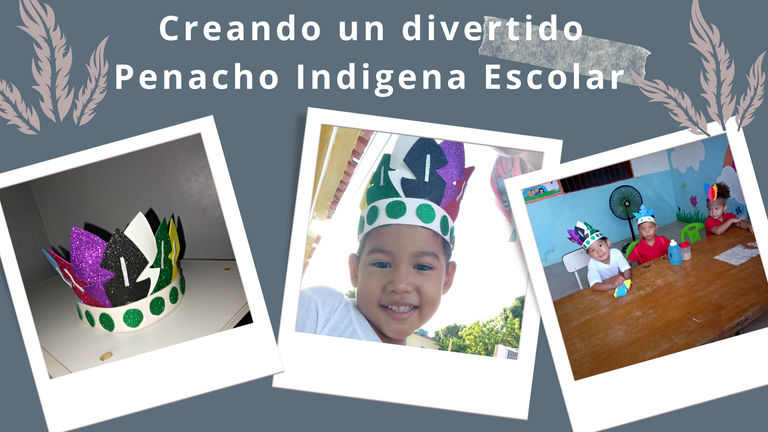
El día de hoy quiero mostrarles cómo realizar paso a paso un cintillo de la resistencia indígena celebrado el 12 de octubre en Venezuela esta fecha es una de las más importantes ya que hacemos homenaje al grupo de indígenas de nuestro país siempre mandan a todos los niños a elaborar trajes y cintillos o coronas indígenas en este caso a mi hija le mandaron a realizar uno con plumas indígenas y este lo voy a estar presentando para ustedes.
Los materiales utilizados la elaboración de nuestro cintillo de indígenas fueron los siguientes:
- Tijera
- Silicón
- Lápiz
- Hoja
- Foamy de diferentes colores
- Cartulina
- Regla
Comencemos a Elaborar!
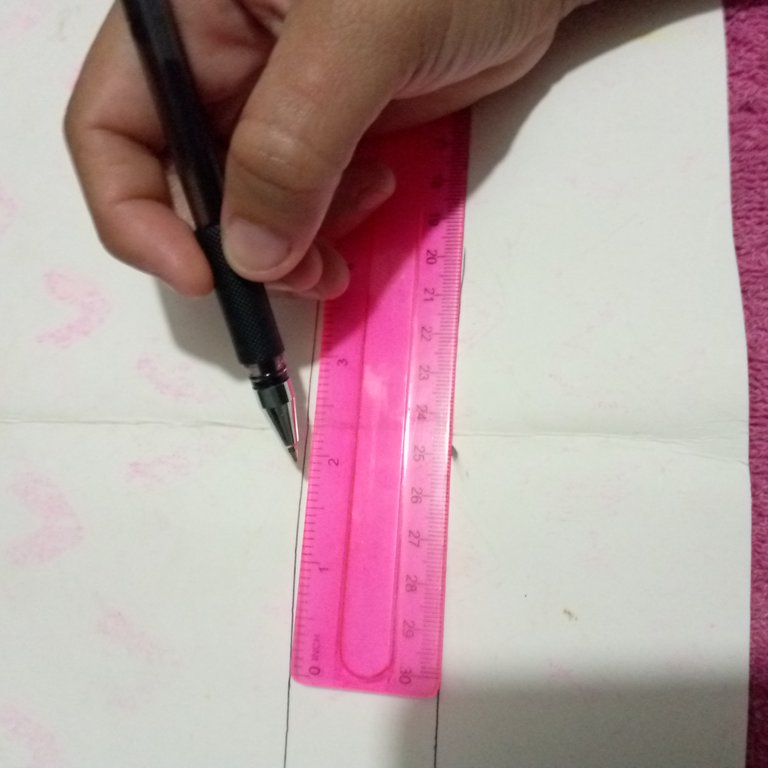
Lo primero que vamos a hacer es tomar la cartulina junto con la regla y el lápiz y vamos a trazar la tira que va a hacer el cuerpo del cintillo.
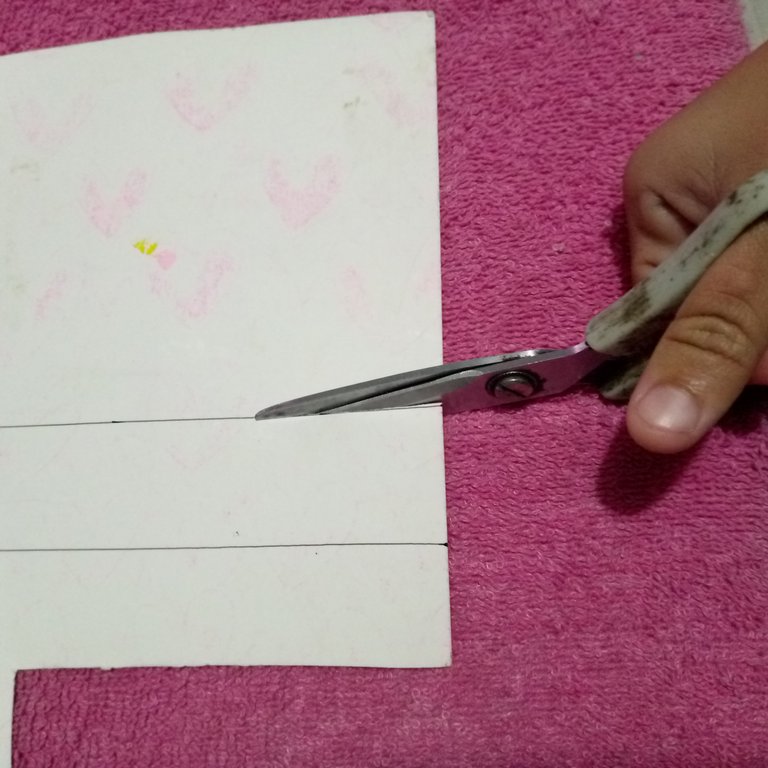
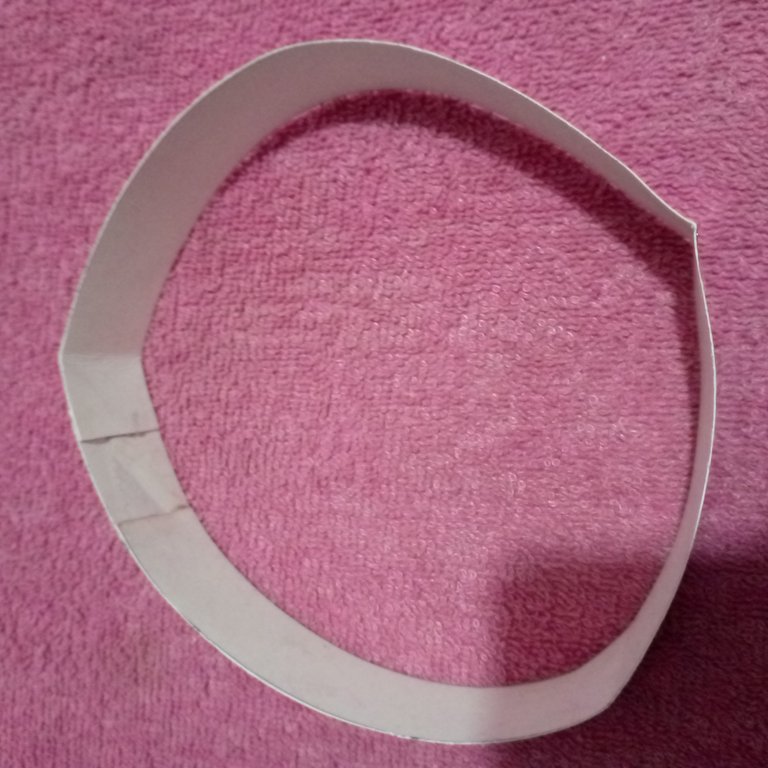
Este lo vamos a recortar y luego lo vamos a pegar con silicón agregando suficiente para que quede bien fuerte y lo pueda despegarse así de esta manera.
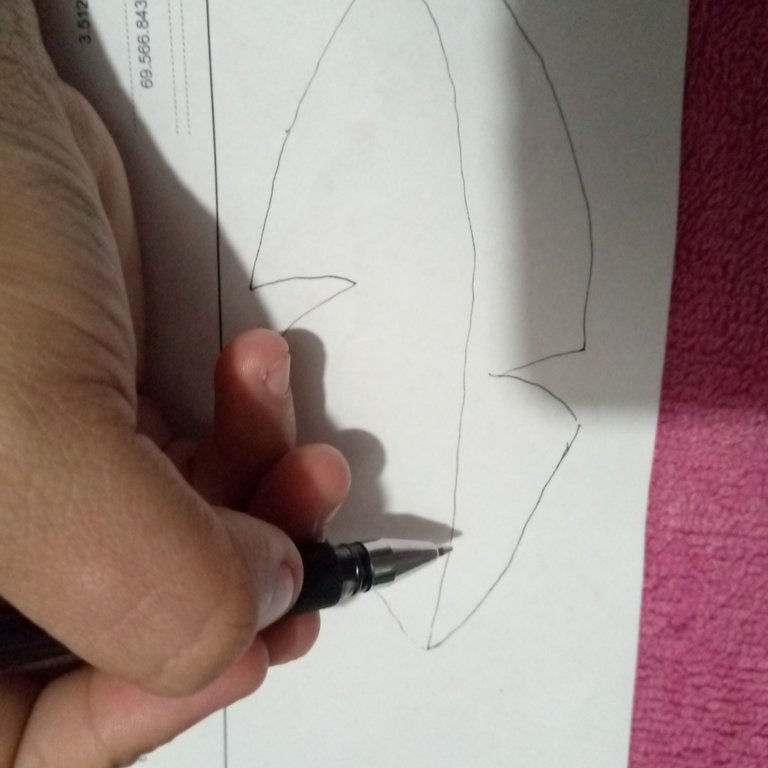
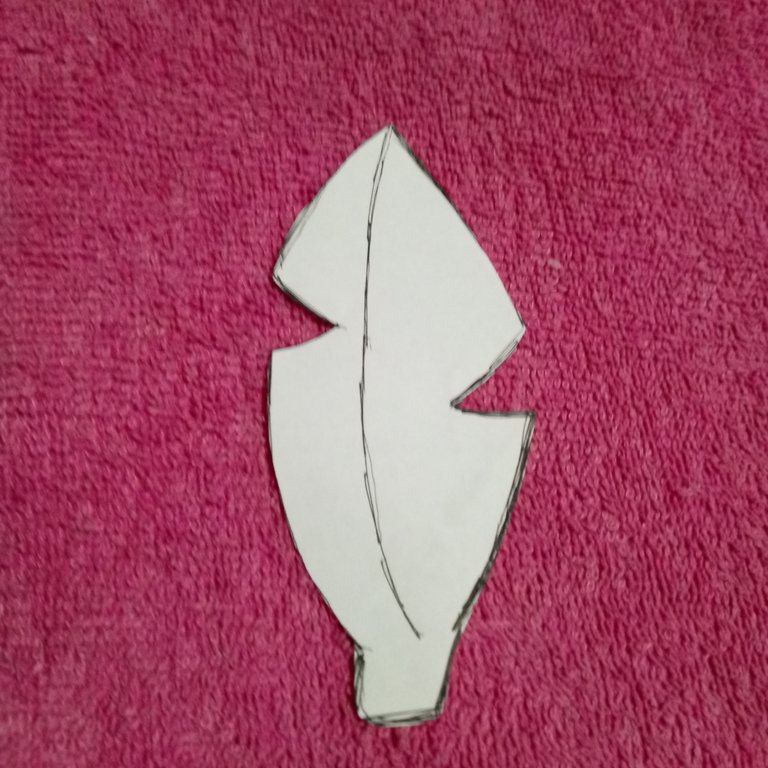
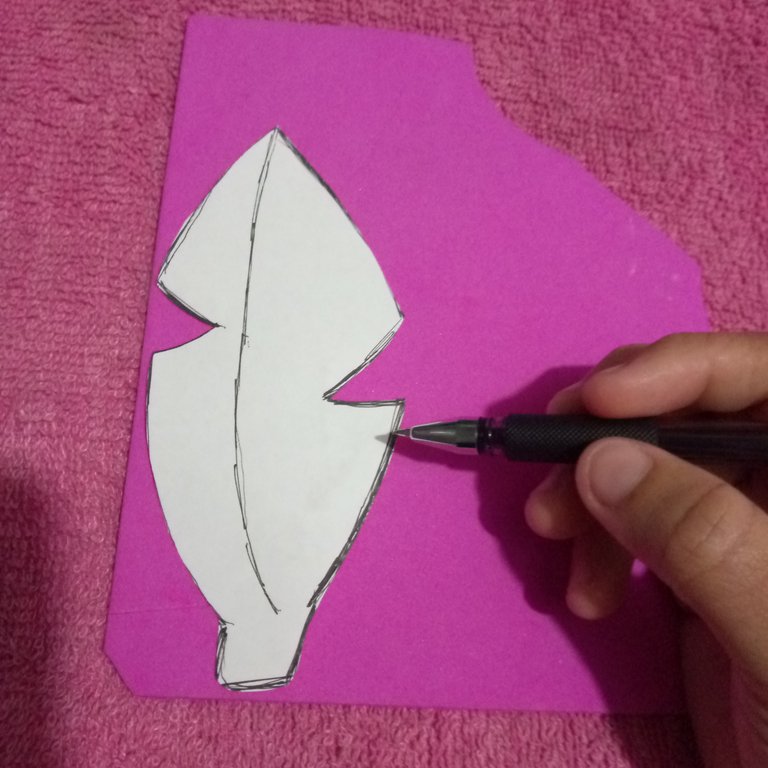
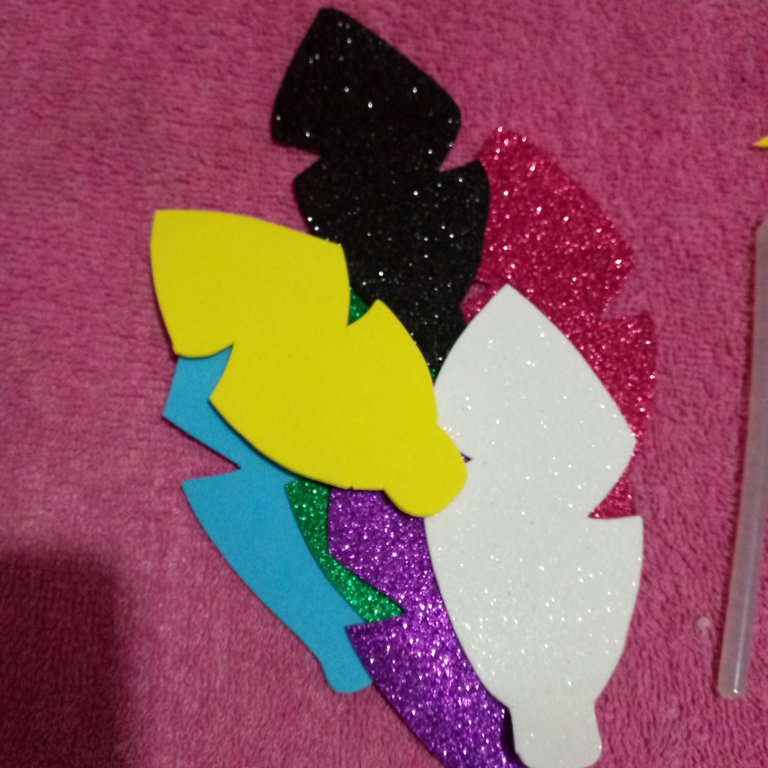
Ahora lo que vamos a realizar es un pequeño dibujo de una pluma así de esta manera y esta la vamos a recortar luego vamos a realizar el mismo patrón en los foamis Y estos también los vamos a recortar y vamos a ir teniendo los listos para luego estructurarlos en el cuerpo del cintillo así de esta manera.
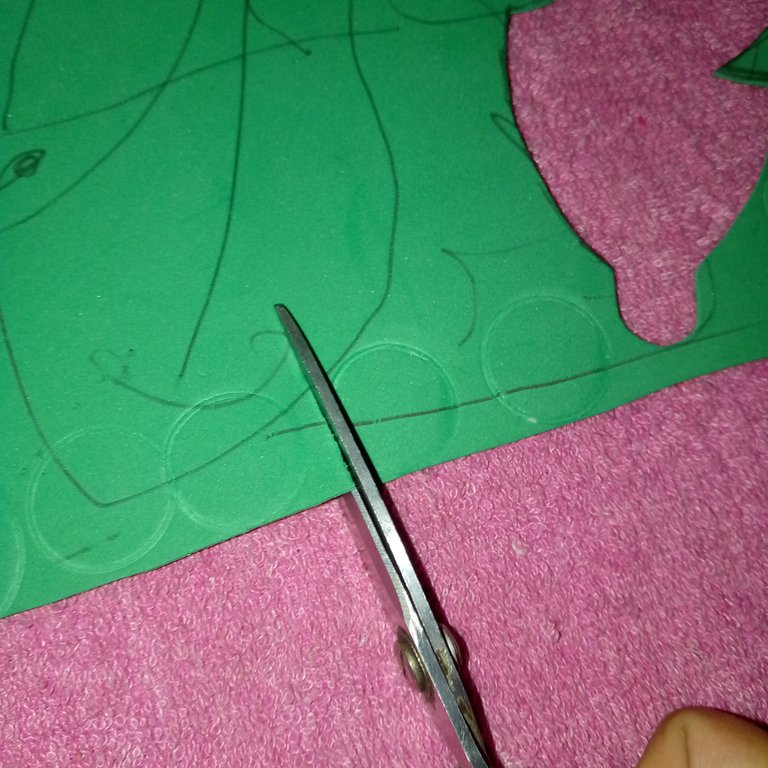
Ahora nos vamos a encargar de realizar pequeños círculos y de estos vamos a hacer suficientes para pegarlo en el lado lateral del cuerpo del cintillo así de esta manera.

Una vez ya listo nos vamos a encargar de ir pegando las plumas de diferentes colores así de esta forma poniéndolas pegadamente una al lado de la otra.

En la parte delante de las plumas con pequeñas tiras plateadas se la vamos a pegar así de esta manera dejando una por fuera sin ponerle igualmente de ambas partes.

Y por último así obtenemos el resultado de cómo elaborar un cintillo de indígena para las pequeñas o pequeños de la casa espero que les guste amigos y les deseo un fin de semana exitoso para todos.


Agradecida con Dios por darme el orgullo de ser mama de una modelo hermosa como mi princesa Joheisy!

Las imágenes son tomadas por mi teléfono tecno.
Traductor utilizado: https://www.deepl.com
La imagen fue editada mediante la aplicación de canva.
Hello dear friends of this community a pleasure to greet you all I hope you are very well telling you A weekend full of many blessings joy and prosperity for our lives.
Today I want to show you step by step how to make a headband of the indigenous resistance celebrated on October 12 in Venezuela this date is one of the most important since we pay tribute to the indigenous group of our country always send all the children to make costumes and headbands or indigenous crowns in this case my daughter was sent to make one with indigenous feathers and this I will be presenting it to you.
The materials used to make our indigenous headband were the following:
- Scissors
- Silicone
- Pencil
- Blade
- Foamy of different colors
- Cardboard
- Ruler
Let's start making!
The first thing we are going to do is to take the cardboard along with the ruler and the pencil and we are going to trace the strip that will make the body of the headband.
We are going to cut it out and then we are going to glue it with silicone adding enough to make it strong enough to be able to take it off this way.
Now what we are going to make is a small drawing of a feather like this and we are going to cut it out and then we are going to make the same pattern on the foamis and we are also going to cut them out and we are going to have them ready to structure them in the body of the headband like this.
Now what we are going to make is a small drawing of a feather like this and we are going to cut it out and then we are going to make the same pattern on the foamis and we are also going to cut them out and we are going to have them ready to structure them in the body of the headband like this.
Now we are going to make small circles and we are going to make enough of them to glue on the side of the body of the headband like this.
Once ready, we are going to glue the feathers of different colors in this way, putting them side by side.
On the front part of the feathers with small silver strips we are going to glue it in this way leaving one on the outside without putting it equally on both sides.
And finally this way we obtain the result of how to elaborate an Indian headband for the little ones of the house. I hope you like it friends and I wish you a successful weekend for all of you.
Thankful to God for giving me the pride of being the mother of a beautiful model like my princess Joheisy!
Images are taken by my techno phone.
Translator used: https://www.deepl.com
The image was edited using canva application.
