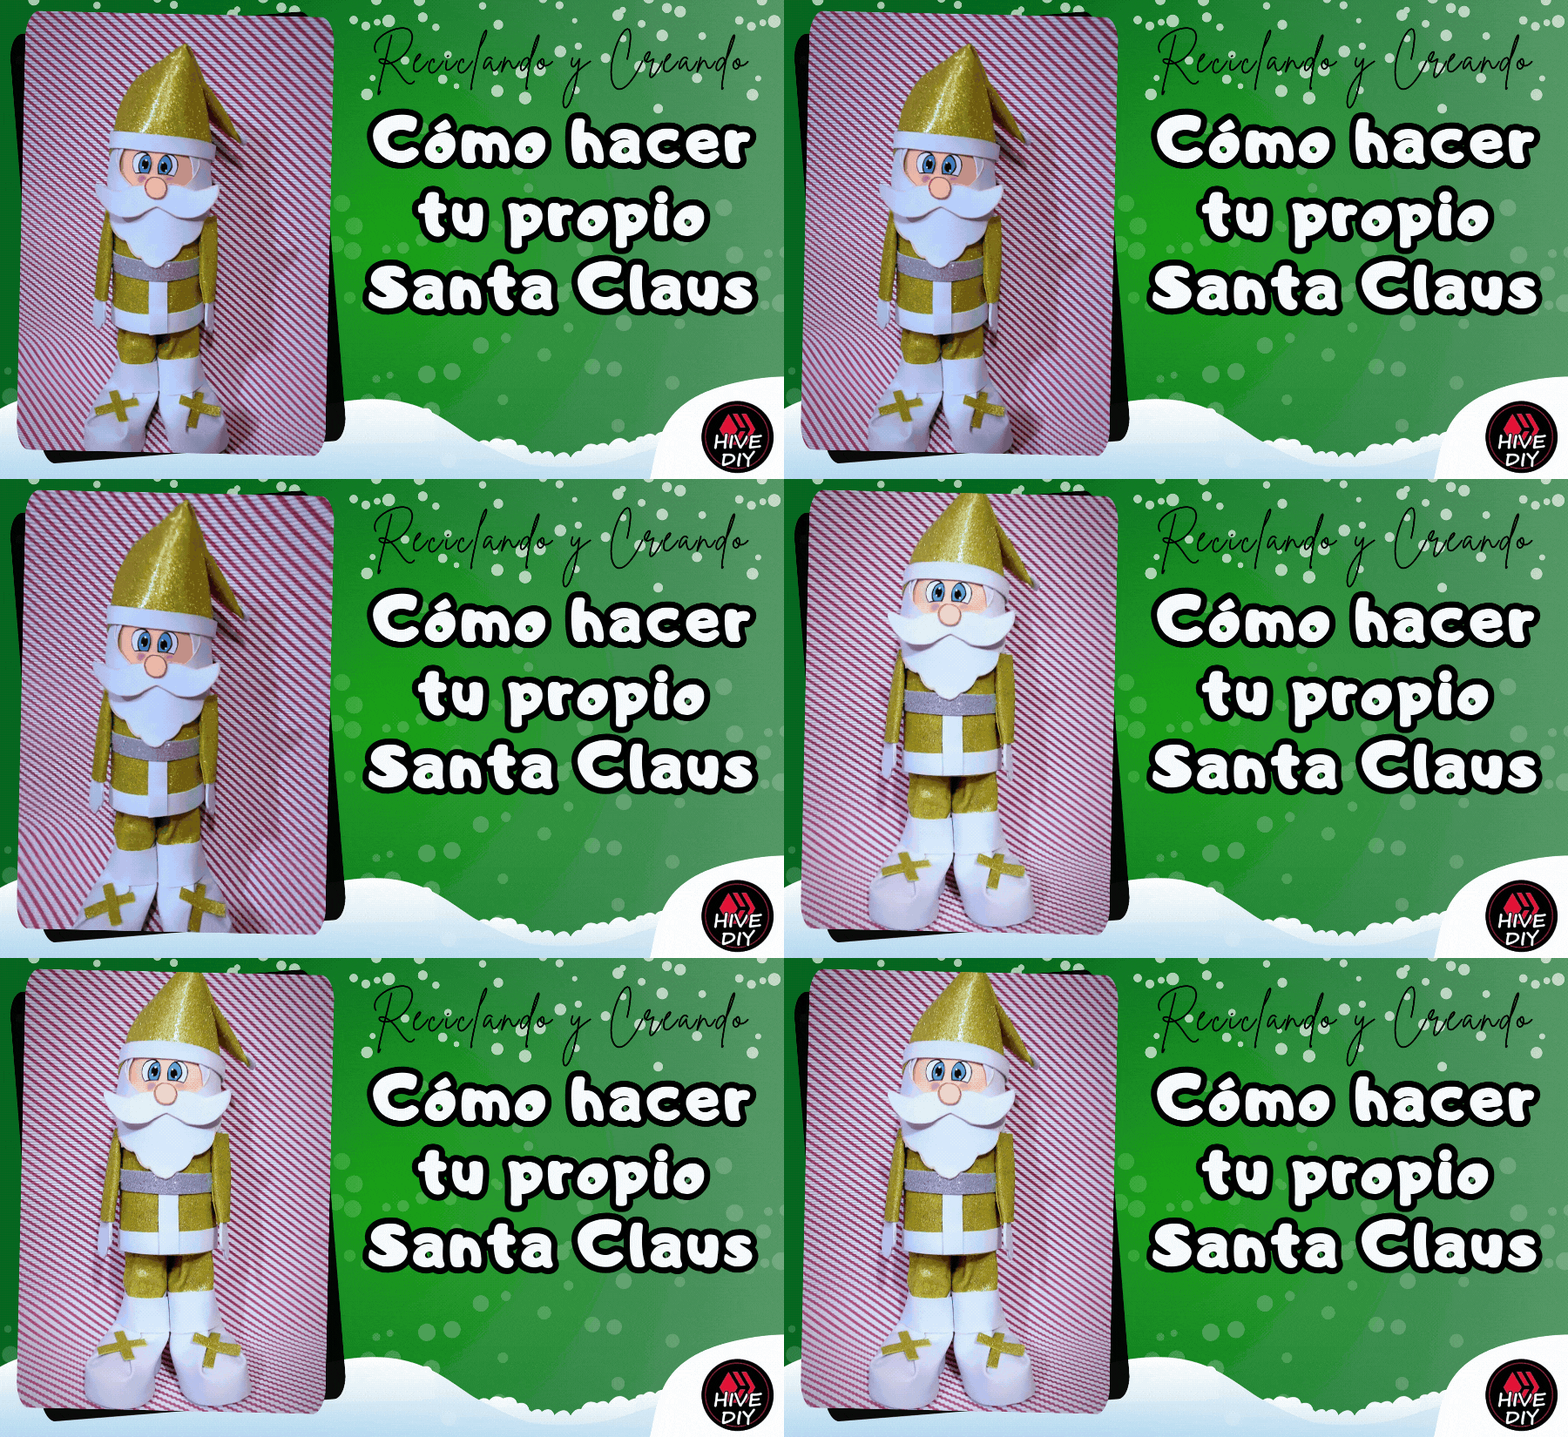
¡Bienvenidos amigos creativos!👩🎨
🙋♀️ ¡Hola gente bonita y creativa! Espero que se encuentren súper bien y hayan tenido días llenos de gratos momentos. Por este lado de la pantalla todo bien gracias a Dios feliz de estar una vez más aquí y compartir con ustedes el paso a paso de cómo cree un Santa Claus usando como base material reciclado.
Para nadie es un secreto que los adornos navideños son sumamente bellos, pero mucho de ellos realmente costosos, como por ejemplo las figuras de santa Claus o cualquier personaje navideño, esto lo confirme estando de visita por algunas tiendas, y me enamore de un santa Claus realmente costoso, así que decidí crear el mío puesto que buscando ideas note que no es realmente complicado y lo mejor muchísimo más económico, sin más preámbulos…
Welcome creative friends!👩🎨
🙋♀️ Hello beautiful and creative people! I hope you are feeling great and have had days full of good times. On this side of the screen all is well thank God I am happy to be here once again and share with you the step by step of how to create a Santa Claus using recycled material as a base.
For no one is a secret that Christmas decorations are extremely beautiful, but many of them really expensive, such as Santa Claus figures or any Christmas character, I confirmed this while visiting some stores, and I fell in love with a really expensive Santa Claus, so I decided to create my own since looking for ideas I noticed that it is not really complicated and the best thing much cheaper, without further ado....
¡Llegó la hora de crear! / It's time to create!🎅✨.
Materiales/ Materials✍🏻 |
|---|
| 🎅 Foami liso y escarchado / Smooth and frosted Foami. |
| 🎅 Botella plástica / Plastic bottle. |
| 🎅 Cartón / Cardboard. |
| 🎅 Pelota de anime / Anime ball. |
| 🎅 Pintura al frío color / Cold paint. |
| 🎅 Tijera / Scissors. |
| 🎅 Silicón / Silicone. |
¿Cuál es el proceso?/ What is the process?⬇️
🎅 Paso 1 / Step1
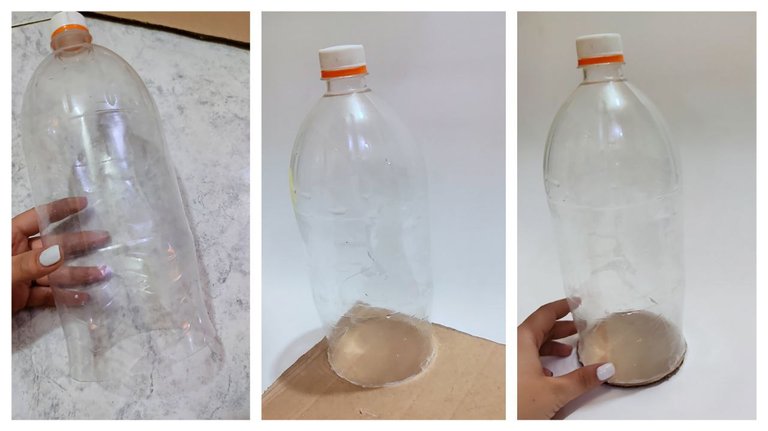
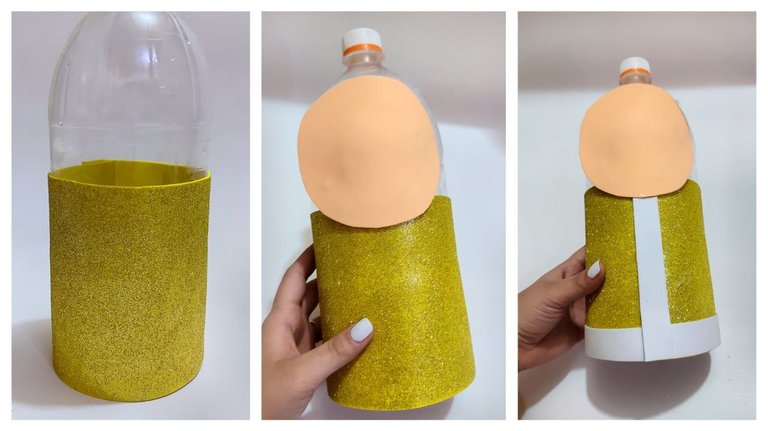
Lo primero que hice fue ubicar una botella de plástico, en mi caso use una de 2 litros, en ella retire la parte final de la botella aproximadamente unos cuatro dedos de ancho, seguidamente pegue sobre cartón y recorte en el borde entre la botella y el cartón.
The first thing I did was to place a plastic bottle, in my case I used a 2 liter, in it remove the end of the bottle about four fingers wide, then paste on cardboard and cut on the edge between the bottle and cardboard.
🎅 Paso 2 / Step 2
Posteriormente con foami escarchado color dorado forre la mitad de la botella, es importante resaltar que las medidas dependerán de qué tan grande o pequeña será la botella que escojas, en mi caso se llevó 13cm de largo x 34cm de ancho que es el borde de toda la botella, luego con foami color piel realice un círculo y pegue sobre el foami dorado dejando solo descubierto una pequeña parte de arriba de la botella.
Then with gold colored frosted foami line half of the bottle, it is important to note that the measures will depend on how big or small will be the bottle you choose, in my case I took 13cm long x 34cm wide which is the edge of the entire bottle, then with skin colored foami make a circle and paste over the gold foami leaving only a small part of the top of the bottle uncovered.

🎅 Paso 3 / Step 3
Luego con foami liso color blanco recorte franjas de 2cm de ancho, una para el centro y otra para la parte superior.
Then with white plain foami cut out 2 cm wide strips, one for the center and one for the top.
🎅 Paso 4 / Step 4
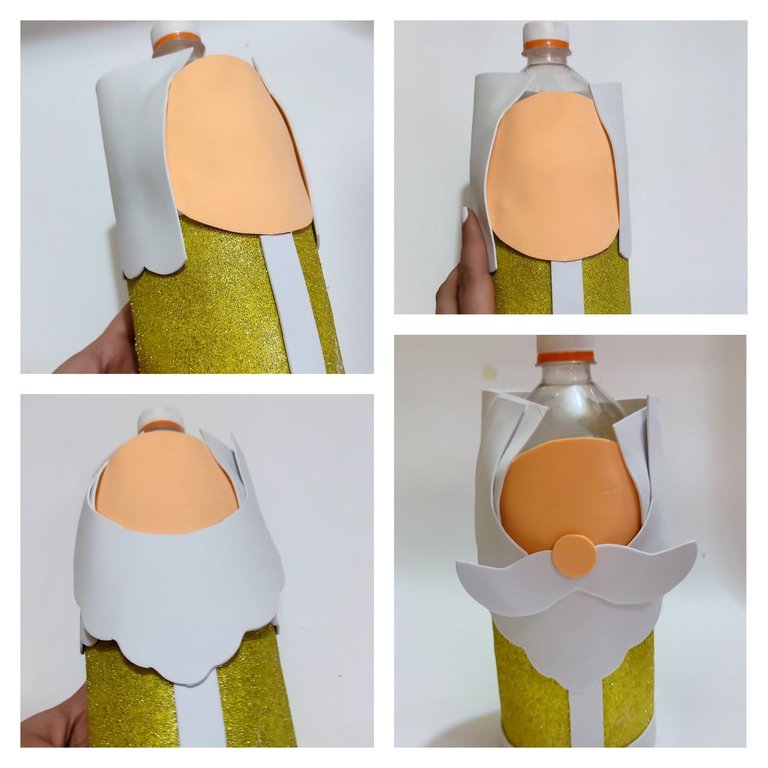
En foami blanco recorte la forma del cabello, para ello dejé la parte inferior en forma ovalada y recta en la parte superior, está la pegue desde la parte de atrás de la botella hasta llegar a cubrir un poco la parte color piel, seguidamente hice la barba y bigote, como otro toque pegue la nariz en el centro del bigote. Todas estás medidas dependerán de que tanto es el grosor de la botella que estés usando. En mi caso no tomé medidas puesto que hice cálculos de acuerdo a la botella que tenía.
In white foami I cut out the shape of the hair, for this I left the lower part in an oval shape and straight at the top, I glued it from the back of the bottle until I covered a little the skin colored part, then I made the beard and mustache, as another touch I glued the nose in the center of the mustache. All these measurements will depend on how thick of a bottle you are using. In my case I didn't take measurements since I made calculations according to the bottle I had.
🎅 Paso 5 / Step 5
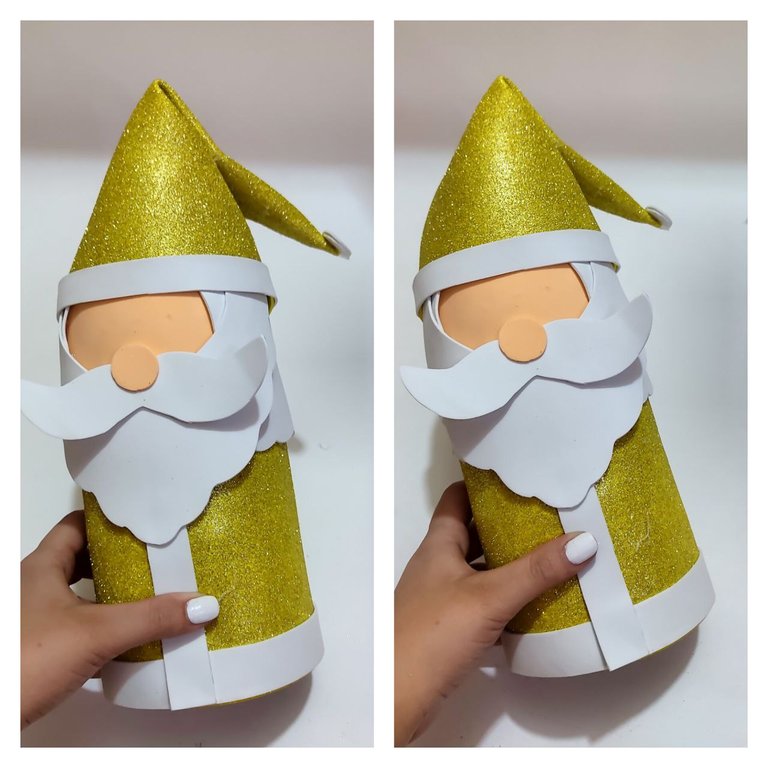
Luego en foami escarchado color dorado, usando la misma tonalidad que al principio realice un cono, siendo este el gorro de santa, doble un poco y reforcé con Silicón para que esté no se colocará recto.
Then in gold colored frosted foami, using the same color as at the beginning, make a cone, this being the Santa's hat, fold it a little and reinforce it with Silicone so that it will not be placed straight.
🎅 Paso 6 / Step 6
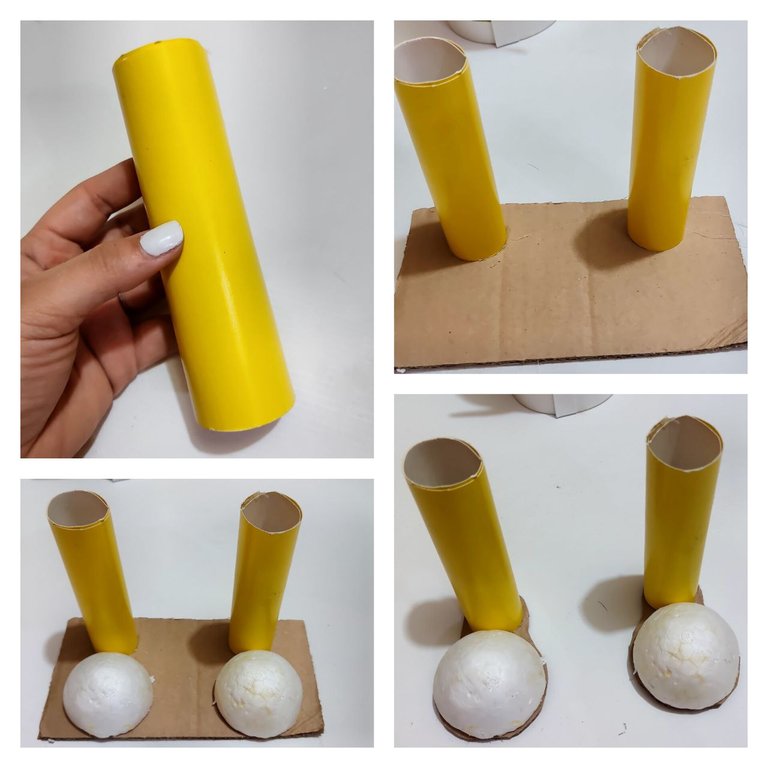
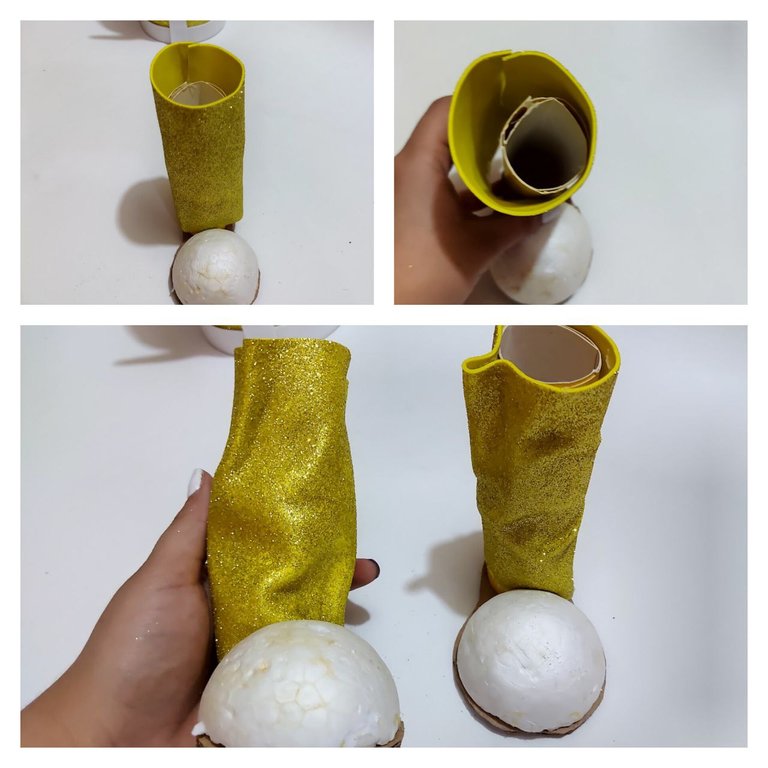
Como tenía retazos de cartulina amarilla realice la forma de las piernas de Santa, aunque también se puede usar cartón, solo se debe enrollar del tamaño que desees, para luego pegar sobre un cartón. Seguidamente use una pelota de anime la cual recorte a la mitad y pegue cada una en frente del tubo hecho anteriormente, y recorte alrededor de ellos, quedando así las dos piernas de Santa.
As I had scraps of yellow cardboard I made the shape of Santa's legs, although you can also use cardboard, just roll it to the size you want, and then glue it on cardboard. Next I used an anime ball which I cut in half and glued each one in front of the tube previously made, and cut around them, thus leaving Santa's two legs.
🎅 Paso 7 / Step 7
Luego para forrar y hacer el pantalón de santa forre las piernas con foami escarchado color dorado, este lo dejé mucho más ancho y algo más alto que la base principal hecho en cartulina esto con el fin de poder arrugar un poco y hacer el simulacro de pantalón ancho.
Then to line and make the Santa's pants I lined the legs with gold colored frosted foami, this I left it much wider and a little higher than the main base made in cardboard, this in order to be able to wrinkle a little and make the simulacrum of wide pants.
🎅 Paso 8 / Step 8
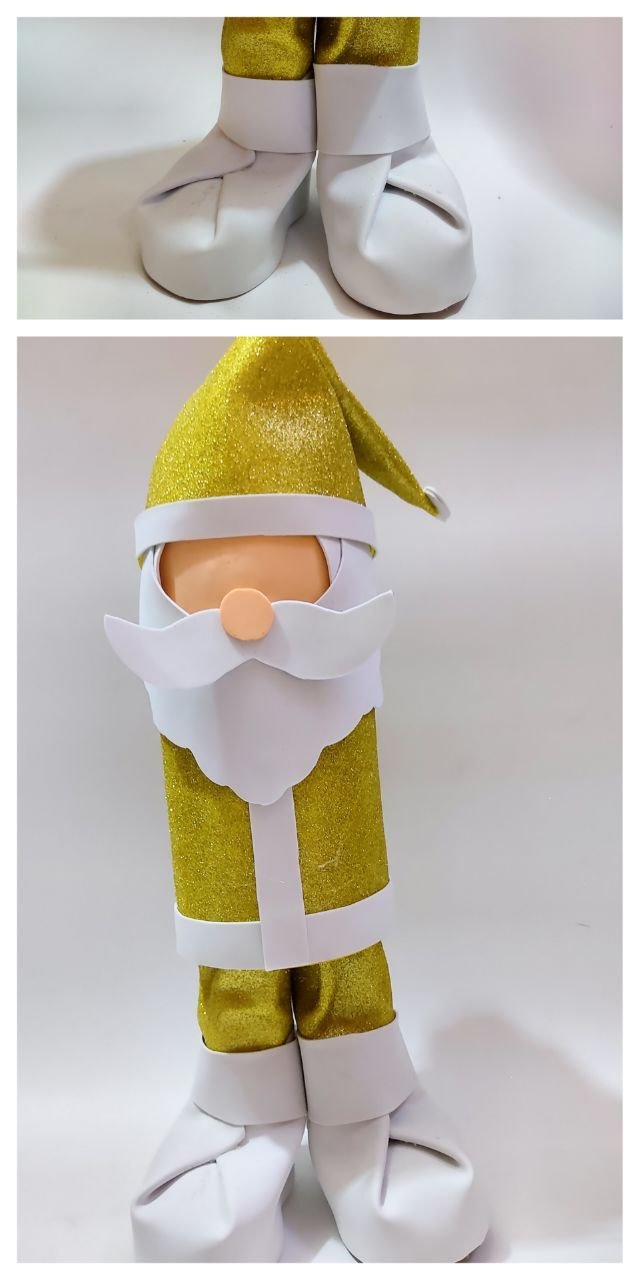
Seguidamente con foami blanco forre las botas haciendo un pequeño dobles hacia el centro y formando una equis, del mismo color blanco forre e hice el borde de la bota. Listas las piernas las pegue por debajo del cuerpo de santa realizado anteriormente.
Then with white foami I lined the boots making a small double to the center and forming a cross, with the same white color I lined and made the edge of the boot. Ready the legs I glued them under the body of Santa made previously.
🎅 Paso 9 / Step 9
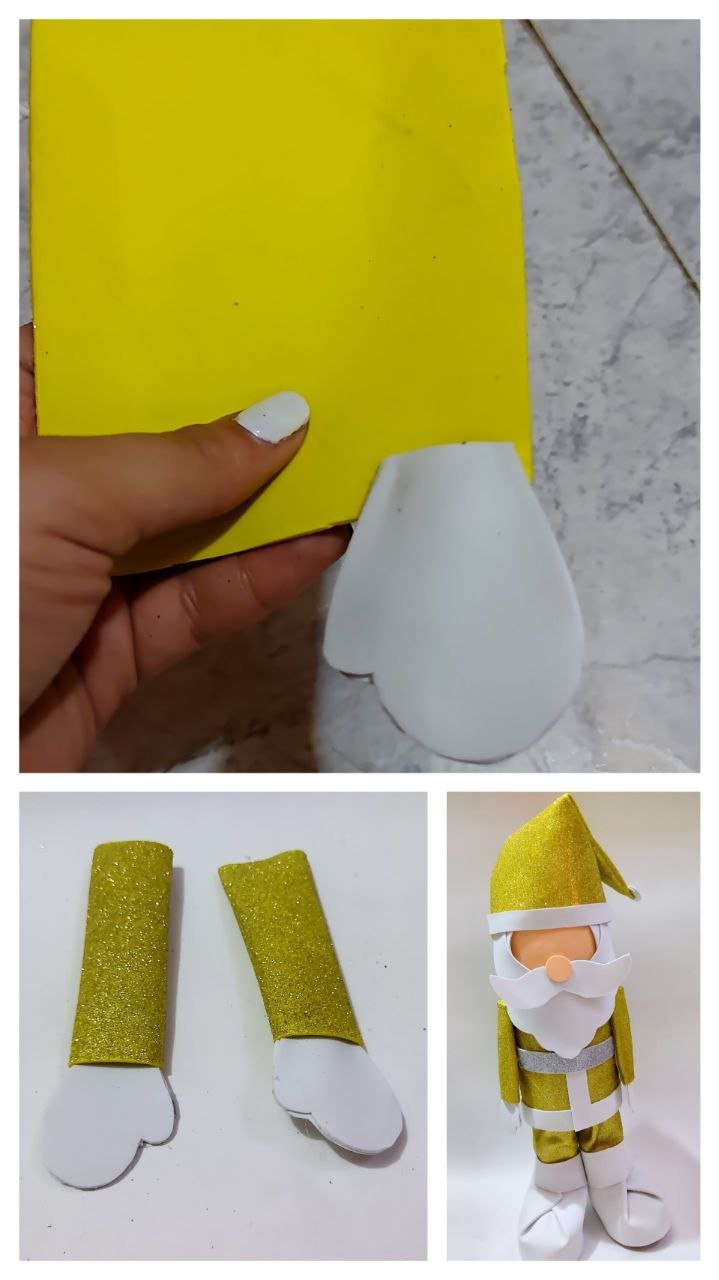
Luego en foami blanco realice la forma de los guantes de santa y pegue sobre foami dorado escarchado, para ello pegue por la parte que no tiene escarcha ya que al dar la vuelta se vería el escarchado. Teniendo los dos brazos ambos los pegué a la altura de la barba.
Then in white foami I made the shape of Santa's gloves and glued on frosted gold foami, for this I glued on the part that has no frost because when I turn around the frosting would be seen. Having both arms I glued them both at the height of the beard.
🎅 Paso 10 / Step 10
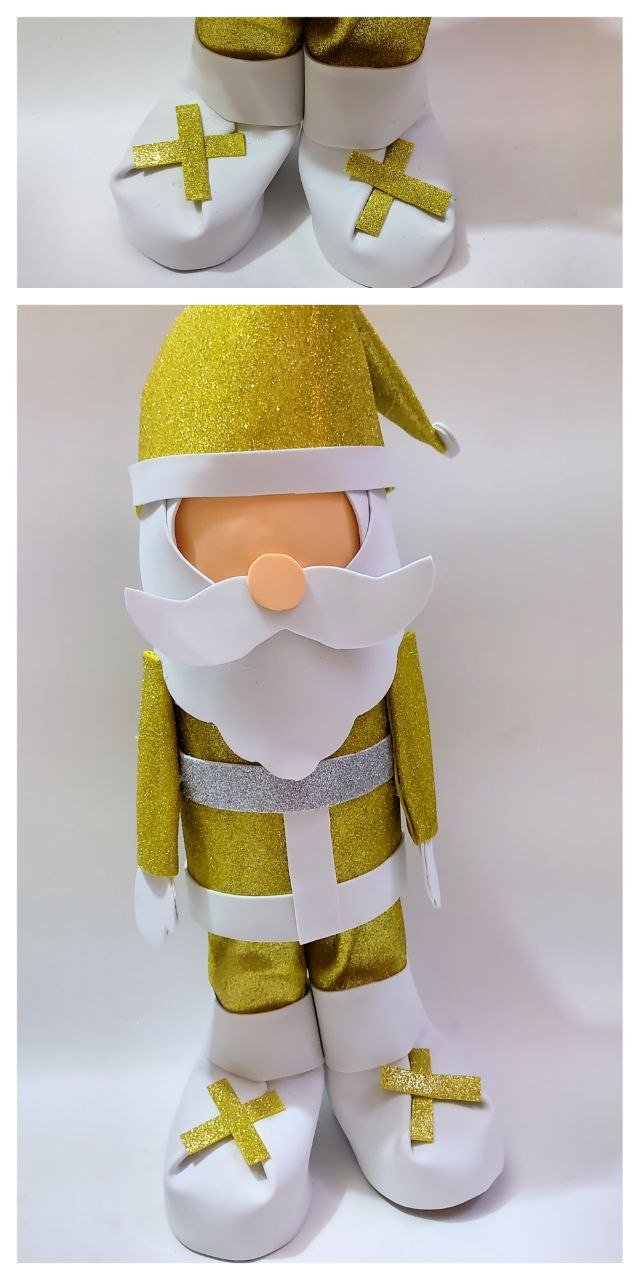
Como toque decorativo en las botas de santa realice una equis con foami escarchado color dorado, dejé secar muy bien.
As a decorative touch on the Santa's boots I made an X with gold colored frosted foami, I let it dry very well.
🎅 Paso 11 / Step 11
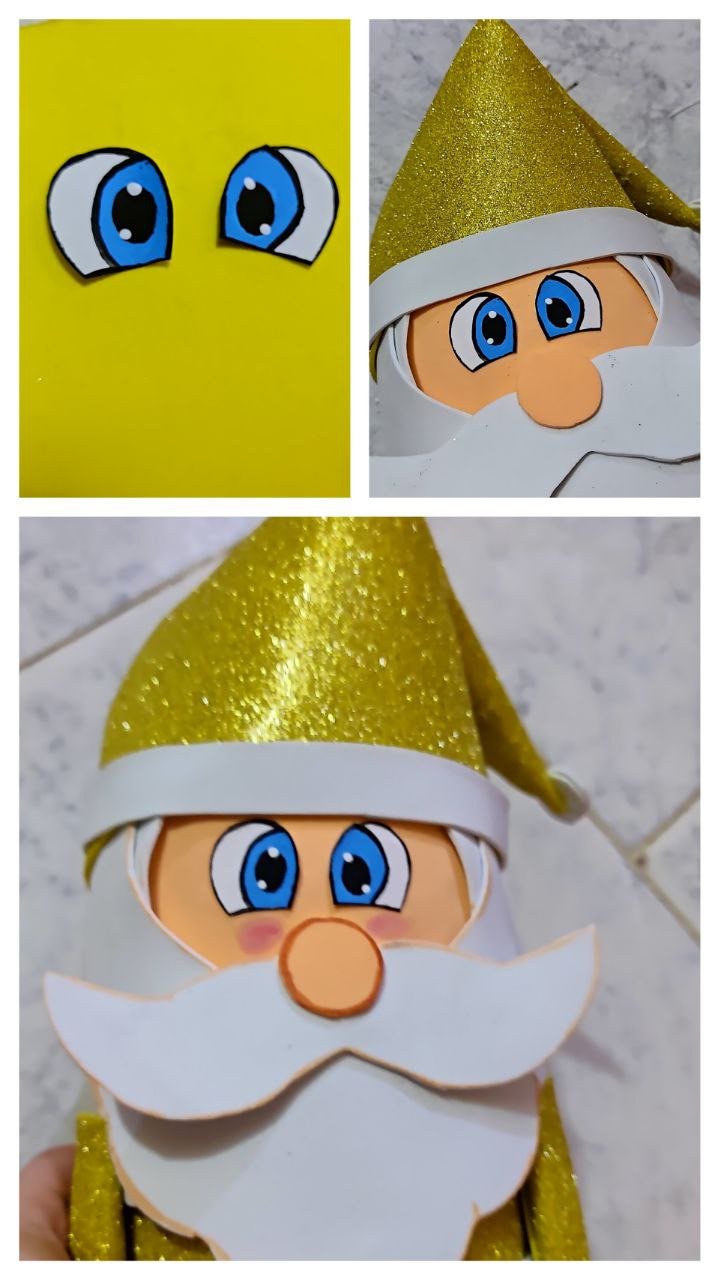
Por último pinte los ojos de santa, para ello los diseñe primero en cartulina blanca, pinté con pintura al frío, recorte y luego pegue en la cara de santa Claus, también se puede hacer directo en ella, pero para mí se me hizo más fácil de calcular el tamaño de esa forma. Luego pinte un poco sus mejillas y el borde de los bigotes y barba🥰.
Finally I painted the eyes of Santa Claus, for this I designed them first on white cardboard, painted with cold paint, cut out and then glued on the face of Santa Claus, you can also do it directly on it, but for me it was easier to calculate the size of that way. Then I painted a little bit his cheeks and the edge of the whiskers and beard🥰.
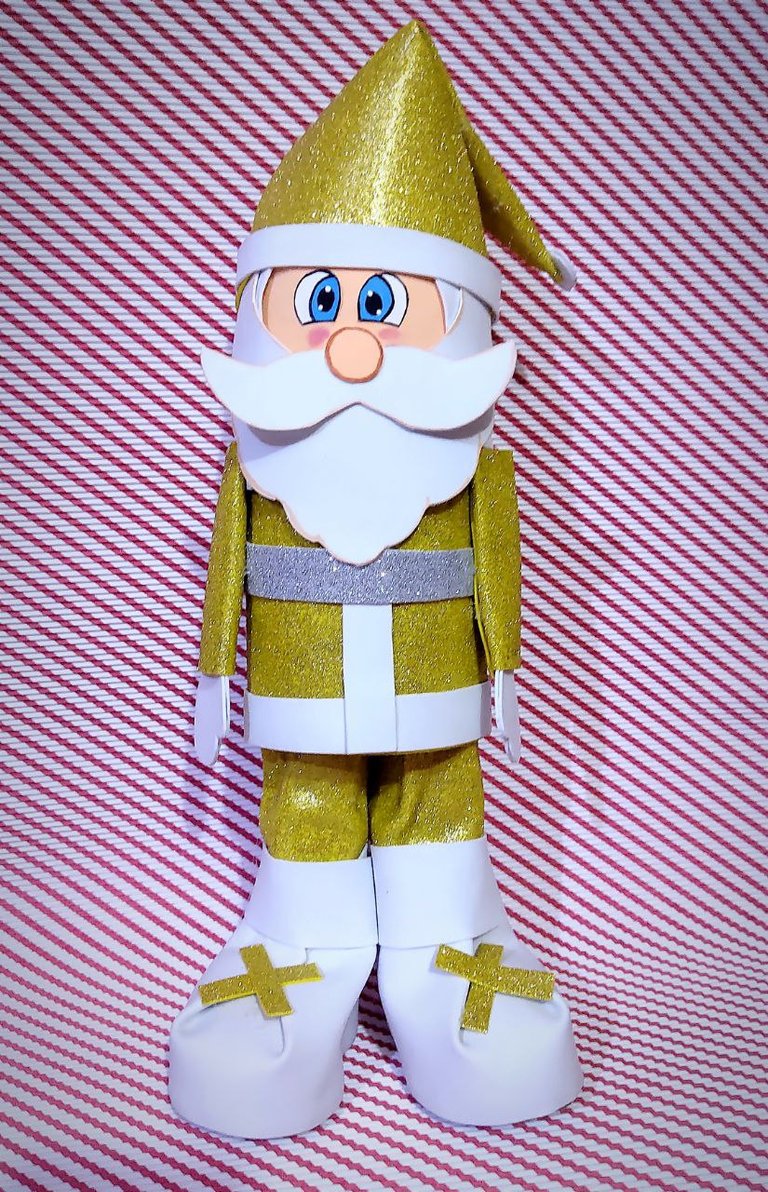
Creación finalizada / Creation completed⬇️
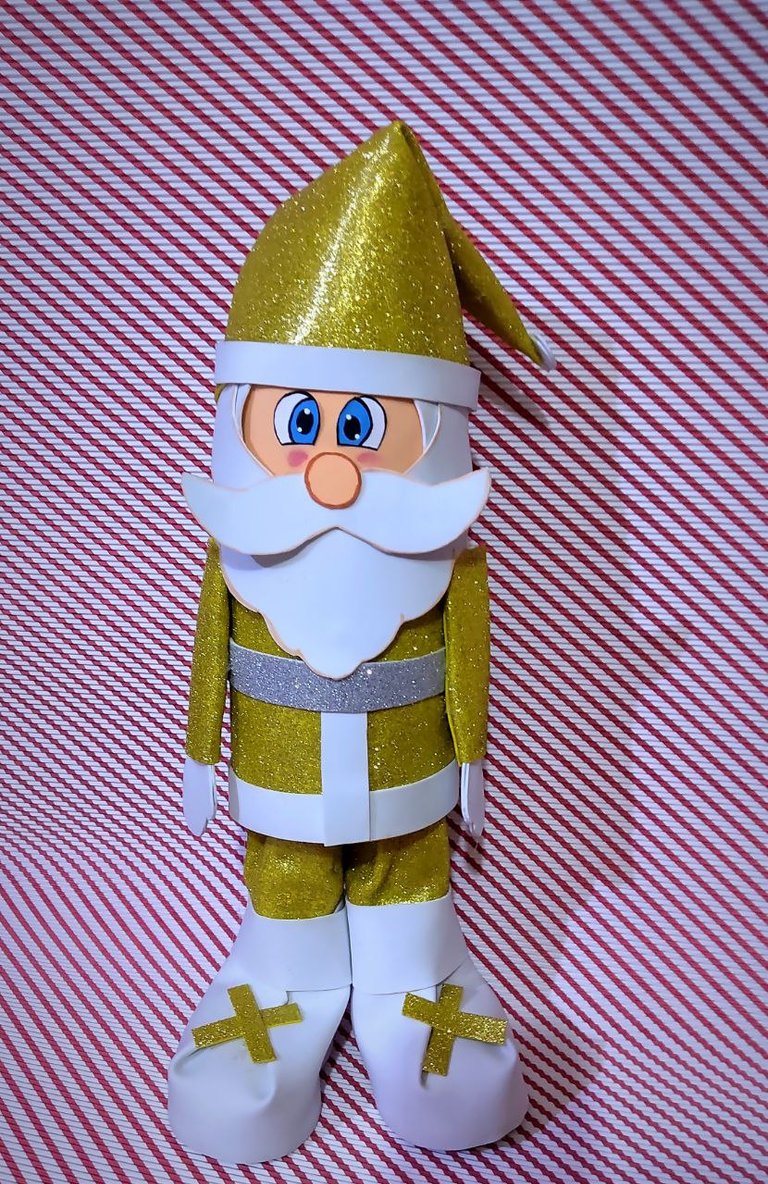
¡ Y de esta forma obtuve mi propio Santa Claus!🎅👩🏻🎨✨
Quedé totalmente enamorada fue un reto para mí, que aunque lleva varios pasos es muy fácil de hacer, lo mejor es que utilizó material de provecho y me sale mucho más económico que comprarlo en cualquier tienda. Espero les haya gustado tanto como a mí🥰.
Nos vemos en una nueva creación👩🎨
And in this way I got my own Santa Claus!🎅👩🏻🎨✨
I was totally in love with it, it was a challenge for me, although it takes several steps it is very easy to make, the best thing is that I used useful material and it is much cheaper than buying it in any store. I hope you liked it as much as I did🥰.
See you in a new creation👩🎨

Mil gracias por leerme una vez
Nos vemos en una próxima publicación.
Muchas bendiciones y abrazos digitales🤗
Thank you very much for reading me once
See you in an upcoming post.
Many blessings and digital hugs🤗
📷 Fotografía: De mi propiedad / Photography: From my property
👩🏼💻 Edición: Inshot y Canva / Edition: Inshot and Canva
✨ Traducción: DeepL.com / Translation: DeepL.com
