Bienvenidos, amigos creativos🎨💜
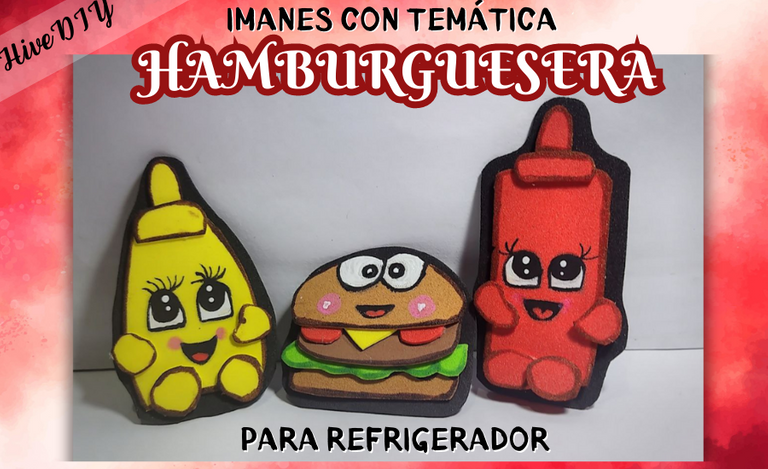
En esta oportunidad traigo para ustedes un paso a paso de como elabore unos imanes para el refrigerador para esta ocasión decidí hacer algo que me encanta, y si amo las hamburguesas y si traen mucha salsa más jajajaja, aunque no sea tan bueno para la salud de igual forma quise plasmarlo en mi nevera, casi siempre encontramos de frutas o cosas así y quise hacer algo diferente. Sin más los materiales a utilizar son:
Welcome, creative friends🎨💜 Happy day to you! I wish you a lot of health and that you are doing very well in this new week that has begun.
This time I bring for you a step by step of how to make some magnets for the refrigerator for this occasion I decided to do something that I love, and if I love hamburgers and if they bring a lot of sauce more hahahaha, although it is not so good for health in the same way I wanted to capture it in my fridge, we almost always find fruit or things like that and I wanted to do something different. Without further ado the materials to use are:
 |
|---|

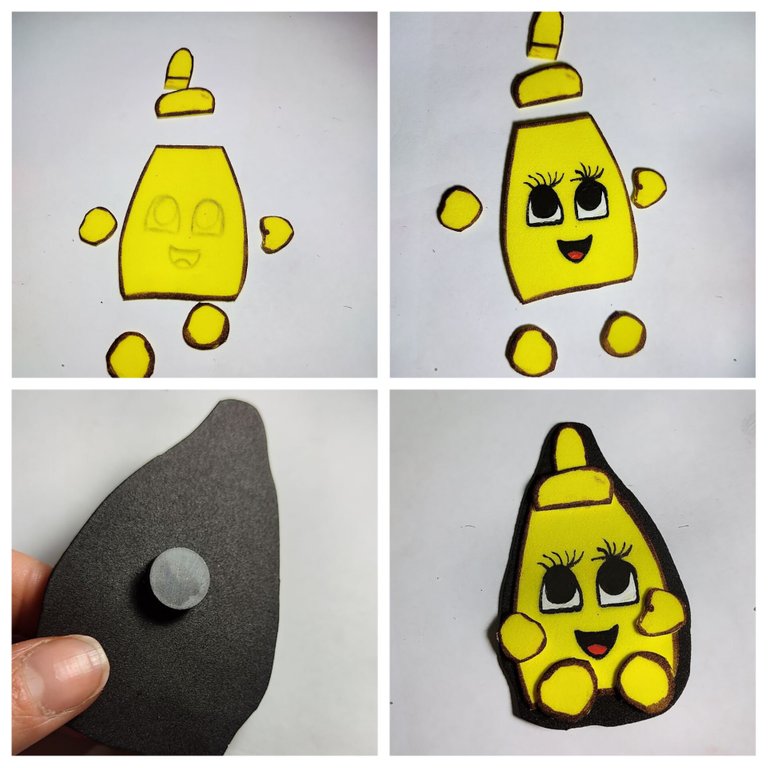
🍔 Paso 1: Lo primero fue buscar algunos dibujos por internet y los que se ven animados mí me gustan mucho, y en foami se ven muy tiernos así que por eso escogí dos potes de salsa y una hamburguesa animada. La cual dibuje en una hoja blanca y recorte siendo estos los moldes a utilizar.
🍔 Paso 2: Empecé a plasmar en el foami uno de los potes de salsa, para cual recorte sus partes a pesar de que iban en un mismo color me gusta hacerlo por separados para que se pueda apreciar muy bien cada parte, para este pote de salsa escogí el color rojo en foami la cual cada una de las piezas las transferi en el foami luego recorte.
🍔 Paso 2: Empecé a plasmar en el foami uno de los potes de salsa, para cual recorte sus partes a pesar de que iban en un mismo color me gusta hacerlo por separados para que se pueda apreciar muy bien cada parte, para este pote de salsa escogí el color rojo en foami la cual cada una de las piezas las transferi en el foami luego recorte.
🍔 Step 1: The first thing was to look for some drawings on the internet and I really like the animated ones, and in foami they look very tender so I chose two pots of sauce and an animated hamburger. Which I drew on a white sheet and cut out these being the molds to use.
🍔 Step 2: I started to shape in the foami one of the sauce pots, for which I cut its parts even though they were in the same color I like to do it separately so that each part can be appreciated very well, for this pot of sauce I chose the red color in foami which each of the pieces I transferred them in the foami then cut out.
🍔 Step 2: I started to shape in the foami one of the sauce pots, for which I cut its parts even though they were in the same color I like to do it separately so that each part can be appreciated very well, for this pot of sauce I chose the red color in foami which each of the pieces I transferred them in the foami then cut out.

🍔 Paso 3: Al tener todas las piezas en foami lo siguiente que hice fue delinear cada una con un marcador color rojo, luego con un pincel muy finito y con pinturas al frío pinte los ojos y boca del pote de salsa, al secar por completo la pintura procedí a pegar cada pieza en el lugar correspondiente.
🍔 Step 3: When I had all the pieces in foami the next thing I did was to outline each one with a red marker, then with a very fine brush and cold paints I painted the eyes and mouth of the sauce pot, when the paint was completely dry I proceeded to glue each piece in the corresponding place.

🍔 Paso 4: Luego pegue en un foami color negro en el cual recorte dejando un pequeño borde, después en la parte de atrás pegue un pequeño imán. Teniendo así listo el primer pote de salsa.
🍔 Step 4: Then glue on a black foami in which I cut out leaving a small border, then on the back I glued a small magnet. Having thus ready the first pot of sauce.

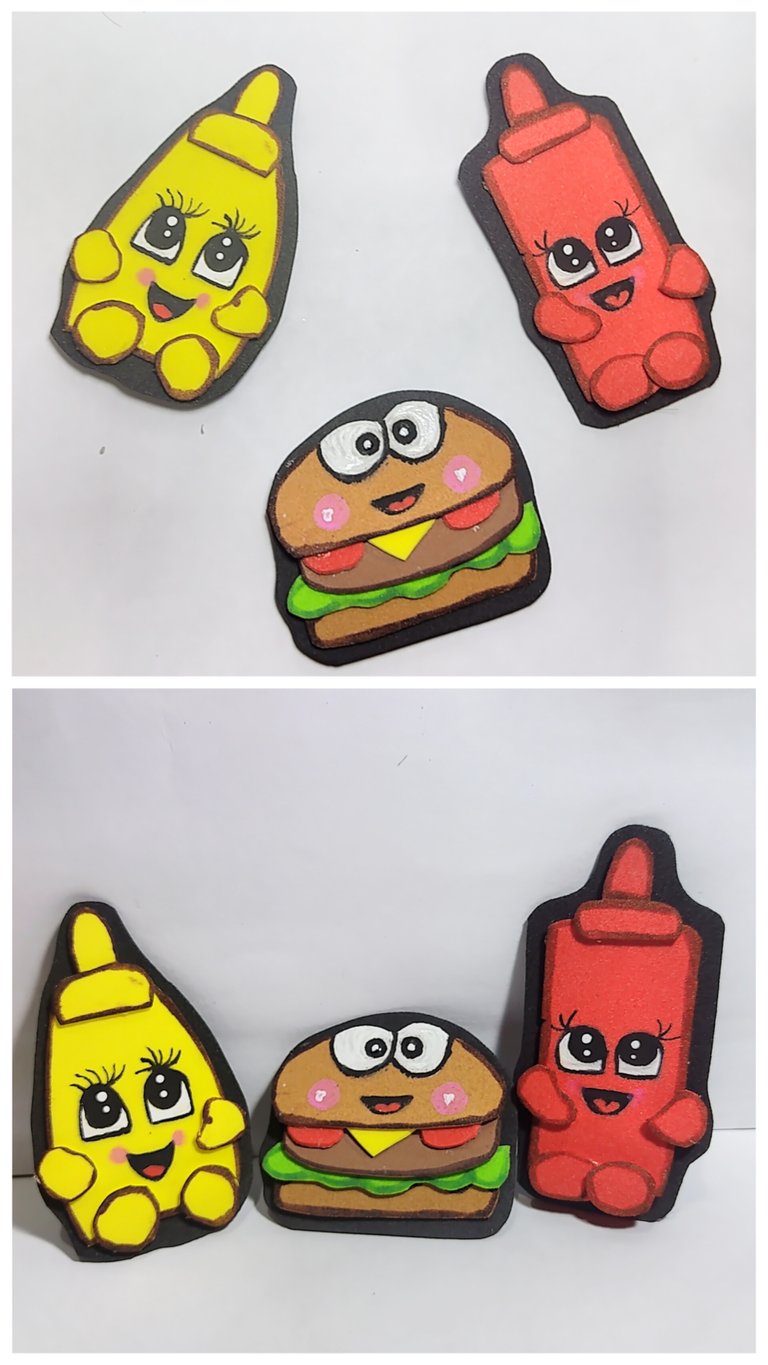
🍔 Paso 5: Para el segundo pote de salsa decidí hacerlo en color amarillo y para esto repetí los mismos pasos anteriores, transferir cada parte en el foami, delinear con marcador marrón y pintar con pintura al frío los ojos y boca, de igual forma pegar cada pieza incluyendo en un foami negro y su imán. Siendo ese el otro pote de salsa.
🍔 Step 5: For the second sauce pot I decided to do it in yellow color and for this I repeated the same steps as before, transfer each part on the foami, outline with brown marker and paint with cold paint the eyes and mouth, in the same way glue each piece including a black foami and its magnet. That being the other sauce pot.
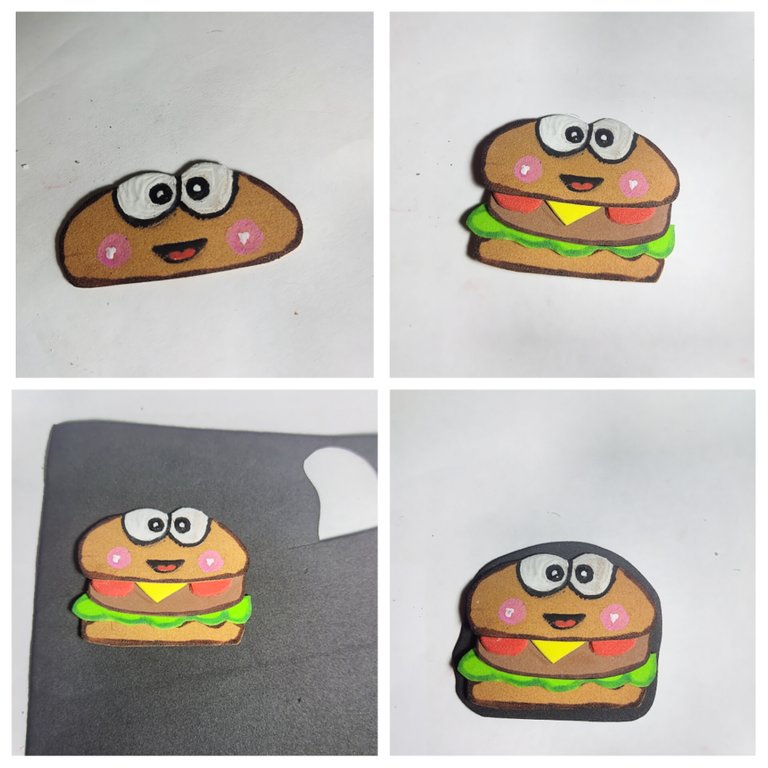
🍔 Paso 6: Para la hamburguesa por ser piezas pequeñas iba recortando en el molde de hoja e iba transfiriendo inmediatamente en el foami de color correspondiente y así pegando de una vez, empezando con un color beigs siendo una tapa del pan, seguido de verde por la lechuga, luego marrón siendo ese la carne, después amarillo para el queso y rojo los tomates terminando con la siguiente tapa del pan haciendo por supuesto unos ojitos.
🍔 Step 6: For the hamburger, being small pieces, I was cutting them in the sheet mold and immediately transferring them to the corresponding colored foami and thus gluing them all at once, starting with a beige color for the bun lid, followed by green for the lettuce, then brown for the meat, then yellow for the cheese and red for the tomatoes, finishing with the next bun lid, making of course some little eyes.
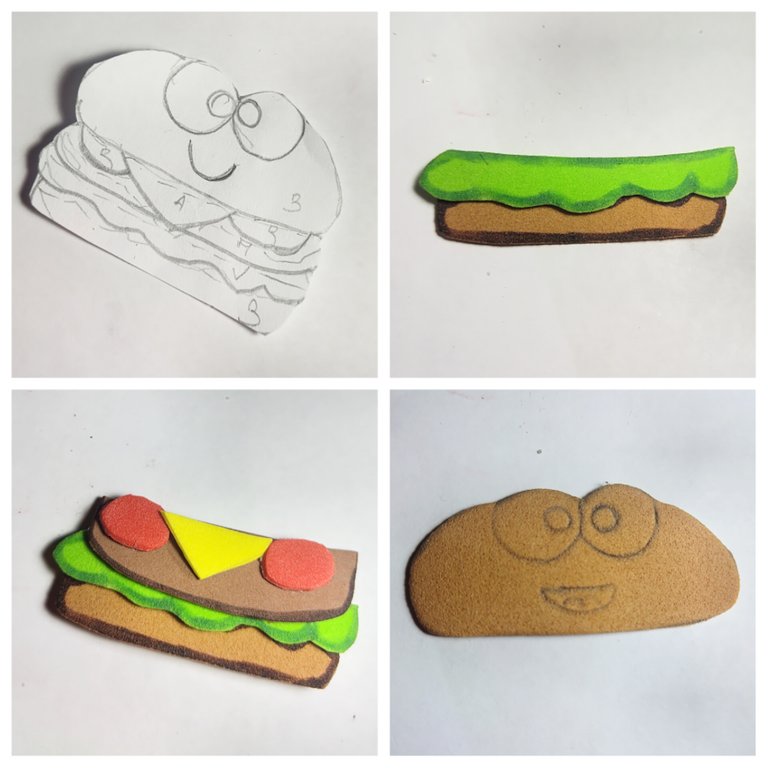
🍔 Paso 7: También realice delineados y pinte los ojos y boca de la hamburguesa. Por último pegue en el foami negro seguido del imán.
🍔 Step 7: Also outline and paint the eyes and mouth of the hamburger. Finally glue on the black foami followed by the magnet.

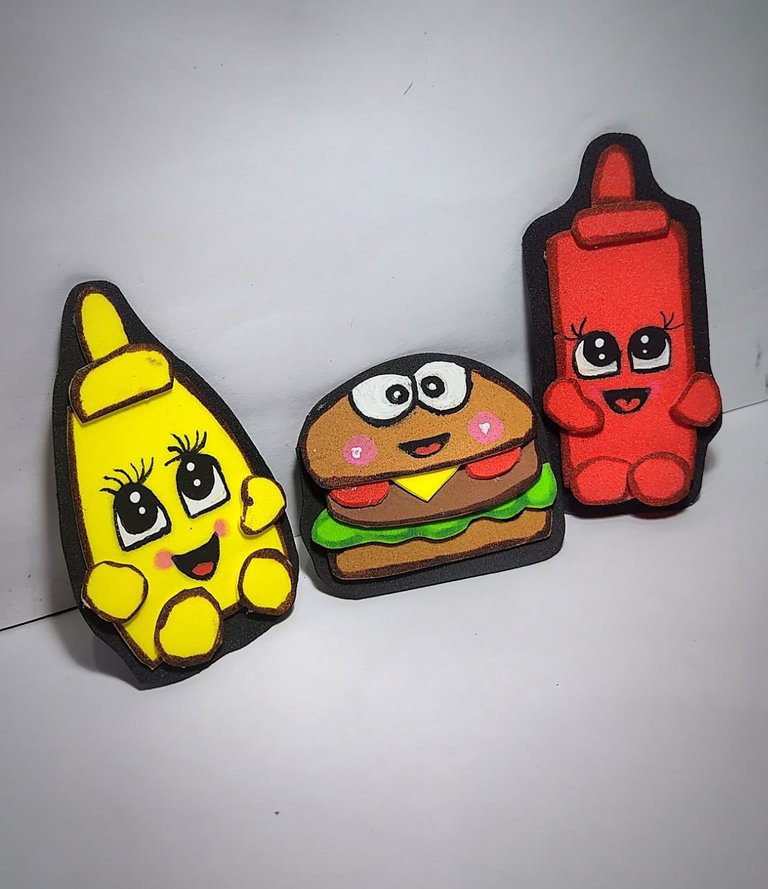
¡Y de esta forma obtuve unos lindos imanes para el refrigerador!
Me gustó mucho hacer esta idea fue un proceso fácil y lo mejor con pocos materiales, cualquier creación en foami me encanta así que está no es la excepción lo puedes crear con los detalles y figuras que más te gusten, deja volar la imaginación.Nos vemos en una nueva creación👩🎨✨.
And this way I got some nice fridge magnets!
I really enjoyed making this idea, it was an easy process and the best thing is that it was made with few materials, I love any foami creation so this is no exception, you can create it with the details and figures that you like the most, let your imagination fly.
See you in a new creación👩🎨✨.


Mil gracias por leerme una vez
Nos vemos en una próxima publicación.
Muchas bendiciones y abrazos digitales🤗
Thank you very much for reading me once
See you in an upcoming post.
Many blessings and digital hugs🤗