Bienvenidos, amigos creativos🎨💜
En esta ocasión traigo para ustedes el paso a paso de como crear dos marca paginas con diseños diferentes, lo mejor es que son hechos con materiales muy fáciles de adquirir logrando una linda forma de no perdernos en esa página que estábamos leyendo. Sin más los materiales a utilizar son:
Welcome, creative friends🎨💜 Happy Thursday!. We are almost at the end of the week and I hope this week is going well. On my side everything is fine thanks to God✨.
This time I bring for you the step by step of how to create two bookmarks with different designs, the best thing is that they are made with very easy to acquire materials achieving a nice way to not get lost in that page we were reading. Without further ado the materials to use are:
 |
|---|

👒 Diseño 1: Muñequita / Design 1: Little doll
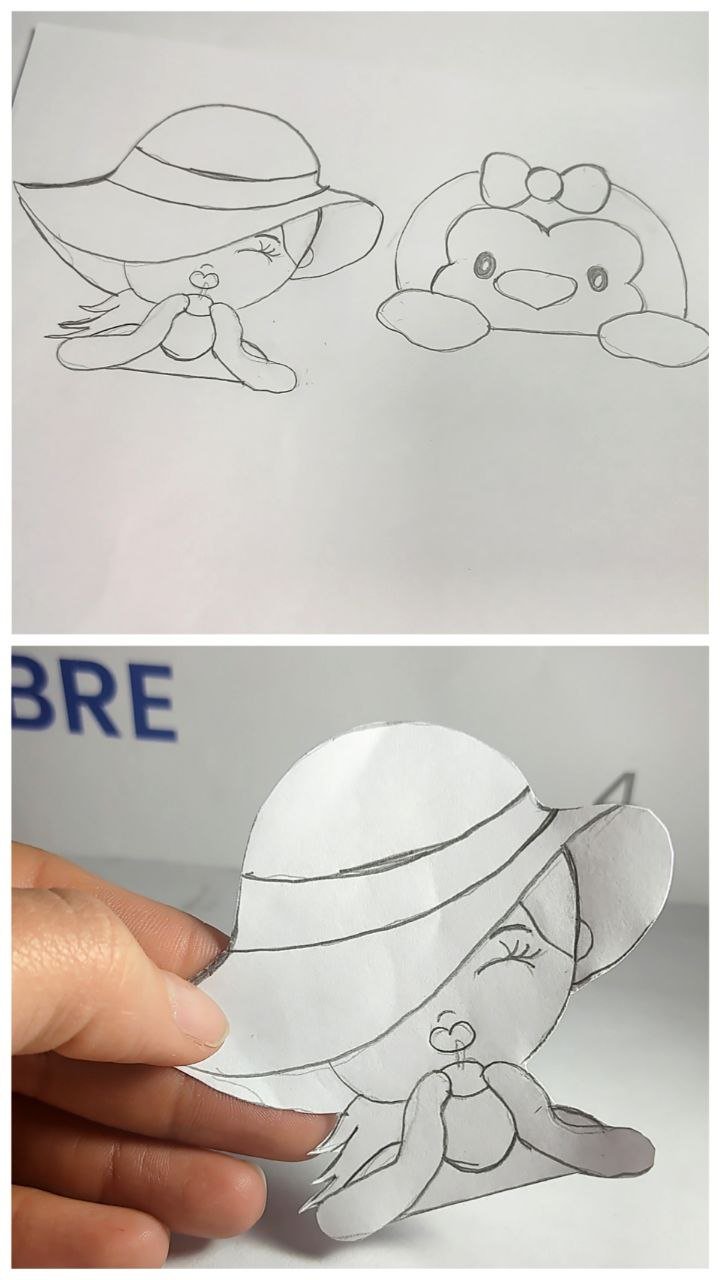
✨ Paso 1: Lo primero que hice fue escoger los diseños que quería para los marca páginas, de los cuales me decidí por una muñequita y un lindo pingüino, simplemente porque me parecieron tiernos. Después de dibujar en una hoja blanca, recorte siendo ellos los moldes a utilizar. Comencé por elaborar la muñequita puesto que tenía más detalles por hacer.
✨ Step 1: The first thing I did was to choose the designs I wanted for the bookmarks, of which I decided on a little doll and a cute penguin, simply because they seemed cute. After drawing on a white sheet of paper, I cut them out as the molds to be used. I started by making the doll since I had more details to do.
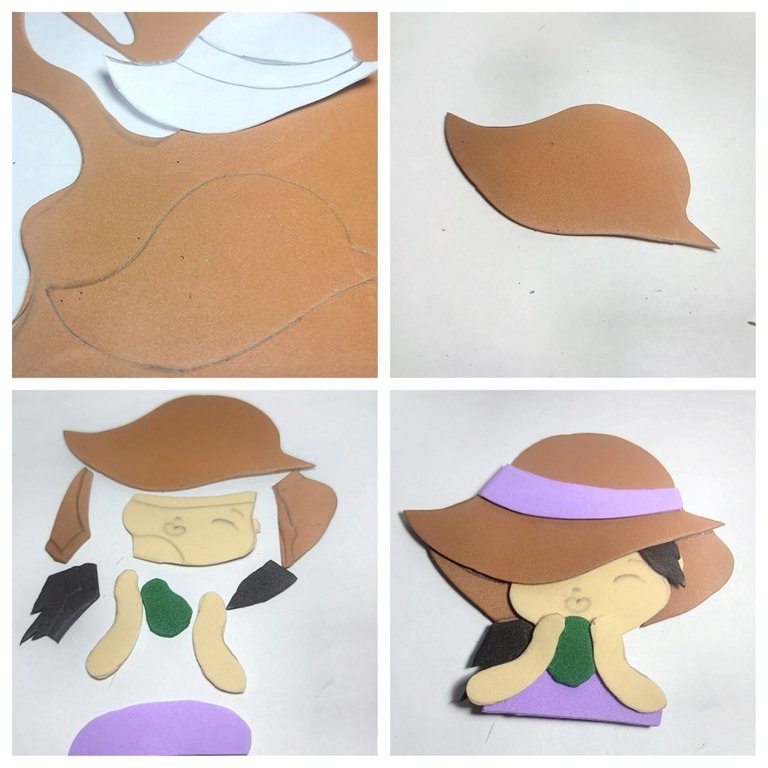
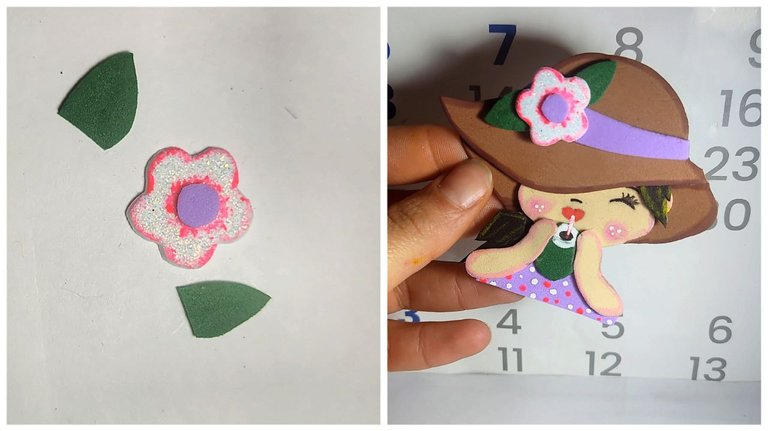
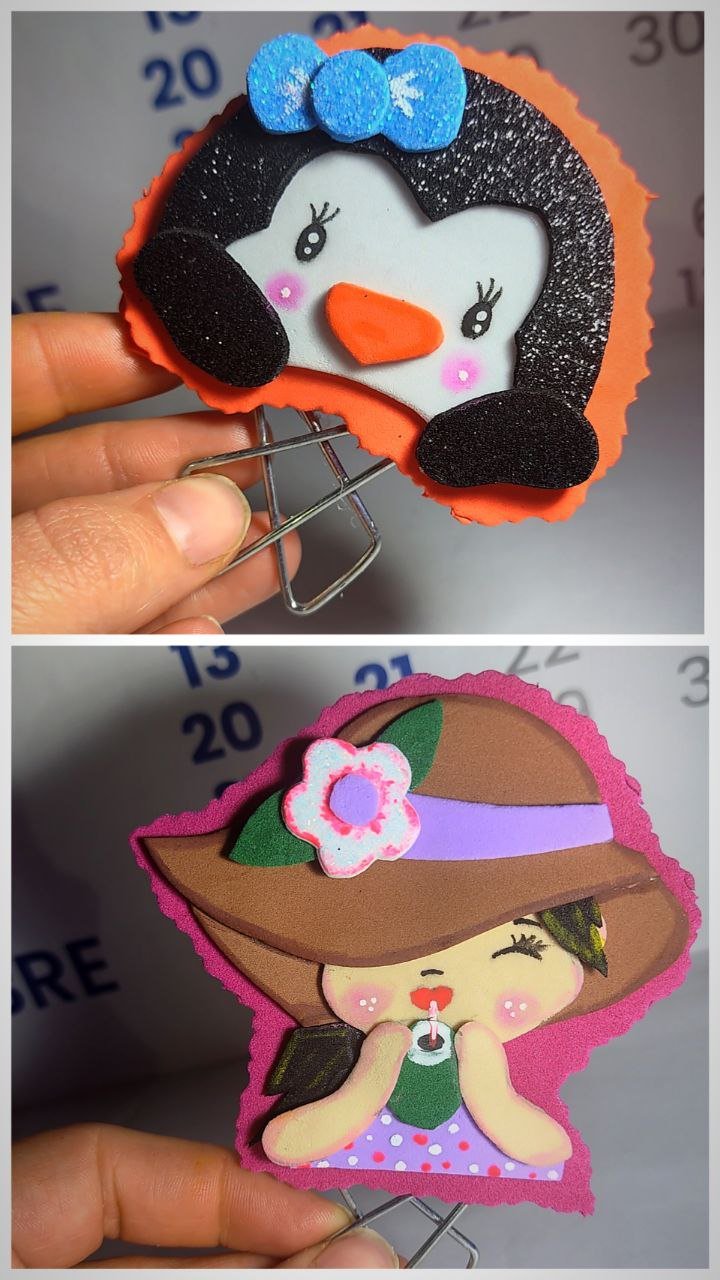
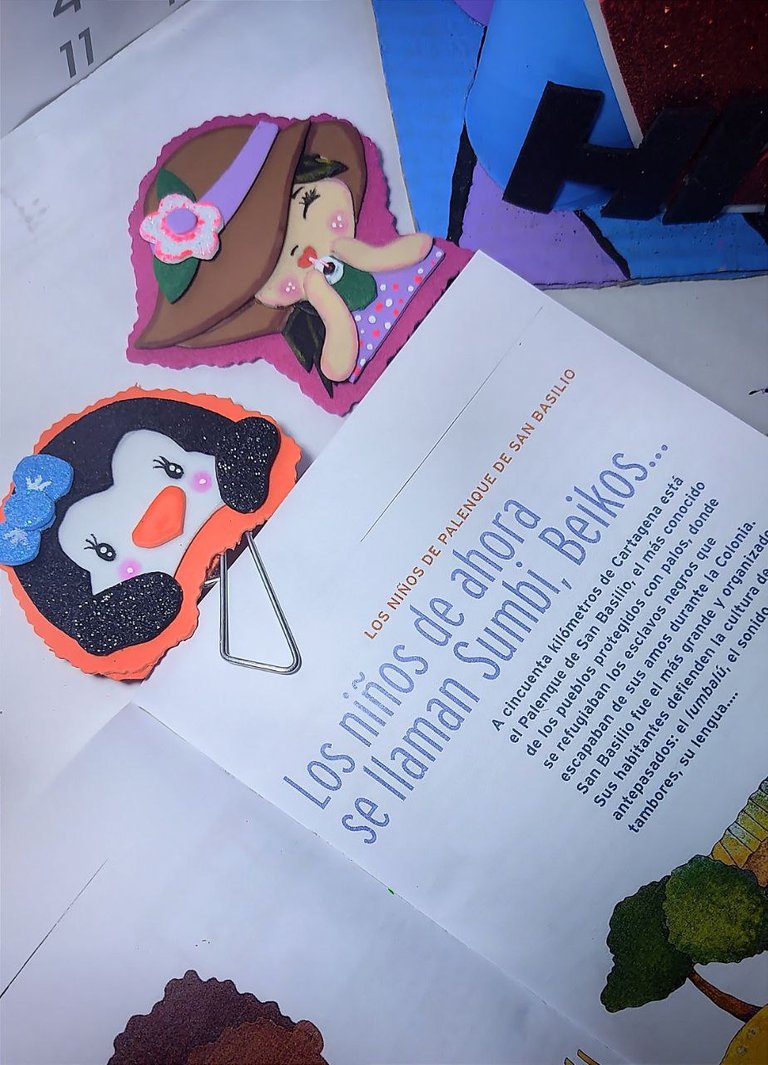
✨ Paso 2: Seguidamente transferí cada pieza en el foami de colores deseados, y en los cuales escogí: para el sombrero el color beigs, cara y brazos en color piel, cabello de negro, blusa en morado y el recipiente en el que está tomando de verde. Luego de tener cada pieza pegue cada una en el lugar correspondiente con silicón frío.
✨ Step 2: Then I transferred each piece in the desired color foami, and in which I chose: for the hat I chose beige, face and arms in skin color, hair in black, blouse in purple and the container in which she is drinking in green. After having each piece, glue each one in the corresponding place with cold silicone.
✨ Paso 3: Al tener todas las piezas pegadas, lo siguiente es decorar cada parte. Para esto con color rosado pinte las mejillas de la muñequita con pintura al frio color negro su ojo y pestaña, y el simulacro de la nariz, con color rojo la boca, para la blusa hice pequeños puntos en blanco y fucsia. Así como también delineados alrededor del borde del sombrero, cara y brazos.
✨ Step 3: Once all the pieces are glued together, the next step is to decorate each part. For this I painted the doll's cheeks with pink color, her eye and eyelashes with black cold paint, and the nose simulacrum, the mouth with red color, for the blouse I made small dots in white and fuchsia. As well as outlines around the edge of the hat, face and arms.

✨ Paso 4: Como último detalle para la muñequita realice una flor y está la pegue en el borde morado del sombrero de la misma.
✨ Step 4: As a last detail for the doll, I made a flower and glued it to the purple edge of the doll's hat.
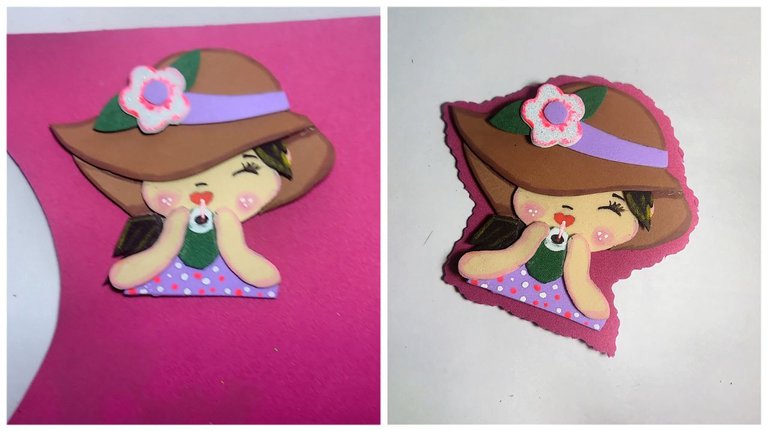
✨ Paso 5: La muñequita la pegue sobre un foami fucsia y recorté con una tijera de figuras dejando un pequeño borde.
✨ Step 5: I glued the doll on a fuchsia foami and cut it out with a figure scissors leaving a small border.
✨ Paso 6: Luego pegue un clip por detrás de la muñequita y encima de él un trozo de foami del mismo color para tener un mejor soporte.
✨ Step 6: Then glue a paper clip behind the doll and on top of it a piece of foami of the same color to have a better support.
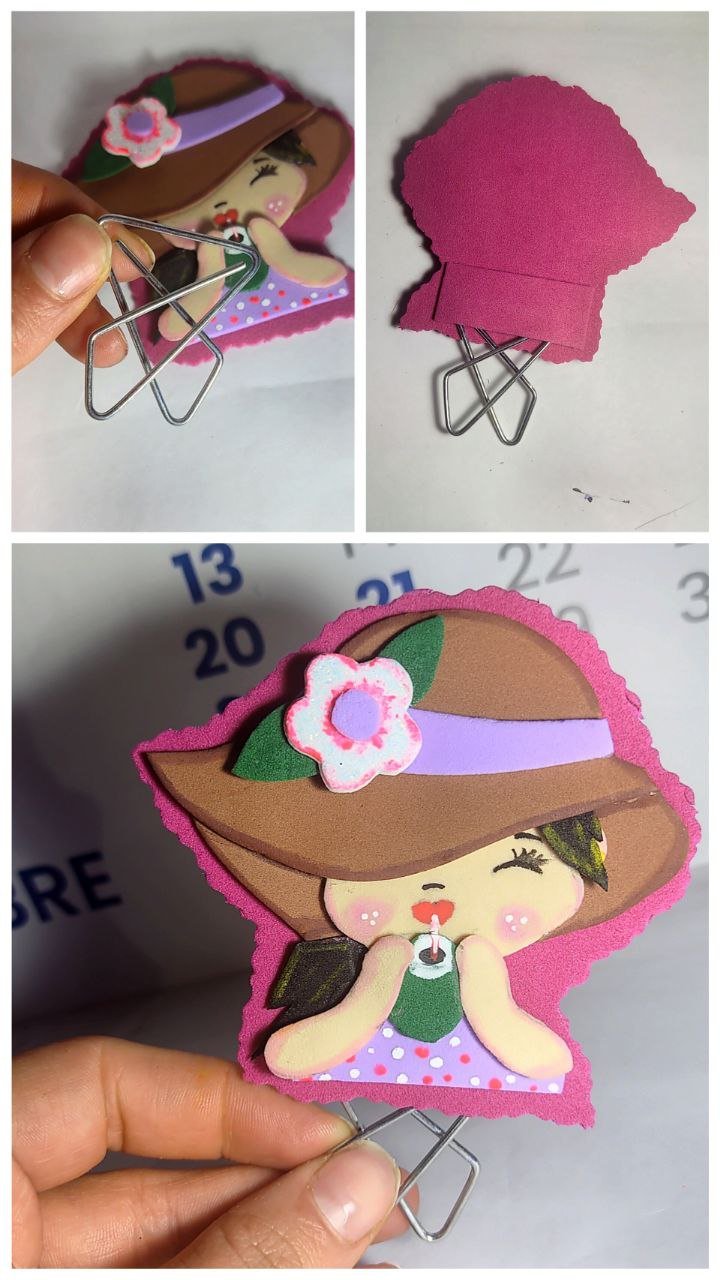
✅ And this is how the first design that I chose was realized.
🐧 Diseño 2: Tierno pingüino / Design 2: Tender penguin
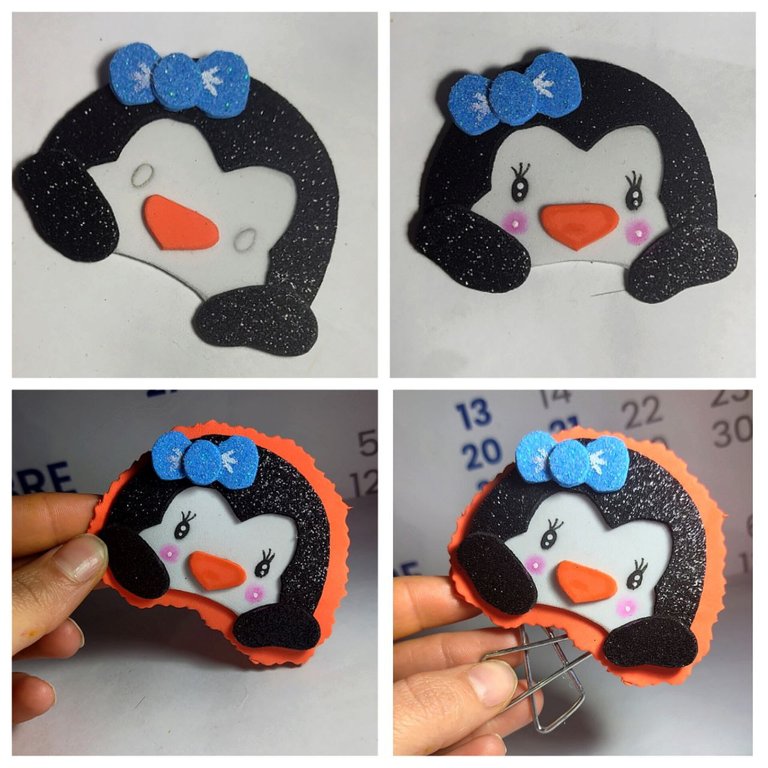
✨ Paso 7: Para hacer el pingüino se repiten los mismos pasos señalados anteriormente, dibujar el molde, recortar y transferir al foami de colores correspondiente en este caso fue blanco y negro para el rostro, el lazo azul y un pico color naranja, seguidamente pegue cada pieza en su lugar.
✨ Step 7: To make the penguin repeat the same steps outlined above, draw the mold, cut out and transfer to the corresponding colored foami, in this case it was black and white for the face, the blue ribbon and an orange beak, then glue each piece in place.
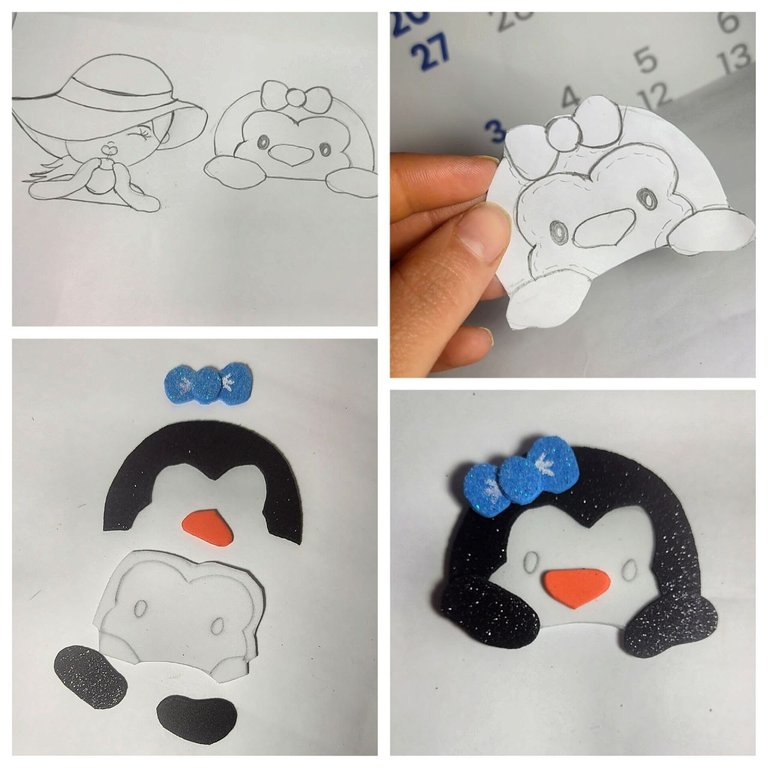
✨ Paso 8: Al tener armado el pingüino le di color a cada pieza, pintando sus ojos con pintura al frío color negro y puntos de color blanco, sus mejillas con color fucsia.
✨ Paso 9: Luego pegue el pingüino sobre un foami color naranja y recorte dejando un pequeño borde, de igual forma pegue el clip y un soporte de ese mismo color.
✨ Paso 9: Luego pegue el pingüino sobre un foami color naranja y recorte dejando un pequeño borde, de igual forma pegue el clip y un soporte de ese mismo color.
✨ Step 8: To make the penguin repeat the same steps outlined above, draw the mold, cut out and transfer to the corresponding colored foami, in this case it was black and white for the face, the blue ribbon and an orange beak, then glue each piece in place.
✨ Step 9: Then glue the penguin on an orange foami and cut out leaving a small border, and also glue the clip and a support of the same color.
✨ Step 9: Then glue the penguin on an orange foami and cut out leaving a small border, and also glue the clip and a support of the same color.
✅ This is the second design I chose.

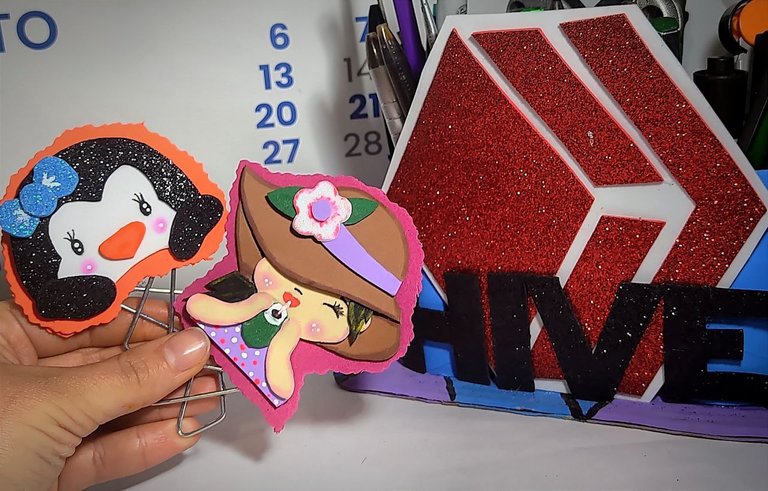
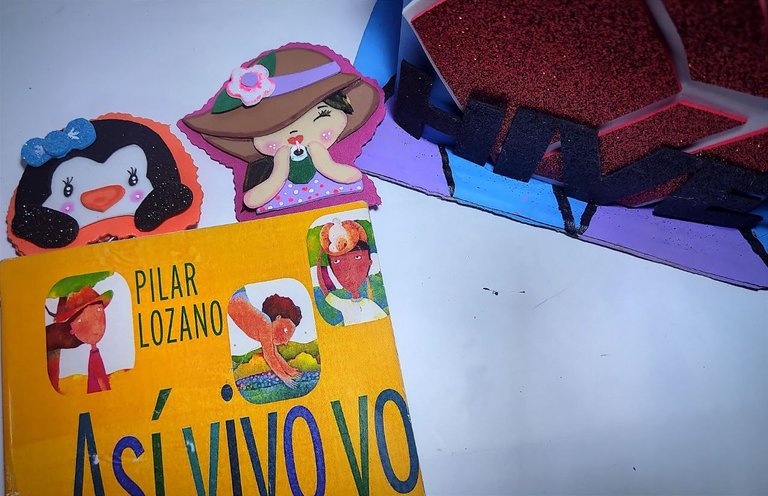
Finalmente obtuve dos diseños para marcar páginas, que en lo personal me encantaron siendo mi favorita la muñequita. Lo importante es que fue con pocos materiales y fáciles de hacer dándole un gran toque a esas páginas que dejamos para seguir leyendo después. Recuerda que puedes hacer el diseño que más te guste, solo deja volar tu imaginación✨.
Nos vemos en una nueva creación👩🎨✨.
Nos vemos en una nueva creación👩🎨✨.
Finally I got two designs to mark pages, which I personally loved being my favorite the little doll. The important thing is that it was with few materials and easy to make giving a great touch to those pages that we leave to continue reading later. Remember that you can make the design you like the most, just let your imagination fly.
See you in a new creación👩🎨✨.
Mil gracias por leerme una vez
Nos vemos en una próxima publicación.
Muchas bendiciones y abrazos digitales🤗
Thank you very much for reading me once
See you in an upcoming post.
Many blessings and digital hugs🤗