Un saludo a todos los que hacen vida en esta comunidad, me uno al Desafío del Reciclaje Creativo-17de la amiga @jennyzer, en el cual propone realizar manualidades con material de provecho y de esta forma estamos cuidando el medio ambiente, además de crear hermosos proyectos con diferentes materiales reusables que tengamos en nuestros hogares. Te invito @bella76 a que nos deleites con alguna manualidad
Greetings to all who make life in this community, I join the Creative Recycling Challenge-17 of my friend @jennyzer, in which she proposes to make crafts with useful materials and in this way we are taking care of the environment, in addition to creating beautiful projects with different reusable materials that we have in our homes. I invite you @bella76 to delight us with a craft.
Materiales: Cartón, foami rojo escarchado, molde de gallina, pistola de silicón, tijera, tapas del envase de salsa de tomate
Materials: Cardboard, frosted red foami, chicken mold, silicone gun, scissors, tomato sauce container lids

Paso 1/Step 1
Transferimos el molde al trozo de cartón y recortamos con mucho cuidado. Se recortan las crestas en foami rojo escarchado y el ala en foami rojo simple se decora el ala con tres recortes de foami rojo escarchado. Realizamos el pico con un pequeño triángulo de foami amarillo escarchado
Transfer the mold to the piece of cardboard and cut out very carefully. Cut out the crests in frosted red foami and the wing in simple red foami and decorate the wing with three cuts of frosted red foami. We make the beak with a small triangle of frosted yellow foami.


Paso 2/Step 2
Se dibuja un circulo con la ayuda de un plato, se recorta y luego se dibujan seis círculos pequeños que es donde irán colocados los huevos y en el centro se recorta una ranura que es donde ira incrustada la gallina. Finalizamos esta parte pintando con pintura blanca
Draw a circle with the help of a plate, cut it out and then draw six small circles which is where the eggs will be placed and in the center cut a groove which is where the hen will be embedded. We finish this part painting with white paint


Paso 3/Step 3
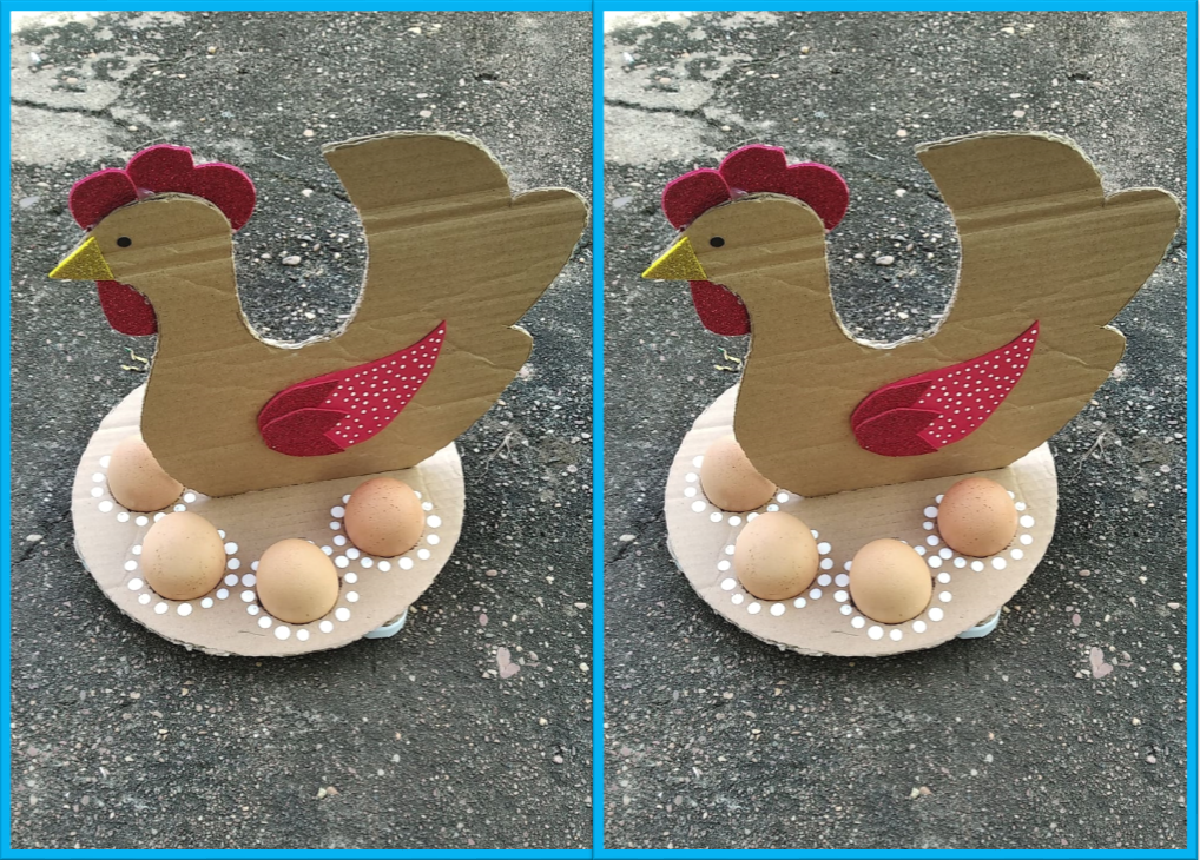
Debemos reutilizar todo lo que podamos, recuerdan los seis círculos que realizamos en el paso 2, tomamos los círculos que sobaron y pegamos dos en cada tapa de salsa de tomate para hacer la base donde ira pegada nuestra porta huevos, de esta forma los huevos no pegan de la mesa. Se pegan en la parte de abajo y por último se incrusta la gallina en la ranura colocamos silicón para que quede bien pegada. Y de esta manera terminamos la porta huevos, miren que hermoso quedo, anímense a realizarlo es muy fácil de hacer
We must reuse everything we can, remember the six circles that we made in Step 2, we took the circles that were rubbed and we glued two on each tomato sauce cover to make the base where our egg holder will stick, in this way the eggs will not stick from the table. They are glued at the bottom and finally the hen is embedded in the slot, we place silicone so that it is well glued. And in this way we finish the egg holder, look how beautiful it is, go ahead and do it, it is very easy to do


Gallina Porta Huevos/Egg Carrier Hen


Las fotos fueron tomadas por mí con mi celular Xiaomi Redmi7
The photos were taken by me with my Xiaomi Redmi7 cell phone.


