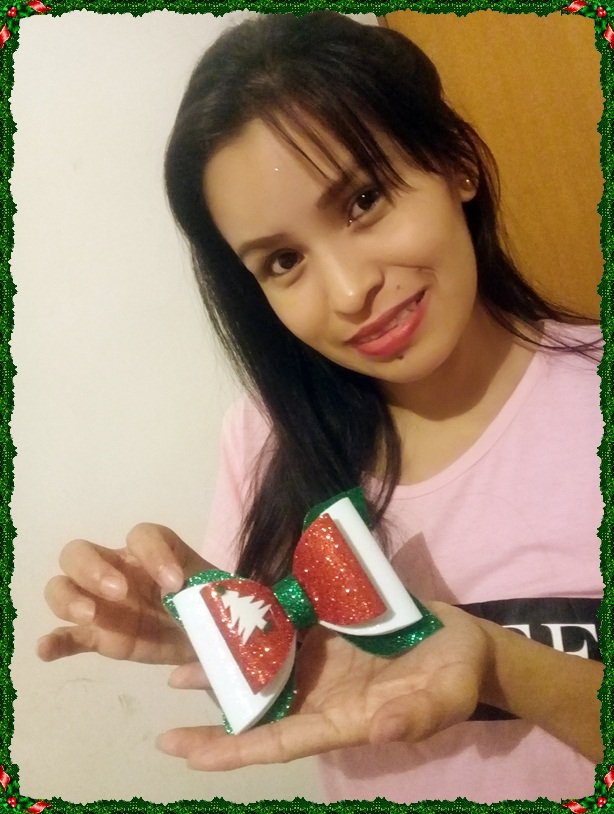

¡Hola mis hermosos lectores! Buenos días, bendecida mitad de semana, nuevamente estoy por acá compartiendo con ustedes contenido hecho en casa, con mucha dedicación y cariño.
El día de hoy, les mostraré como realicé un hermoso lazo con motivo navideño, adelantandome un poco a las fiestas decembrinas, ya que no falta mucho para ello.
Este lazo lo realicé en foami escarchado, me gusta mucho trabajar con este material, ya que el brillo que le da a los trabajos de manualidades es hermoso.
Veamos el paso a paso 😊...
Manos a la obra.
Hello my beautiful readers! Good morning, blessed midweek, again I am here sharing with you content made at home, with a lot of dedication and love.
Today, I will show you how I made a beautiful bow for Christmas, anticipating the holidays a bit, since there is not much left for it.
I made this bow in foami frosted, I really like working with this material, since the shine it gives to handicrafts is beautiful.
Let's see the step by step 😊 ...
Let's do it.
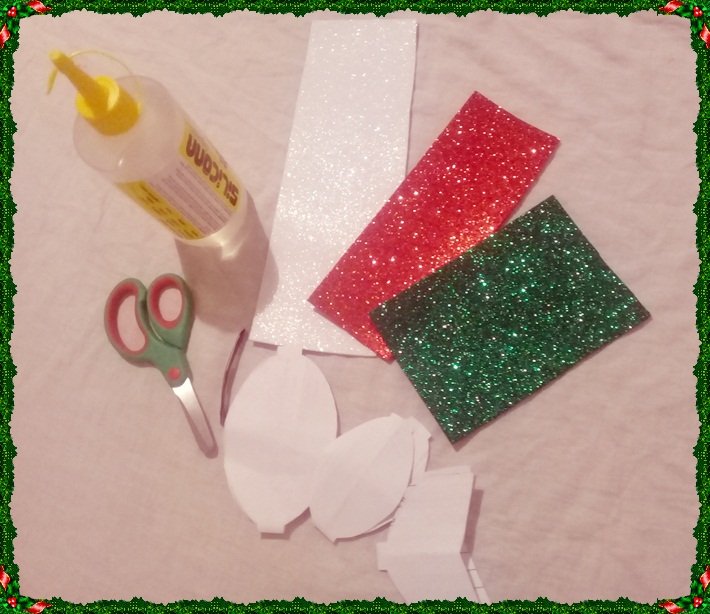
Materiales:
- Foami escharchado (Blanco, rojo y verde).
- Silicona líquido.
- Tijera.
- Molde para lazo.
- Gancho para el cabello.
Materials:
- Frosted foam (White, red and green).
- Liquid silicone.
- Scissor.
- Mold for bow.
- Hairpin.
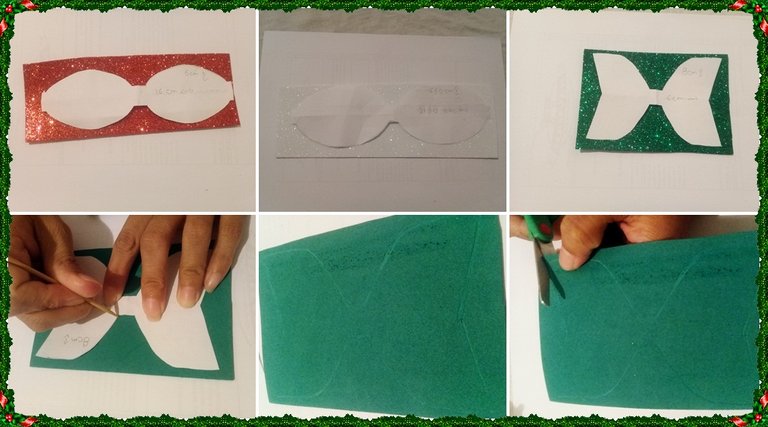
El primer paso es copiar los moldes en el foami, las mediads de cada lazo varian.
Para el lazo rojo 16cm de ancho por 5cm de alto.
El blanco 21,5cm por 6,5cm.
Y el verde que es la base, 12cm de ancho por 8 de alto.
Una vez copiado, se procede a recortar
The first step is to copy the molds in the foami, the media of each loop varies.
For the red bow 16cm wide by 5cm high.
The white 21.5cm by 6.5cm.
And the green that is the base, 12cm wide by 8 high.
Once copied, we proceed to cut
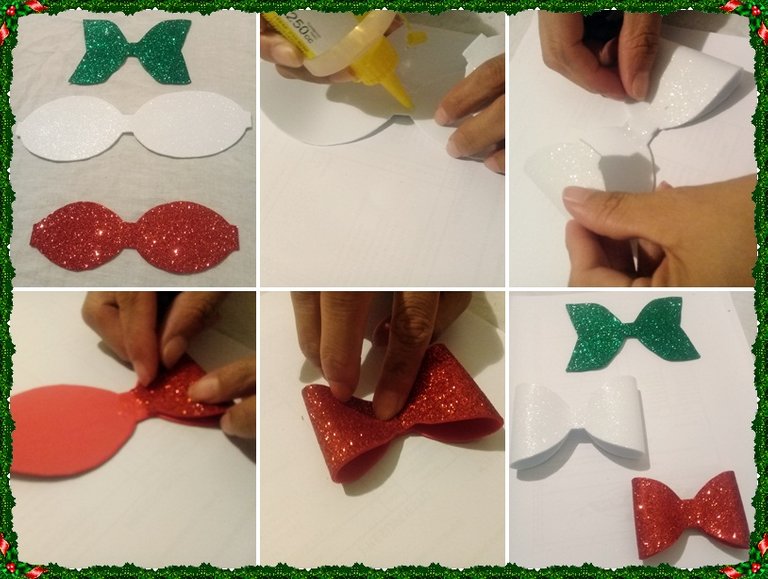
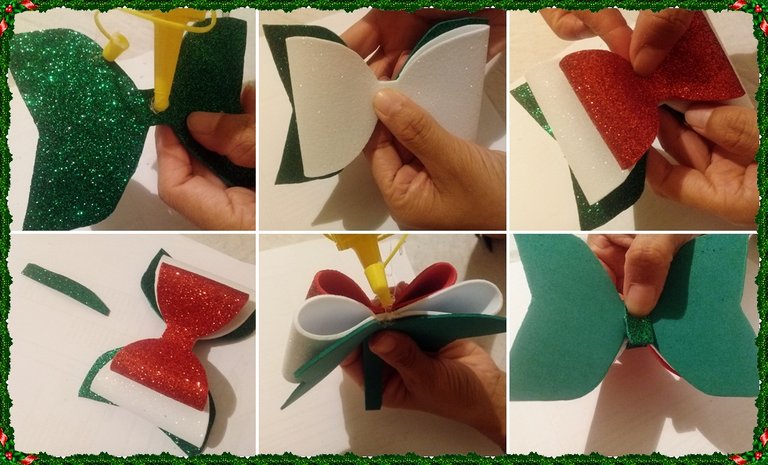
Ya con los 3 moldes copiados y recortados en el foami, procedemos a darle forma.
Para los lazos de color blanco y rojo, con ayuda del silicona, unimos ambos extremos llevándolos al centro.
With the 3 molds copied and cut into the foam, we proceed to shape it.
For the white and red bows, with the help of the silicone, we join both ends bringing them to the center.
Ahora, comenzamos a juntar cada lazo con la base(color verde), uno encima del otro
Con un pequeño recorte de foami verde, no máximo de 1/2cm de ancho, realizamos una cinta para cubrir el centro, este detalle le da un toque muy bonito, ademas que refuerza la unión de los lazos.
Now, we begin to join each tie with the base (green color), one on top of the other
With a small cut of green foami, no maximum of 1/2cm wide, we make a ribbon to cover the center, this detail gives a very nice touch, also reinforces the union of the ties.
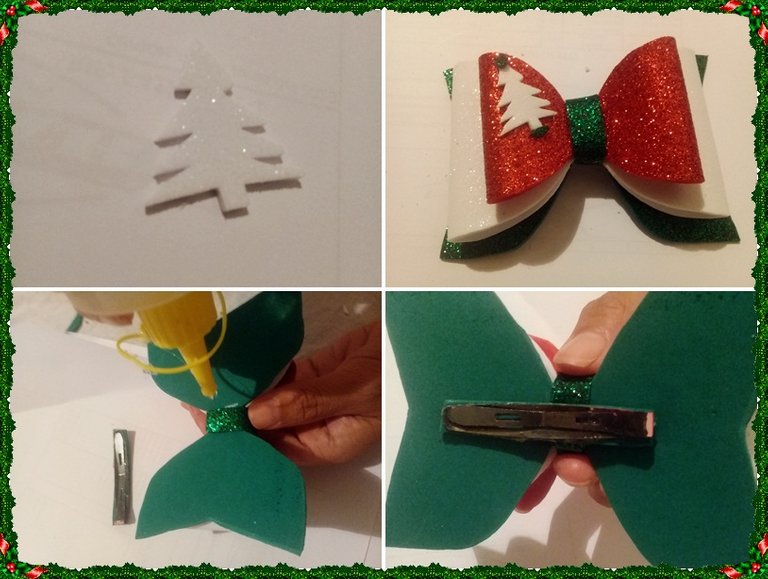
Para culminar, podemos añadir una linda figura navideña, yo decidí un árbol de navidad, en color blanco para dar contraste, además le coloqué una pequeña base y un circulo en la punta, este último para simular la estrella de navidad. En la parte trasera adherí el gancho con silicona.
To finish, we can add a nice Christmas figure, I decided on a Christmas tree, in white to give contrast, I also placed a small base and a circle at the tip, the latter to simulate the Christmas star. On the back I attached the hook with silicone.
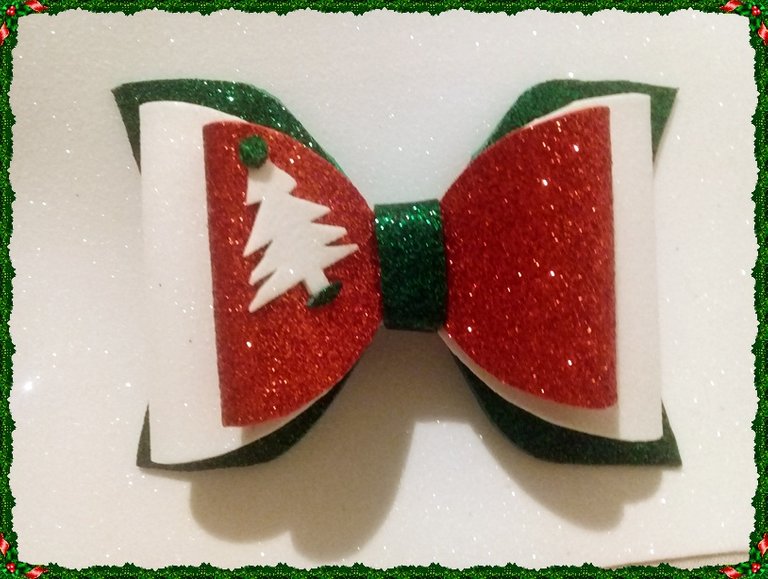
Y voilá... Este es el resultado 😍
And voila... This is the result 😍
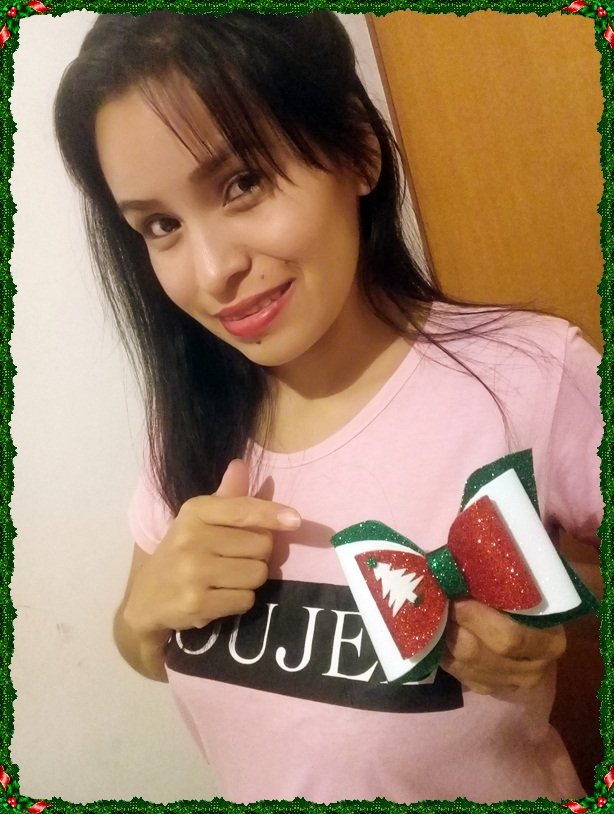

Gracias por visitar mi blog, gracias por leer mi contenido, es algo sencillo de hacer, para lo cual no se necesita mucho material, espero les haya gustado y les sea de gran utilidad si se animan a realizarlo. Lluvia de bendiciones 🙏 Hasta luego. 😊
Todas las fotos son personales.
Separador de: www.pngwing.com/
Disculpen si poseo errores de traducción, mi unico lenguaje es el castellano.
Thank you for visiting my blog, thank you for reading my content, it is something simple to do, for which you do not need much material, I hope you liked it and it will be very useful if you dare to do it. Rain of blessings 🙏 See you later. 😊
All photos are personal.
Separator from: www.pngwing.com/
Sorry if I have translation errors, my only language is Spanish.


