
Joy-con drift, what is it?
So last week my youngest came to me, claiming Luigi didn't want to play anymore with him anymore. And that he only wanted to walk in circles 😁 Well, my youngest is 5, and playing his favorite game, Luigi's mansion on the Switch. Also, technically he was correct, Luigi was only turning in circles, and couldn't be controlled anymore.
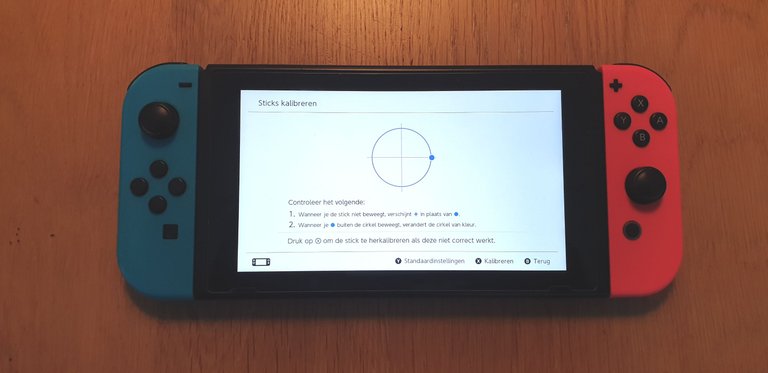
What happened was, that the right joy-con only wanted to go full right, nothing more and nothing less. So, after trying to re-calibrate the joy-con to no remorse, and the Switch being out of warranty, i figured that it was worth it to try and fix the joy-con.
This because of several reasons.
a. Apparently it's malfunctioning, so the worse what could happen was completely breaking it.
b. A single joy-con costs € 45, which i find pretty expensive.
c. Go try an buy one somewhere, i wish you good luck finding one.
So let's open our patient up.
Let's start fixing
small note: if your Switch is still under warranty, perhaps it's better to send it back to get it fixed!
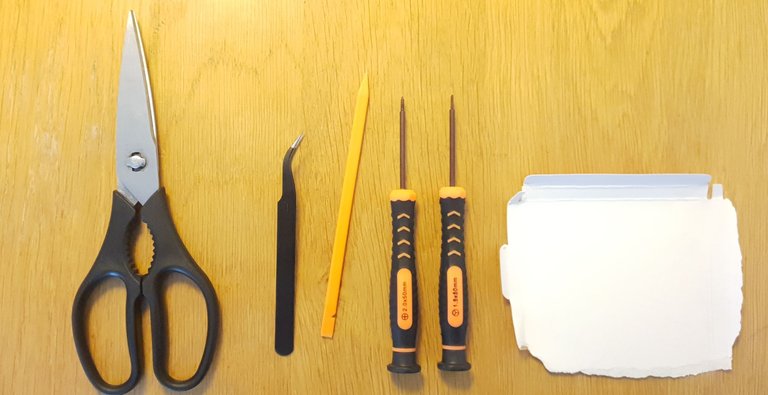
For this 'operation' you'll the following tools:
- Scissors
- Piece of cardboard
- Tweezers
- A plastic pry
- A tri-wing screwdriver (1.5)
- A phillips screwdriver (2.0)
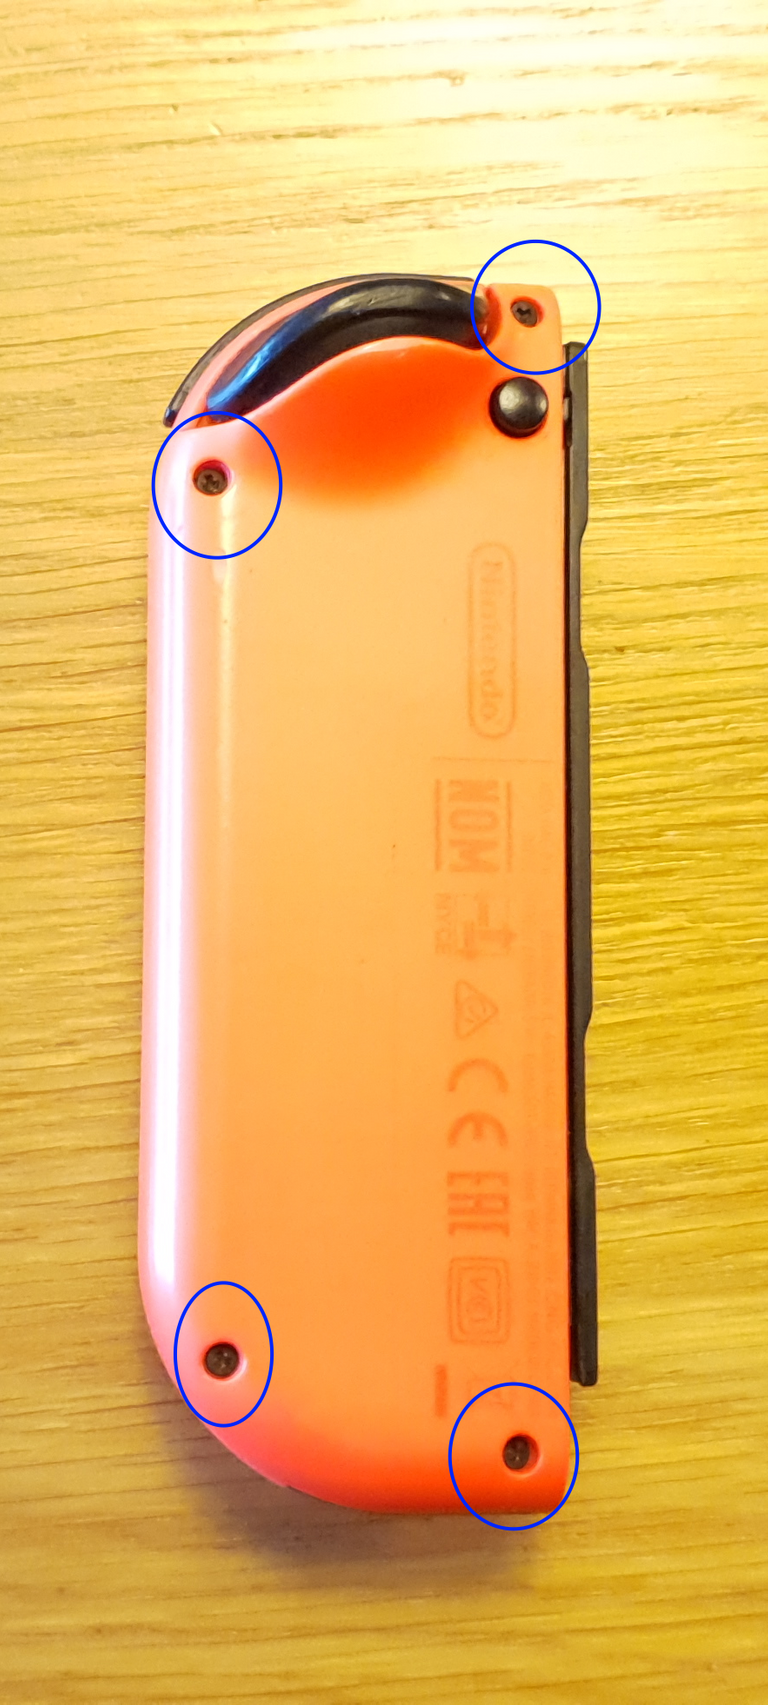
The first step in opening the joy-con, is removing the 4 tri-wing screws from the back.
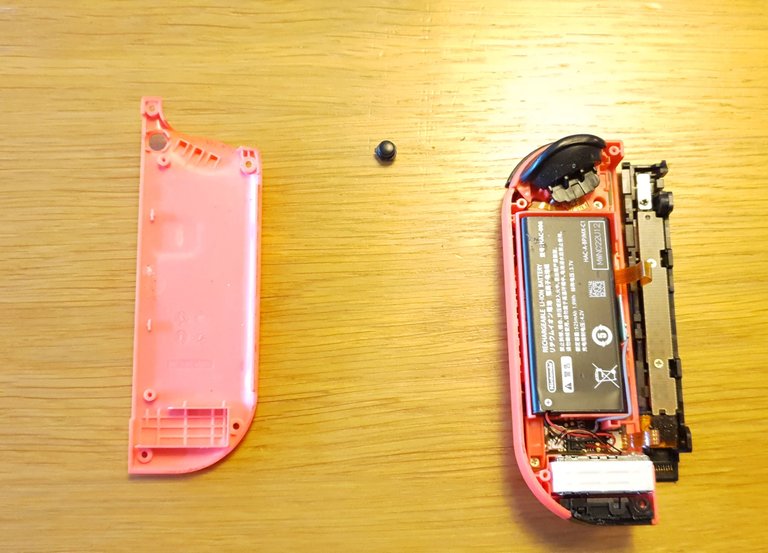
After removing the screws, gently pry open the joy-con starting on the outer side. Gently open it, and be careful not the damage the connectors. Also notice that the black part is screwed inside the shell, so if you pull it of to hard you will break the connector, be gentle.
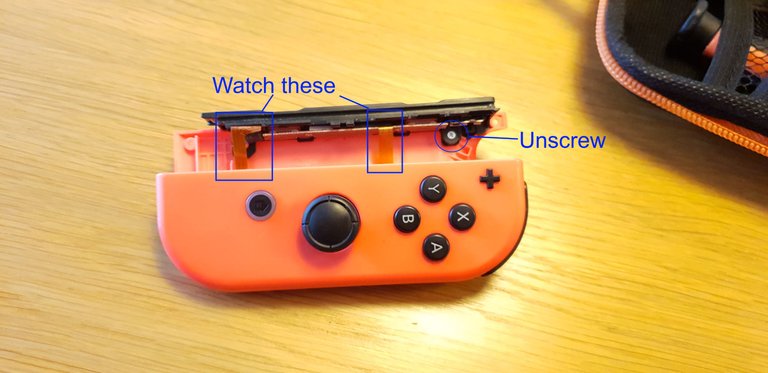
Next up is removing the Phillips screw to remove the buttons. Once you have done this, the lock button can also be removed.
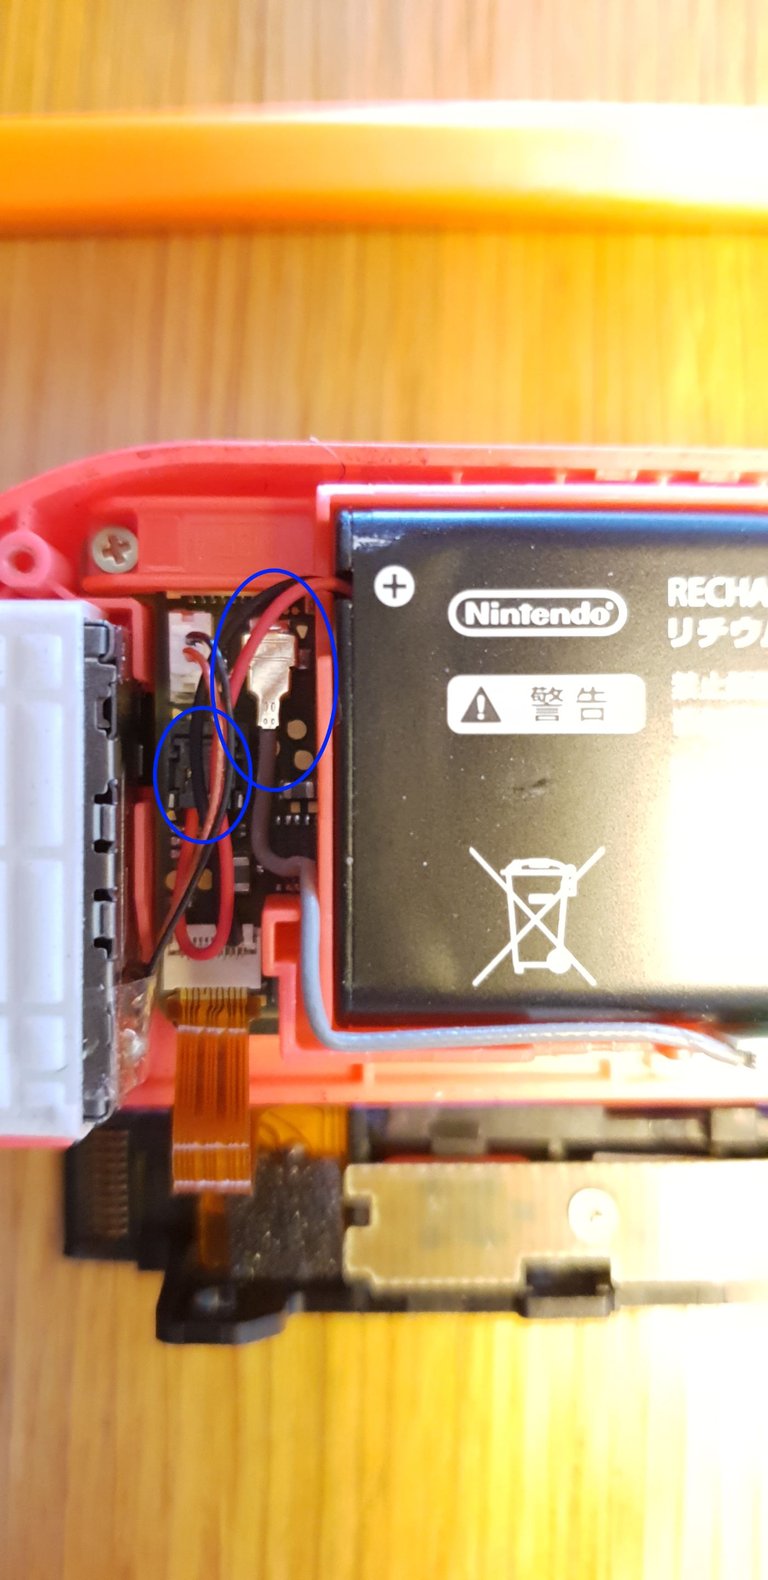
Now gently detach the antenna and battery from the main board. Be very careful to avoid damaging the connectors. After doing so, you can remove the battery which is held to by a small piece of double sided tape.
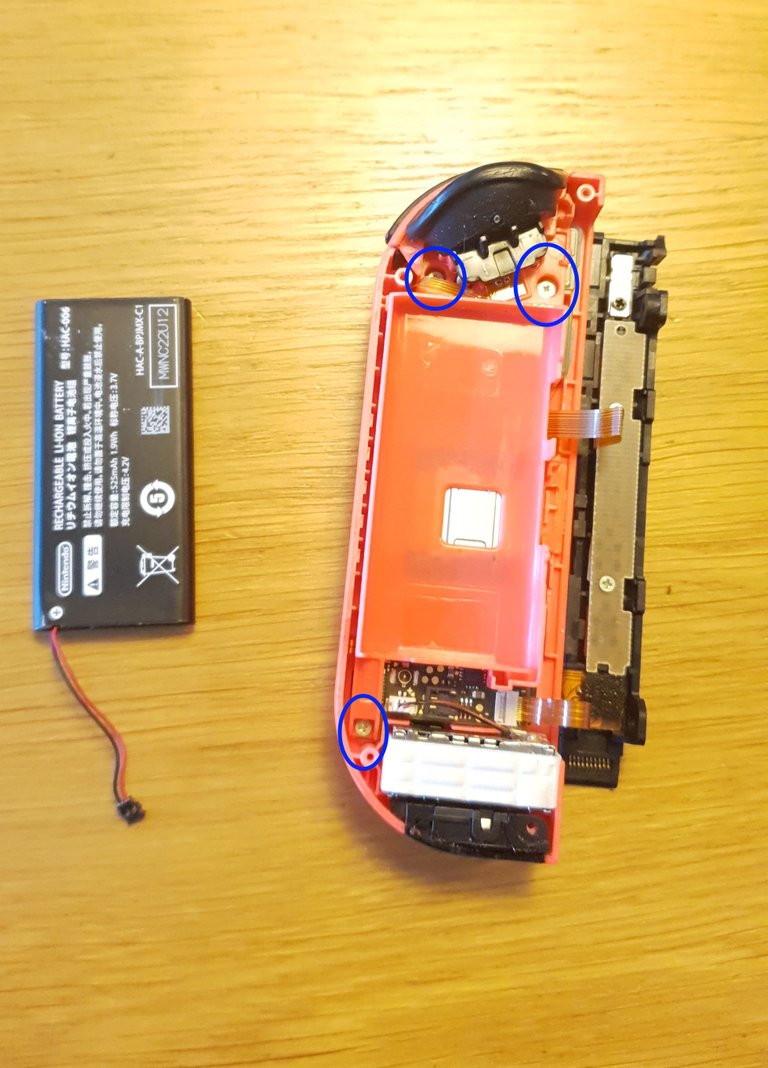
After removing the battery, you can unscrew and remove the battery box by removing the 3 Phillips screws. This is as far as we need to open the joy-con up.
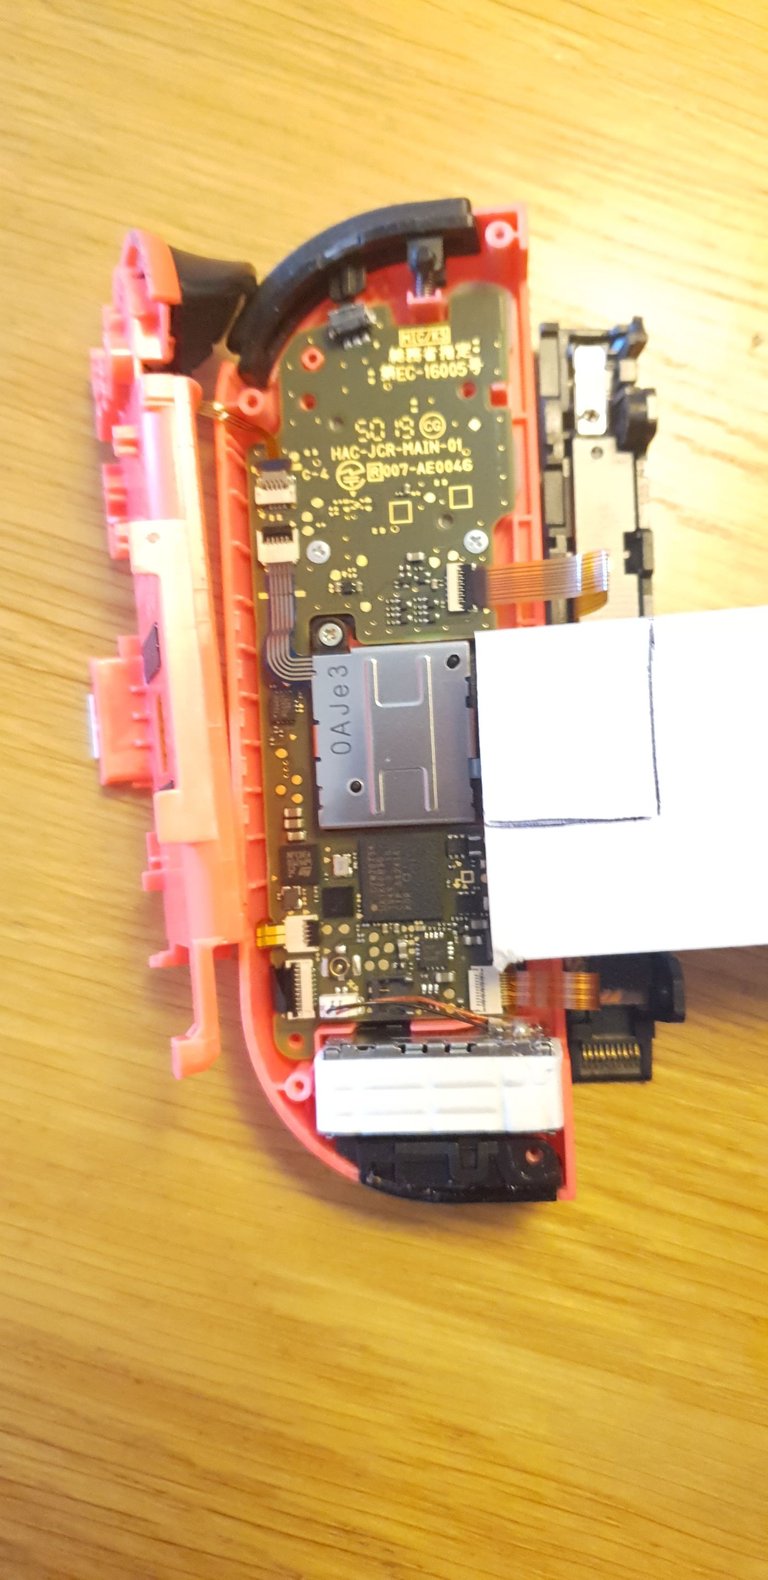
What we're now gone do, is mark the piece of cardboard in the same size as the joy-con base-plate, cut it out and put it on the the base-plate. Once we've done this we are ready to close up the joy-con.
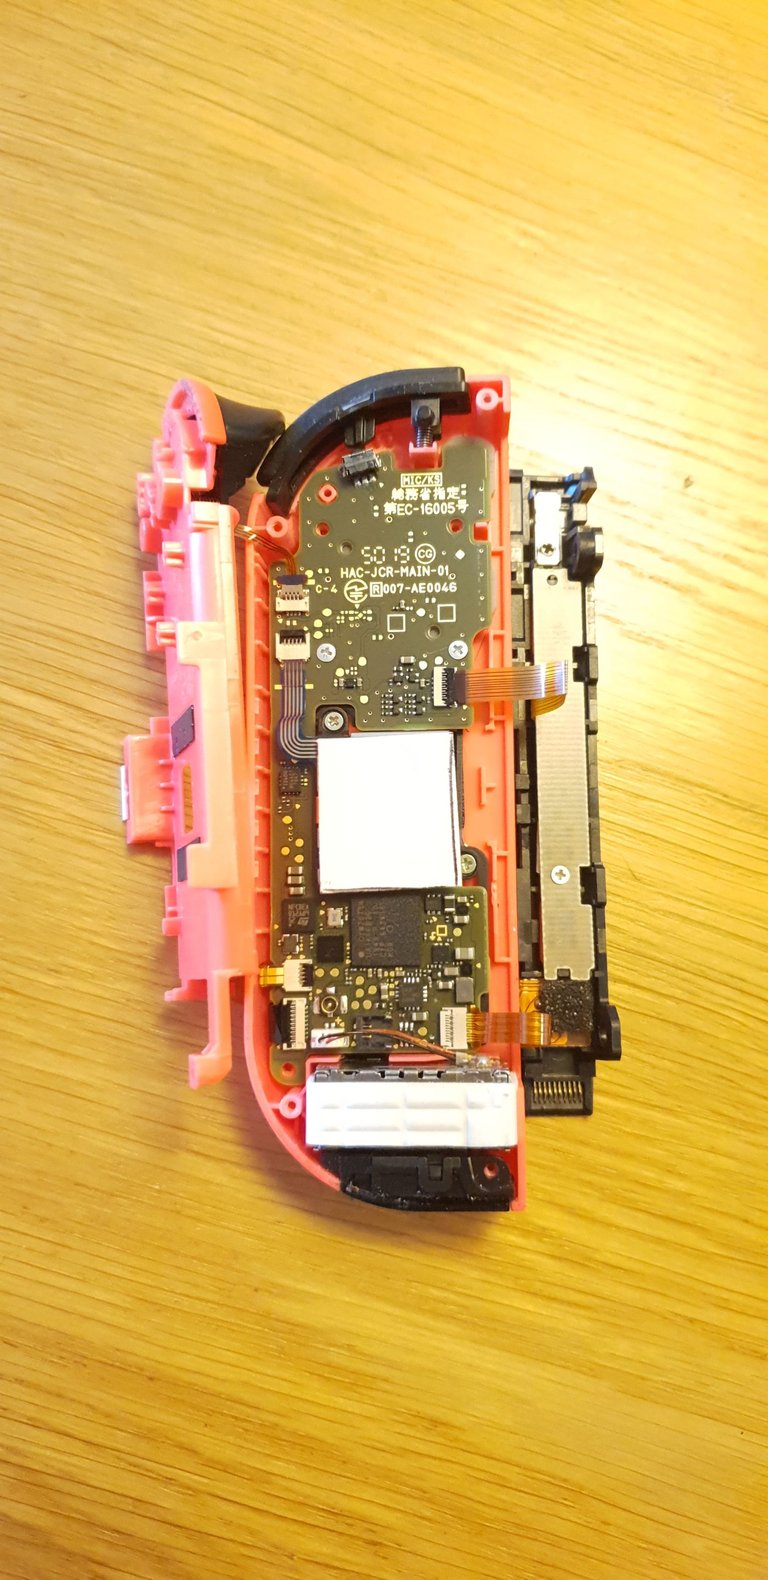
After closing up the joy-con, it's time to check if our repair worked.
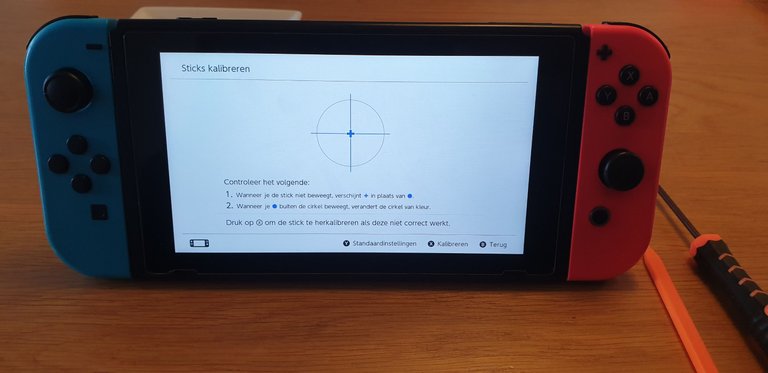
Yup, as you can see, after re-calibrating the stick keeps neatly in the center 😁 Now Luigi can go back on his ghost hunt!
So in about 10 minutes, you can fix a joy-con saving you a lot of frustration, time for repairs and money.
So why does this work?
Well, the problem is that there is a small spacing between the joy-con base and the battery box. And because the joy-con is put trough the PCB, the user will apply pressure on the thumb-stick, which in turn pushes the base-plate out of the PCB. This causes the base-plate connectors to come loose and 'drift'. With the cardboard in place, it pushes the joy-con back into the PCB and elimenates the gap between the joy-con base-plate and the battery box.
I hope you will find this tutorial helpful, and can guide you on your repair journey.
Thanks for reading!