✨⛄🎄¡Hola amigos amantes de la creatividad! Espero que hayan pasado un muy buen comienzo de semana.🎄⛄✨
🔸Sin más que añadir, a continuación los dejo con el paso a paso:
✨⛄🎄¡Hello friends who love creativity! I hope you had a very good start to the week.🎄⛄✨
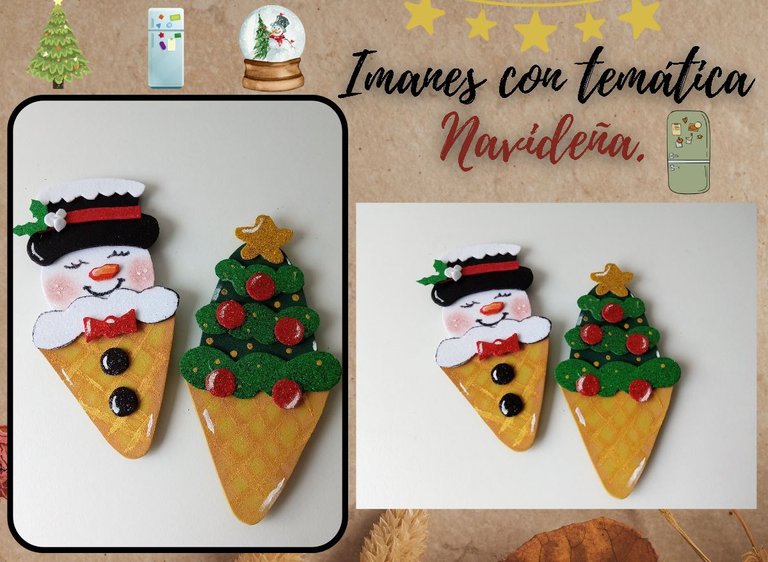
I hope you are doing well and had a nice Monday. On this occasion I share with you the step by step to make some beautiful Christmas-themed magnets. You don't know how excited I am!! With this craft I start my Christmas creations. I'M SO HAPPY! After all my creations last year of which I was happy with every result, this year it gets a little difficult to surpass those cuties, even so, I hope you like it and join me in this process. I'm already looking forward to seeing the rest of my colleagues, filling hivediy with beautiful Christmas creations.
On this occasion I started with making some nice magnets for the fridge, specifically 2 ice cream ideas with different Christmas decorations; on one hand, a snowman and on the other, a cute Christmas tree. I hope you like it and it inspires you.
🔸Without more to add, then I leave you with the step by step:
♥️ESPERO QUE TE GUSTE,
¡Empecemos!
♥️I HOPE YOU LIKE IT,
Let's start!

🎄 MATERIALES | 🎄 MATERIALS
⛄Imán muñeco de nieves:
- Foami marrón claro y naranja.
- Foami escarchado:
- Negro.
- Blanco.
- Rojo.
- Verde.
🎄Imán de árbol:
- Foami verde oscuro y marrón claro.
- Foami escarchado:
- Verde.
- Rojo.
- Dorado.
Otros materiales:
- Imanes
- Tizas o pinturas.
- Hoja.
- Lápiz.
- Pegamento.
⛄Snowman magnet:
- Light brown and orange foami.
- Frosted foam:
- Black.
- White.
- Red.
- Green.
🎄Tree magnet:
- Dark green and light brown foami.
- Frosted foam:
- Green.
- Red.
- Golden.
Other materials:
- Magnets
- Chalk or paints.
- Sheet.
- Pencil.
- Glue.
🎄 PROCEDIMIENTO | 🎄 PROCESS
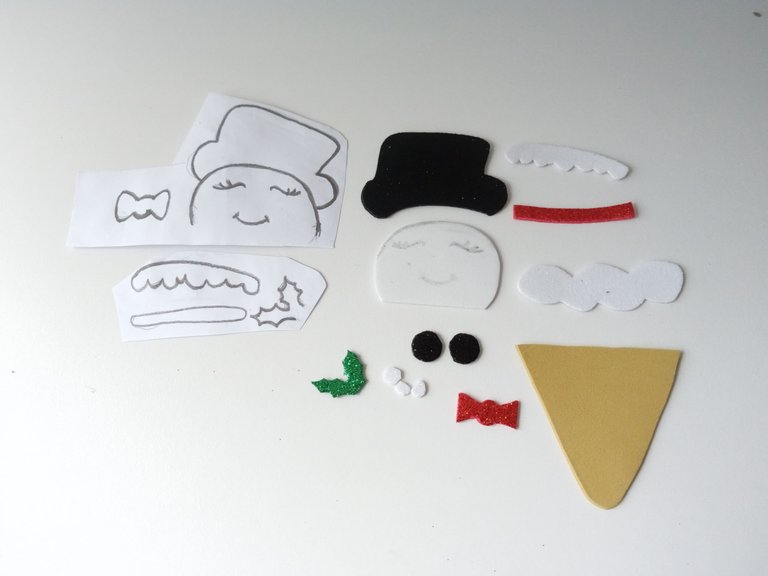
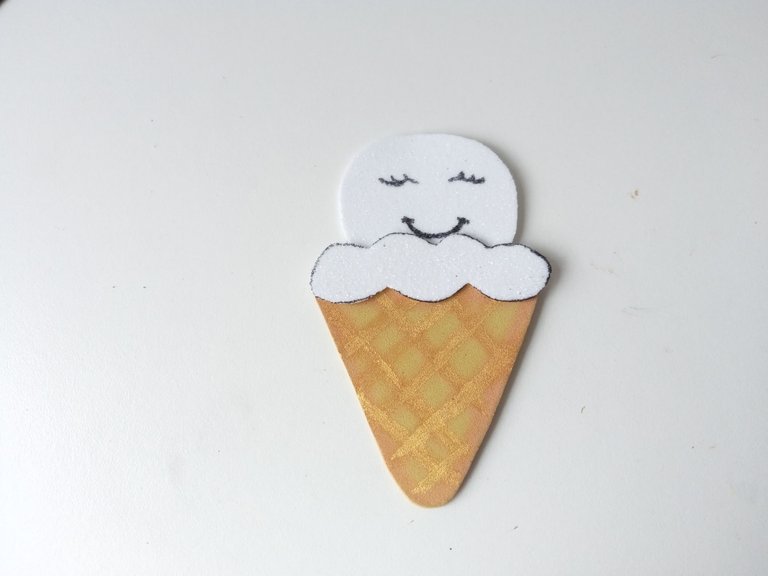
- PASO 1:
Comencé elaborando el imán de muñeco de nieves, así que comencé dibujando todo el patrón en una hoja blanca. Luego transferí cada pieza a los colores correspondientes de foami, en mi caso, el sombrero y botones en negro escarchado; el lazo y tira del sombrero en rojo escarchado; la cabeza y parte del helado en blanco escarchado; Unas hojas navideñas en verde escarchado; 3 círculos pequeños en blanco escarchado y, por último, el cono en marrón claro.
- STEP 1:
I started by making the snowman magnet, so I started by drawing the entire pattern on a white sheet of paper. Then I transferred each piece to the corresponding colors of foami, in my case, the hat and buttons in frosty black; the bow and strap of the hat in frosty red; the head and part of the ice cream in frosted white; Some Christmas leaves in frosty green; 3 small circles in frosted white and finally the cone in light brown.
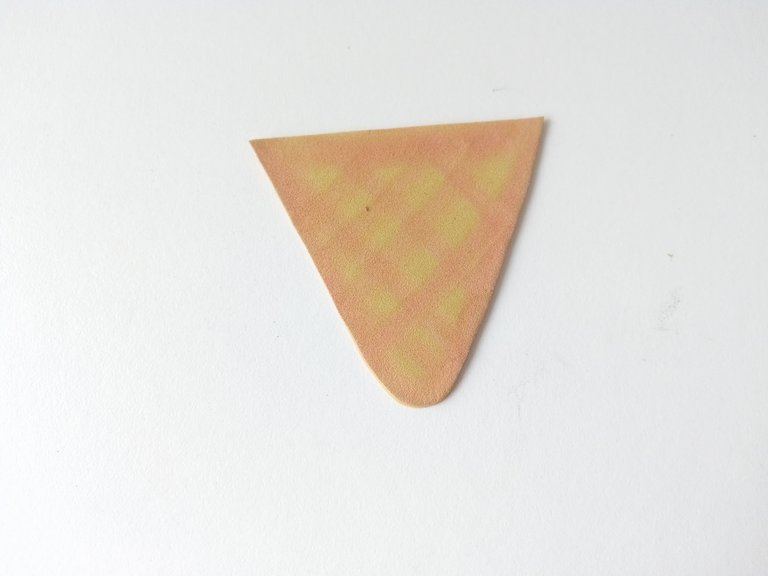
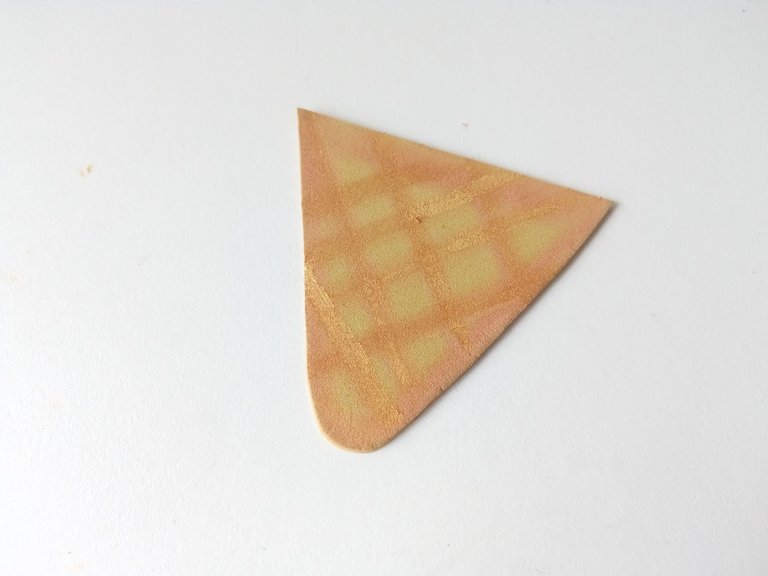
- PASO 2:
Una vez recortadas todas las piezas en el color correspondiente de foami, comencé haciendo el diseño de los conos con tiza un tono más oscuro y por encima pintura dorada. El diseño es sencillo, simplemente tracé todo el borde con tiza marrón e hice líneas de un lado y luego las mismas líneas, pero del lado contrario, como el típico diseño de los conos de helado. Por último, tracé las mismas líneas, pero con un poco de pintura dorada.
- STEP 2:
Once all the pieces were cut out in the corresponding color of foam, I began making the design of the cones with chalk in a darker tone and gold paint on top. The design is simple, I simply traced the entire edge with brown chalk and made lines on one side and then the same lines, but on the opposite side, like the typical ice cream cone design. Finally, I traced the same lines, but with a touch of gold paint.
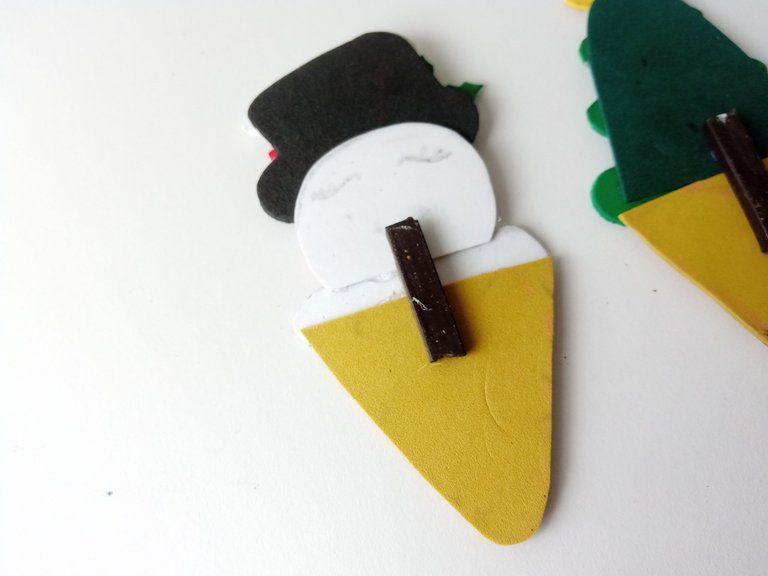
- PASO 3:
Después, con marcador negro, dibujé el rostro en la cabeza del muñeco de nieves y pase marcador negro por el borde de una porción del helado. Pegué las piezas en la parte superior del cono; primero la porción y luego la cabeza.
- STEP 3:
Then, with black marker, I drew the face on the snowman's head and ran black marker along the edge of a portion of the ice cream. I glued the pieces to the top of the cone; first the portion and then the head.

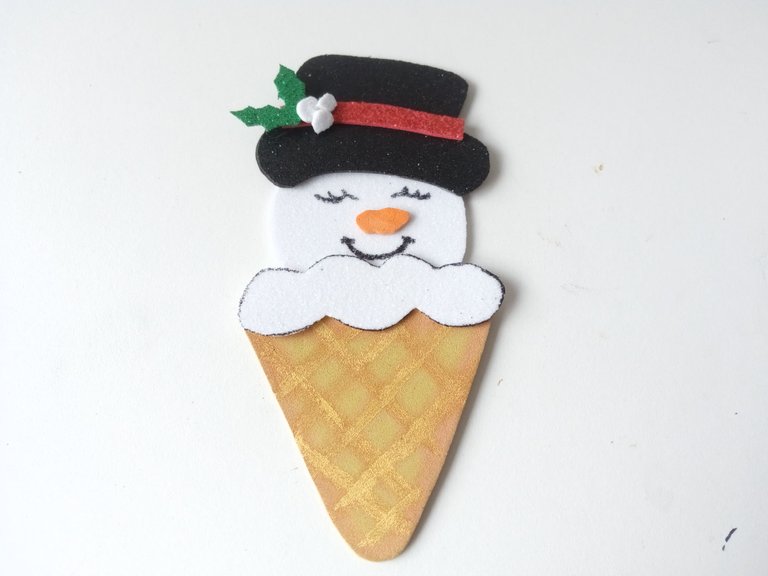
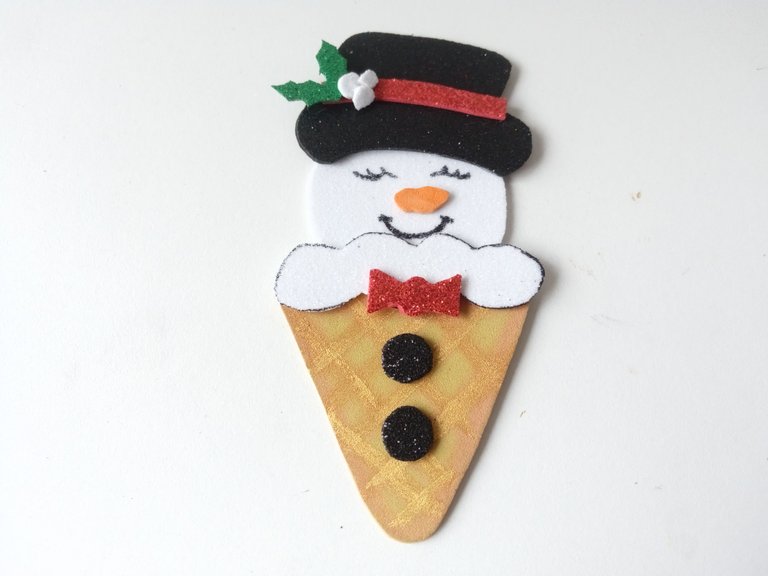
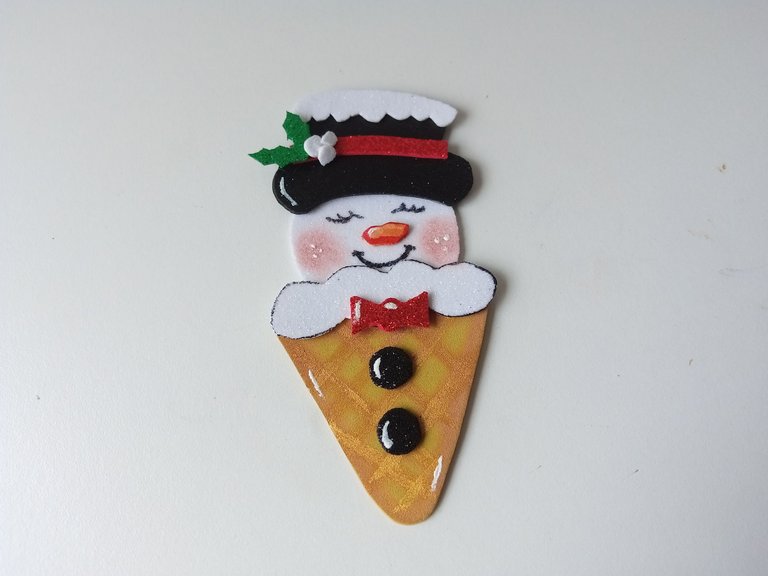
- PASO 4:
Enseguida, pegué el sombrero, la tira de en medio, la rama con los pequeños círculos en foami blanco, la nariz en foami naranja dando forma de zanahoria y tranzando el borde con marcador naranja. Por otra parte, pegué el lazo y los botones en el cono de helado. Por último, pinté las mejillas con tiza y di toques de luz con pintura blanca, en la nariz, en las mejillas, sombrero y partes del cono.
- STEP 4:
Next, I glued the hat, the middle strip, the branch with the small circles in white foam, the nose in orange foam forming a carrot shape and tracing the edge with orange marker. On the other hand, I glued the bow and buttons on the ice cream cone. Finally, I painted the cheeks with chalk and gave highlights with white paint, on the nose, cheeks, hat and parts of the cone.
- PASO 5:
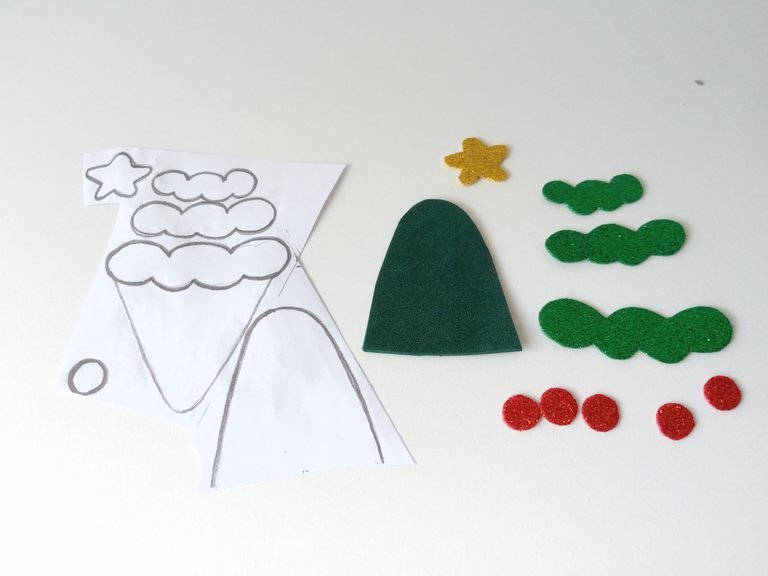
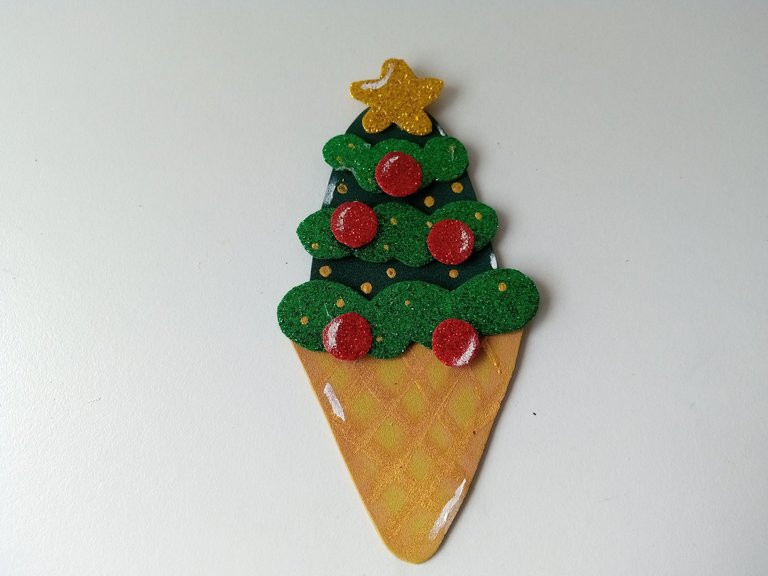
En este caso, el helado de árbol de navidad es la decoración más sencilla. Con este imán repetí el mismo proceso. Dibuja el patrón en una hoja blanca y luego transferí cada pieza al color correspondiente de foami. En este caso, la base del árbol en foami verde oscuro, para el relieve escarchado verde, 5 círculos en foami rojo, la estrella en escarchado dorado y la misma forma del cono.
- STEP 5:
In this case, Christmas tree ice cream is the simplest decoration. With this magnet I repeated the same process. I drew the pattern on a white sheet and then transferred each piece to the corresponding color of foami. In this case, the base of the tree in dark green foam, for the green frosted relief, 5 circles in red foam, the star in gold frosted and the same shape of the cone.
- PASO 6:
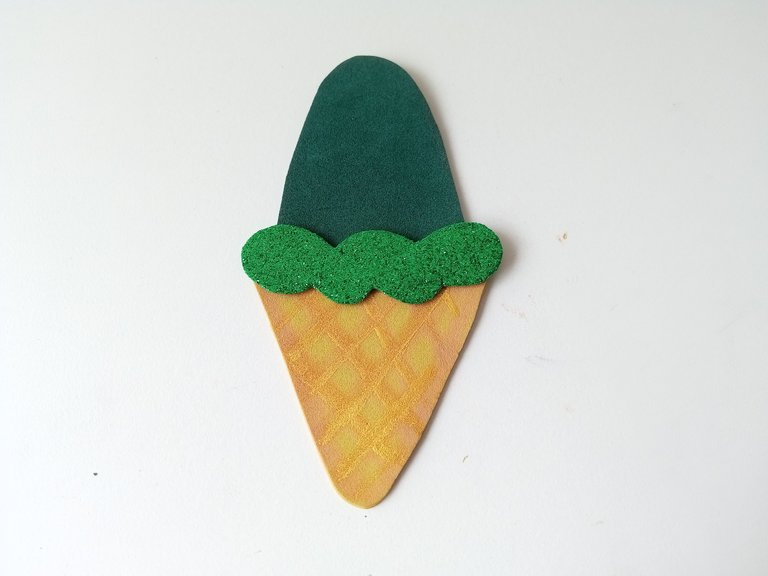
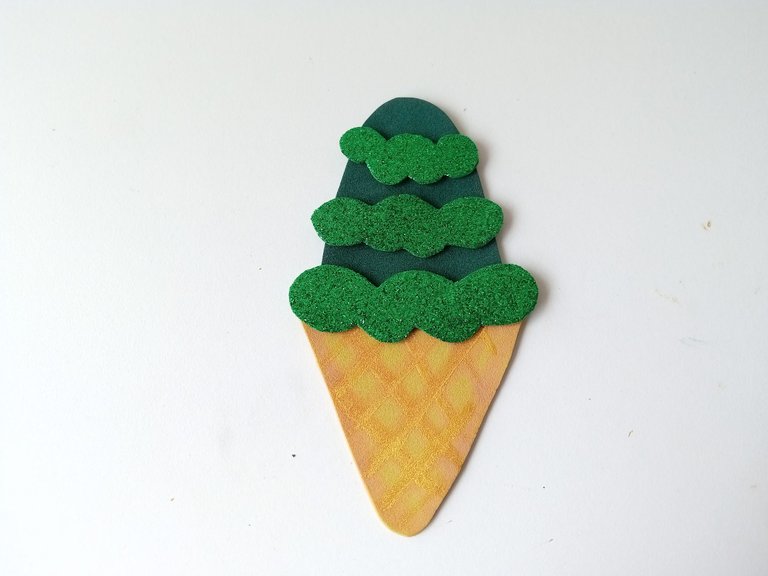
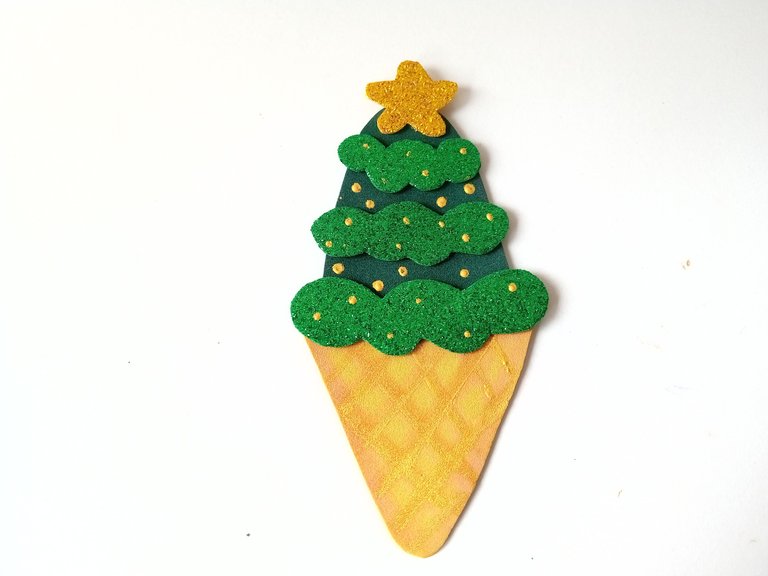
En este caso, tenía listo el cono, entonces comencé a pegar la base del árbol en la parte superior del cono y los relieves, dejando espacio de por medio entre cada pieza y un espacio para la estrella en la parte superior del árbol. Pegué la estrella en la punta del árbol y con pintura dorada decoré el árbol, haciendo puntos por todos lados.
- STEP 6:
In this case, I had the cone ready, so I started gluing the base of the tree to the top of the cone and the reliefs, leaving space in between each piece and a space for the star at the top of the tree. I glued the star to the top of the tree and with gold paint I decorated the tree, making dots everywhere.
- PASO 7:
Después, pegué los círculos rojos en los relieves, pero en el orden deseado. También, di detalles de luz con pintura blanca en los lugares que creí que se verían bien. Y, por último, pegue los imanes en la parte de atrás de las dos figuras.
- STEP 7:
Next, I glued the red circles onto the reliefs, but in the desired order. Also, I gave highlights with white paint in the places I thought would look good. And finally, glue the magnets to the back of the two figures.
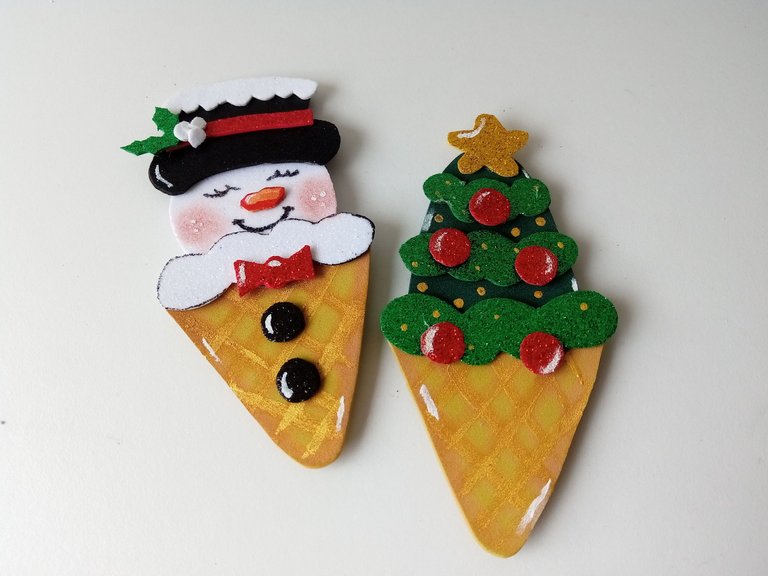
✨¡And ready!✨ In this simple, easy and quick way, you can make a beautiful decoration for the refrigerator. I thought it was a good idea to start with some refrigerator magnets because it combines perfectly with the weather of this beautiful season. I hope you liked the step by step and are encouraged to make it.
❤️Until the next post.
✨RESULTADO: | ✨RESULT:


Todas las fotografías son de mi propiedad.
Separador y Fotos editadas en Canva
All photographs are my property.
Photos edited in Canva
