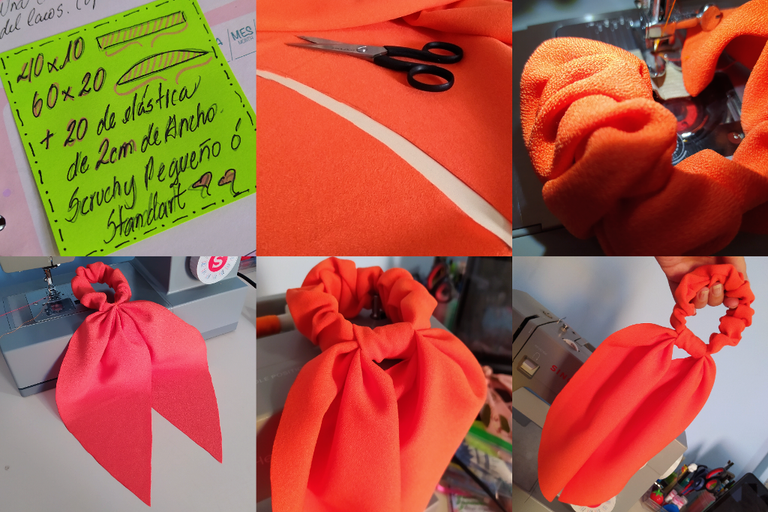
✦ Another accessory that has had a big comeback on your closet must-have list ✅ ✨ - Collage & Edition in FotoJet, photos by @Tesmoforia ✦

🇪🇸 ~ Antes de comenzar con el tutorial de hoy, por favor apreciemos en la nota de indicaciones de las medidas la consecuencia de escribir demasiado rápido, "scruchy", era "Scrunchie" 🤣 👍
A veces por la emoción al empezar un nuevo proyecto me sucede eso y he comenzado a colocar papelillos de colores para los datos importantes en lugar de escribir directamente en mi agenda.
🇺🇸 ~ Before we get started with today's tutorial, please appreciate in the measurement indications note the consequence of writing too fast, "scruchy", was "Scrunchie" 🤣 👍
Sometimes due to excitement when starting a new project that happens to me and I have started putting colored paper slips for important data instead of writing directly in my notebook.
 |  |  |
|---|
Una amiga me comentaba esta semana que los "Scrunchie" así como los "Maxi Lazos" siguen siendo artículos relevantes tanto en el guardarropa de niños como adultos.
Me pregunté si sería difícil fabricar uno y encontré que aunque tiene su truco, es un articulo de confección rápida si sabes qué hacer y unas medidas predeterminadas. ¡Vamos a eso! °˖✧◝(⁰▿⁰)◜✧˖°
A friend was telling me this week that "Scrunchies" and "Maxi Bows" continue to be relevant items in both children's and adults' closets.
I wondered if it would be difficult to make one and found that although there is a trick to it, it is a quick to make item if you know what to do and some predetermined measurements. Let's get to it! °˖✧◝(⁰▿⁰)◜✧˖°
✦ Do-it-yourself ✦
« "Fabric Scrunchie in 10 minutes" »

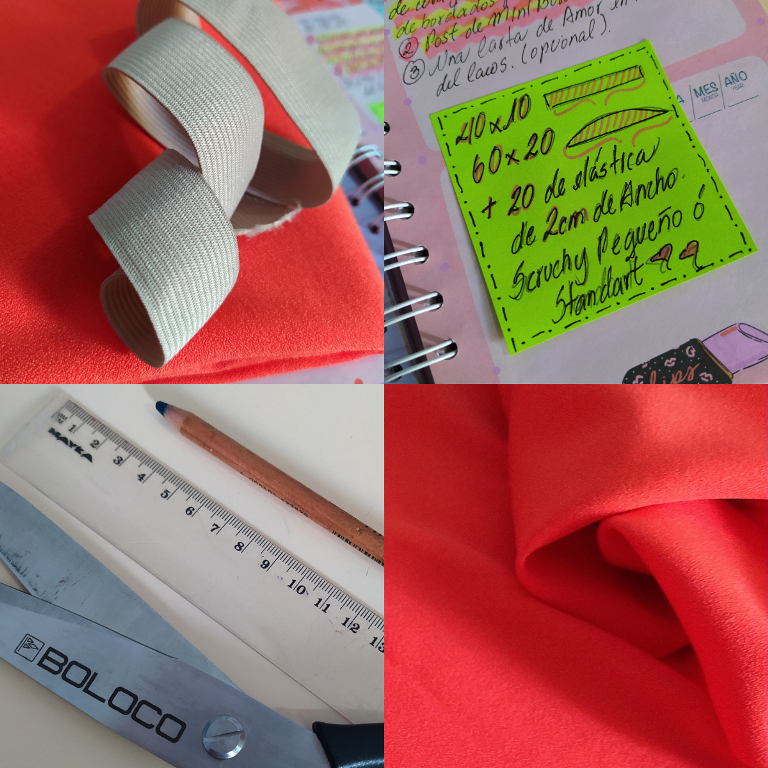

🟠 Los materiales y herramientas que necesitas para fabricar este Scrunchie son: Lápiz, regla, tijera, tela, cinta elástica de 2 cm, alfileres, hilo y aguja regular, imperdible-alpita, yesquero, máquina de coser (opcional).
🟧 The materials and tools you need to make this Scrunchie are: Pencil, ruler, scissors, fabric, 2 cm elastic tape, pins, regular thread and needle, safety pin, cigarette lighter, lighter, sewing machine (optional).

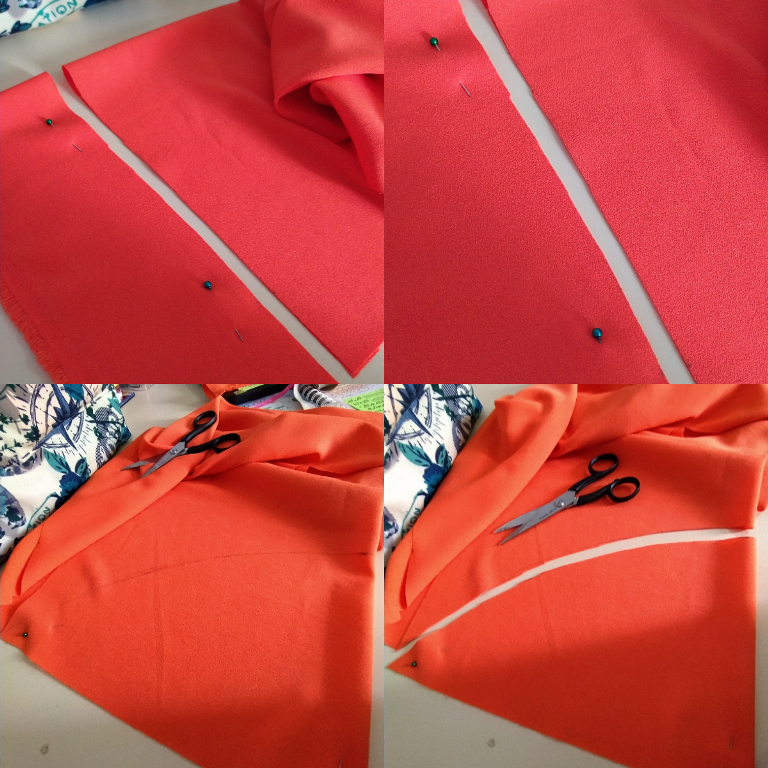
🍊 PASO 1 ✦ Corta 3 figuras de tela, un rectángulo de 10 cm x 40 cm, y la mitad de un ovalo largo de 60 cm de largo y en la parte mas alta, su centro, 20 cm de alto. Por último un rectangulo de 6 cm x 15 cm de largo.
🍊 STEP 1 ✦ Cut 3 fabric shapes, a rectangle 10 cm x 40 cm, and half of a long oval 60 cm long and in the highest part, its center, 20 cm high. Finally a rectangle 6 cm x 15 cm long.
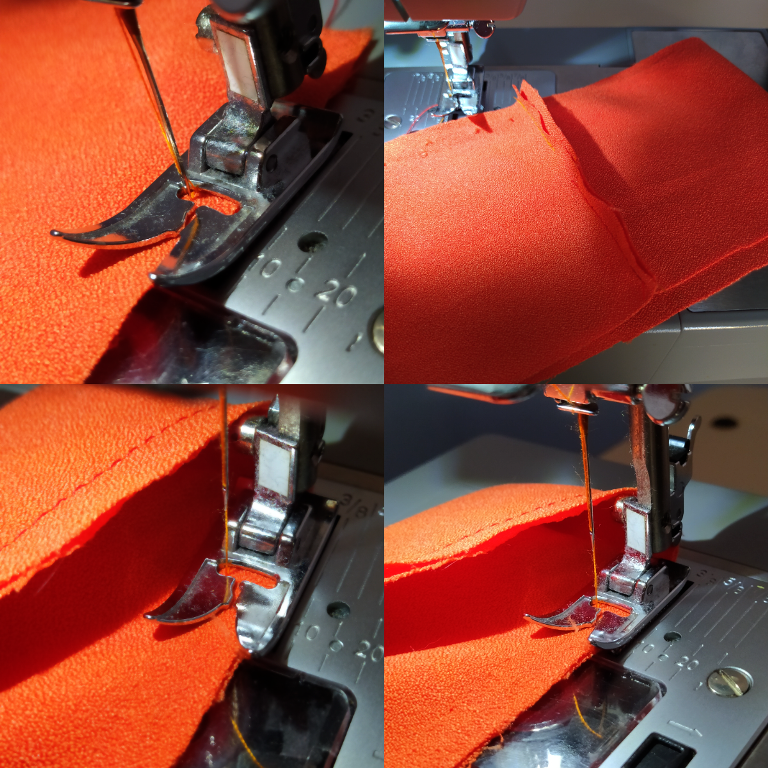
🍊 PASO 2 ✦ Toma el rectángulo más grande y uno sus extremos con una puntada recta pequeña a mano, o en máquina de coser con puntada N° 3. Luego cose a lo largo doblando la tela por la mitad y dejando una abertura para voltear la pieza. Otra forma de hacerlo y la que más me gustó fue coserlo como un tubo de tela normal.
🍊 STEP 2 ✦ Take the larger rectangle and join its ends with a small straight stitch by hand, or on a sewing machine with stitch #3. Then sew lengthwise by folding the fabric in half and leaving an opening to flip the piece over. Another way to do it and the one I liked the most was to sew it like a normal fabric tube.
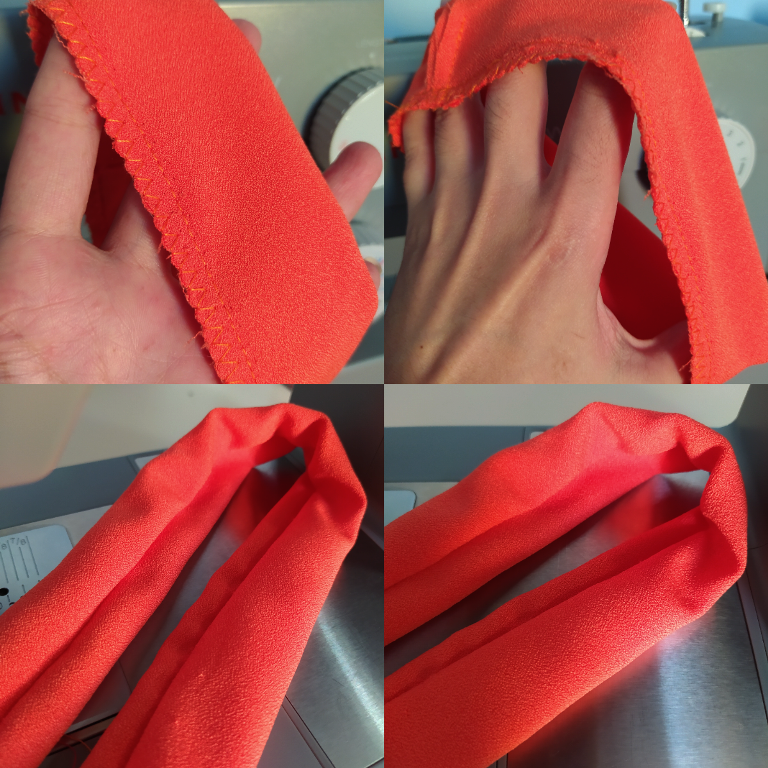
🍊 PASO 3 ✦ A mano o con la máquina de coser haz un zigzag en todo el borde como refuerzo, ya que te trata de un accesorio que será varias veces estirado. Luego voltea.
🍊 STEP 3 ✦ By hand or with the sewing machine make a zigzag all around the edge as a reinforcement, since you are dealing with an accessory that will be stretched several times. Then flip.
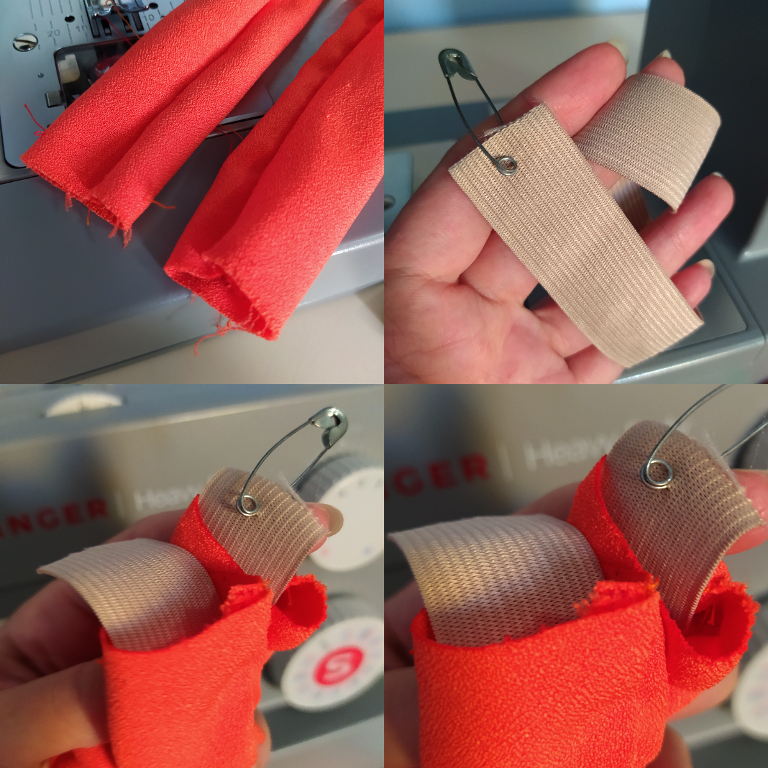
🍊 PASO 4 ✦ Corta una tira de 20 cm de largo de cinta elástica, y pásala con ayuda del imperdible a través del tubo de tela.
🍊 STEP 4 ✦ Cut a 20 cm long strip of elastic band, and thread it with the help of the safety pin through the fabric tube.
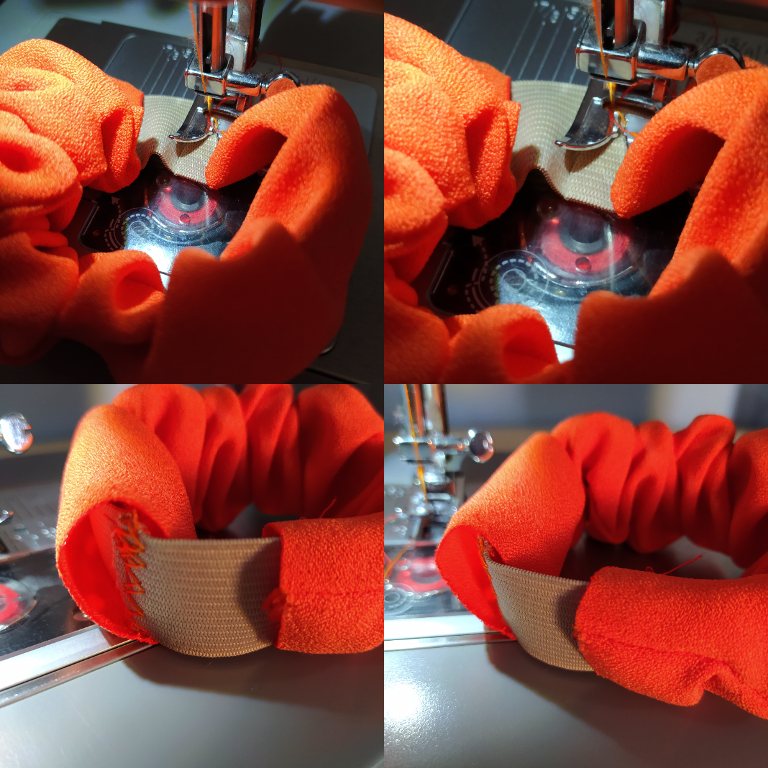
🍊 PASO 5 ✦ Junta los extremos de la cinta elástica y has varias puntadas de seguridad.
🍊 STEP 5 ✦ Bring the ends of the elastic band together and make several safety stitches.
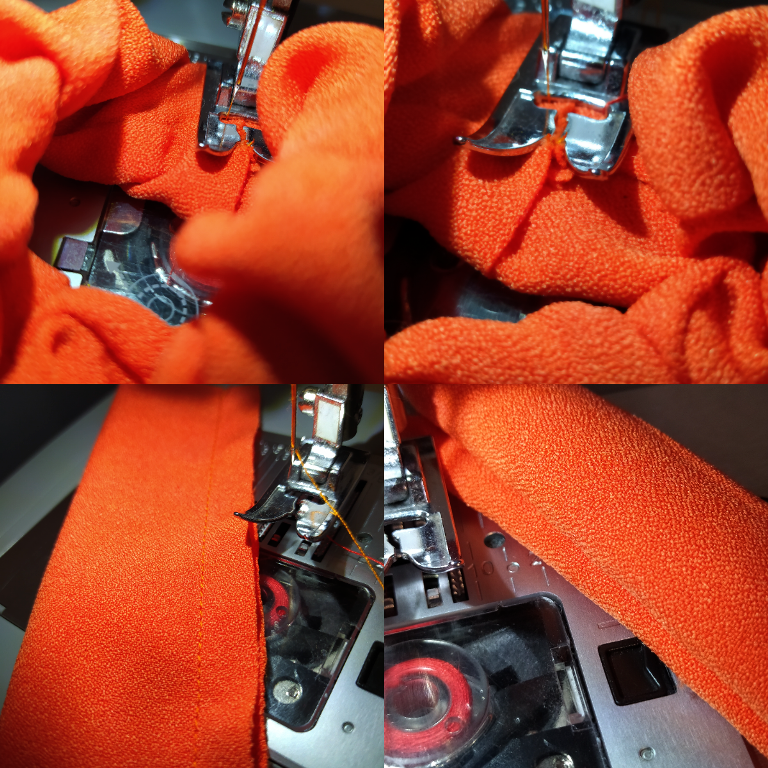
🍊 PASO 6 ✦ Junta ambos extremos del tubo de tela uno sobre otro cóselos en linea recta. Aparte, toma el ultimo rectángulo de tela y elabora un tubito, luego voltea.
🍊 STEP 6 ✦ Join both ends of the fabric tube on top of each other and sew them in a straight line. Apart, take the last rectangle of fabric and make a little tube, then flip.
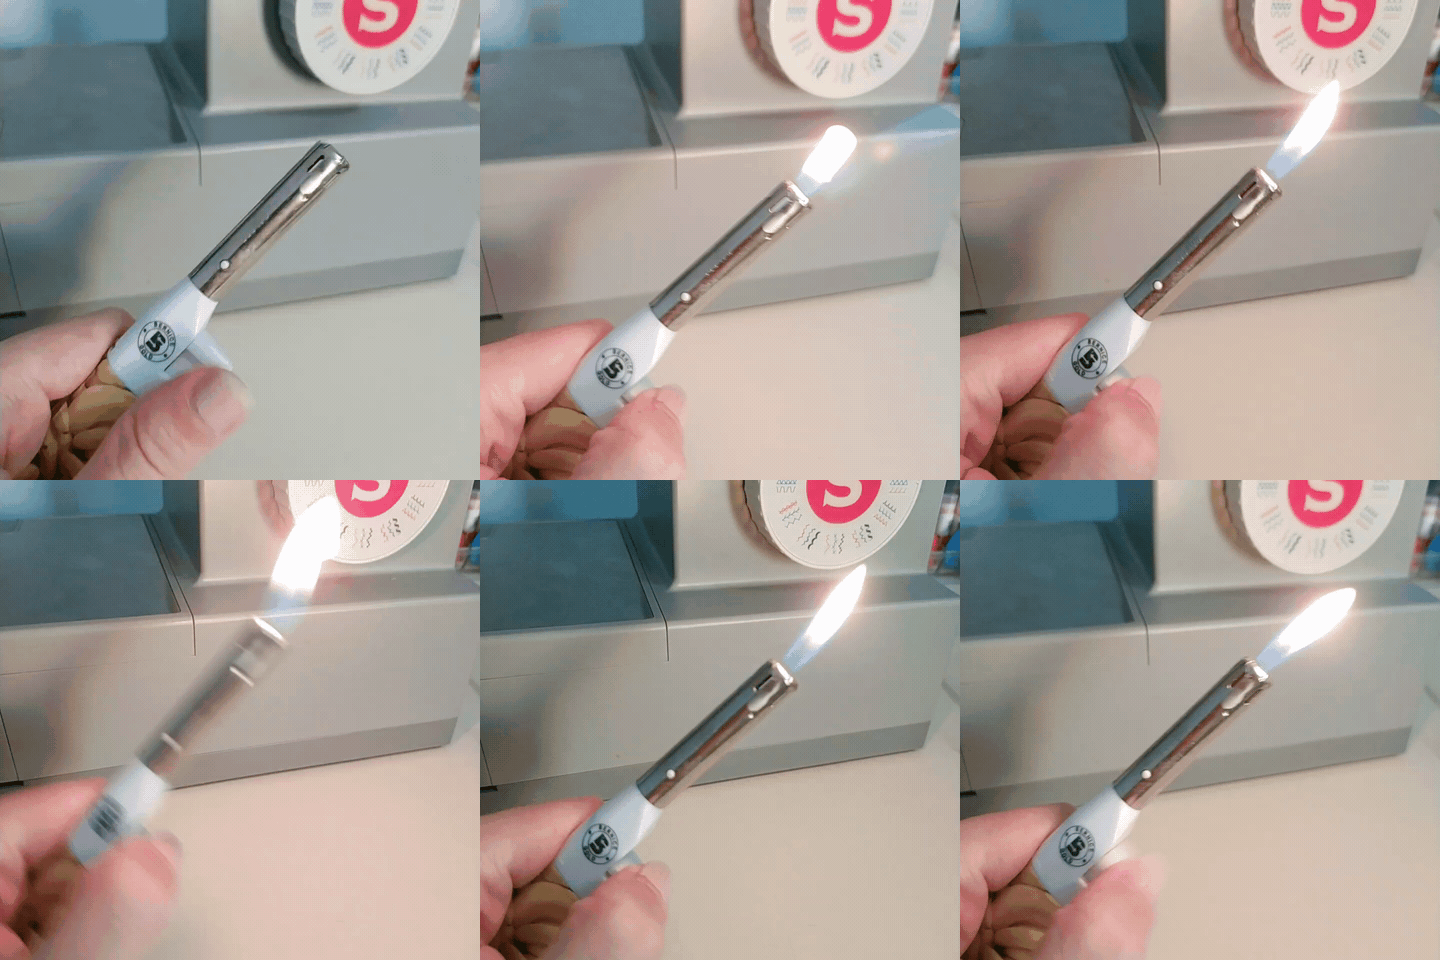
🍊 PASO 7 ✦ Con ayuda del encendedor, volvamos a la figura de tela con forma de medio ovalo y vamos a sellar con la llama todos sus bordes. En caso que la tela que escogiste no reaccione al calor, puedes elaborar un pequeño bies.
🍊 STEP 7 ✦ With the help of the lighter, let's go back to the half oval-shaped fabric figure and seal with the flame all its edges. In case the fabric you chose does not react to heat, you can elaborate a small bias binding.
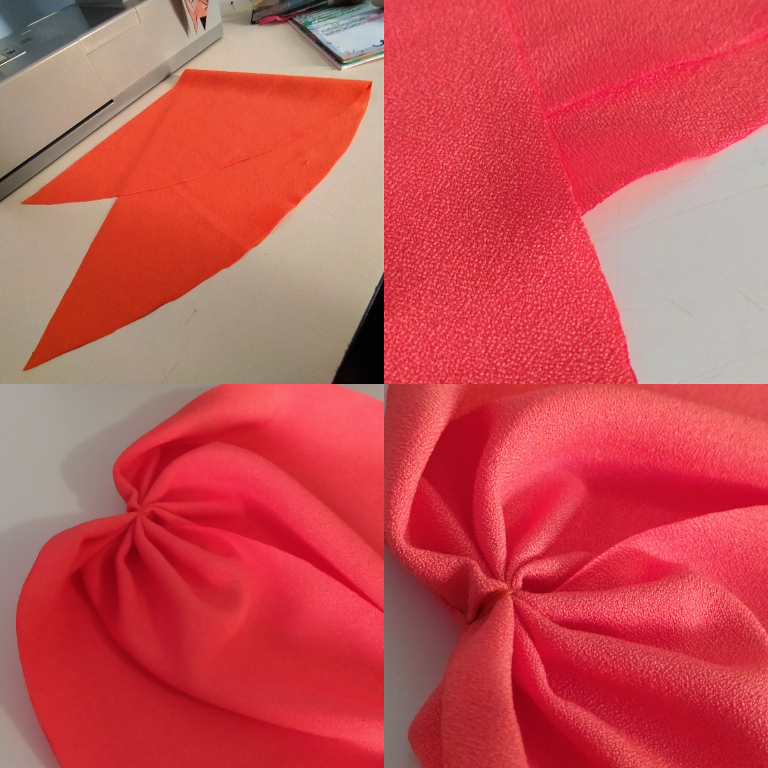
🍊 PASO 8 ✦ Sellados todos los bordes, vamos a arrugar su centro y fijaremos con unas puntadas a mano, como se aprecia en la imagen guía.
🍊 STEP 8 ✦ Once all the edges are sealed, we will crease their center and fix them with a few hand stitches, as shown in the guide image.
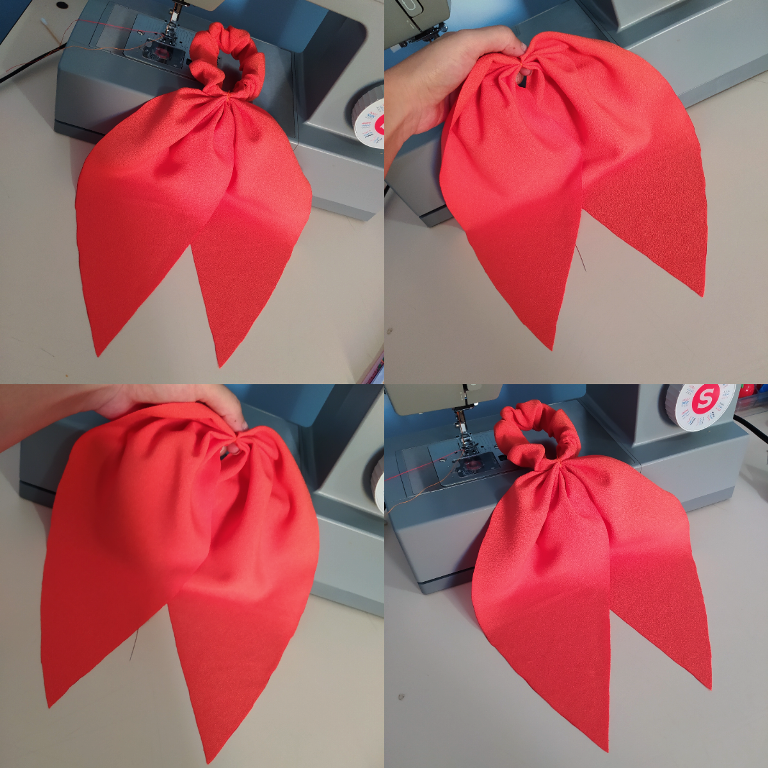
🍊 PASO 9 ✦ Une con puntada a mano el cuerpo del Scrunchie con es las "orejas de tela", fíjate en las imágenes guía. Y has que coincida en esa unión el punto de cierre del Scrunchie.
🍊 STEP 9 ✦ Hand stitch the body of the Scrunchie with the "fabric ears", see the guide images. And make the Scrunchie's closing point coincide at that junction.
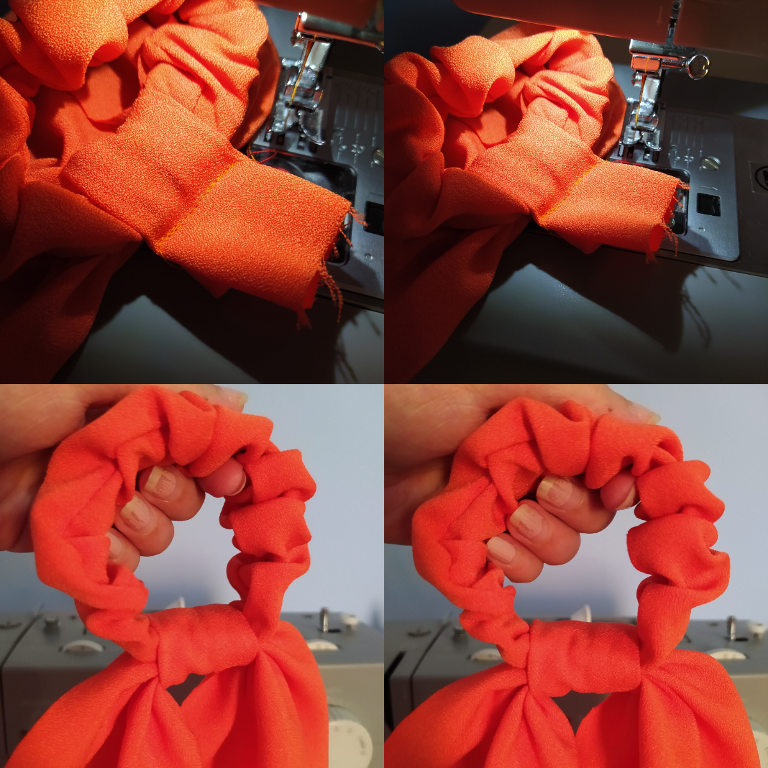
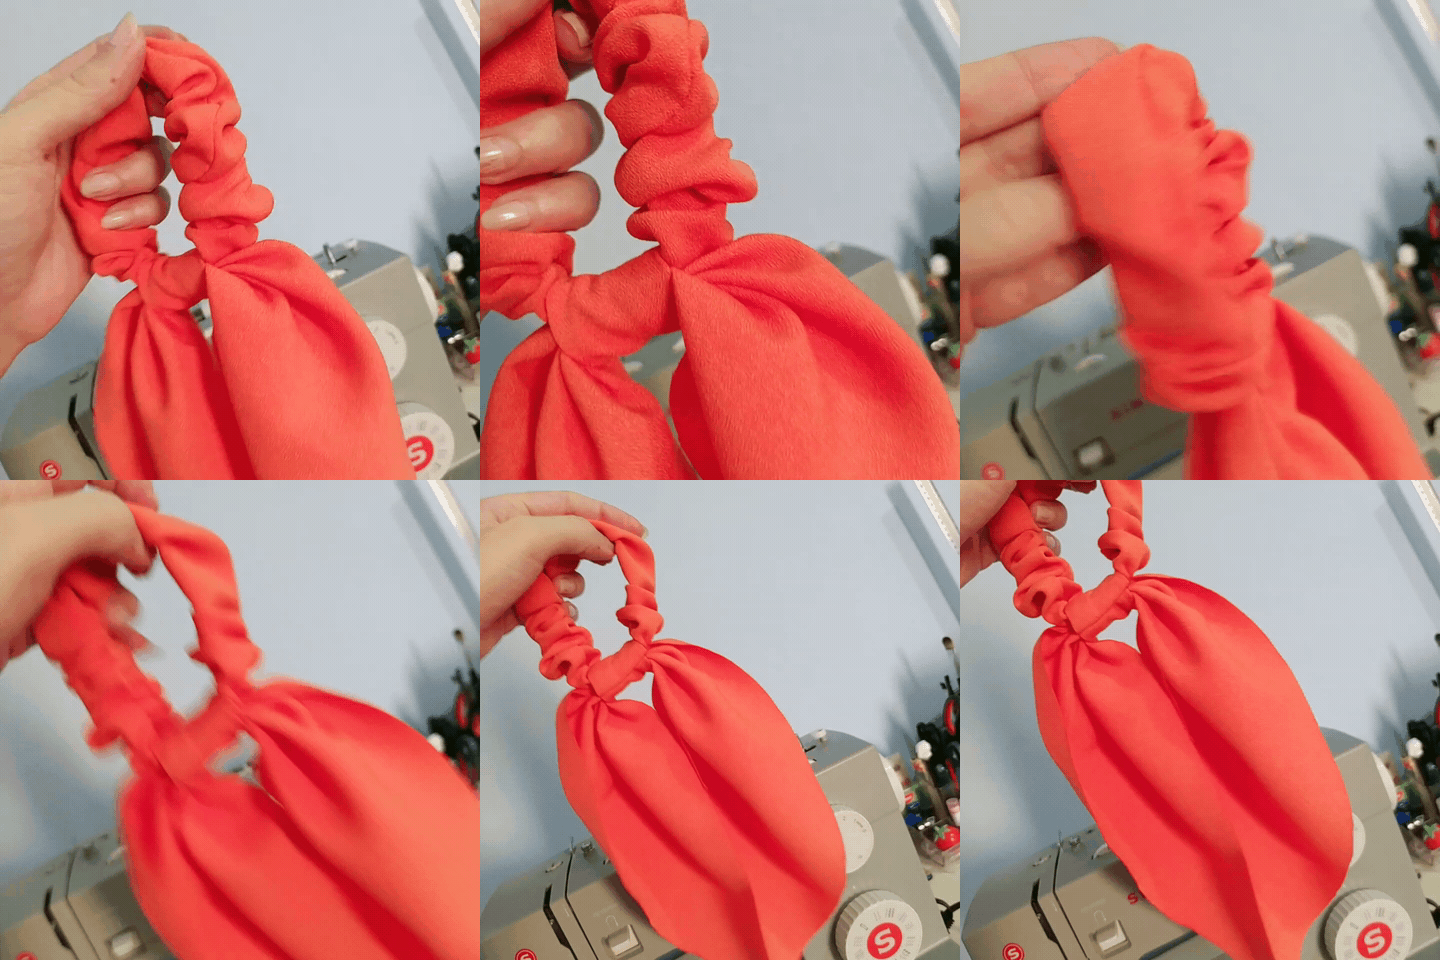
🍊 PASO FINAL ✦ Envuelve el punto de unión de ambas piezas, con la tercera y ultima pieza de tela que hiciste, a modo de anillo, y cose en linea recta a 1 o 2 cm de distancia de tocar el cuerpo del Scrunchie. Recorta el exceso de tela y voltea este anillo. El resultado debe ser como el del collage que se aprecia arriba.
🍊 FINAL STEP ✦ Wrap the joining point of both pieces, with the third and last piece of fabric you made, as a ring, and sew in a straight line 1 or 2 cm away from touching the body of the Scrunchie. Trim the excess fabric and turn this ring over. The result should look like the collage above.
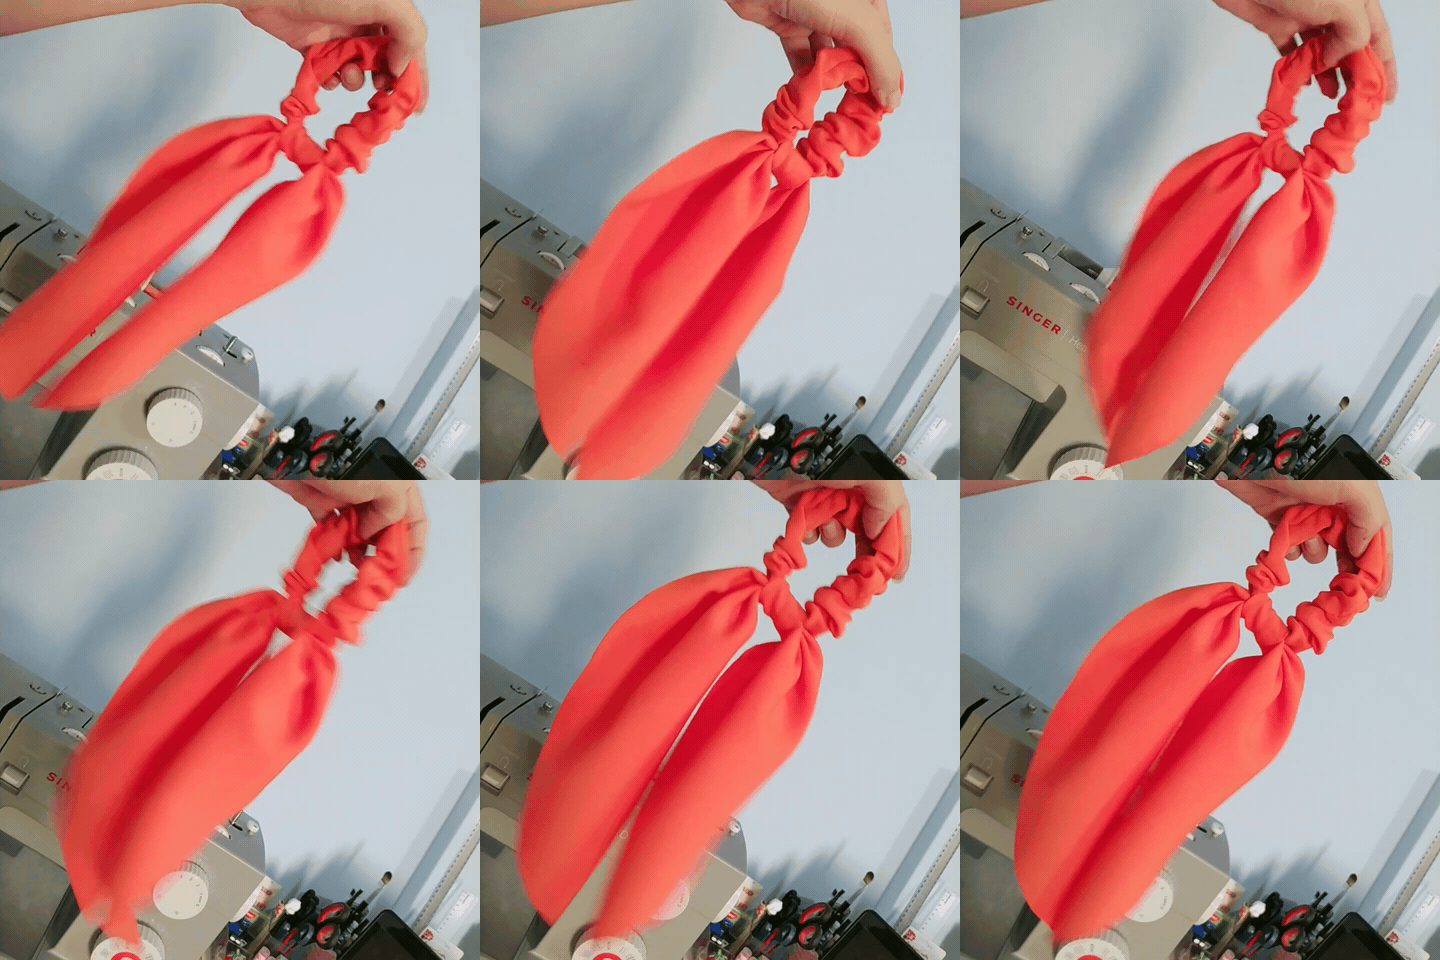
✦ COMPLETED PROJECT ✦
« "Fabric Scrunchie in 10 minutes" »

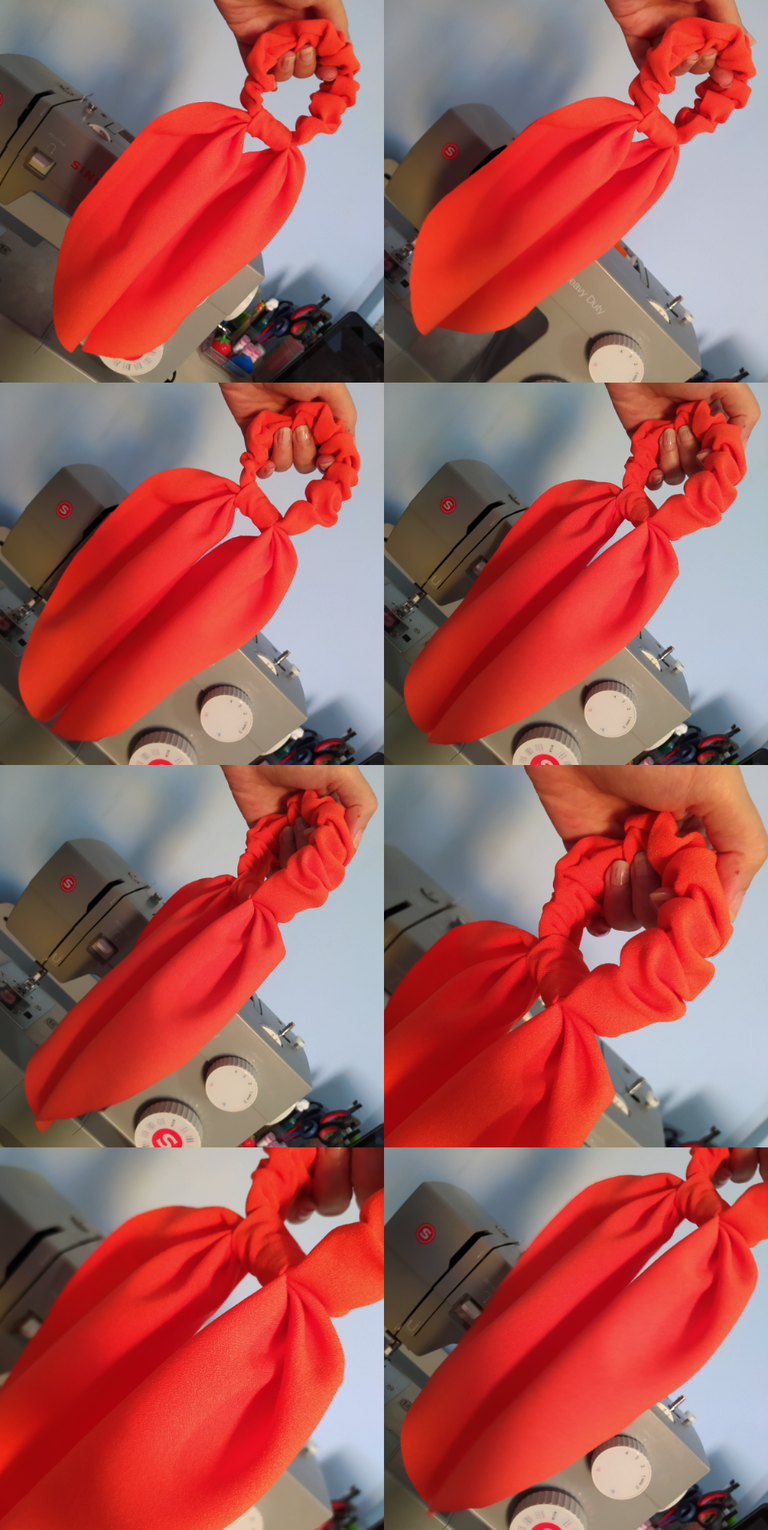
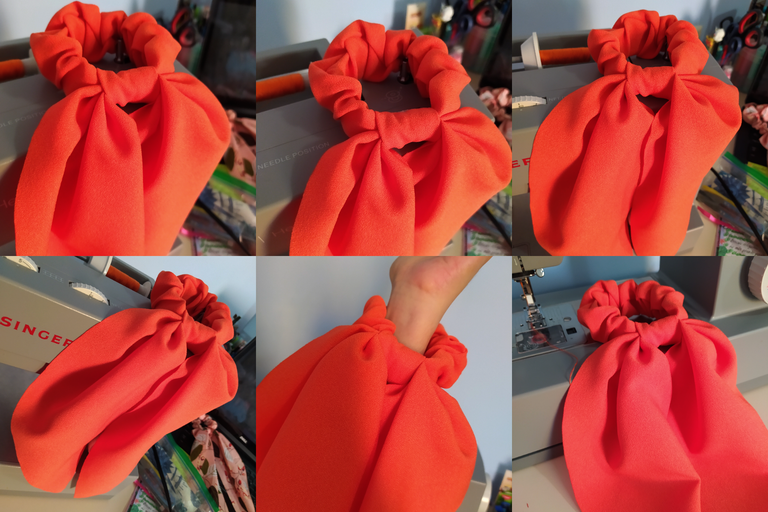
🍑 ¿Recomendaciones finales?, ¡claro que si! 🍑 1) Las mejores telas para un resultado hermoso y funcional son las telas elásticas y las telas sintéticas. 2) Recomiendo no planchar, le quita volumen y cuerpo a la tela. 3) Trabaja una medida estándar si vas a trabajar Scrunchies para la venta o para regalar, el proceso será mas rápido y menos agotador en comparación a si trabajas en secuencia medidas personalizadas.
🍑 Final recommendations, of course I do! 🍑 1) The best fabrics for a beautiful and functional result are stretch fabrics and synthetic fabrics. 2) I recommend not ironing, it takes volume and body out of the fabric. 3) Work a standard size if you are going to work Scrunchies for sale or to give away, the process will be faster and less tiring compared to if you work in sequence custom sizes.

 |  |  |
|---|
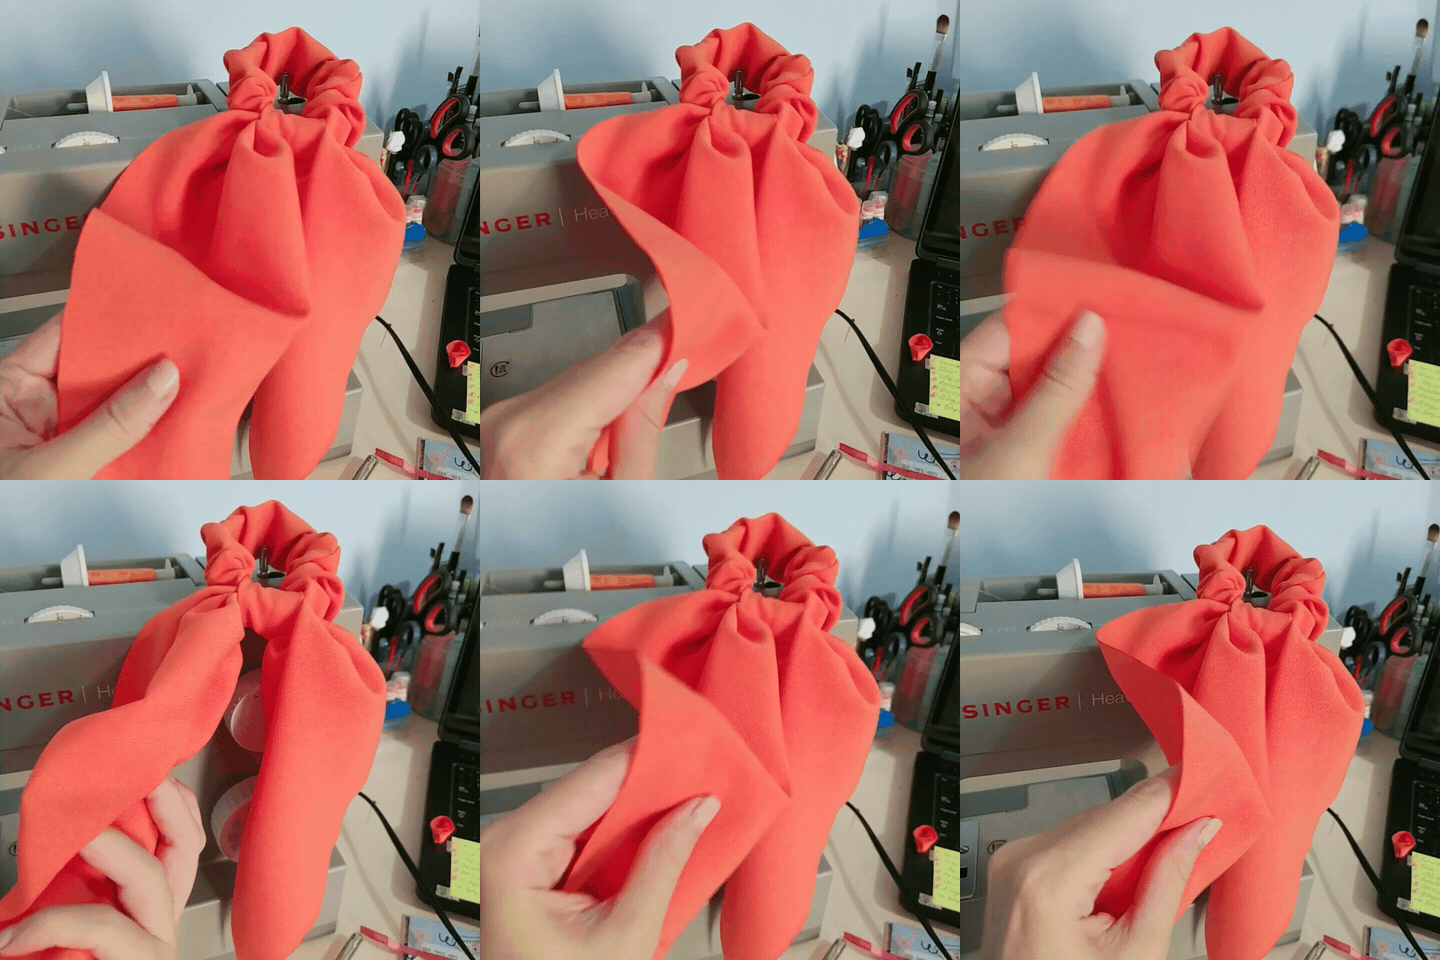
Al final de este proyecto puedo concluir que los Scrunchies podrían ser tan personalizables como otro tipo de accesorios.
Me planteo cómo se verán utilizando distintos tipos de colores a la vez, o incluso varias capas de telas diferentes que sean traslucidas. He visto que colocan en los puntos de unión cinta de encaje o torchón.
¡Veo mucho potencial para experimentar!, y existe un muy bajo riesgo de dañar el material o equivocarte. Es un buen proyecto para amateurs que quieran perderle el miedo a coser, y sin sentirse presionados por los resultados (ღ˘⌣˘ღ) 💕
At the end of this project I can conclude that Scrunchies could be as customizable as other types of accessories.
I am pondering how they will look using different types of colors at the same time, or even several layers of different fabrics that are translucent. I have seen them placed at the attachment points with lace tape or torchon.
I see a lot of potential for experimentation!, and there is very little risk of damaging the material or making a mistake. It's a good project for amateurs who want to lose their fear of sewing, and without feeling pressured by the results (ღ˘⌣˘ღ) 💕

 |  |  |  |  |  |  |  |  |
|---|
✨ 🍓 All texts and images by @Tesmoforia 🍓 ✨
📸 Tools: Xiaomi Redmi Note 8 📲 Snow 🎬 Remini 🌓 FotoJet 📐
🚨 ¡Please do not take, edit or republish my material without my permission! 🚨
💌 ¿Do you wish to contact me? Discord #tesmoforia 💌
🌙 Banner, signature and separators by Keili Lares
Posted Using InLeo Alpha