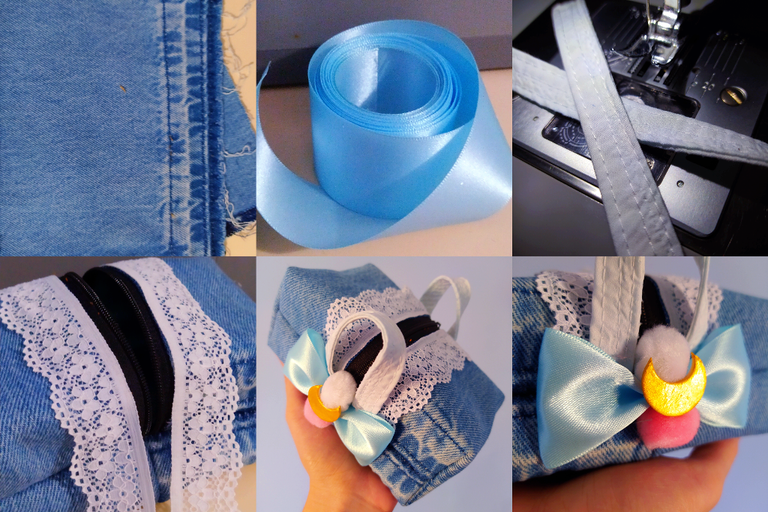
✦ So that your makeup doesn't dance in your bag, so that your headphones and charger don't scratch your glasses, or to store your tarot cards 👌 ✅ - Collage & Edition in FotoJet, photos by @Tesmoforia ✦

🇪🇸 ~ Los estuches pequeños han regresado con renovado interés como artículo no solo útil sino decorativo.
He visto variedad de estilos en muchos materiales diferentes, pero antes de intentar hacer apropiadamente uno tome algunos materiales de mi caja de retazos para practicar.
Este mes planeo salir solo una vez a mi recorrido por materiales nuevos asi que debo escoger sabiamente qué comprar para qué proyecto en especifico, por eso esta semana la dedicare a prácticas de proyectos de costura que jamás he elaborado antes.
Esta será una semana de novedades e items de costura inusuales con los recursos que tenga a la mano ☆ ⌒ (ゝ.∂)
🇺🇸 ~ Small pouches have returned with renewed interest as not only a useful but decorative item.
I have seen variety of styles in many different materials, but before I attempt to properly make one I took some materials from my patchwork box to practice.
This month I plan to go out only once on my new materials run so I must choose wisely what to buy for which specific project, so this week will be dedicated to practice sewing projects I have never made before.
This will be a week of novelties and unusual sewing items with whatever resources I have on hand ☆ ⌒ (ゝ.∂)
📌 Los materiales y herramientas que necesitas para este proyecto son: Lápiz, regla, cinta métrica, tijera, tela denim, fieltro, silicón frio, hilo regular, aguja regular, cinta de seda, encaje, apliques varios, tela, plancha para ropa, alfileres o pinzas de costura, cierre regular de 15 centímetros, y máquina de coser (opcional).
📝 The materials and tools you will need for this project are: Pencil, ruler, tape measure, scissors, denim fabric, felt, cold silicone, regular thread, regular needle, silk ribbon, lace, miscellaneous embellishments, fabric, clothes iron, pins, 15 cm regular zipper, and sewing machine (optional).
✦ STEP-BY-STEP TUTORIAL ✦

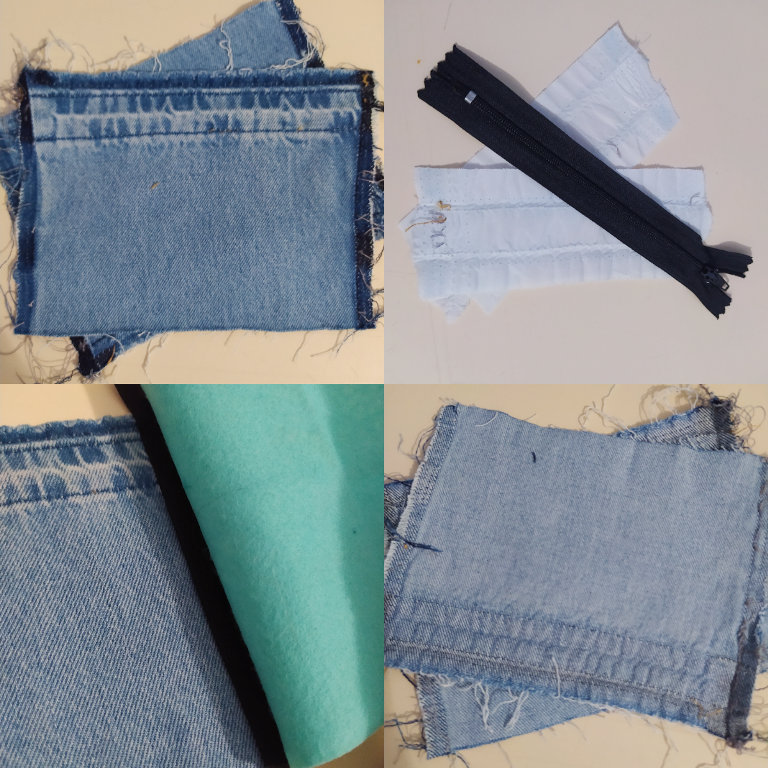

PRIMER PASO: Necesitaras 4 rectángulos de tela de denim y fieltro de 16 cm x 20 cm. Como se trata de material reciclado es importante limpiarlo antes de terminar. Corta todos los hilos sueltos, y plancha a alta temperatura.
STEP ONE: You will need 4 rectangles of denim fabric and felt of 16 cm x 20 cm. As this is recycled material it is important to clean it before finishing. Cut all the loose threads, and iron at high temperature.

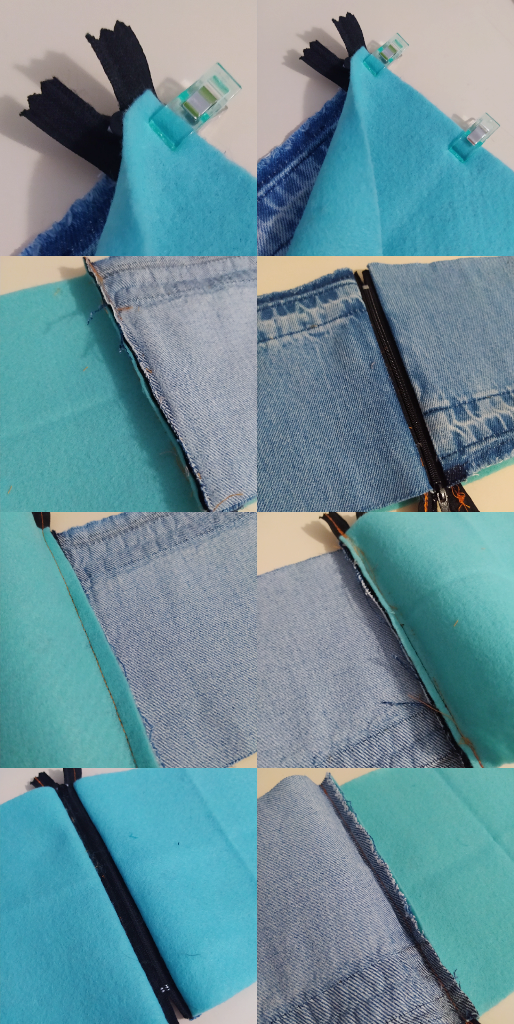

SEGUNDO PASO: Centra en lado mas angosto de cada rectángulo un borde exterior del cierre, y cose con puntada básica o a máquina, luego repite el mismo procedimiento en el lado opuesto del cierre. Fíjate en las imágenes guía.
SECOND STEP: Center on the narrowest side of each rectangle an outer edge of the zipper, and sew with basic or machine stitch, then repeat the same procedure on the opposite side of the zipper. Refer to the guide images.

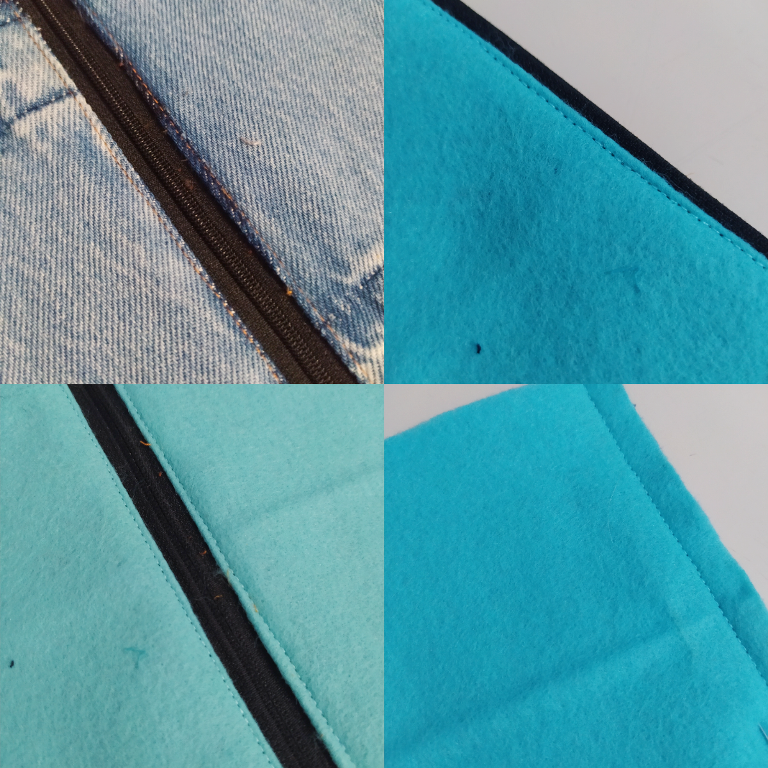

TERCER PASO: Agrega una puntada recta de seguridad cerca del borde del cierre. Si puedes hacerlo con hilo color anaranjado por fuera y el color del hilo del fieltro por abajo para que coincida con el forro, queda más bonito. Luego junta los extremos de la pieza y cose en línea recta.
THIRD STEP: Add a straight lockstitch near the edge of the clasp. If you can do this with orange thread on the outside and the color of the felt thread on the bottom to match the lining, it looks nicer. Then join the ends of the piece together and sew in a straight line.

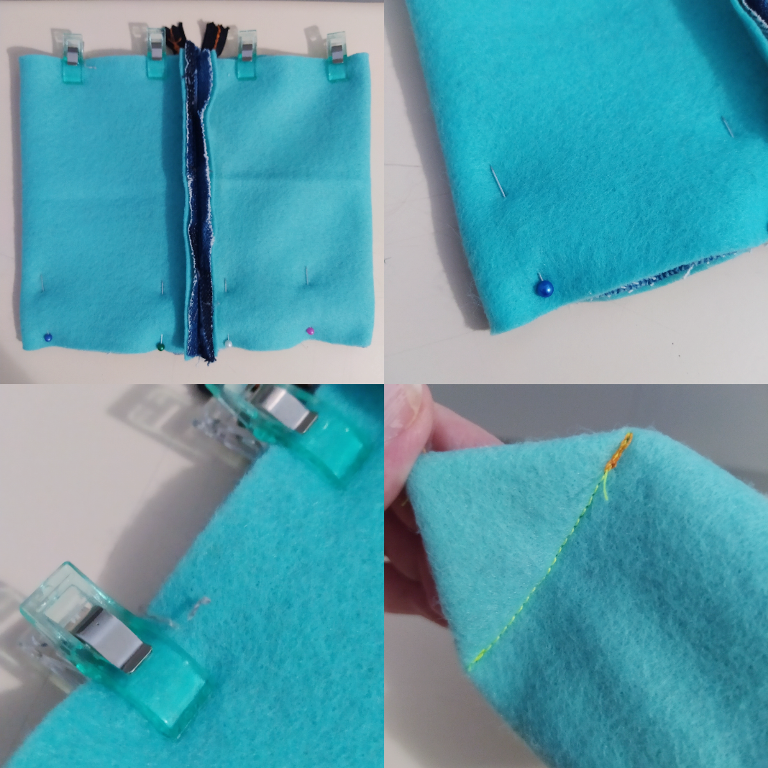

CUARTO PASO: Con ayuda de alfileres o pinzas de costura mantén en su sitio los lados de la pieza como se aprecia en las imágenes guía. Cose en línea recta, y después aprieta los extremos de esta "funda" hasta formar un triangulo, y cose en línea recta una linea que mida 6 cm.
FOURTH STEP: With the help of pins or sewing pliers hold in place the sides of the piece as shown in the guide images. Sew in a straight line, and then pinch the ends of this "cover" to form a triangle, and sew in a straight line a line measuring 6 cm.

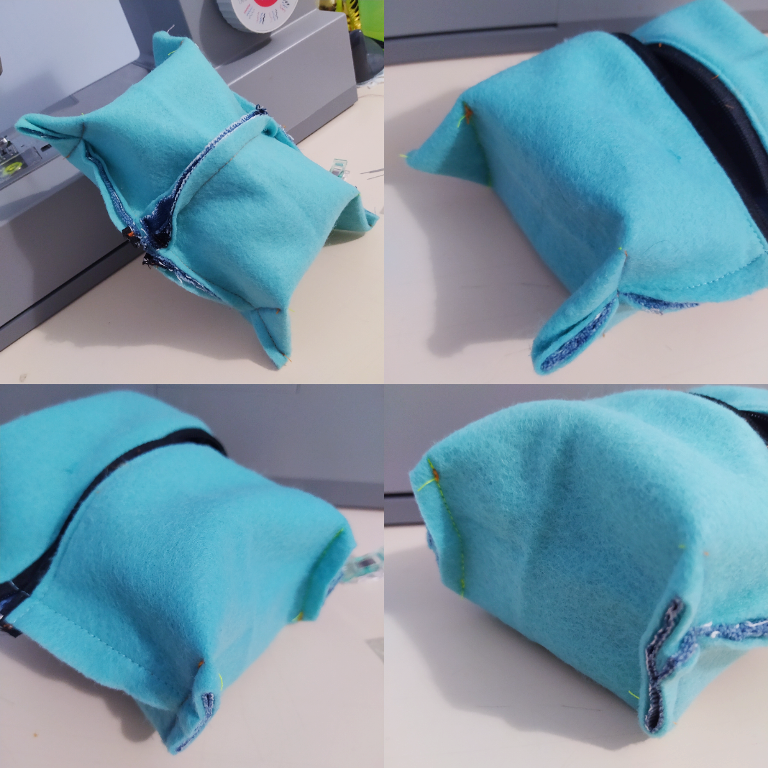

QUINTO PASO: Ese excedente de tela en forma de "rectángulo" vamos a cortarlo dejando una pestaña de 1 cm.
FIFTH STEP: That excess fabric in the shape of a "rectangle" we are going to cut it leaving a tab of 1 cm.

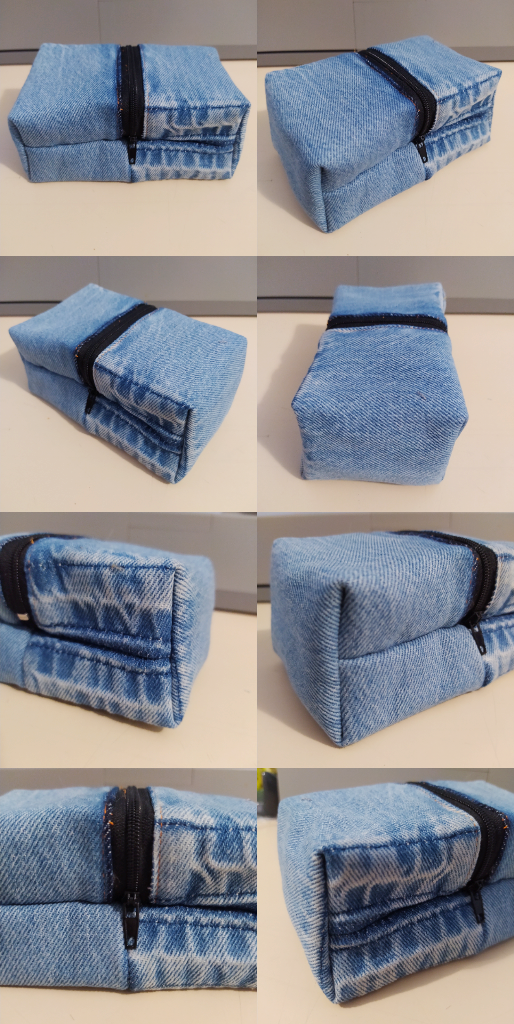

SEXTO PASO: Voltear la pieza lentamente y con cuidado, y estirar muy bien todas sus esquinas.
SIXTH STEP: Turn the piece slowly and carefully, and stretch all its corners very well.

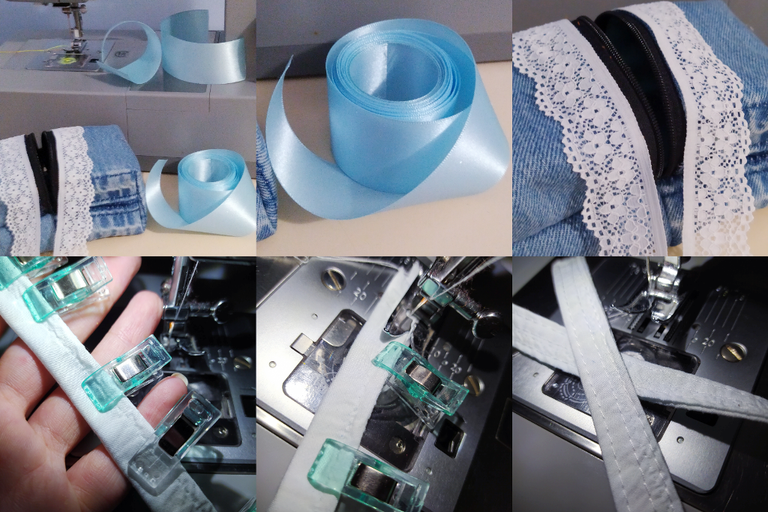

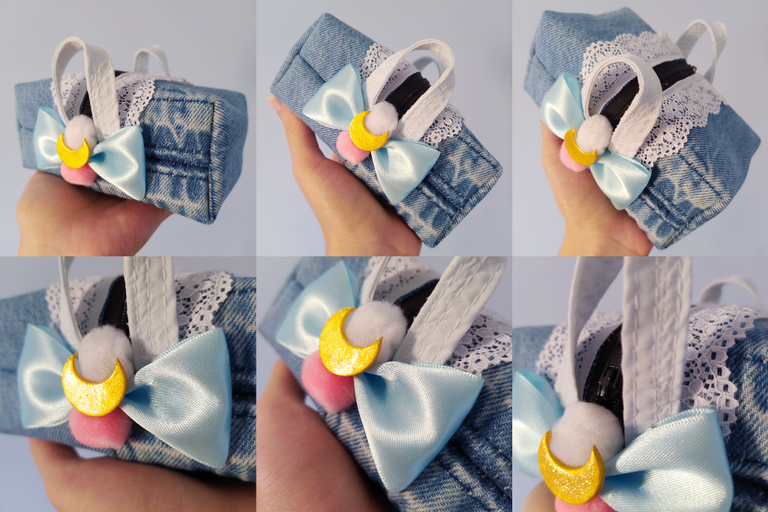
ÚLTIMO PASO: Agrega decoraciones a tu gusto. Yo corté 2 piezas de cinta de seda de 16 cm de largo para hacer 2 lazos, tomé unos apliques de un proyecto anterior (lunitas), y unos pompones afelpados color rosa y blanco de 2 cm de ancho. También cosí unas pequeñas azas con unos retacitos de tela de 6 cm x 15 cm, doblándolos hacia su propio centro 2 veces.
LAST STEP: Add decorations to your liking. I cut 2 pieces of silk ribbon 16 cm long to make 2 bows, took some appliques from a previous project ("little moons"), and some pink and white plush pompoms 2 cm wide. I also sewed a few small loops with some fabric scraps of 6 cm x 15 cm, folding them to their own center twice.
 |  |  |
|---|
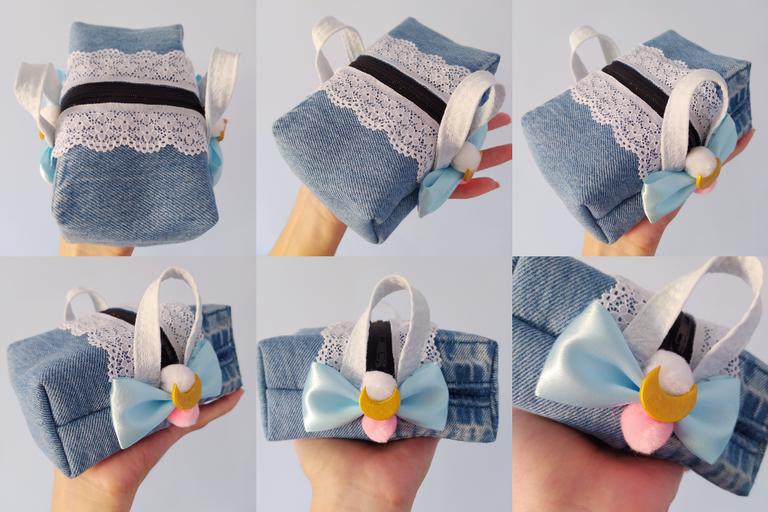
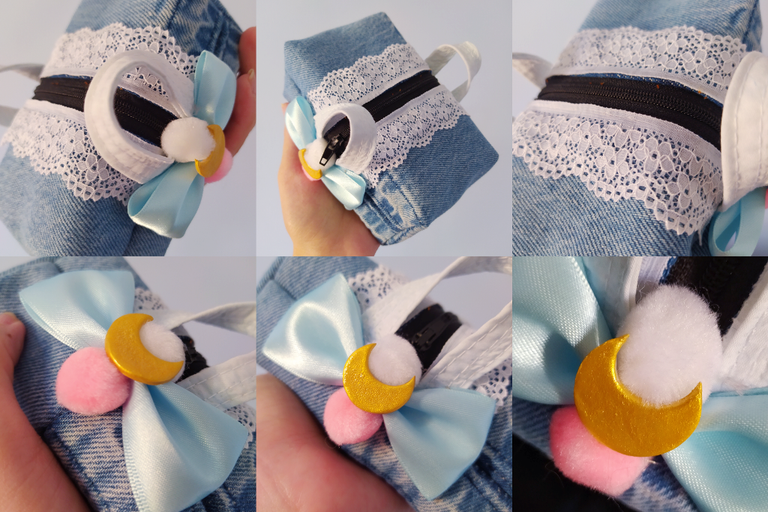
Existen distintas maneras de hacer este tipo de estuche pero para este primer experimento yo utilice la forma más sencilla. Existen patrones más construidos y con patronaje más detallado disponible como guía en internet. Pero aún estoy estudiando la correspondencia entre las medidas y los resultados para poder crear mi propio patron.
There are different ways to make this type of case but for this first experiment I used the simplest way. There are more constructed and more detailed patterns available as a guide on the internet. But I am still studying the correspondence between measurements and results so that I can create my own pattern.

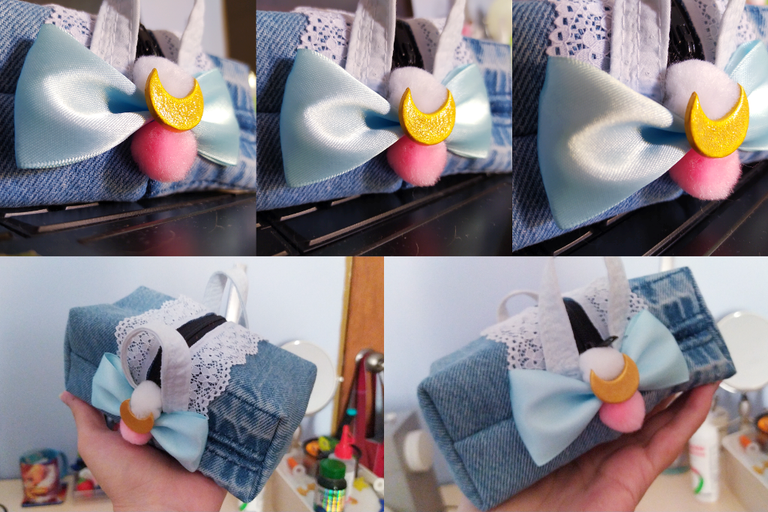
¡Mágicamente y aunque algo a la deriva el resultado es funcional!, ésta propuesta tiene el tamaño aproximado de 2 juegos de cartas para tarot (para que puedas hacer la comparación en tu mano).
¡Es efectivo utilizar fieltro en lugar de entretela!, es una parte del proceso que dejare fija para la próxima vez. Una capa de fieltro, una de guata y un poco de forro satinado debe quedar espectacular, tambien algo de bies bonito para darle mejor terminación al interior.
Regresare con una mejor versión después de las compras por nuevos supplies a mediados de Agosto. Los quiero mucho, un abrazo enorme 🫂 💞
Magically and although somewhat adrift the result is functional, this proposal is about the size of 2 sets of tarot cards (so you can make the comparison in your hand).
It's effective to use felt instead of interfacing!, it's a part of the process that I'll leave fixed for next time. A layer of felt, a layer of wadding and some satin lining should look great, also some nice bias binding to finish off the interior.
I will be back with a better version after shopping for new supplies in mid August. I love you all very much, a big hug 🫂 💞

 |  |  |  |  |  |  |  |  |
|---|
✨ 🍓 All texts and images by @Tesmoforia 🍓 ✨
📸 Tools: Xiaomi Redmi Note 8 📲 Snow 🎬 Remini 🌓 FotoJet 📐
🚨 ¡Please do not take, edit or republish my material without my permission! 🚨
💌 ¿Do you wish to contact me? Discord #tesmoforia 💌
🌙 Banner, signature and separators by Keili Lares
Posted Using InLeo Alpha

