ENGLISH CONTENT
Hello all craft lovers! For my anniversary with my boyfriend, I wanted to make him something special. After he mentioned to me that he wanted to have physical photographs of us, I looked for a way to do it, but in a compact way. That's how I found The Chinese Thread Book, a craft originally created to store sewing implements, such as needles. By making it with paper, you can add messages and in my case, small size photographs. I already explained the first piece, which I consider to be the most elaborate, so today I will talk to you about the second piece, which is much simpler 😉

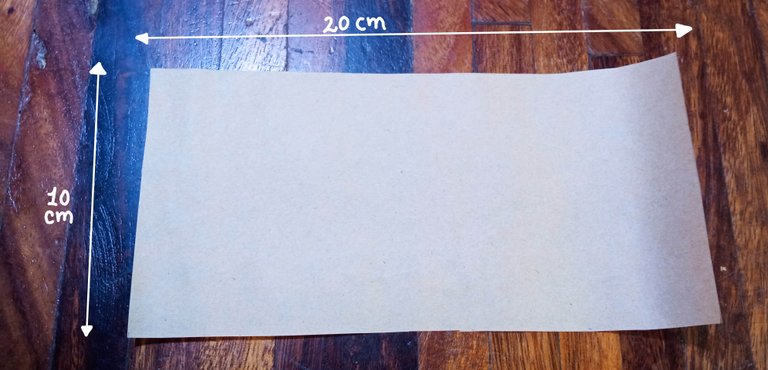
To make this piece, we will need to cut a 10x20 cm piece of paper. The ideal would be to use origami paper, but in my case, since I didn't have this type of paper, I used kraft paper. It's quite good because it gives way quite easily and the folds are marked very well. I do not recommend the use of white sheets of bond paper nor the gift paper, the first is very thick and the second, being smooth, will make them suffer haha but I liked the kraft paper, since it is a little rough for one of the reasons. its sides and allows the permanence of the structures.
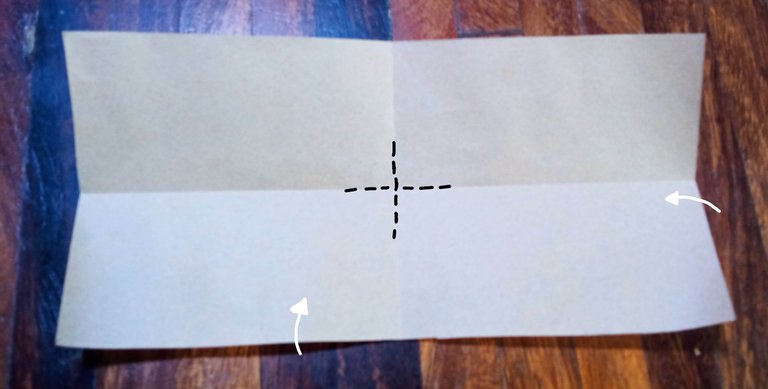
Anyway, leaving aside the type of paper, let's proceed to the steps. First, we will fold the paper from the top to the bottom and from one side edge to the other, in order to obtain the "cross" fold mark, as seen in the photograph (sorry, I didn't realize that that shot was blurry, but I think it's understandable 😅).
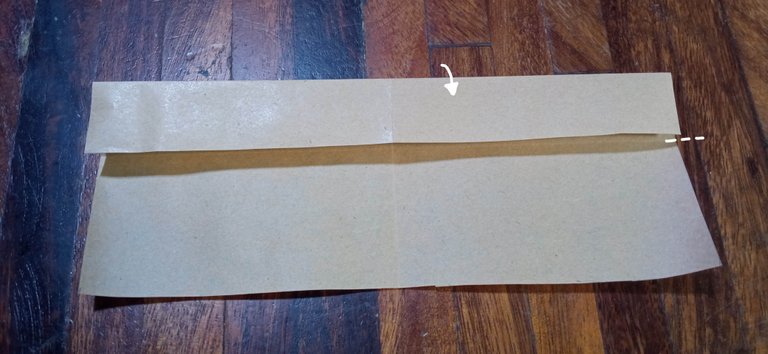
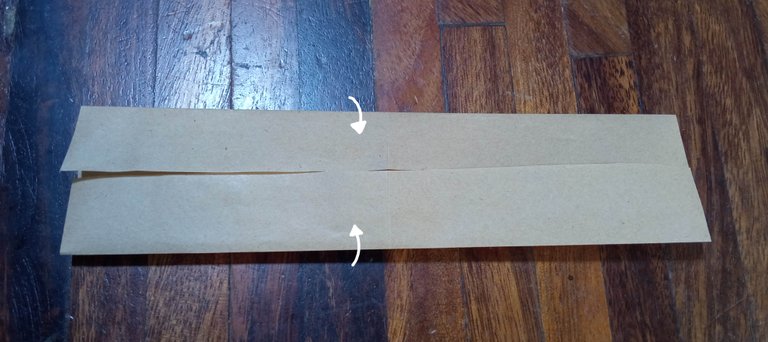
The next thing is to fold the top part again, but up to the center mark. The same happens with the bottom edge. Basically, we would be joining each edge together (I call this part "kissing" 😘).
 |  |
|---|
Then, we do the same with both sides: fold them up to the center guide.
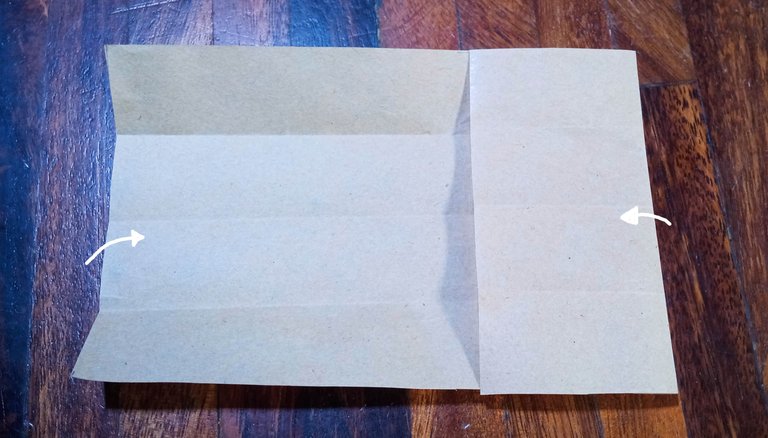
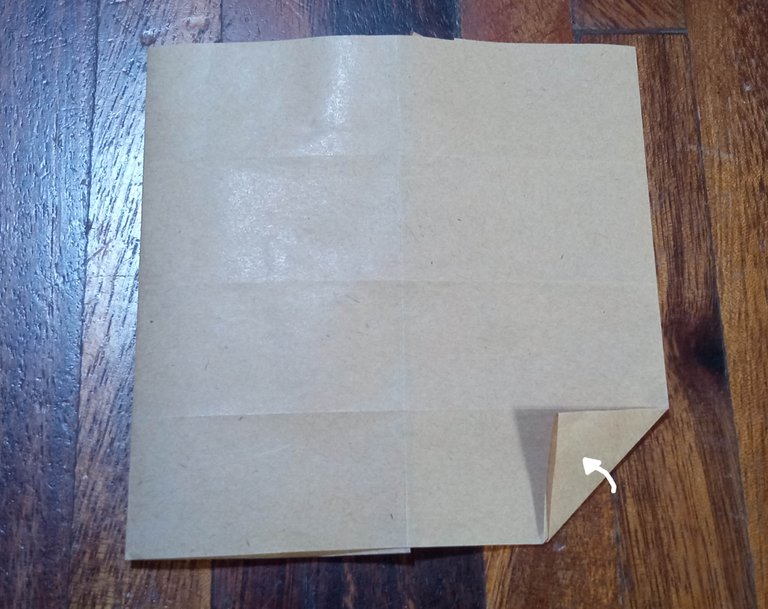
After doing this, without opening the piece, we turn it over and on the back or back of it, we proceed to fold the corners guided by the marks made previously and thus obtaining some triangles.
 |  |
|---|
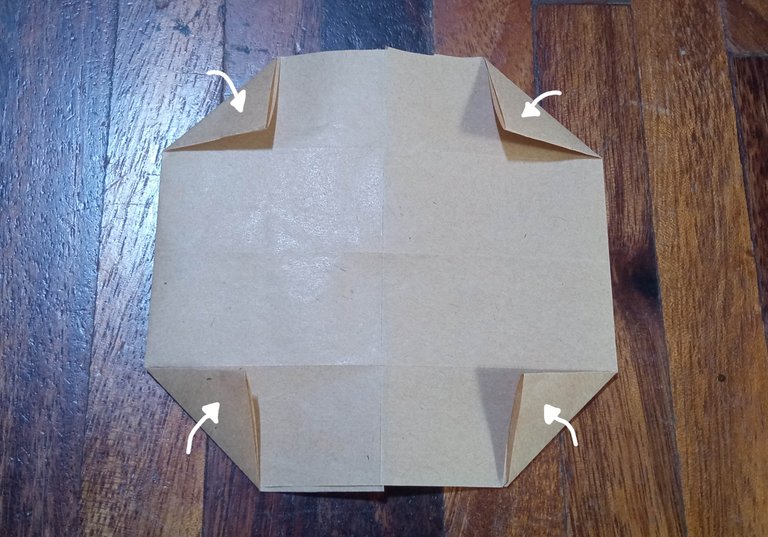
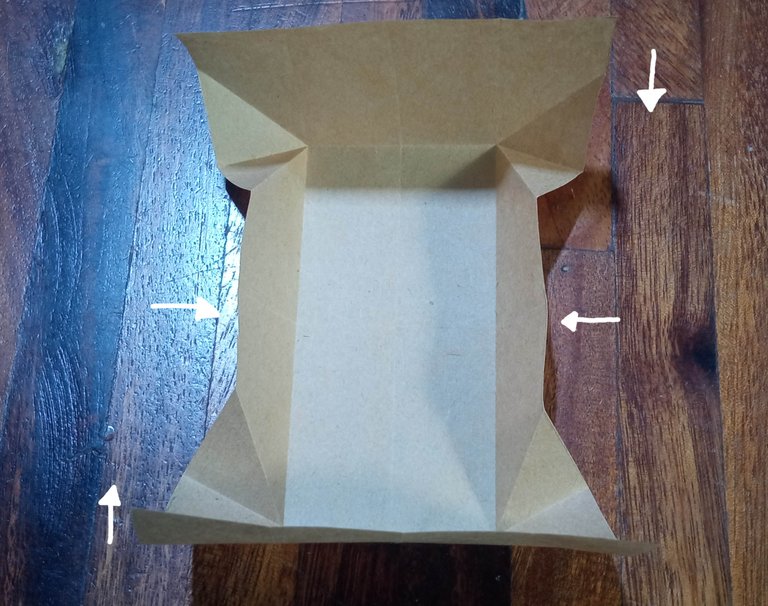
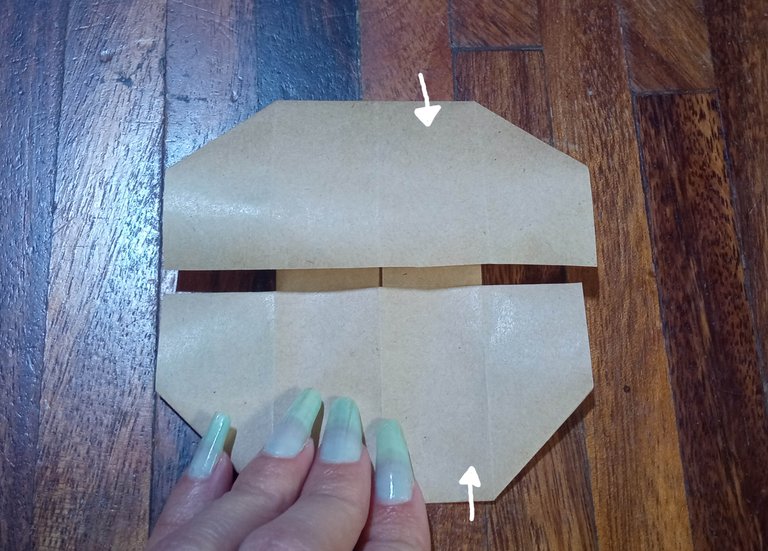
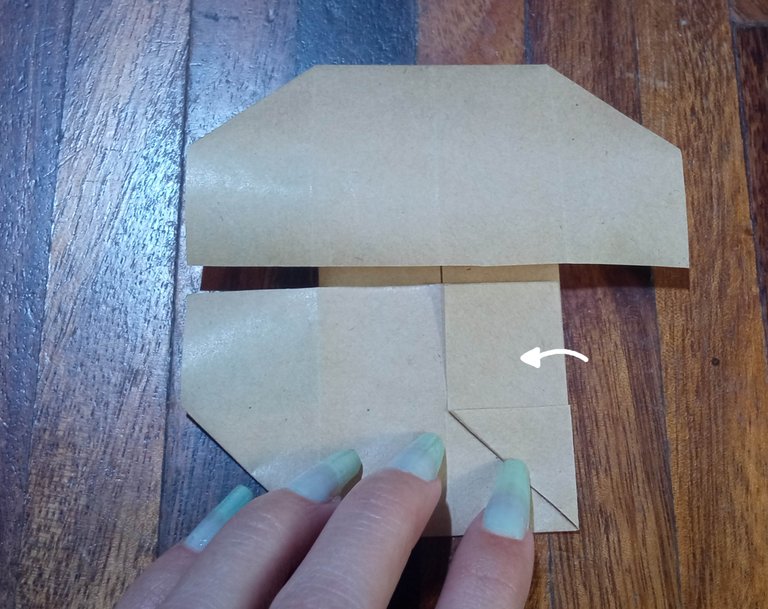
We open the piece (now we do) and turn it over again (Remember that we had turned it over?), to carry out the following steps. Thanks to the folds we made, we will be able to fold the eyelashes seen in the first photograph: Both on the sides, as well as on the top and bottom. All you have to do is push a little and the paper will give way. It has to be as seen in the second photograph and then the four flaps are folded, as seen in the third image:
 |  |  |
|---|
In this way, we will have the piece ready. As they were able to confirm, it is not as complicated as the first piece, but it has some steps of the same. So, if you start the project with the most difficult piece, the rest will be a piece of cake 😉
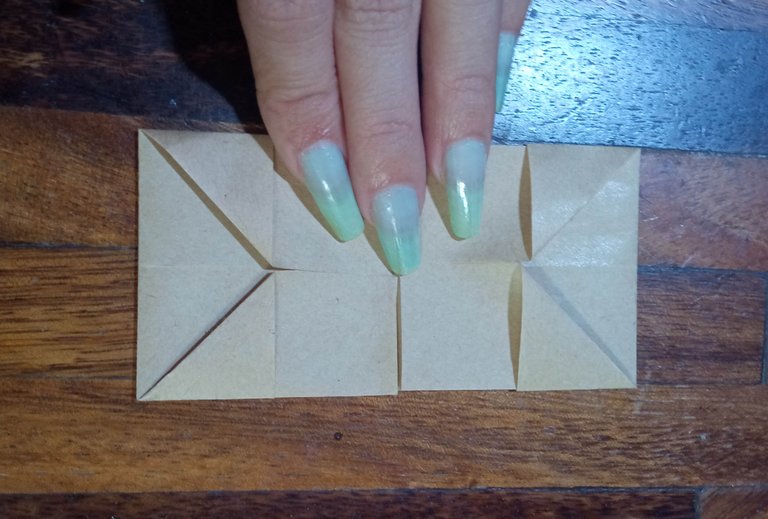
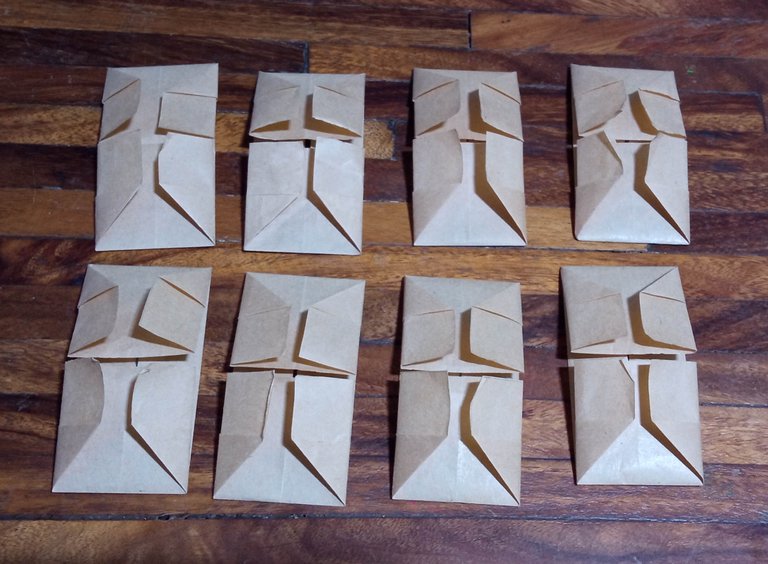
Of this type, you have to make 8 exact pieces for the final project. I recommend that once you finish the pieces, you place them inside a book, so that they flatten and can be used better when joining them with the rest of the pieces. Once they make them, they will be able to verify that the little pieces open like a little box, like the ones in the first part, but they don't have that attractive decoration (you'll see later why 👀). I invite you to see the following parts of this project that I will upload throughout these days, it is worth it, it looks very nice 😌
Thank you very much for visiting my publication. I hope you found it interesting.
Until next time!

CONTENIDO EN ESPAÑOL
¡Hola a todos los amantes de las manualidades! Para el aniversario con mi novio, quise elaborarle algo especial. Luego de que me mencionase que quería tener en físico fotografías de nosotros, busqué la forma de poder hacerlo, pero que fuese de forma compacta. Fue así como encontré El libro de hilos chinos, una manualidad originalmente creada para guardar implementos de costura, como agujas. Haciéndola con papel, se pueden agregar mensajes y en mi caso, fotografías en tamaño reducido. Ya expliqué la primera pieza, la cual considero, es la más elaborada, así que hoy les hablaré de la segunda pieza, que es muchísimo más sencilla 😉

Para hacer ésta pieza, necesitaremos cortar un trozo de papel de 10x20 cm. Lo ideal, sería utilizar papel de origami, pero en mi caso, como no tenía de éste tipo de papel, utilicé papel kraft. Es bastante bueno porque cede con bastante facilidad y se marcan muy bien los dobleces. No recomiendo el uso de hojas blancas de papel bond ni tampoco el papel de regalo, el primero es muy grueso y el segundo, al ser liso, los hará sufrir jaja pero el papel kraft me gustó, ya que es un poco áspero por uno de sus lados y permite la permanencia de las estructuras.

En fin, ya dejando de lado el tipo de papel, procedamos a los pasos. Primero, doblaremos el papel desde la parte superior hasta la inferior y desde un borde lateral al otro, con el fin de obtener la marca de los dobleces "en cruz", como se aprecia en la fotografía (disculpen, no me percaté de que esa toma quedó borrosa, pero creo que se entiende 😅).

Lo siguiente, es volver a doblar la parte superior, pero hasta la marca del centro. Lo mismo sucede con el borde inferior. Básicamente, estaríamos uniendo cada borde entre sí (llamo a esta parte "darse un besito" 😘).
 |  |
|---|
Después, hacemos los mismo con ambos laterales: doblarlos hasta la guía del centro.

Tras hecho esto, sin abrir la pieza, la volteamos y en el dorso o parte trasera de ésta, procedemos a doblar las esquinas guiándonos por las marcas hechas anteriormente y obteniendo así, unos triángulos.
 |  |
|---|
Abrimos la pieza (ahora sí) y la volvemos a voltear (¿Recuerdan que la habíamos volteado?), para realizar los siguientes pasos. Gracias a los dobleces que hicimos, podremos doblar las pestañas que se ven en la primera fotografía: Tanto en los laterales, como en la parte superior como la inferior. Bastará con empujar un poco y el papel cederá. Tiene que quedar como se aprecia en la segunda fotografía y seguidamente, se doblan las cuatro solapas, como se ve en la tercera imagen:
 |  |  |
|---|
De ésta forma, tendremos la pieza lista. Como pudieron confirmar, no es tan complicada como la primera pieza, pero tiene algunos pasos de la misma. Así que, si comienzan el proyecto con la pieza más difícil, el resto les será pan comido 😉

De éste tipo, hay que realizar 8 piezas exactas para el proyecto final. Les recomiendo que una vez que terminen las piezas, las vayan colocando dentro de algún libro, para que se aplasten y puedan usarse mejor a la hora de unirlas con el resto de las piezas. Una vez que las hagan, podrán verificar que las piecitas abren como una cajita, como las de la primera parte, pero no tienen ese vistoso adorno (ya verán luego, por qué 👀). Los invito a ver las siguientes partes de éste proyecto que iré subiendo a lo largo de estos días, vale la pena, queda muy bonito 😌

Muchas gracias por haber visitado mi publicación. Espero que les haya parecido interesante.
¡Hasta una próxima oportunidad!
