Hola amigos creativ@s de Hive... me animé a hacer otros zarcillos esta vez más vistosos ya que se acerca la época decembrina y todas queremos vernos lindas.
Recuerda que todos tenemos habilidades, solo debemos ponernos en práctica para cada día hacerlo mejor, así que atrévete a aprender.
Hello creative friends from Hive ... I decided to make other earrings this time more colorful as the holiday season is approaching and we all want to look pretty.
Remember that we all have skills, we just have to put ourselves into practice to do better every day, so dare to learn.

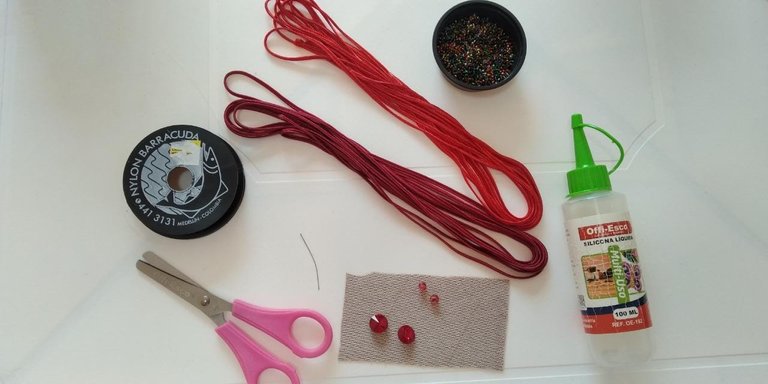
Materiales:
- Cordón soutache
- 4 piedras brillantes, dos más grandes y dos más pequeñas.
- Mostacillas.
- Silicón frío.
- Tijera
- Strass
- Bi piel o fieltro planchado.
- aguja e hilo nylon de bordar.
Materials:
- Soutache cord
- 4 shiny stones, two larger and two smaller.
- Mostacillas.
- starss
- Cold sylicon.
- Scissor
- Bi-leather or ironed felt.
- needle and nylon embroidery thread.

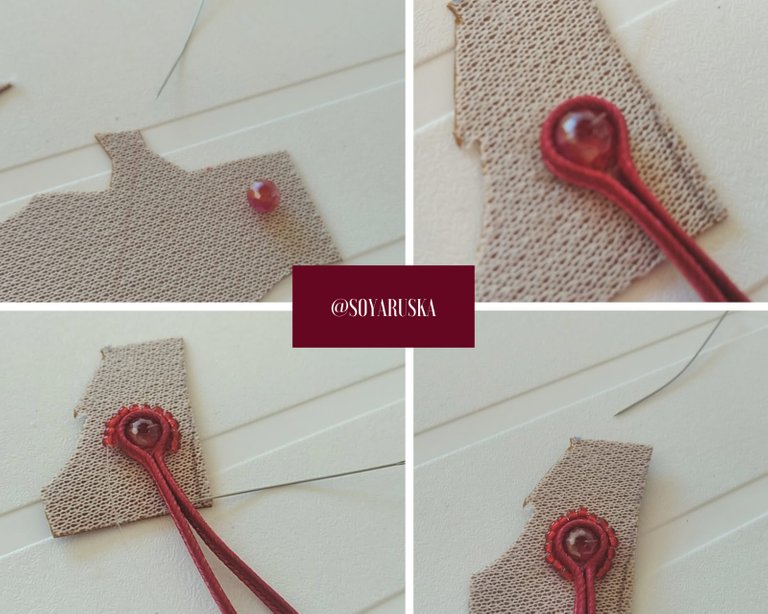
Comencemos pegando nuestra piedra más grande en nuestra bi piel o fieltro, luego cortamos dos trozos de cordón soutache, de aproximadamente 6cm, todo depende del tamaño de la piedra que uses.
Vamos a bordear hacía arriba nuestra piedra con los dos hilos pegándolo con el silicón frío.
Let's start by gluing our largest stone to our bi-skin or felt, then we cut two pieces of soutache cord, approximately 6cm, it all depends on the size of the stone you use.
We are going to skirt our stone upwards with the two threads, gluing it with the cold silicone.

Luego vamos a recortar lo que tenemos pegado, y vamos a tomar hilo aguja para bordar mostacillas rojas al rededor de nuestra piedrita base.
Cuando llegamos ya al otro extremo, cerramos con un nudo sencillo de costura a mano.
Then we are going to cut out what we have glued, and we are going to take needle thread to embroider red beads around our base pebble.
When we get to the other end, we close with a simple hand-sewn knot.

Tomaremos dos strass para hacer un adorno en la parte de arriba de nuestra pieza, enrollamos con silicón el strass y el hilo, ocultando el restante por la parte de atrás.
We will take two rhinestones to make an ornament on the top of our piece, we roll the rhinestones and thread with silicone, hiding the rest from the back.

Cuando ya tenemos nuestra pieza, ahora vamos a pegarla nuevamente en la bi piel, para seguir haciendo nuestra base.
Vamos a cortar dos hilos de 7 cm y vamos a bordear la pieza de abajo hacía arriba, y vamos a volver a cortarlo de la bipiel.
Entonces, vamos a tocar 4 strass, y vamos a hacer adoro en el bordo, bordeando dos strass y escondiendo el restante del hilo por la parte de atrás.
When we already have our piece, now we are going to glue it back on the bi skin, to continue making our base.
We are going to cut two 7 cm threads and we are going to border the piece from the bottom up, and we are going to cut it again from the double skin.
So, we are going to touch 4 rhinestones, and we are going to make adornment on the edge, bordering two rhinestones and hiding the rest of the thread on the back.

Seguimos creando nuestra pieza, luego de que tenemos el adorno listo de cada lado, vamos a tomar nuevamente aguja e hilo, para bordar la zona de abajo.
Tomaremos una piedrita grande y una mostacilla y vamos a ponerlas en el borde, recordando que cuando regresamos de cada piedra metemos el hilo por la primera piedra que tenemos.
We continue creating our piece, after we have the ornament ready on each side, we are going to take the needle and thread again, to embroider the area below.
We will take a large stone and a small bead and we will put them on the edge, remembering that when we return from each stone we put the thread through the first stone that we have

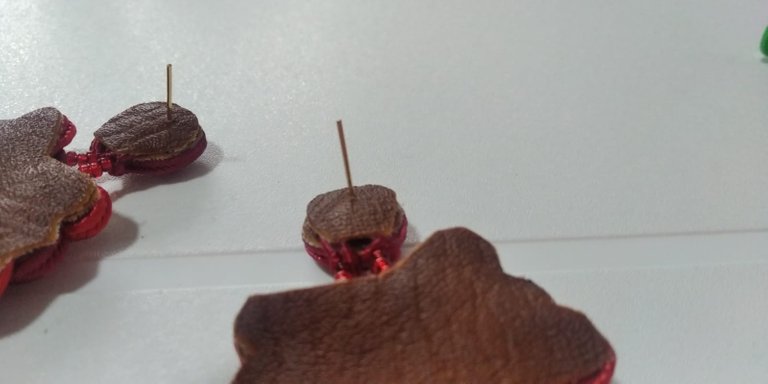
Tenemos ya la base lista, que es como nuestra pieza principal en el zarcillo.
Ahora vamos a realizar la parte de arriba donde vamos a colocar el pin de nuestro zarcillo y lo colgaremos.
El primer paso es pegar nuestra piedra pequeña en el bipiel, bordearemos con hilo, y bordaremos con mostacillas.
We already have the base ready, which is like our main piece in the tendril.
Now we are going to make the upper part where we are going to place the pin of our earring and we will hang it.
The first step is to glue our small stone on the bi-leather, we will border with thread, and we will embroider with beads.
Haremos el mismo proceso, con el hilo que sobra bordeamos la piecita y le ponemos suficiente silicón para que quede bien sellado, los hilos sobrantes luego de ese proceso los pegamos por la parte de atrás.
Tomaremos más hilo y aguja, para unir esta pieza con la anterior con tres mostacillas, pasamos por el centro y anudamos por la parte de atrás.
We will do the same process, with the leftover thread we border the little piece and put enough silicone on it so that it is well sealed, the excess threads after that process we glue them from the back.
We will take more thread and needle, to join this piece with the previous one with three beads, we go through the center and knot at the back.

Estamos listos, ahora hacemos el segundo arete y los pegamos en el bipiel, para sellarlo y que por la parte de atrás quede bien presentados.
We are ready, now we make the second earring and stick them on the double skin, to seal it and that the back is well presented.

Ahora sellamos nuestros arete,es y colocamos los pin para ponerlos colocar en nuestras orejitas.
Now we seal our earrings, it is and we put the pins to put them in our ears.

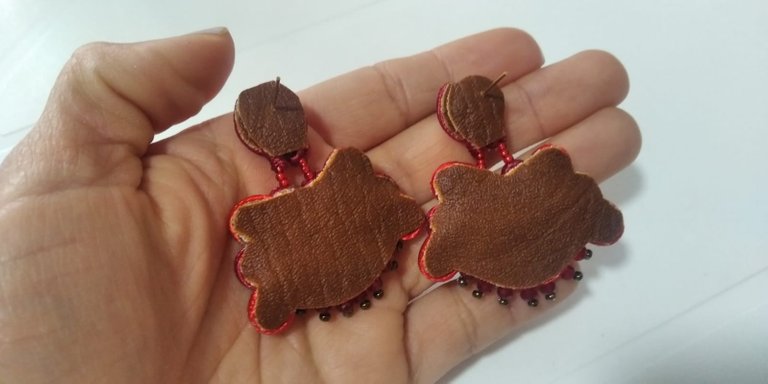
¡Tenemos unas bellos aretes para la navidad!
Gracias por acompañarme en este post, lleno de amor para compartirlo con ustedes.
We have some beautiful earrings for Christmas!
Thank you for joining me in this post, full of love to share it with you.


Las fotografías fueron tomadas por mi, con mi celular Xiaomi 7A... los banners los realicé con la aplicación Canva.
The photographs were taken by me, with my Xiaomi 7A cell phone ... I made the banners with the Canva application.