💚💚Español💚💚
Hola hola mis queridos amigos de Hive ✨️ saludos para todos espero hayan disfrutado de este tranquilo día 😊 y que todos se encuentren muy bien disfrutando de la noche ✨️ por mi parte aun estoy en recuperación a causa de mi cirugía y en cada tiempo libre me ocupo de mis proyectos de costura y en esta noche quise compartir con ustedes la confección de un cómodo uniforme quirúrgico para caballeros elaborado en una tela antifluidos o microfibra la cual es resistente e ideal para la confección de estos. Me gustaría mostrarles como hice y todo el proceso para que tu también lo hagas tu mismo 😊 los invito a acompañarme en este post tutorial.
Estos fueron los materiales que use
• Máquina de coser
• Tijera
• Hilo de coser
• Tela
• Prenda de medida
• Elástica
✨️Pasos✨️
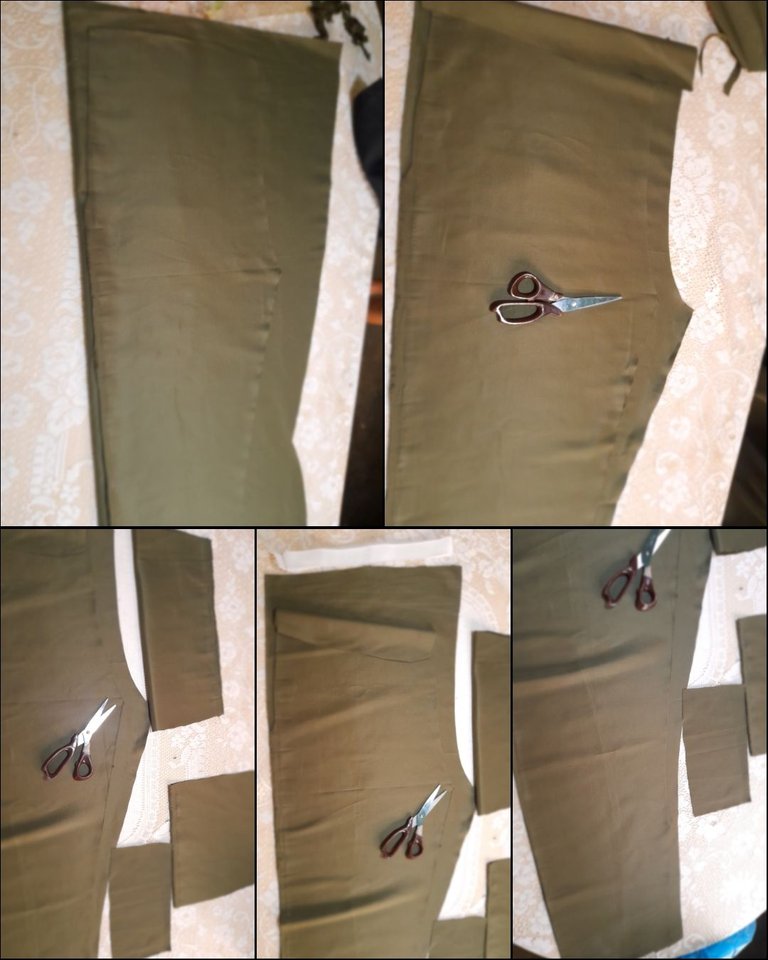
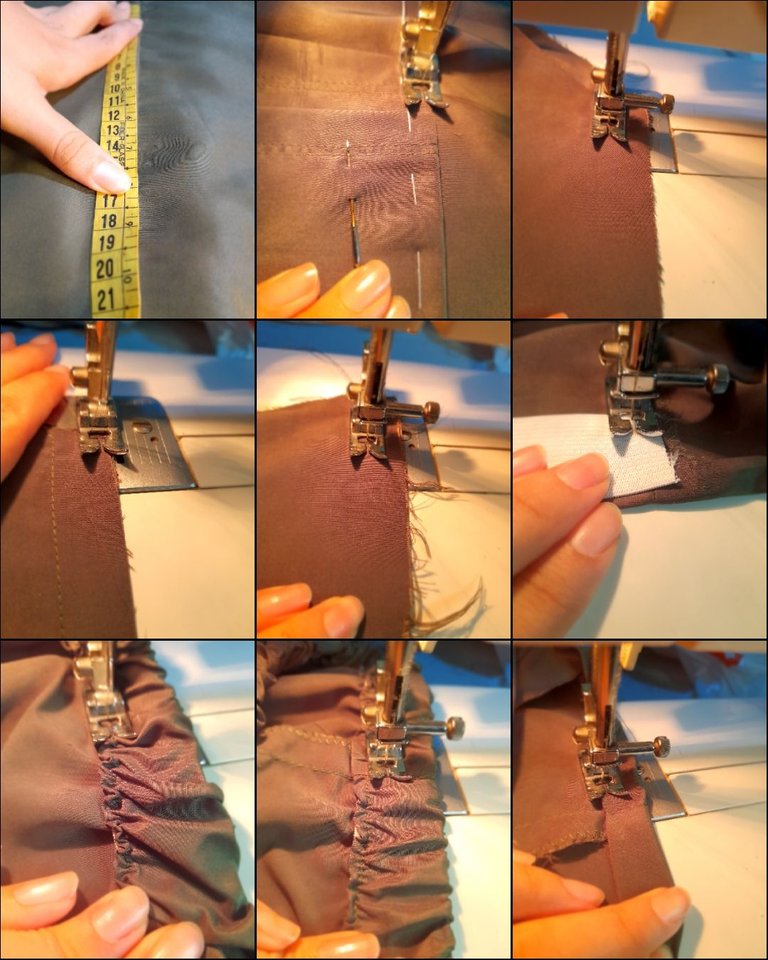
•✨️Voy a iniciar cortando todas las piezas de este conjunto siendo estas las piezas para la parte del pantalón: dos piezas delanteras, dos piezas traseras, dos bolsillos internos y tres bolsillos laterales.
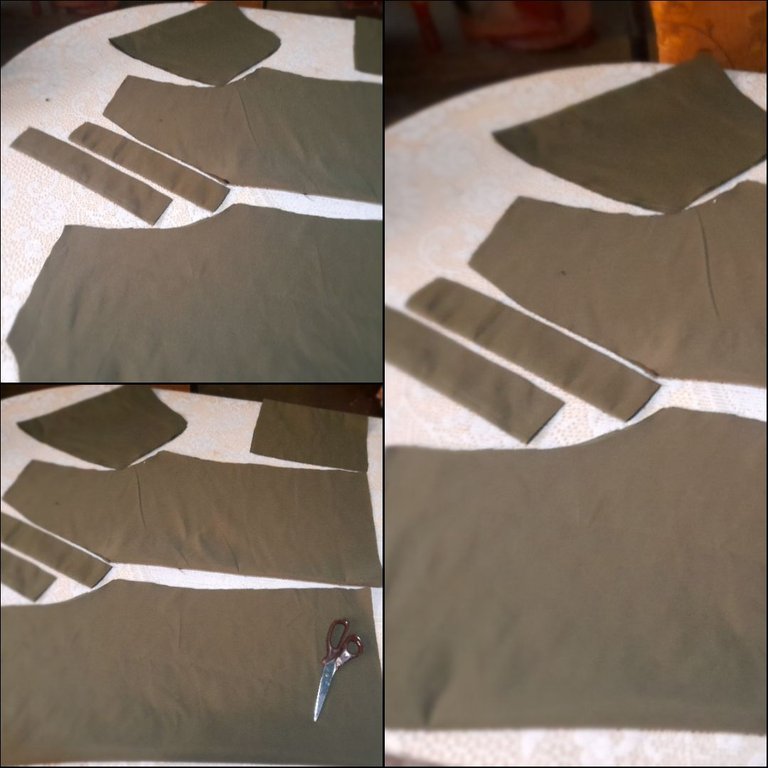
Para la parte superior voy a cortar una pieza trasera, delantera, tres orillas superiores para el cuello, dos mangas y cuatro bolsillos frontales.
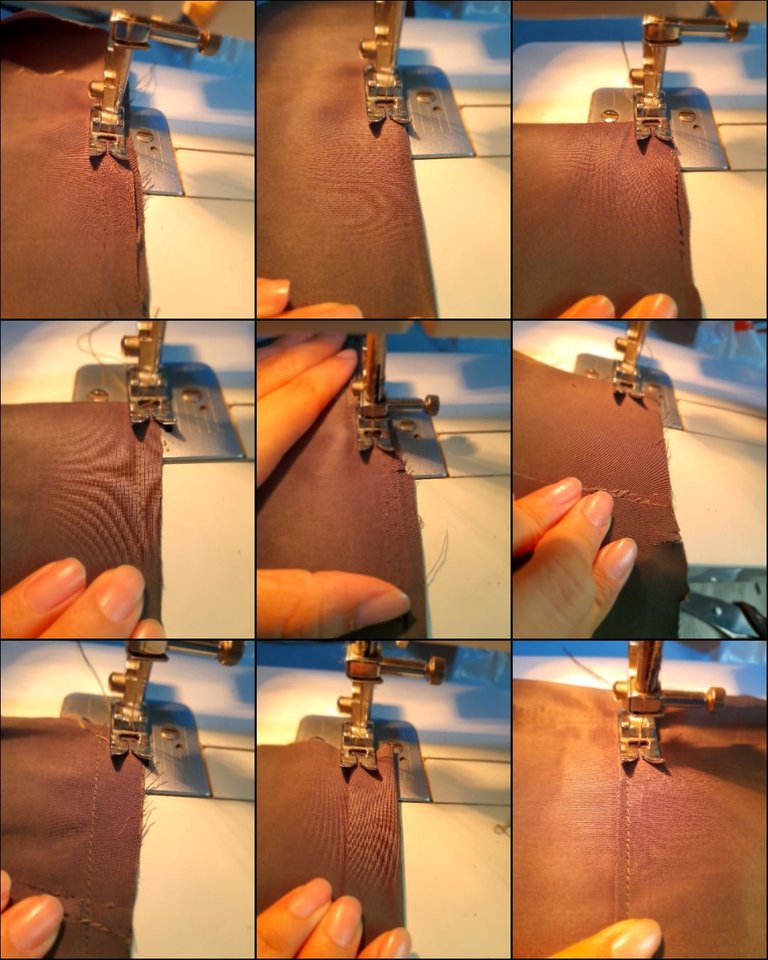
•✨️Voy a iniciar cosiendo los bolsillos internos colocandolos en el lado derecho de la tela y cosiendo con costura recta para luego voltear y coser con costura recta por encima luego voy a coser la parte interna de los bolsillos con costura recta y zigzag en la parte inferior y luego voy asegurar los extremos con costura recta para evitar que se muevan. Luego voy a coser la parte frontal con la trasera en los extremos del bolsillo con costura recta y zigzag y luego continúo armando los bolsillos doblando la orilla de estos y cosiendo con costura recta y armare uno de estos por encima de los más grandes con el fin de usarlo para los bolígrafos.
•✨️Voy a medir a partir del bolsillo interno 17 cm y fijaré mis bolsillos externos los cuales voy a coser con costura recta.
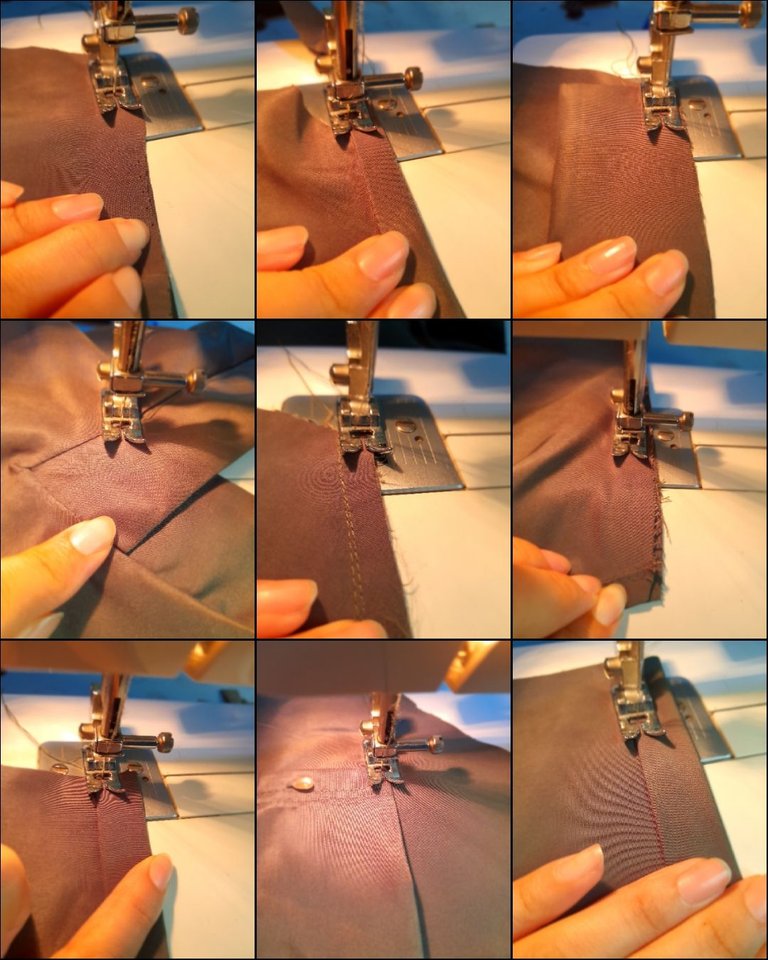
Luego voy a coser la parte interna de la pierna con una costura recta y zigzag para luego unir ambas partes laterales con dos costuras rectas y zigzag y continúo cosiendo la elástica del contorno de cintura estirando esta y cosiendo con costura recta y para finalizar el pantalón voy a coser el ruedo de este.
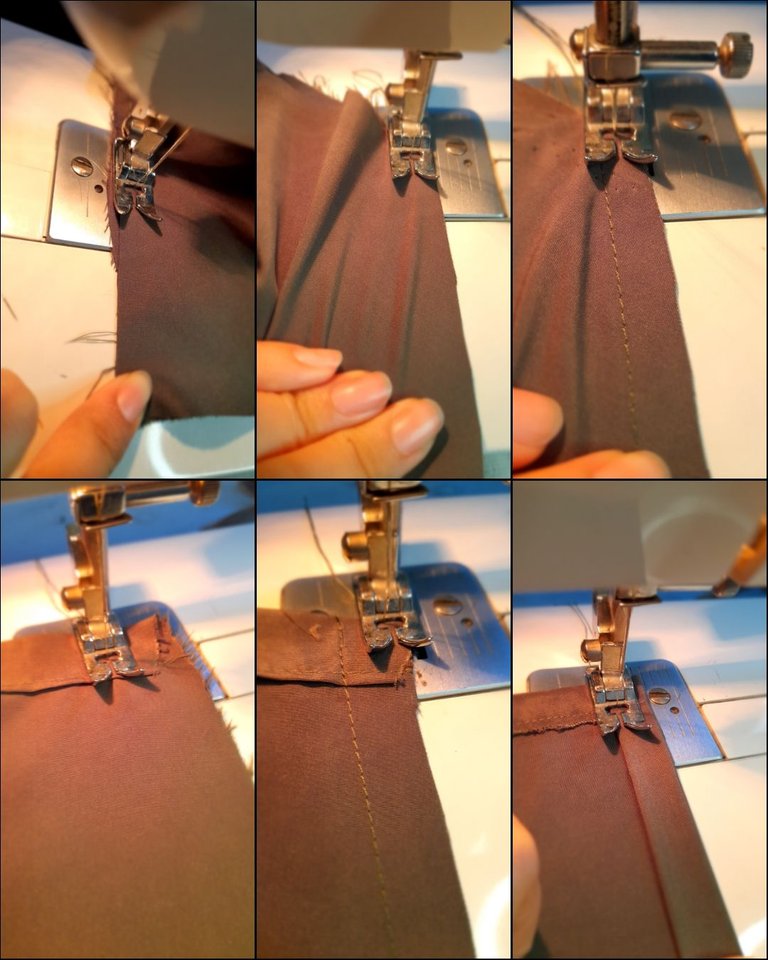
•✨️Continúo cosiendo la orilla superior trasera colocandola en el lado derecho de la tela y cosiendo con costura recta para luego voltear y doblar y coser con costura recta nuevamente luego voy a coser la orilla superior frontal como es un cuello "v" voy a coser un extremo primero luego voy a coser el otro y fijaré la parte frontal con costura recta luego voy a coser ambas piezas en la parte de los hombros con costura recta y zigzag para coser las mangas colocandolas en el lado derecho de la tela y coser con costura recta y zigzag y luego voy a coser con costura recta el ruedo de las mangas doblando la tela. Luego voy armar los bolsillos doblando la tela y cosiendo con costura recta para luego fijar con la ayuda de unos alfileres y los cuales voy a coser con costura recta.
•✨️Voy a coser los extremos con costura recta y zigzag para luego coser las aberturas laterales doblando la tela y cosiendo con costura recta para luego coser el ruedo mientras voy doblando la tela y cosiendo con costura recta.
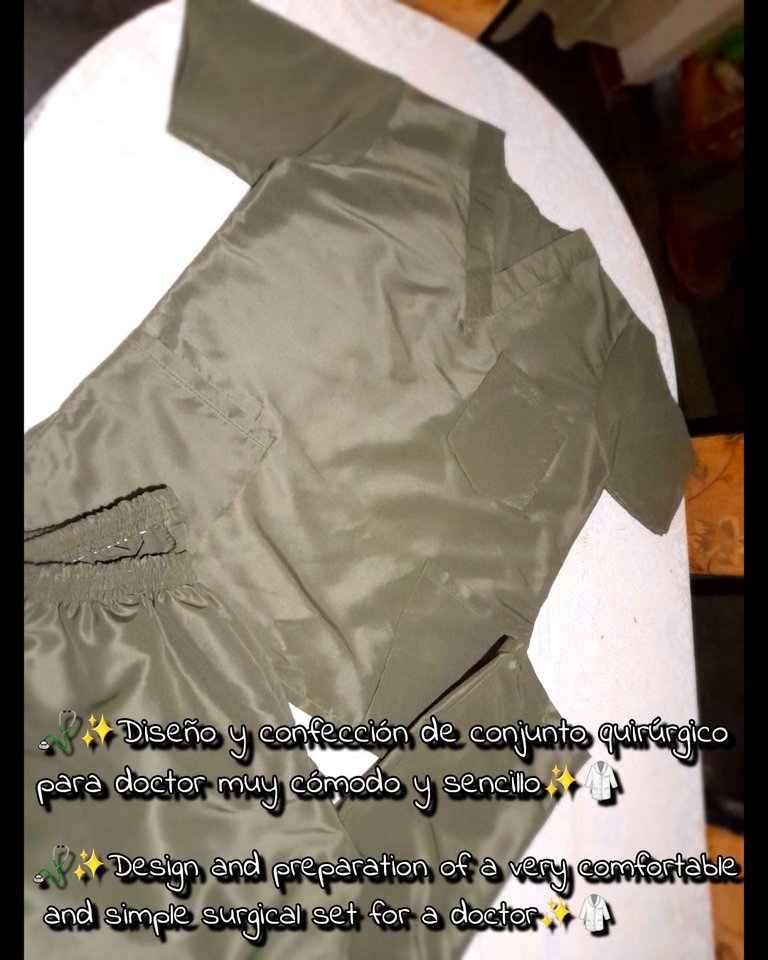
💚💚Resultados💚💚
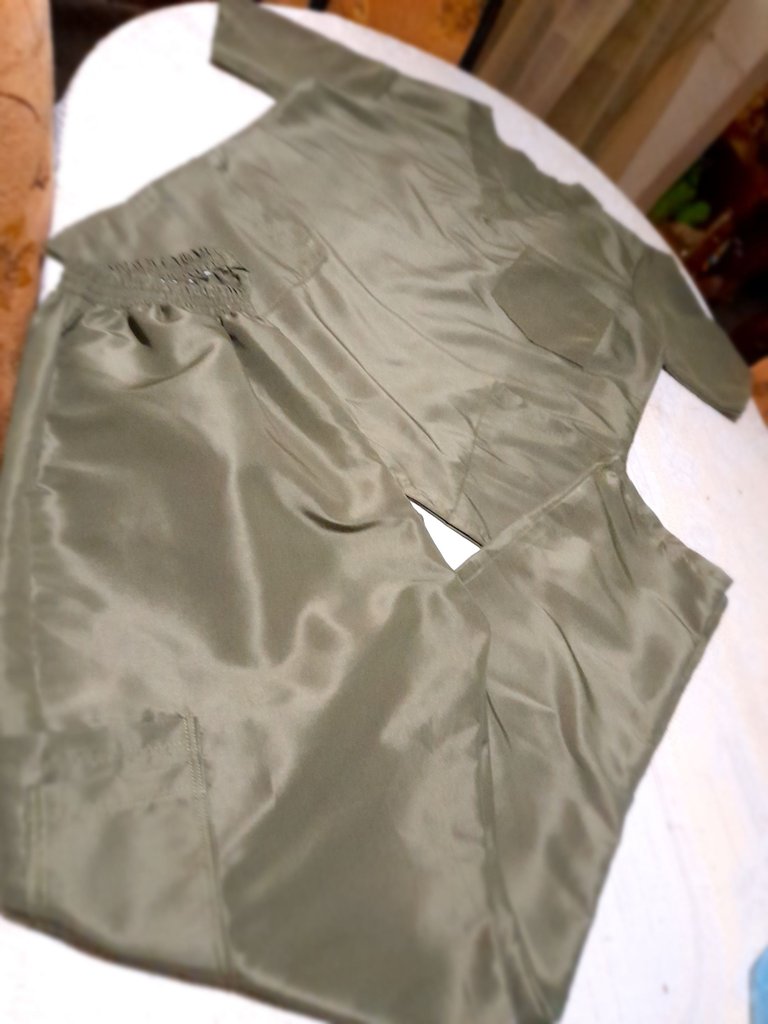
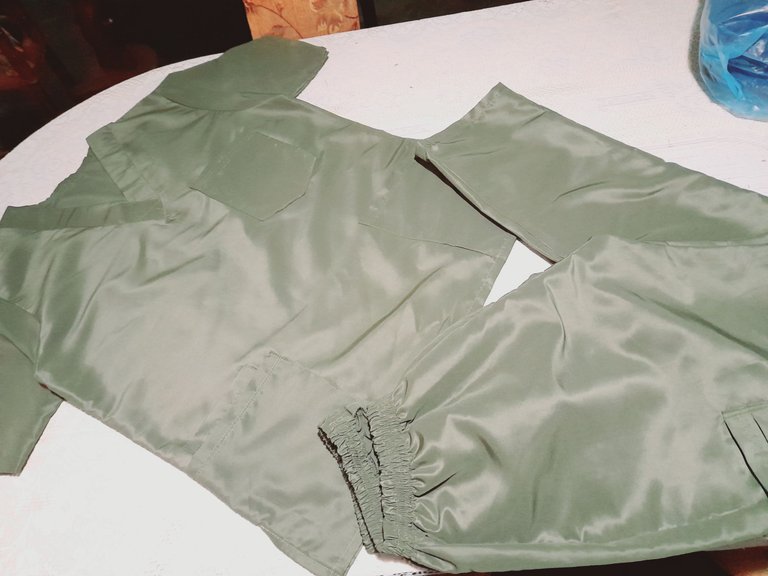
Es un diseño muy cómodo y presentable para un uniforme de un profesional de la salud 😉 siempre debemos fomentar el aprendizaje y facilitar nuevos tips para futuros proyectos todo es cuestión de tiempo y práctica me alegra mucho poder estar nuevamente acá compartiendo nuevos conocimientos y brindándoles un tutorial de calidad 😊 muchas gracias por haber tomado un minuto para leer mi post espero les guste ❤️ saludos y muy buenas noches para todos 😘.
💚💚English💚💚
Hello hello my dear friends of Hive ✨️ greetings to all I hope you enjoyed this quiet day 😊 and that everyone is feeling very well enjoying the night ✨️ for my part I am still recovering from my surgery and in every free time I take care of myself of my sewing projects and tonight I wanted to share with you the making of a comfortable surgical uniform for men made of an anti-fluid or microfiber fabric which is resistant and ideal for making these. I would like to show you how I did it and the entire process so that you can also do it yourself 😊 I invite you to join me in this tutorial post.
These were the materials I used
• Sewing machine
• Scissors
• Sewing thread
• Fabric
• Measurement garment
• Elastic
✨️Steps✨️
•✨️I'm going to start by cutting all the pieces of this set, these being the pieces for the pants: two front pieces, two back pieces, two internal pockets and three side pockets. For the top part I am going to cut a back piece, a front piece, three upper edges for the neck, two sleeves and four front pockets.
•✨️I'm going to start sewing the internal pockets, placing them on the right side of the fabric and sewing with a straight seam and then turn around and sew with a straight seam on top, then I'm going to sew the inside of the pockets with a straight seam and a zigzag on the back. bottom and then I'm going to secure the ends with a straight seam to prevent them from moving. Then I am going to sew the front part with the back part at the ends of the pocket with a straight and zigzag seam and then I continue assembling the pockets by folding the edge of these and sewing with a straight seam and I will assemble one of these above the largest ones in order to use it for pens.
•✨️I am going to measure 17 cm from the internal pocket and set my external pockets which I am going to sew with a straight seam. Then I am going to sew the inner part of the leg with a straight and zigzag seam and then join both side parts with two straight and zigzag seams and I continue sewing the elastic around the waist, stretching it and sewing with a straight seam and to finish the pants I will to sew the hem of this one.
•✨️I continue sewing the upper back edge by placing it on the right side of the fabric and sewing with a straight seam and then turn and fold and sew with a straight seam again then I will sew the upper front edge as it is a "v" neck I will sew one end first then I will sew the other and fix the front part with straight seam then I will sew both pieces on the shoulder part with straight seam and zigzag to sew the sleeves placing them on the right side of the fabric and sew with seam straight and zigzag and then I am going to sew the hem of the sleeves with a straight seam, folding the fabric. Then I am going to assemble the pockets by folding the fabric and sewing with a straight seam and then fixing with the help of some pins which I am going to sew with a straight seam.
•✨️I am going to sew the ends with a straight and zigzag seam and then sew the side openings by folding the fabric and sewing with a straight seam and then sewing the hem while I fold the fabric and sewing with a straight seam.
💚💚Results💚💚
It is a very comfortable and presentable design for a health professional's uniform 😉 We must always encourage learning and provide new tips for future projects everything is a matter of time and practice I am very happy to be here again sharing new knowledge and providing you with a tutorial quality 😊 thank you very much for taking a minute to read my post I hope you like it ❤️ greetings and good night to all 😘.
💁♀️Todas las fotografías son de mi autoría capturadas con mi Samsung Galaxy A12 y editadas en GridArt.
El texto y resumen es totalmente de mi autoría.
Texto traducido en el traductor Google.💁♀️
💁♀️All the photographs are my own, captured with my Samsung Galaxy A12 and edited in GridArt.
The text and summary is entirely my own.
Translated text in Google translator.💁♀️