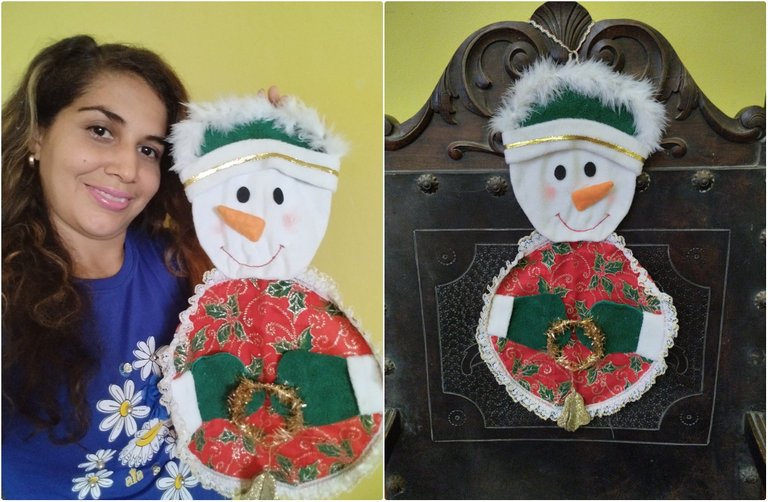
Saludos, estimada comunidad. Hoy les traigo un nuevo proyecto, se trata de la creación de un muñeco de nieve para la decoración de sillas o muebles. Si queremos tener el comedor en armonía, tendríamos que hacer la cantidad de asientos que tengamos, bien podemos utilizar la misma figura con diferentes adornos u otra referida a la Navidad. Claro, esta idea podría aplicarse a cualquier mes del año, incluso, con motivos de caricaturas para fiestas, bautizos u otro tipo de eventos. Les voy a mostrar los materiales que usé y describiré el paso a paso.
Greetings, dear community. Today I bring you a new project, this is the creation of a snowman for decorating chairs or furniture. If we want to have the dining room in harmony, we would have to make the amount of seats we have, we can use the same figure with different ornaments or another referred to Christmas. Of course, this idea could be applied to any month of the year, even with cartoon motifs for parties, baptisms or other events. I will show you the materials I used and describe the step by step.
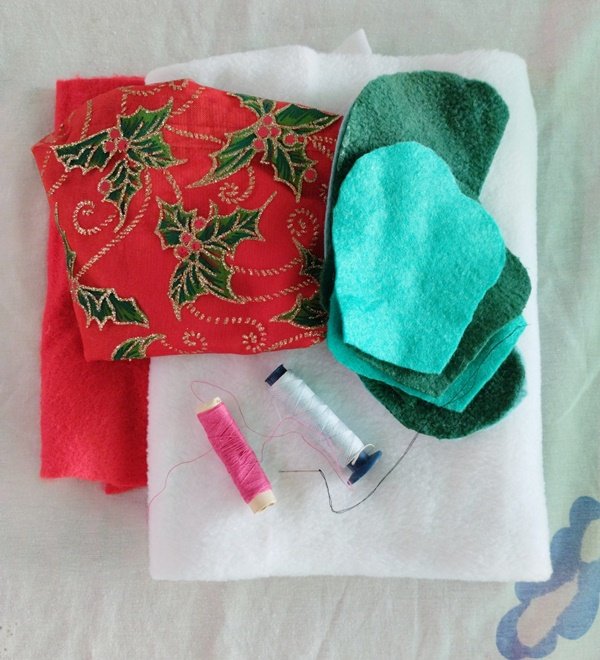
Materiales e instrumentos:
- Telas de peluche
- Tela decorada
- Foami
- Algodón
- Tijera
- Encaje
- Hilos
- Pega
- Aguja
- Cinta dorada
- Colorete
- Tira de plumas
- Escarcha dorada
- Guirnalda dorada
- Alambre
- Cartón
- Silicón frío
Materials and instruments:
- Plush fabrics
- Decorated fabric
- Foami
- Cotton
- Scissors
- Lace
- Threads
- Glue
- Needle
- Gold ribbon
- Blusher
- Feather strip
- Gold frosting
- Golden garland
- Wire
- Cardboard
- Cold silicone
Procedimiento:
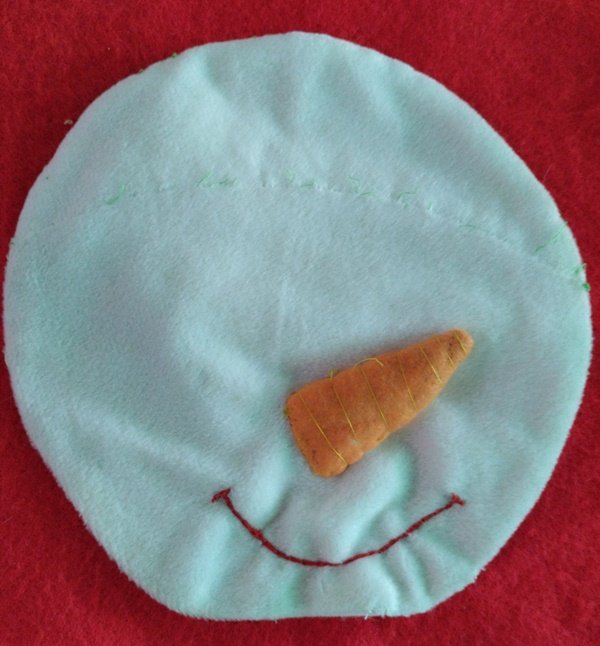
Saqué dos círculos en tela de peluche blanca, los cuales cosí. Lo hice de esta manera para que la cara del muñeco tomara volumen. Marqué la zona donde le colocaría el sombrero.
Con ayuda de una aguja muy fina y del hilo rojo bordeé una sonrisa, este procedimiento es muy delicado, pues de equivocarte en la costura no obtendrás el resultado que deseas.
Posteriormente, elaboré la nariz en su típica forma de zanahoria. Uní los bordes y rellené con algodón, luego, le coloqué hilo por arriba para que simulara las marcas características de dicho vegetal.
Procedure:
I pulled out two circles in white stuffed fabric, which I sewed. I did it this way so that the doll's face would take volume. I marked the area where I would place the hat.
With the help of a very fine needle and red thread I bordered a smile, this procedure is very delicate, because if you make a mistake in the sewing you will not get the result you want.
Afterwards, I made the nose in its typical carrot shape. I joined the edges and filled with cotton, then, I placed thread on top to simulate the characteristic marks of this vegetable.
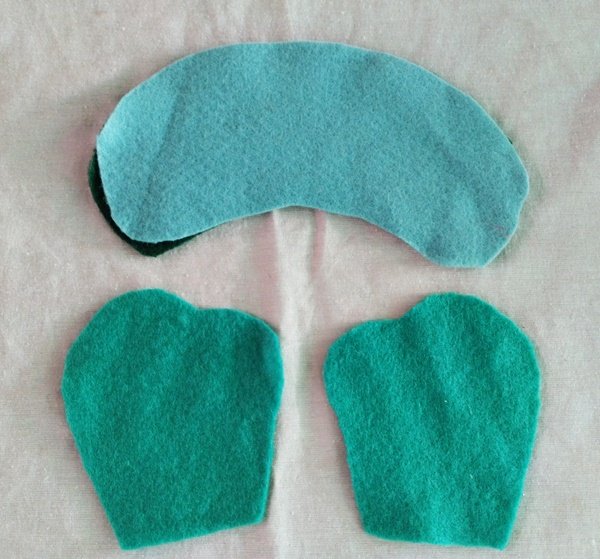
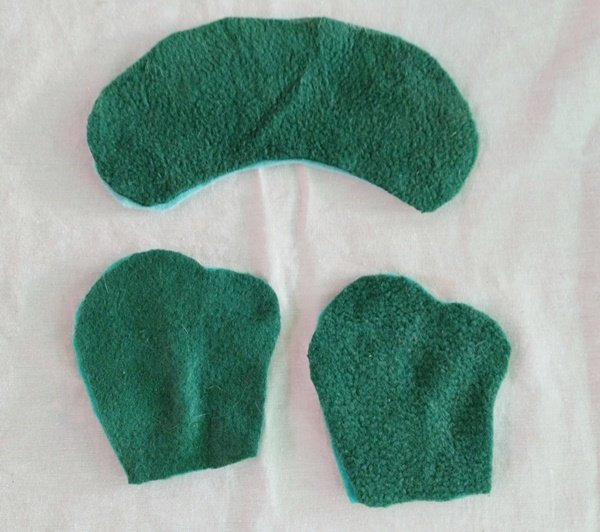
A continuación, saqué el patrón del gorro y los guantes. Luego, los marqué en la tela y los recorté. Usé verde claro y oscuro para que combinara con el resto de las piezas.
Next, I pulled out the pattern for the hat and mittens. Then, I marked them on the fabric and cut them out. I used light and dark green to match the rest of the pieces.
 |  |
|---|
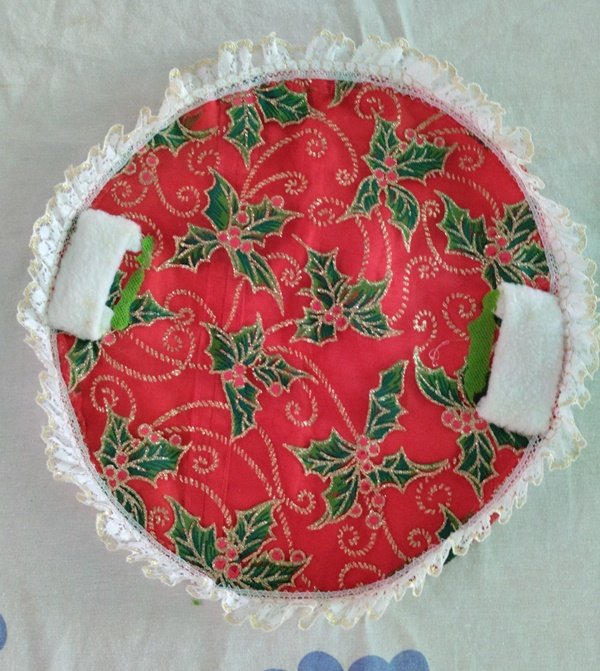
Para la parte del cuerpo, consideré que la tela estampada sería ideal, sobre todo, por sus hermosos colores navideños. Este círculo sería más grande que el de la cara, un plato fue la medida perfecta. Luego, lo decoré por el borde con un encaje blanco con dorado, lo cosí con mucho cuidado, de tal manera que no se notaran las puntadas.
Seguidamente, elaboré dos cuadrados en tela blanca, esta sería la parte final del guante. Las cosí a la estructura más grande.
For the body part, I thought the printed fabric would be ideal, especially with its beautiful Christmas colors. This circle would be larger than the one on the face, a plate was the perfect size. Then, I decorated it around the edge with a white lace with gold, I sewed it very carefully, so that the stitches would not show.
Next, I made two squares in white fabric, this would be the final part of the glove. I sewed them to the larger structure.
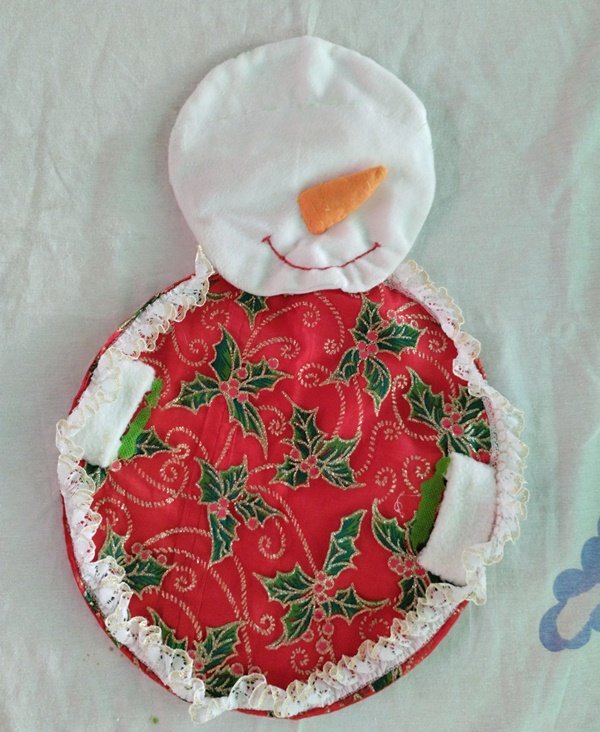
Posteriormente, zurcí la cara con el cuerpo. En la fotografía pueden observar el procedimiento. En seguida, inserté los guantes en el lugar correspondiente.
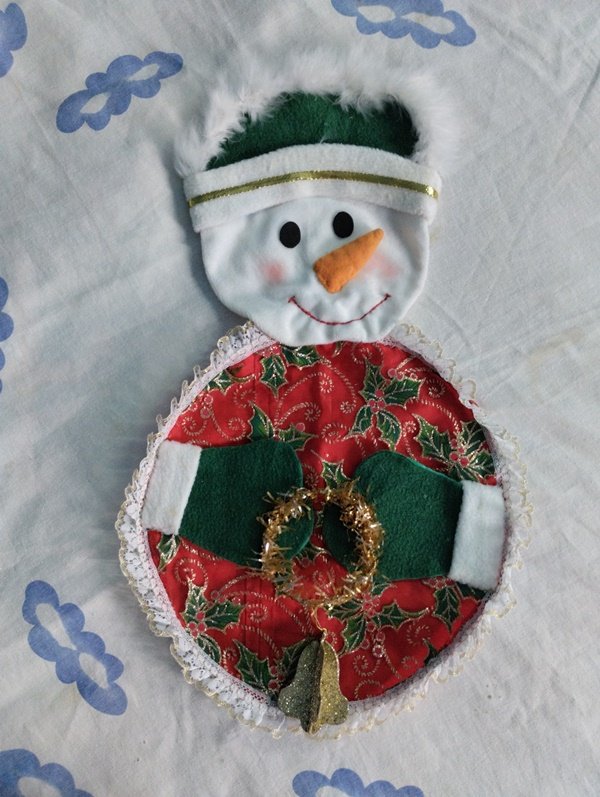
Después, le coloqué su simpático gorro. Con el fin de darle algunos toques llamativos, le incorporé una cinta dorada a la base y en orilla de la parte superior una tira de plumas, me gustó el resultado.
Los ojos los realicé en foami negro y a los cachetes les puse un poco de colorete, esto lo haría más coqueto. Cuando llegué a este punto, observé el diseño y consideré que todavía le faltaba algo, así que utilicé un pedazo de alambre para armar un pequeño arco, el cual decoré con guirnaldas doradas, quise que colgara una campana de allí, recorté en cartón dos de la misma dimensión y las uní en cruz para dar un poco de relieve, unté pega y las llené de escarcha.
Por último, le coloqué una cinta arriba para sujetarlo del mueble. De esta forma terminé con este diseño, espero que este tutorial les haya sido de utilidad. Hasta una próxima oportunidad.
Subsequently, I darned the face with the body. In the picture you can see the procedure. Then, I inserted the gloves in the corresponding place.
Then, I put on his cute hat. In order to give him some eye-catching touches, I added a golden ribbon to the base and a strip of feathers at the edge of the upper part, I liked the result.
I made the eyes in black foami and put a little blush on the cheeks, this would make it more flirtatious. When I got to this point, I looked at the design and considered that something was still missing, so I used a piece of wire to make a small arch, which I decorated with golden garlands, I wanted a bell to hang from there, I cut two of the same size in cardboard and joined them in a cross to give a little relief, smeared glue and filled them with frosting.
Finally, I placed a ribbon on top to hold it to the furniture. This is how I finished this design, I hope this tutorial has been useful. See you next time.
 |  |
|---|
Todas las fotos son de mi archivo personal.
All photos are from my personal archive.

