Although the rain still lingers up until this month where many are preparing for Christmas and Holiday the sun has also kept busy releasing scorching intense heat some day as well. Some of us can testify to this fact.
Another thing I've also noticed is that, if you are not in a business environment and you live or established your work some where out of these environments, it gets quite and sometimes bored.
This forces one to also find relaxation in one way or the other, anyhow even if it's not that comfortable.
Considering all these; on one of my bored days, I started gathering tools, components of any material I found available. For example, for the creation of this Fan, I gathered:
- Box of Huawei y5 lite (my moms former Device)
- Dead or old cables/cords
- A DC Motor fan
- Iron pipe
- Plastic Bottle caps
- Switch
- Copper wire
- Screws and 3.7v battery
- Part of a torch and other things I could find from my scrap bag (still useful anyways ☺️)
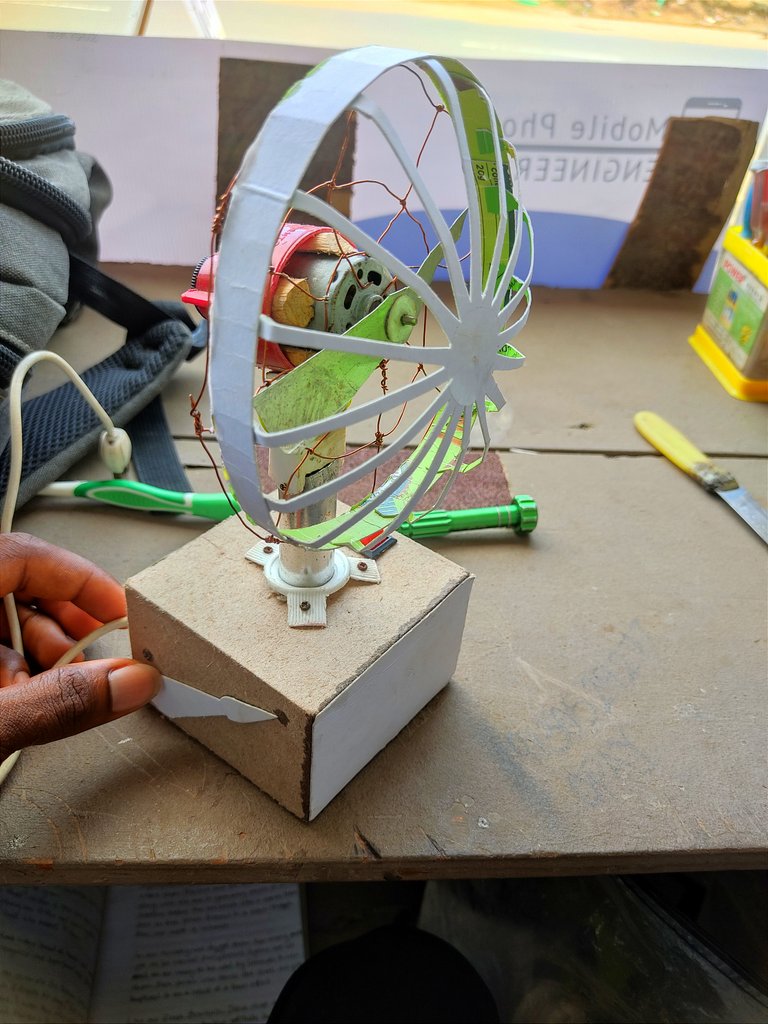
I cut and shaped the phone box to a 4×4" (inches) box. It is inside the box that the wiring is done. I peeled off the cables to reveal the positive (+ve) and negative (-ve) inside to work with.
Connected the switch on the +ve of the battery, to the supply and the to the DC motor. I was formally using the mother board of a torch lamp but it became invalid and it wasn't able to charge the 3.7v batteries properly.
I held the metal to the top of the box with a plastic Bottle cap and some screws. Do not worry. The box is made with a 3-5mm strawboard and it's firm.
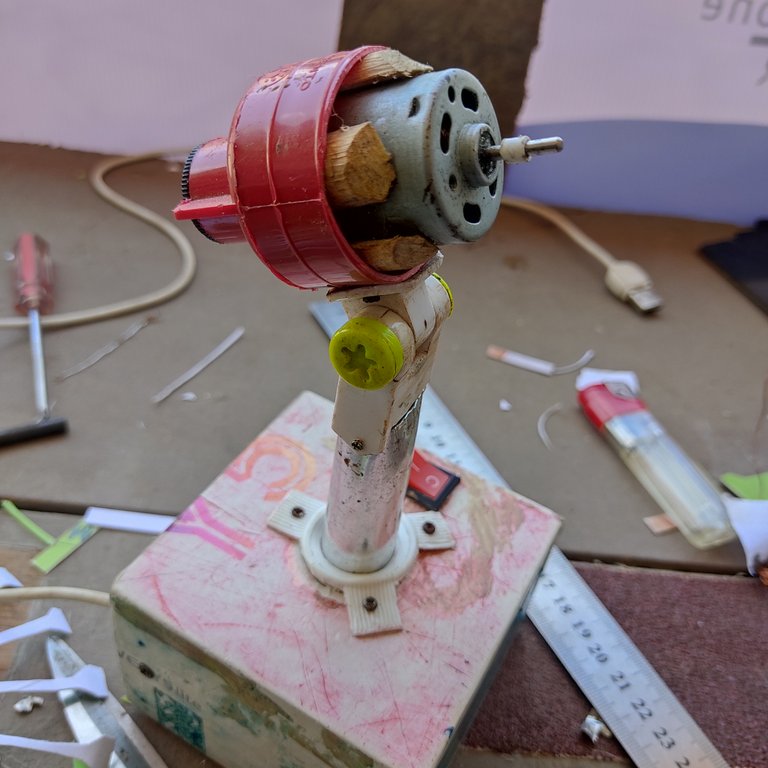
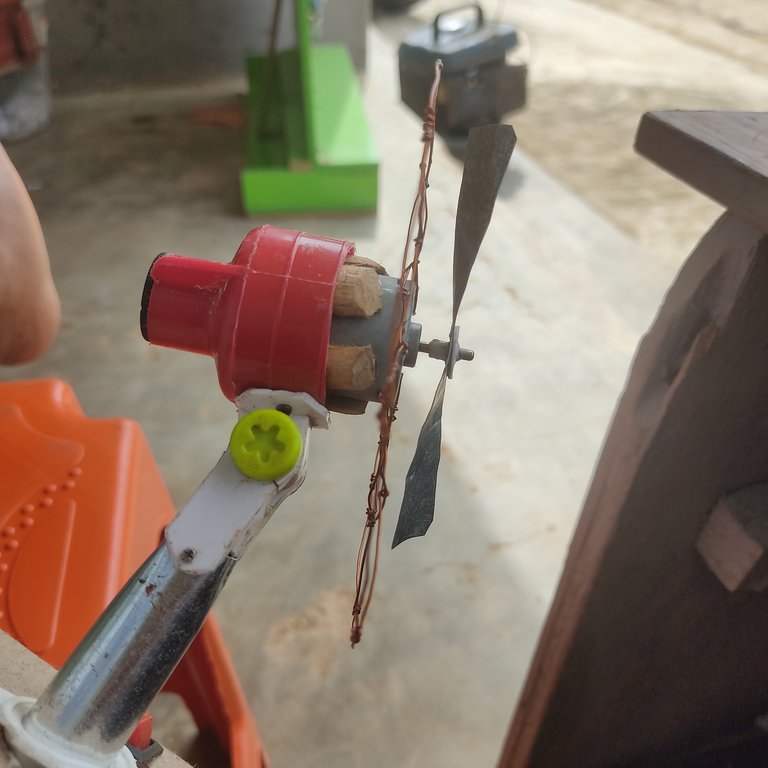
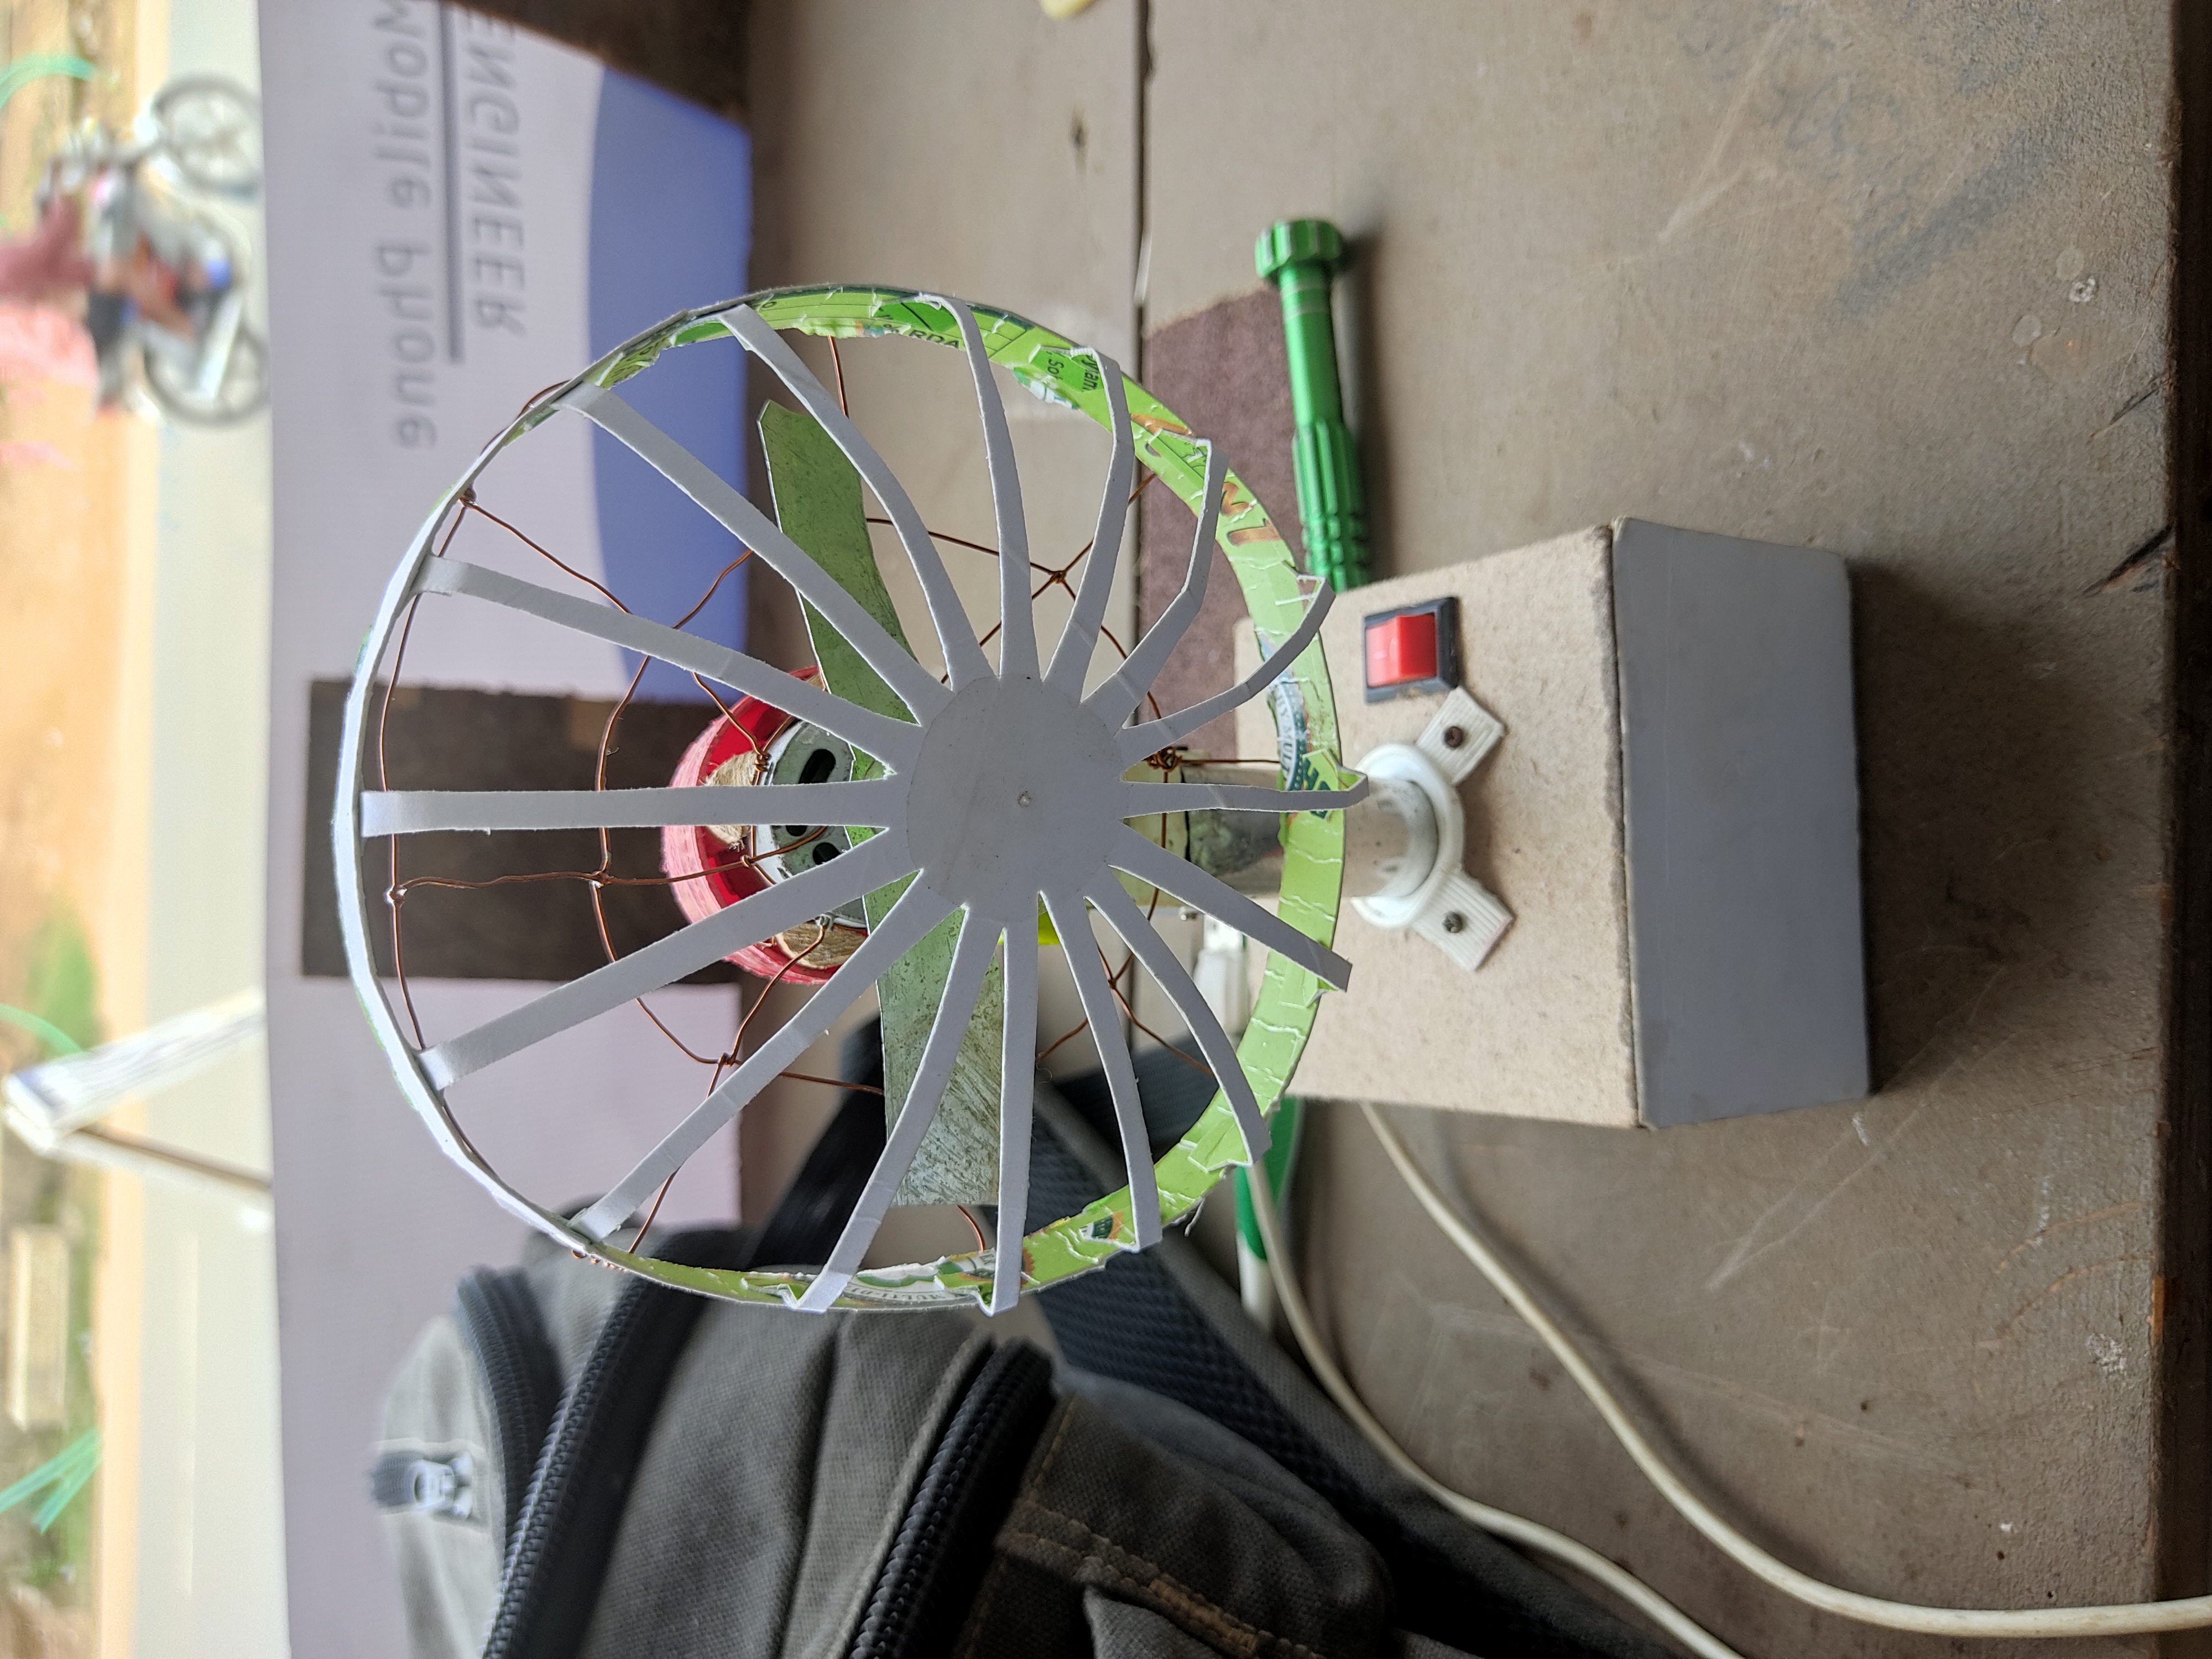
If you observe closely, I use the part of a torch that is adjustable. I bolted on the metal iron passing the tiny wires through it and also to the body carrying the the Motor.
The neck is adjustable up and down. The red motor carrier is a plastic from plumbing materials. I don't know what it's call exactly but I've given it my own name. 😁
Well, it was a bit bigger. So, I got a stick from our backyard, chopped it, carved and used it to support my Motor. Due to the connection. A DC (Direct Current) would not be used to power my fan but an AC (After circuit) which is supplied from a regular charger.
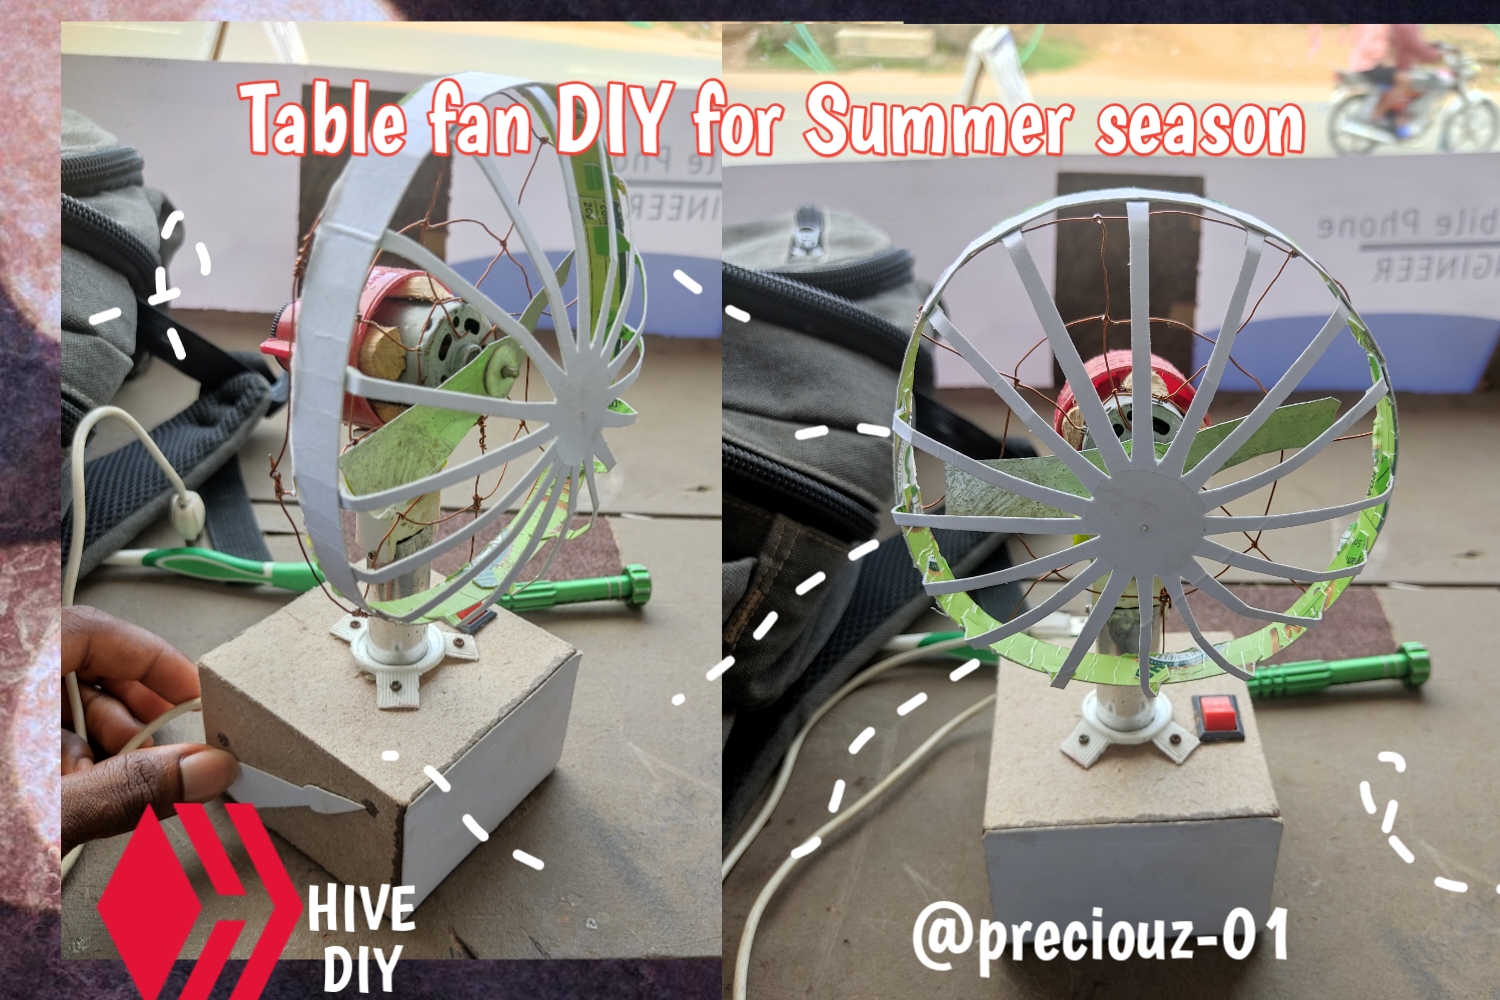
It is working ver okay! It is now time for the fan blade and cover.
 |  |
|---|
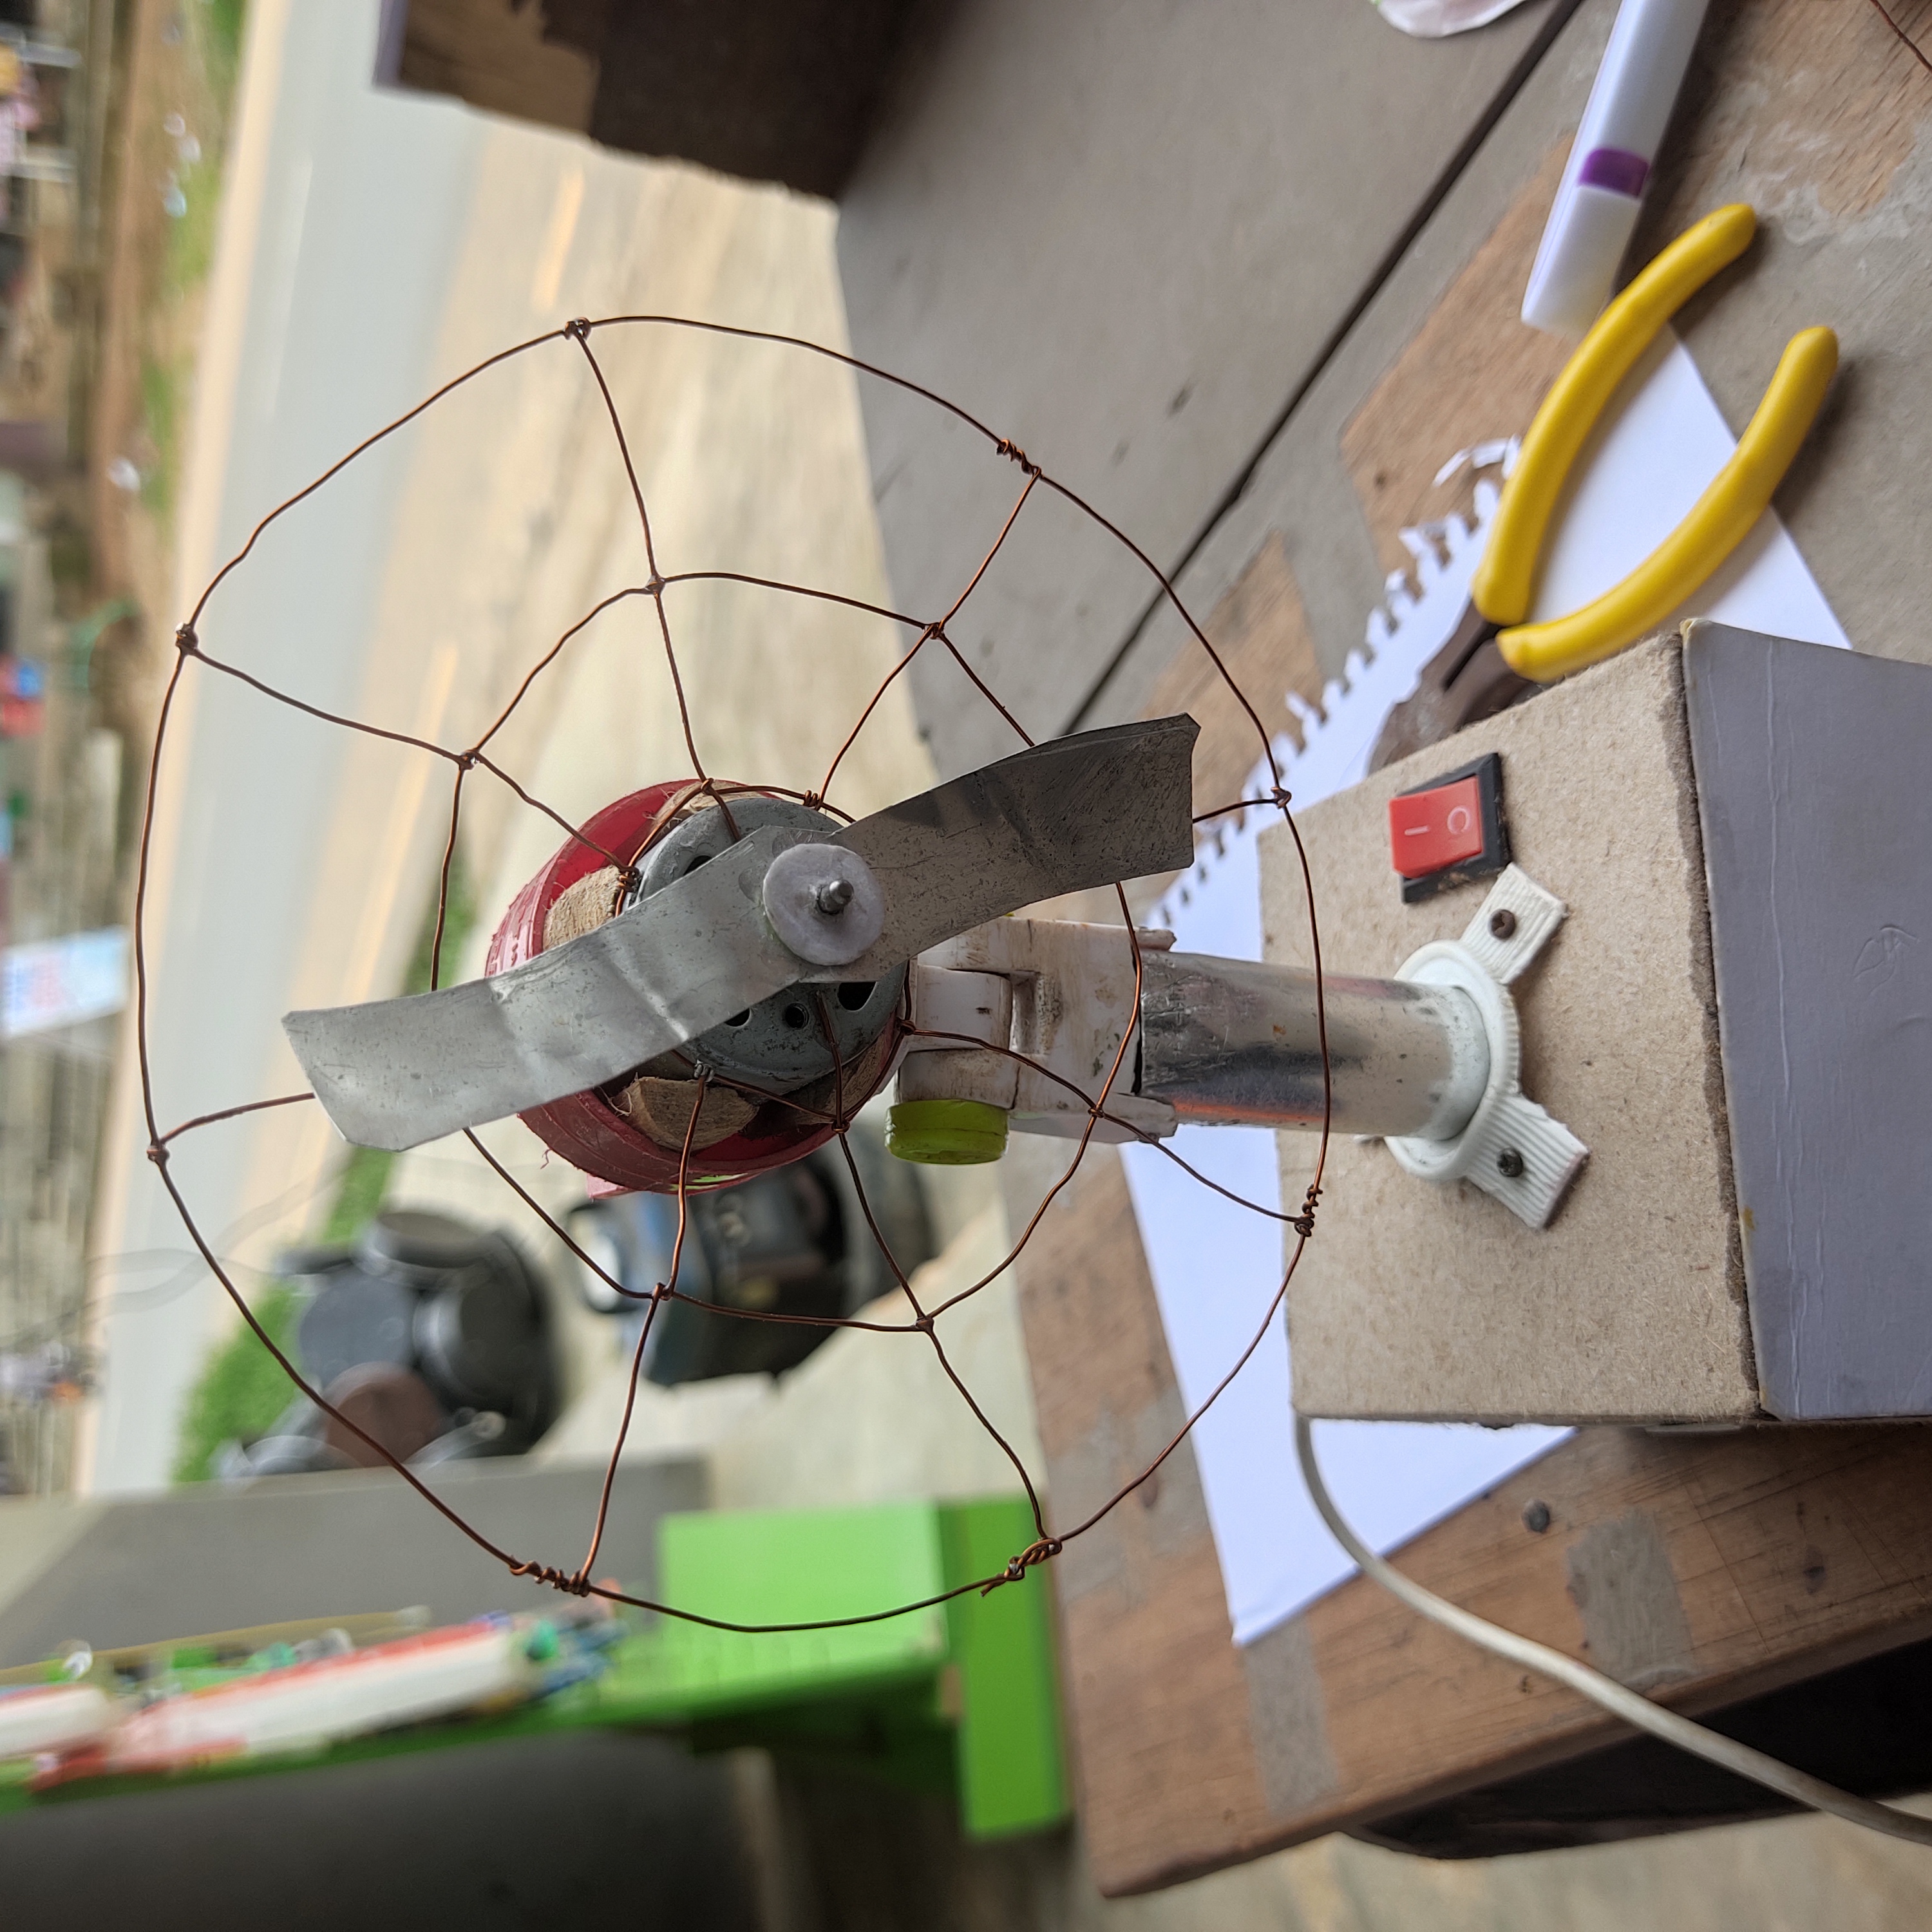
With the copper wire and hand plier, I made a net-like plating for the covering for the back of the fan. This is not a strong material but it could still be useful.

For the front, I used paper
If you noticed, I peeled off the covering on the box. My cousin's and siblings made me paint it and without allowing the paint to settle so it smered and didn't look okay 🌝
I made a circle about 12cm diameter to for the front covering. I noticed it was too thick and could prevent airflow so I cut it into two
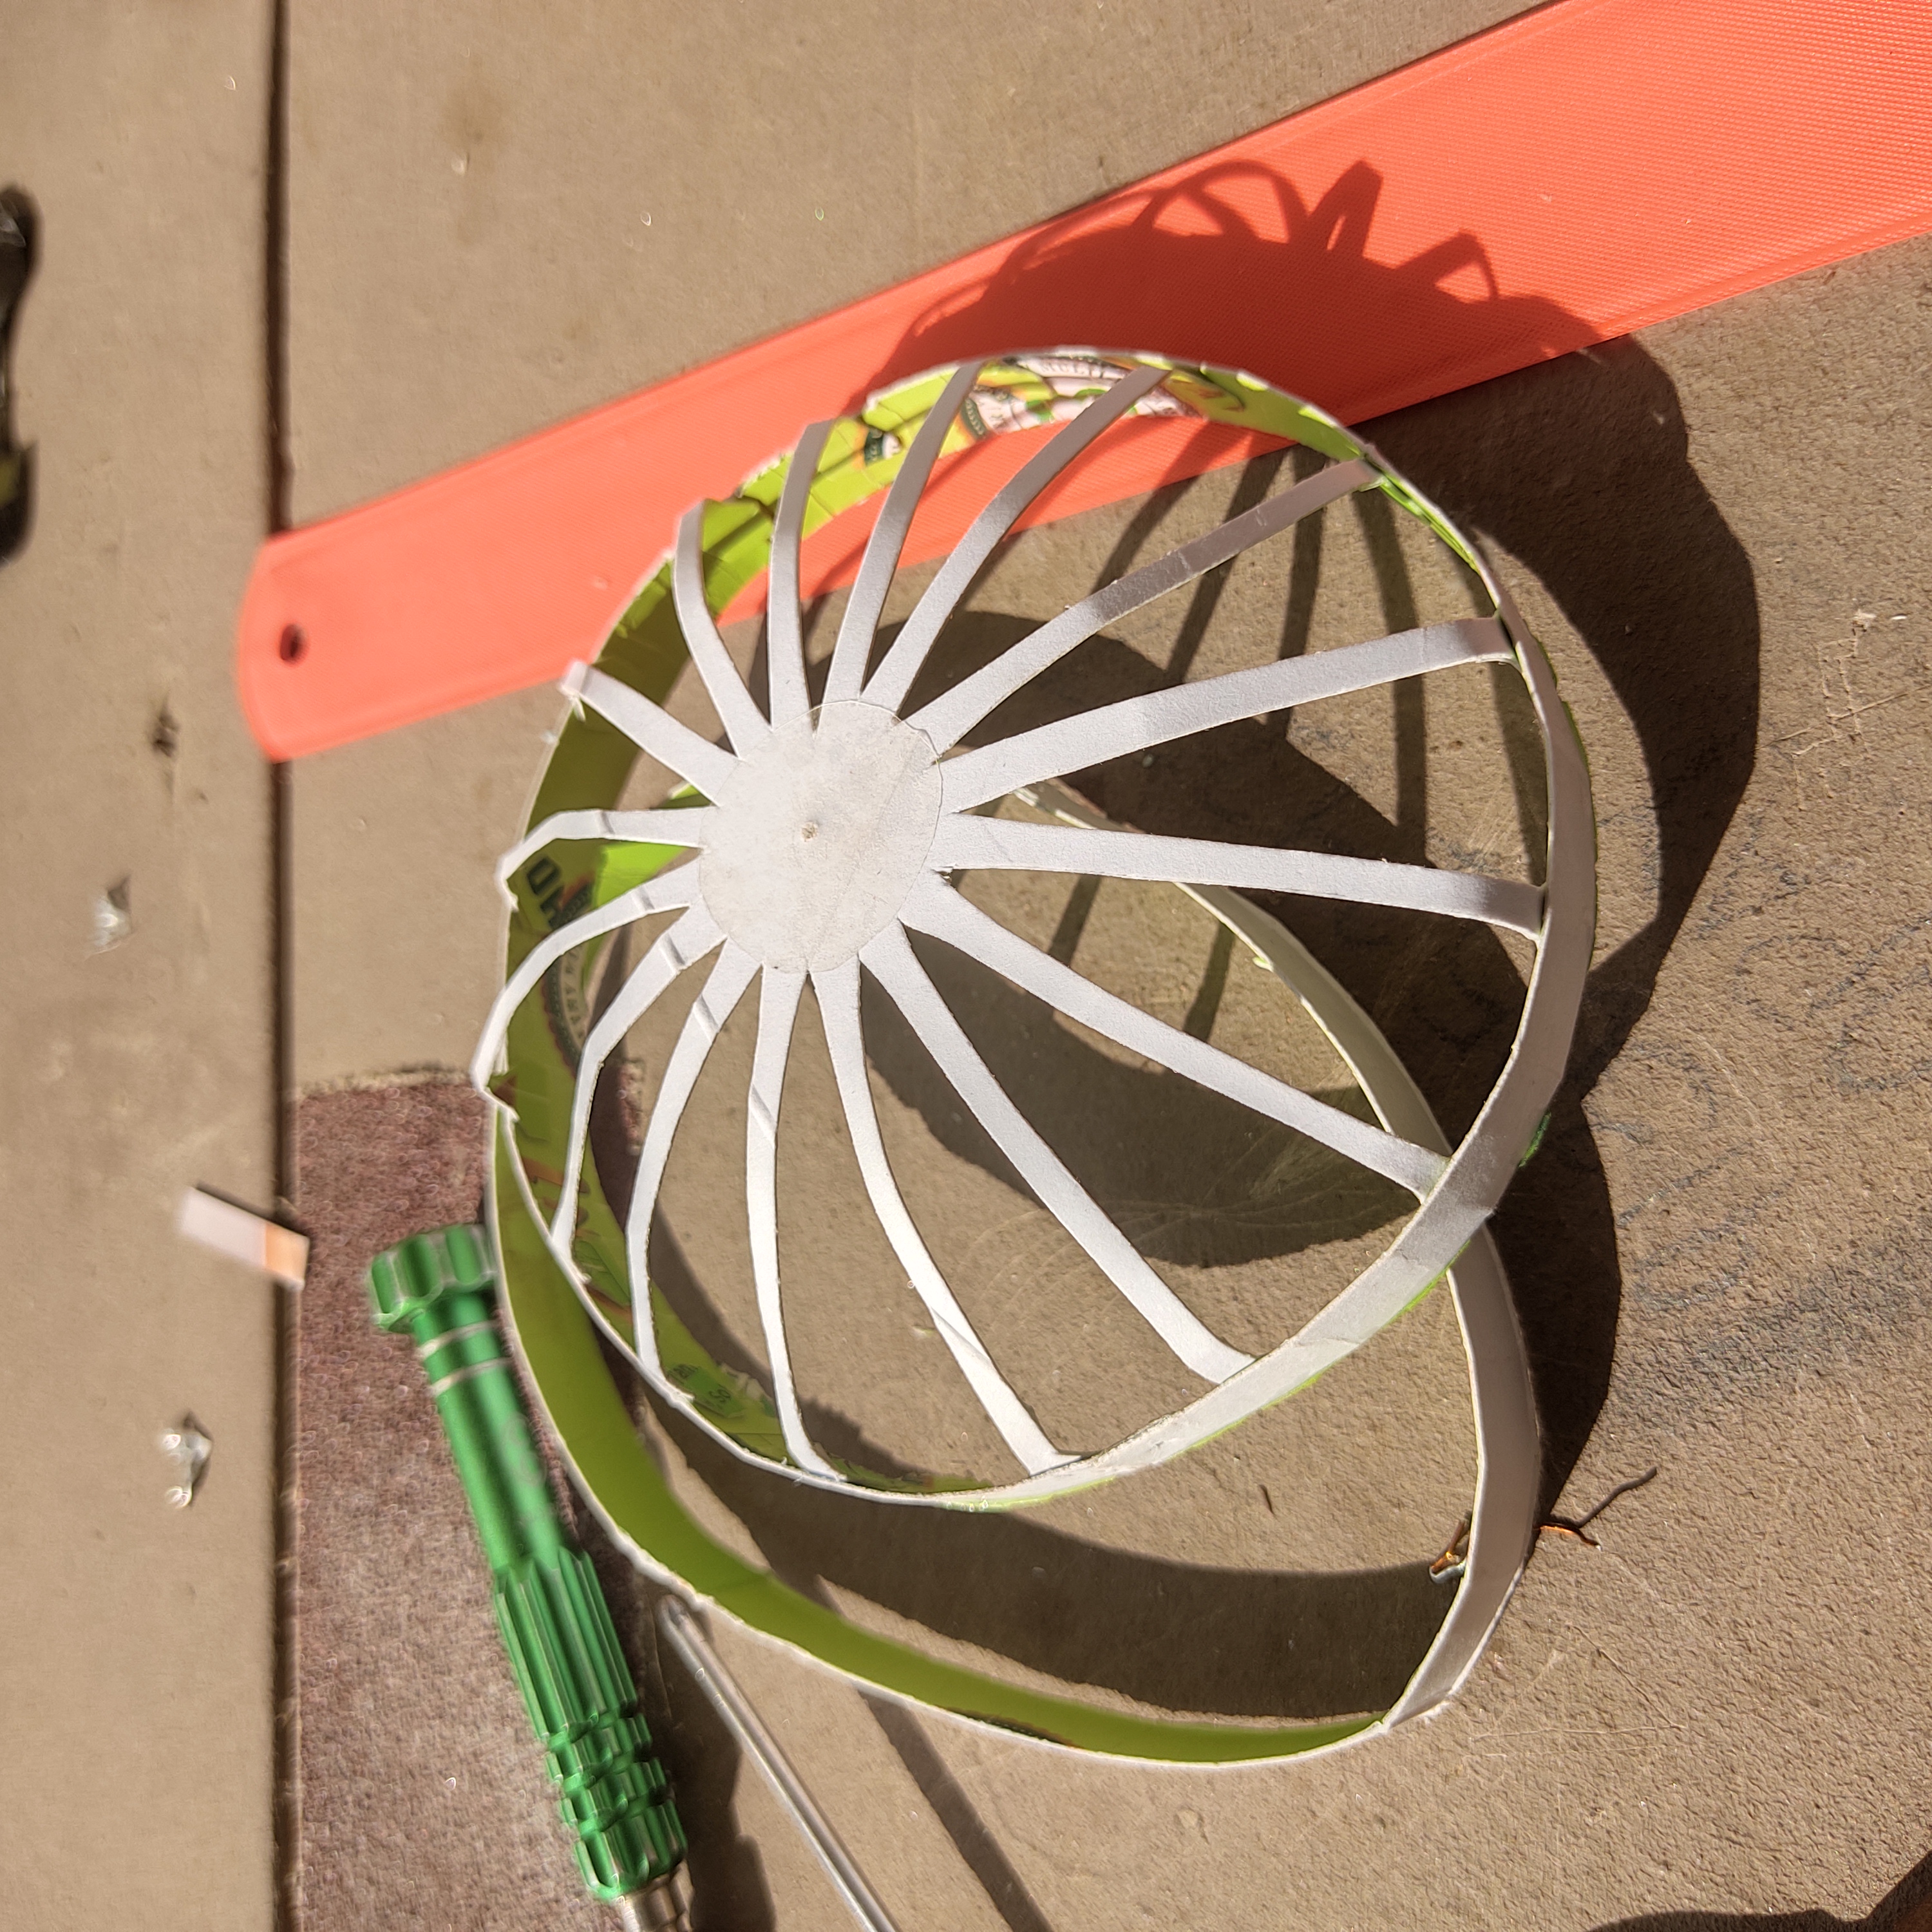
Looking sharp already!
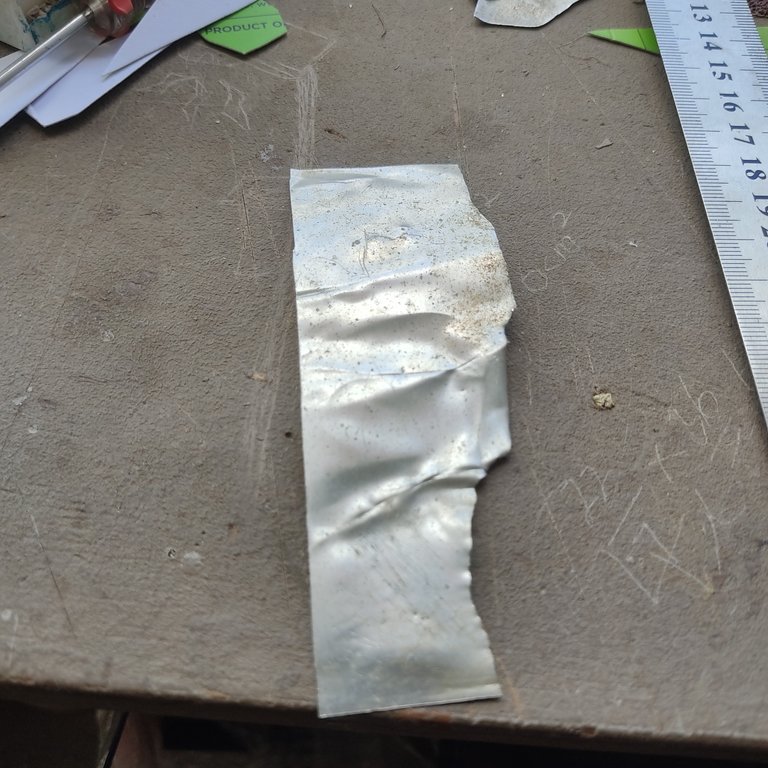
For the blade, I used a sheet of metal. Zinc. Since it's malleable, I flattened it and used it for the blade. It is about 8cm long. Fixed and fitted firmly. It's so refreshing

I can choose to use it plugged a charger or a powerbank. It's pretty portable as well.
Results
This is my first blog post on this community and I am happy to be part of you all.
I hope you liked my post. Thank you for reading through.
You can also make one for yourself for the coming summer season and it could also be a present 🎁. Think of the joy it would bring to the recipient maybe son, cousin, nephew, or and one✌️.