Hola amigos, espero se encuentren muy bien y tengan un día muy productivo y lleno de bendiciones.
Me encuentro nuevamente en esta comunidad para compartir con ustedes para mostrarles lo que hago en mis tiempos libres; me gusta hacer manualidades con diferentes tipos de materiales pero en esta ocasión voy a elaborar una manualidad con foami, les enseñaré paso a paso como hice un lindo llavero para el bolso escolar de mi hijita.
El foami es muy versátil, me gusta porque es liviano, viene en muchos tonos y es muy fácil de doblar y pegarlo para darle formas.
Cabe destacar que está idea no me se ocurrió a mi, sino que la vi hace mucho tiempo en internet y aunque no recuerdo exactamente el modelo es muy parecido al que recuerdo haber visto.
Para realizar este llavero use muy pocos materiales, prácticamente lo hice con retazos de foami y reutilice un porta llavero de silicón que trajo un antibacterial.
Materiales
- Foami azul
- Foami escarchado rosa
- Foami escarchado dorado
- Silicón
- Porta llavero (Reusado)
Además utilice
- Tijera
- Regla
- Palito de altura
Paso a Paso
Mediante collages les mostraré el paso a paso para elaborar este lindo llavero.
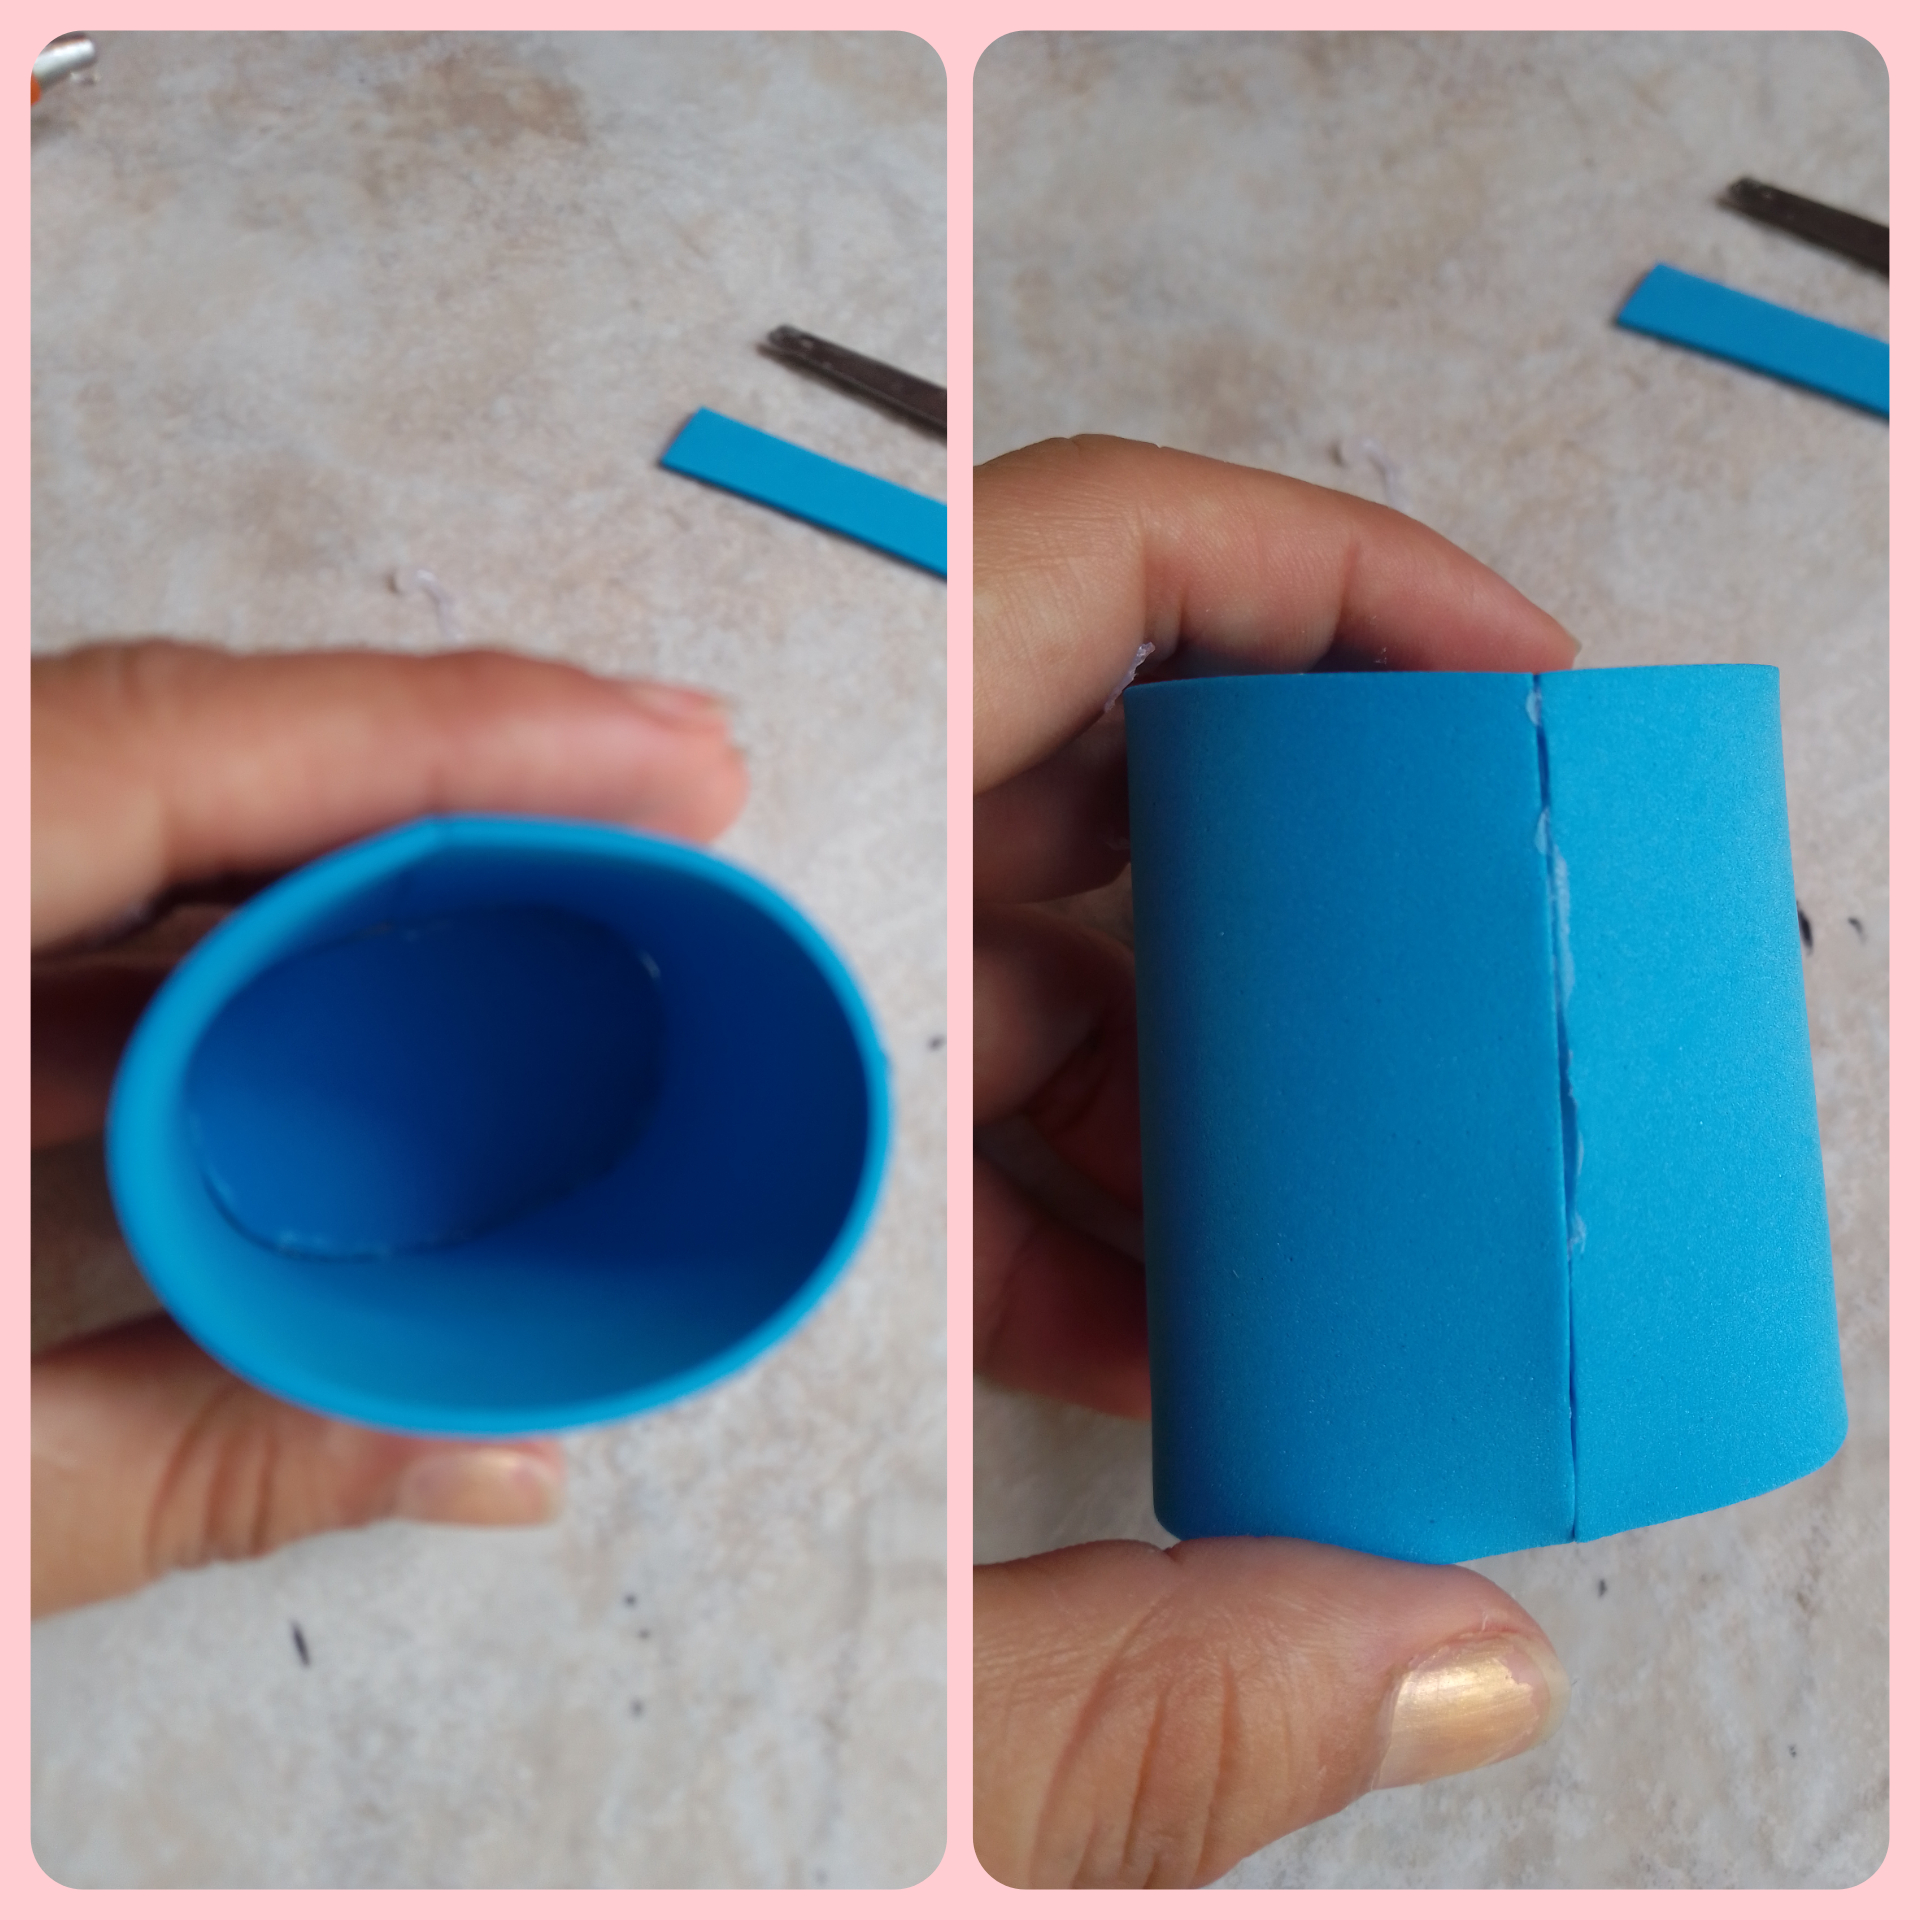
Lo primero que hice fue recortar un óvalo, luego medi la circunferencia de ese óvalo con el foami y me dió la medida exacta para cubrirlo, recorte un rectángulo

Aplicando solo la cantidad necesaria de silicon caliente, empecé a pegar el borde del óvalo en uno de los extremos del rectángulo del foami
Es importante no aplicar mucho silicón para mantener un lindo acabado
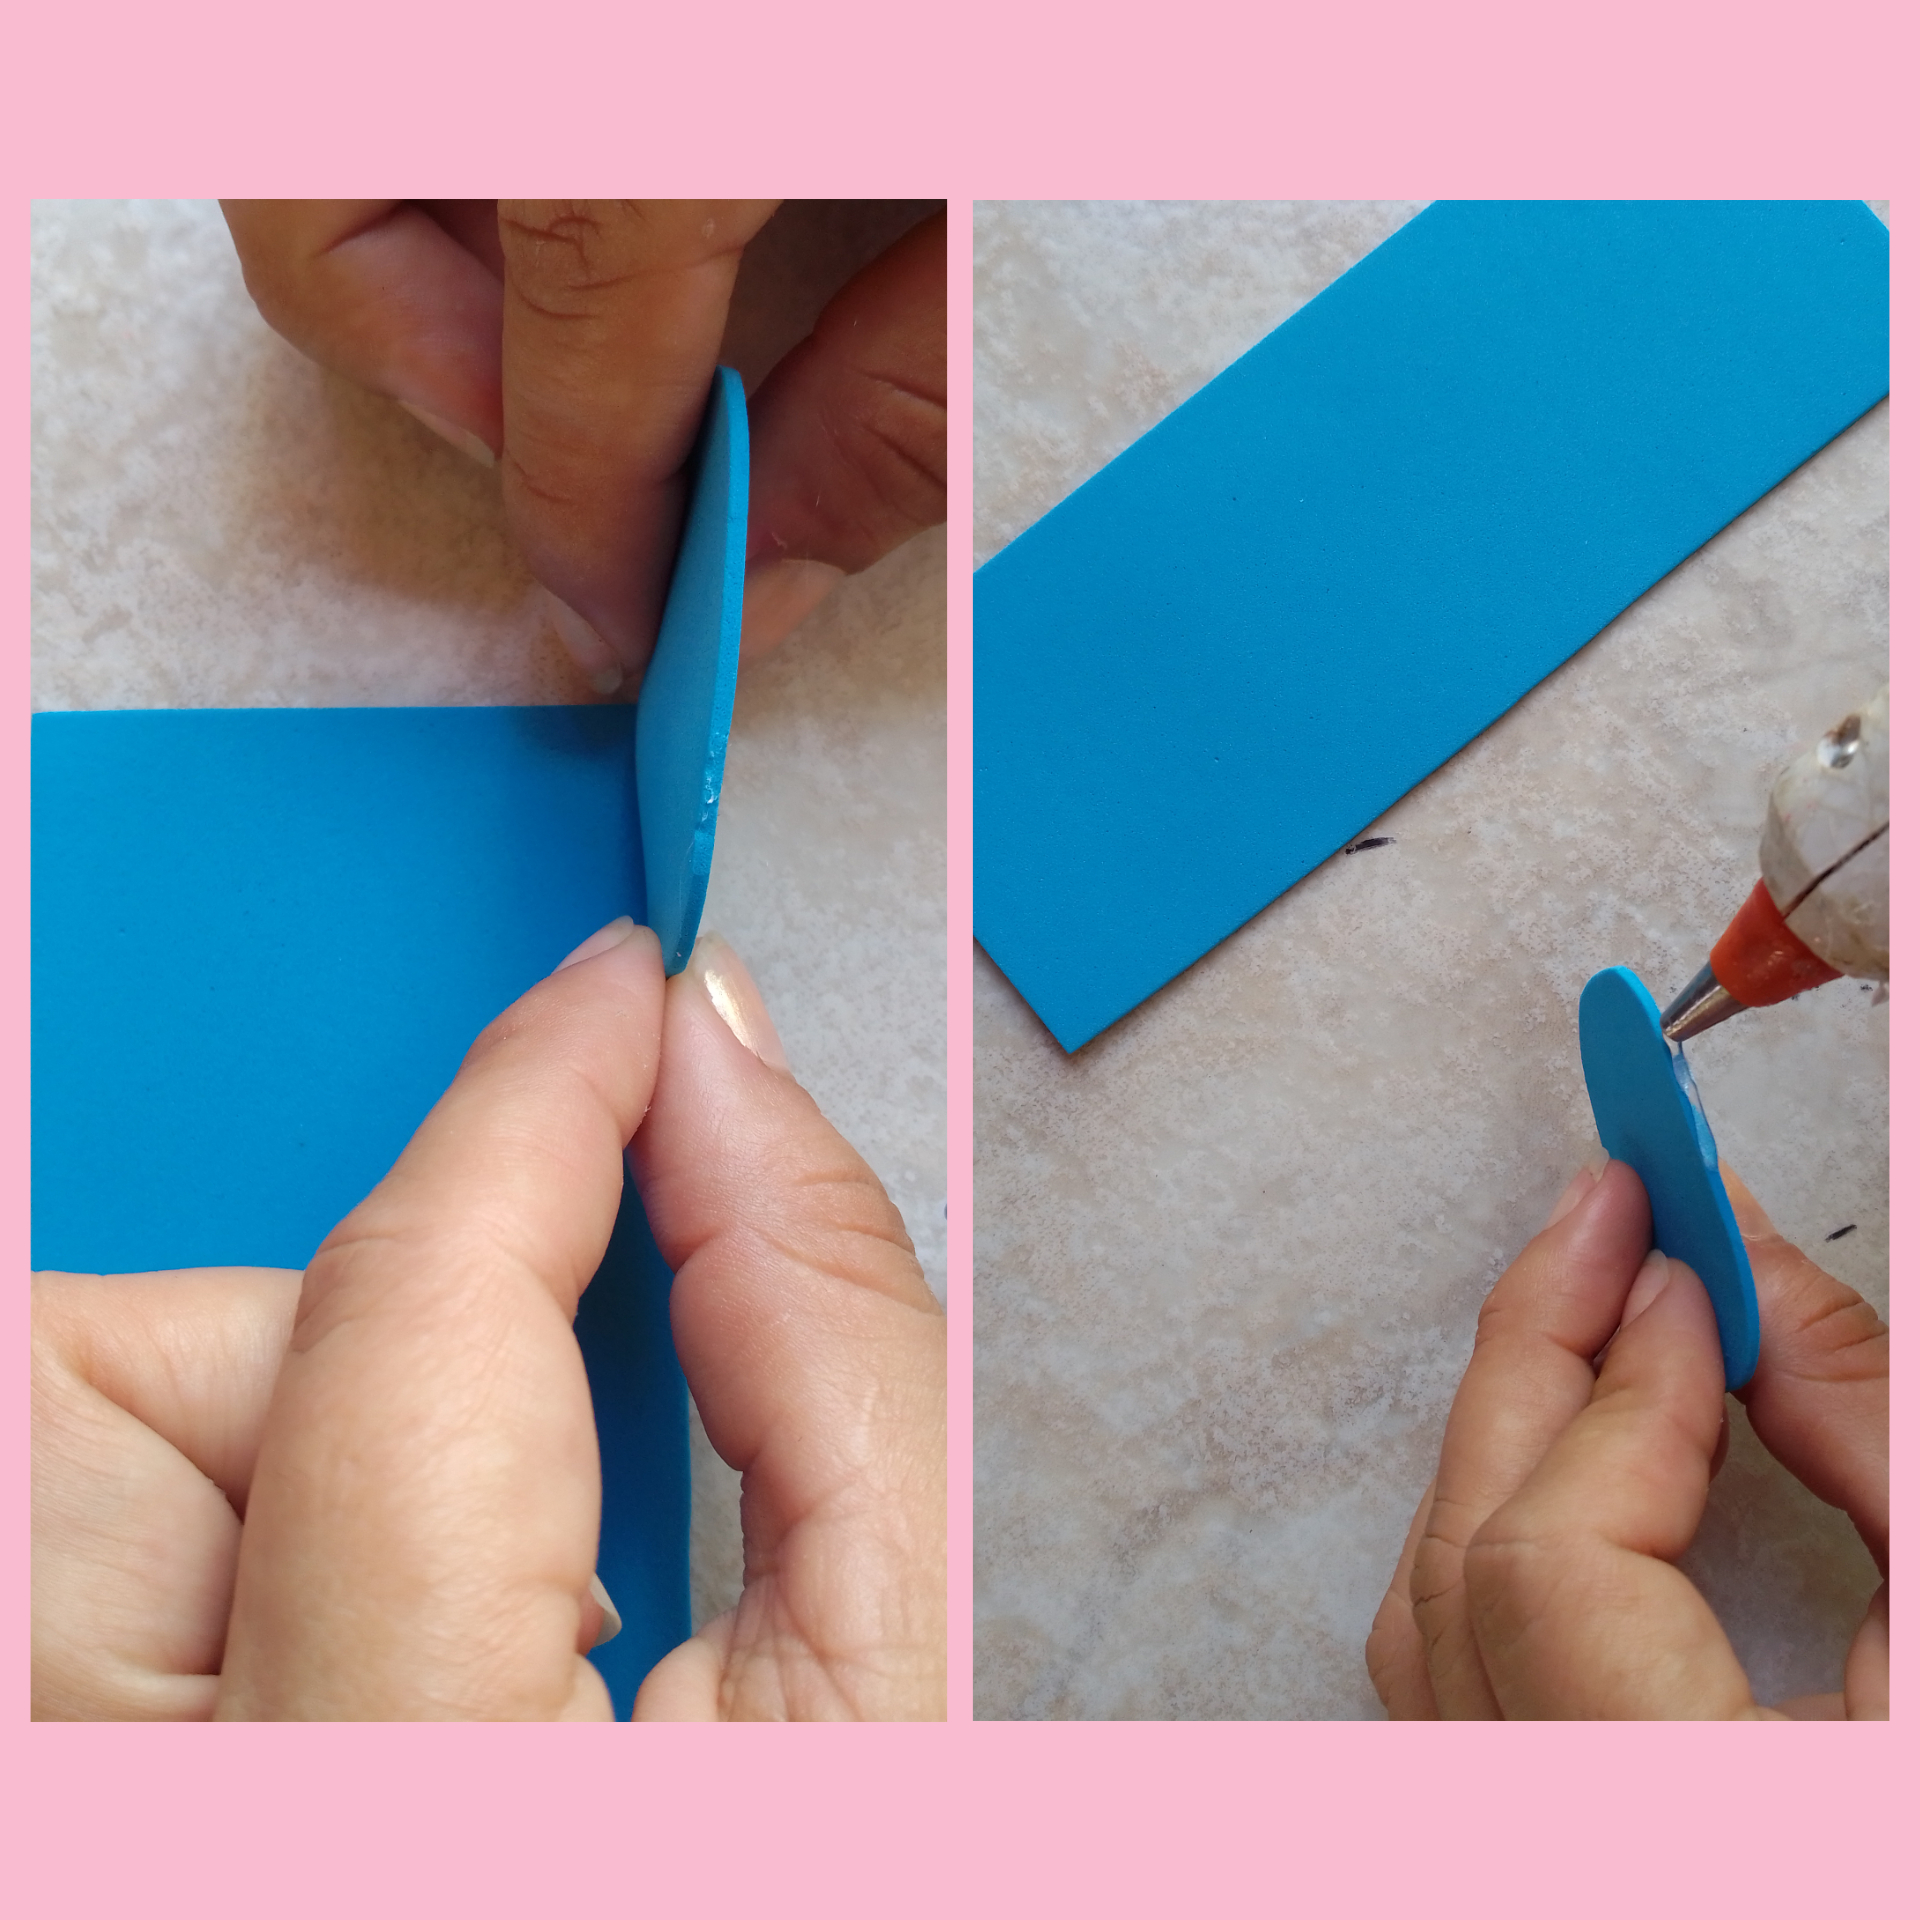
Al terminar de pegarlo solo aplique más silicón en sus extremos para que quedara pegado completamente, así como se aprecia en la imágen

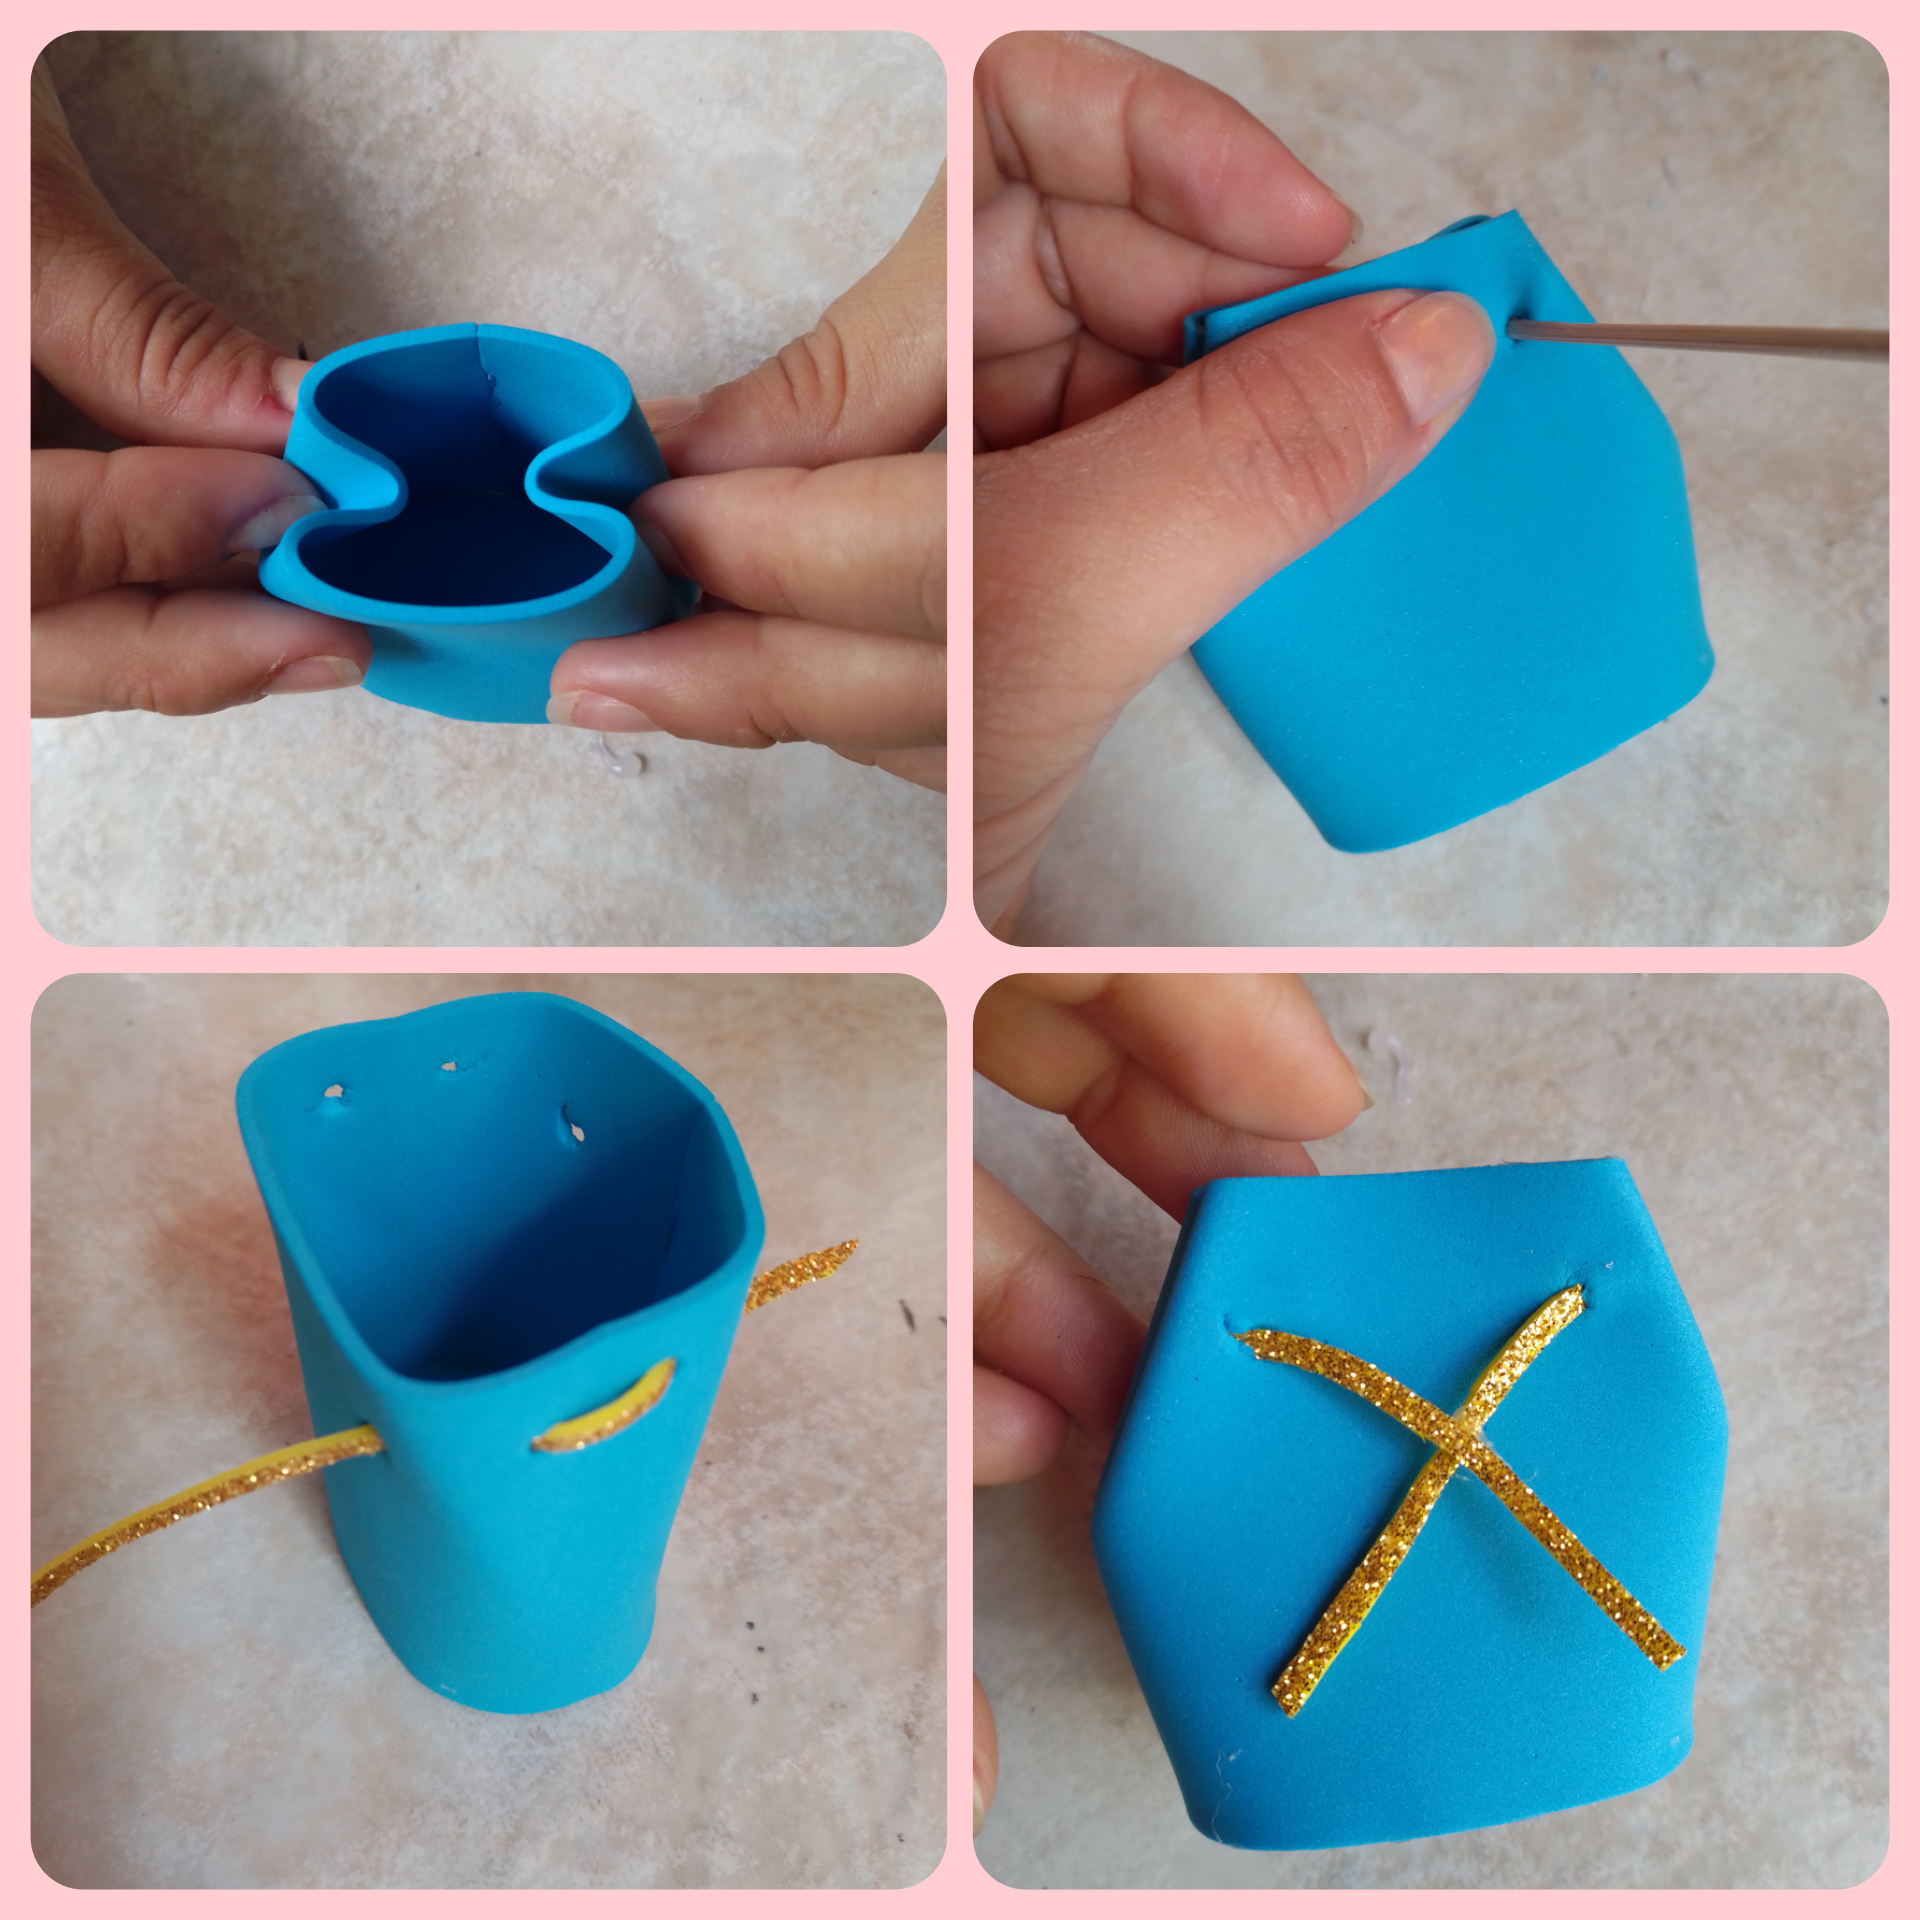
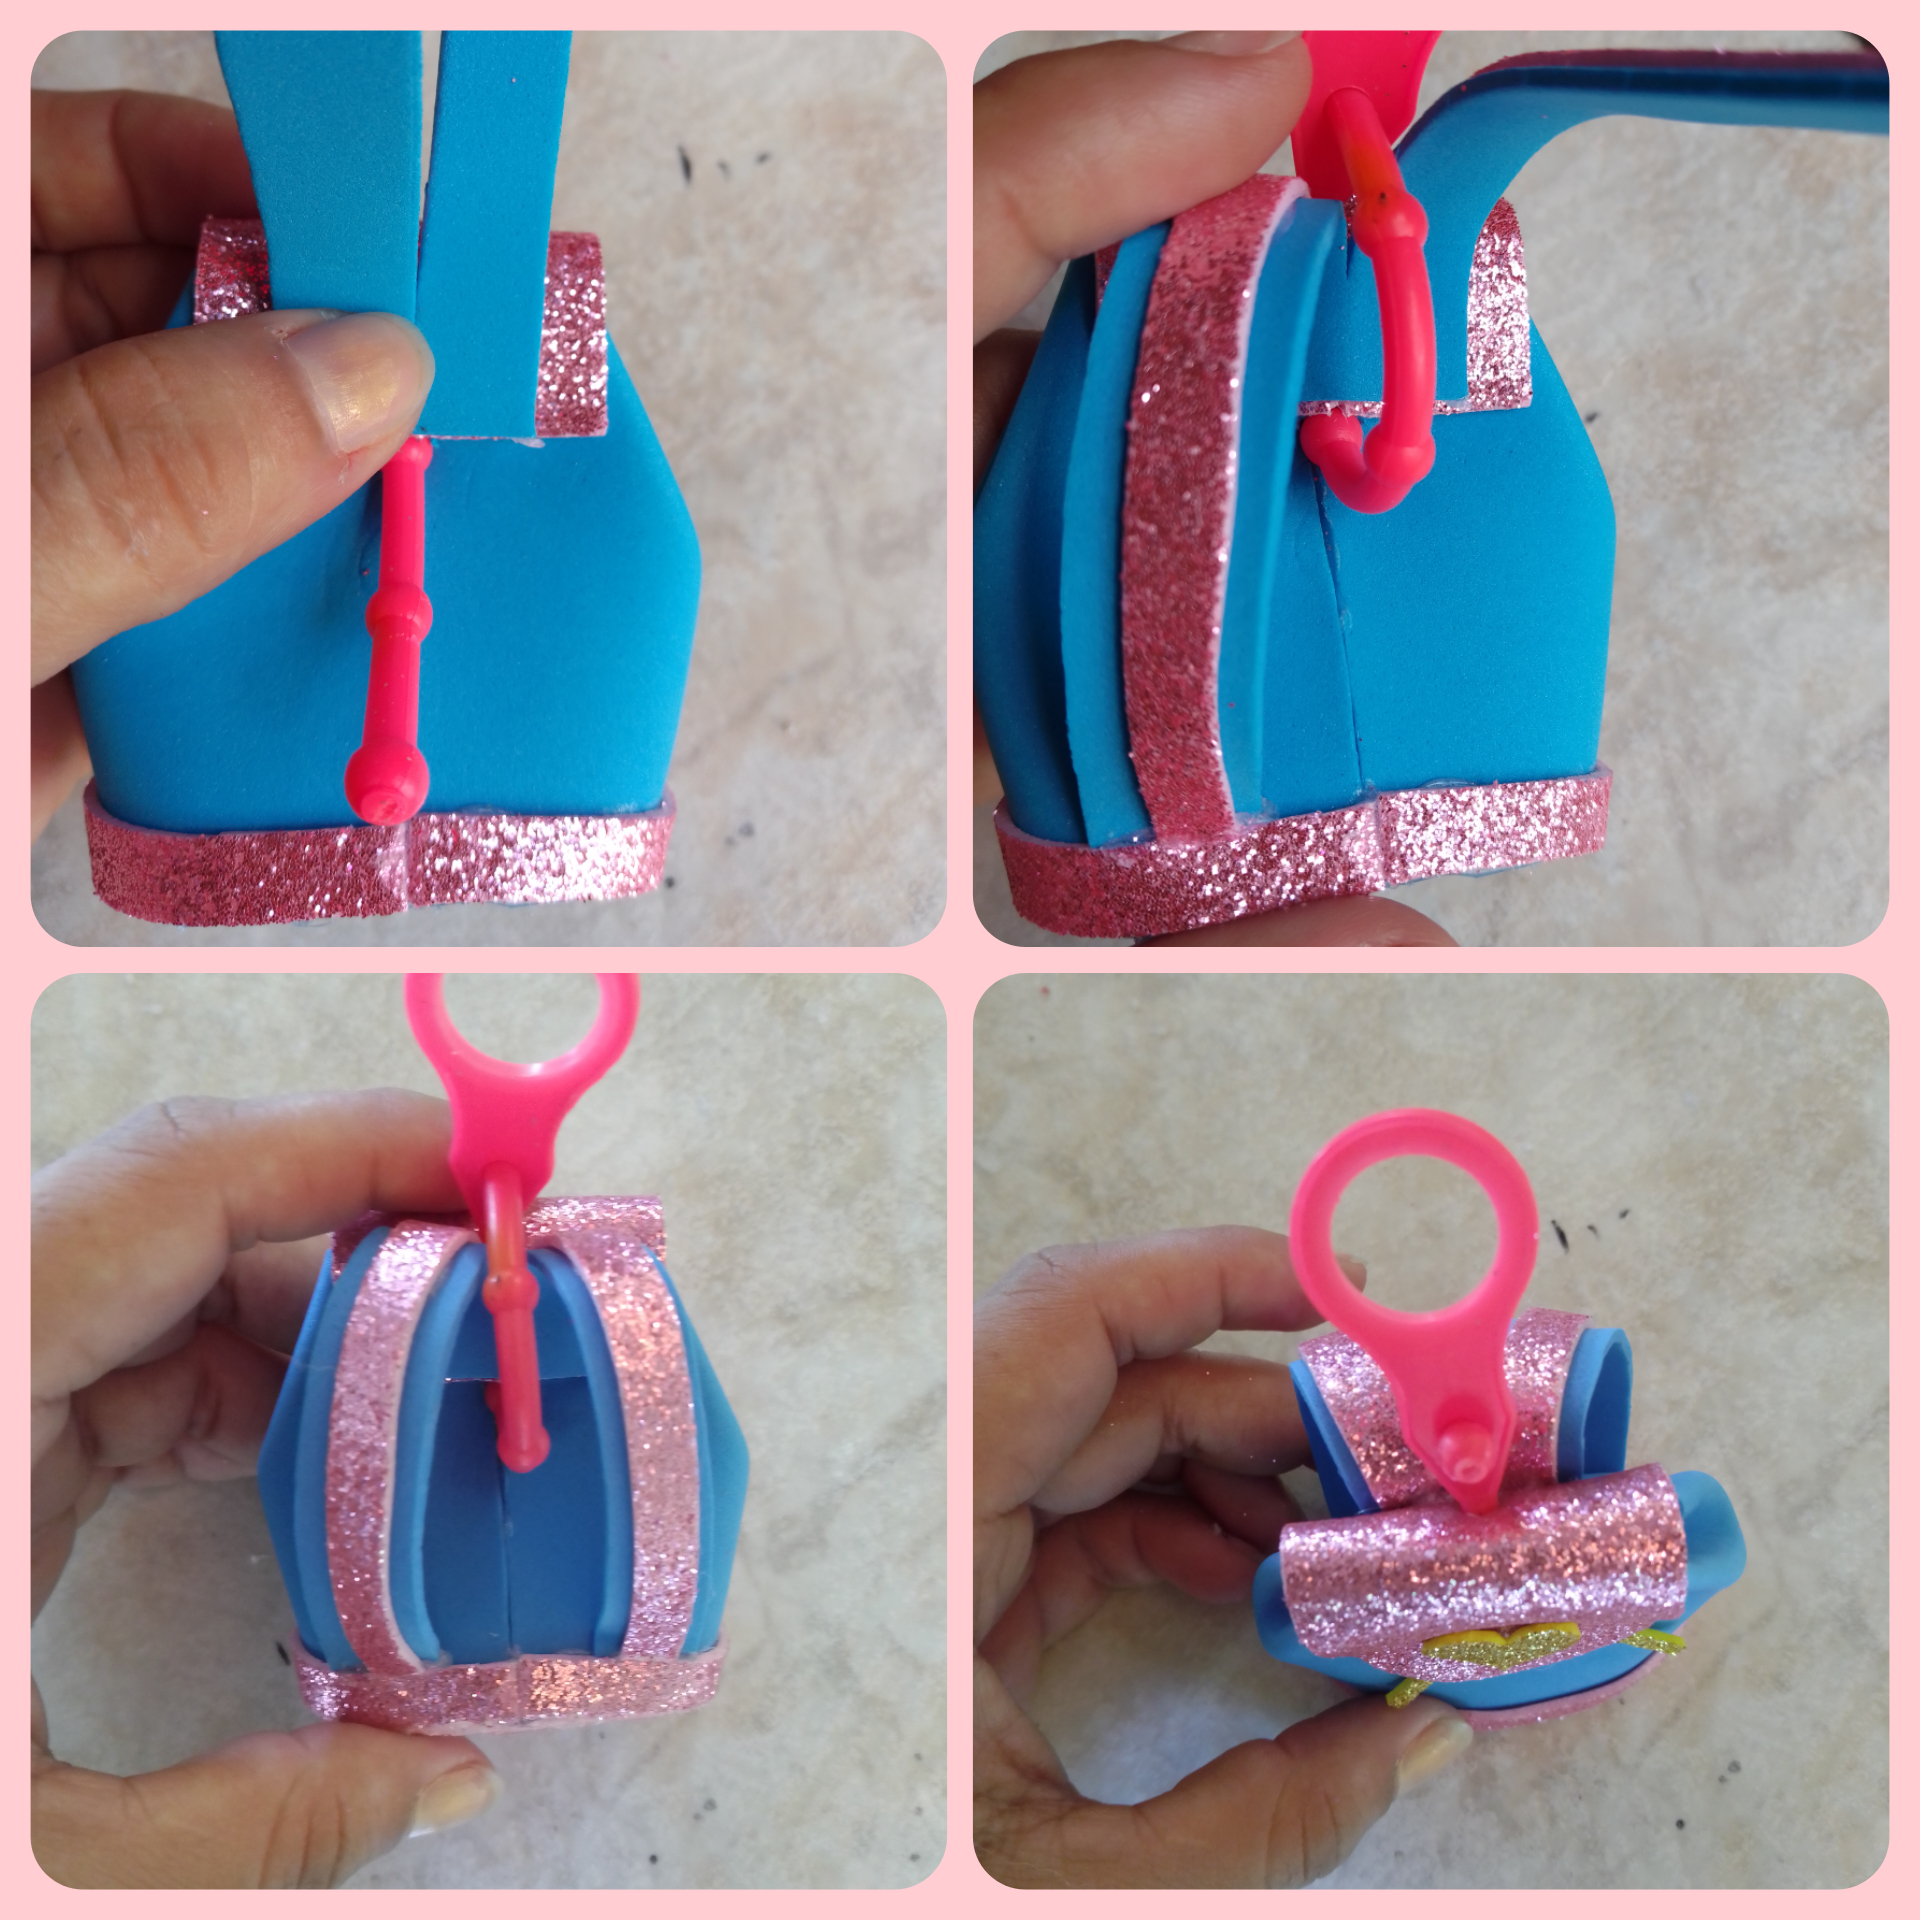
Con las manos, lleve los extremos hacia adentro para formar una honda e irle dando forma de morral al llavero. Con la ayuda de un palito de altura hice unos hoyitos y posteriormente introduje una tira fina de 2 mm foami dorado decarchado
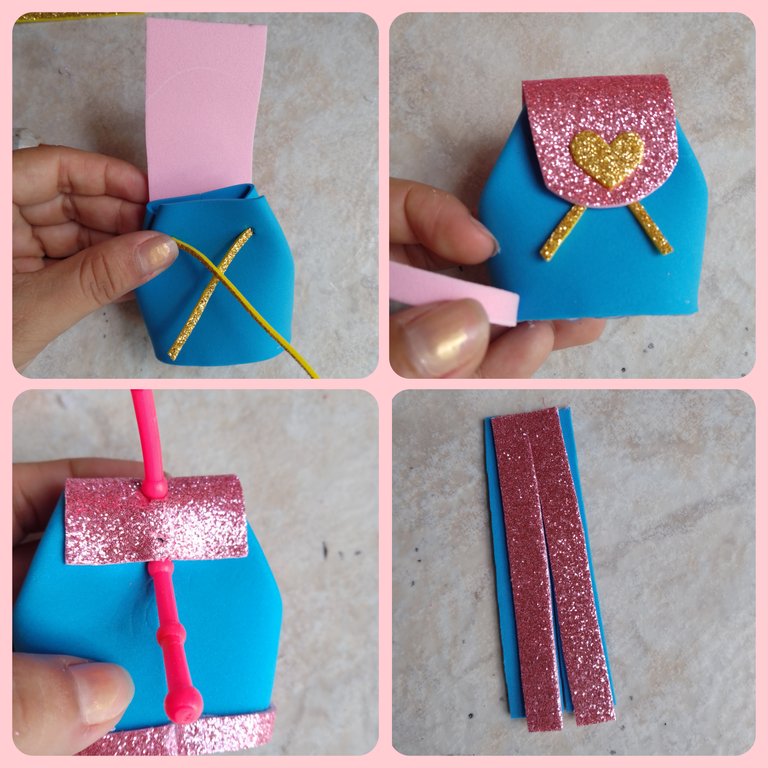
Luego con foami escarchado rosa recorte un rectángulo guiandome del ancho del morral, lo pegue y luego le saque una forma redondeada en la punta, recorte un pequeño corazón dorado y lo pegue en el centro, también recorte una tira de foami rosa para colocarlo por el borde
En este punto de mi manualidad fue momento de hacer dos hoyitos al inicio del foami rosa para colocar el porta llavero. Corte dos tiras en foami azul y rosa para hacer las tiras del moral
Estás tiras las pegue al inicio de la sopala o tapa del morral para cubrir cualquier desperfecto en los hoyos por dónde que coloco el porta llaveros, pegue cada tira en cada extremo del morral
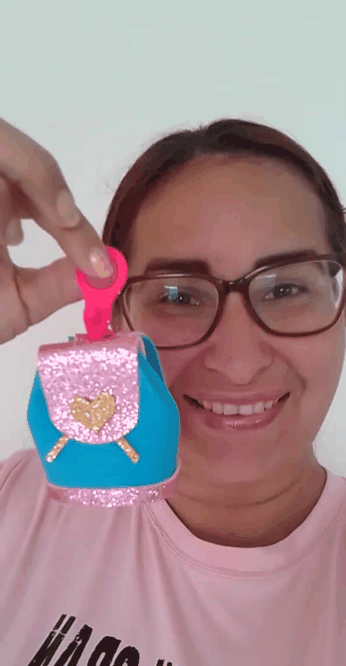
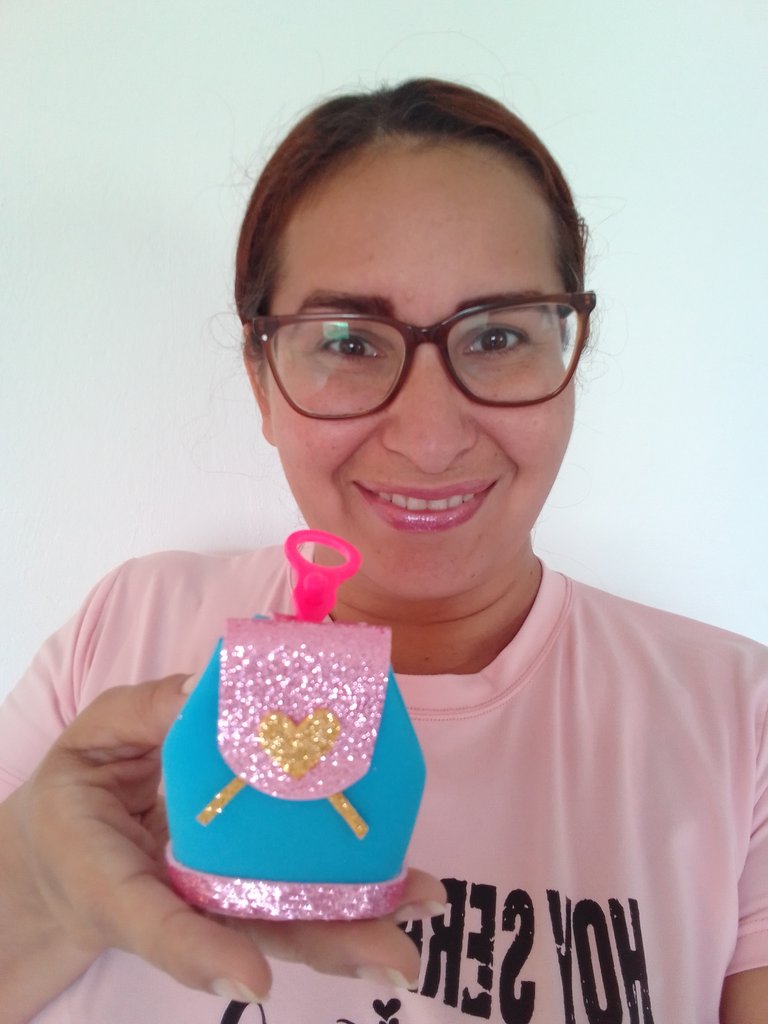
Ya para finalizar y que tuviera un lindo acabado, decidí colocarle en la parte de abajo más foami rosa y cubrir los detalles que habían quedado del silicón.

La verdad es que me encantó el resultado y mi hijita quedó muy contenta, ahora quiere que le haga morrales a sus muñecas 😃.
Gif creado con la app gifStudio
Todas las fotos son de mi autoría, collages realizados con la app inshot, teléfono Blade A7s, banner creado por mi en canva- Venezuela.
ENG
Hello friends, I hope you are doing very well and have a very productive day full of blessings.
I am again in this community to share with you to show you what I do in my free time; I like to make crafts with different types of materials but this time I am going to make a craft with foami, I will show you step by step how I made a nice keychain for my little daughter's school bag.
Foami is very versatile, I like it because it is light, it comes in many colors and it is very easy to fold and glue it to give it shapes.
It's worth mentioning that I didn't come up with this idea myself, I saw it a long time ago on the internet and although I don't remember the exact model, it's very similar to the one I remember seeing.
To make this keychain I used very few materials, I practically made it with scraps of foami and reused a silicone key holder that brought an antibacterial.
- Blue foami
- Pink frosted foami
- Gold frosted Foami
- Silicone
- Key holder (Reused)
Also use
- Scissors
- Ruler
- Height stick
Using collages I will show you the step by step to make this cute keychain.
The first thing I did was to cut out an oval, then I measured the circumference of that oval with the foami and it gave me the exact measurement to cover it, cut out a rectangle.

Applying only the necessary amount of hot silicon, I started to glue the edge of the oval on one end of the foami rectangle.
It is important not to apply too much silicone to maintain a nice finish.
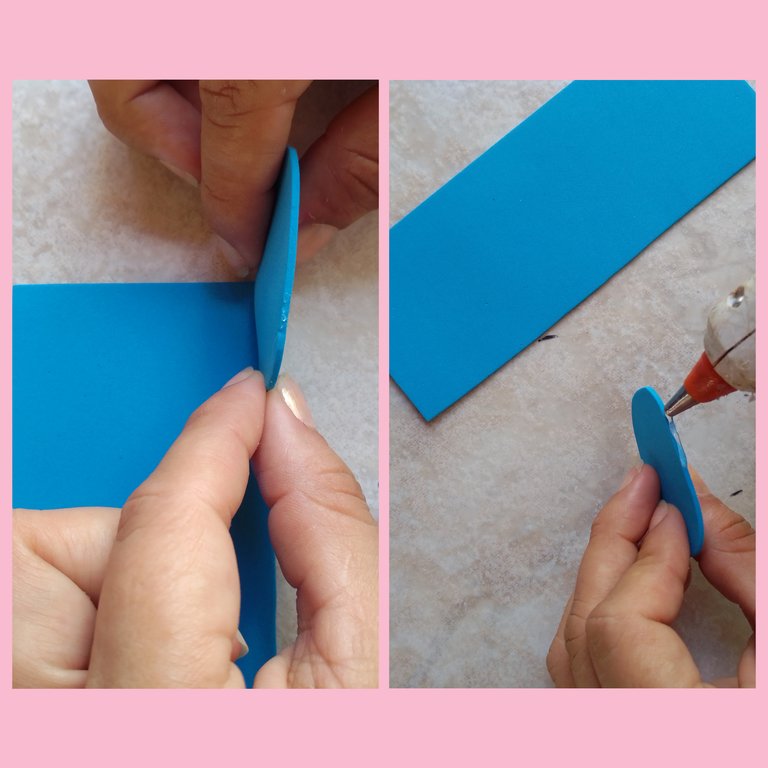
When you finish gluing it just apply more silicone on the ends so that it is completely glued, as shown in the image.
With your hands, bring the ends inward to form a sling and shape the keychain into a pouch. With the help of a stick of height I made a few holes and then introduced a thin strip of 2 mm gold foami frosted

Then with pink frosted foami cut out a rectangle guiding me the width of the backpack, glue it and then take out a rounded shape at the tip, cut out a small golden heart and glue it in the center, also cut out a strip of pink foami to place around the edge.
At this point of my craft it was time to make two little holes at the beginning of the pink foami to place the key holder. Cut two strips of blue and pink foami to make the moral strips.
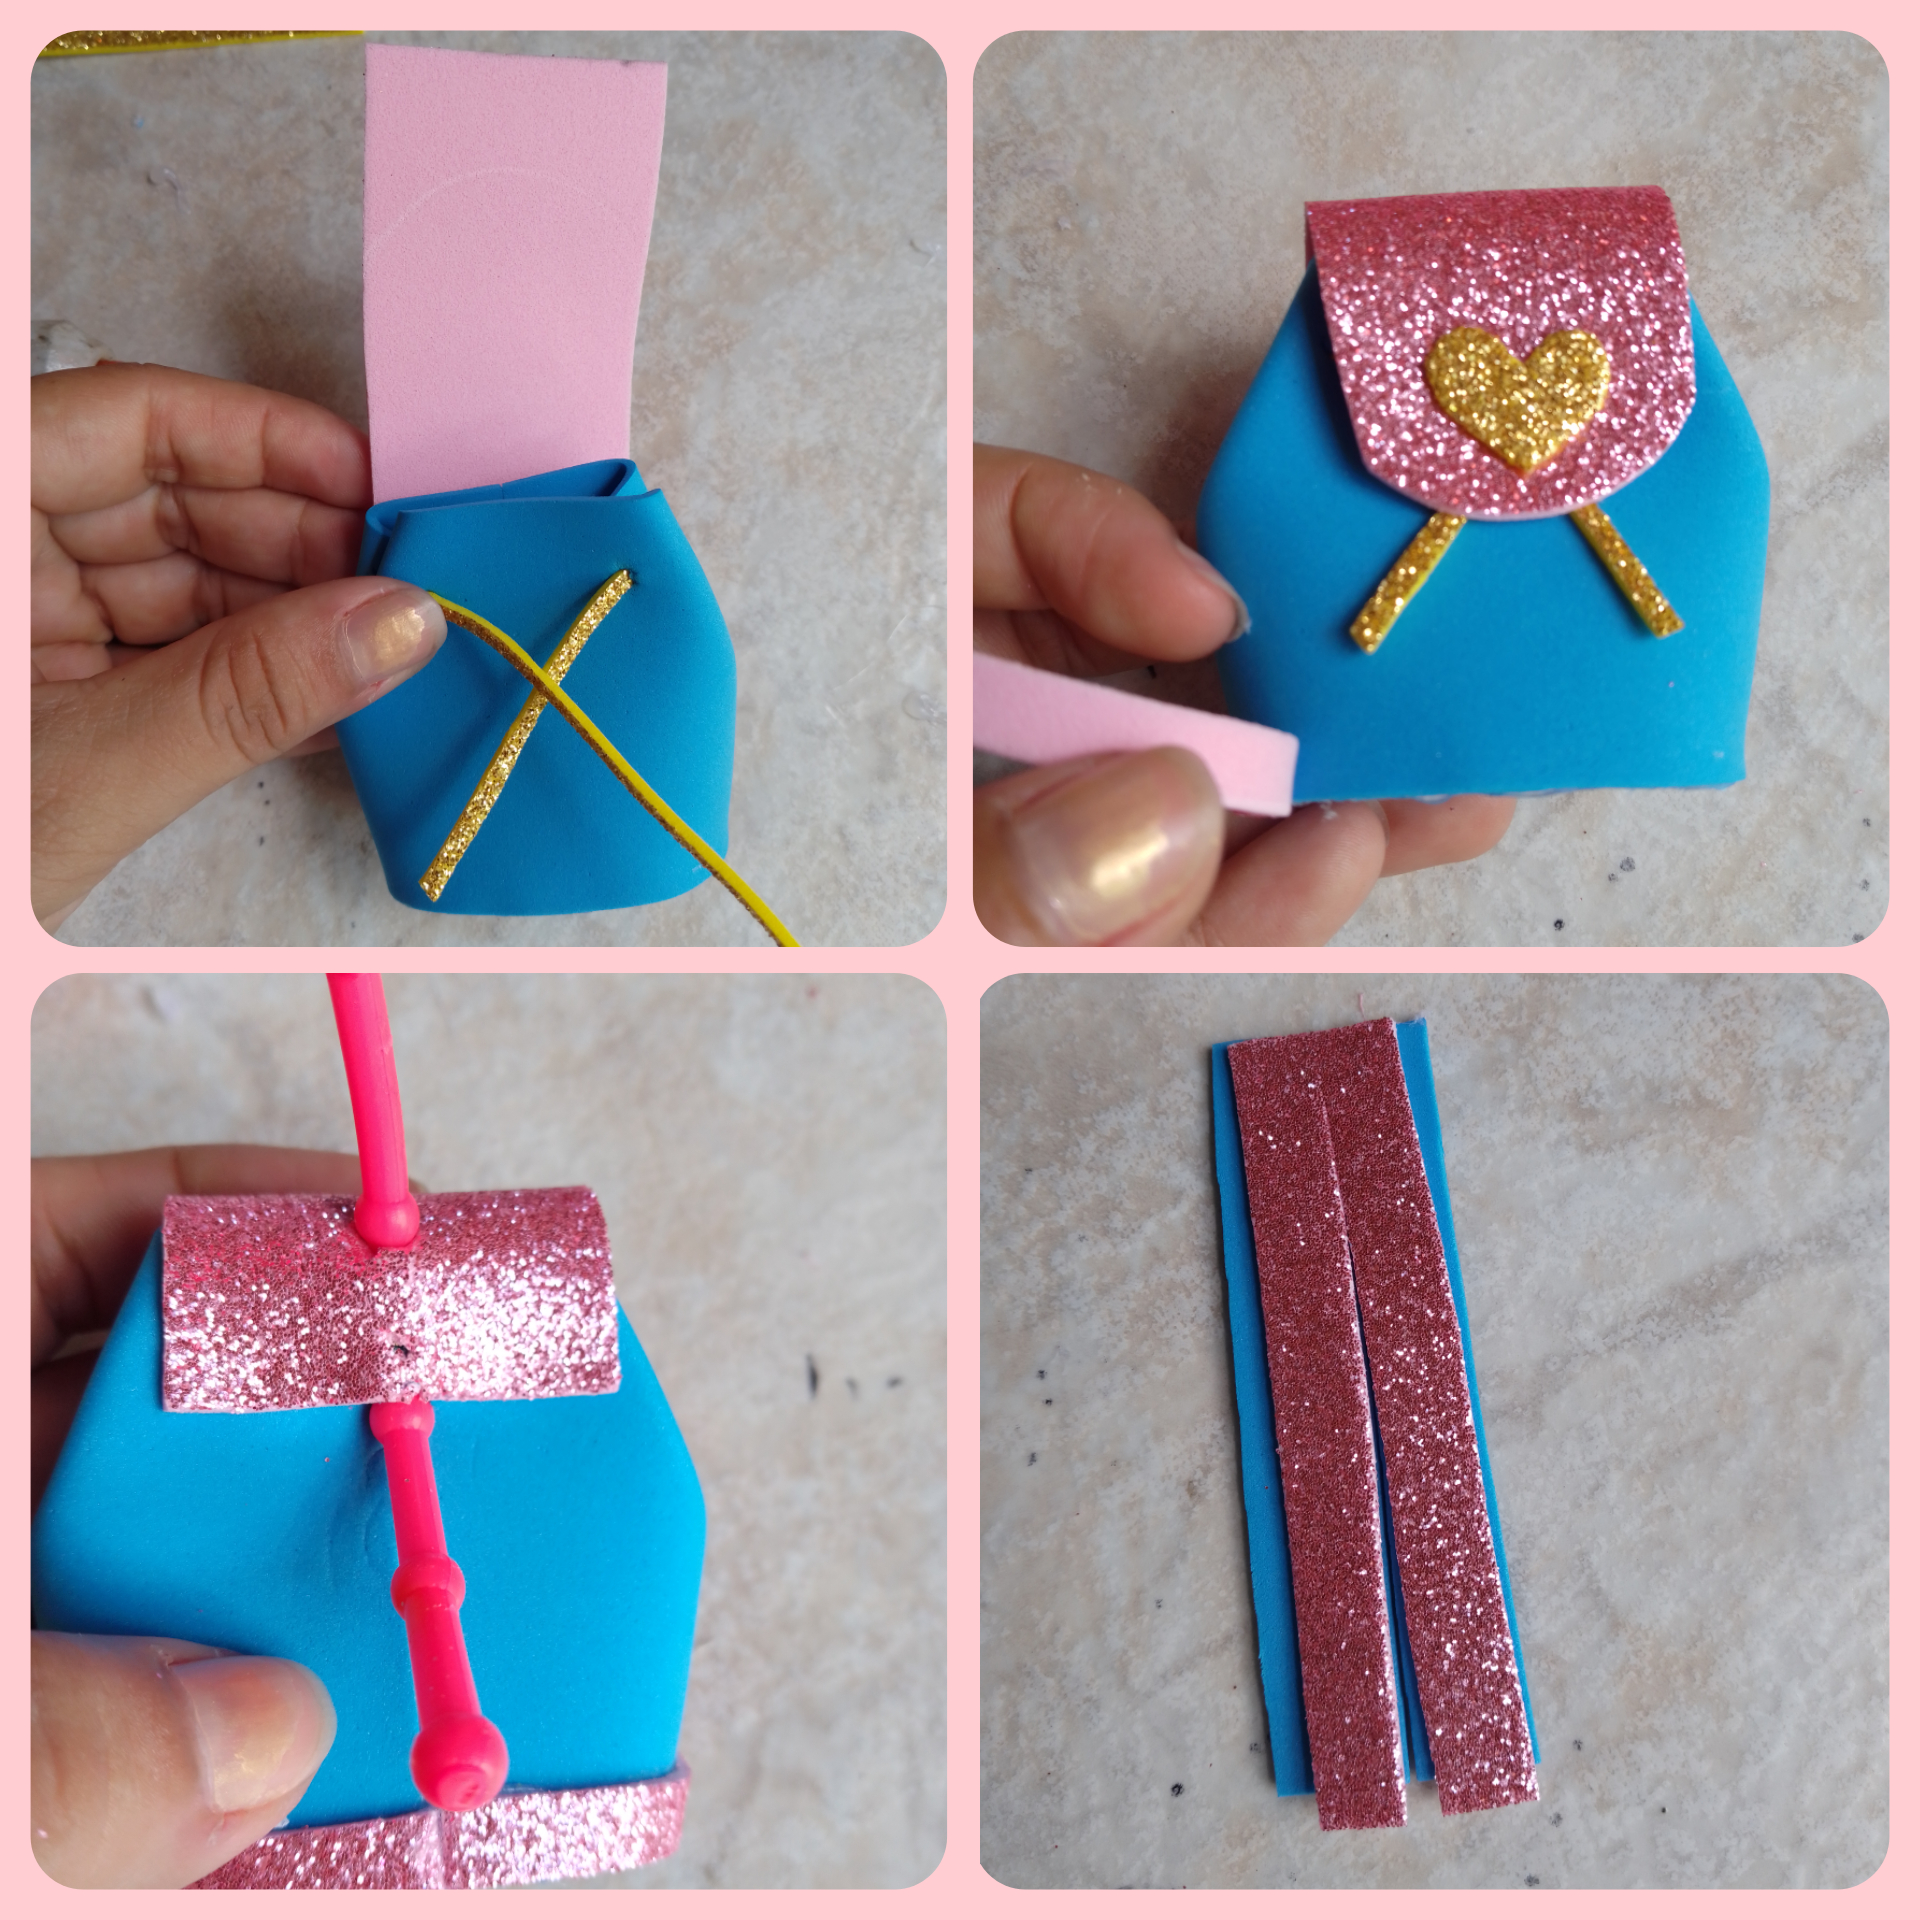
These strips I glued to the top of the top of the backpack to cover any damage in the holes where I put the key holder, glue each strip on each end of the backpack.

To finish it off, I decided to put more pink foami on the bottom and cover the details that were left over from the silicone.
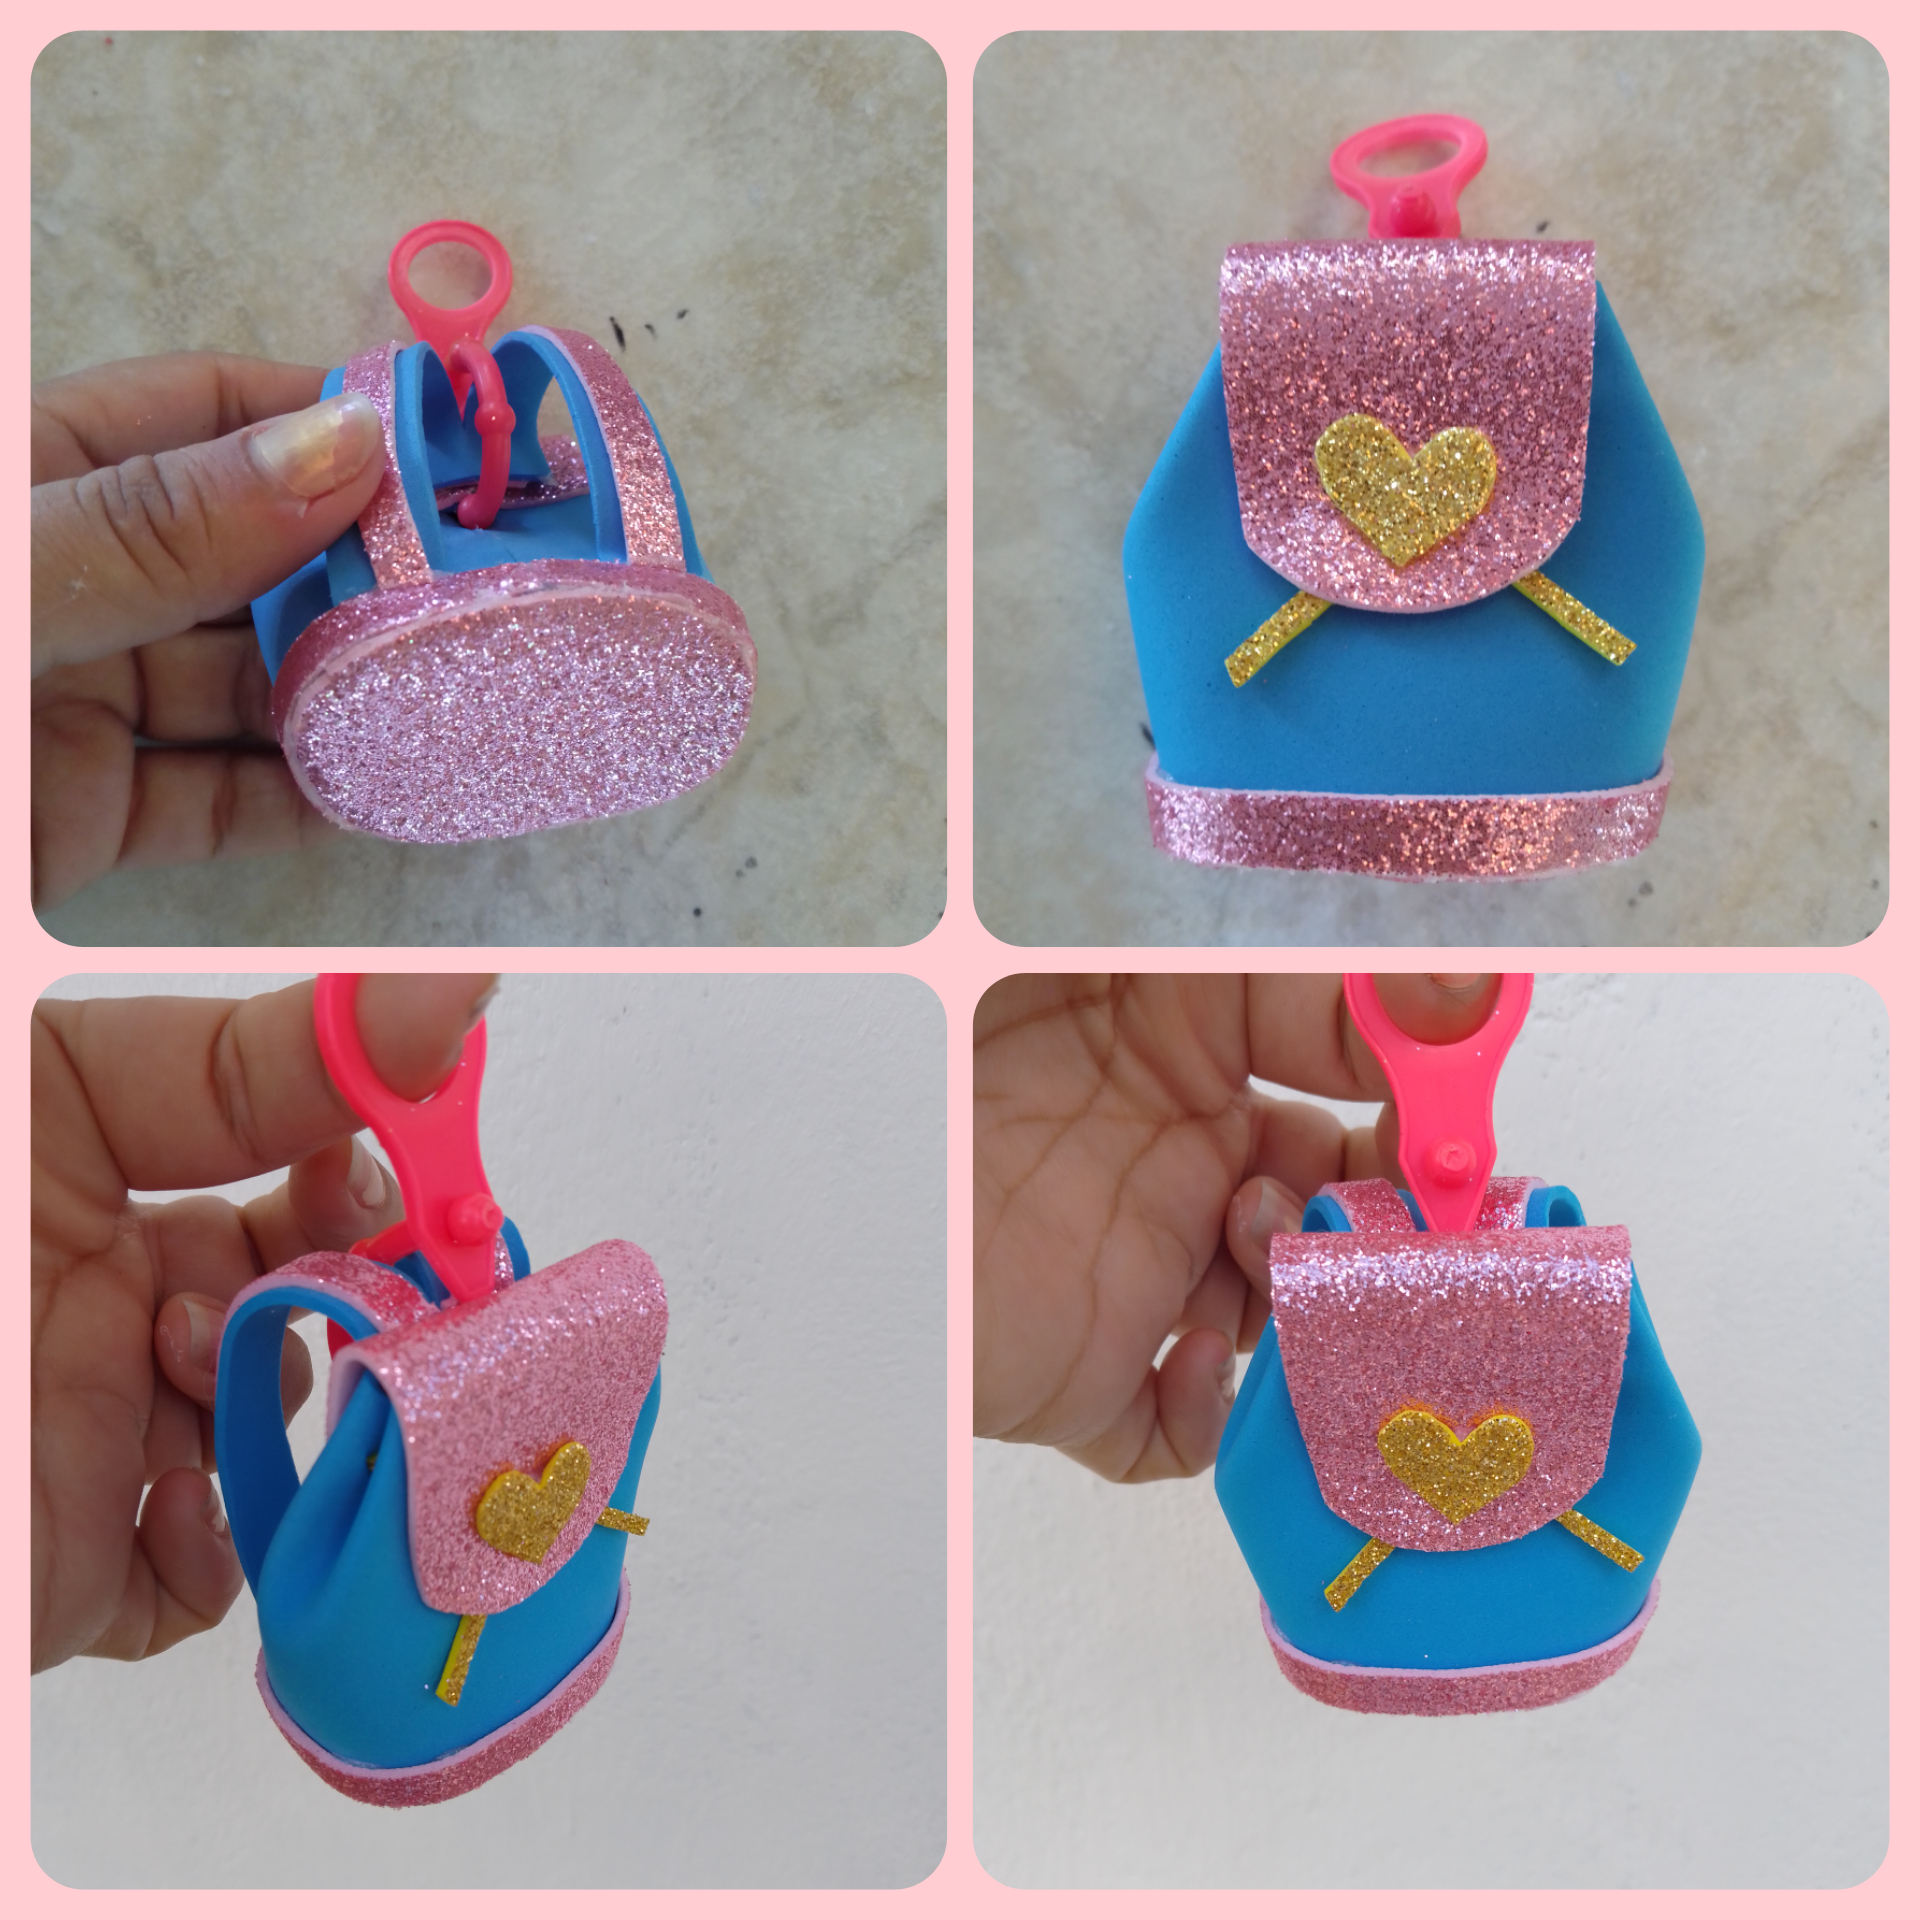
The truth is that I loved the result and my little daughter was very happy, now she wants me to make backpacks for her dolls 😃.

Gif created with the gifStudio app
All photos are of my authorship, collages made with the inshot app, Blade A7s phone, banner created by me in canva. Deepl Translator version 1.2.2 - Venezuela