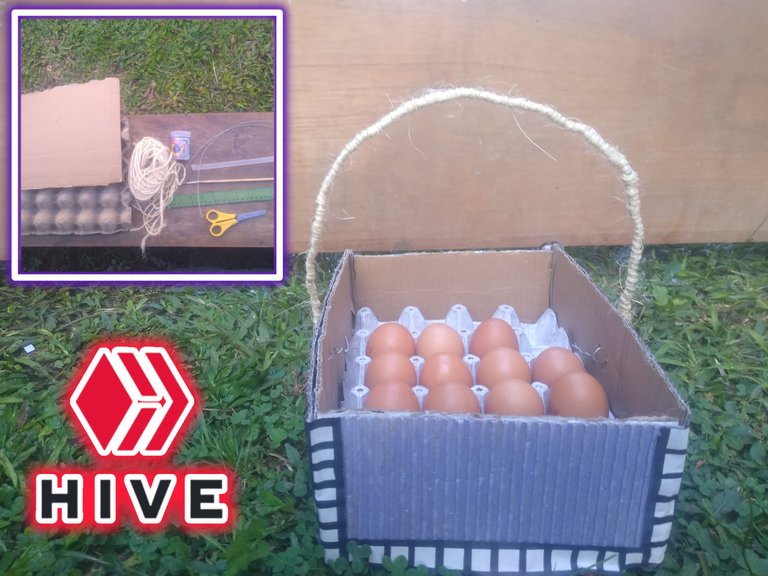
Una canasta de cartón multiusos es lo que traigo para ti ,la verdad la usaré para guardar los huevos, pero le puedes dar el uso que quieras, además los materiales, la mayoría son reutilizados y fáciles de encontrar, espero me acompañes hasta el final.
A multipurpose cardboard basket is what I bring for you, the truth is that I will use it to store eggs, but you can give it any use you want, besides the materials, most of them are reused and easy to find, I hope you join me until the end.

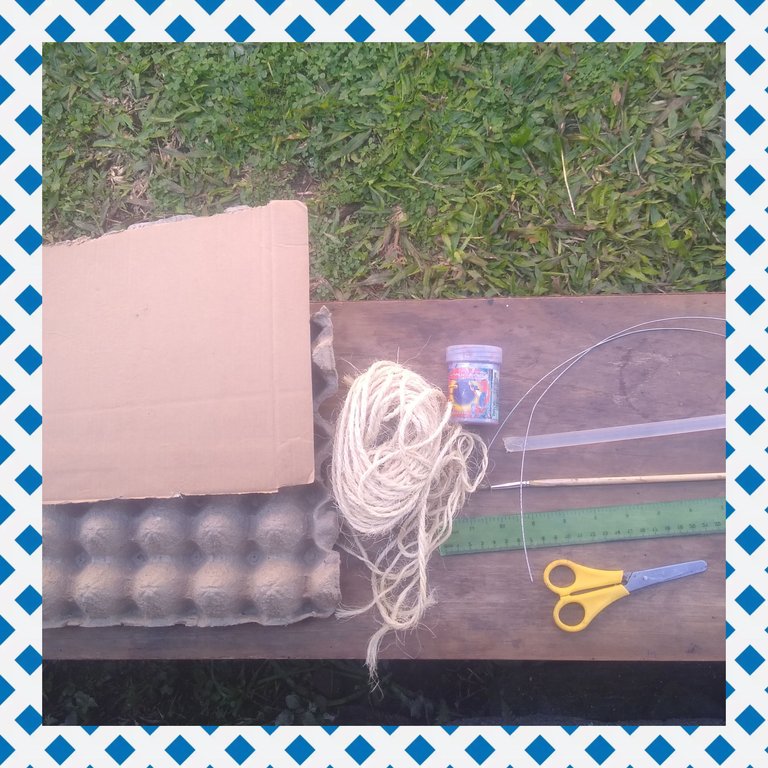
MATERIALES:
- 1 canastilla de huevos vacía
- cartón
- fique o cabuya rustica
- vinilo
- alambre que se pueda doblar fácil
- silicona
- pincel
- tijeras
- regla para medir
MATERIALS:
1 empty egg basket
cardboard
fique or cabuya rustica
vinyl
wire that can be easily bent
silicone
brush
scissors
measuring ruler

PASO 1
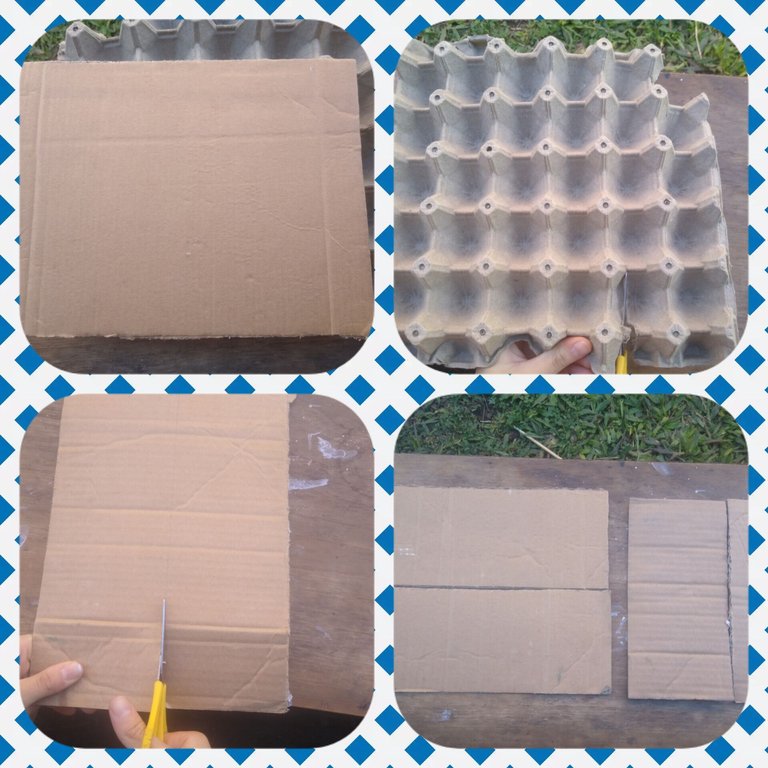
Empezaré cortando la base de cartón, esta será de 27 cm aprox de largo y de ancho es de 9 cm aprox.
Seguido cortamos también la canastilla de huevos de la misma medida que el cartón, por supuesto también cortaremos las piezas laterales, están son de cartón, pero aquí habrá una pequeña variación en las medidas, necesitaremos 4 piezas, dos de 28 cm aprox y dos de 10 cm aprox, lo haré así por qué quiero que las puntas de las piezas se encuentren cómodamente y formen una esquina con buen espacio para poder asegurarlas bien con silicona después.
I will start by cutting the cardboard base, this will be about 27 cm long and about 9 cm wide.
Then we also cut the egg basket of the same size as the cardboard, of course we will also cut the side pieces, they are made of cardboard, but here there will be a small variation in the measures, we will need 4 pieces, two of 28 cm approx and two of 10 cm approx, I will do so because I want the tips of the pieces to meet comfortably and form a corner with good space to secure them well with silicone later.

PASO 2
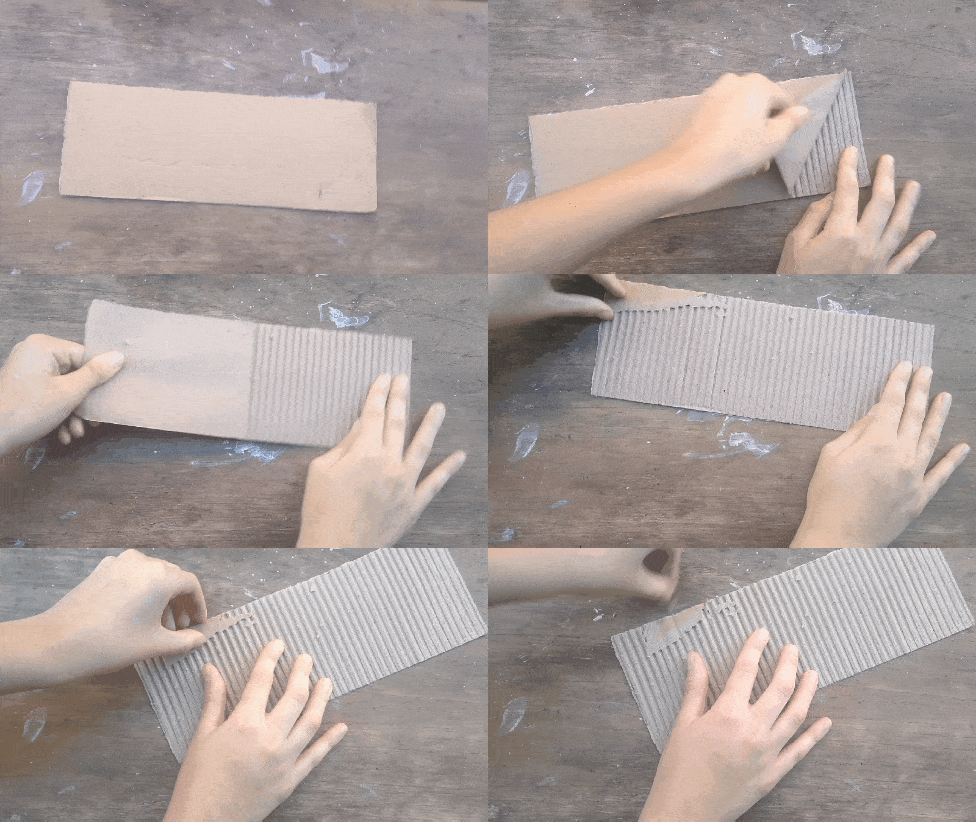
Quitaremos de cada una de las piezas de cartón la parte delgada del mismo para que se vea el corrugado que lleva en su interior, así como te muestro en el gif.
We will remove from each of the cardboard pieces the thin part of the cardboard to show the corrugated inside, as I show you in the gif below.
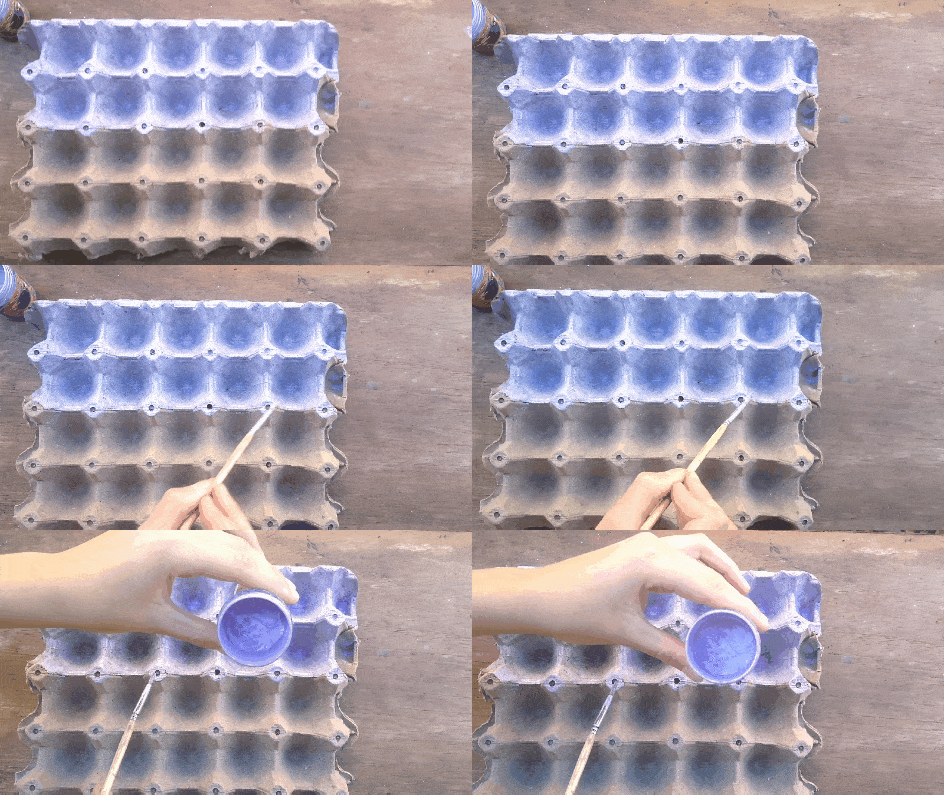
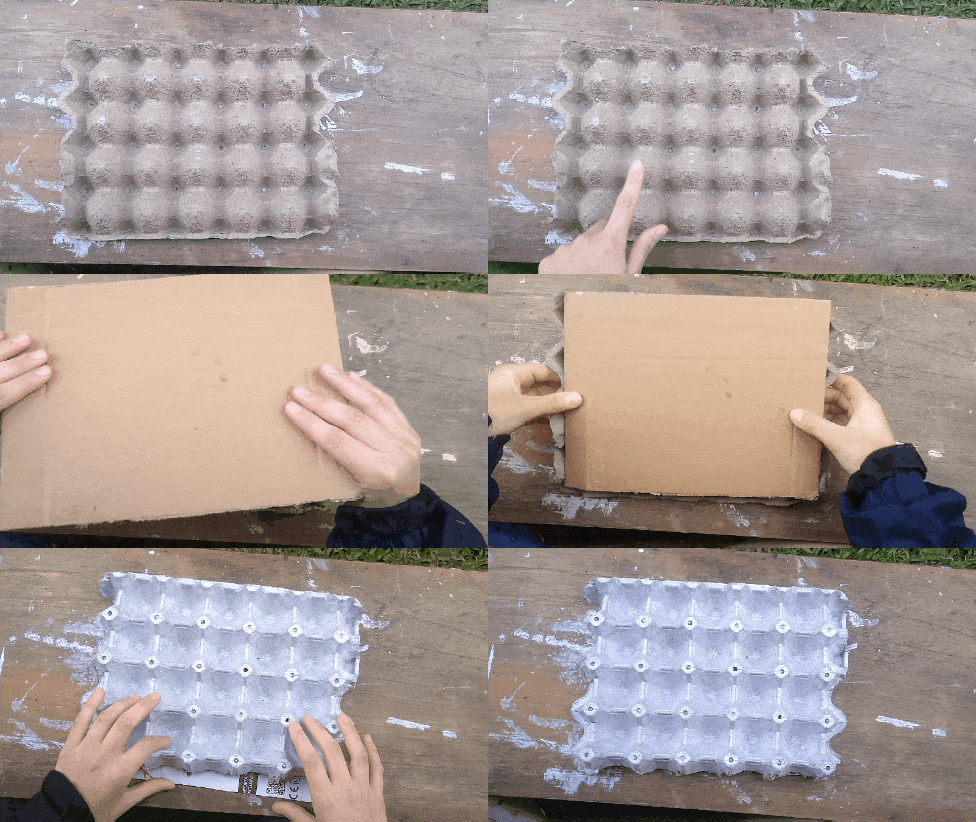
Teniendo los cartones al descubierto en este mismo paso. Pintaremos la canastilla de huevos, elegí el color lila perlado, además tienes que saber que este tipo de vinilo no es tóxico para la salud, le puedes poner el color que más te guste, posterior a esto pegamos la base de cartón que teníamos cortada y reservada agrégale bastante silicona.
Having the cartons uncovered in this same step. We will paint the egg basket, I chose the pearl lilac color, also you have to know that this type of vinyl is not toxic to health, you can put the color you like, after this we glue the cardboard base that we had cut and reserved add enough silicone.

PASO 3
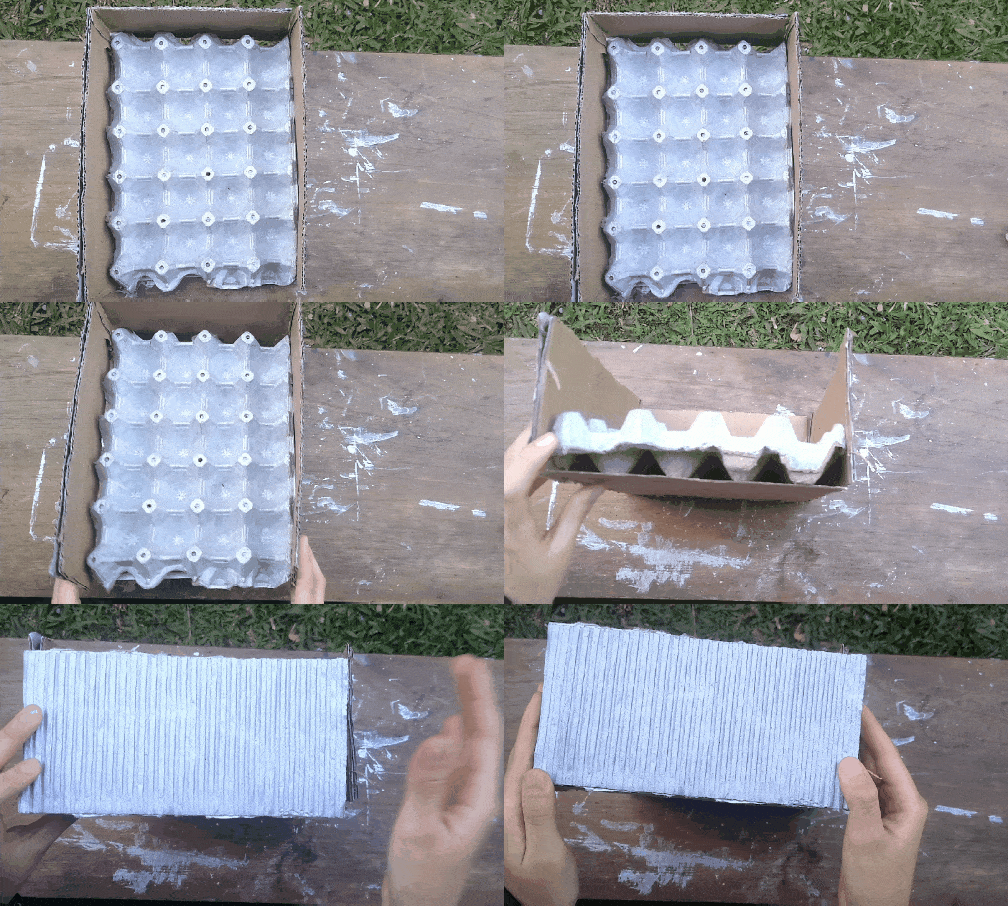
Lo siguiente que hice fue pintar con el mismo color los laterales, cuando la pintura estuvo seca entonces procedí a pegar los mismos uno a uno como puedes observar, procura agregar suficiente silicona para asegurar bien estas piezas.
The next thing I did was to paint the sides with the same color, when the paint was dry then I proceeded to attach them one by one as you can see, be sure to add enough silicone to secure these pieces well.

PASO 4
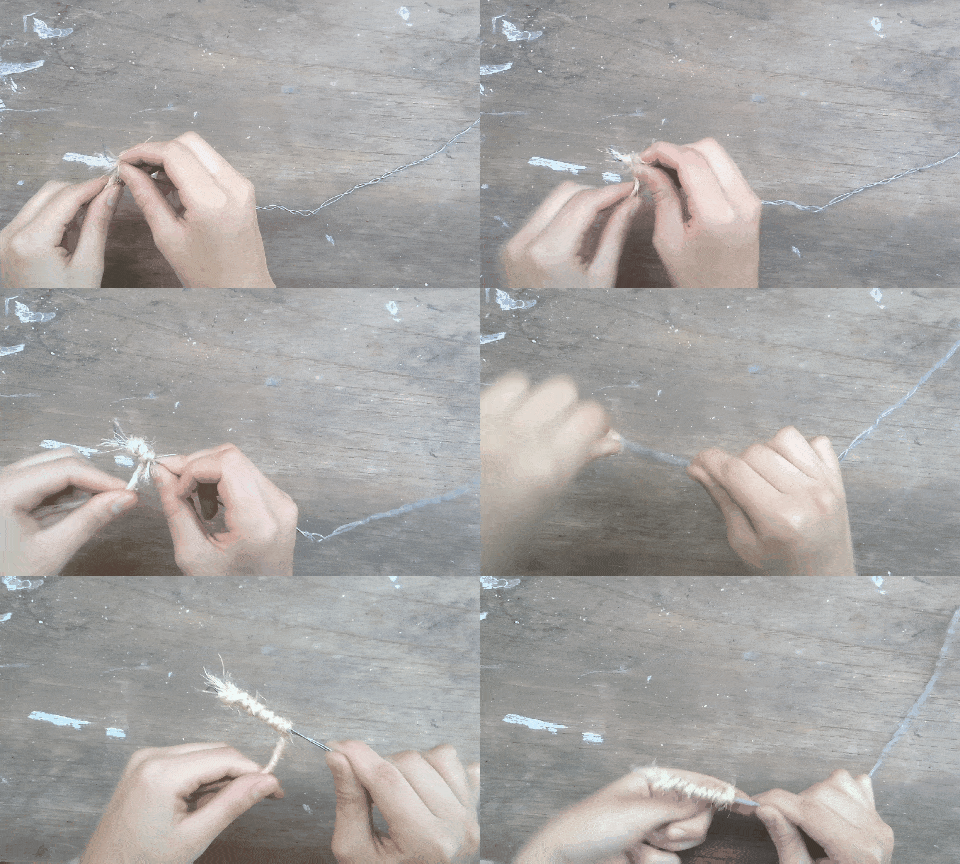
Envolveremos dos pedazos de alambre entre sí ,del que se deja doblar con facilidad para que la agarradera quede más gruesa y firme, ay si teniendo este paso listo procedemos a forrar con fique o cabuya el alambre de esta manera como te muestro en el GIF ,acá te podría sugerir que temples bien la cabuya a medida que la envuelves para que esta quede firme y el alambre quede bien cubierto.
We will wrap two pieces of wire between them, the one that can be easily bent so that the handle is thicker and firmer, and if we have this step ready we proceed to line with fique or cabuya the wire in this way as I show you in the GIF, here I would suggest that you tighten the cabuya as you wrap it so that it is firm and the wire is well covered.
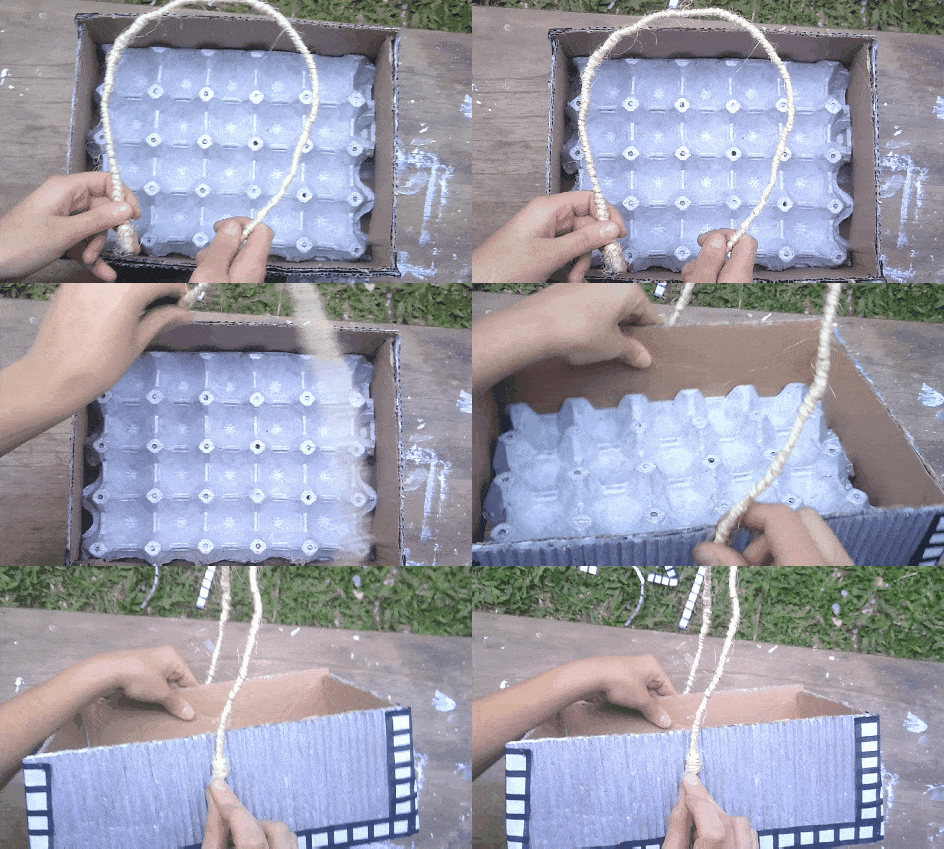
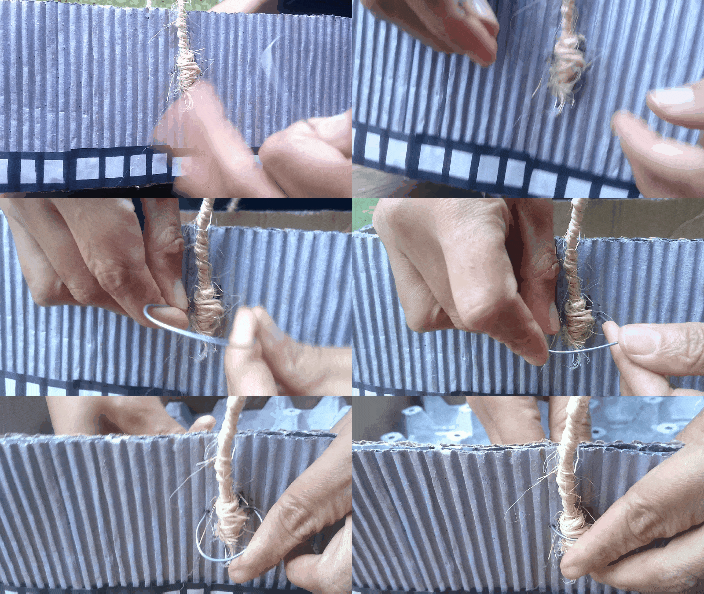
Pegaremos con bastante silicona la agarradera en la mitad de los costados más largos, después para reforzar con un pedazo de alambre abrimos un par de orificios incrustaremos allí el alambre y por dentro de la canasta le daremos vueltas entre sí al sobrante del mismo, para que este quede seguro.
We will glue with enough silicone the handle in the middle of the longest sides, then to reinforce with a piece of wire we open a couple of holes there we will embed the wire and inside the basket we will twist the excess of the same, so that it is secure.

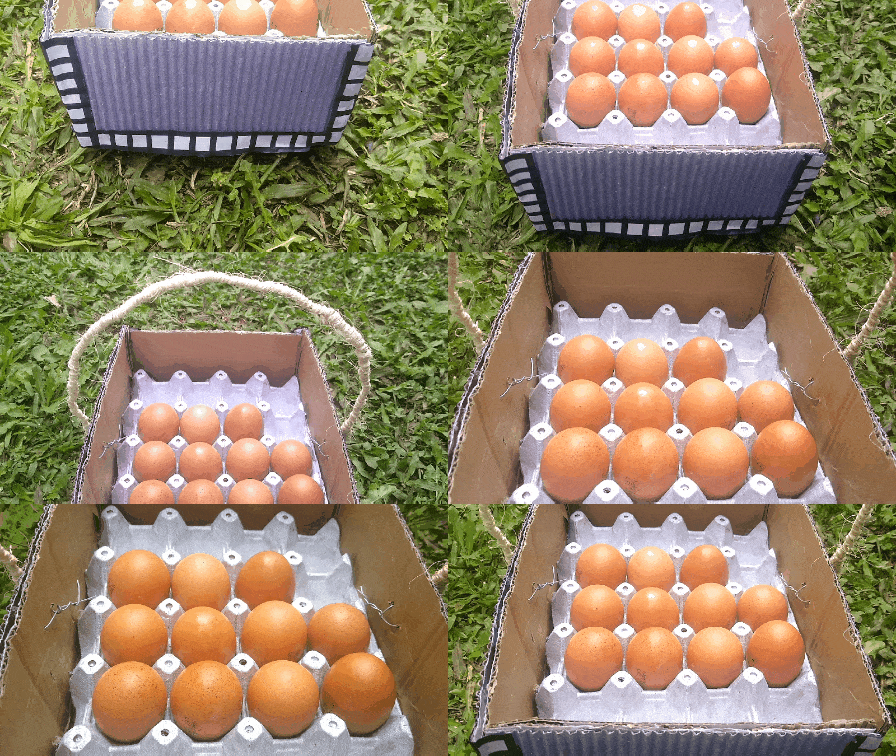
Estaba olvidando decirte que en las esquinas y la parte inferior de la canasta como toque personal hice cuadrados en una hoja blanca y los pegue, tú puedes decorar como quieras o simplemente dejarlo así, mira como luce el resultado final de nuestra canasta. También podrías pintar el interior de los costados no lo hice por qué se me acabo la pintura y no quería hacer mezcla de colores Gracias por llegar hasta aquí y leer, nos vemos pues.
I was forgetting to tell you that in the corners and the bottom of the basket with a personal touch I made squares on a white sheet and glued them, you can decorate as you like or just leave it like this look how the final result of our basket looks like. You could also paint the inside of the sides, I didn't do it because I ran out of paint and I didn't want to mix colors. Thanks for coming here and reading, see you then.
fotos y gif tomados por mi
traducido en deepl
separador usado hive
fotos y gif tomados por mi
traducido en deepl
separador usado hive
