Hola Hiveans!
Hello Hiveans!
This is my first blog on this intricate but interesting platform. So I've decided to share a little bit of what I do and what I love to do: "teaching and sewing".
Así que espero puedan aprender a confeccionar sus propias prendas y disfruten de la experiencia creativa.
So I hope you can learn how to make your own garments and enjoy the creative experience.

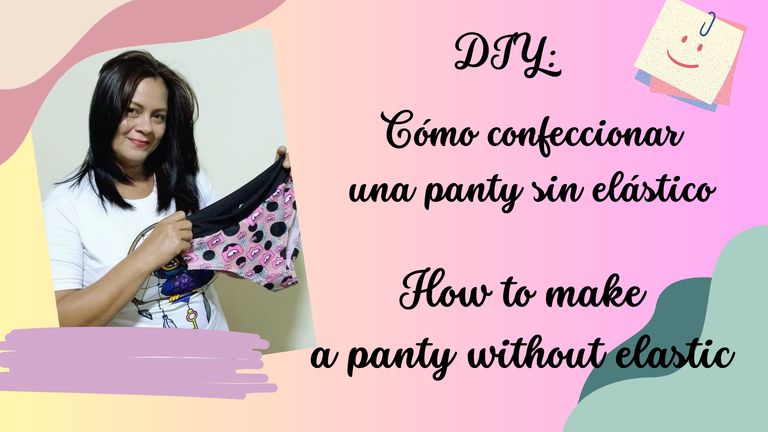
| Cómo hacer una panty sin elástico |
|---|
| How to make a panty without elastic |
|---|
Pantyhose are a garment that all of us girls are going to wear, but most of us are bothered by the elastic around the crotch - it's tight and uncomfortable! That's why I'm bringing you this easy to make project. So if you've been wanting to learn all about making intimate apparel for girls and ladies, this is the blog for you. Since I will be sharing my experience in this world of sewing.

| ¡Empecemos! |
|---|
| Materiales a necesitar: |
|---|
| 25 Cms de tela de franela, algodón u otra elastizada. |
| Tira de tela en lycra o Rib (60x10 Cms) |
| Tijeras |
| Hilo |
| Máquina de coser |
| Alfileres |
| Let's get started! |
|---|
| Materials needed: |
|---|
| 25 Cms of flannel, cotton or other elasticized fabric. |
| Strip of lycra or Rib fabric (60x10 Cms) |
| Scissors |
| Thread |
| Sewing machine |
| Pins |
| Instrucciones: |
|---|
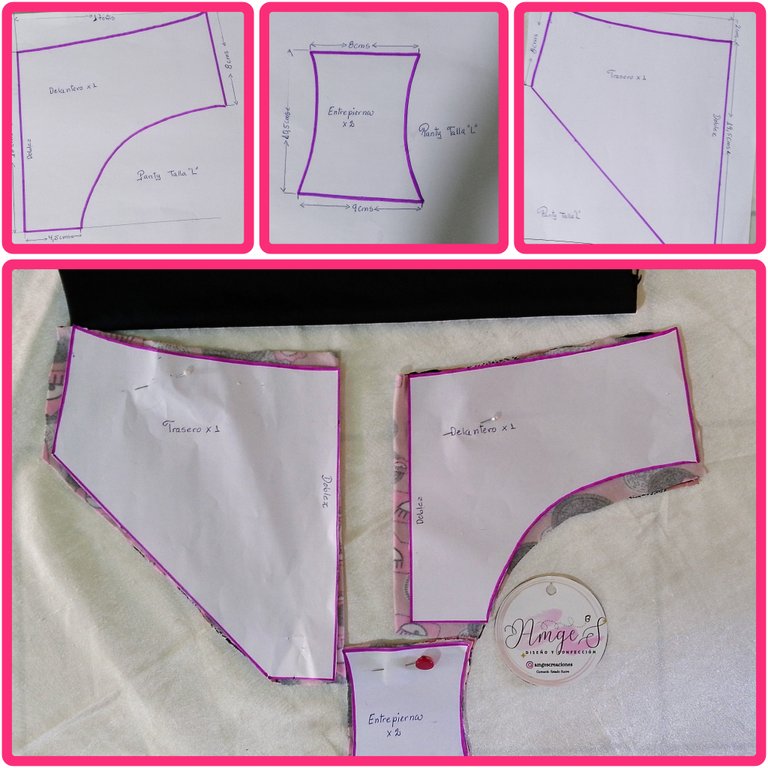
Después de hacer tu propio patrón guiandote por las medidas, llévala a la tela. Es importante que donde dice doblez, la tela va doblada, así tendrás un corte simétrico al abrirla.
De igual forma, los valores x1 y x2, indican el número de veces que vas a cortar en tela. Es decir, x1 será una sola pieza y con el x2 serán dos piezas del mismo molde.
Instructions:
For this panty I will be using a size L pattern, but you can adjust it by reducing or expanding 1 centimeter up and sideways, depending on your size.
After making your own pattern based on the measurements, take it to the fabric. It is important that where it says fold, the fabric is folded, so you will have a symmetrical cut when you open it.
Similarly, the values x1 and x2 indicate the number of times you are going to cut the fabric. That is, x1 will be a single piece and x2 will be two pieces of the same mold.
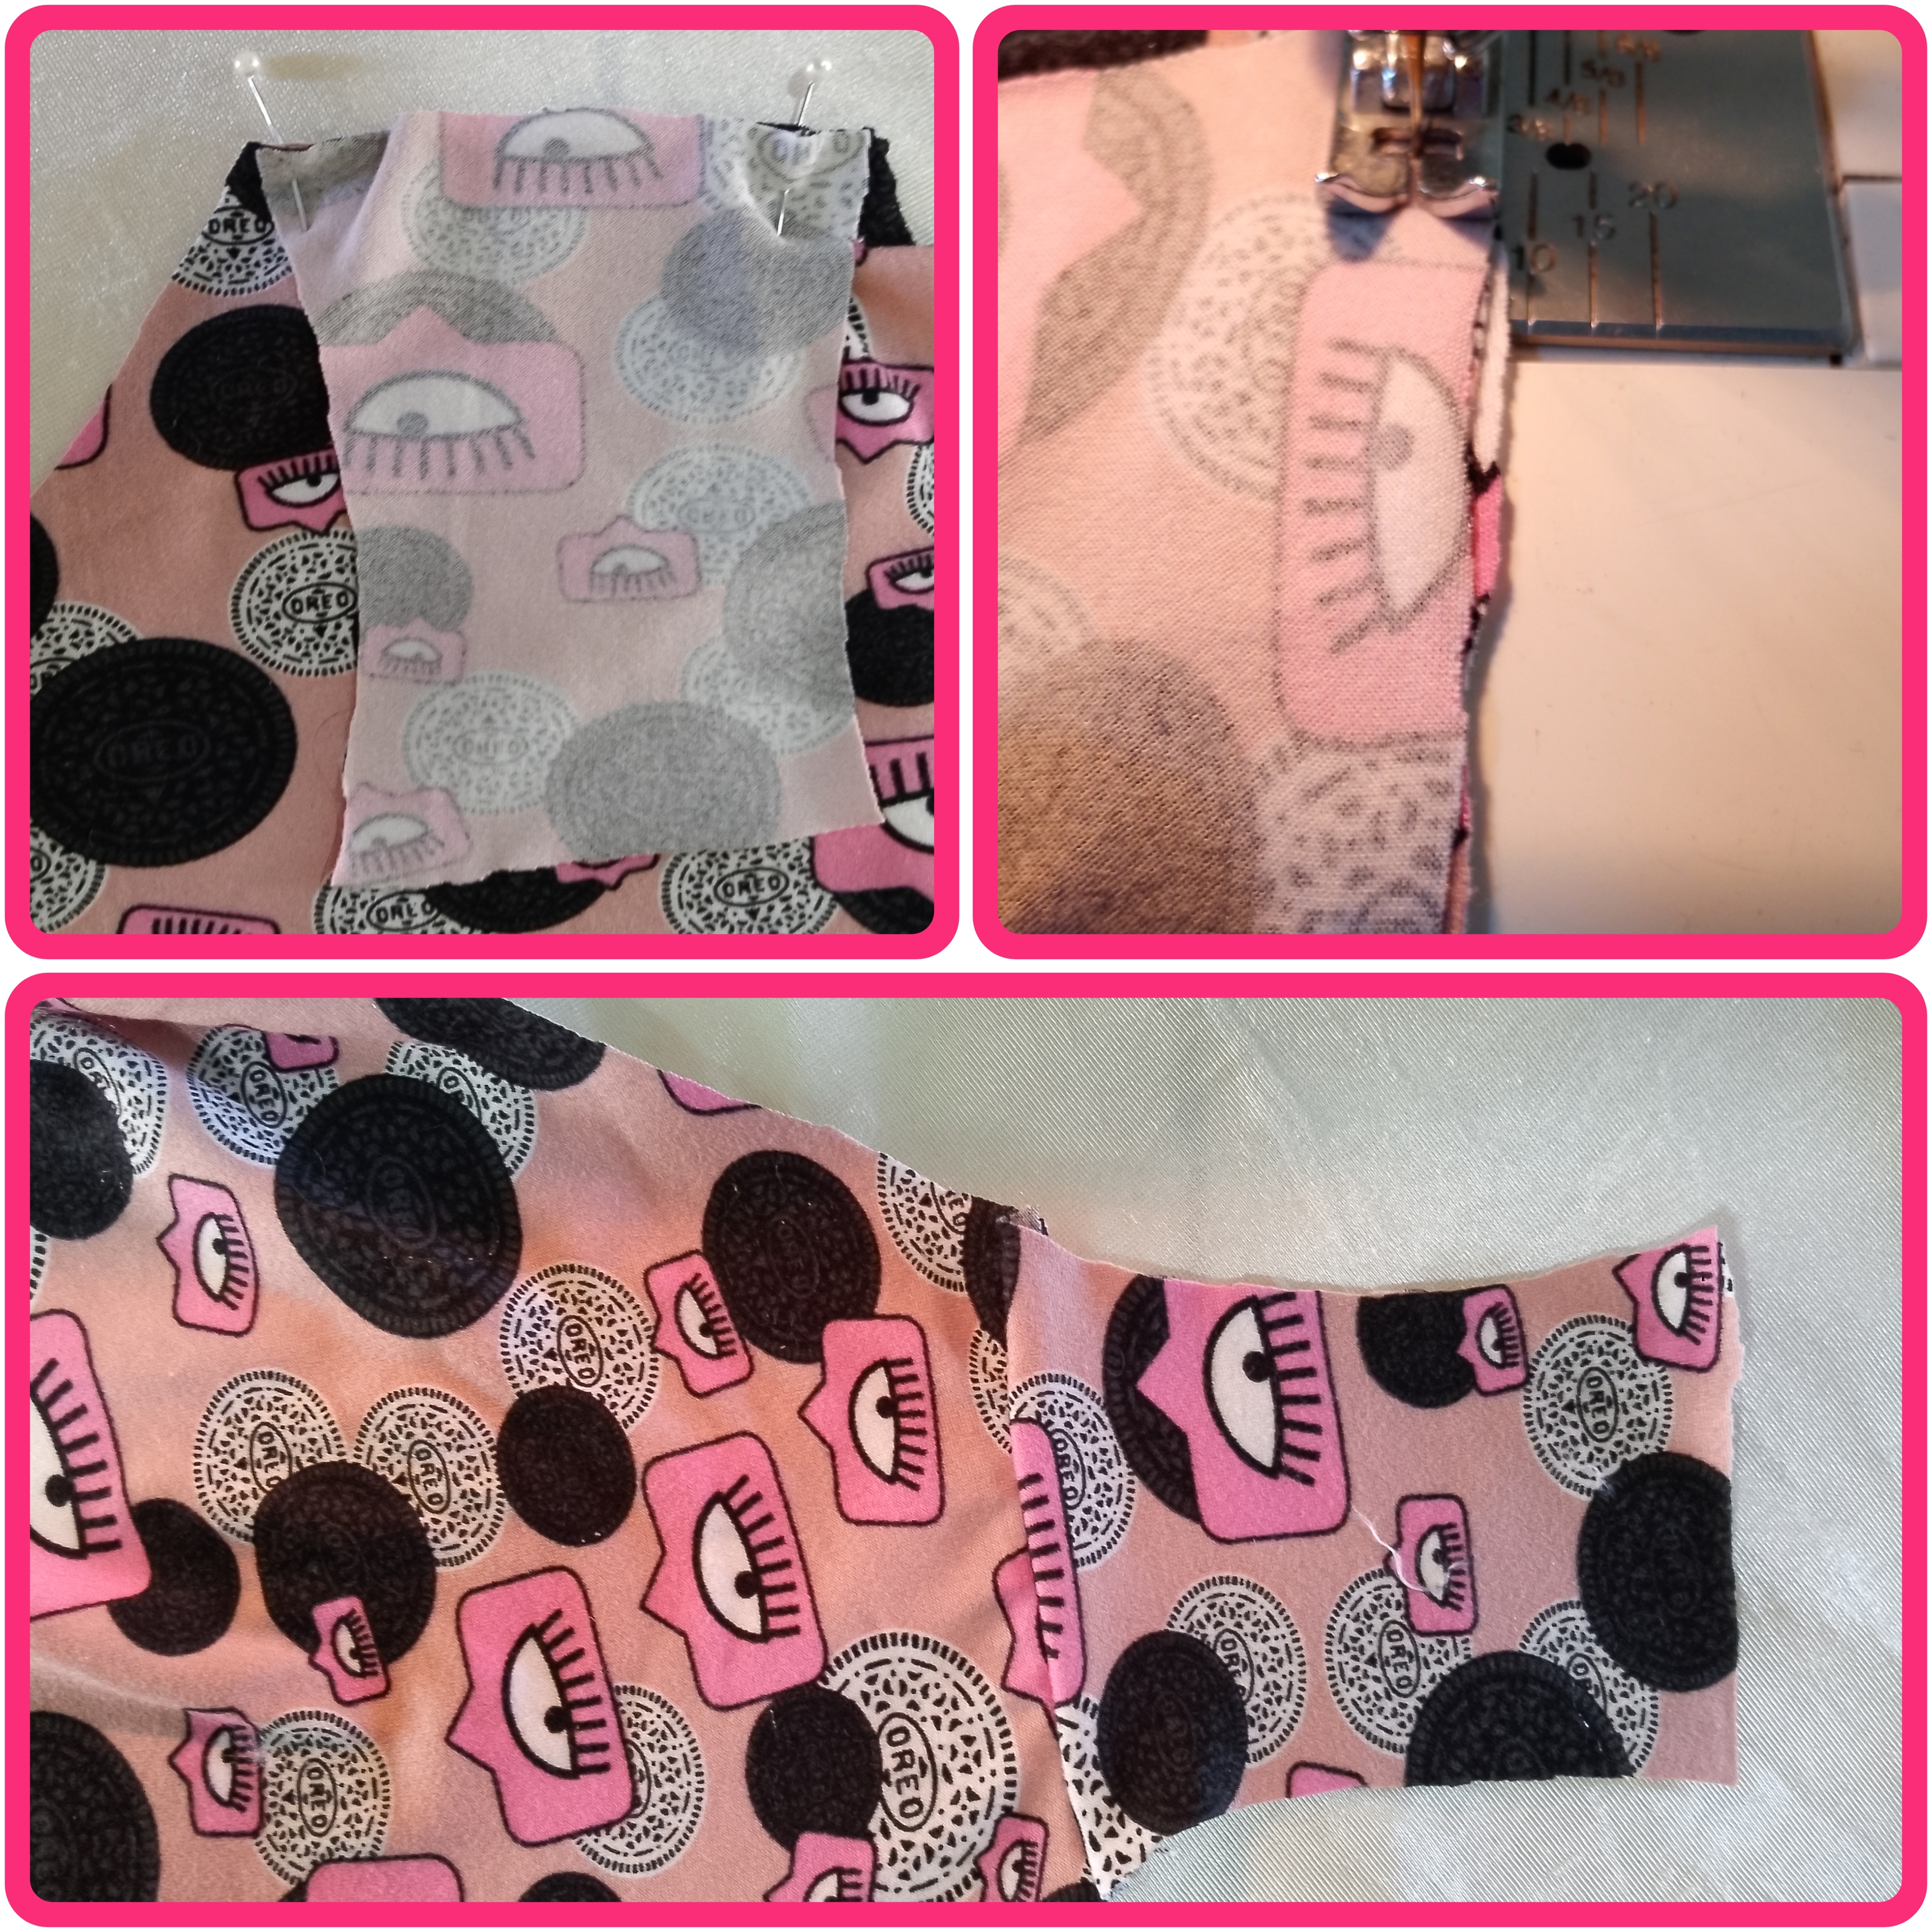
Con las piezas cortadas en tela, iniciamos uniendo el delantero con las entrepiernas. Colocando el delantero entre las dos piezas pequeñas, como se muestra en la imagen.
With the pieces cut in fabric, we start by joining the front with the crotch. Place the front between the two small pieces, as shown in the image.
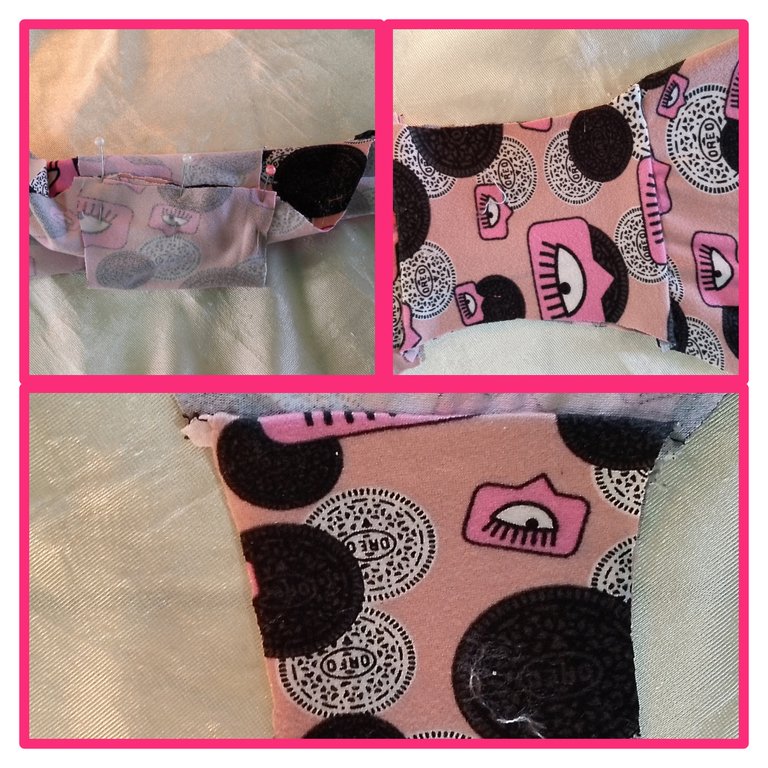
Para unir la parte de atrás, enrolle el delantero hacia la costura de la entrepierna y fijé con alfileres el trasero al otro extremo, cuidando que queden los derechos de frente y haga una costura recta para unir todas las piezas:
To join the back, roll the front to the crotch seam and pin the back to the other end, taking care to leave right sides facing and make a straight seam to join all the pieces together:
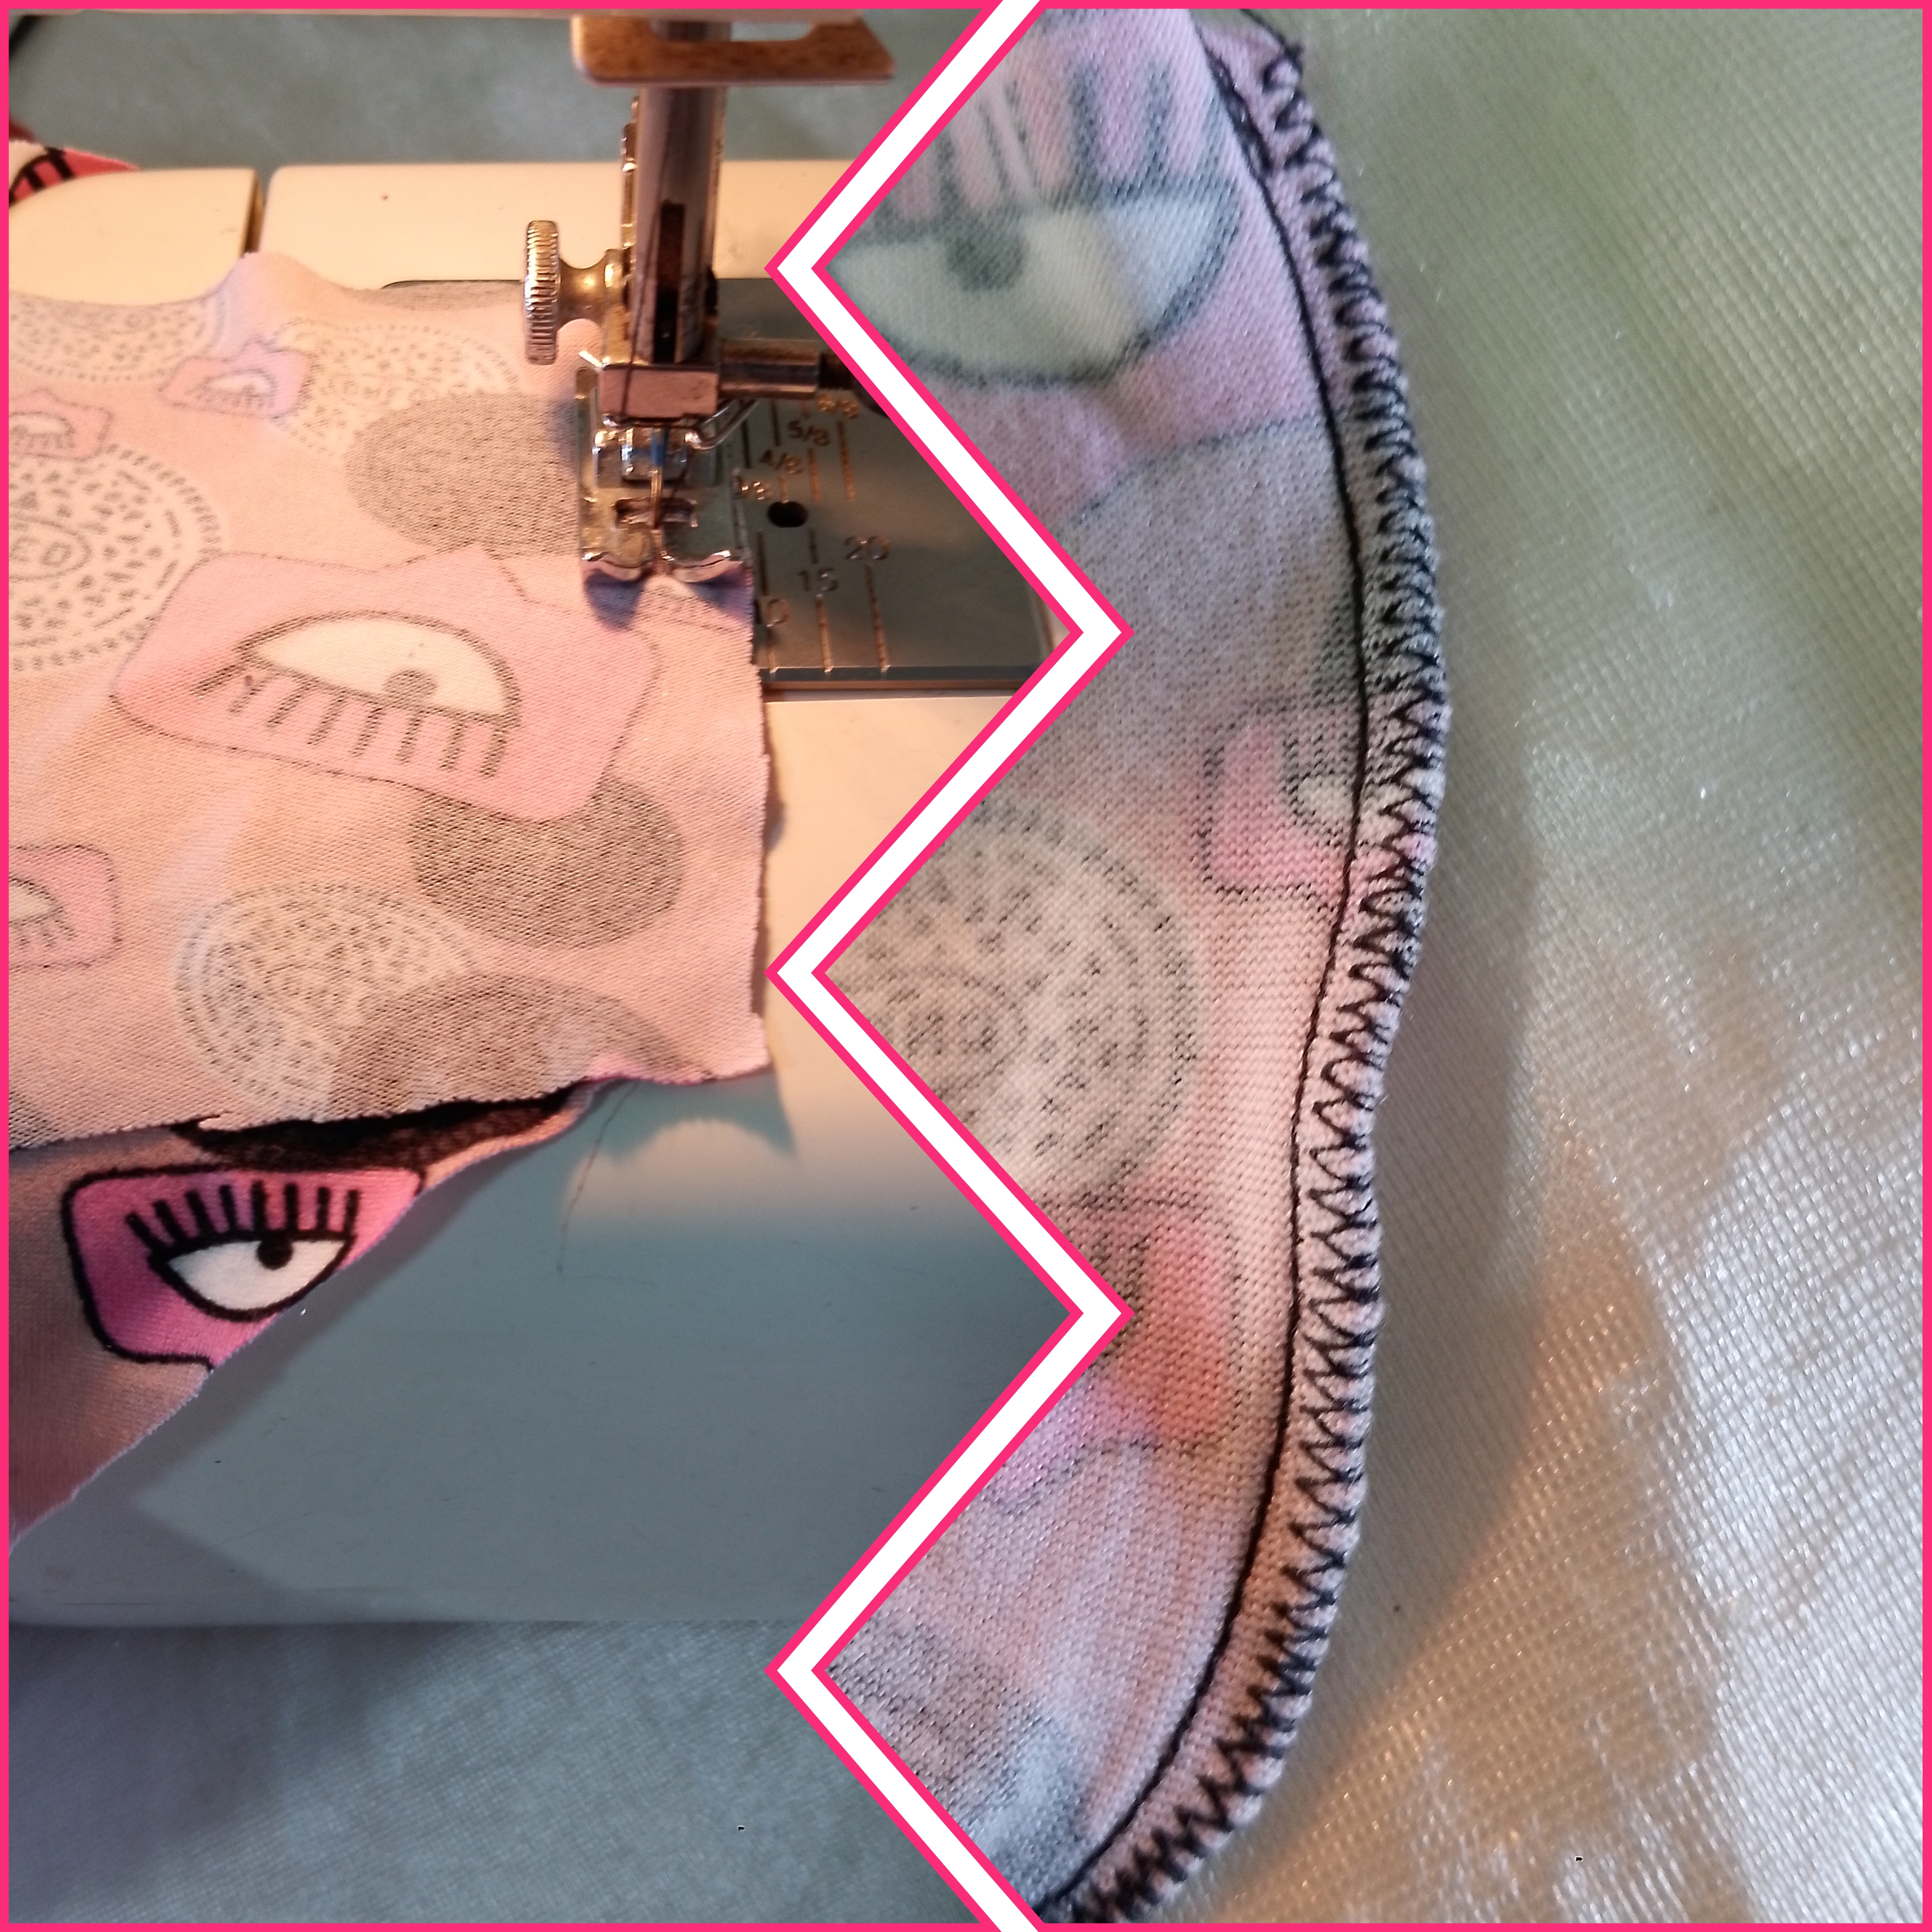
Una los lados de la panty para cerrar con una costura recta y remate por la orilla con zigzag. Aunque la tela no deshilacha, servirá como refuerzo a la hora de estirar.
Join the sides of the panty to close with a straight seam and zigzag along the edge. Although the fabric does not fray, it will serve as a reinforcement when stretching.
Con la tira de lycra, una ambos extremos y doble para darle mayor ajuste alrededor de la cintura. Y un mejor acabado a la prenda. Recuerda ir estirando un poco la tela de lycra, no la de algodón. Esto ayuda a que la prenda no le quede floja en la zona de la cintura.
Luego, doble alrededor de la pierna y haga una costura con puntada recta, si usa aguja doble mejor. Yo la hice sencilla para mostrar como queda si no eres muy diestra en la costura. Más adelante le mostraré cómo usar ese tipo de agujas tan necesarias para coser prendas íntimas.
With lycra strip, one both ends and double to give a better fit around the waist. And a better finish to the garment. Remember to stretch the lycra fabric a little, not the cotton. This helps the garment not to be loose in the waist area.
Then make a fold around the leg and make a straight point seam, better if you use a twin needle. I made it simple to show how it looks if you are not very good at sewing. Later on I will show you how to use this type of needle so necessary for sewing undergarments.
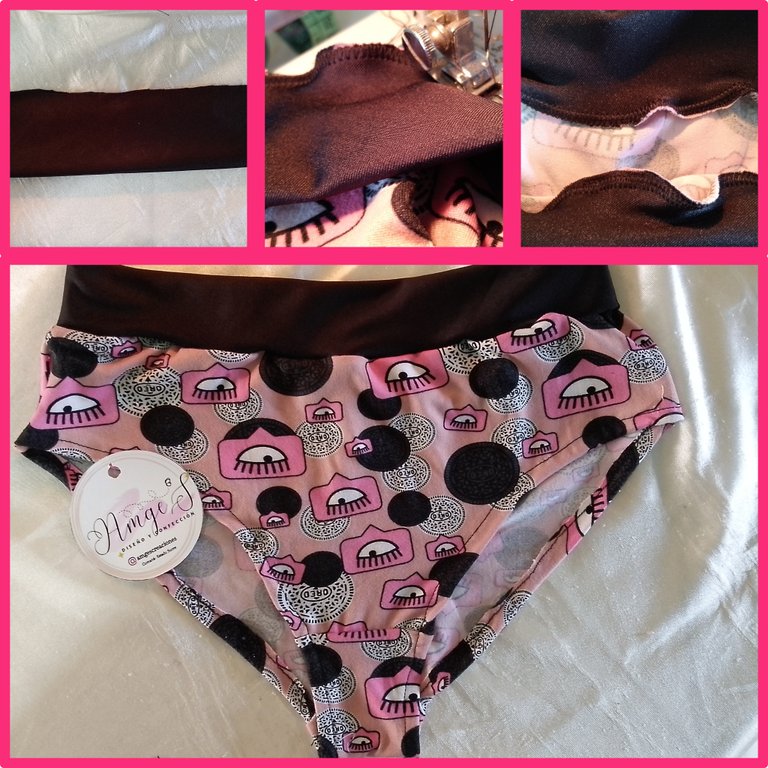
Y listo, ya puedes ahorrarte un dinerito haciendo tus propios pantys. Además de usar los colores y estampados que más te gusten.
And that's it, you can save a little money making your own tights. And you can use the colors and prints you like the most.
Esperando que puedan aprender sobre Cómo confeccionar una panty sin elástico.
Un saludo para todos y bendiciones.
Hoping you can learn about How to make a panty without elastic.
Greetings to all and blessings.