Mother's Day is here 🌺🌹🌺💞 Give the gift of a beautiful Detail made with your own hands. Beautiful Basket made with foami or eva gum📏✂️/// Hermosa Cesta hecha con foami o goma eva📏✂️

in #hive-1305602 years ago

1652036894961.jpg

####_______________✂️📏🖌️🏵️_______________

Hello my dear friends of Hive Blog, warm greetings to all who read me. Happy Sunday and Happy Mother's Day 🌺. This is undoubtedly one of the most special days of the year, Mother's Day is more than a day of celebration and gifts, this day is to show how much we love and value the one who gave us life. And we don't need this day to let those mothers know that we value them and that it is our greatest, most unconditional and lasting love that we will have throughout our lives. Show that love in life, and don't wait for this day to do it, Mother's Day is every day.

Today I bring you a tutorial referring to this important date, I have made a beautiful basket with recycled material, it is a nice and practical option if you want to give something made with your own hands to the most important person in your life, your mom.

This beautiful basket is made of eva rubber only, so if you have scraps of this material at home, some glue or liquid silicone, and a pair of scissors, you don't need anything else to make it. I hope you like it, and Welcome to My Blog 💖

Hola mis apreciados amigos de Hive Blog, saludos cordiales a todos los que me leen. Feliz Domingo y Feliz día de Las Madres 🌺. Éste es sin duda uno de los días mas especiales del año, el Día de la madre es más que un día de celebración y regalos, este día es para demostrar cuánto amamos y valoramos a el ser que nos dió la vida. Y no hace falta que llegue éste día para hacerle saber a esas madres que las valoramos y que es nuestro amor más grande, el más incondicional y el mas duradero que tendremos a lo largo de nuestras vidas. Demuestren ese amor en vida, y no esperen éste día para hacerlo, el día de las madres es todos los días.

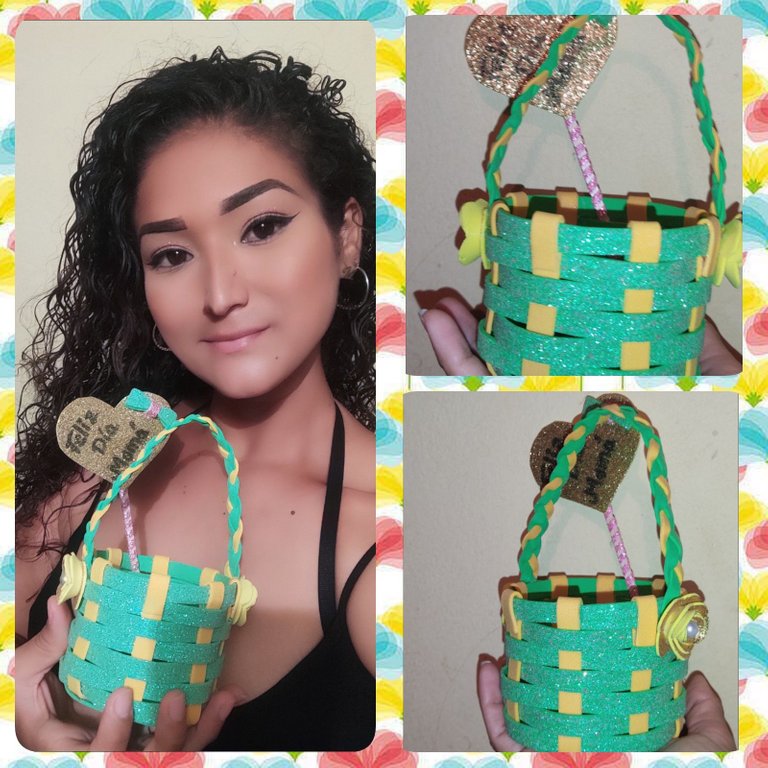
Hoy les traigo un tutorial haciendo referencia a esta importante fecha, he realizado una hermosa cesta con material reciclado, es una linda y práctica opción si quieres regalarle algo realizado con tus propias manos al ser más importante de tu vida, tu mamá.

Esta linda cesta esta hecha de goma eva únicamente, asi que si tienes retazos de este material en tu casa, un poco de pegamento o Silicón liquido, y unas tijeras, no necesitas nada mas para poder elaborarla. Espero que les guste, y Bienvenidos a Mi Blog 💖

EVA RUBBER BASKET TO GIVE TO MOTHERS ON THEIR DAY 💞🌹❤️💖🌺

CESTA DE GOMA EVA PARA OBSEQUIAR A LAS MADRES EN SU DÍA 💞🌹❤️💖🌺
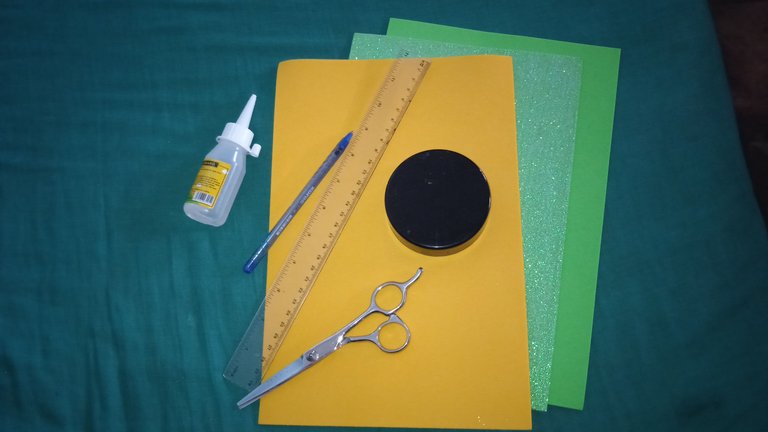
🌷MATERIALS:

🖌️Foami (eva rubber) in different colors.
🖌️Scissors.
🖌️Glue (can be instant or Silicone).
🖌️Ruler.
🖌️Pencil.
🖌️Circle cap to draw circle molds.

🌷MATERIALES:

🖌️Foami (goma eva) de diferentes colores.
🖌️Tijeras.
🖌️Pegamento (puede ser instantáneo o Silicón).
🖌️Regla.
🖌️Lápiz.
🖌️Tapa circular para sacar moldes de círculos.

IMG_20220507_112211.jpg

🌷STEP-BY-STEP REALIZATION🌷.

🌷REALIZACIÓN PASO A PASO🌷
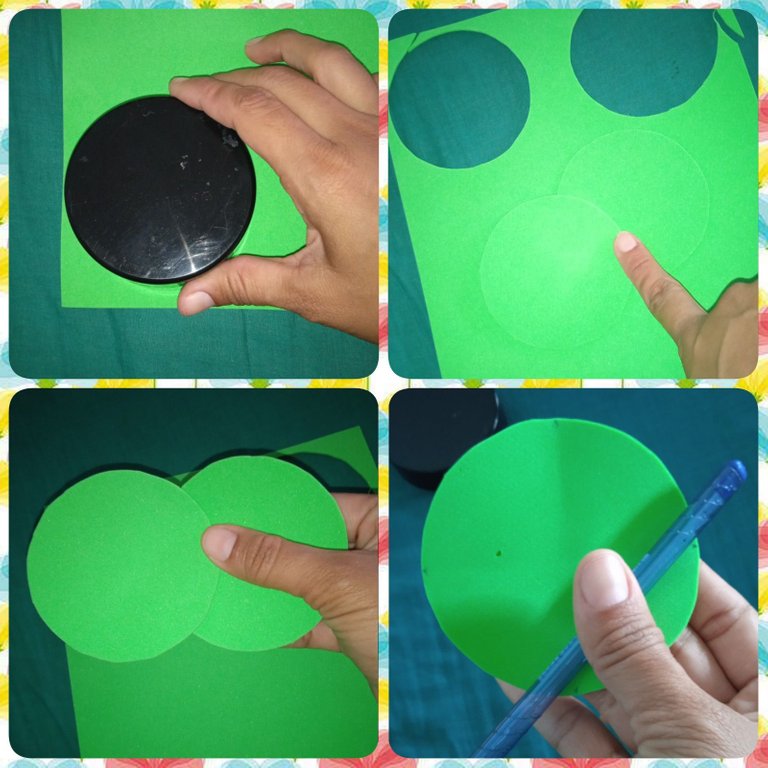
STEP 1.

The first thing I did was to take a sheet of foami or eva rubber green color (can be the color of your preference) and with the circular lid mark and cut out 2 circles of approximately 8 cm. This will be the base of our little basket. Then I took one of the circles and folded them in half to mark the corners with the pencil, we do it so that there are 4 initial marks.

PASO 1

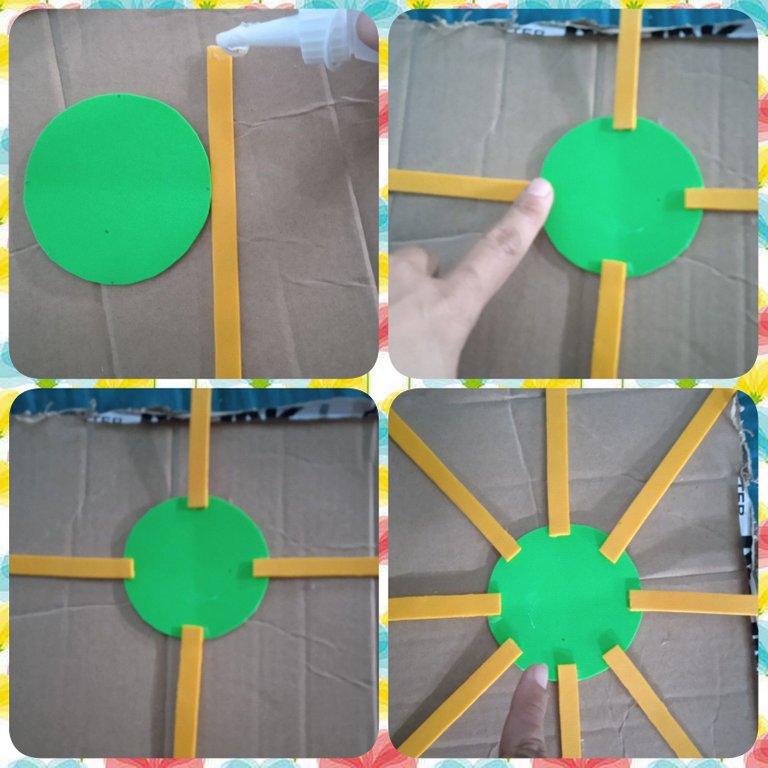
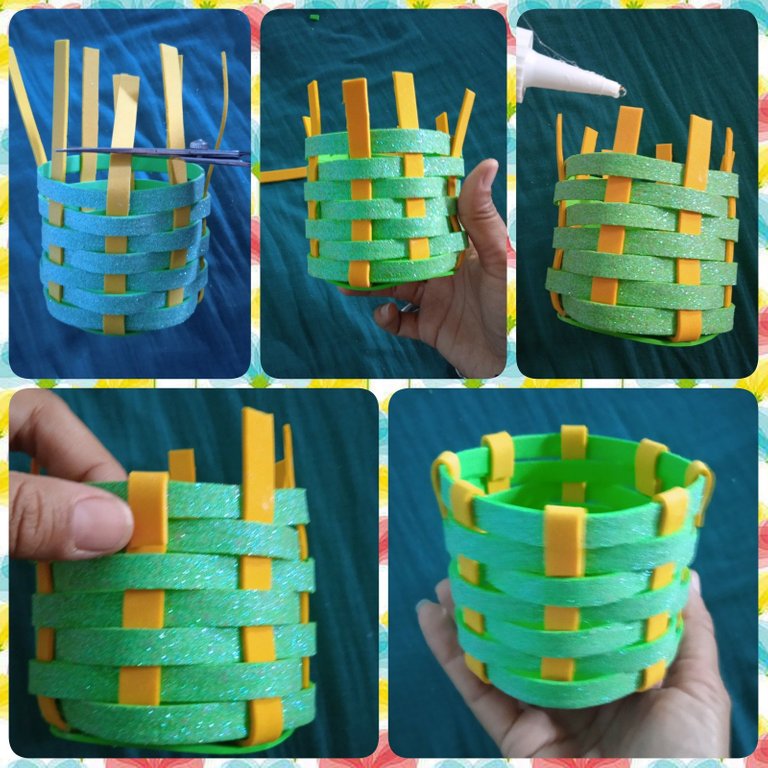
Lo primero que hice fue tomar una lamina de foami o goma eva color verde (puede ser el color de tu preferencia) y con la tapa circular marque y recorté 2 circulos de aproximadamente 8 cm. Esto sera la base de nuestra pequeña canasta. Luego tomé uno los círculos y los doblamos a la mitad para marcar las esquinas con el lapiz, lo hacemos de manera que queden 4 marcas iniciales.
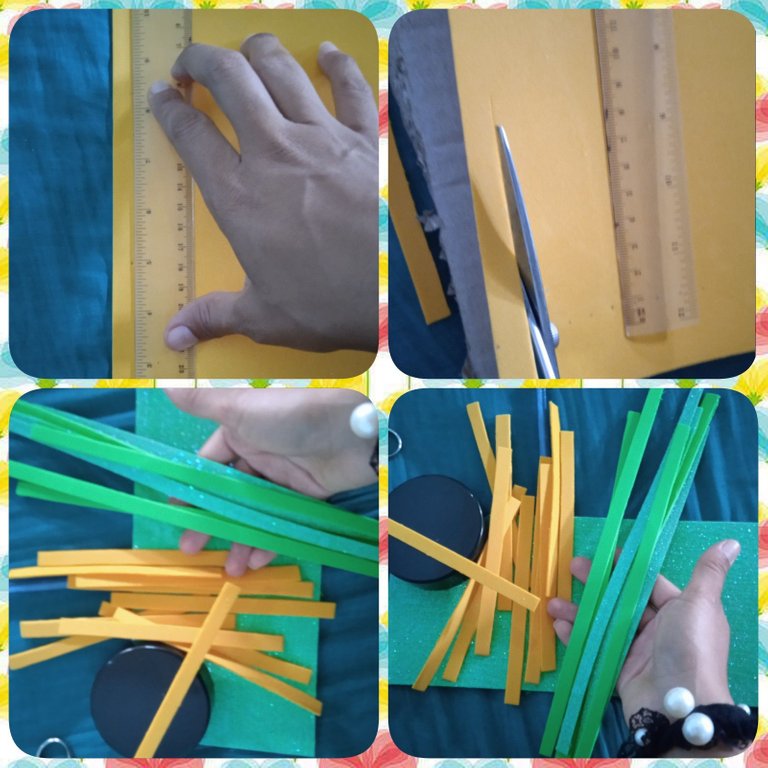
1651975666423.jpg

Step 2

Take another color of eva rubber, this time yellow color and cut 8 strips of approximately 15 centimeters long and 1 cm wide, also cut 7 strips of frosted green color of approximately 30 centimeters long and 1 cm wide. With these strips we can weave our basket.

Paso 2

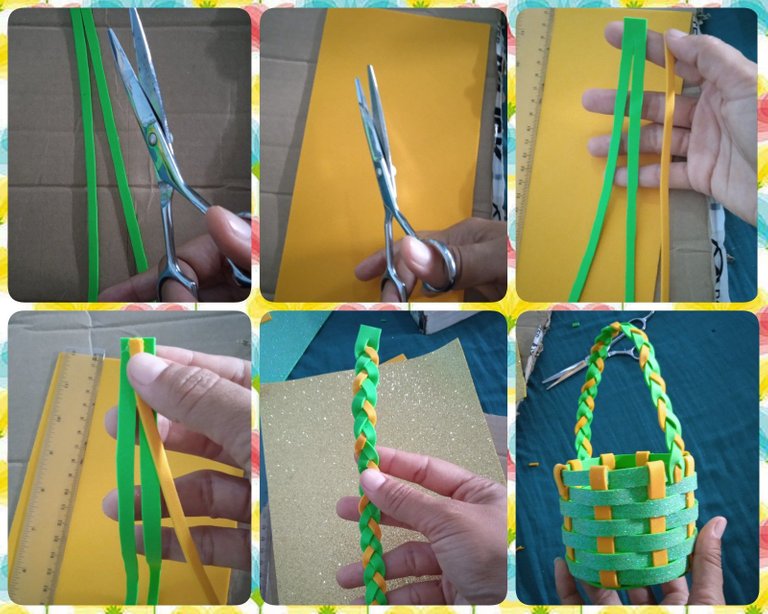
Tome otro color de goma eva, esta vez color amarillo y recorte 8 tiras de aproximadamente 15 centímetros de largo y 1 cm de ancho, también recorte 7 tiras color verde escarchado de aproximadamente 30 cms de largo y 1 cm de ancho. Estas tiras podremos tejer nuestra cesta.

1651975775820.jpg

Step 3

Now we use the glue, I used in this opportunity cold liquid silicone, and we place a point in the marks we made previously in one of the green circles, we glue 4 yellow strips in each mark, so that they are in the form of a cross, then we glue the other 4 yellow strips in the spaces left between each initial mark, as shown in the photo. There should be 8 yellow strips glued to the circle.

Paso 3

Ahora usamos el pegamento, yo use en esta oportunidad silicón líquido frío, y colocamos un punto en las marcas que hicimos anteriormente en uno de los circulos verdes, pegamos 4 tiras amarillas en cada marca, de manera que queden en forma de cruz, seguidamente pegamos las otras 4 tiras amarillas en los espacios que quedaron entre cada marca inicial, como se muestra en la foto. Deben ir 8 tiras amarillas pegadas al círculo.

1651975963069.jpg

Step 4

Now I apply liquid silicone to another green circle and glue it on top of the first one. This is to hide the union of the strips on the green foami. So we have our base ready.

Paso 4

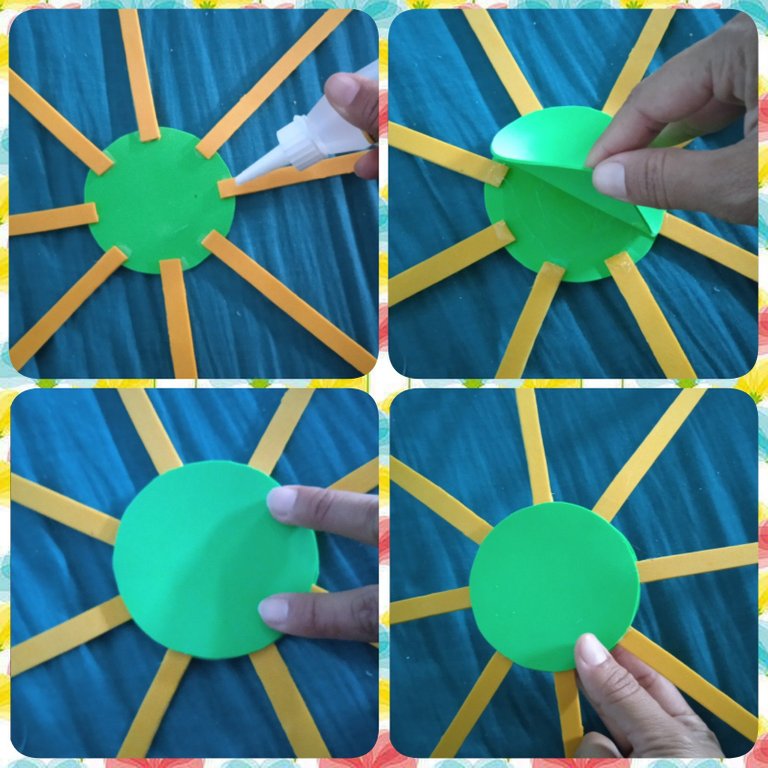
Ahora le aplico silicon liquido a otro circulo verde y lo pegamos encima del primero. Esto es para ocultar la unión de las tiras en el foami verde. Asi tenemos lista nuestra base.

1651976025904.jpg

Step 5

Now we start weaving our basket. We take a frosted green strip from the ones we cut out previously and we glue it on the base of one of the yellow strips, always on the inside, and we begin to pass this green strip under and over each yellow strip until we get to the beginning where the other end was glued, we glue with silicon and proceed to glue the next green strip, this time on the next yellow strip, that is, never glue them on the same yellow strip, always on the next one, as shown in the photos. After gluing each green strip, we pull the yellow ones to see how this basket takes shape. We continue gluing all 7 green strips until we get the shape of this beautiful basket.

Paso 5

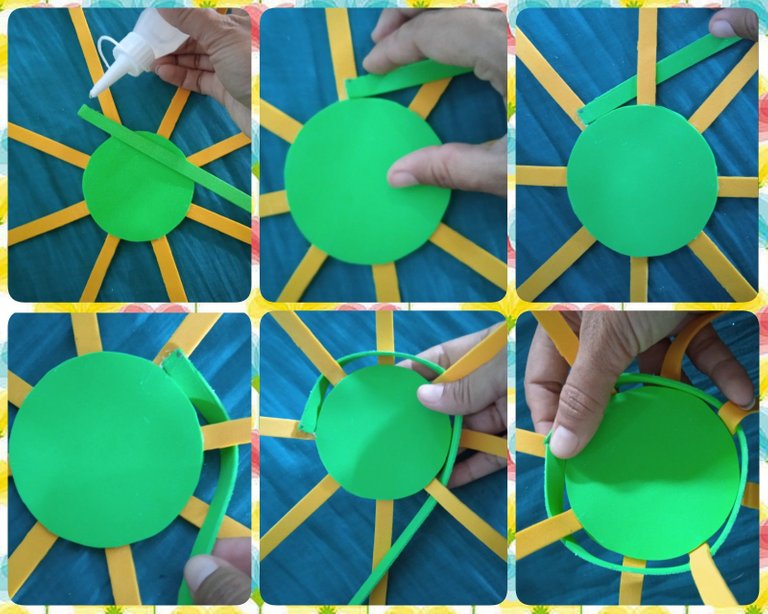
En este comenzaremos a tejer nuestra cesta. Tomamos una tira verde escarchada de las que recortamos anteriormente y la pegamos en la base de una de las tiras amarillas, siempre en la parte interior, y comenzamos a pasar esta tira verde por debajo y por encima de cada tira amarilla hasta que lleguemos al inicio donde se pego el otro extremo, pegamos con silicon y procedemos a pegar la siguiente tira verde, esta vez en la siguiente amarilla, es decir, nunca hay que pegarlas en la misma tira amarilla, siempre en la que sigue, tal y como se muestra en las fotos. Después de pegar cada tira verde, vamos jalando las amarillas para ur viendo como toma forma esta cesta. Continuamos pegando todas las 7 tiras verdes hasta lograr darle forma a esta linda canasta.

1651976197193.jpg

1651976575115.jpg

Step 6

Now with the scissors, cut the excess yellow strips and leave about 1.5 cm in each, and apply liquid silicone to glue them to the basket. The ones left on the outside will be glued to the inside and vice versa. And in this way we already have our basket for mom assembled.

Paso 6

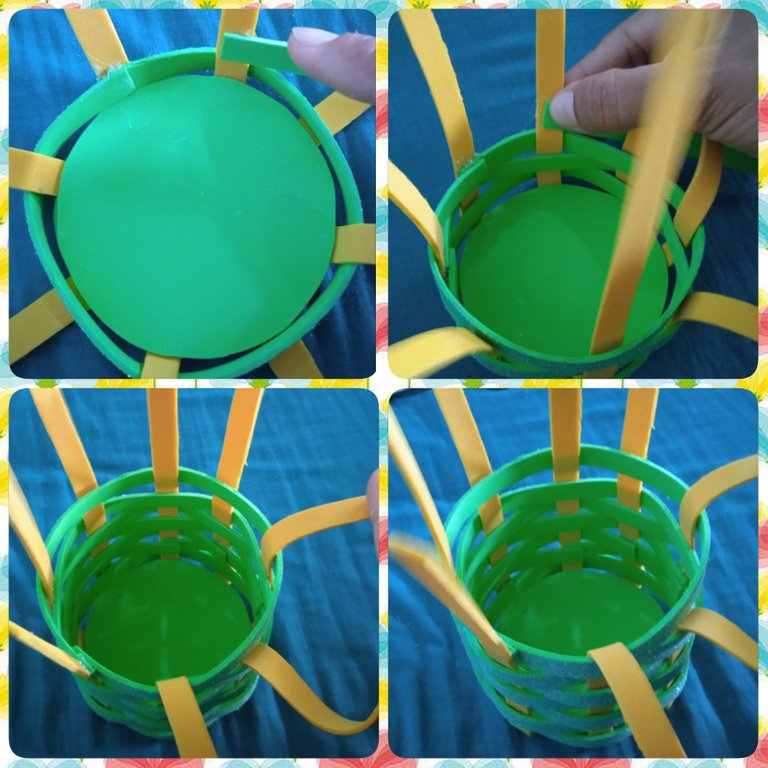
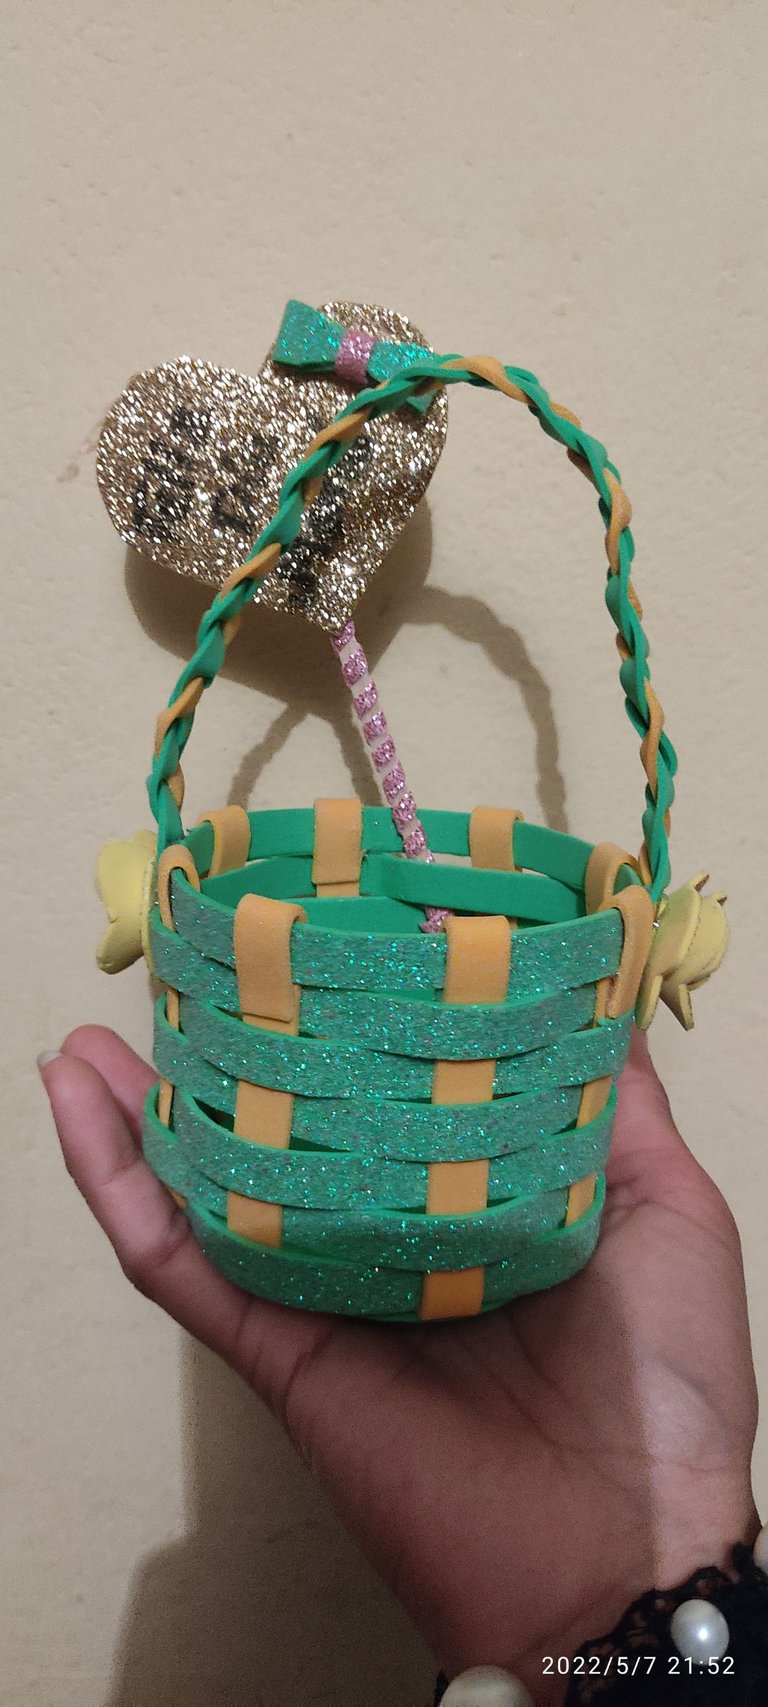
Ahora con las tijeras, recorto el excedente de tiras amarillas y dejo aproximadamente 1,5 cm en cada una, y le aplico silicon liquido para pegarlas ala canasta. Las que quedaron por fuera se pegara hacía dentro y viceversa. Y de esta manera ya tenemos armada nuestra cestica para mamá.

1651976728695.jpg

ELABORATION OF THE RIBBON TO HOLD THE BASKET.

ELABORACIÓN DE LA CINTA PARA SOSTENER EL CESTA.

To hold the basket, make a woven ribbon or handle. I took a green strip of 1 cm wide and 30 cm long and I opened it in 2 parts leaving 2 strips of 5 millimeters, then I added another yellow strip of the same measures. And I started to weave a braid that I then glued directly on two ends of the basket.

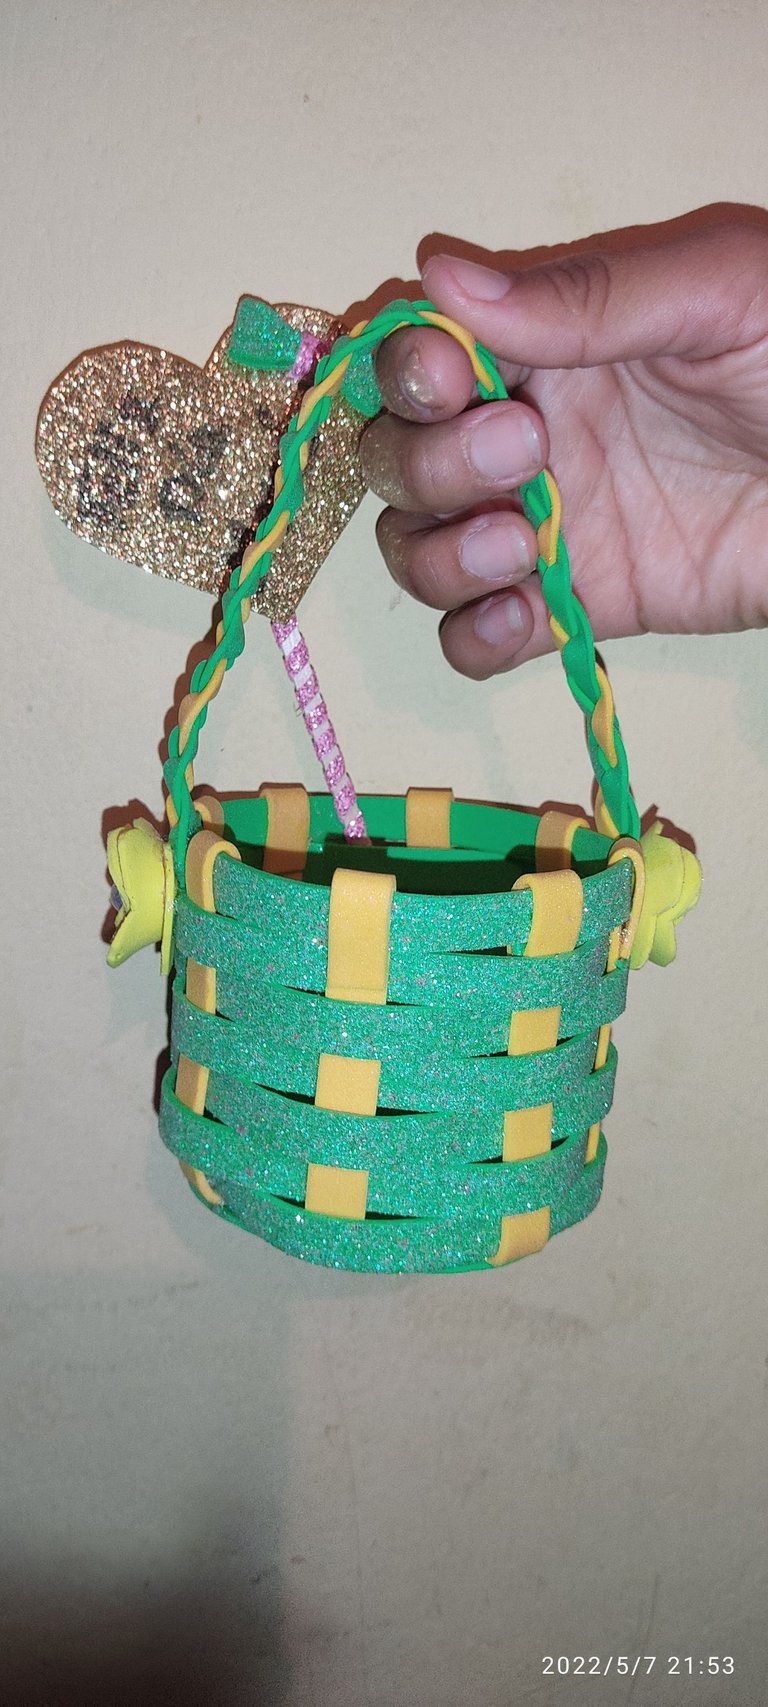
Para sostener esta cesta elabore una cinta o agarradera tejida. Tome una tira verde de un 1 cm de ancho y 30 cm de largo y la abrí en 2 partes dejando 2 tiras de 5 milímetros, luego le agregue otra tira de color amarillo de las mismas medidas. Y empecé a tejer una trenza que luego pegue directamente en dos extremos de la cesta.

1651976861580.jpg

ELABORATION OF THE FLOWERS.🏵️

ELABORACIÓN DE LAS FLORESITAS.🏵️

These flowers are to hide the union where I glued the braid that will serve as a handle. The first thing I did was to cut out a circle of foami in the color of your choice, I used gold. Then I cut this circle in the shape of a spiral, and then give it some curved shapes on the edges resembling the petals of the flowers, and finally I just started to glue it around from the beginning of the spiral to the inside, the bottom end will serve as the lid of our flower, seal it with liquid silicone, glue a pebble in the middle and ready, we have our flower for the basket.

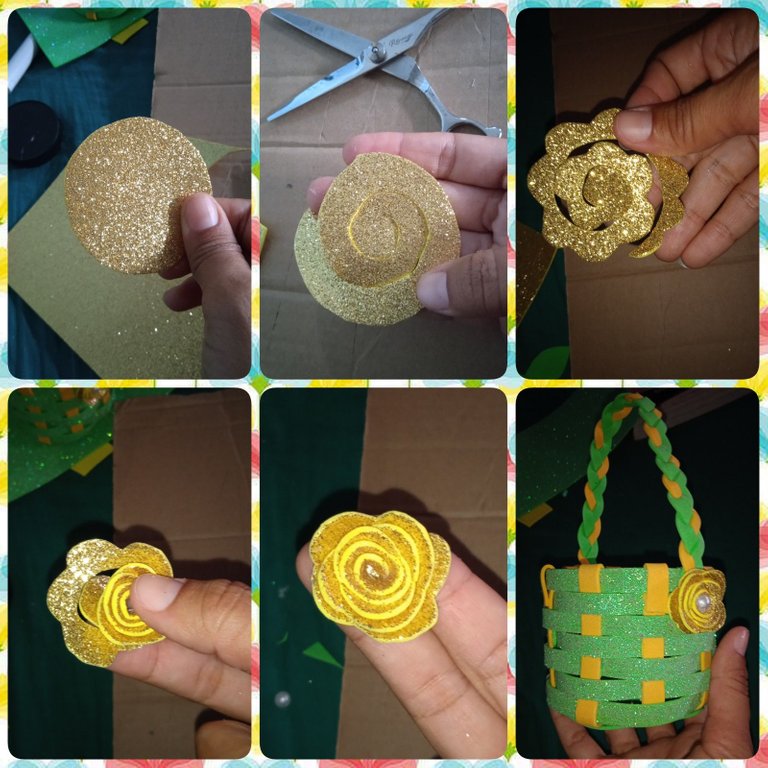
Éstas flores son para ocultar la union donde pegue la trenza que servirá de agarradera. Lo primero que hice recortar un circulo de foami del colo de tu preferencia, yo utilice dorado. Luego este círculo lo recorte en forma de espiral, para después darle unas formas de curvas en los bordes asemejando los pétalos de las flores, y por último solo empece a pegarlo dandole vueltas desde el comienzo del espiral hasta en interior, la parte inferior final servirá como tapa de nuestra flor, sellamos con silicón liquido, pegamos una piedrita en el medio y listo, ya tenemos nuestra flor para la cesta.

1651976997093.jpg

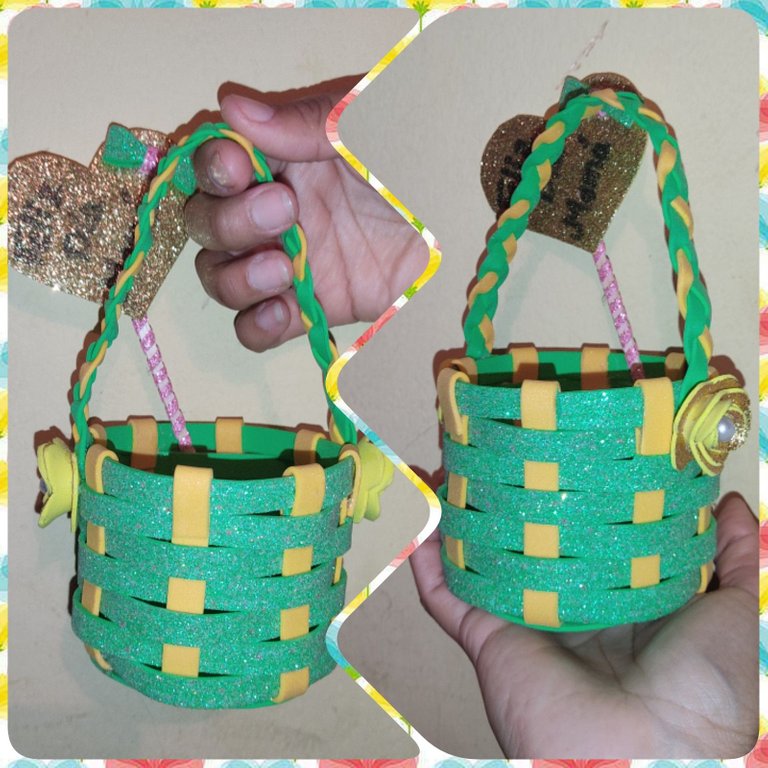
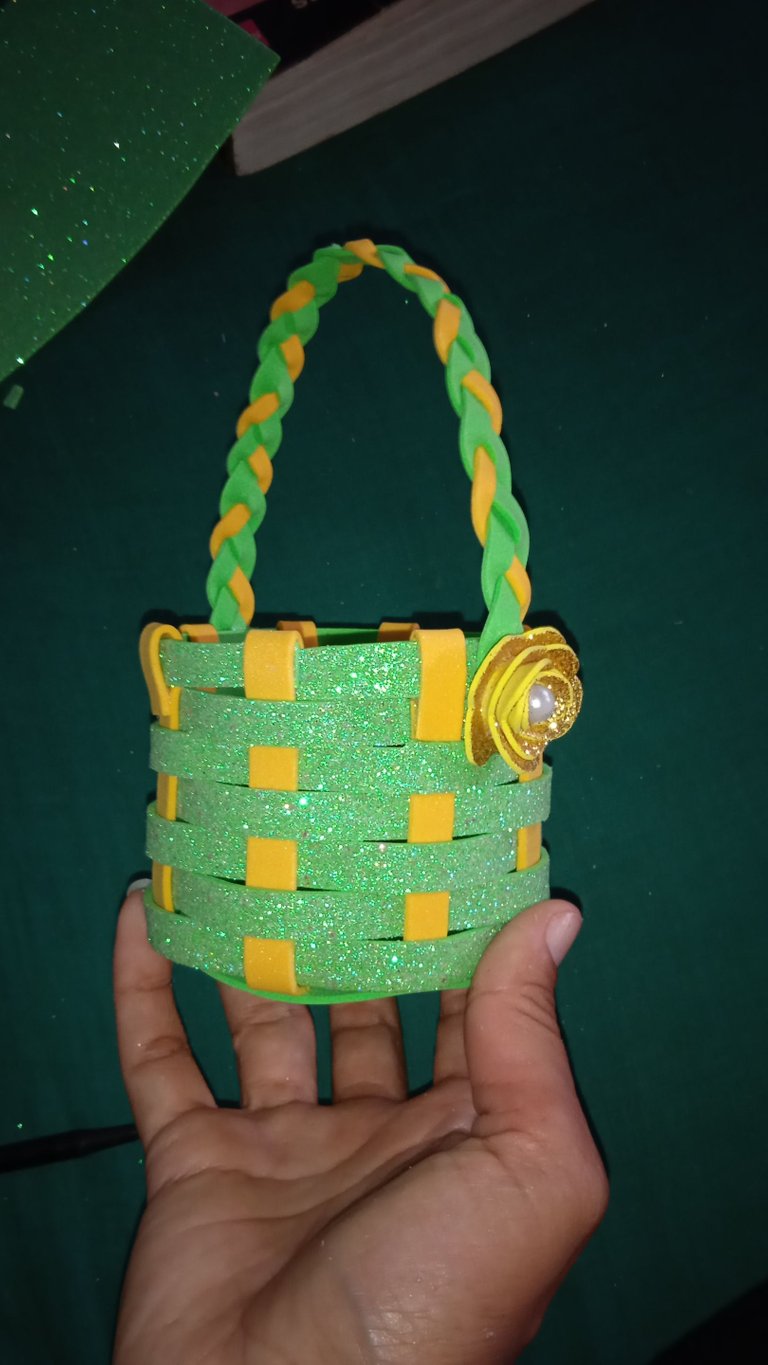
Now our beautiful basket to give to mom on her day is ready, how did it look? ❤️🌹💞🖌️✂️📏

Ya nuestra hermosa cesta para regalar a mamá en su día esta lista. ¿Que tal quedó? ❤️🌹💞🖌️✂️📏

1651977266054.jpg

1651977544378.jpg

1651974974107.jpg

1651974974117.jpg

IMG_20220507_140835.jpg

IMG_20220507_140524.jpg

1652016189117.jpg

1652017191918.jpg

Well my dear friends, this was my post today, I hope you liked it, I loved the result, it is a basket that you can use to store clothes, cosmetic goodies or just to decorate your table or hairstylist. Once again, Thank you for visiting my Blog and for the support you give me through your votes and comments, I say goodbye and I hope to be back with you very soon. I love you all. HAPPY DAY BEAUTIFUL MOTHERS🥰🥰🥰🥰😍🥳

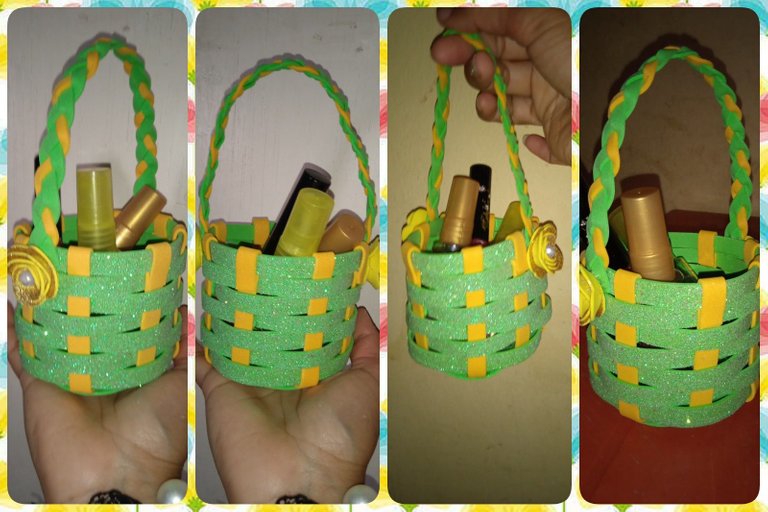
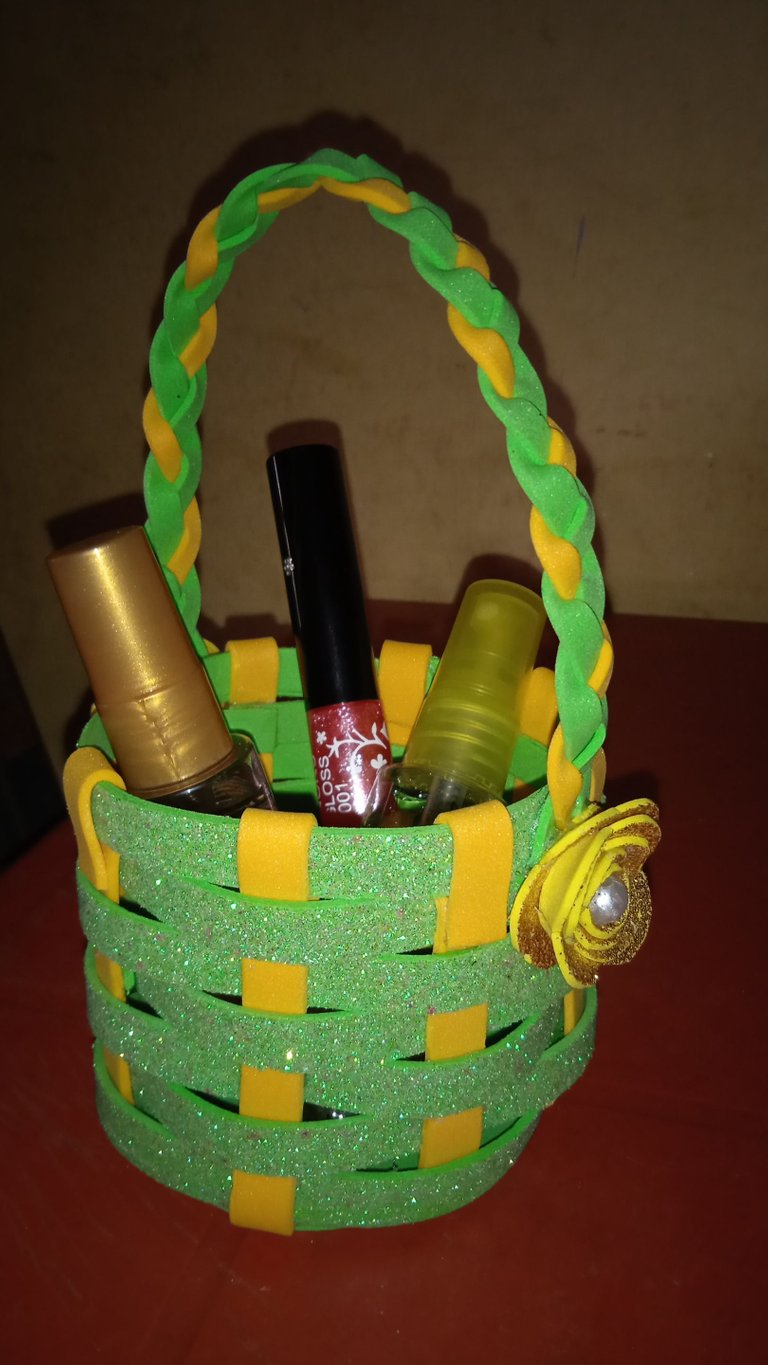
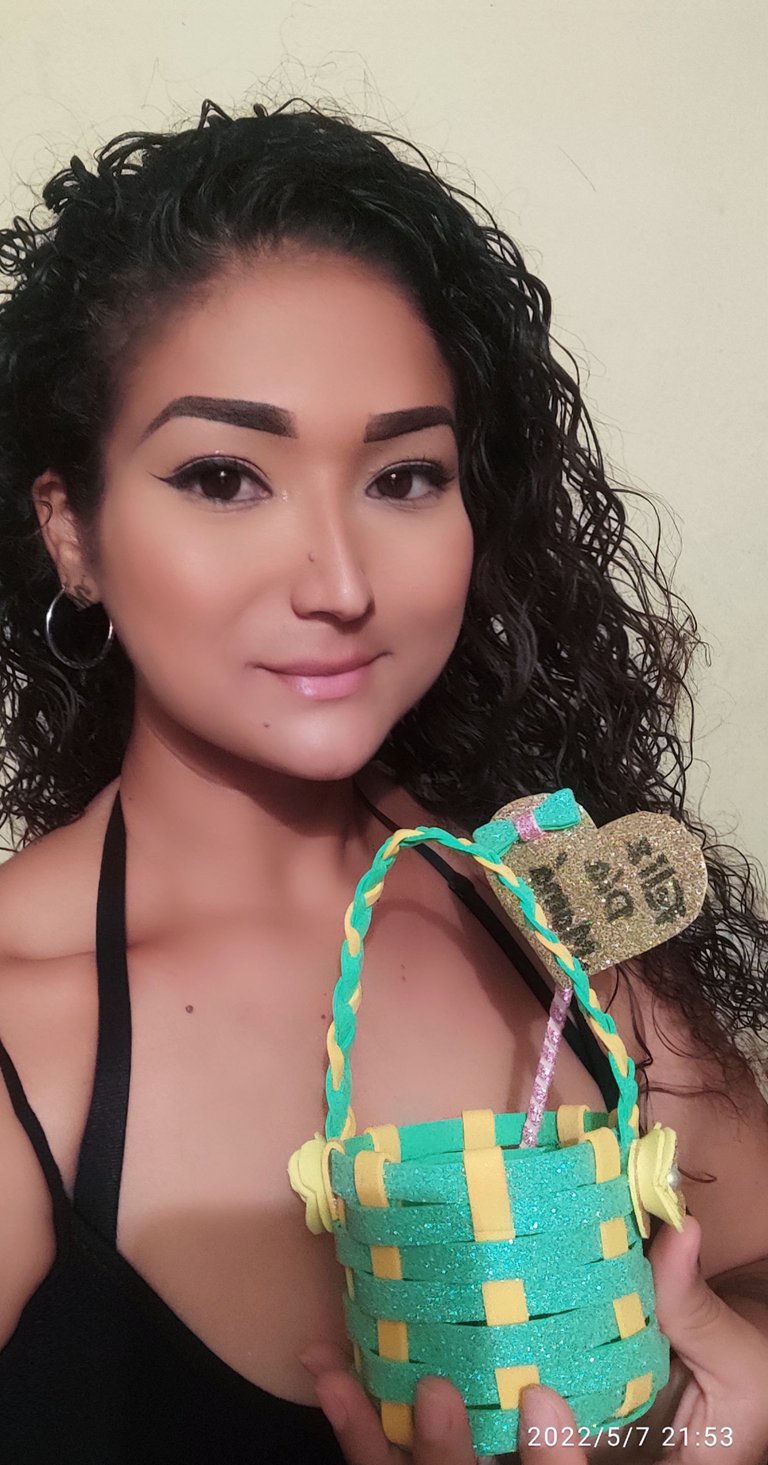
Bueno mis queridos amigos, este fué mi post de hoy, espero que les haya gustado, a mi me encantó el resultado, es una cesta que pueden utilizar para muchas guardar prendas, golosinas cosmeticos o simplemente para adornar tu mesita o peinadora. Una vez más, Gracias por visitar mi Blog y por el apoyo que me dan a través de sus votos y comentarios, ne despido y espero estar de vuelta con ustedes muy pronto. Se les quiere bonito. FELIZ DÍA MADRES HERMOSAS🥰🥰🥰🥰😍🥳

flyerdesign_05042022_094525.png

Content is Original and Exclusive for Hive Blog. All photos are my property and were taken with my Xiaomi Redmi 9C phone.

Contenido es Original y Exclusivo para Hive Blog. Todas las fotos son de mi propiedad y fueron tomadas con mi teléfono Xiaomi Redmi 9C.

Translator DeepL. / Traductor DeepL.

Sort:  

Muy original y bello trabajo.

Gracias por compartir ☺️☺️😊🤗☺️😉
🌈💮🌱🏵️🌻🌺🍁💋♥️🍄💜💐🎊🌸💖🌼🌷🌹🎉🥀💙

Hola buen día. Muchas gracias, me alegra que te haya gustado. Saludos 🙋🏽‍♀️💕🤗


The rewards earned on this comment will go directly to the person sharing the post on Twitter as long as they are registered with @poshtoken. Sign up at https://hiveposh.com.

Hola amiga linda cesta. 😊

Hola amiga muchas gracias. Saludos 🙋🏽‍♀️❤️

Thank you for sharing this amazing post on HIVE!
  • Your content got selected by our fellow curator @rezoanulvibes & you just received a little thank you via an upvote from our non-profit curation initiative!

  • You will be featured in one of our recurring curation compilations and on our pinterest boards! Both are aiming to offer you a stage to widen your audience within and outside of the DIY scene of hive.

Join the official DIYHub community on HIVE and show us more of your amazing work and feel free to connect with us and other DIYers via our discord server: https://discord.gg/mY5uCfQ !

If you want to support our goal to motivate other DIY/art/music/homesteading/... creators just delegate to us and earn 100% of your curation rewards!

Stay creative & hive on!