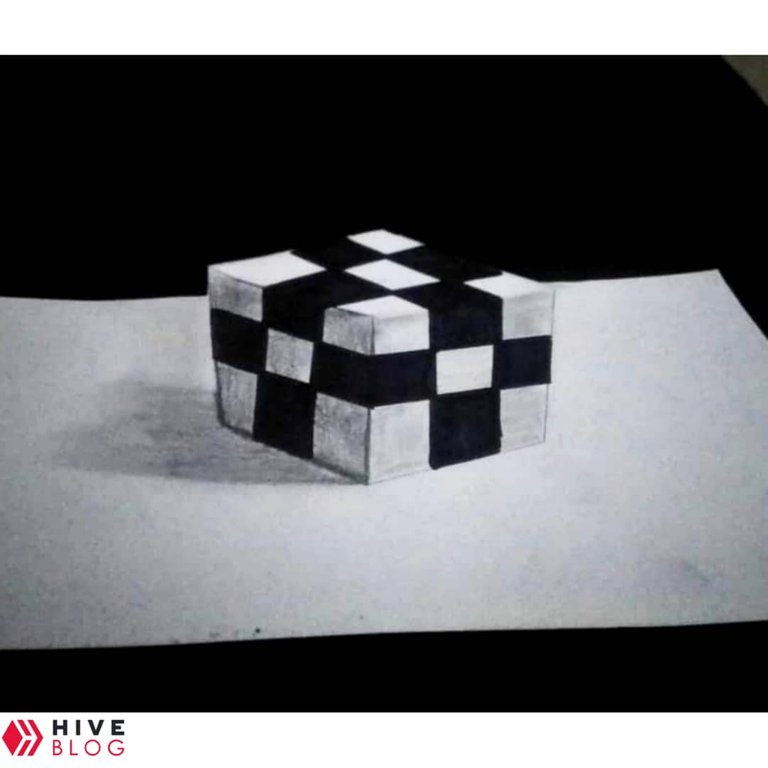
Un gran saludo a todos, Familia de hive. Estoy aquí con mi entrada a el concurso de la comunidad de Hive Diy, el cual se trata de hacer algo en tercera dimensión, por eso me decidí a hacer este cubo en 3D, muchas gracias a @maryoris.marcano por invitarme a este concurso, quiero invitar a @eribetzi a participar.
Sin mas que decir, aquí les dejo el paso a paso.
A big greeting to all, hive Family. I'm here with my entry to the Hive Diy community contest, which is about making something in third dimension, that's why I decided to make this 3D cube, thanks a lot to @maryoris.marcano for inviting me to this contest, I want to invite @eribetzi to participate.
Without more to say, here is the step by step.


Materiales:
❥┊ Hoja blanca
❥┊ Lápiz de carbón
❥┊ Marcador negro
❥┊ Tijera
❥┊ Regla
Materials:
❥┊ White sheet.
❥┊ Charcoal pencil.
❥┊ Black marker.
❥┊ Scissors.
❥┊ Ruler

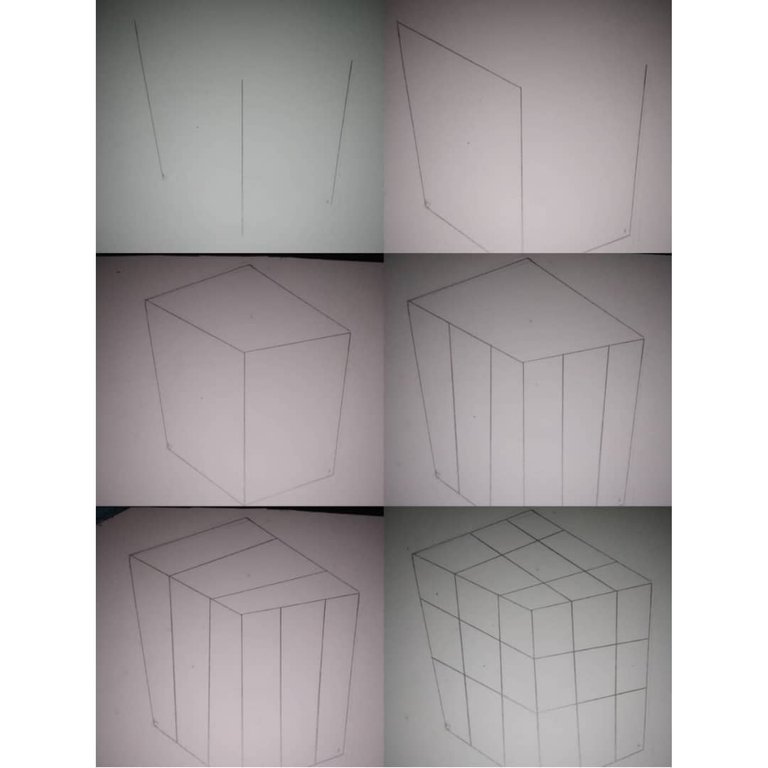

Para empezar, dibujamos 3 líneas verticales separadas, después de eso, uniremos las líneas con otras líneas de forma horizontal, hacemos las ultimas dos líneas arriba para cerrar el cubo. Luego hacemos líneas verticales como muestro en la imagen y después horizontales, estas deben seguirse en las dos caras que se le ve al cubo, es decir tiene que ser una misma línea.
To start, we draw 3 separate vertical lines, after that, we will join the lines with other lines horizontally, we make the last two lines above to close the cube. Then we make vertical lines as shown in the image and then horizontal lines, these must be followed on both sides of the cube, that is to say, they must be the same line.

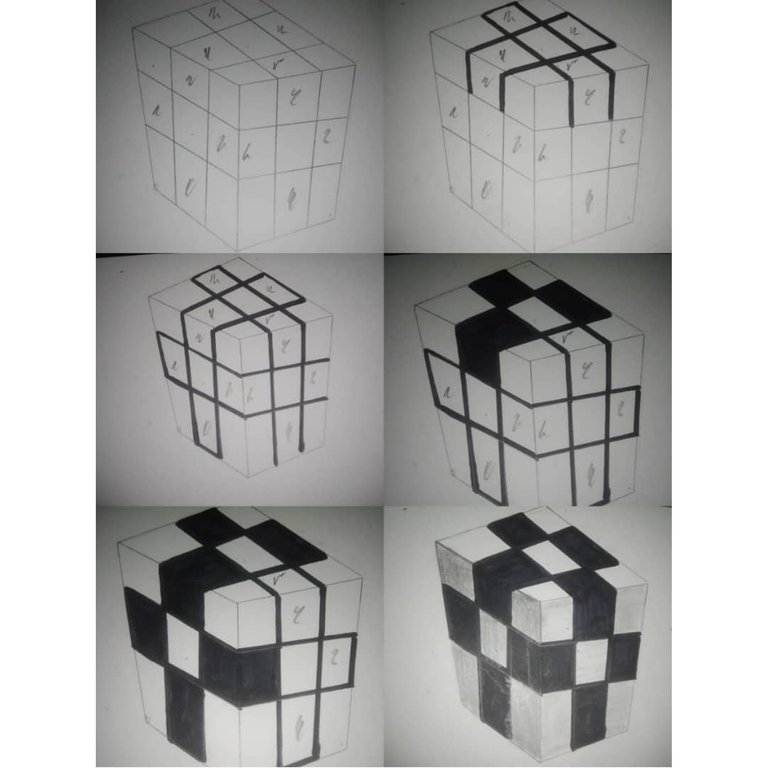

Luego marcamos en forma de ajedrez los cuadros que pintaremos con el marcador. Es decir, remarcamos esas líneas con cuidado y luego empezamos a rellenarlas.
Después de rellenar todo con el marcador negro, tomaremos nuestro lápiz y sombrearemos los espacios que no pintamos con el marcador, y con el dedo lo difuminamos bien.
Then we mark the squares that we will paint with the marker in a chess shape. That is, we carefully mark those lines and then start filling them in.
After filling in everything with the black marker, we will take our pencil and shade the spaces that we did not paint with the marker, and with our finger we blur it well.

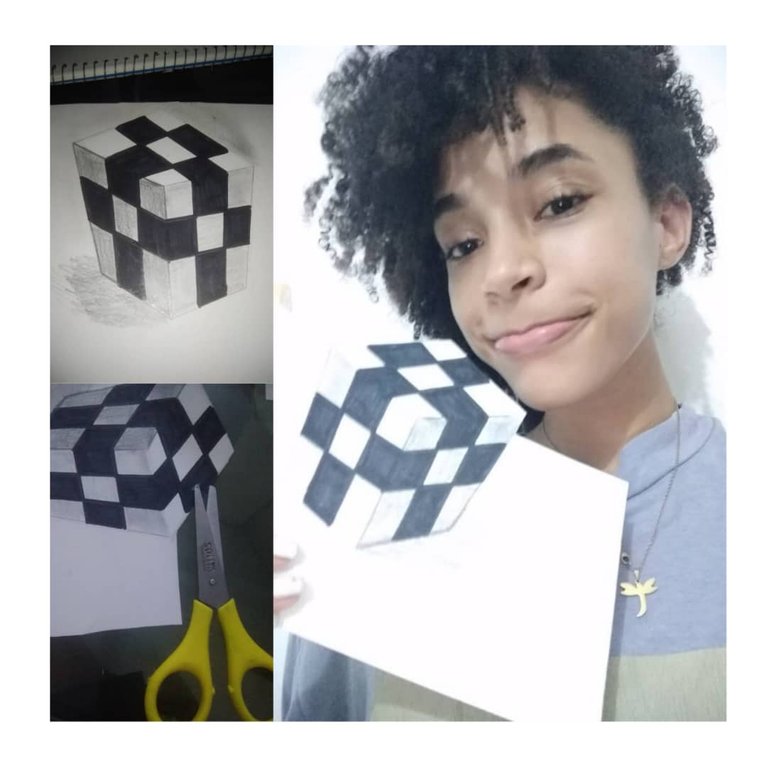

Para finalizar, sombreamos por fuera del cubo, a los bordes pero solo un poco, nos afincaremos o concentraremos mas en hacerlo en la parte de abajo a la izquierda del cubo, para que parezca una sombra. Luego recortamos la hoja sin cortar el cubo como muestro en la imagen.
To finish, we shade the outside of the cube, to the edges but only a little, we will focus more on the bottom left of the cube, to make it look like a shadow. Then we cut the sheet without cutting the cube as shown in the image.


Y eso es todo, tomamos la foto desde un ángulo bajo para que parezca que el cubo sobresale o esta en 3D, jajaja. Espero les haya gustado, esta es mi participación, gracias por llegar hasta aquí, hasta la próxima.
And that's it, we took the photo from a low angle to make it look like the cube is sticking out or is in 3D, hahaha. I hope you liked it, this is my participation, thank you for reaching here.

Todas las imágenes son de mi autoría.
Editor → PicsArt
Traductor → Deepl

