COSTURA TU COCINA!
NEEDLEWORK YOUR KITCHEN !
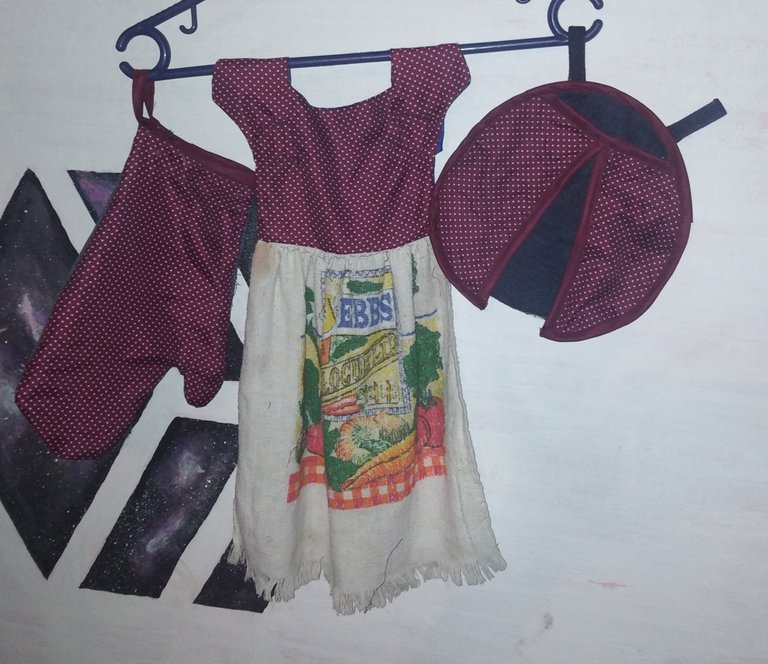
La semana pasada vi el concurso ¨Costura tu casa¨ el cual me encanto, quise participar pero me fue imposible publicar para esto hice un juego de tres piezas para mi cocina: un agarra ollas, un guante y un pañito, el cual les mostrare a continuación como lo realice.
Una vez que vi de que trataba el concurso me puse a buscar así que encontré estos retazos de tela y unas botas de jeans que quedaron de un trabajo que hice para un cliente
Last week I saw the contest "Sewing your house" which I loved, I wanted to participate but it was impossible for me to publish for this I made a three-piece set for my kitchen: a pot holder, a glove and a cloth, which I will show you below how to do it.
Once I saw what the contest was about I started looking so I found these scraps of fabric and some jean boots left over from a job I did for a client.
Pieza 1
fuente modelo
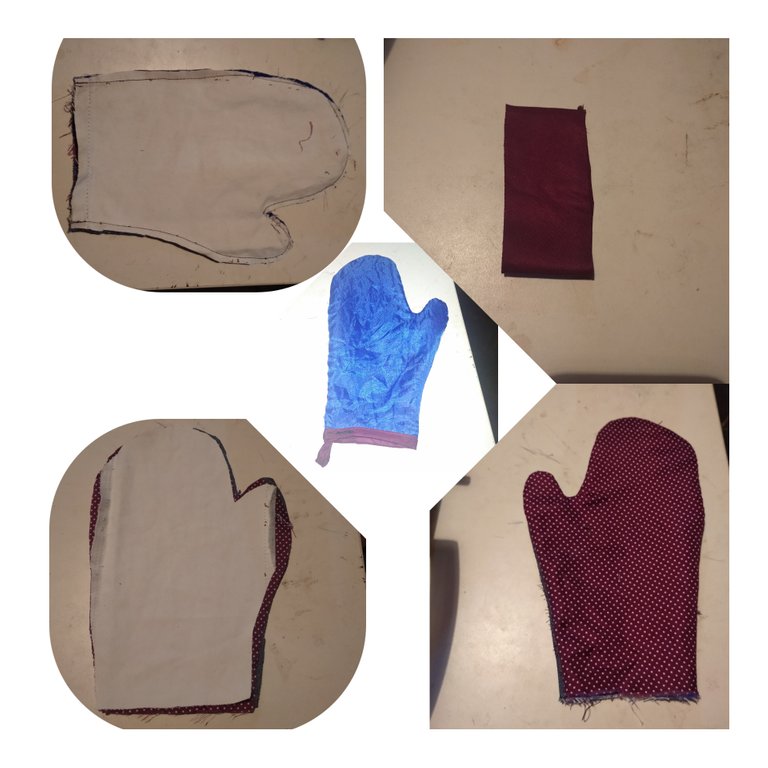
En primer lugar, hice el guante de cocina, como no tenía patrón, hice uno, con el molde de mi mano y le añadí dos centímetros más por cada lado, para que quedara holgado y luego corté tres piezas en jeans y dos en tela de forro.
Luego de cortarlo, los organice de tal manera que quedara la tela de jeans para la parte que va agarrar la olla y la tela de forro para la parte que cubre la mano y que no está expuesta a el calor.
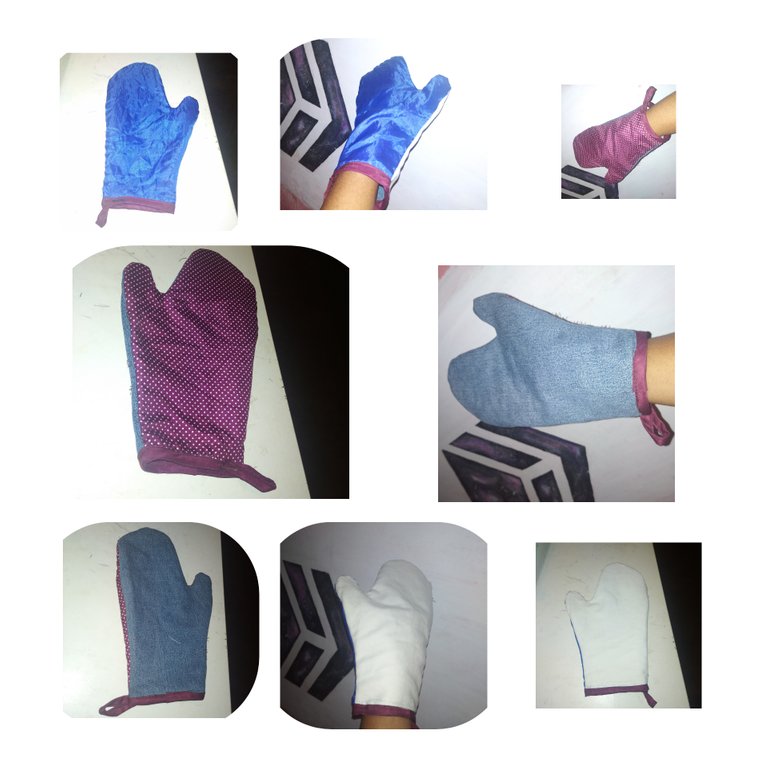
Al organizarlo me di cuenta que había posibilidad de que quedara reversible, así que lo fijé con alfileres para hacerlo más fácil.
Una vez organizado procedí a coserlo y a ponerle el sesgo que lleva en el borde y por último le puse la asa, para cuando haya que colgarlo.
piece 1
fuente modelo
First of all, I made the kitchen glove, since I didn't have a pattern, I made one, with the mold of my hand and I added two more centimeters on each side, so that it would be loose and then I cut three pieces in jeans and two in cotton fabric. cover.
After cutting it, organize them in such a way that there is the jeans fabric for the part that will hold the pot and the lining fabric for the part that covers the hand and that is not exposed to heat.
When organizing it I realized that there was a possibility that it could be reversible, so I fixed it with pins to make it easier.
Once organized, I proceeded to sew it and put the bias that it has on the edge and finally I put the handle, for when it has to be hung.
Pieza 2
En segundo lugar, hice el agarra ollas con forma de mariquita para lo cual hice un dibujo como uno que yo había visto antes en internet. fuente
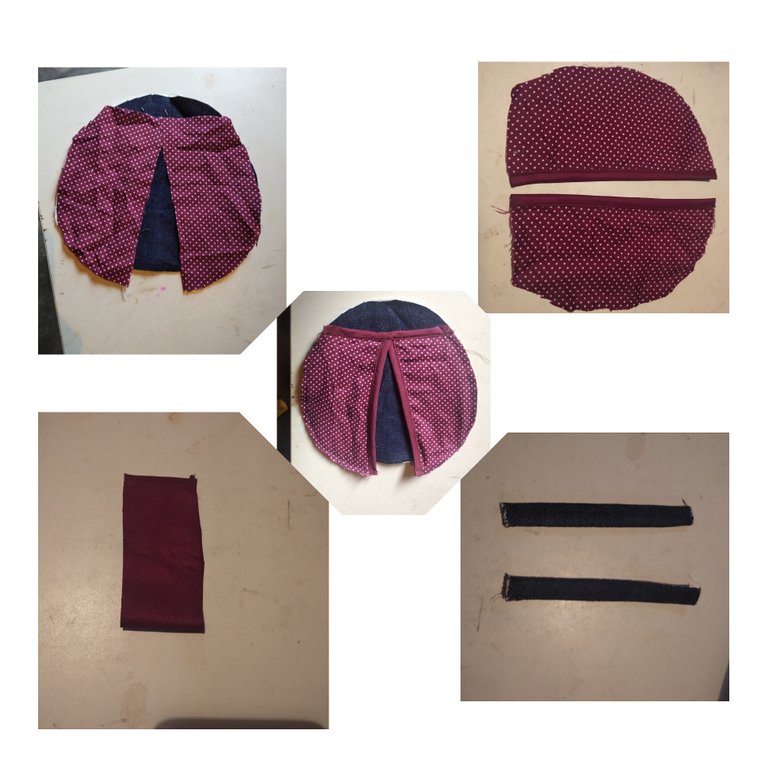
y una vez que saque el patrón corte todas las piezas y procedí a organizarlas para comenzar a coserlas.
En primer lugar, ponerles el sesgo a las alas, en la parte de arriba y en el centro que eran la partes que le correspondían antes de cerrarlo.
Segundo paso pasarle una costura alrededor para fijar todas las piezas para luego ponerle el sesgo al resto que le faltaba.
Por ultimo hacerle las antenitas que van a ser también las asas para guindarla.
piece 2
Secondly, I made the pot holder in the shape of a ladybug for which I made a drawing like one that I had seen before on the internet. fuente
and once I took out the pattern I cut all the pieces and proceeded to organize them to start sewing them.
First, put the bias on the wings, at the top and in the center, which were the parts that corresponded to it before closing it.
Second step, pass a seam around it to fix all the pieces and then put the bias to the rest that was missing.
Finally, make the little antennas that will also be the handles to hang it.


Pieza 3
fuente modelo
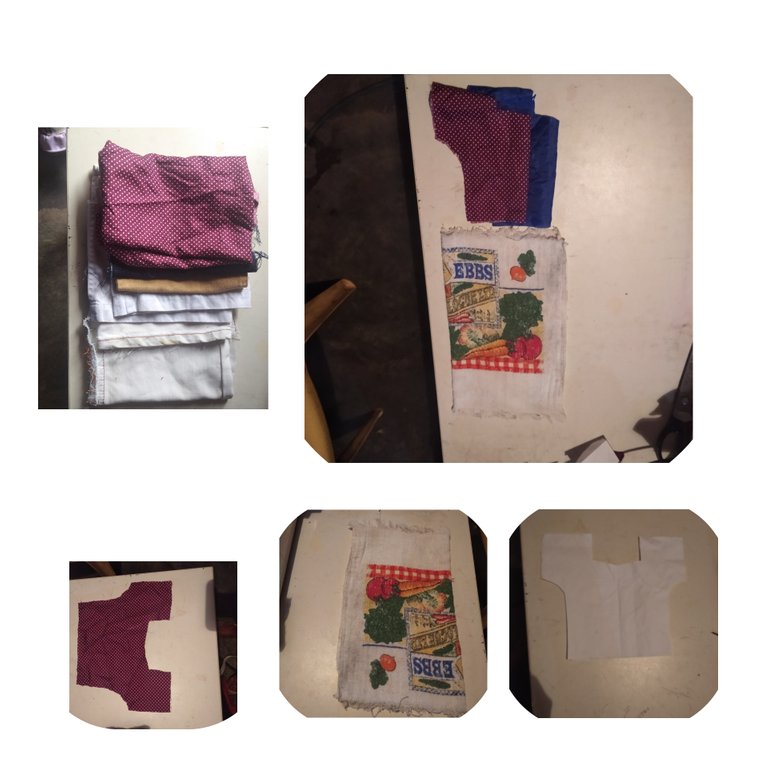
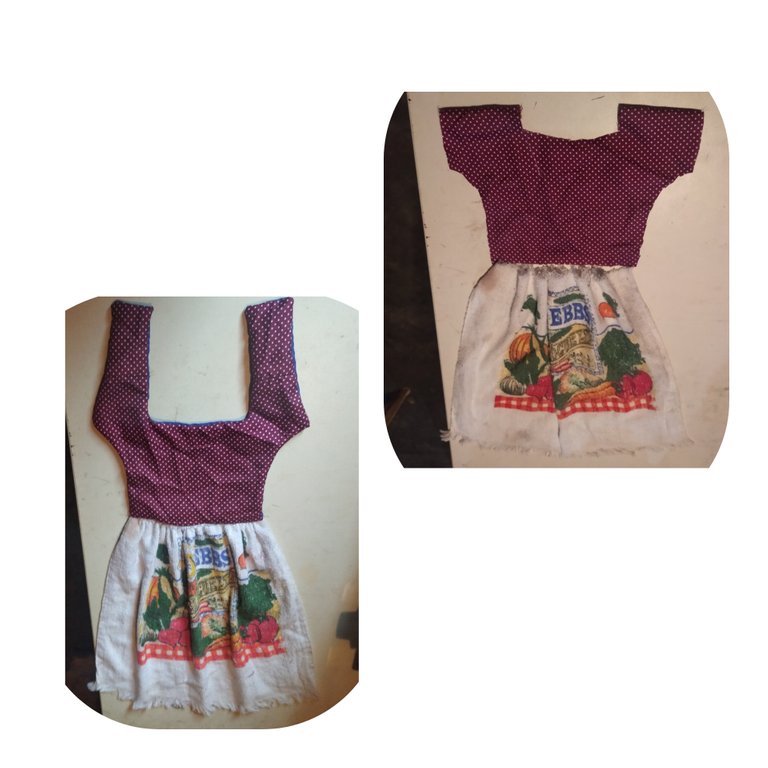
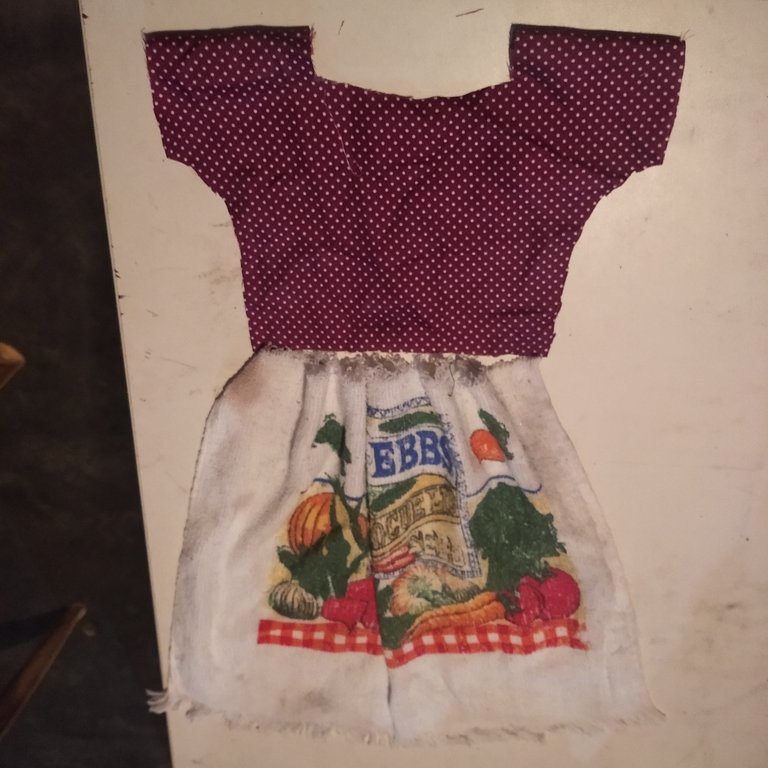
La tercera pieza era el pañito de cocina con forma de vestido, este resulto ser el más fácil de hacer.
Sacar el molde de la blusita y luego cortar dos piezas iguales, una en tela y otra en forro, ponerla cara con cara y coserla por el revés, voltearla plancharla y luego pegarle la parte de abajo o el faralao que en este caso es el pañito.
Por ultimo pegarle el cierre mágico para que sea más fácil al momento de colgarlo
piece 3
fuente modelo
The third piece was the dress-shaped kitchen towel, this turned out to be the easiest to make.
Remove the mold from the blouse and then cut two equal pieces, one in fabric and the other in lining, put it face to face and sew it on the wrong side, turn it over, iron it and then glue the bottom part or the faralao which in this case is the cloth.
Finally paste the magic closure to make it easier when hanging it

Gracias por leer mi publicación.
Este es contenido original.
Este texto se tradujo en traductor google traductor de inglés a español.
Thank you for reading my publication.
This is original content.
This text was translated in google translator English to Spanish translator.
