Saludos mi gente bella de hive, reciban de mi parte un beso inmenso y un abrazo virtual desde la distancia que les transmita la mejor de las vibras.
Greetings my beautiful people of hive, receive from me a huge kiss and a virtual hug from a distance that transmits the best of vibes.
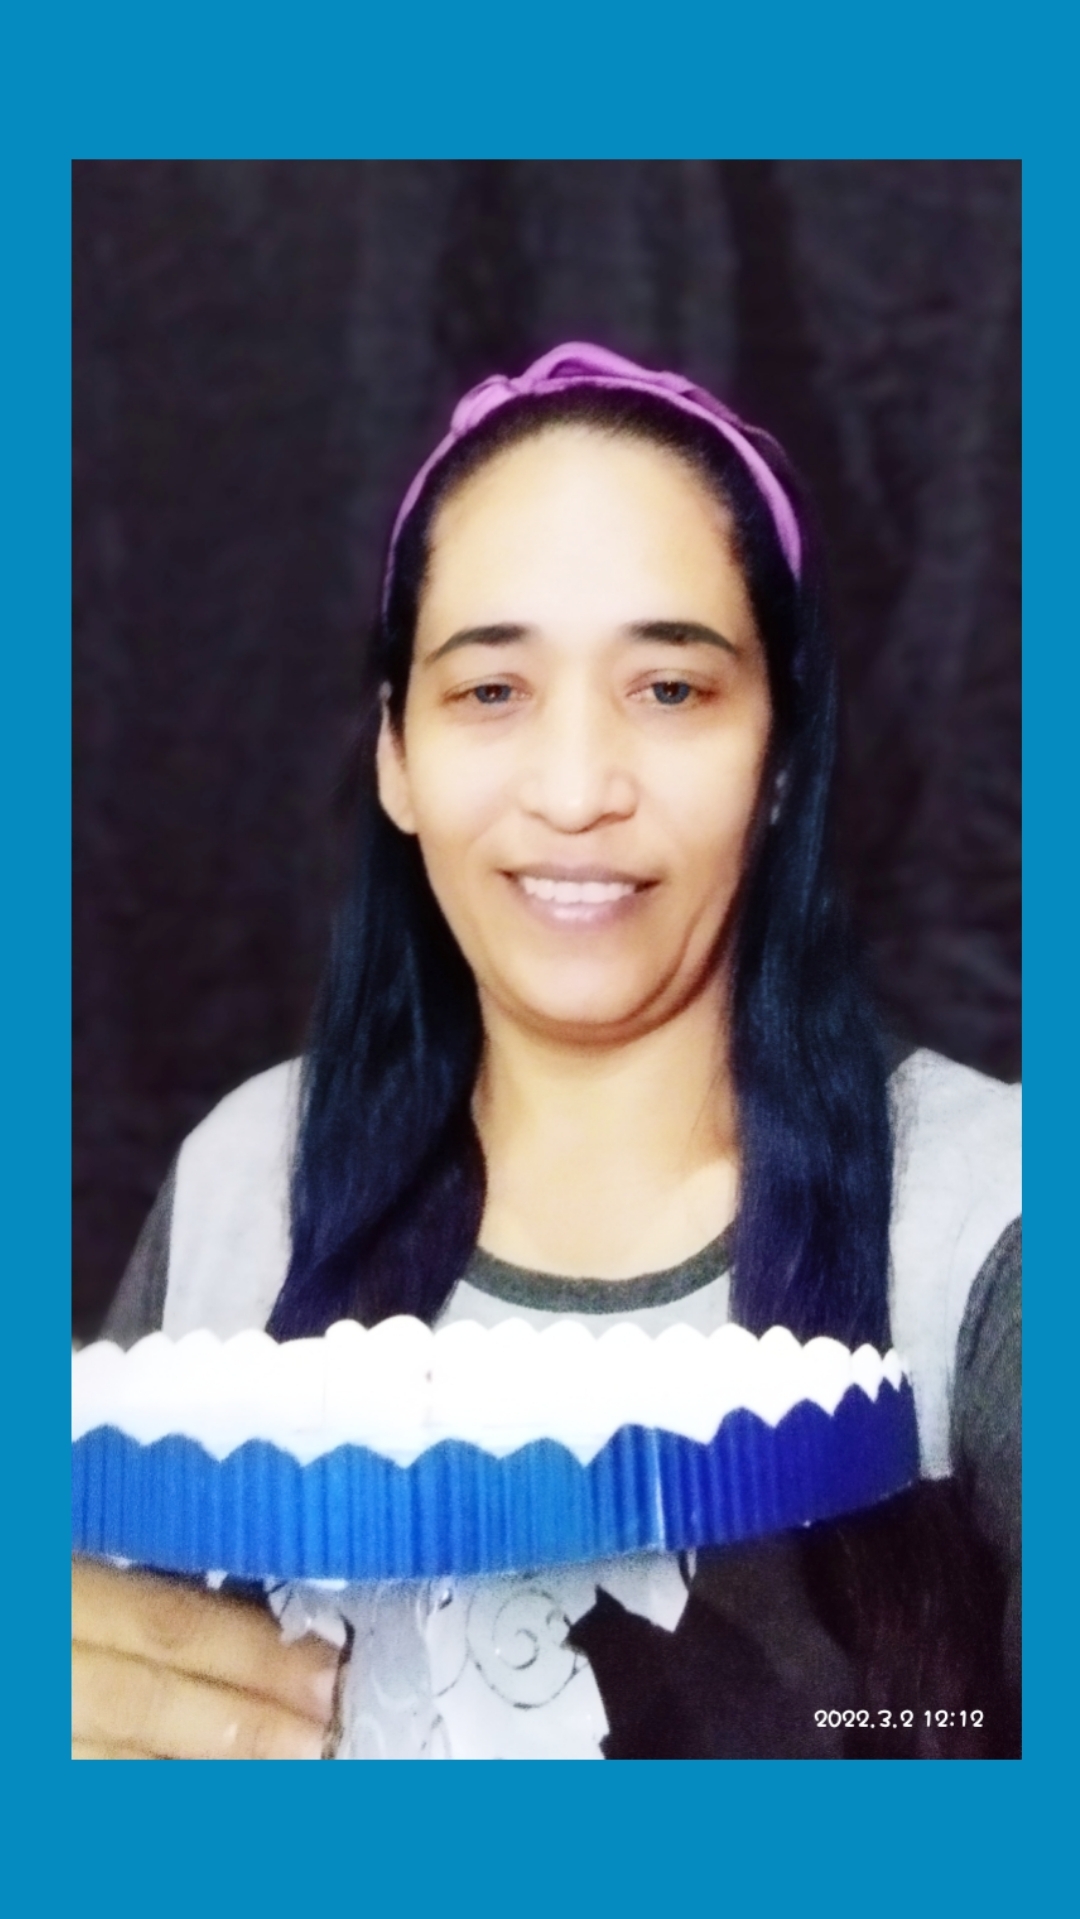
Nuevamente regreso a esta bella comunidad que me abre las puertas para expresar un poco de mi arte, y en esta oportunidad les traigo un tutorial de un elemento decorativo para colocar en la mesa principal de alguna celebración, se trata de un lindo porta dulce o candy bar que le da un toque elegante a nuestra decoración y lo mejor de todo que puede ser elaborando por nosotros mismos.
Again I return to this beautiful community that opens the doors to express a little of my art, and this time I bring you a tutorial of a decorative element to place on the main table of a celebration, this is a nice candy holder or candy bar that gives an elegant touch to our decoration and best of all that can be made by ourselves.
Hoy voy hacer este candy bar con materiales de reciclaje, cosas sencillas de conseguir en nuestras casas, y si falta algo son de bajo costo, lo que si necesitamos y mucho sin duda alguna es la imaginación y las ganas enormes de hacer las cosas, así que mis amores sin más vamos, manos a la obra.
Today I'm going to make this candy bar with recycled materials, simple things to get in our homes, and if something is missing are low cost, what we do need and a lot without a doubt is the imagination and the enormous desire to do things, so my loves without further ado, let's get to work.
MATERIALES // MATERIALS.
✂️ Cartón de caja.// Box carton.
✂️ Papel de regalo.// Gift wrapping paper.
✂️ Silicón frío.//Cold silicone.
✂️ Tijeras.//Scissors.
✂️ Regla.//Rule.
✂️ Retazo de cartulina corrugada perlada.//Piece of pearlized corrugated cardboard.
✂️ Lápiz.//Pencil.
✂️ Hoja en blanco.//Blank sheet.
 PASO A PASO // STEP BY STEP
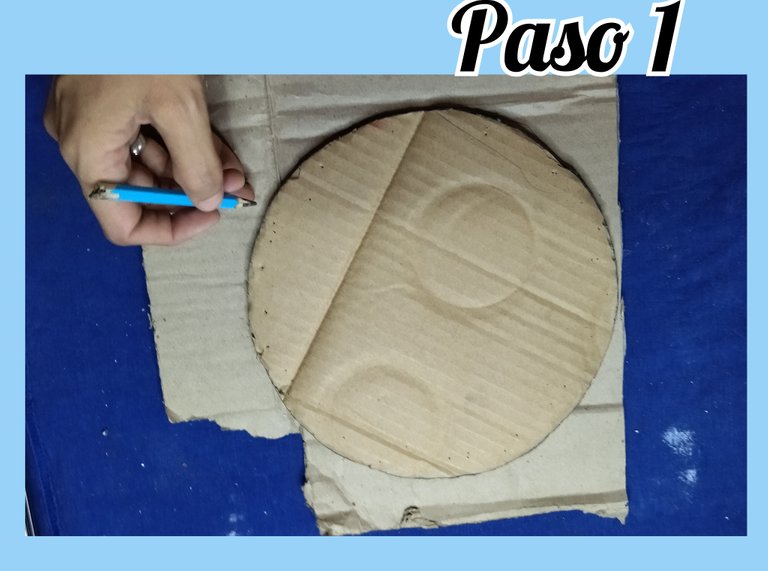
PASO 1 // STEP 1
PASO A PASO // STEP BY STEP
PASO 1 // STEP 1
Primero que nada tomamos alguna pieza que nos sirva de guía para dibujar el círculo en el cartón, podemos ayudarnos con un plato o una tapa, o si tenemos un compás mucho mejor.
First of all we take a piece that will serve as a guide to draw the circle on the cardboard, we can help us with a plate or a lid, or if we have a compass much better.
Se coloca el plato o tapa encima del cartón y luego con el lápiz dibujamos el círculo que será la parte de arriba de nuestro candy bar, el tamaño lo deciden ustedes yo lo hice pequeño porque no tenía mucho cartón, pero realmente eso depende del gusto de cada quien.
Place the plate or lid on top of the cardboard and then with the pencil draw the circle that will be the top of our candy bar, the size is up to you, I did it small because I did not have much cardboard, but it really depends on the taste of each person.
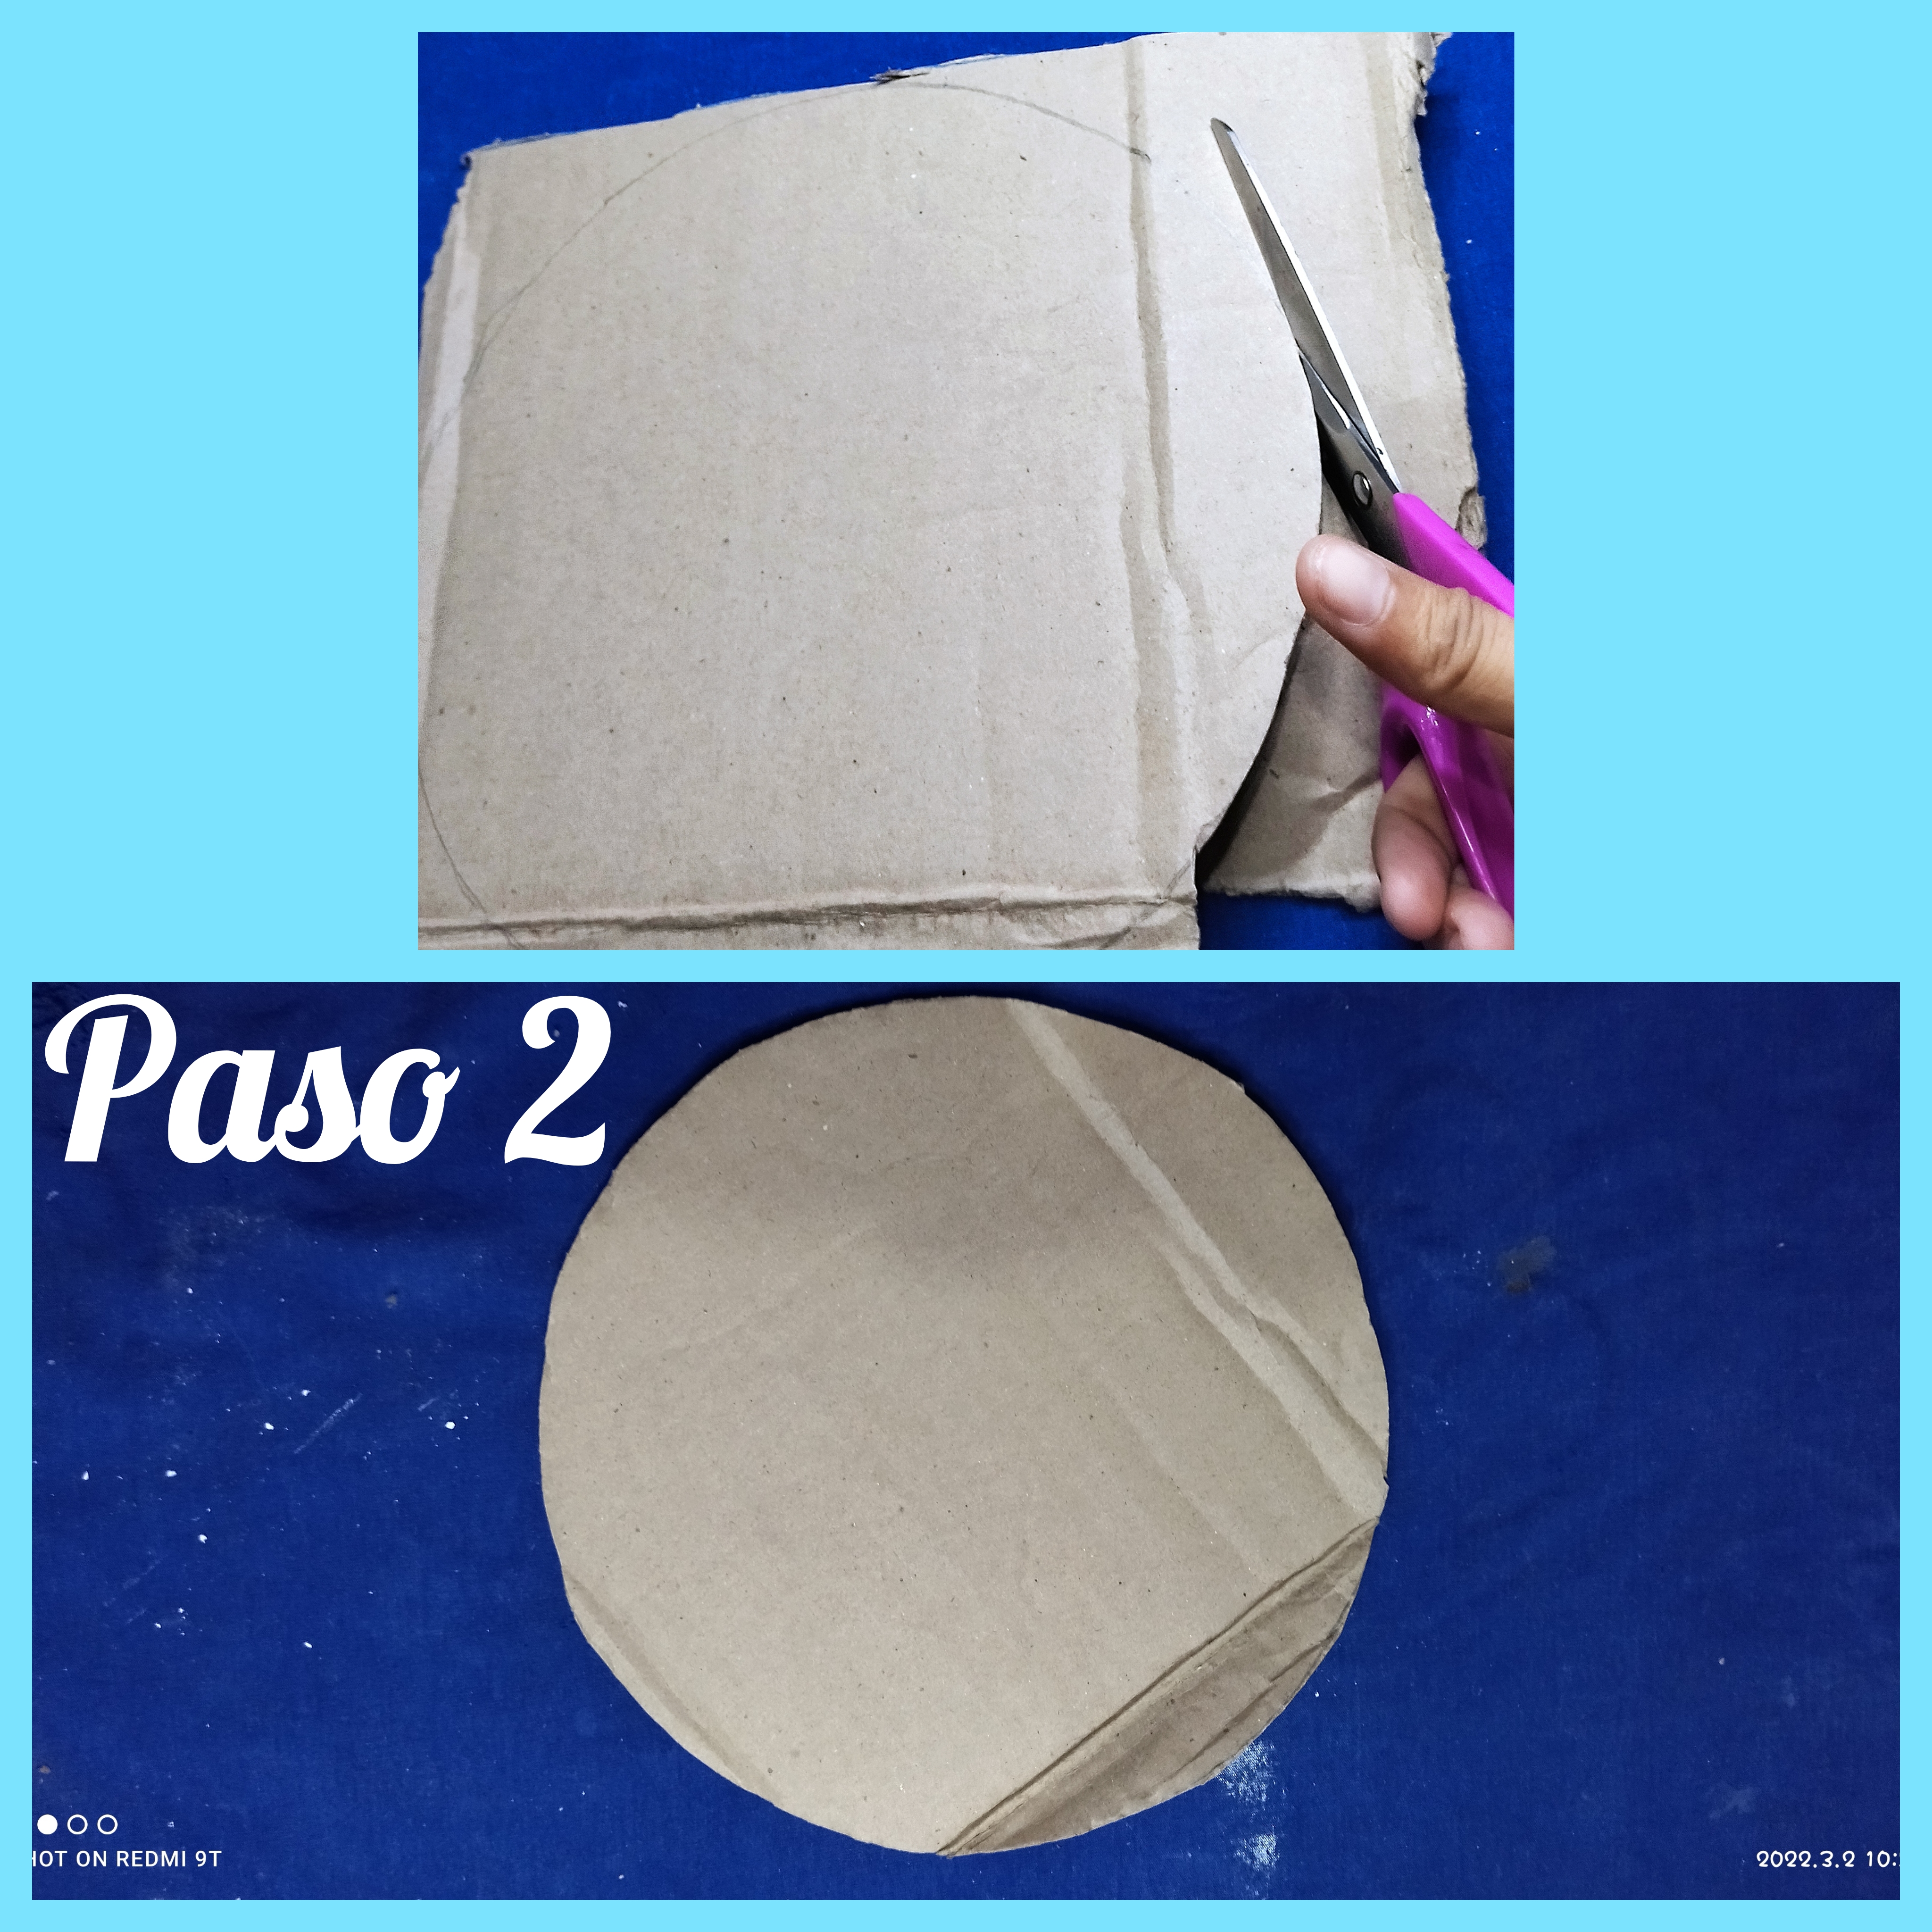
 PASO 2 // STEP 2
Una vez marcado nuestro círculo tomamos las tijeras y procedemos a recortar tratando de que nos quede lo más prolijo posible.
Once we have marked our circle, we take the scissors and proceed to cut it out, trying to make it as neat as possible.
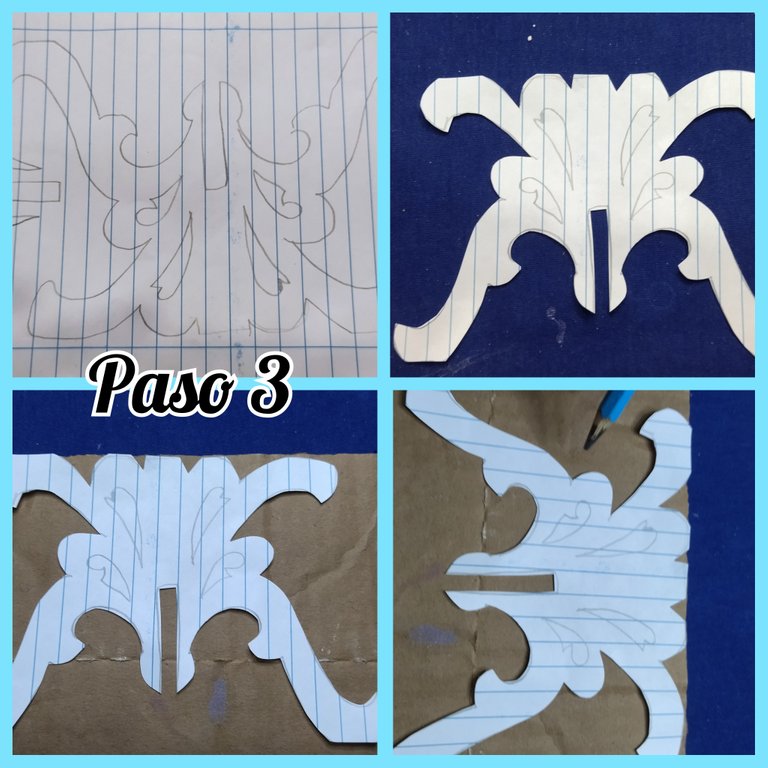
 PASO 3 // STEP 3
En este paso paso dibujamos lo que vendrá a ser la base del candy bar, yo tome el modelo del Internet, allí se consigue gran variedad de tamaños y de modelos yo escogí este porque me pareció muy lindo y elegante.
In this step we draw what will become the base of the candy bar, I took the model from the Internet, there you can find a great variety of sizes and models, I chose this one because I thought it was very nice and elegant.
Lo dibuje en una hoja de papel, para luego recortarlo, y de esta manera ya sacamos nuestro patrón, esta hoja también la podemos pegar en una cartulina para asegurar que el patrón quede más duro.
I drew it on a sheet of paper, and then cut it out, and in this way we get our pattern, this sheet can also be pasted on a cardboard to ensure that the pattern is harder.
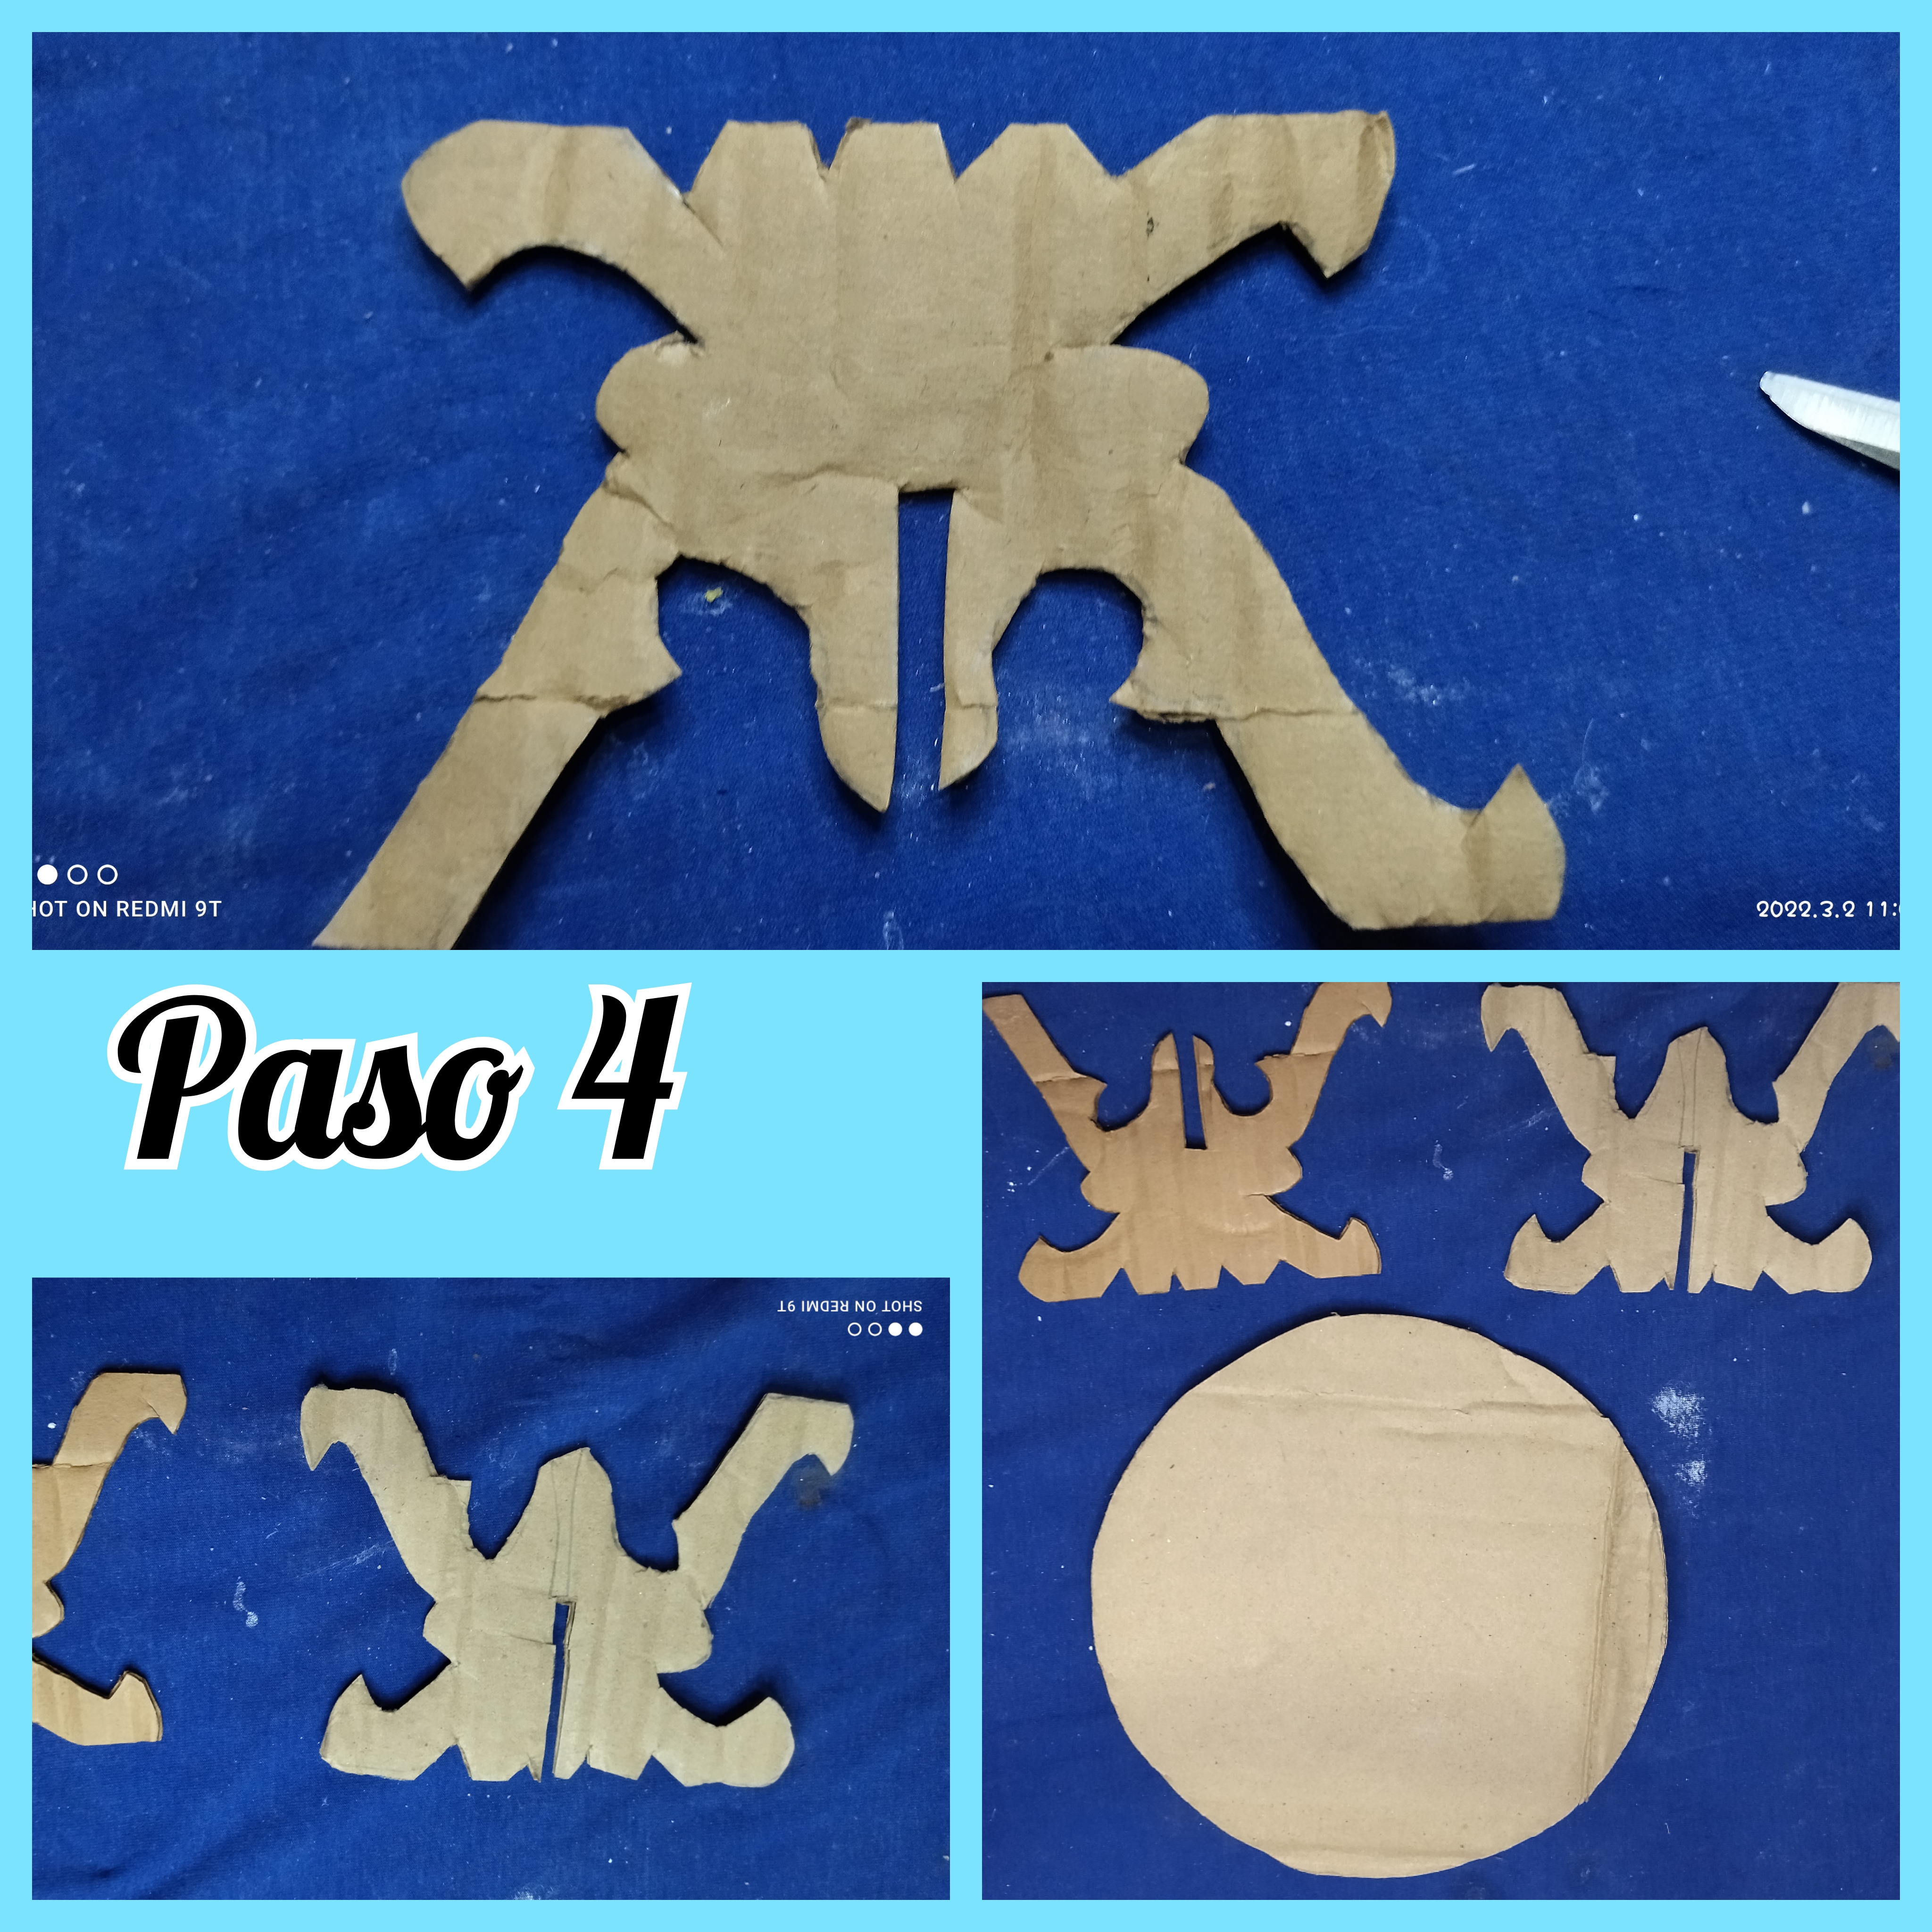
 PASO 4 // STEP 4
Una vez que se marcó en el cartón lo que nos queda es recortar las dos piezas iguales que debemos tener, estás vienen a ser la base de nuestro candy bar, eso sí debemos recordar que deben quedar bien parejitas para que pueda tener estabilidad,es bien importante recordar esto, ya que no se trata de hacerlo y ya si no de que sea funcional y para eso debe ser buen estable sobretodo cuando se le coloquen los dulces.
Once it is marked on the cardboard what we have left is to cut out the two equal pieces that we must have, these are the base of our candy bar, we must remember that they must be very even so that it can have stability, it is very important to remember this, since it is not about doing it and already if not to be functional and for that it must be good stable especially when the candy is placed.
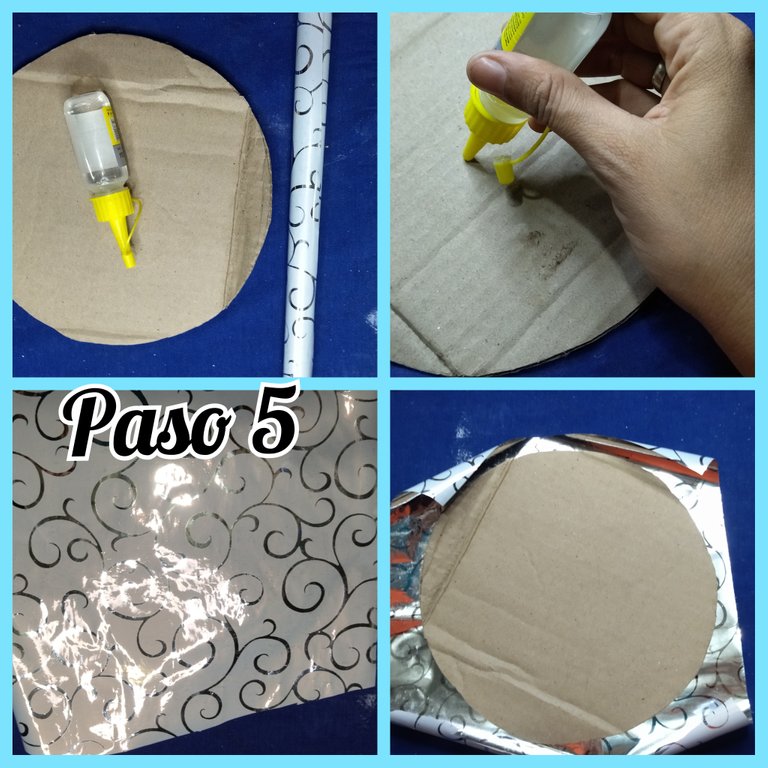
 PASO 5 // STEP 5
Luego a la parte de arriba el círculo que hemos picado le colocamos un poco de silicón frío en toda su superficie, y luego le montamos encima el papel de regalo, debemos asegurarnos de extenderlo bien para que no le queden grumos al papel, luego a los bordes los picamos y le ponemos silicón y los doblamos hacía el lado de adentro para asegurarnos de que mantenga la forma redonda.
Then at the top of the circle that we have chopped we put a little cold silicone on the entire surface, and then we mount the wrapping paper on top, we must be sure to spread it well so that there are no lumps to the paper, then we chop the edges and put silicone and fold them to the inside side to ensure that it maintains the round shape.
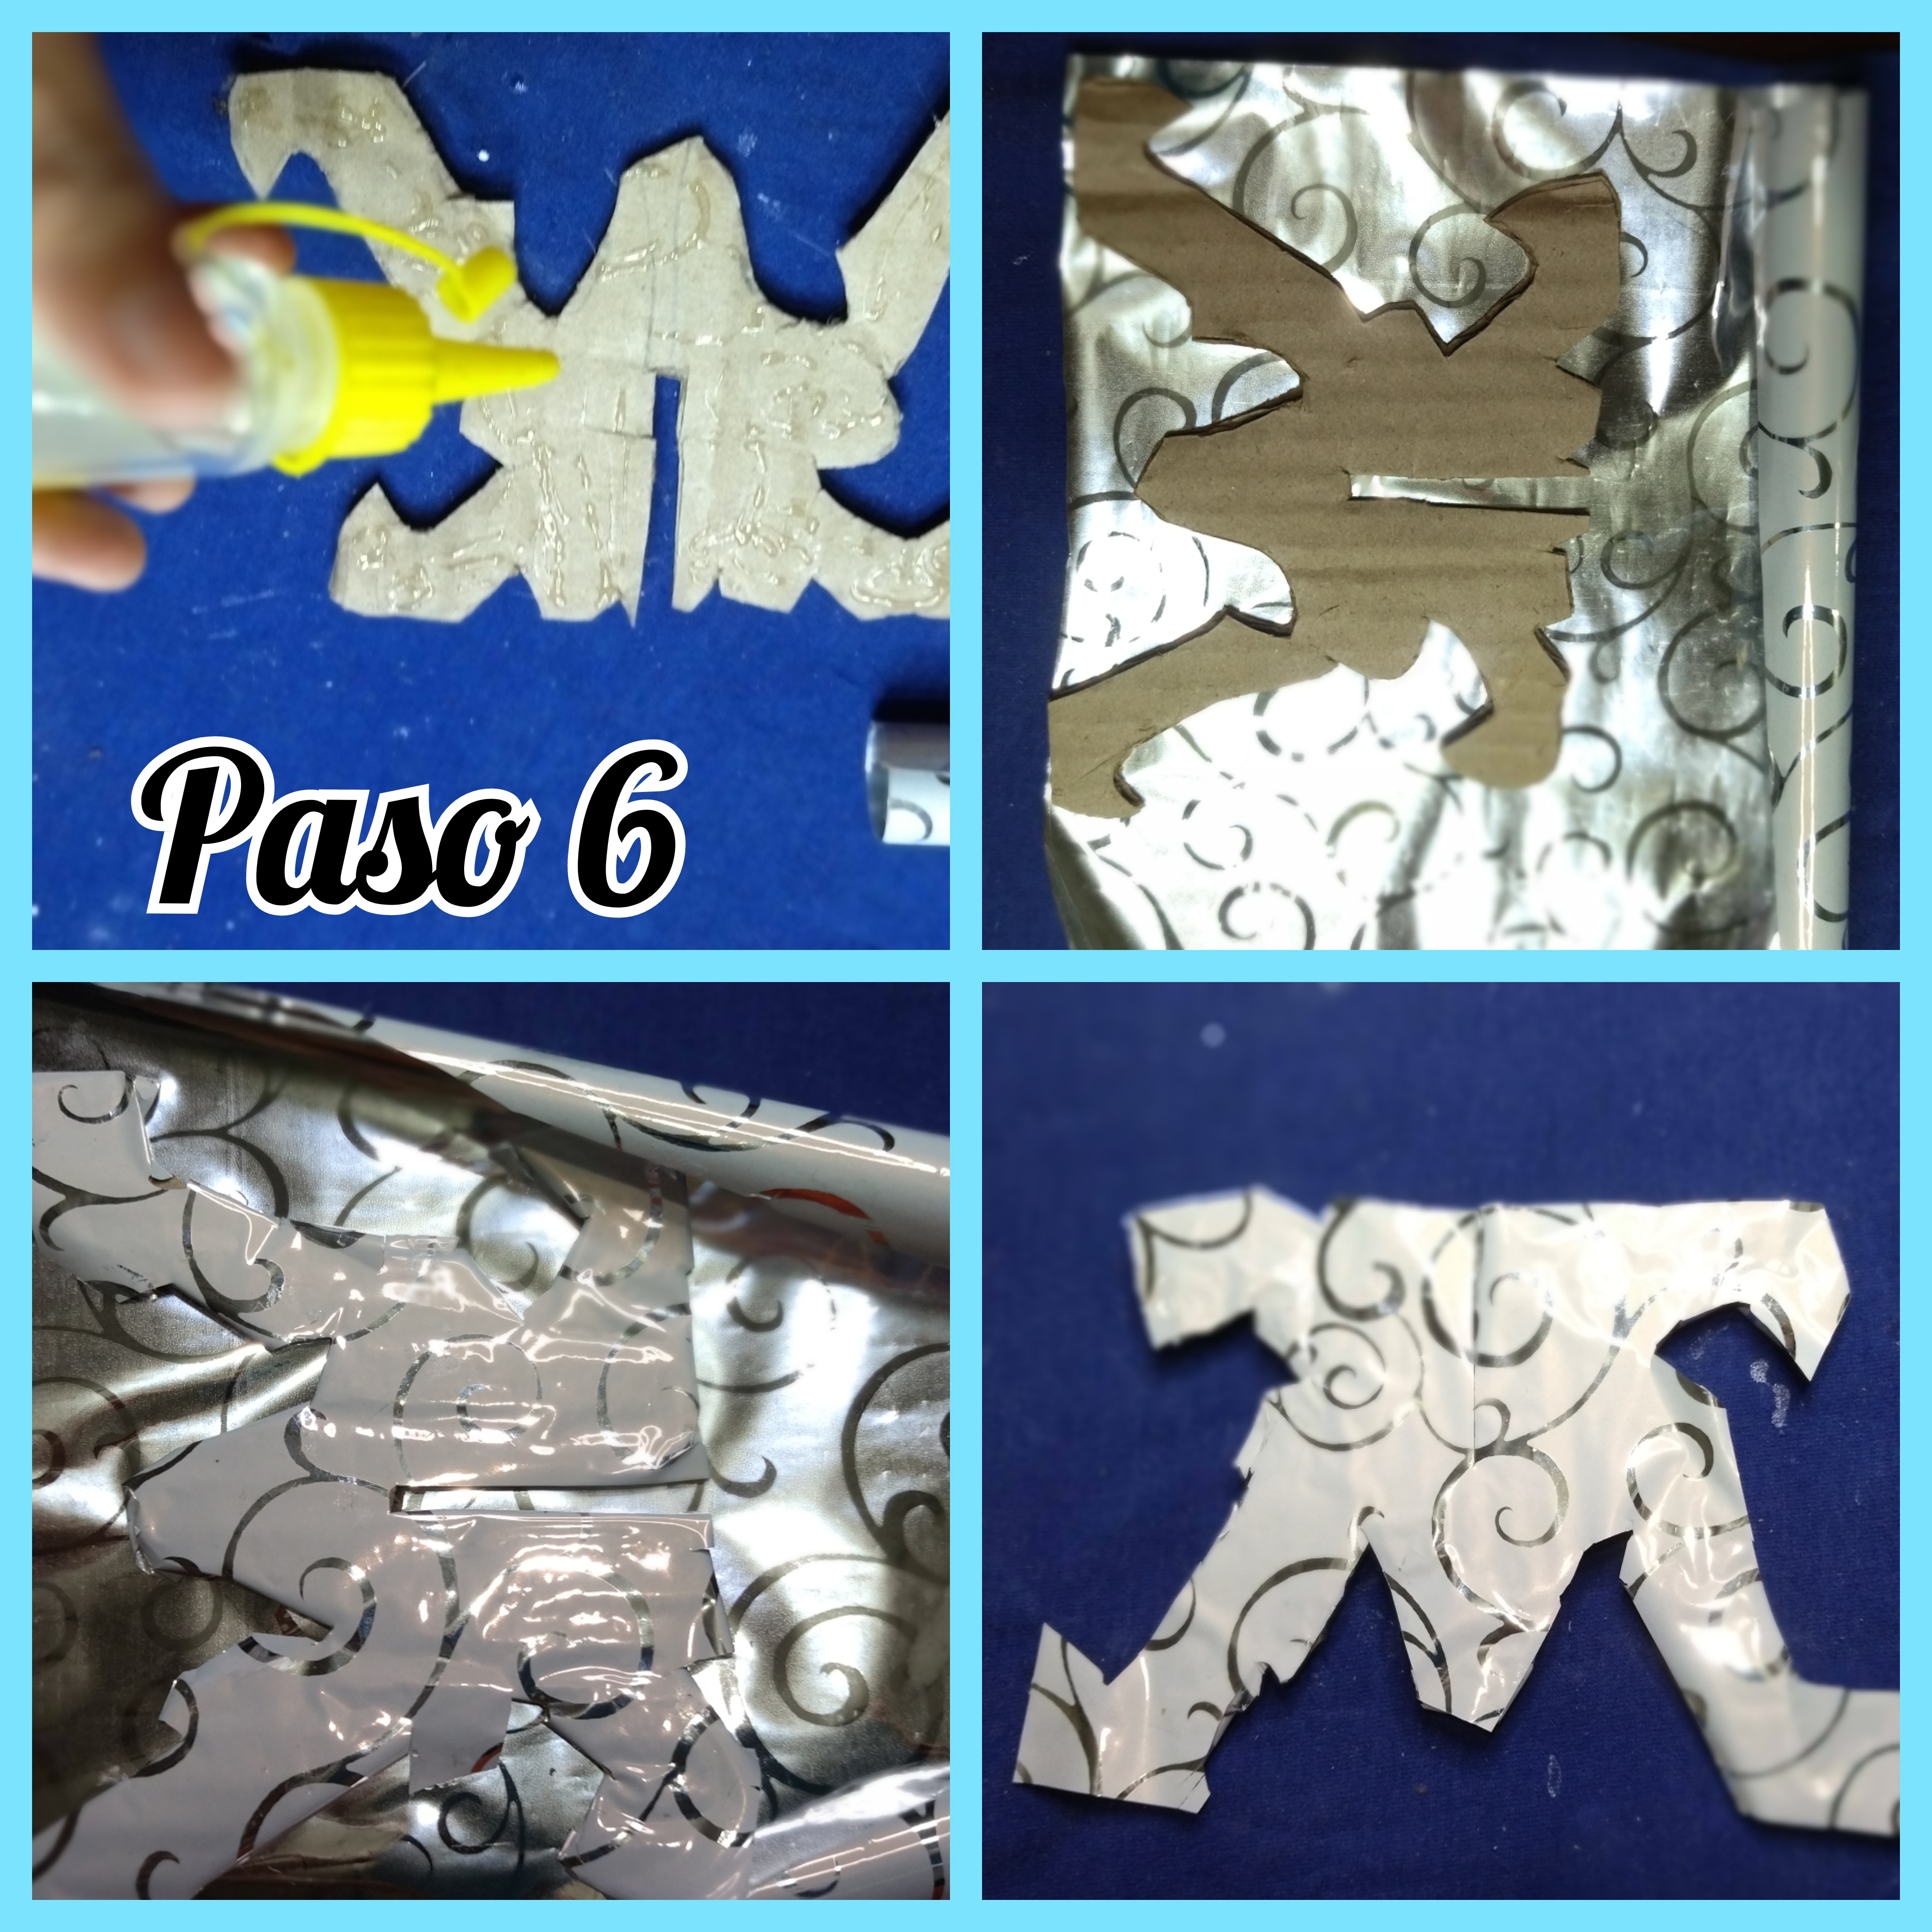
 PASO 6 // STEP 6
En este paso vamos a repetir el paso anterior, pero lo haremos con las bases, debemos asegurarnos de cubrir bien todo para que no se pierdan los detalles, ya que el motivo que elegimos es muy bonito y elegante.
In this step we will repeat the previous step, but we will do it with the bases, we must make sure to cover everything well so that the details are not lost, since the motif we chose is very beautiful and elegant.
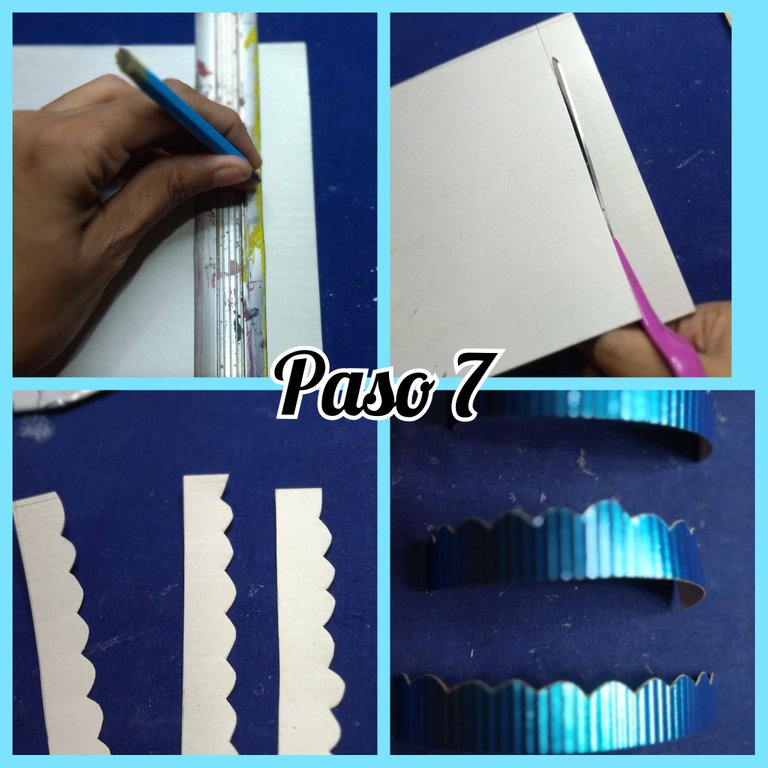
 PASO 7 // STEP 7
Luego tomamos el retazo de la cartulina corrugada perlada y con ayuda de la regla y el lápiz vamos a marcar unas divisiones de aproximadamente unos 4 cm, sacaremos tantas como se necesiten para cubrir el círculo.
Then we take the piece of pearlized corrugated cardboard and with the help of the ruler and the pencil we will mark some divisions of approximately 4 cm, we will take as many as we need to cover the circle.
Luego estas divisiones las recortamos y le recortamos las orillas a modo que quede con una decoración bonita, puede apreciarse mejor en la fotografía.
Then we cut these divisions and trim the edges so that it has a nice decoration, it can be better seen in the picture.
 PASO 8 // STEP 8
Una vez sacadas las divisiones colocaremos un poco de silicón frío por todo el alrededor del círculo, y vamos a ir pegando las divisiones una a una, esto de verdad le da un toque muy bonito a nuestro trabajo.
Once the divisions are removed we will put some cold silicone all around the circle, and we will glue the divisions one by one, this really gives a very nice touch to our work.
Yo lo hice en partes porque no contaba con suficiente cartulina para sacar el borde completo, pero si se puede hacer con los retazos que se tengan a la mano.
I did it in parts because I didn't have enough cardboard to get the entire border, but you can do it with scraps you have on hand.
 PASO 9 // STEP 9
Luego unimos las dos partes iguales que sacamos que van a formar la base del candy bar, recordando que cada una de estas partes se le hizo una división que hacen posible la Unión de estas dos piezas.
Then we join the two equal parts that we took out that will form the base of the candy bar, remembering that each of these parts was made a division that makes possible the union of these two pieces.
Si queremos podemos colocar silicón y dejarlo fijo pero también podemos dejarla libre de silicón.
If we want we can put silicone and leave it fixed but we can also leave it free of silicone.
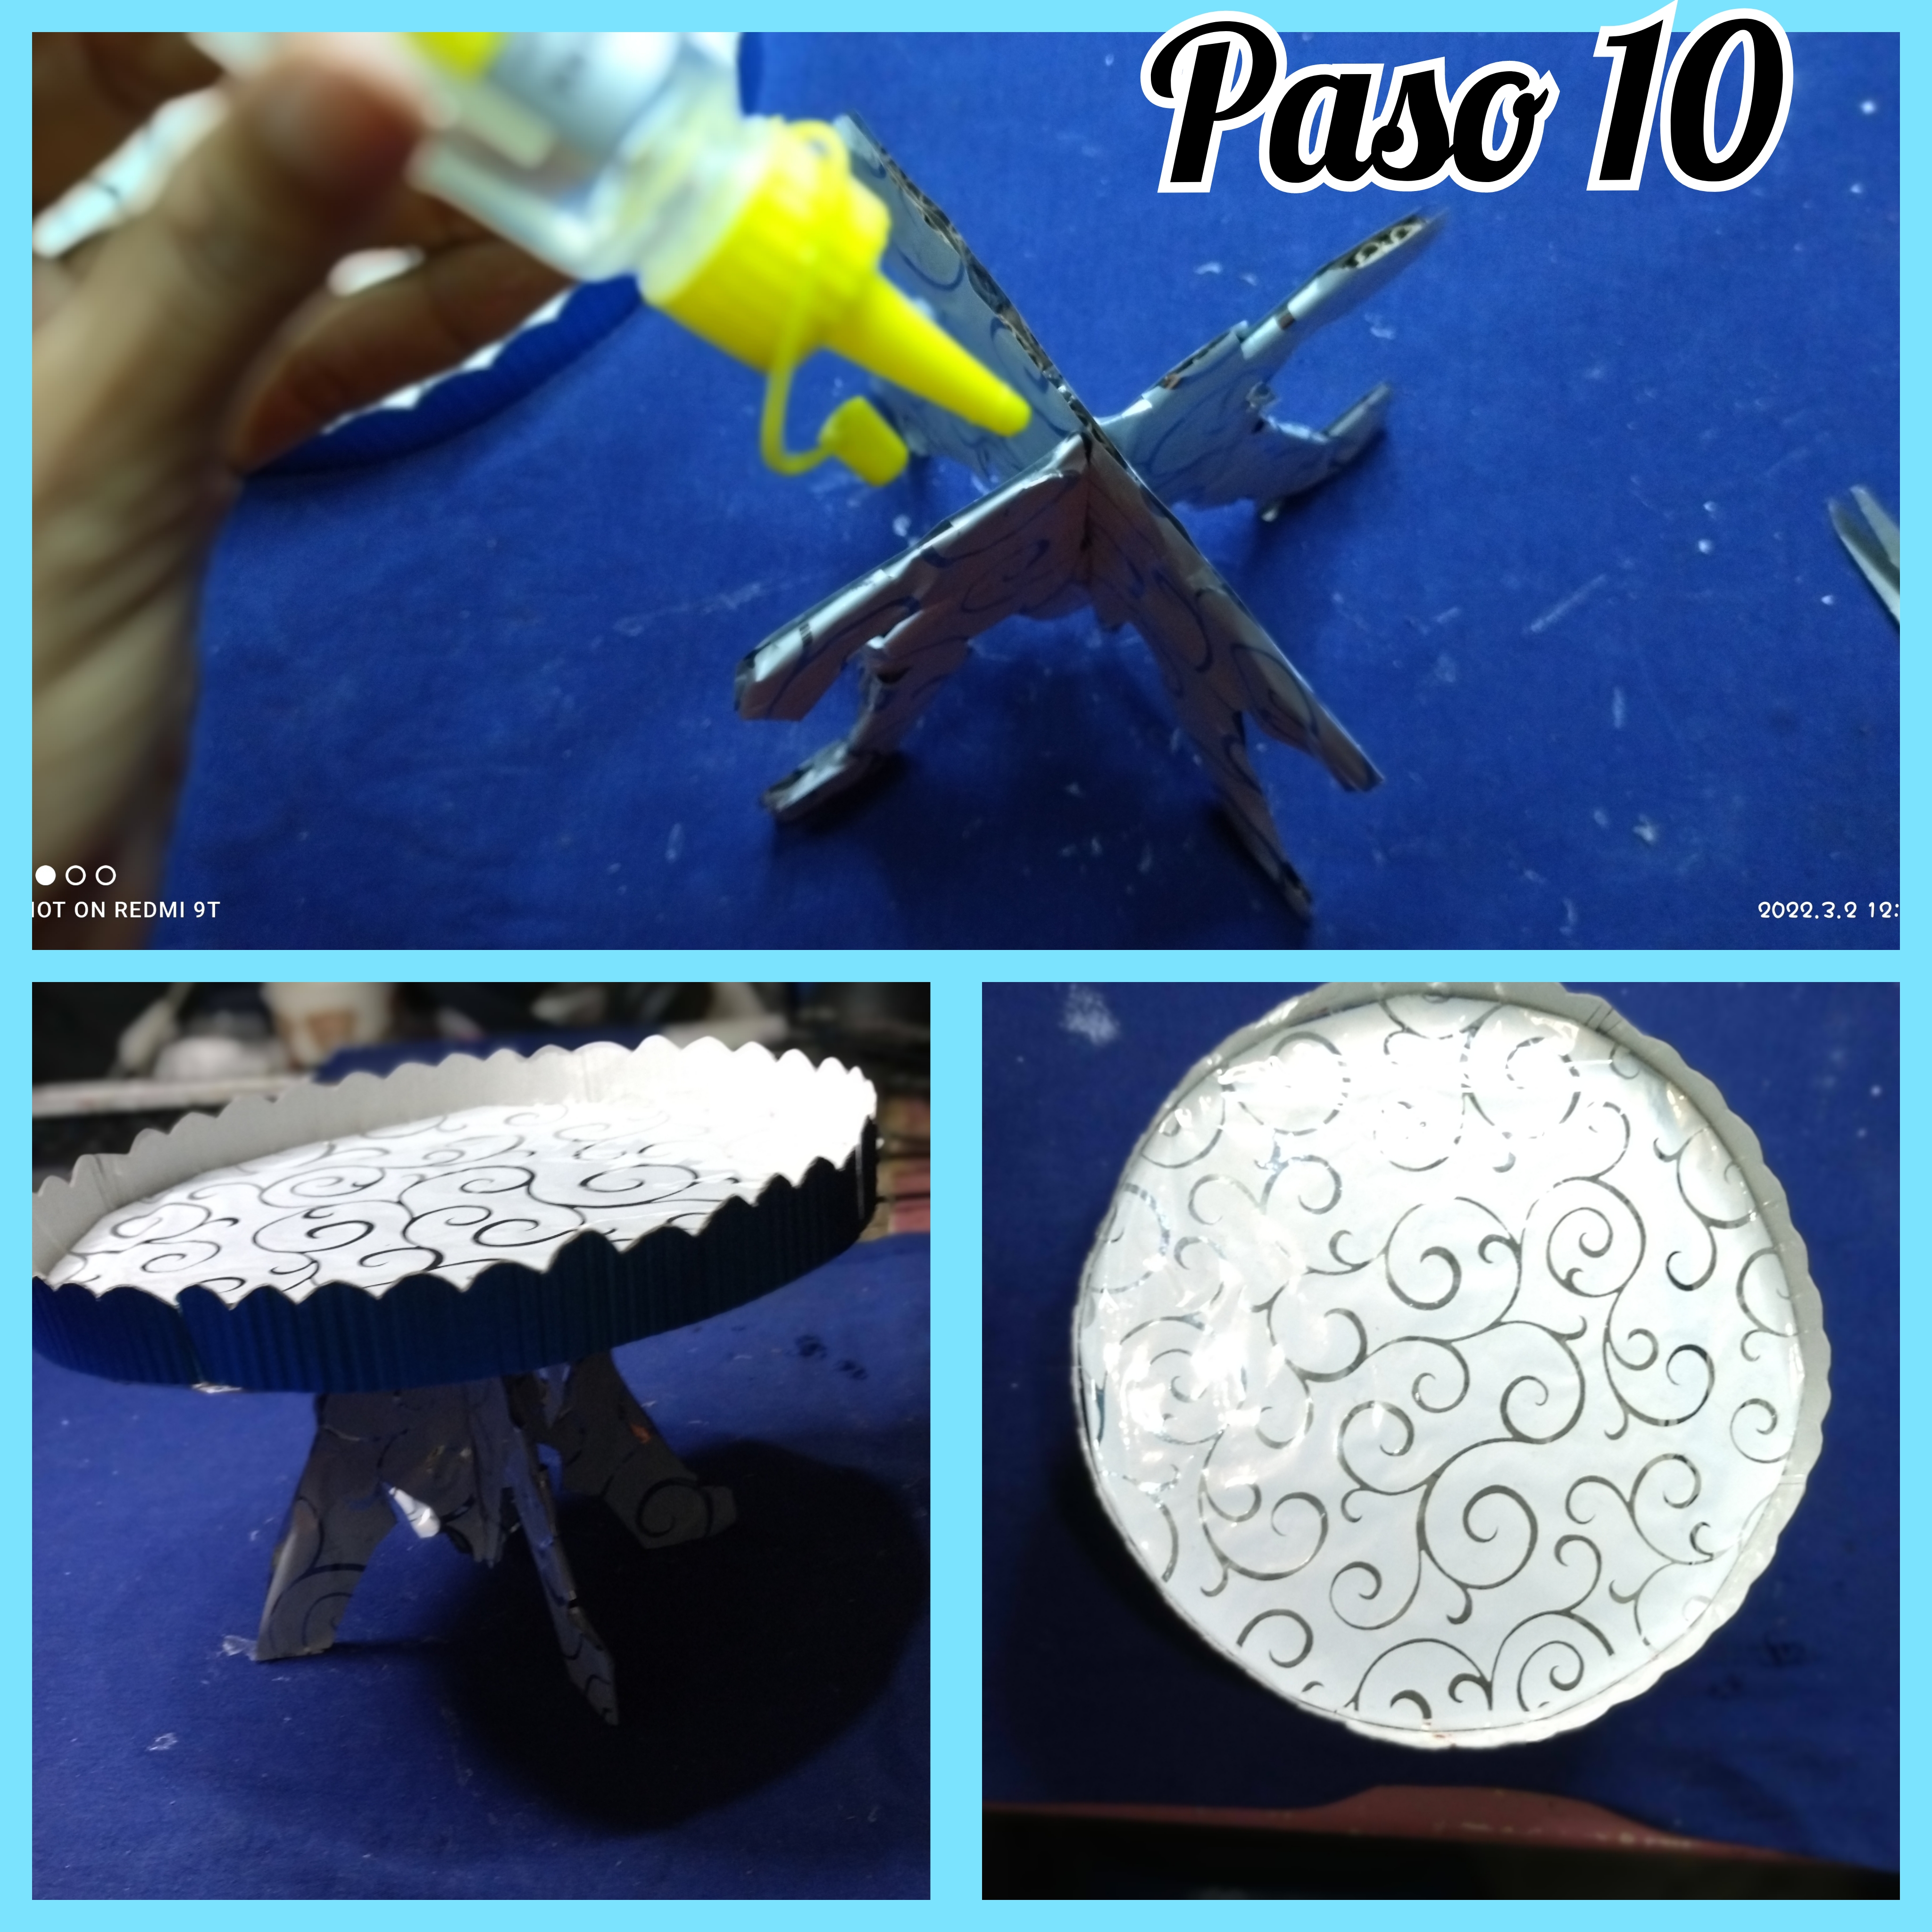
 PASO 10 // STEP 10
Cómo ya decidimos dejarlo fijo le aplicamos un poco de silicón frío en la parte de arriba de la base y luego le montamos la pieza redonda, le aplicamos un poco de presión y dejamos secar y listo hemos terminado nuestro lindo candy bar.
As we decided to leave it fixed we applied a little cold silicone on the top of the base and then we mounted the round piece, we applied a little pressure and let it dry and ready we have finished our nice candy bar.
 FOTOS DEL RESULTADO//PHOTOS OF THE RESULT
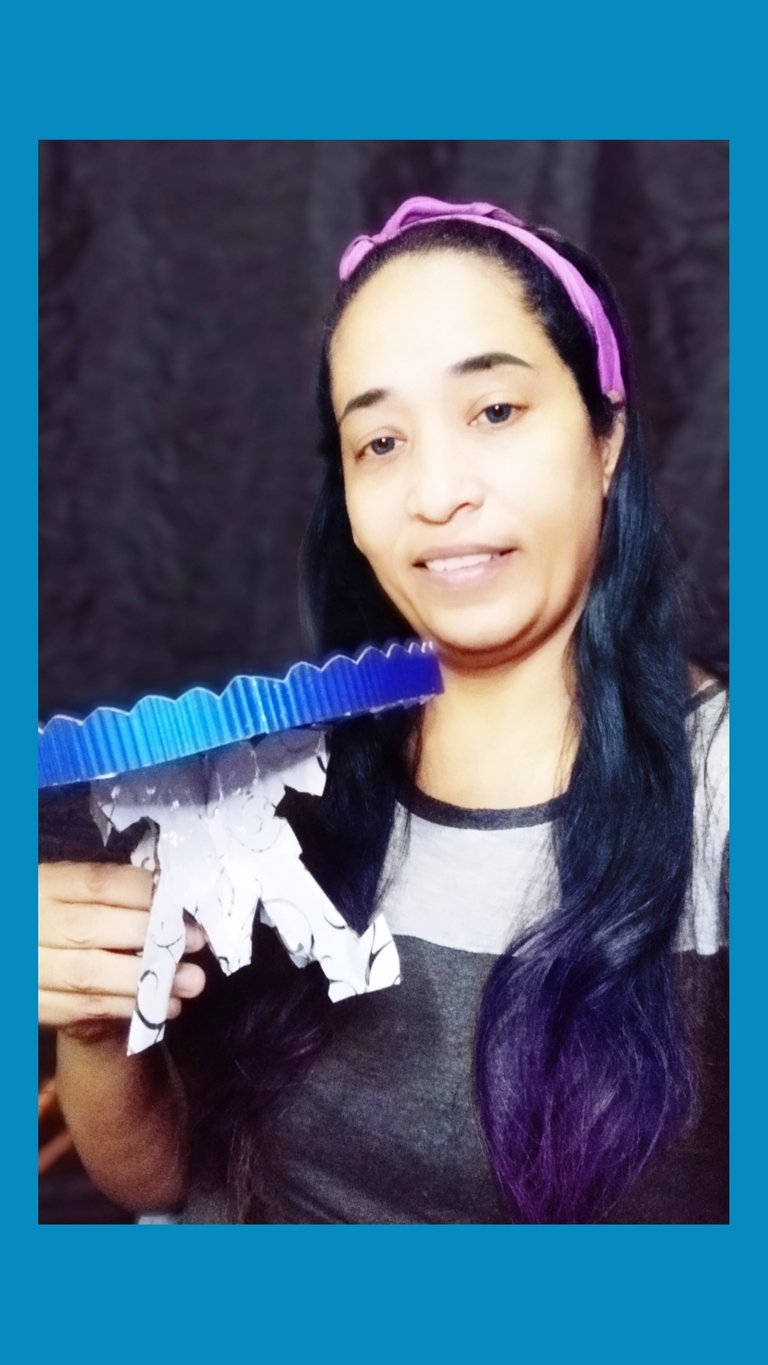
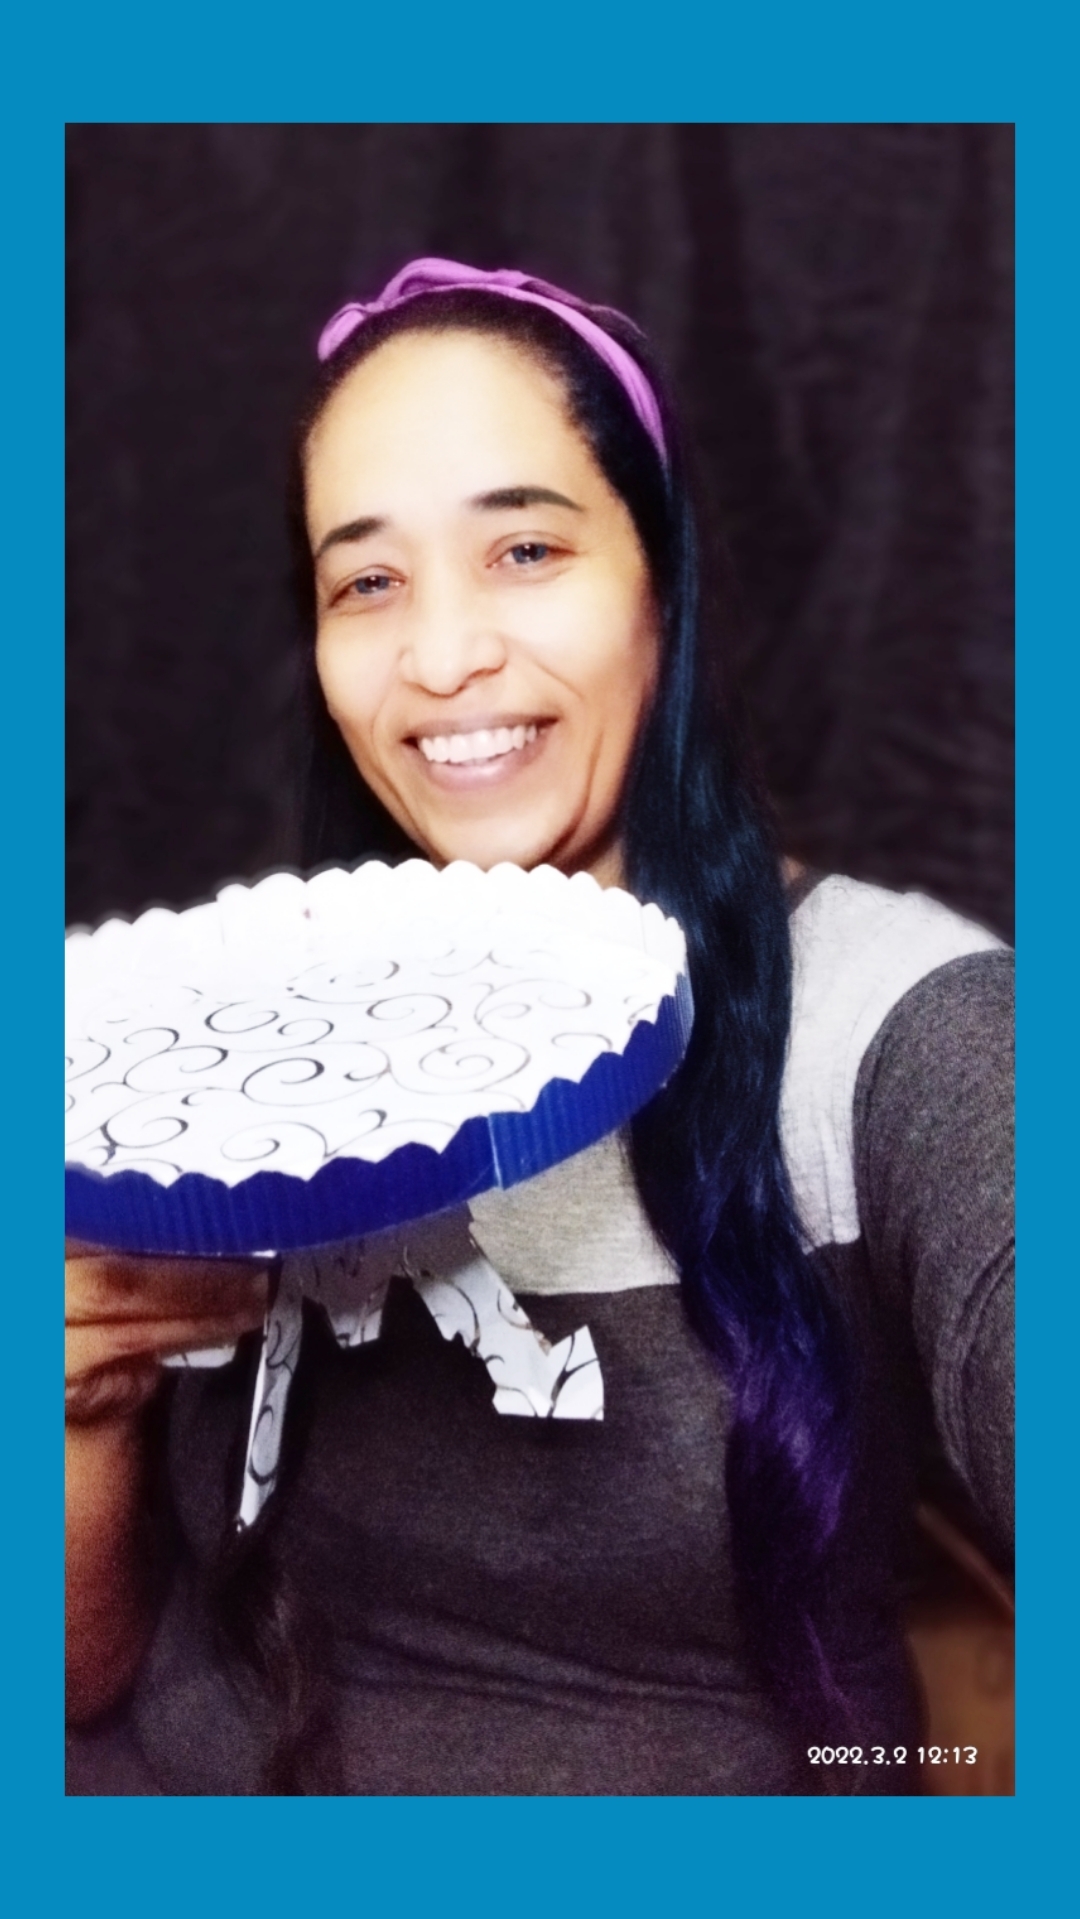
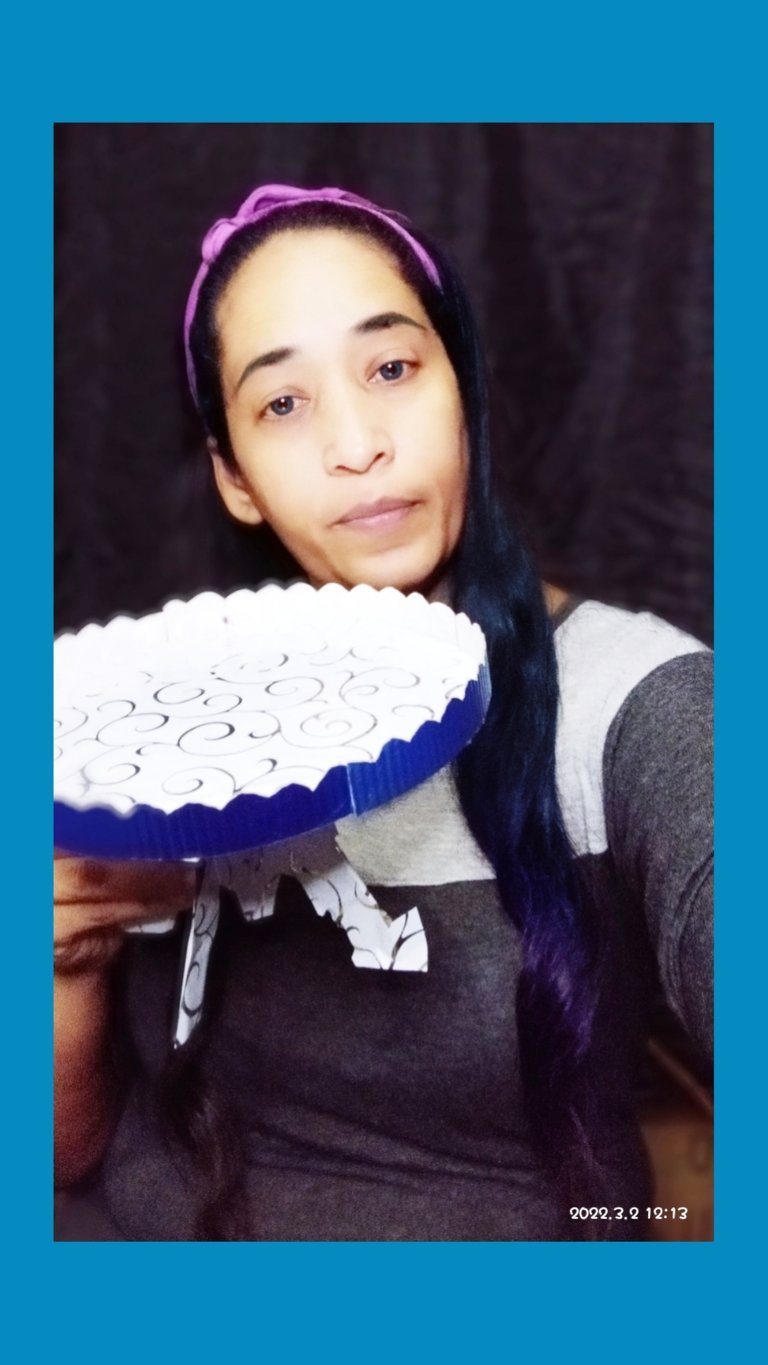
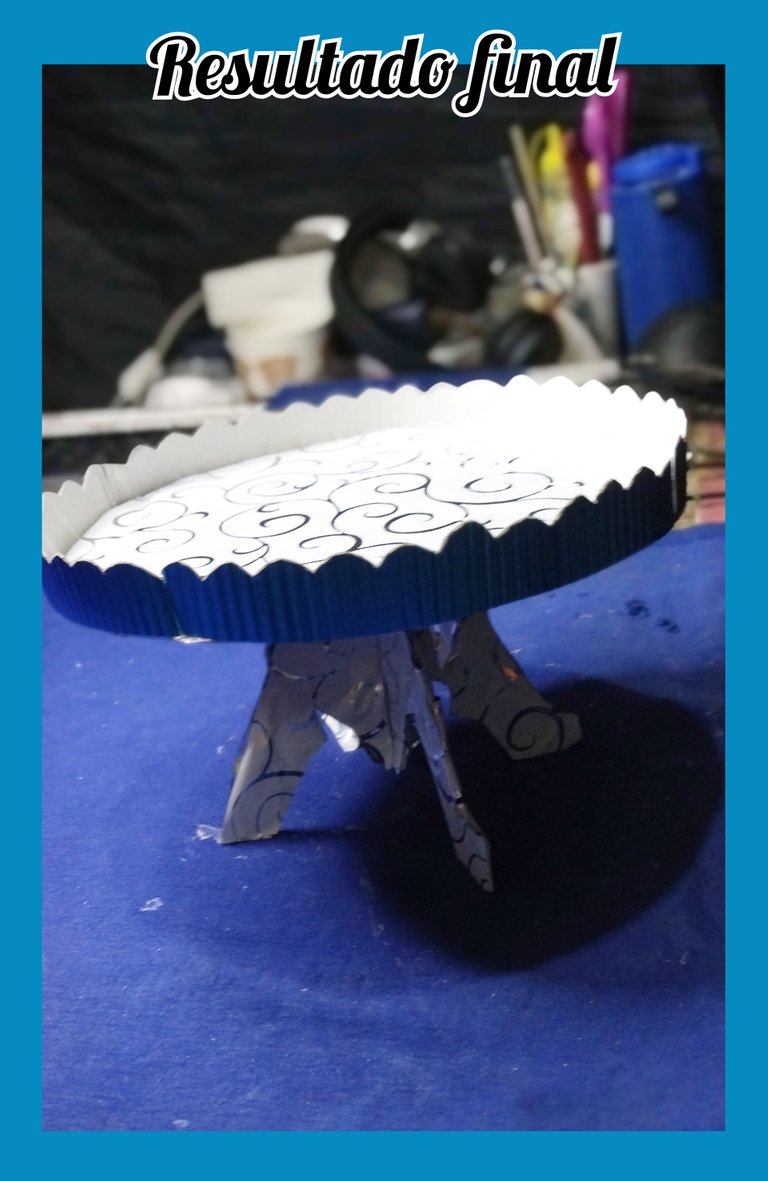
Este candy bar es un modelo muy sobrio y elegante pero podemos alegrarlo colocandole alguna figura de acuerdo a la temática de la fiesta, sobre todo si se trata de un festejo infantil.
This candy bar is a very sober and elegant model but we can brighten it up by placing a figure according to the theme of the party, especially if it is a children's party.
Más adelante les voy a mostrar cómo elaborar nuevos modelos y más variedad sobretodo modelos infantiles, llenos de color, para que sean ustedes mismos quienes le den el toque diferente a sus fiestas, ayudando a que la mesa principal sea decorada con estilo, eso sin contar que se estará contribuyendo con el medio ambiente, pues debemos recordar que algún elemento que muchos consideran basura y que son desechadas, como las cajas de cartón pueden llegar a ser útiles para una infinidad de proyectos que podemos realizar en nuestros hogares nosotros mismos.
Later I will show you how to make new models and more variety, especially children's models, full of color, so that you can give a different touch to your parties, helping the main table to be decorated with style, not to mention that you will be contributing to the environment, because we must remember that some elements that many consider garbage and that are discarded, such as cardboard boxes can become useful for a myriad of projects that we can do in our homes ourselves.
Bueno mis amores esto ha Sido todo por hoy, recordándoles que si les gusto mi post, déjame tu comentario, vota y rebloguea, y de antemano muchas gracias por visitar mi blog y apoyarme.
Well my loves this has been all for today, reminding you that if you liked my post, leave me your comment, vote and reblog, and in advance thank you very much for visiting my blog and support me.
✂️Todas las fotos fueron tomadas con mi teléfono Xiaomi readmi 9T y son de mi propiedad.
✂️All photos were taken with my Xiaomi readmi 9T phone and are my property.
✂️ Utilice el traductor Deepl y el programa polish para la edición de las fotos.
✂️ Use Deepl translator and polish program for photo editing.