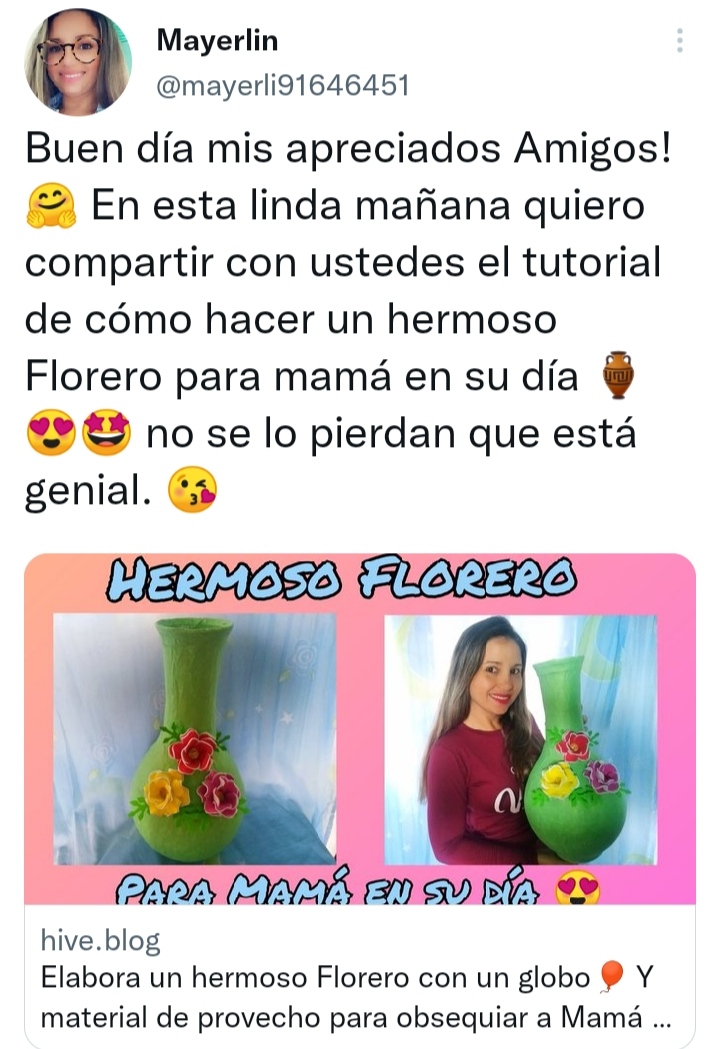
Hola, hola apreciada comunidad de artistas. 🤗🤩💖
Hola, hola apreciada comunidad de artistas. 🤗🤩💖

Deseo todos se encuentren súper bien una vez más estoy muy feliz de poder compartir con ustedes una nueva manualidad y como todos sabemos se acerca el día de las madres y que mejor ocasión para darle un lindo obsequio a ese ser tan querido como lo es nuestra querida madre. En mi opinión mi madre es un ser maravilloso, a quien nunca me cansaré de agradecer todo lo que ha hecho y sigue haciendo por mí, todos los días le pido a Dios que me la llene de vida y salud, mi madre para mí es parte fundamental de mi día a día, sin ella sería muy duro vivir.
I wish everyone is super well once again I am very happy to be able to share with you a new craft and as we all know mother's day is coming and what better occasion to give her a nice gift to that being as loved as our dear mother. In my opinion, my mother is a wonderful being, whom I will never tire of thanking for everything she has done and continues to do for me, every day I ask God to fill her with life and health, my mother is part of fundamental of my day to day, without her it would be very hard to live.
Y como dicen por ahí demostremos ese amor que tenemos por ellas en vida, hagamos que se sientan amadas y valoradas por nosotros, por eso esta vez les quiero mostrar el paso a paso de un lindo jarrón para obsequiar el día de la madre, los materiales son realmente fáciles de conseguir y económicos, mayormente material de provecho como nos encanta en esta comunidad, usaremos potes de arroz chino y hojas recicladas, ahora sin más preámbulo pasemos a los materiales en general que usaremos para este lindo jarrón.
And as they say out there, let's show that love we have for them in life, let's make them feel loved and valued by us, that's why this time I want to show you the step by step of a beautiful vase to give mother's day, the materials are really easy to get and cheap, mostly useful material as we love in this community, we will use Chinese rice pots and recycled leaves, now without further ado let's move on to the general materials that we will use for this pretty vase.
Materiales:
Materiales:

🏺 Bomba.
🏺 Hojas recicladas.
🏺 Potes de arroz chino.
🏺 Maicena.
🏺 Tijera.
🏺 Cúter.
🏺Cinta adhesiva.
🏺Pintura blanca.
🏺 Pintura verde.
🏺 Pincel.
🏺Foami rojo, amarillo, blanco, dorado, verde y fuscia.
🏺 Pistola de silicón.
🏺 Silicón.
🏺lápiz.
🏺 Bomb.
🏺 Recycled leaves.
🏺 Chinese rice pots.
🏺 Cornstarch.
🏺 Scissor.
🏺 Cutter.
🏺 Adhesive tape.
🏺 White paint.
🏺 Green paint.
🏺 Brush.
🏺 Red, yellow, white, gold, green and fuscia foami.
🏺 Silicone gun.
🏺 Silicone.
🏺 pencil.
Ahora veamos el paso a paso para la elaboración del jarrón.
Now let's see the step by step for the elaboration of the vase.
Elaboración:
Elaboración:
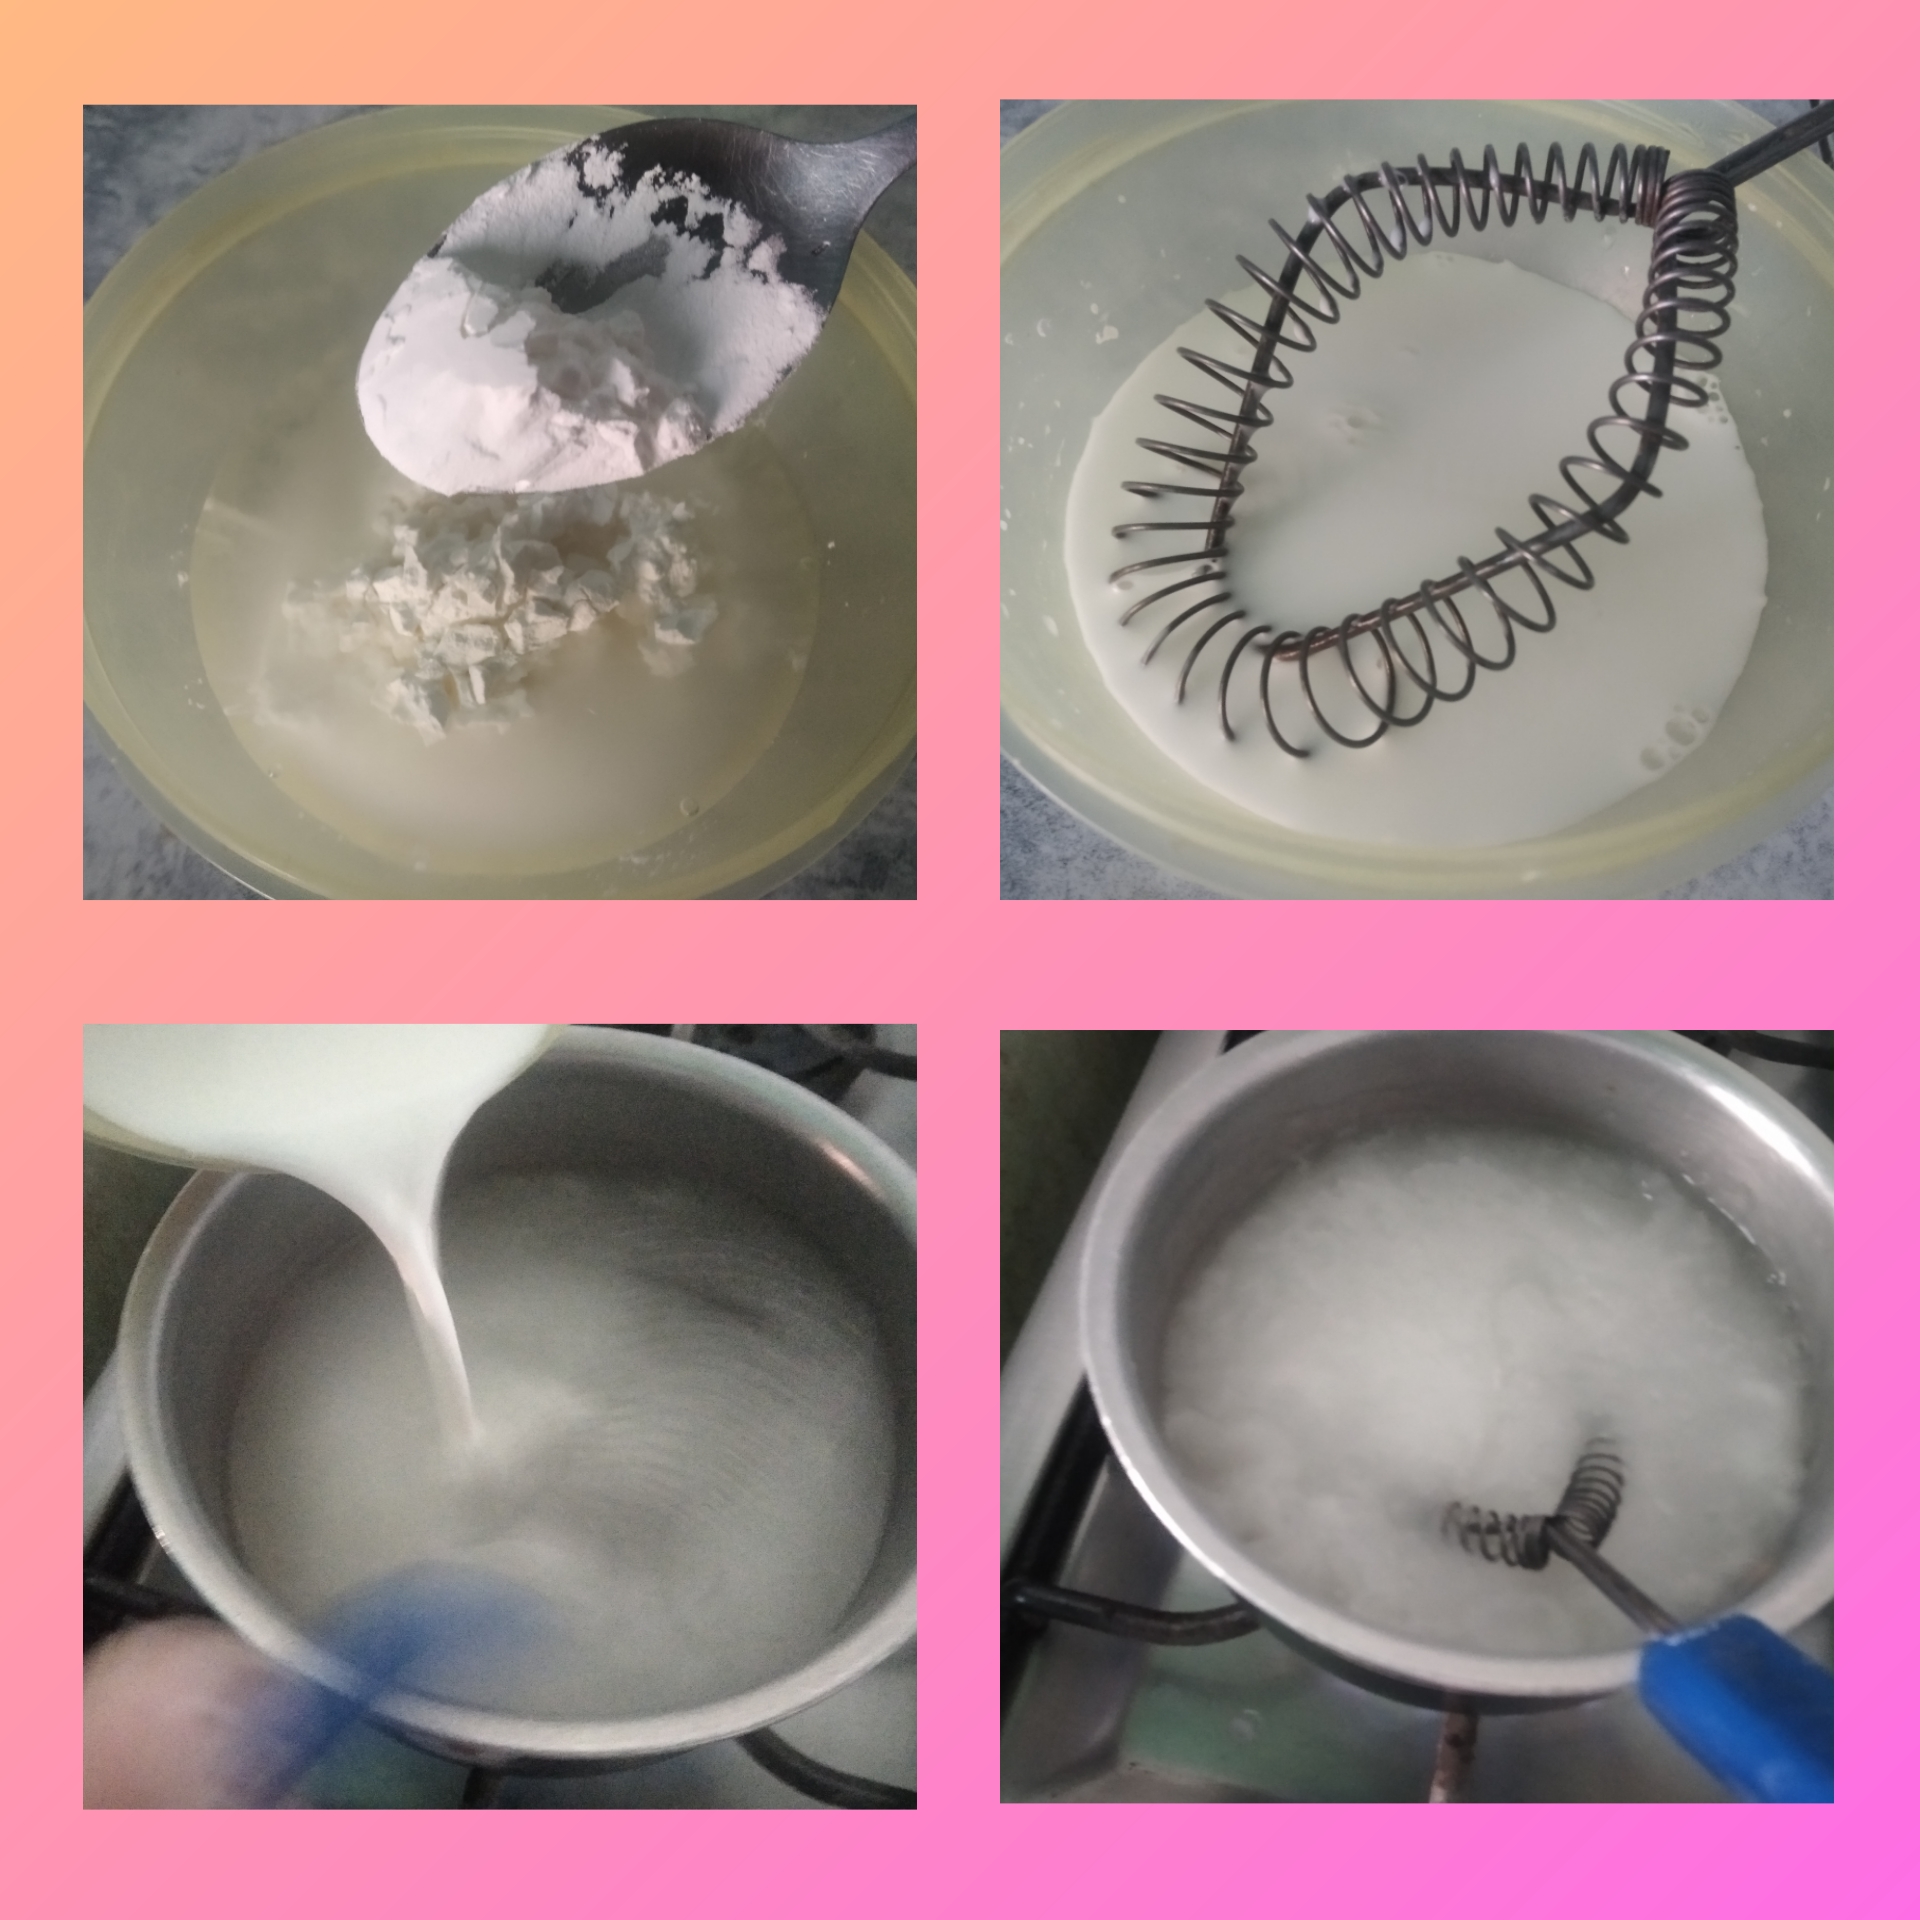
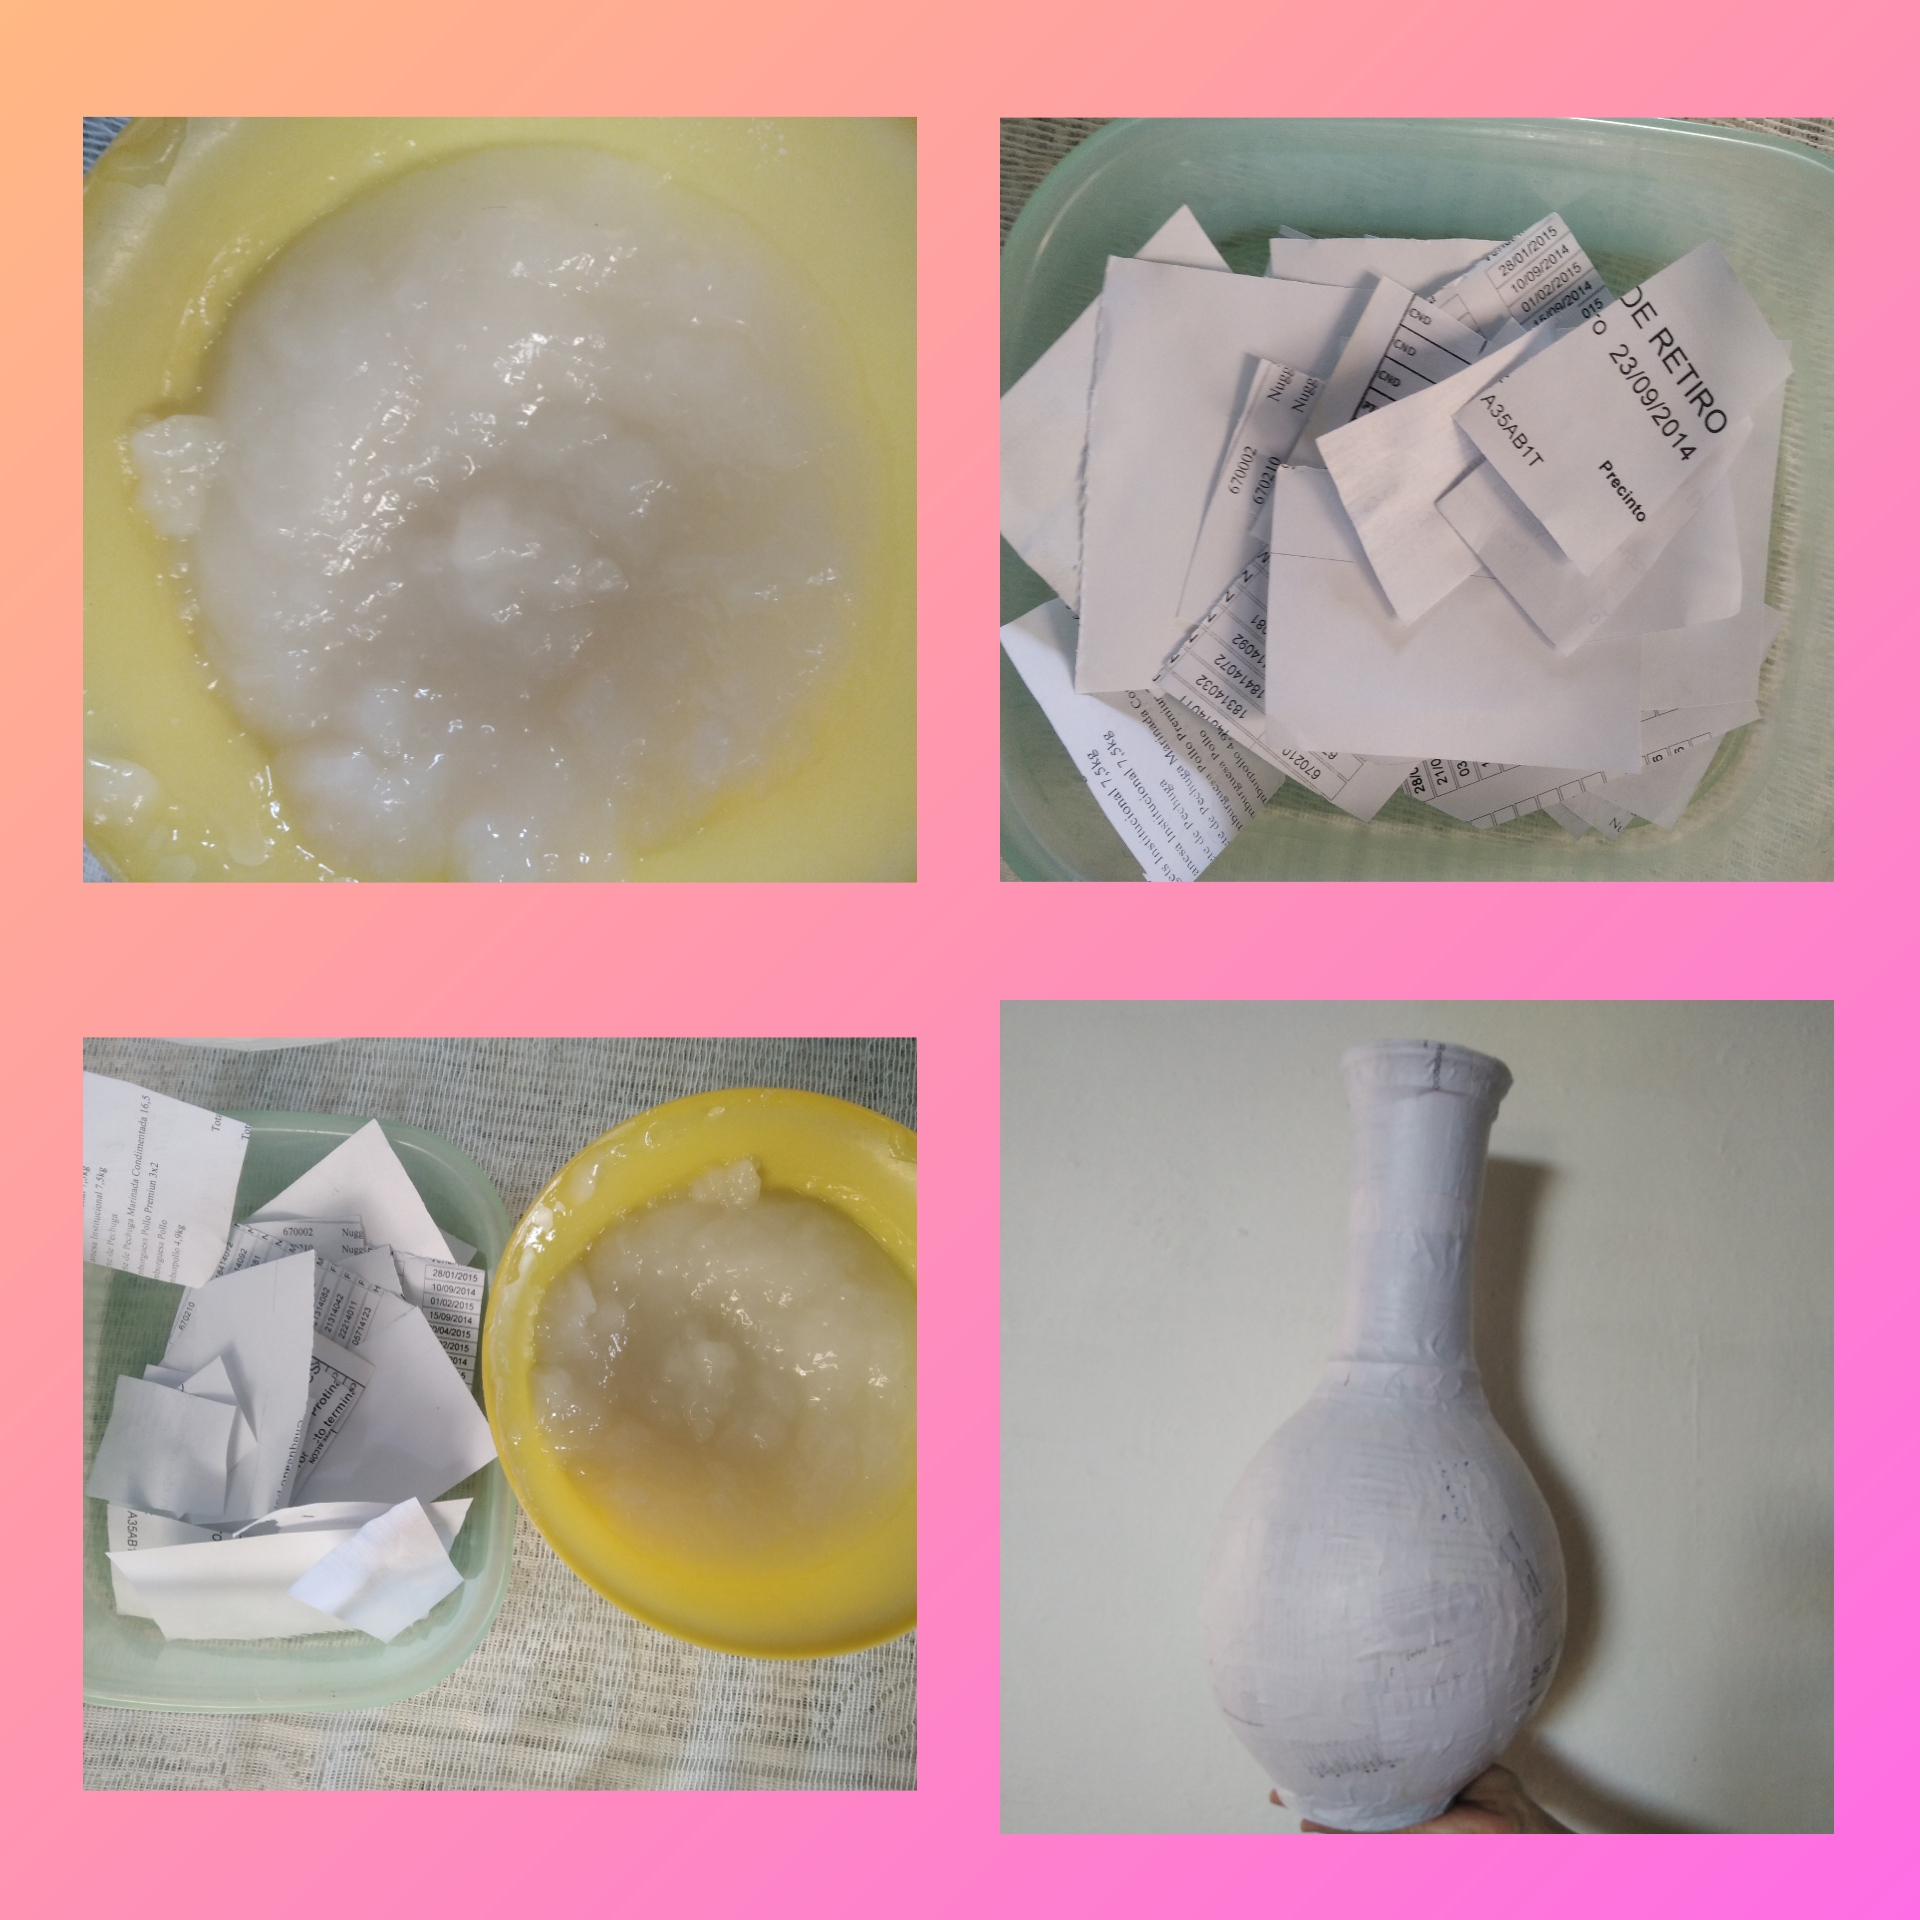
Paso 1.
Vamos a comenzar a elaborar este jarrón haciendo pegamento, acá en Venezuela la pega blanca tiene un costo elevado y para este jarrón vamos a necesitar suficiente pega por eso es mejor hacer nosotros mismos el pegamento. Comenzamos por tomar una olla y en ella agregar un poco de agua, luego en una taza a parte vamos a colocar también agua y vamos a agregar 3 cucharadas de maicena, movemos con el batidor, luego que el agua de la olla esté hirviendo vamos a agregar la mezcla que ya tenemos, mientras la vamos agregando vamos moviendo para que se integren bien la maicena con el agua y no le queden grumos al pegamento, lo dejamos reposar y ya tenemos listo nuestro pegamento.
Step 1.We are going to start making this vase by making glue, here in Venezuela white glue is expensive and for this vase we are going to need enough glue, so it is better to make the glue ourselves. We start by taking a pot and in it add a little water, then in a separate cup we are going to also put water and we are going to add 3 tablespoons of cornstarch, we move with the whisk, after the water in the pot is boiling we are going to add the mixture that we already have, while we are adding it we are moving so that the cornstarch is well integrated with the water and there are no lumps left in the glue, we let it rest and we have our glue ready.
Paso 2.
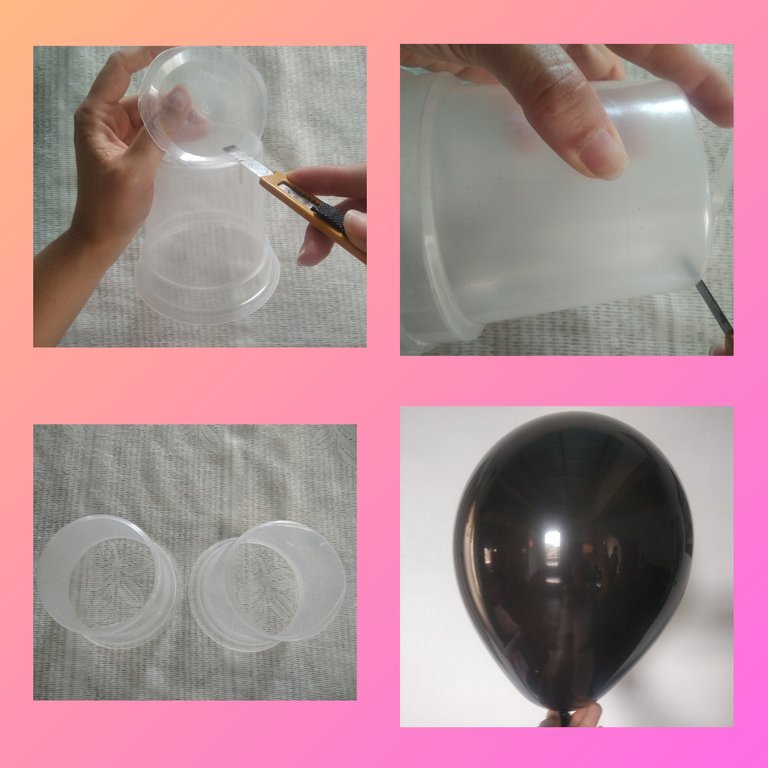
Mientras nuestro pegamento se enfría nos vamos al paso dos. Tomamos los postes de arroz chino y vamos a quitar la parte de abajo de cada pote, haciendo un agujero, luego soplamos la bomba.
Step 2.While our glue cools we go to step two. We take the Chinese rice poles and we are going to remove the bottom of each pot, making a hole, then we blow the pump.
Paso 3.
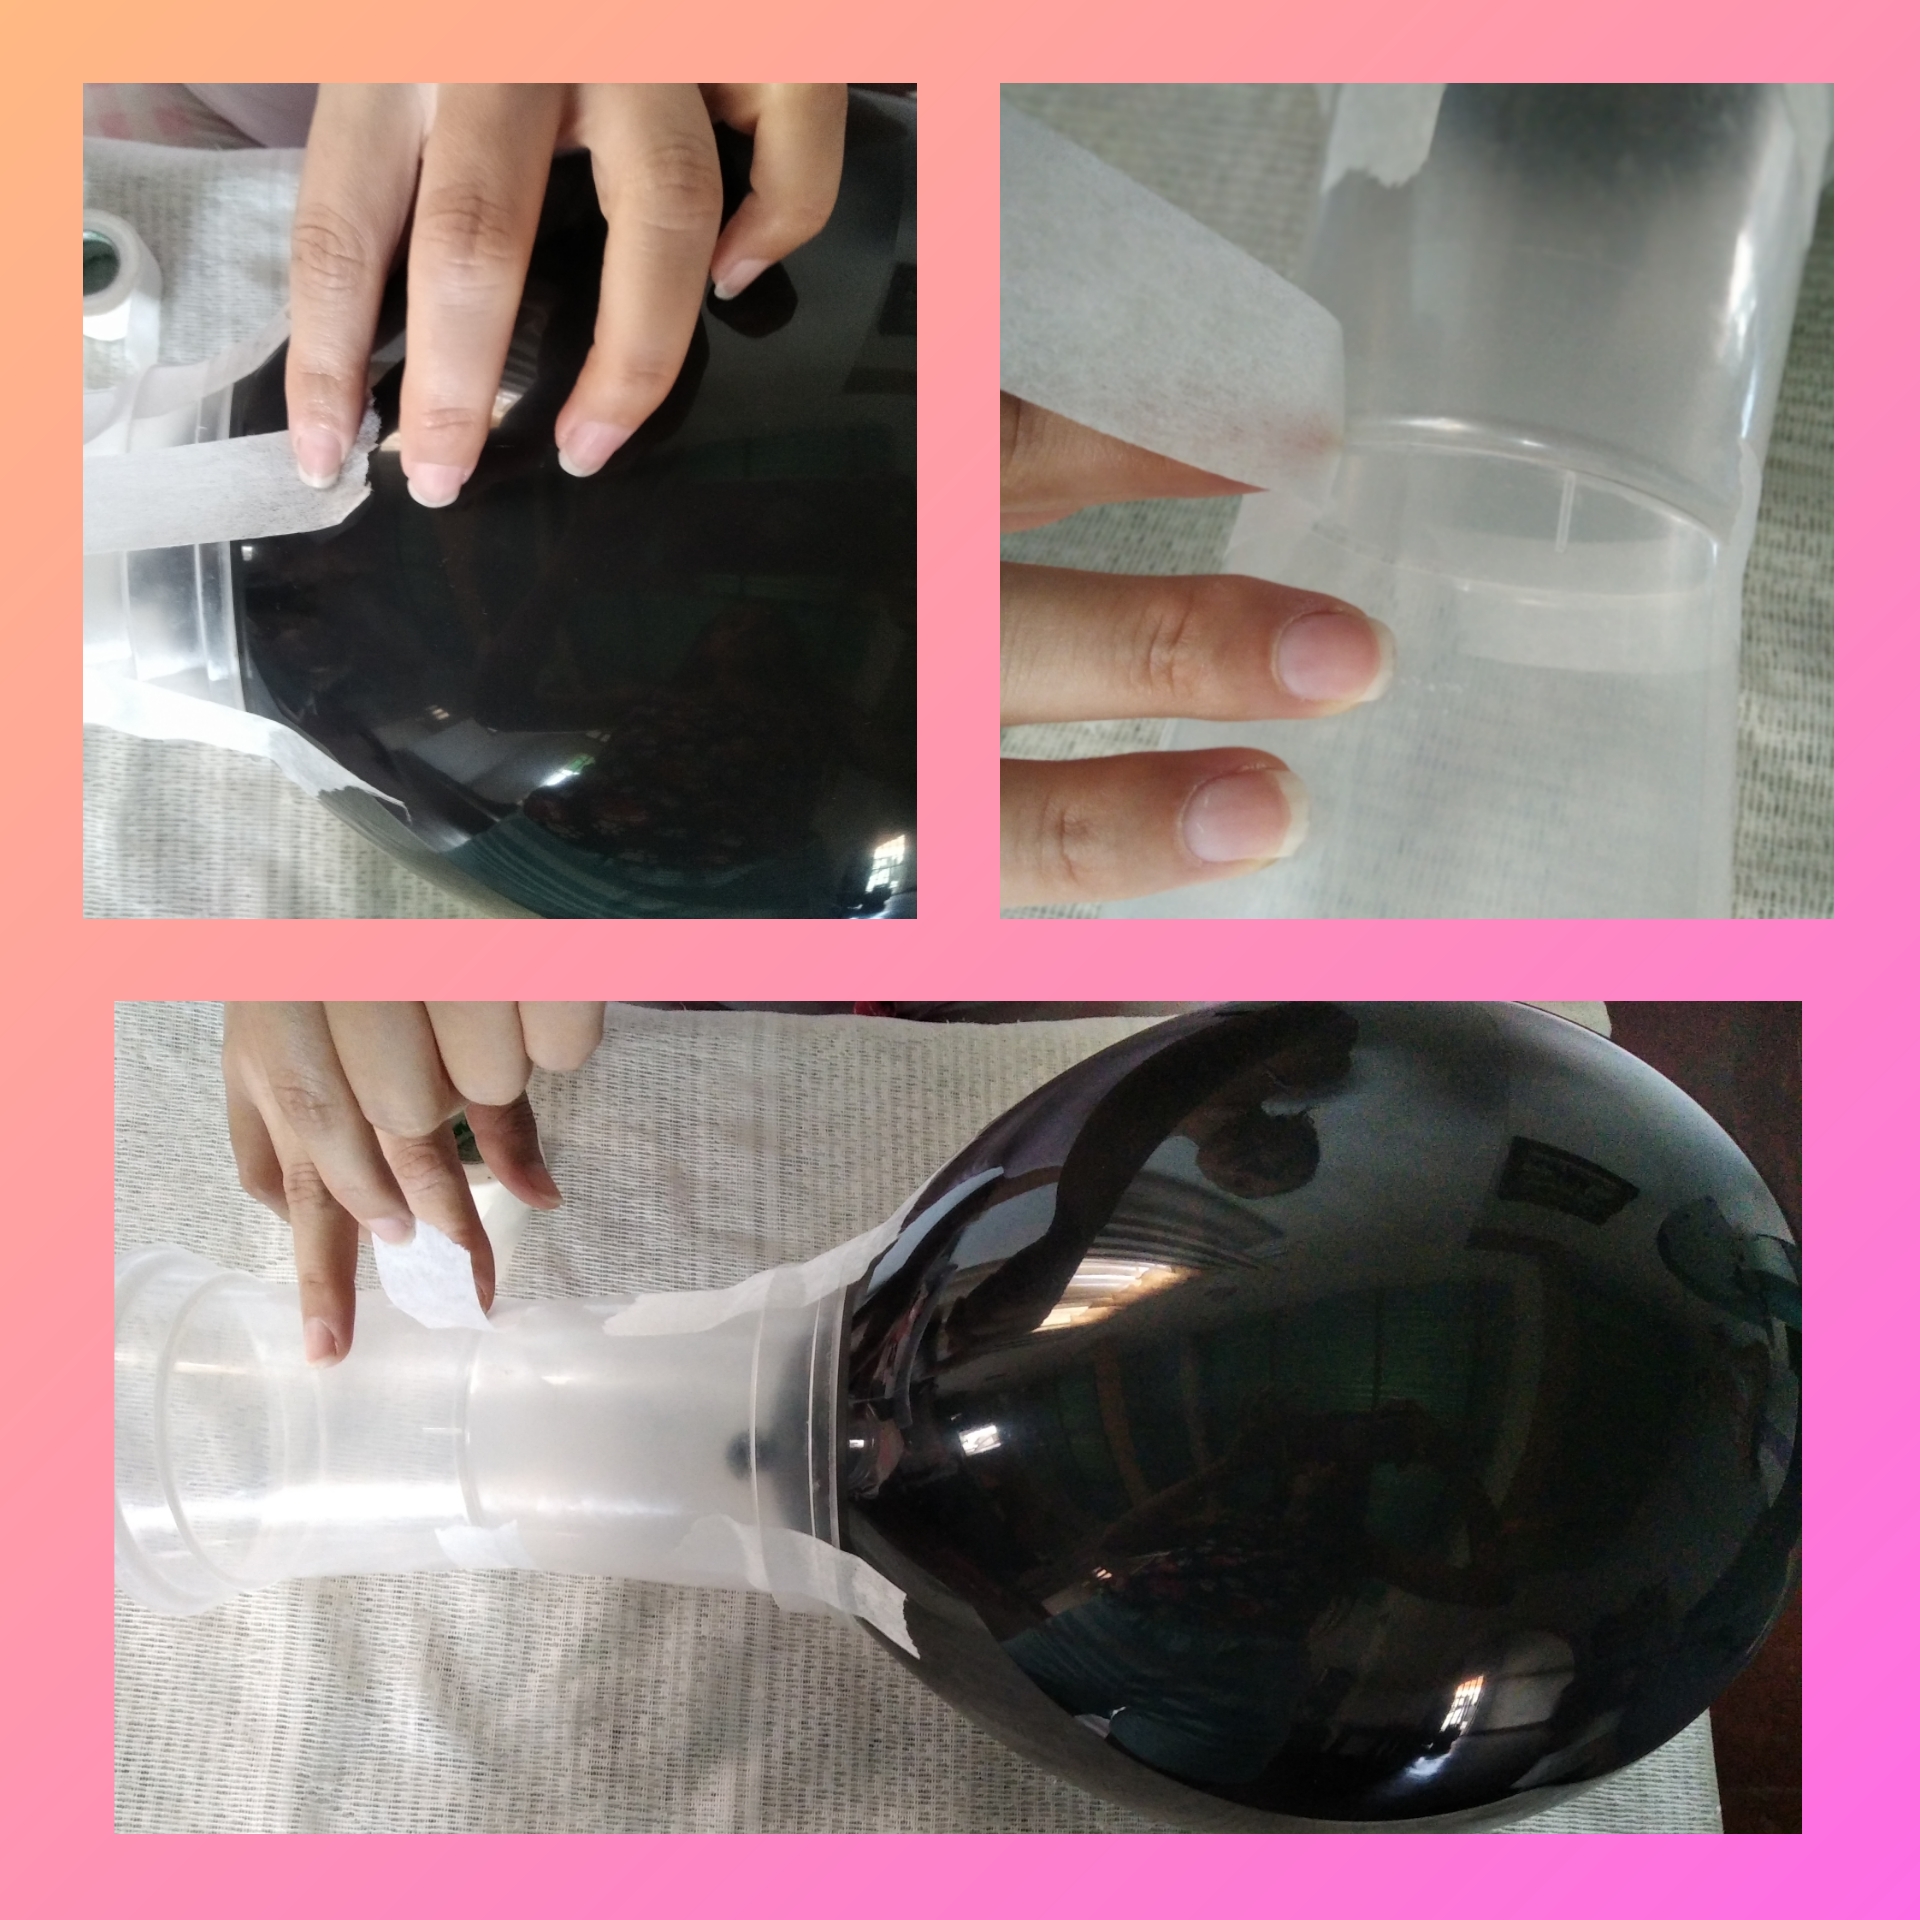
Con la cinta adhesiva vamos a unir la bomba con los dos potes.
Step 3.With the adhesive tape we are going to join the bomb with the two pots.
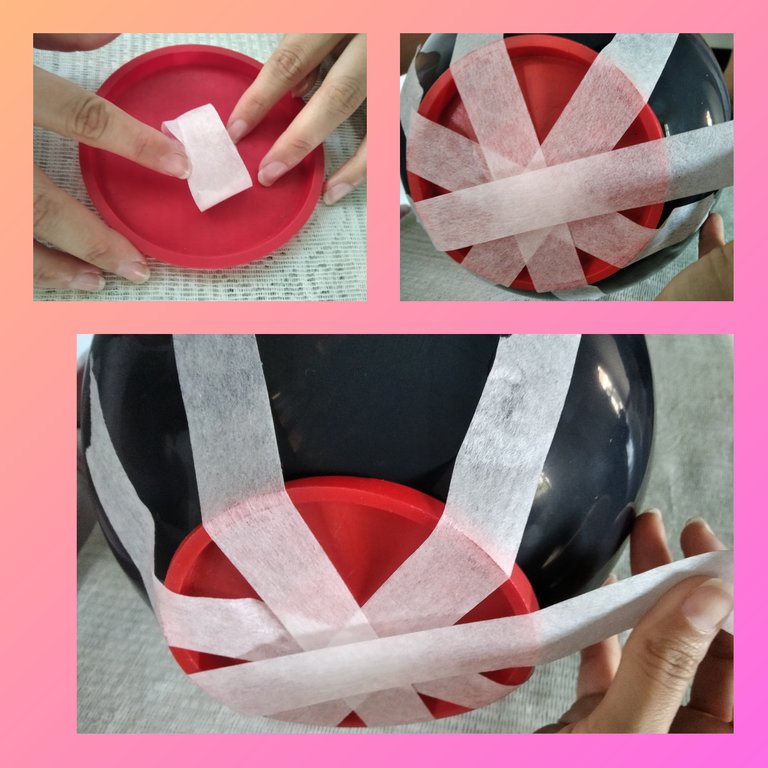
Paso 4.
Luego en la parte de abajo de la bomba vamos a colocar una de las dos tapas de los potes, con la misma cinta la fijamos a la bomba.
Step 4.Then at the bottom of the pump we are going to place one of the two lids of the pots, with the same tape we fix it to the pump.
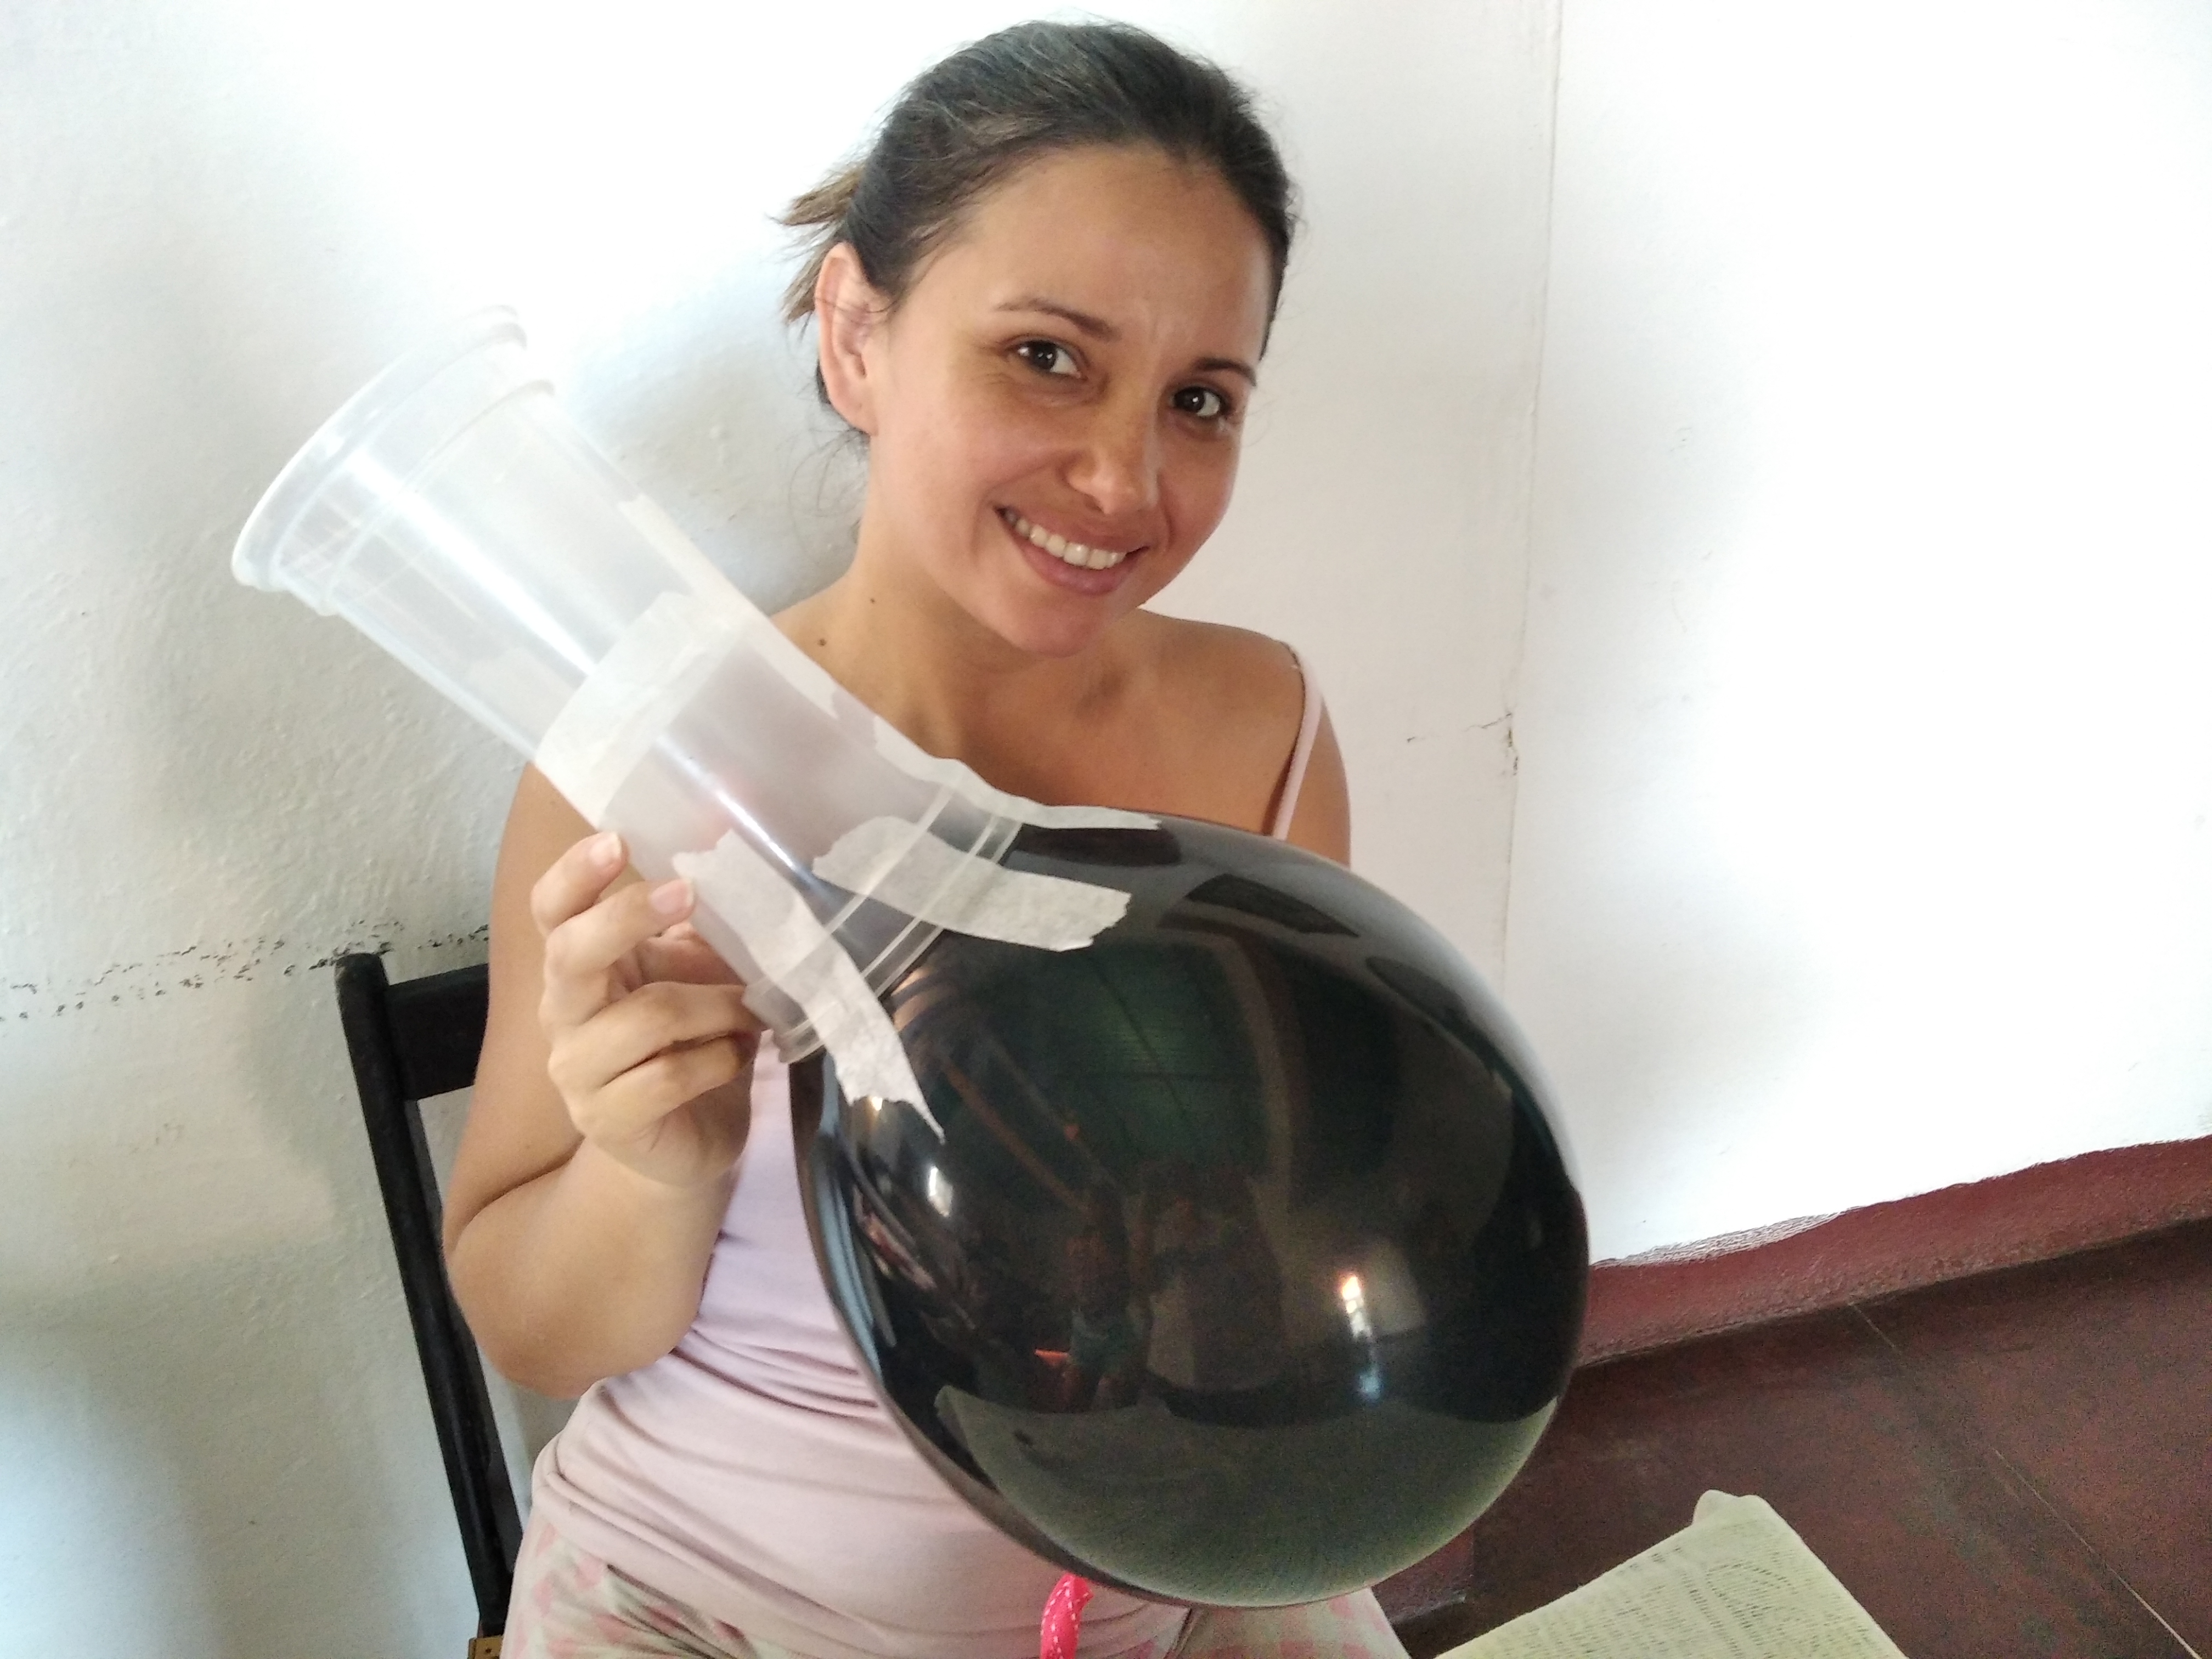
Y así de esta manera nos va quedando nuestro bello jarrón, como ven ya tiene su linda forma.
And so in this way our beautiful vase is left, as you can see it already has its beautiful shape.
Paso 5.
Tomamos las hojas recicladas y con ayuda de la tijera vamos recortando cuadros pequeños de hojas, luego con el pincel aplicamos el pegamento y vamos cubriendo todo el jarrón y esperamos a que seque.
Step 5.We take the recycled leaves and with the help of scissors we cut out small squares of leaves, then with the brush we apply the glue and cover the entire vase and wait for it to dry.
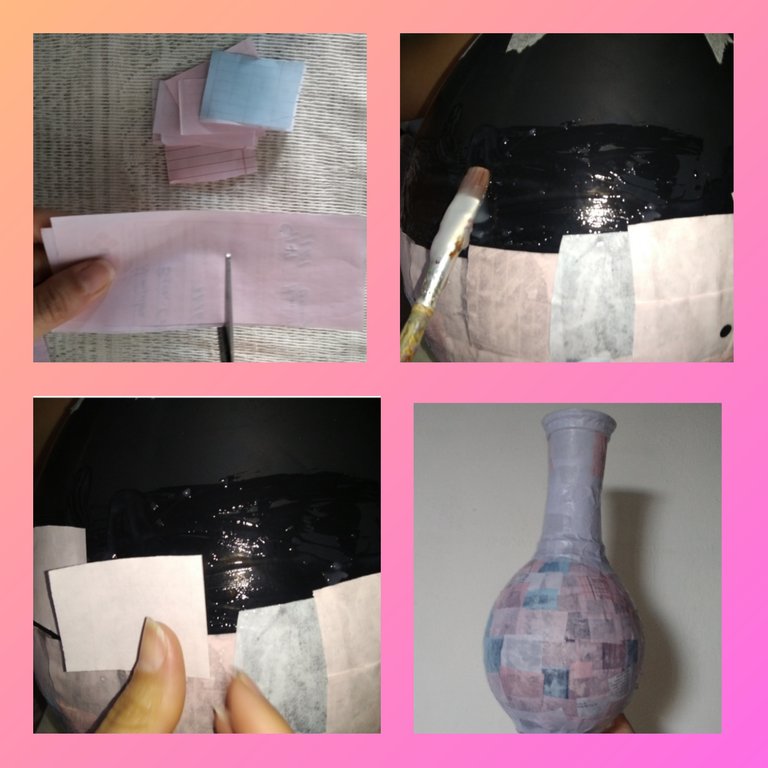
Paso 6.
Este procedimiento lo vamos a repetir dos, tres, cuatro y cinco veces o las veces que sea necesario, hasta que notemos que la el jarrón está duro. Yo repetí este proceso 5 veces hasta que mi jarrón se puso duro, también podemos usar periódico en vez de hojas recicladas.
Step 6.We are going to repeat this procedure two, three, four and five times or as many times as necessary, until we notice that the vase is hard. I repeated this process 5 times until my vase got hard, we can also use newspaper instead of recycled leaves.
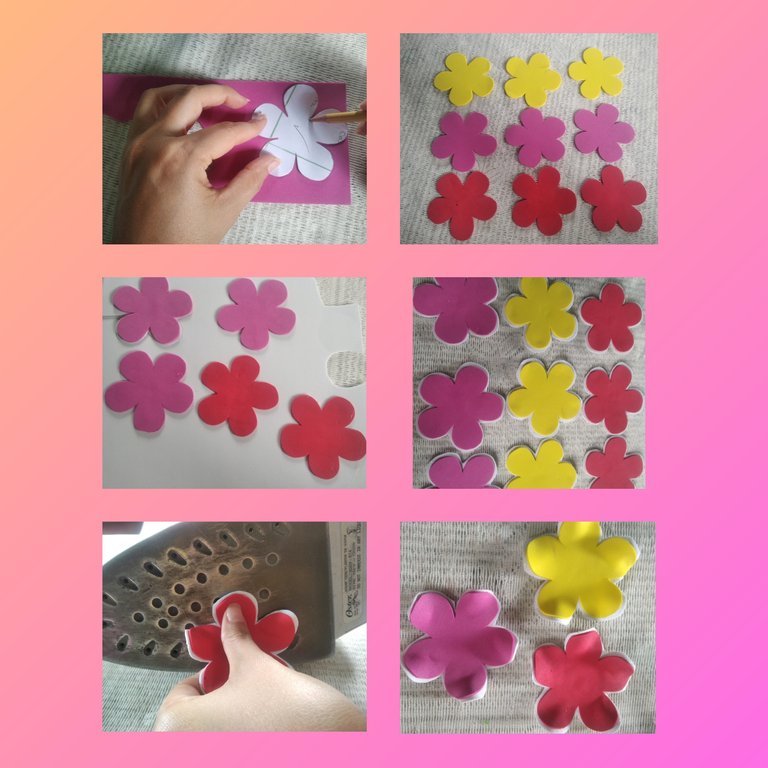
Paso 7.
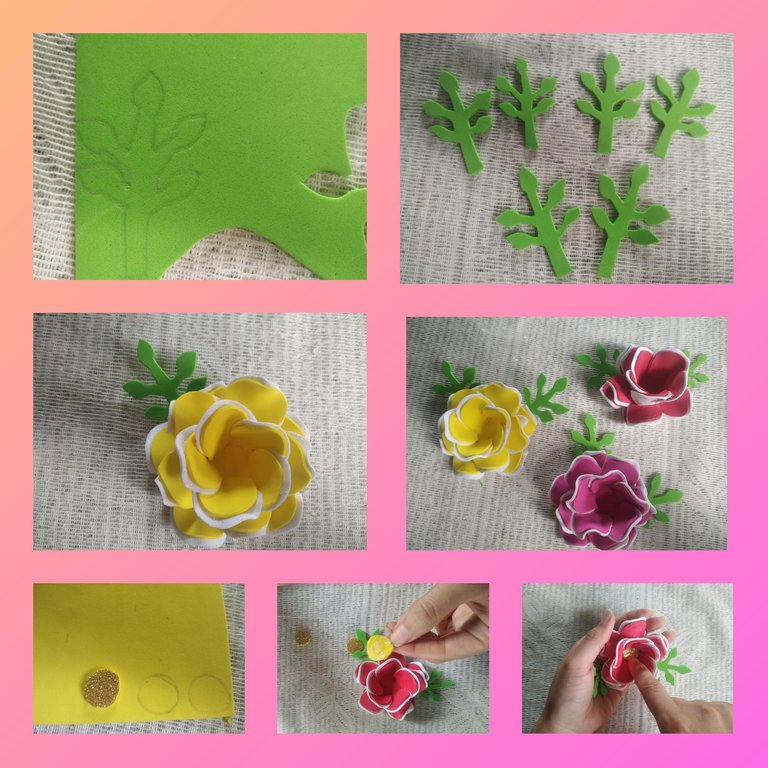
Para adornar este lindo jarrón vamos a elaborar 3 hermosas rosas en foami. Comenzamos dibujando en una hoja blanca una flor de 5 pétalos, luego la vamos a dibujar en el foami, dibujamos 3 flores en el foami amarillo, 3 flores en fuscia y 3 flores en rojo. Cada flor la vamos a unir al foami blanco y vamos a recortar dejando un espacio por fuera de cada flor como lo muestra la imágen, luego vamos a acercar cada pétalo a la plancha y en lo que este se caliente vamos a doblar con nuestro dedo en el medio de cada pétalo para darle forma de rosa.
Step 7.To decorate this beautiful vase we are going to make 3 beautiful roses in foami. We start by drawing a flower with 5 petals on a white sheet, then we are going to draw it on the foami, we draw 3 flowers on the yellow foami, 3 flowers in fuchsia and 3 flowers in red. We are going to attach each flower to the white foami and we are going to cut it leaving a space on the outside of each flower as shown in the image, then we are going to bring each petal closer to the iron and as soon as it is hot we are going to fold with our finger in the middle of each petal to shape it into a rose.
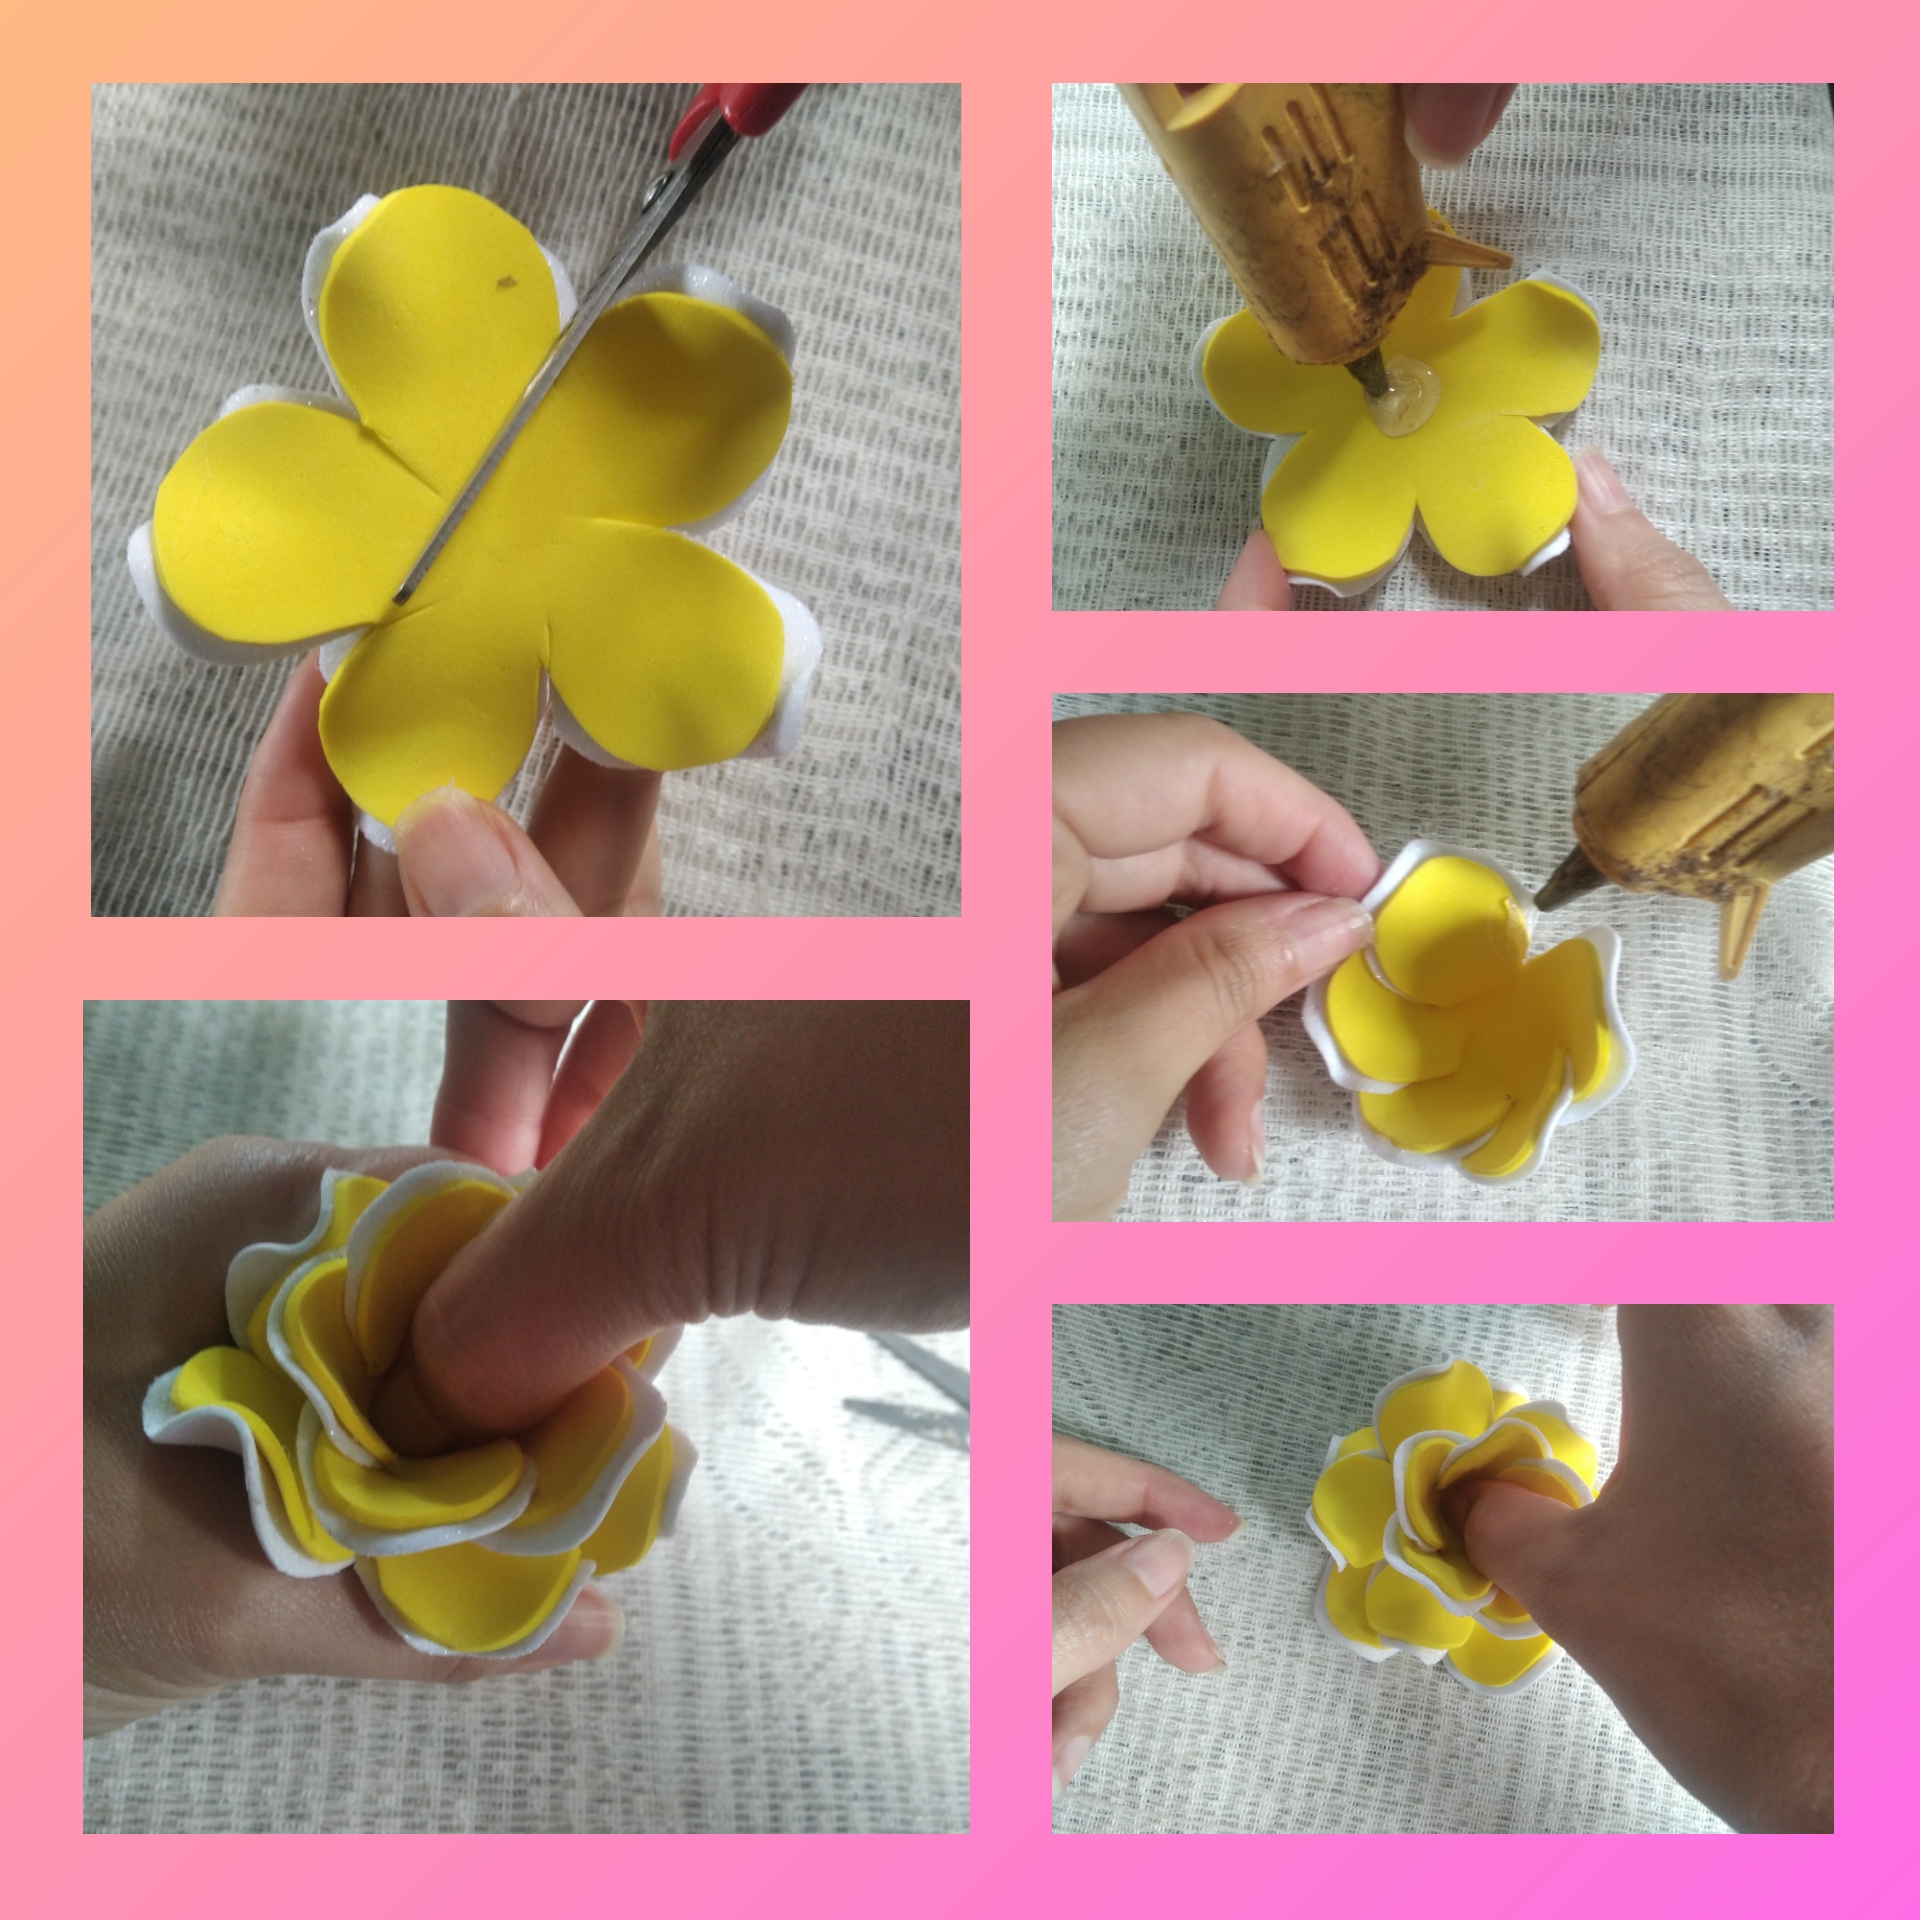
Paso 8.
Ahora vamos a armar cada rosa. Tomamos una flor en este caso la amarilla, con la tijera vamos a cortar en el borde de cada pétalo, luego colocamos silicón para unir cada pétalo, luego colocamos la otra flor amarilla le colocamos silicón en el medio y unimos a la anterior, por último tomamos la última flor amarilla y de igual manera la unimos con las dos anteriores y así obtendremos cada rosa. Este paso lo aplicamos a cada flor a la roja y a la fuscia.
Step 8.Now we are going to assemble each rose. We take a flower in this case the yellow one, with the scissors we are going to cut on the edge of each petal, then we place silicone to join each petal, then we place the other yellow flower, we put silicone in the middle and join the previous one, finally we take the last yellow flower and in the same way we unite it with the previous two and thus we will obtain each rose. We apply this step to each flower, red and fuscia.
Paso 9.
En el foami verde dibujamos unas hojitas, las recortamos y las unimos a cada flor, serían dos para cada flor en total 6 palitos y hojitas. En el foami dorado vamos a dibujar 3 círculos y los colocamos en el medio de cada rosa.
Step 9.In the green foami we draw some leaves, cut them out and attach them to each flower, there would be two for each flower in total 6 sticks and leaves. In the golden foami we are going to draw 3 circles and place them in the middle of each rose.
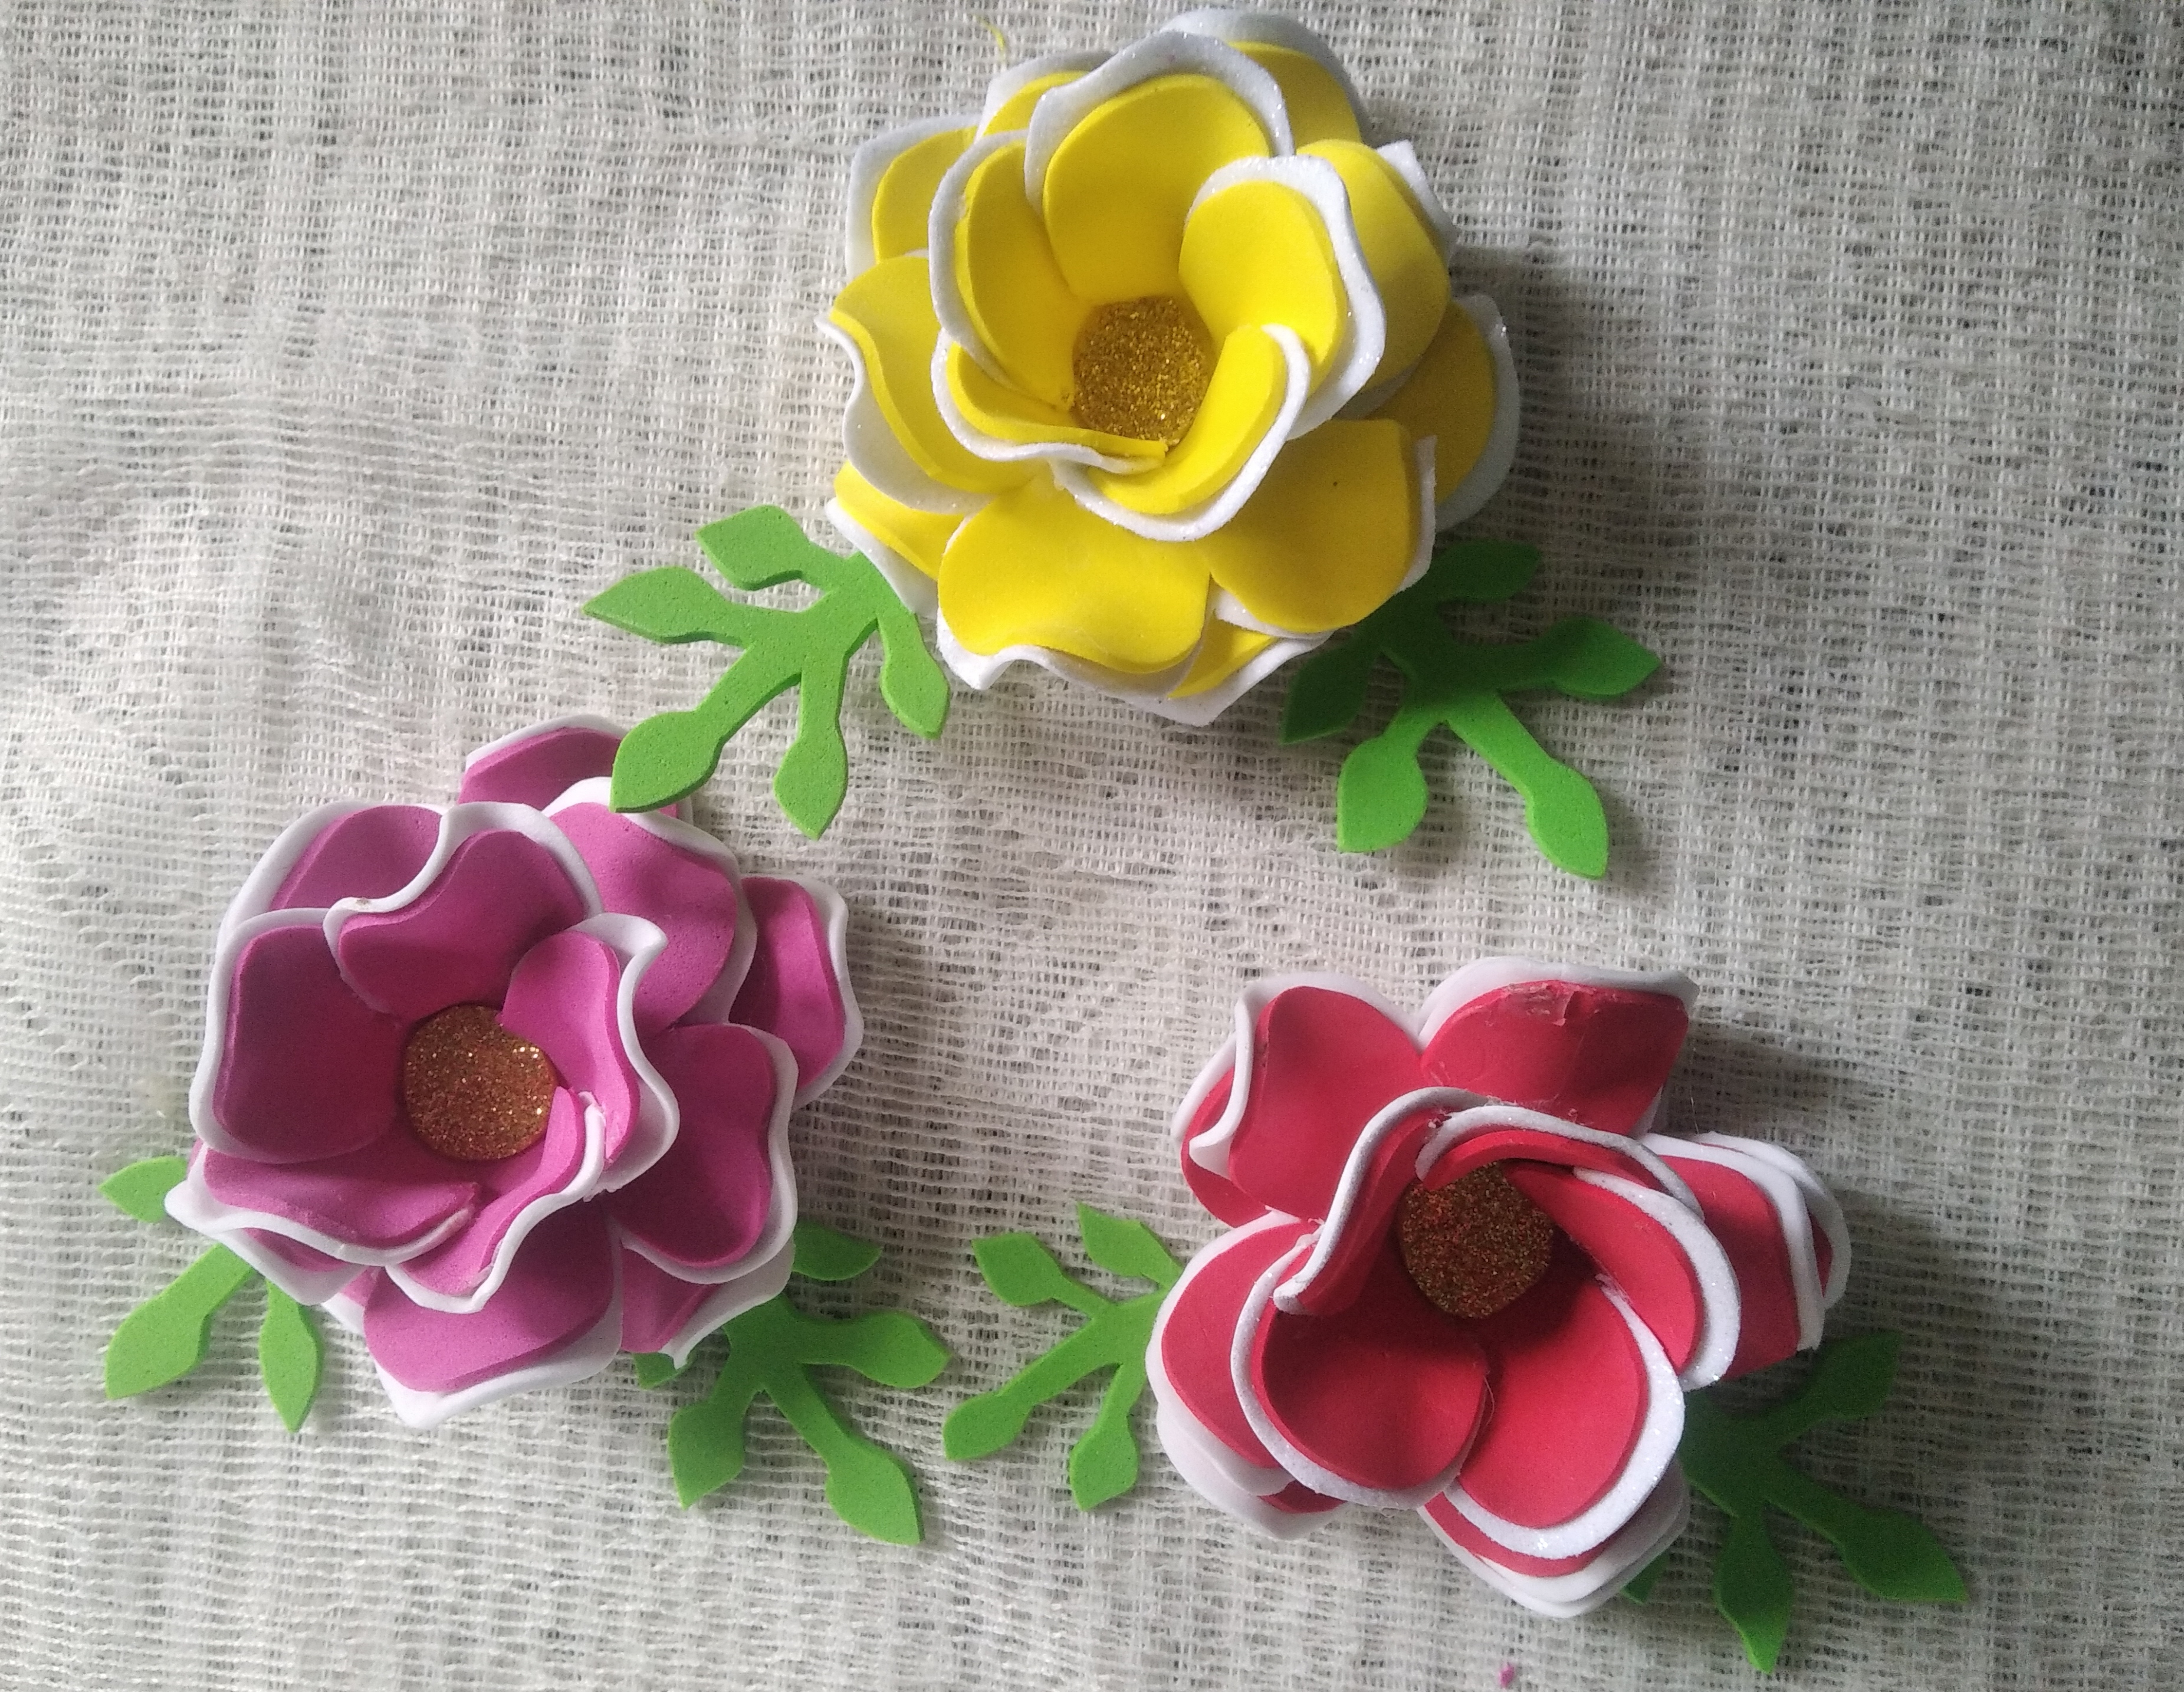
Así de hermosa quedan estás rosas, especial para esta fecha tan importante, yo estoy muy feliz de ver cómo va quedando todo y lo mejor es poder hacer un obsequio con nuestras manitos para esa persona que merece todo en esta vida, como lo es la madre, una abuela, una esposa.
These roses are so beautiful, especially for this important date, I am very happy to see how everything is turning out and the best thing is to be able to make a gift with our little hands for that person who deserves everything in this life, as is the mother, a grandmother, a wife.
Paso 10.
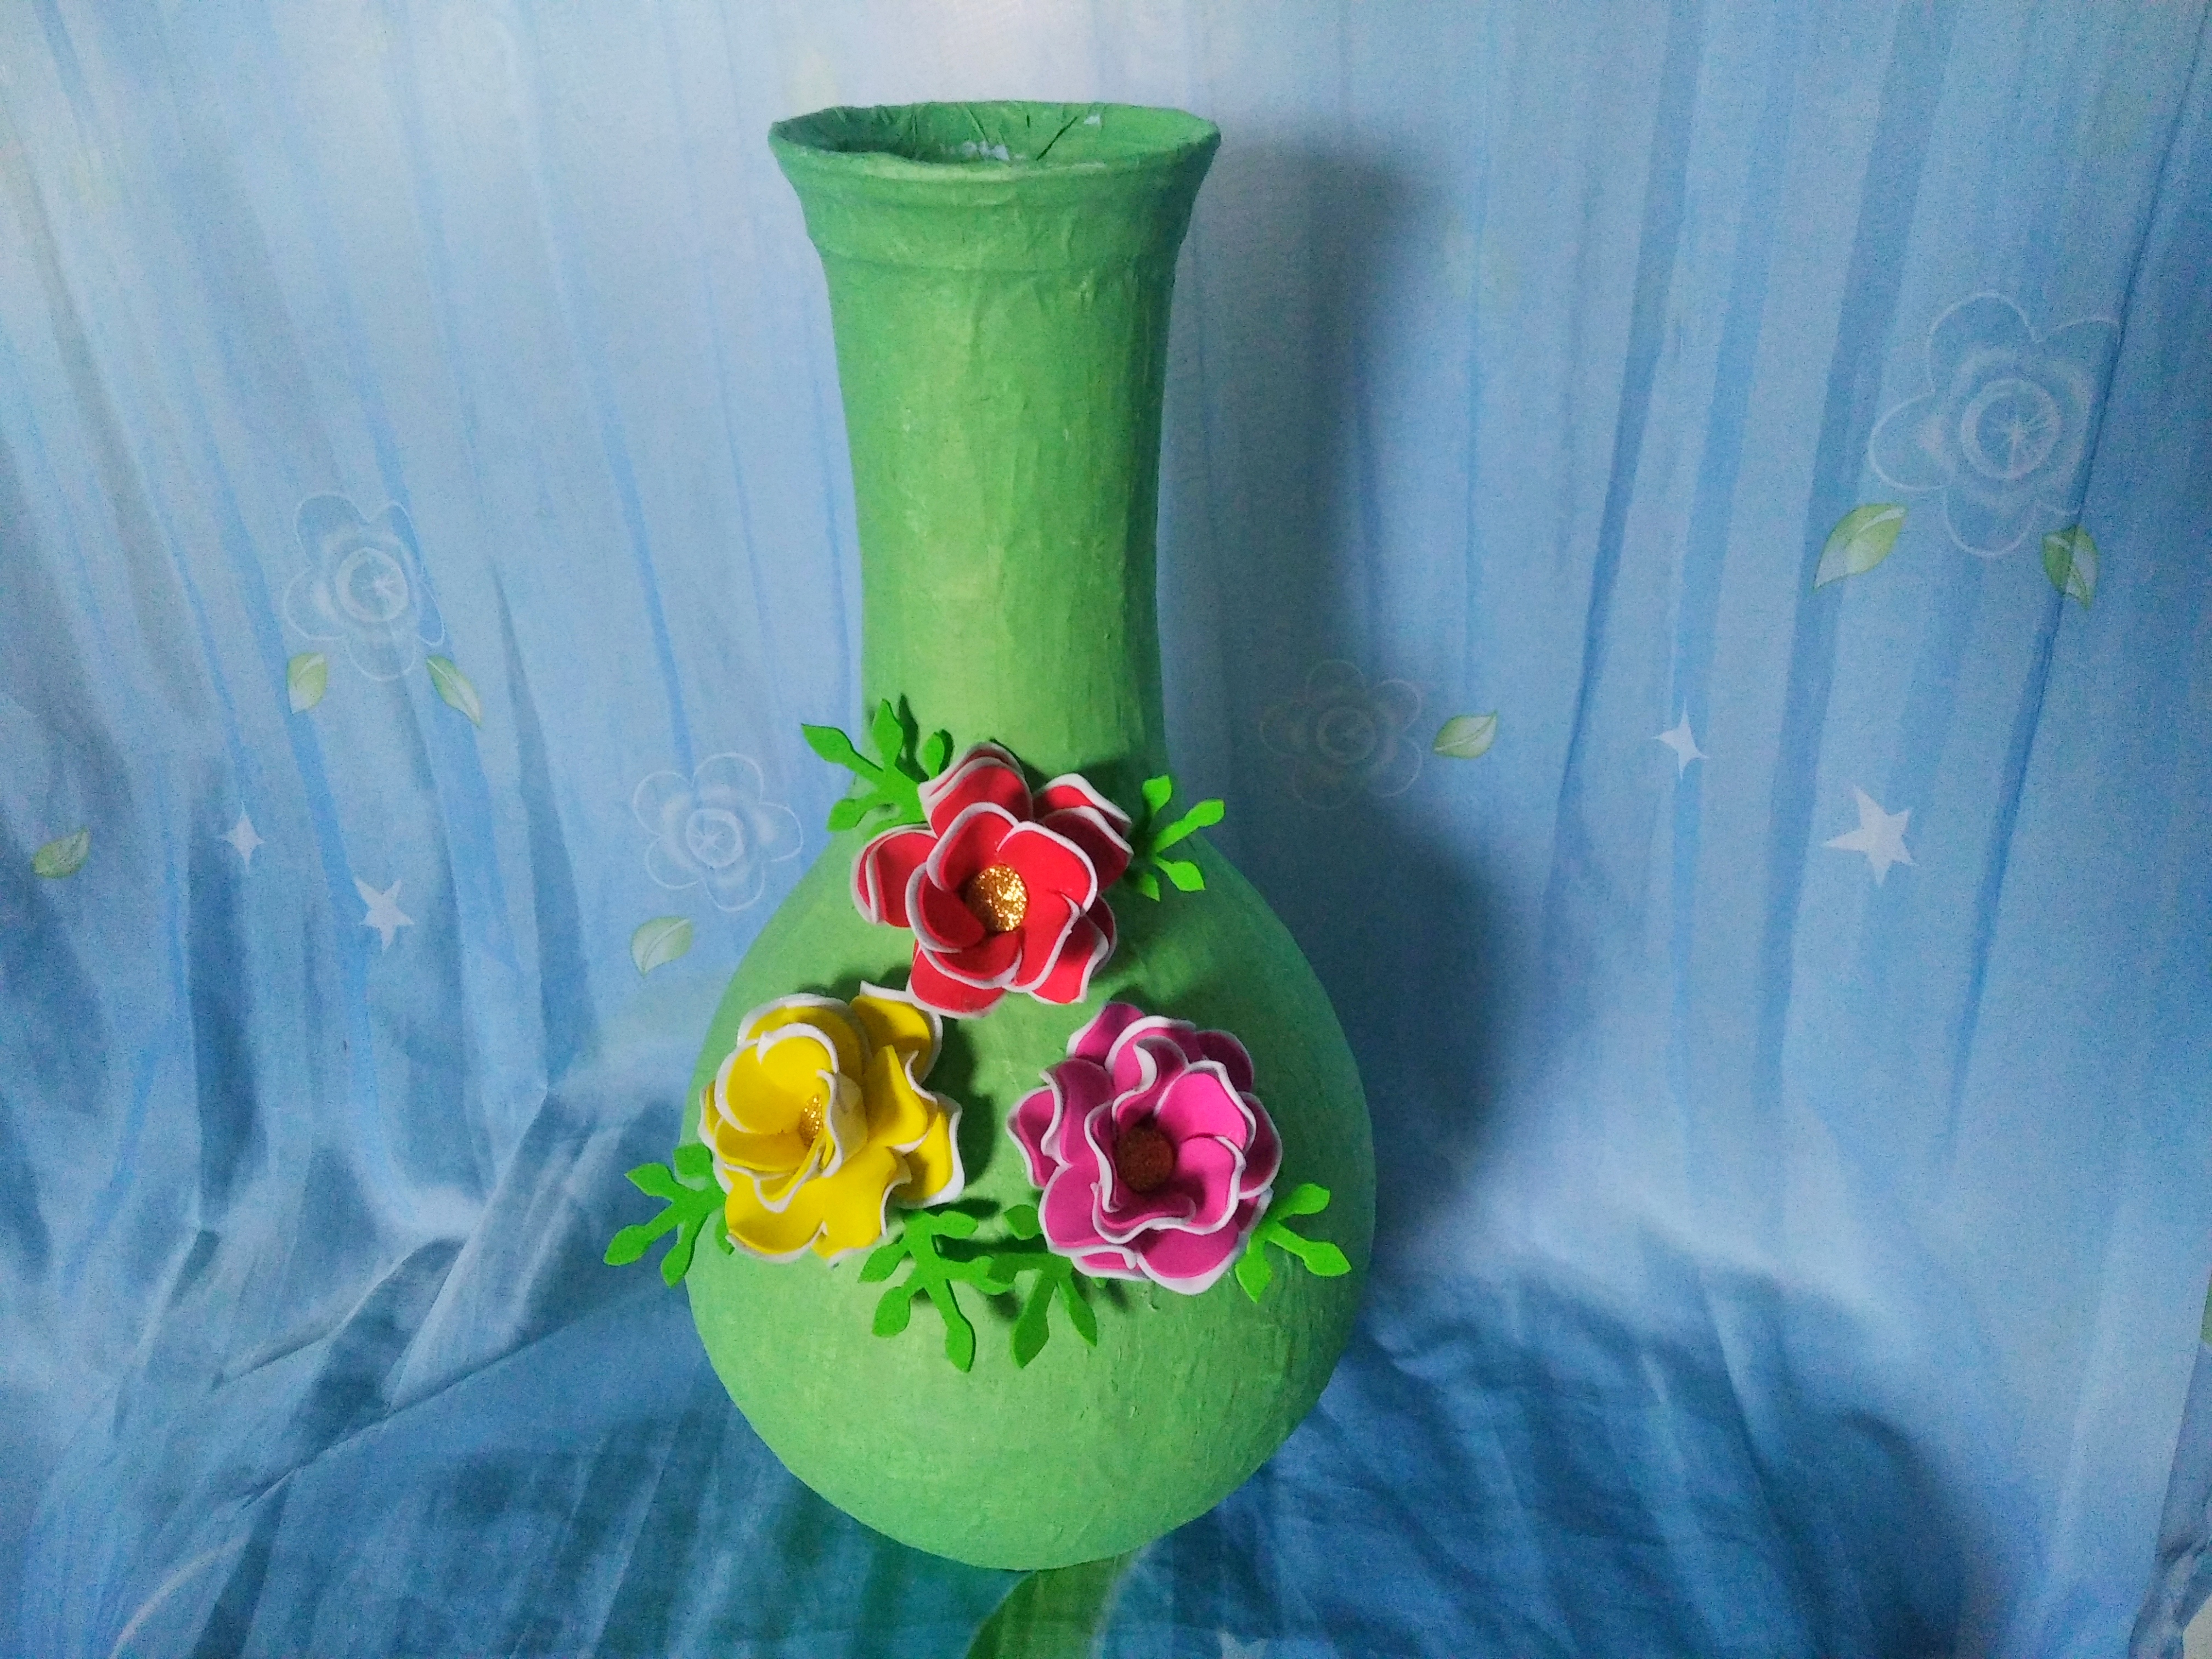
Luego de colocar las capas de papel a nuestro florero, vamos a aplicar la pintura blanca esperamos a que seque y aplicamos la pintura verde, luego vamos a unir una a una las rosas al florero.
Step 10.After placing the layers of paper to our vase, we are going to apply the white paint, wait for it to dry and apply the green paint, then we are going to attach the roses to the vase one by one.
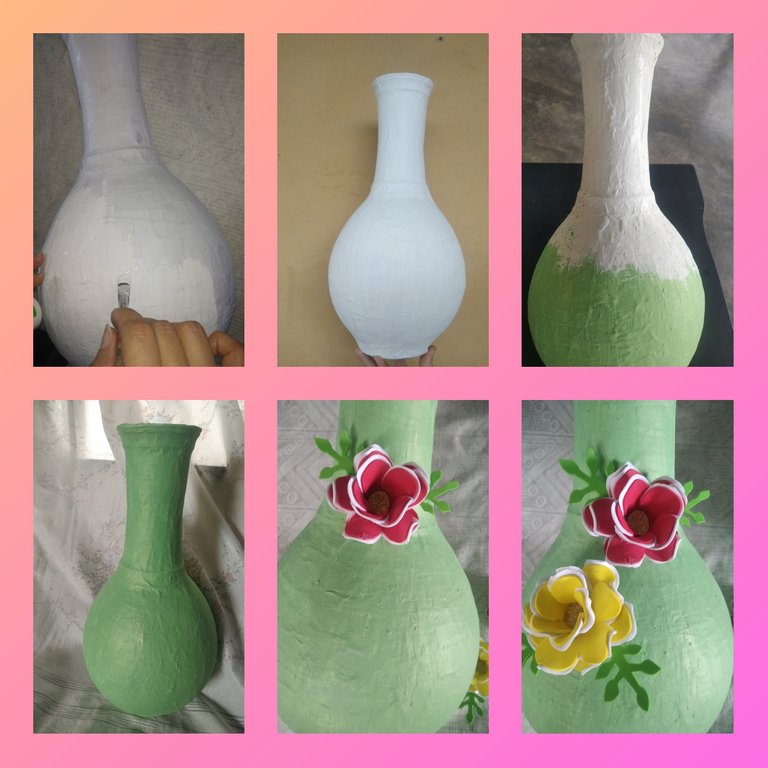
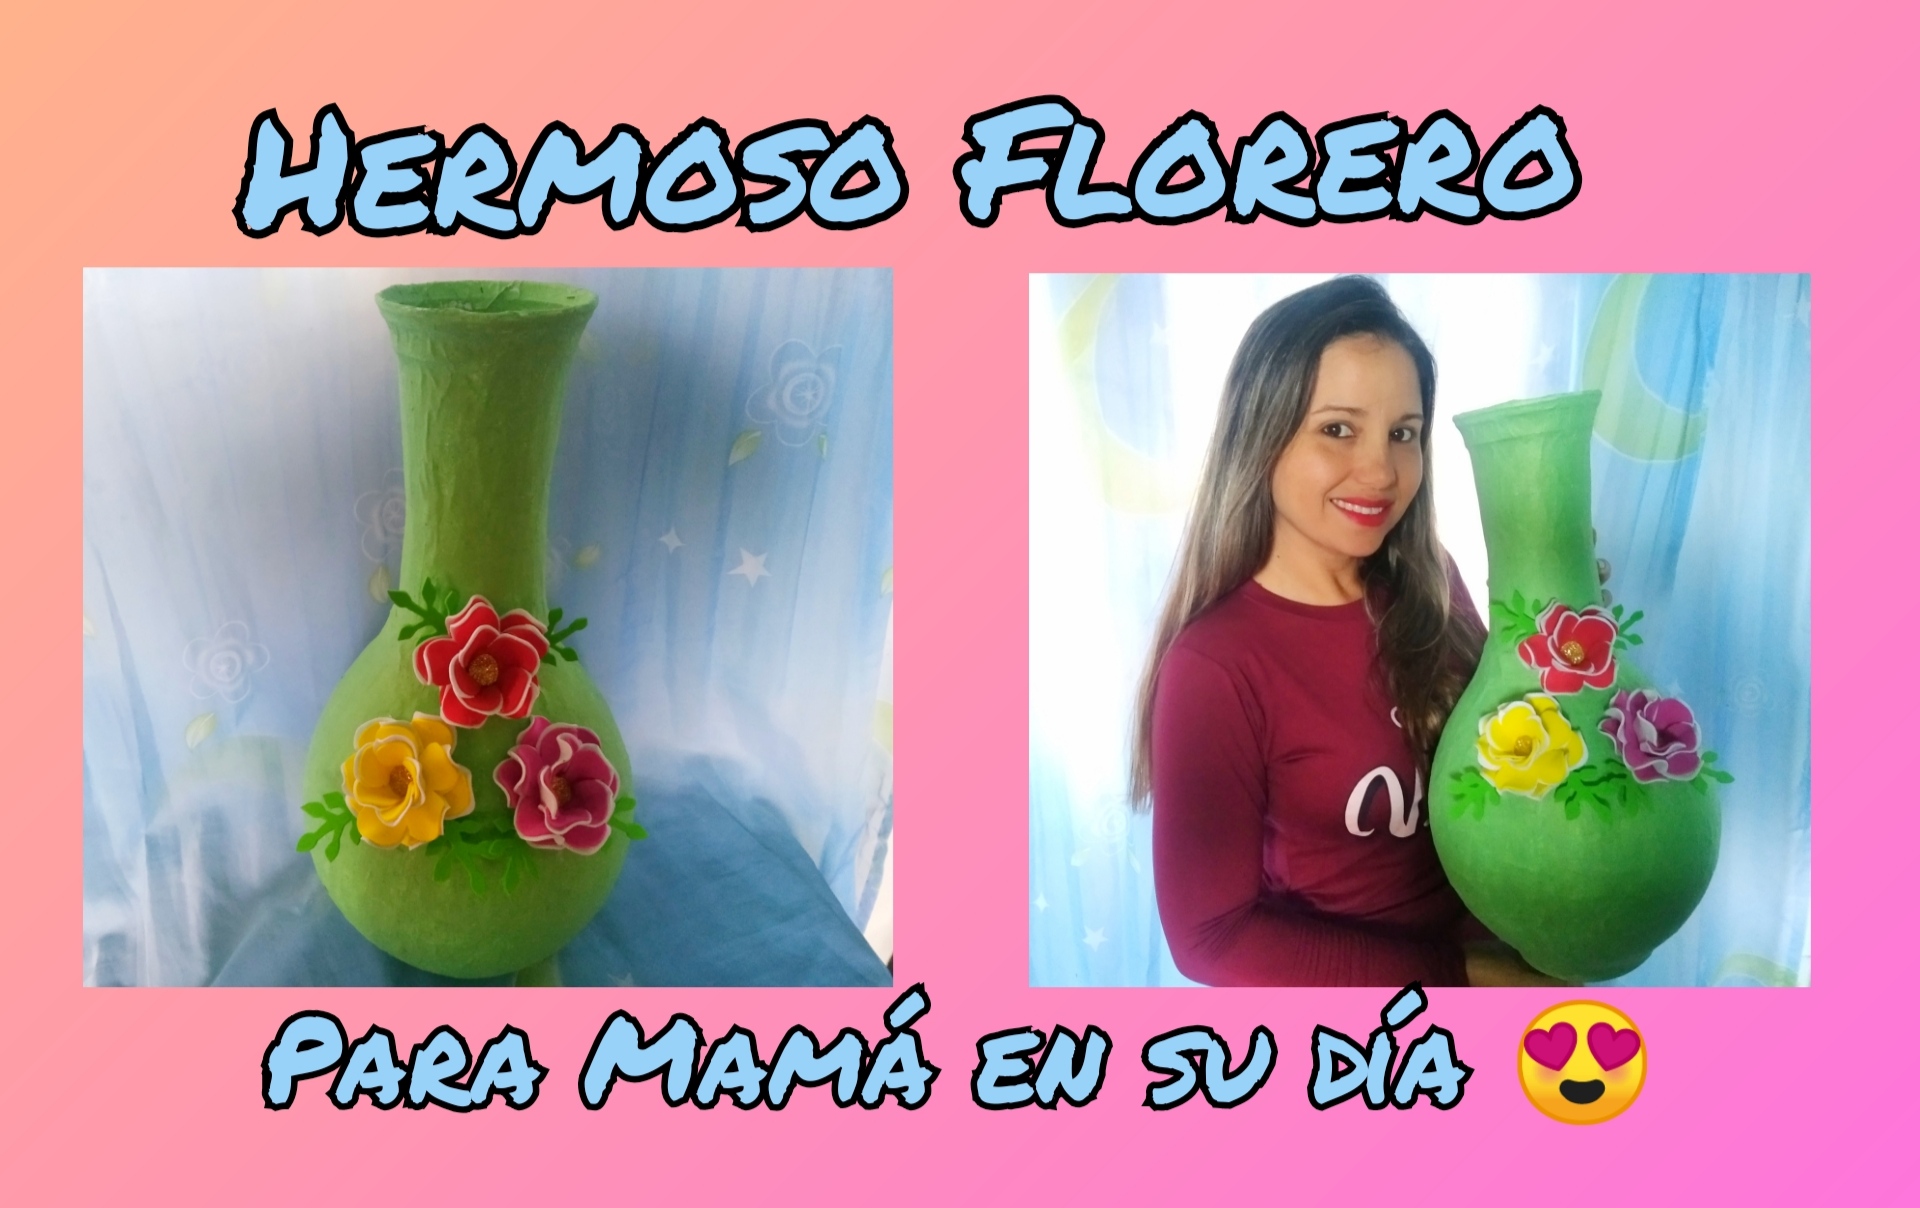
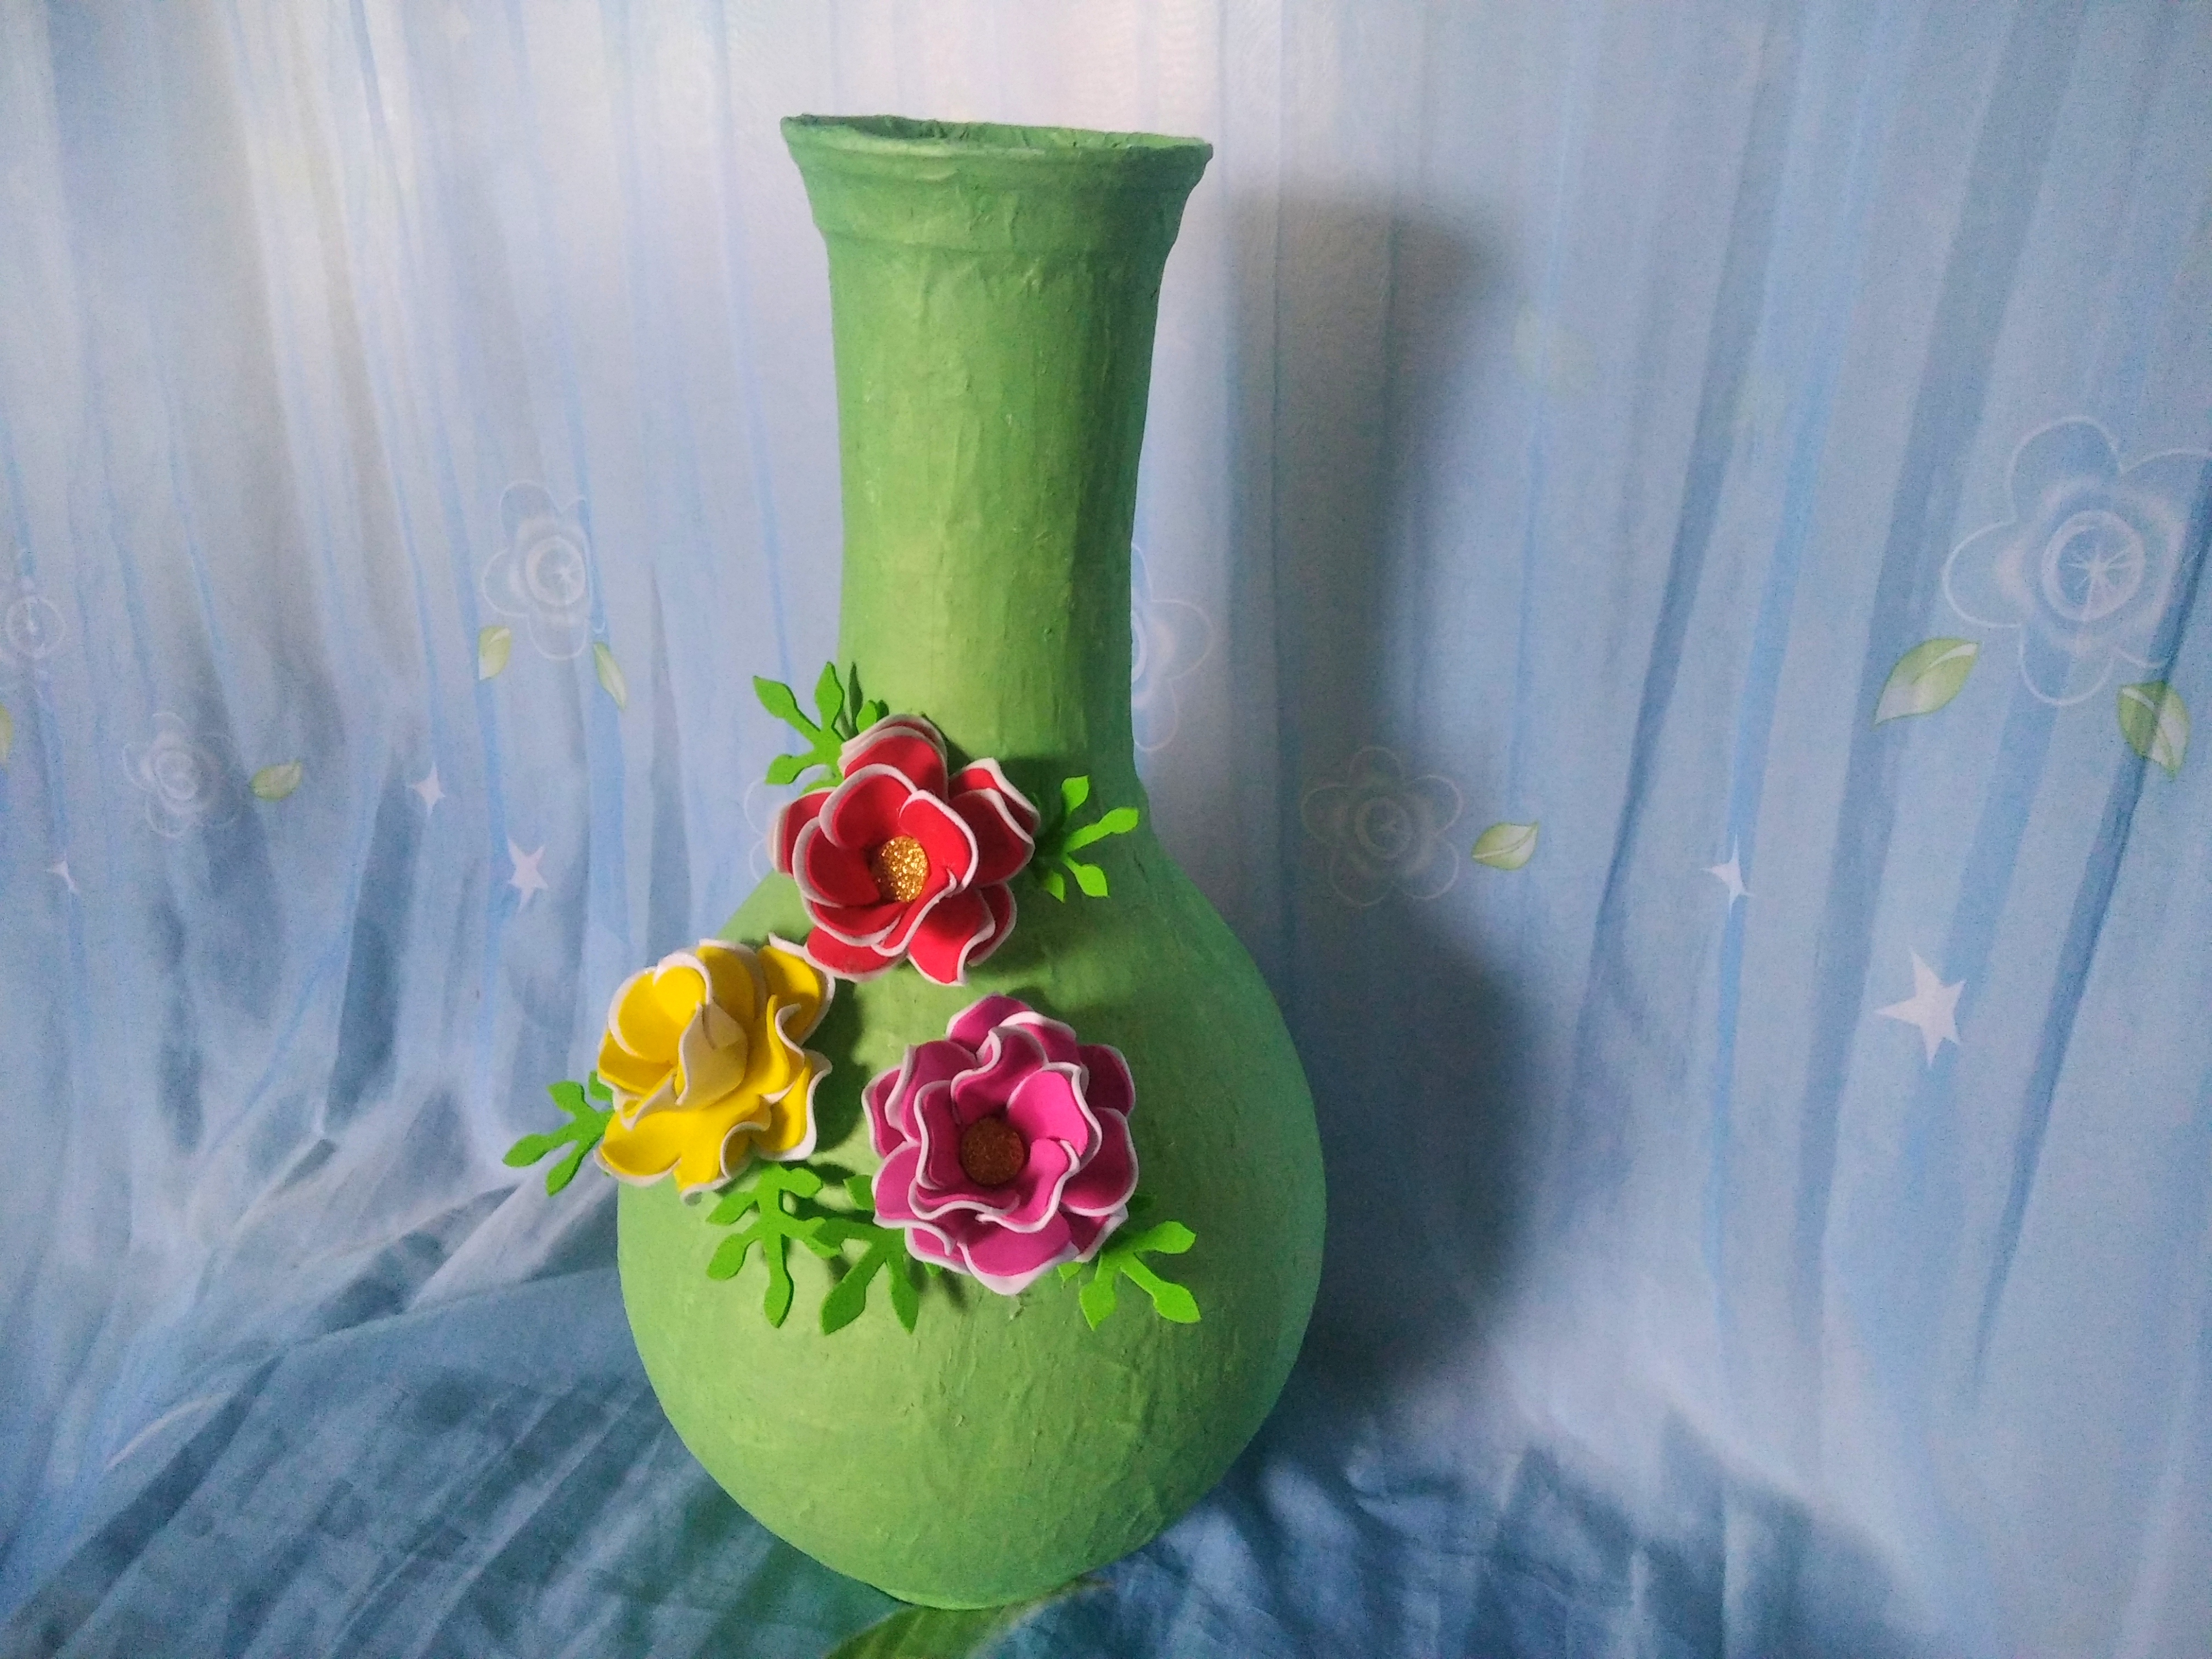
Ahora sí amigos, veamos el resultado final de este hermoso florero, el cual lo podemos pintar del color que queramos, podemos dibujar mandalas, flores, vitrales, en fin se adaptan a todos los gustos.
Now yes friends, let's see the final result of this beautiful vase, which we can paint it any color we want, we can draw mandalas, flowers, stained glass, in short they adapt to all tastes.

Presentación Final
Presentación Final
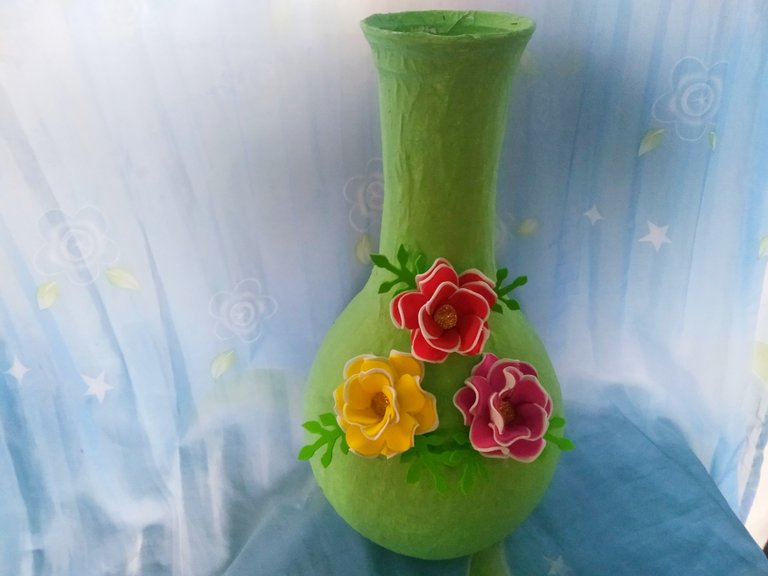
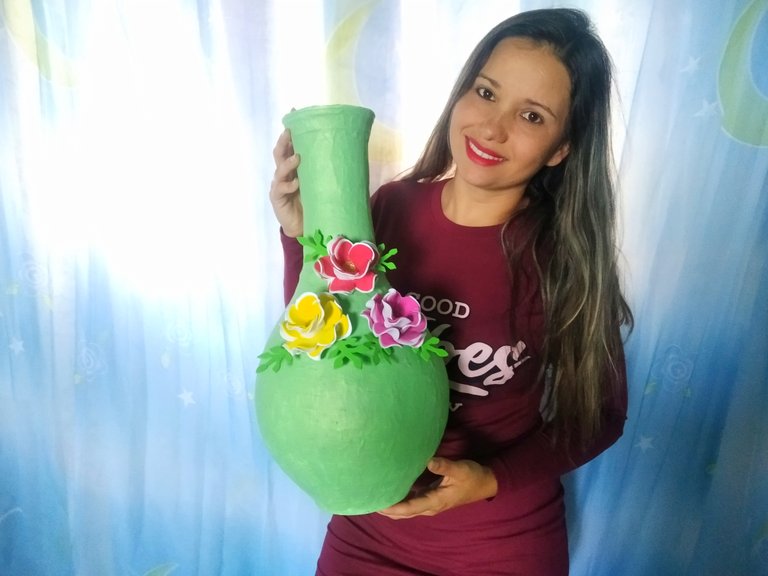
Amigos espero les haya gustado esta linda creación, a mí me encantó y se que mami se pondrá muy contenta el domingo cuando lo vea.
Friends, I hope you liked this beautiful creation, I loved it and I know that mommy will be very happy when she sees it on Sunday.
Todas las fotografías son mi propiedad, tomada con mi teléfono Redmi 8A y editadas con la aplicación Polish.Traductor Googl.co.ve. Los separadores de texto usados. All photos are my property, taken with my Redmi 8A phone. Translator Googl.co.ve. The text separators used.
Gracias por su atención. ❤️
Thank you for your attention. ❤️