¡Saludos Comunidad Creativa! | ¡Greetings Creative Community!
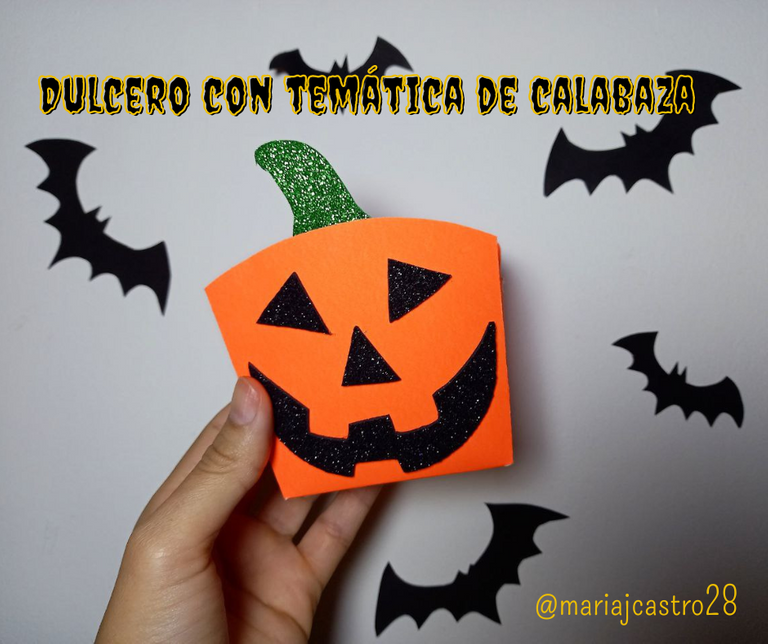
¡Feliz inicio de mes! Hace mucho que no pasaba por acá, pero en vista de que se acerca una de mis festividades favoritas del año como es Halloween he decidido poner manos a la obra y elaborar algunas manualidades alusivas a esta fecha que se aproxima, tanto para decorar así como para regalar a los niños, es algo que me tiene muy emocionada y sin duda tengo que compartir con ustedes, para comenzar la primera manualidad que les traigo para Halloween se trata de un lindo dulcero de cartulina con temática de calabaza, su elaboración es sencilla y el resultado muy lindo y llamativo, aquí les muestro el procedimiento, espero que les guste, sin más, ¡manos a la obra!
¡Happy start of month! It's been a long time since I've been here, but since one of my favorite holidays of the year is approaching, which is Halloween, I've decided to get down to work and make some crafts alluding to this approaching date, both for decorate as well as to give to children, it is something that has me very excited and without a doubt I have to share with you, to start the first craft that I bring you for Halloween it is a cute cardboard candy box with the theme of pumpkin, its preparation is simple and the result is very nice and striking, here I show you the procedure, I hope you like it, without further ado, ¡let's get to work!

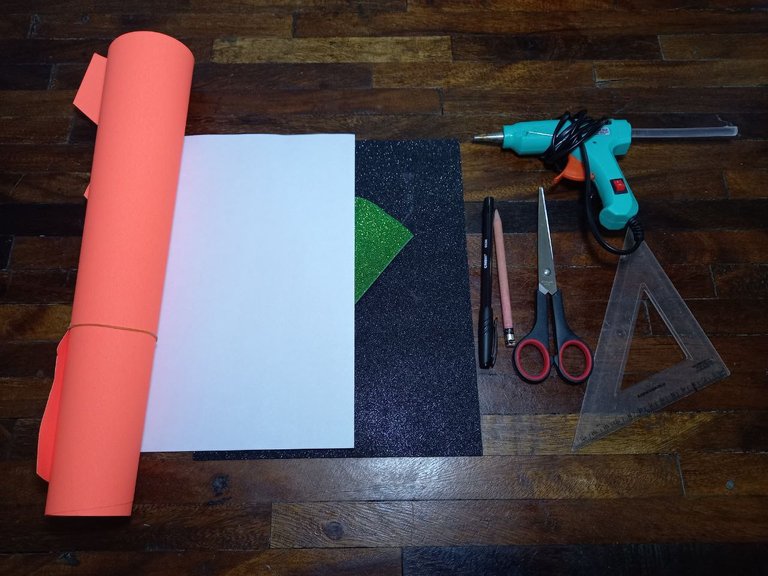
🕸 Cartulina escolar naranja.
🕸 Foami escarchado negro y verde.
🕸 Hoja de papel.
🕸 Silicón caliente.
🕸 Regla.
🕸 Lápiz.
🕸 Tijeras.
🕸 Orange school cardboard.
🕸 Black and green frosted foami.
🕸 Sheet of paper.
🕸 Hot silicone.
🕸 Rule.
🕸 Pencil.
🕸 Scissors.

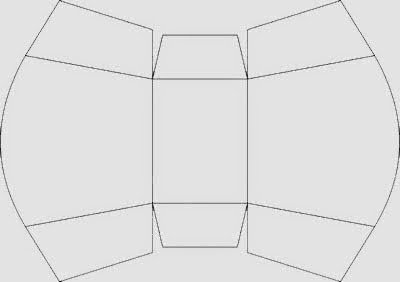

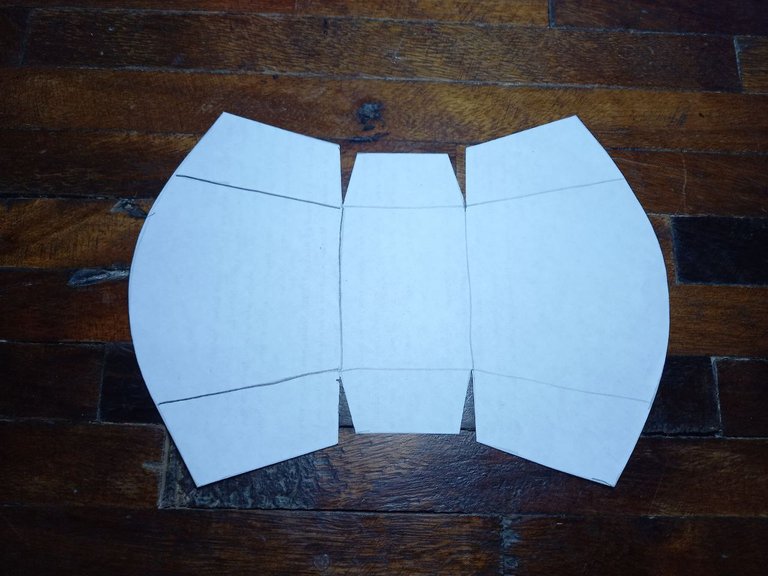
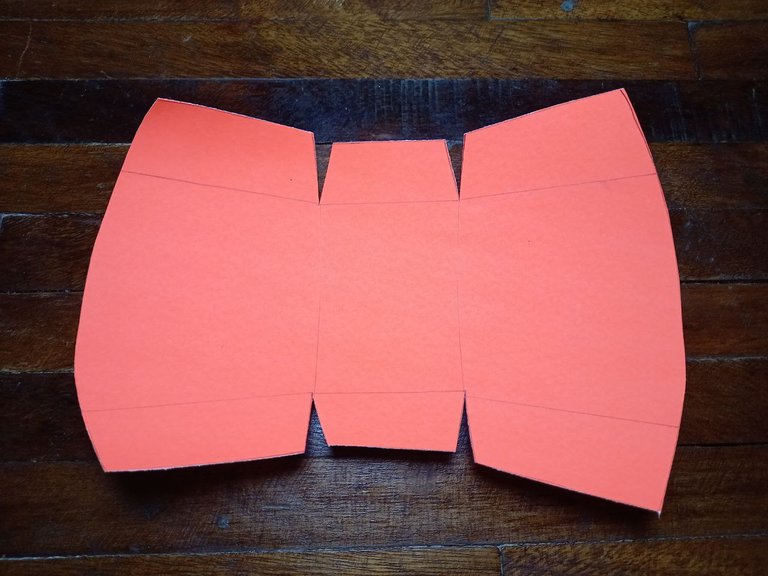
🎃 PASO 1. Lo primero es transferir el patrón a la hora de papel del tamaño de nuestra preferencia, luego lo pasamos a la cartulina escolar naranja y recortamos cuidadosamente.
🎃 STEP 1. The first thing is to transfer the pattern to the paper of the size of our preference, then we pass it to the orange school cardboard and cut it out carefully.

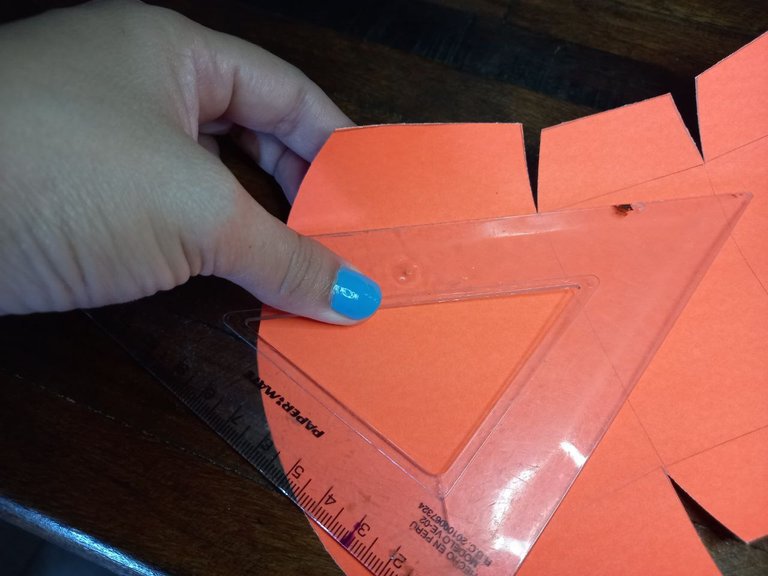
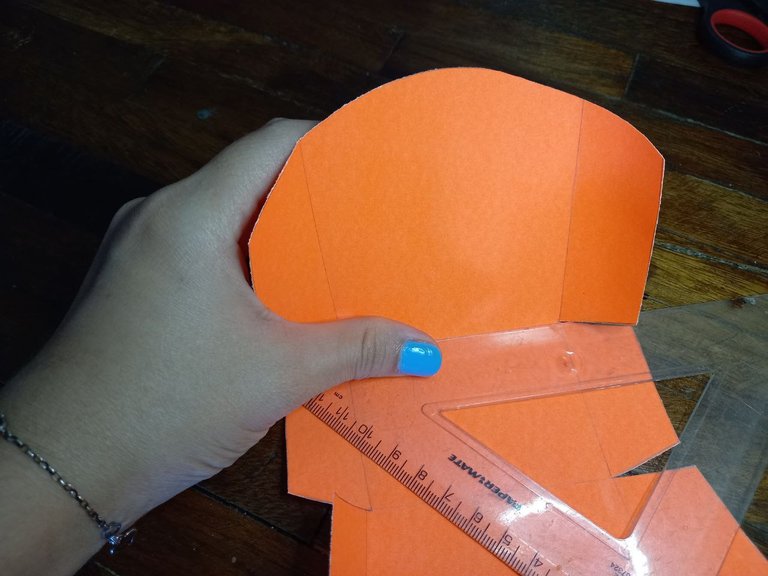
🎃 PASO 2. Con ayuda de la regla comenzamos a doblar las solapas de los lados hacia adentro.
🎃 STEP 2. With the help of the ruler we begin to fold the flaps on the sides inwards.
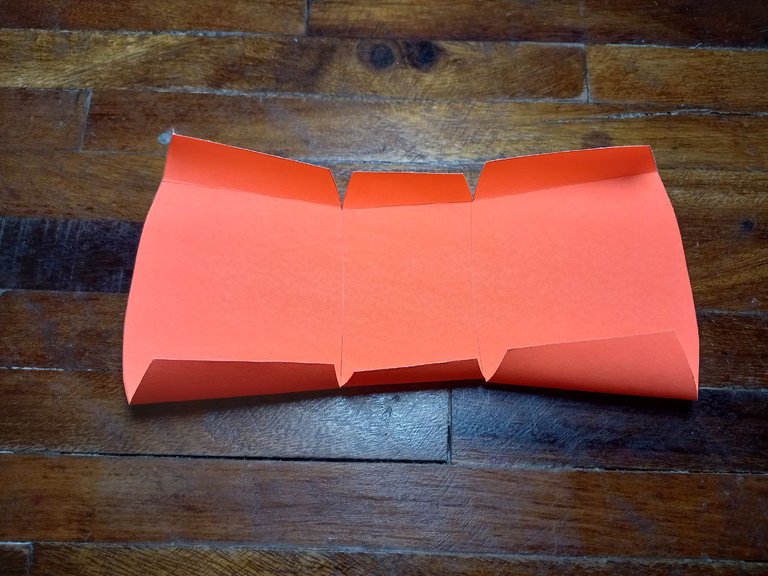
🎃 PASO 3. Luego hacemos lo mismo con las solapas de los lados, es decir, las dos piezas grandes.
🎃 STEP 3. Then we do the same with the flaps on the sides, that is, the two large pieces.
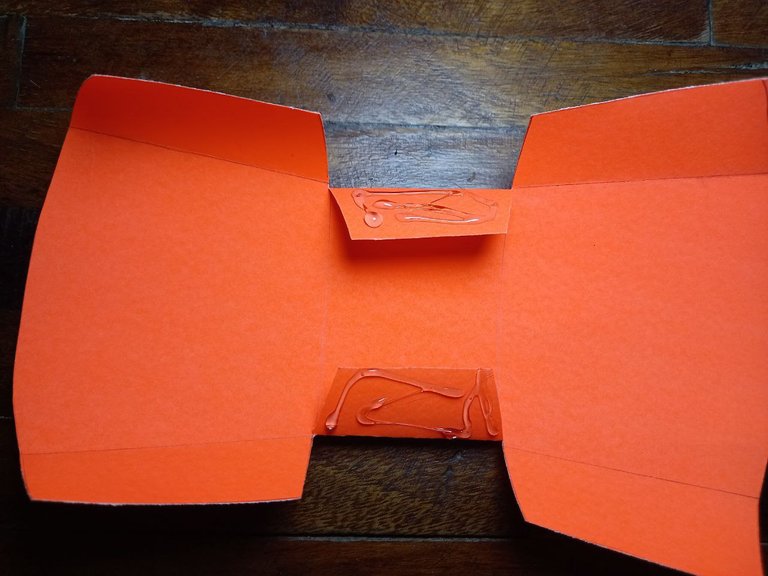
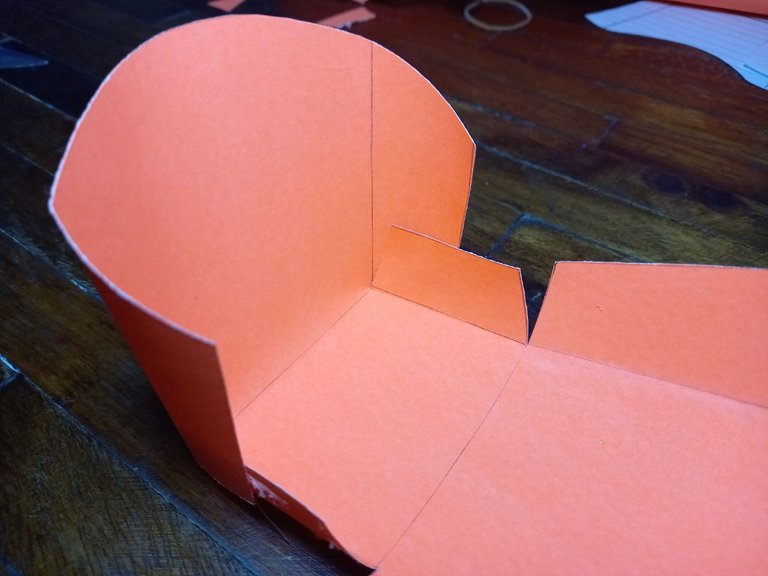
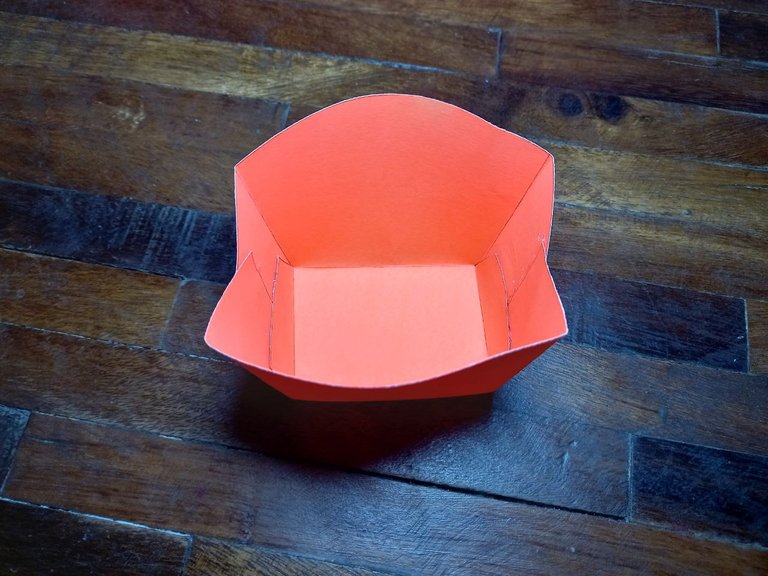
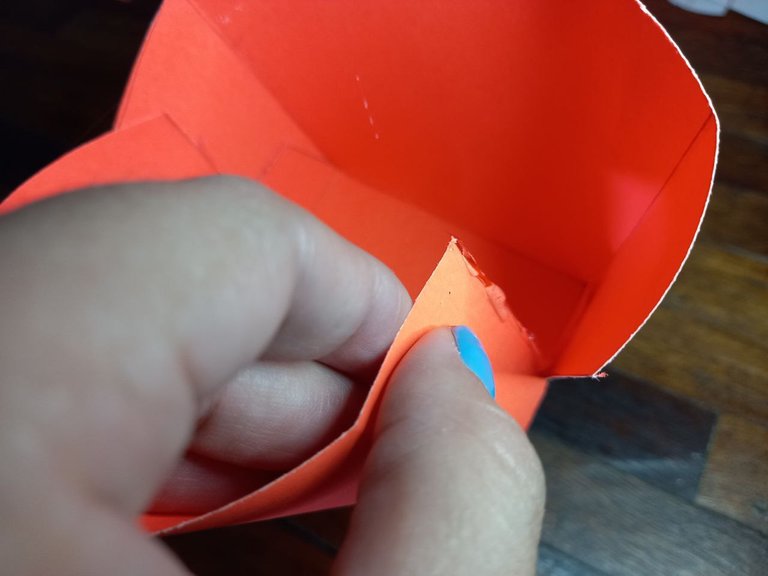
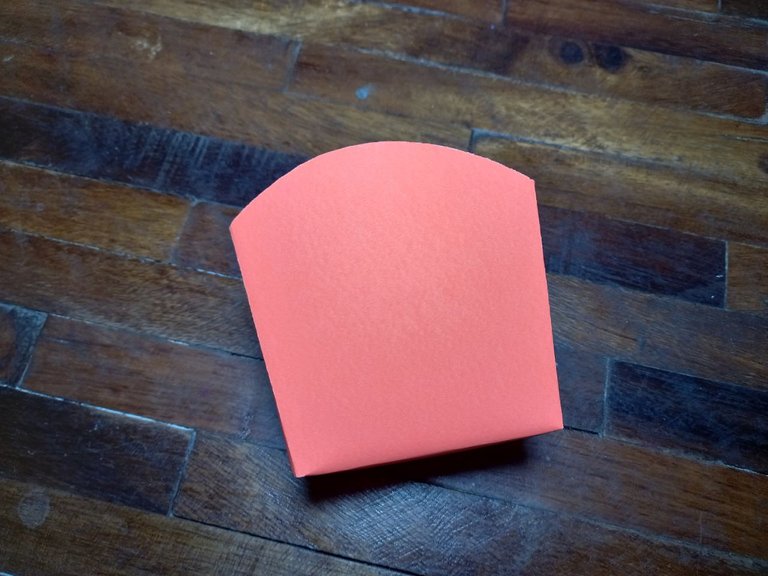
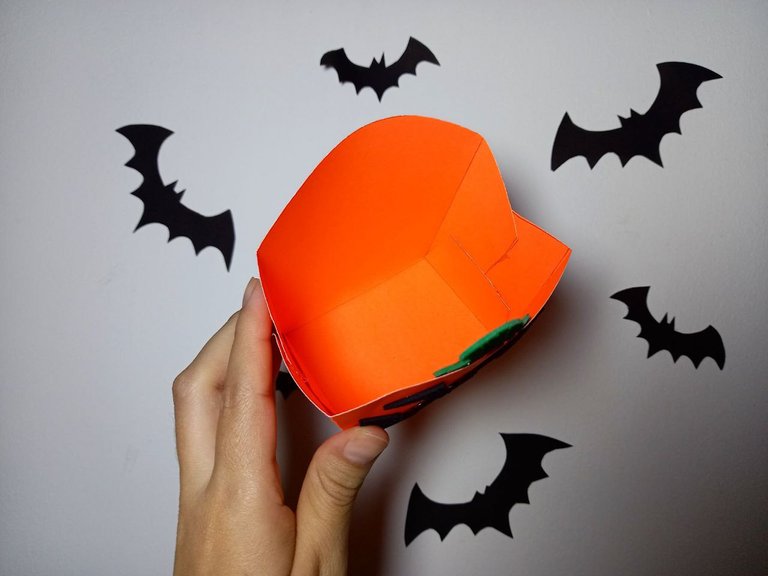
🎃 PASO 4. Luego con silicón caliente comenzamos a unir las solapas, primero las dos pequeñas de los lados las unimos a la parte inferior de las piezas grandes, luego las pegamos a los lados para unir todas las piezas y formar nuestra cajita dulcero.
🎃 STEP 4. Then with hot silicone we begin to join the flaps, first the two small ones on the sides we join them to the bottom of the large pieces, then we glue them to the sides to join all the pieces and form our candy box.
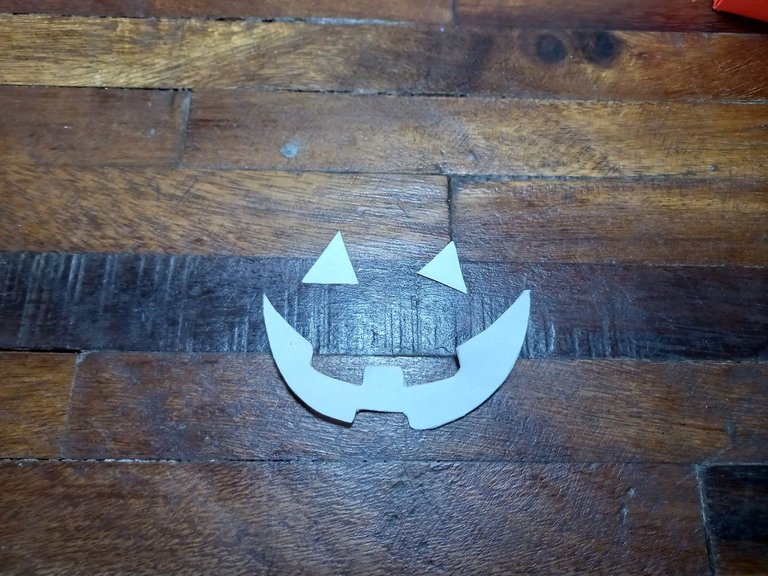
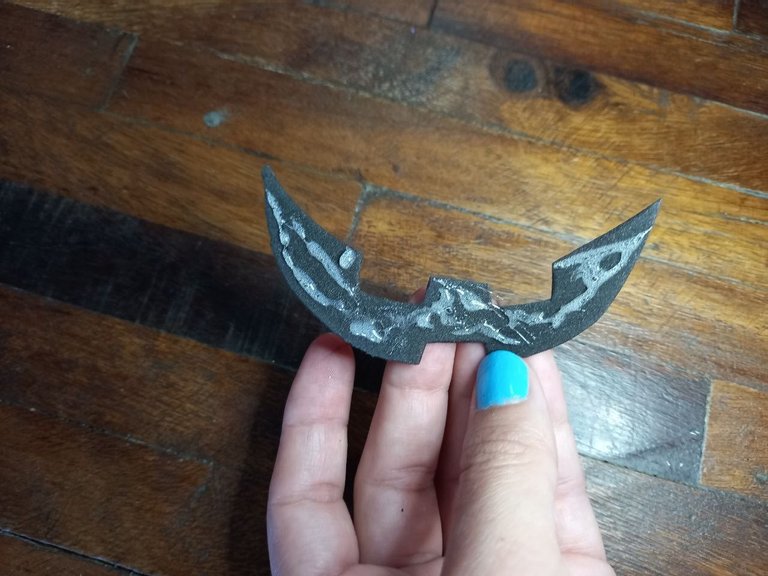
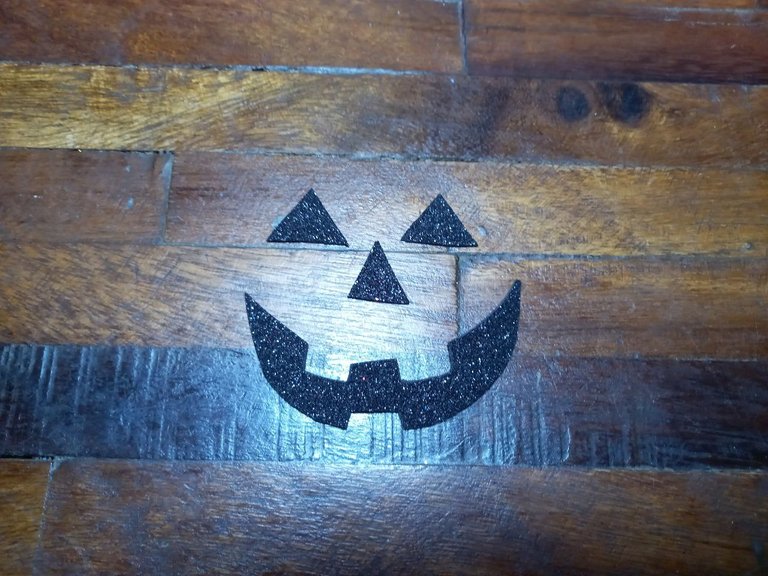
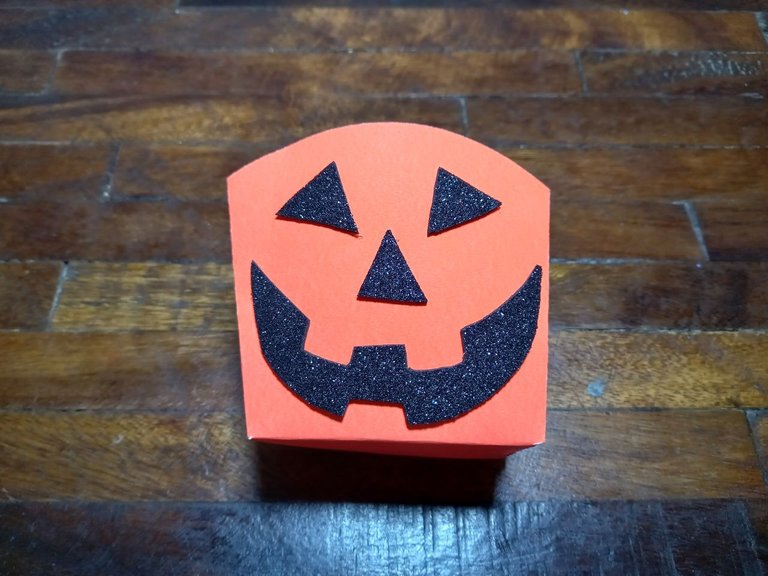
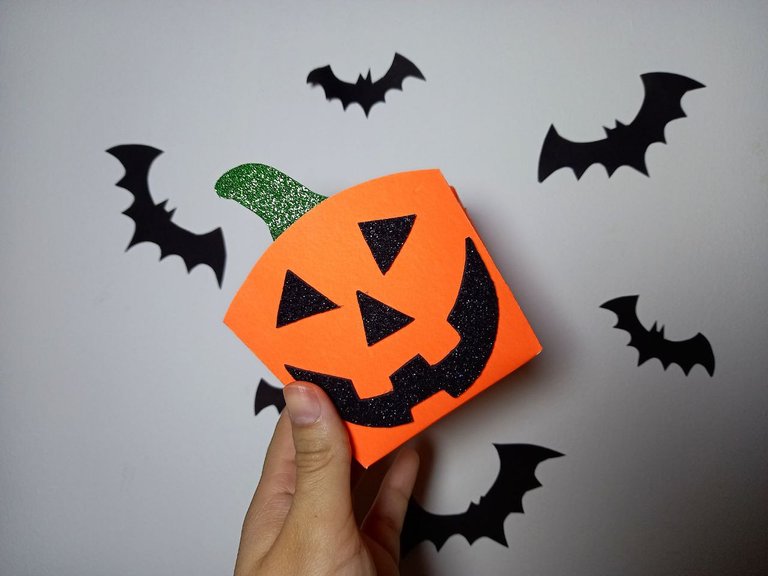
🎃 PASO 5. En la hoja de papel dibujamos la sonrisa de la calabaza y la transferimos al foami negro escarchado y también hacemos 3 triángulos de foami negro escarchado, con silicón pegamos las piezas en la parte frontal de la cajita de cartulina, pegando los triángulos en lugar de los ojos y nariz.
🎃 STEP 5. On the sheet of paper we draw the smile of the pumpkin and transfer it to the black frosted foami and we also make 3 triangles of black frosted foami, with silicone we glue the pieces on the front of the cardboard box , gluing the triangles in place of the eyes and nose.

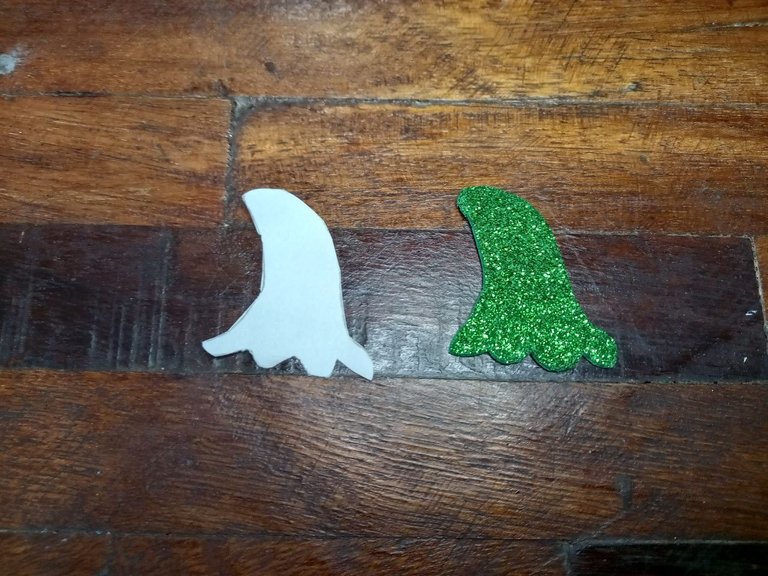
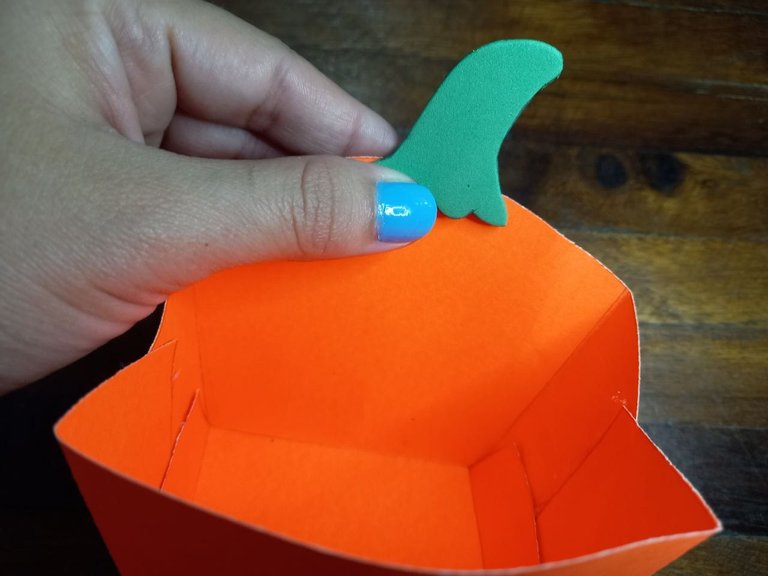
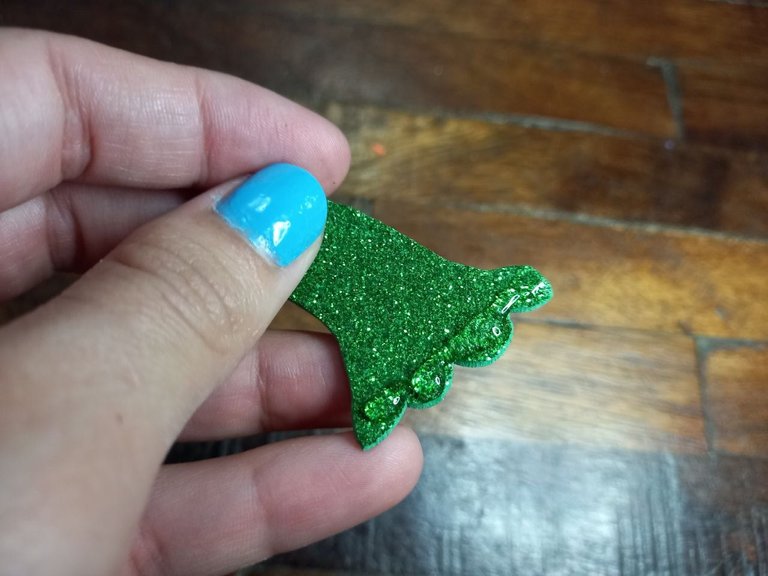
🎃 PASO 6. Finalizamos haciendo la forma de un pequeño tallo y lo transferimos al foami escarchado verde, recortamos y pegamos en la parte superior delantera de la parte interna de la cajita de cartulina.
🎃 STEP 6. We finish by making the shape of a small stem and transfer it to the green frosted foami, cut it out and glue it to the top front of the inside of the cardboard box.
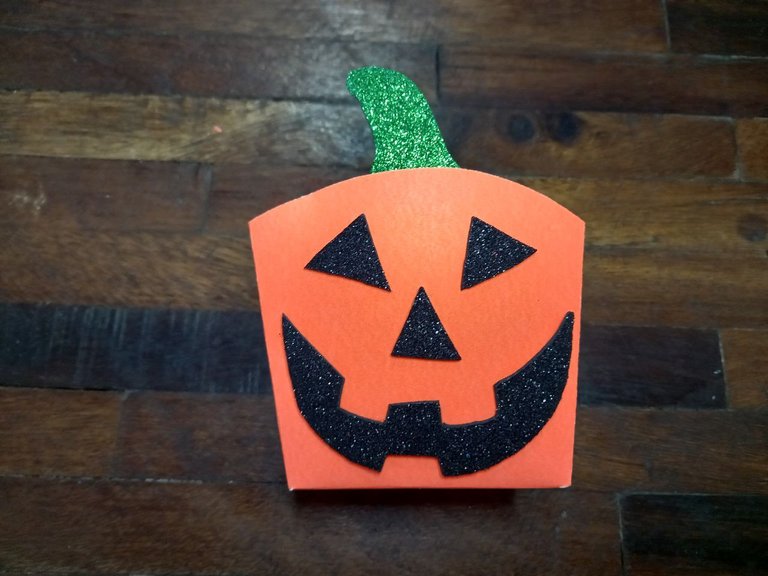
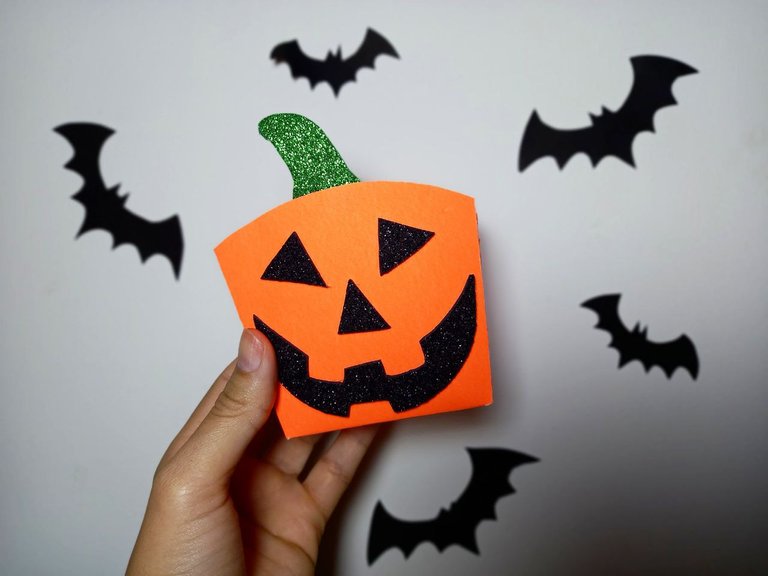
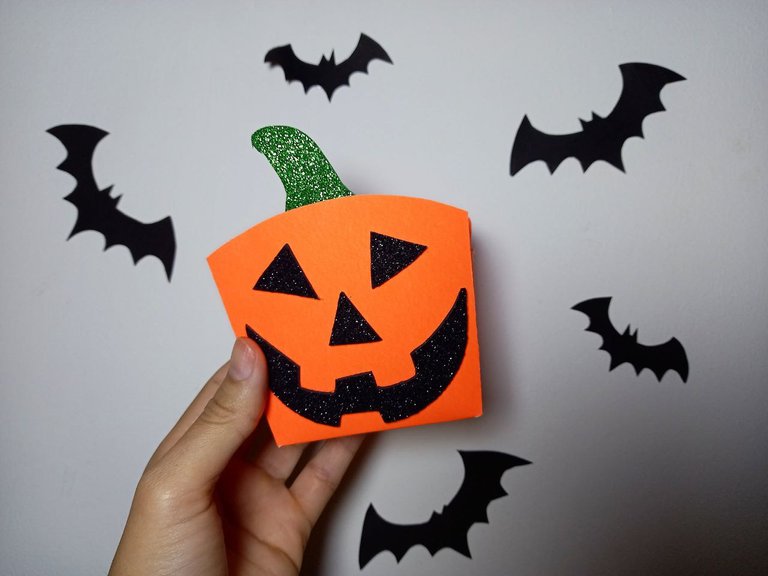
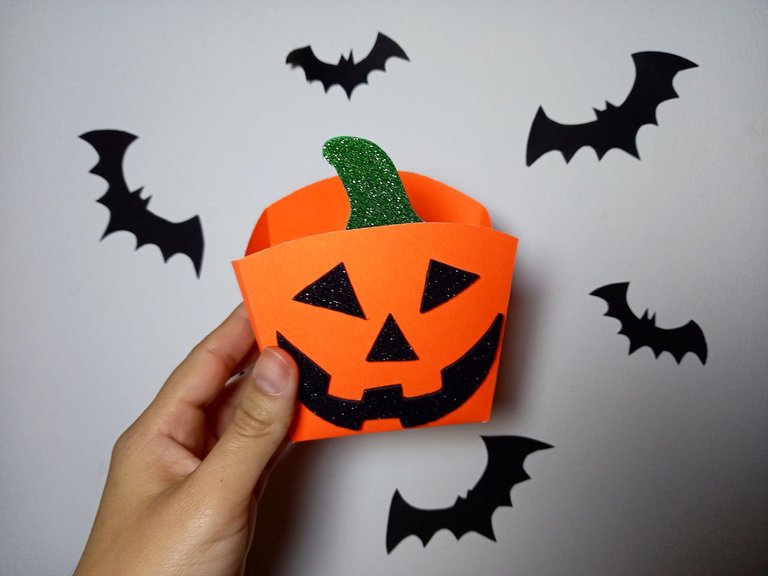
¡Y listo! De esta manera hemos elaborado un lindo dulcero con temática de calabaza para Halloween, solo resta rellenarlo de dulces y podemos obsequiarlo a los niños al momento de pedir dulces, sé que no es una práctica muy común en Venezuela pero sirve para animar a los niños, espero que les haya gustado este tutorial, nos vemos en un próximo post con una nueva idea creativa.
And ready! In this way we have made a cute pumpkin-themed candy for Halloween, all that remains is to fill it with candy and we can give it to the children when asking for candy, I know that it is not a very common practice in Venezuela but it serves to encourage children, I hope you liked this tutorial, see you in a next post with a new creative idea.


Todas las fotografías son de mi propiedad.
Fotografías capturadas con mi Samsung Galaxy A12
Separador de texto elaborado en Canva.
Nos vemos en mi próxima publicación.
¡Tengan un feliz día!
All photographs are my property.
Photos captured with my Samsung Galaxy A12
Text separator made in Canva.
See you in my next post.
¡Have a happy day!