Greetings to all members of this wonderful community!
En estos meses, cuando se acerca el mes de diciembre y en el que tengo como costumbre realizar limpieza profunda, empezando por nuestros gaveteros, me encontré con unos calcetines deteriorados. En lugar de tirarlos, decidí elaborar una linda flor, la cual quiero compartir con todos ustedes el paso a paso de su confección.
In these months, when December is approaching and I am in the habit of doing a deep cleaning, starting with our drawers, I found some deteriorated socks. Instead of throwing them away, I decided to make a beautiful flower, which I would like to share with all of you the step by step of its making.
Esta es una manualidad muy sencilla y divertida que te ayudará a reciclar tus calcetines viejos. Además, es una forma muy original de decorar tu hogar.
This is a very simple and fun craft that will help you recycle your old socks. It is also a very original way to decorate your home.
Dicho esto, los invito a seguirme mientras les menciono los materiales utilizados.
That said, I invite you to follow me as I mention the materials used.
Medias.
Hilo de coser.
Aguja.
Tijera.
Cinta métrica.
Silicón.
Escarche Dorado.
Adorno.
Alambre.
Varilla de madera.
Cinta.

Stockings.
Sewing thread.
Needle.
Scissors.
Thank you very much for reading me!
Fotos tomadas con mi teléfono celular Xiaomi 9C y Banner de Pixabay Fuente
Tape measure.
I hope you like my presentation and come back soon.
Silicone.
Thank you for visiting my post.
Gold plated patch.
Espero que sea de su agrado mi presentación y regresen pronto.
¡Muchas gracias por leerme!
Ornament.
PASO I
STEP I

PASO II
STEP II
PASO III
STEP III
PASO IV
STEP IV

Gracias por visitar mi post.
Wire.
Paso a Paso de la Confección / Passed to the Confection Step.
Wooden rod.

Tape.
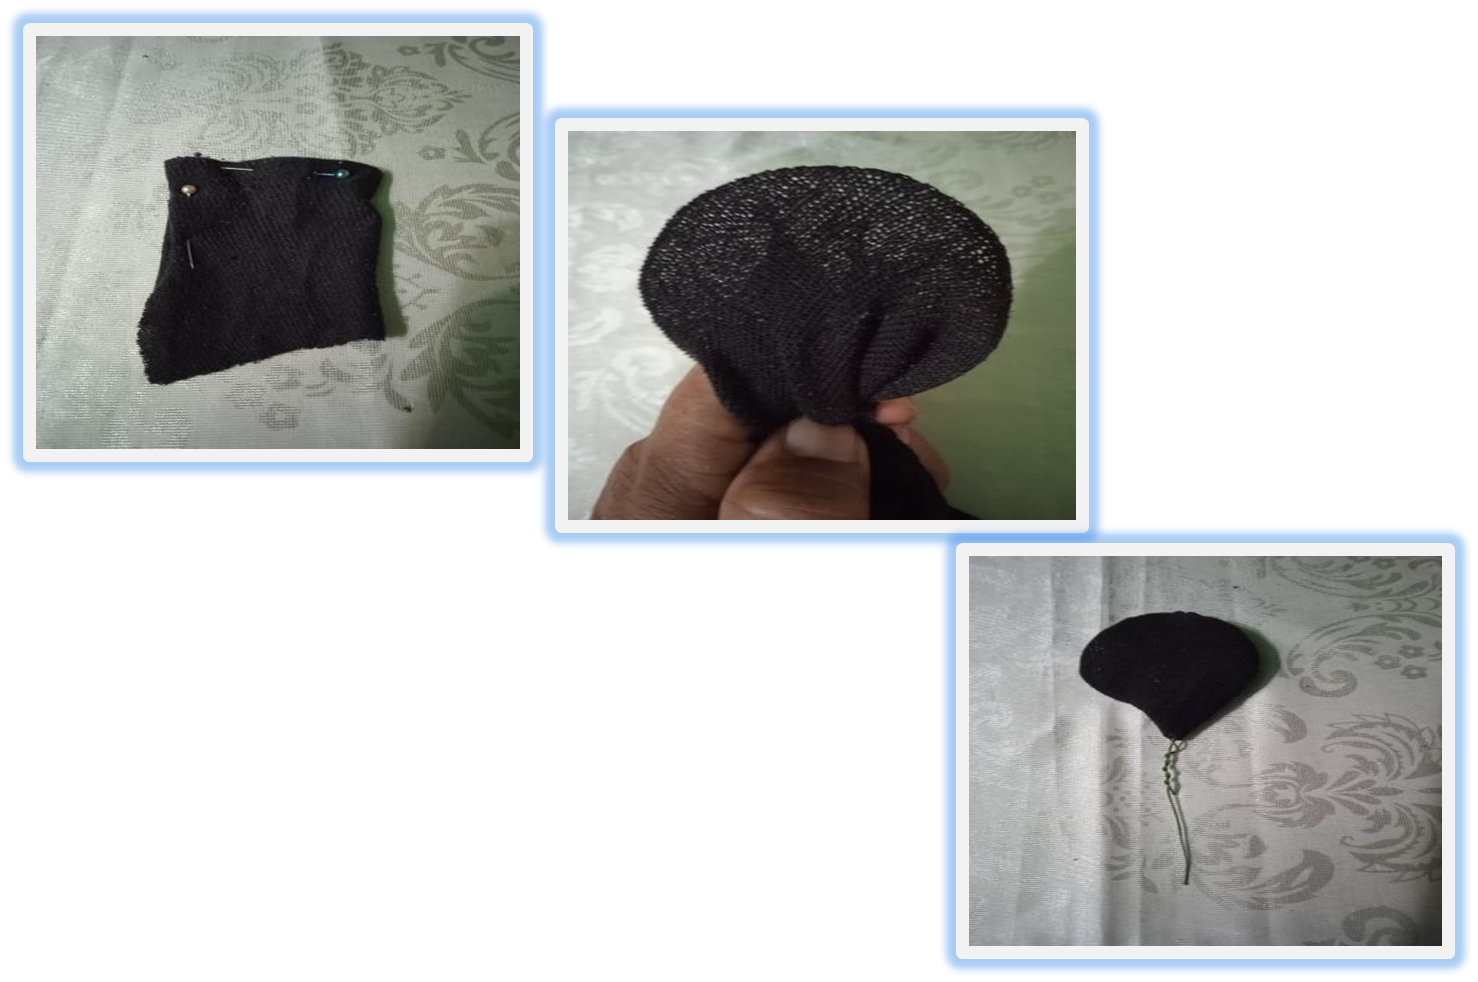
Después de tomar las medidas en partes iguales a cada unidad de alambre de ocho centímetros, para que quede uniforme, empiezo a cortar y darle forma ovalada a cada uno de los seis pétalos de la flor.
After measuring each unit of eight centimeter wire in equal parts to make it uniform, I start cutting and shaping each of the six petals of the flower into an oval shape.
Una vez terminada la base de alambre, empiezo a cortar las medias para elaborar los saquitos con los que voy a cubrir el alambre para darle forma a los pétalos de la flor. Luego, lo sujeto cosiendo a su alrededor para asegurarlo.
Once the wire base is finished, I start cutting the stockings to make the little bags with which I will cover the wire to shape the flower petals. Then, I attach it by sewing around it to secure it.
Una vez asegurado el alambre en la base de la flor, comienzo a darle forma a los pétalos con las yemas de los dedos. Para ello, los doblo hacia atrás, a partir de la parte superior, para que queden curvados.
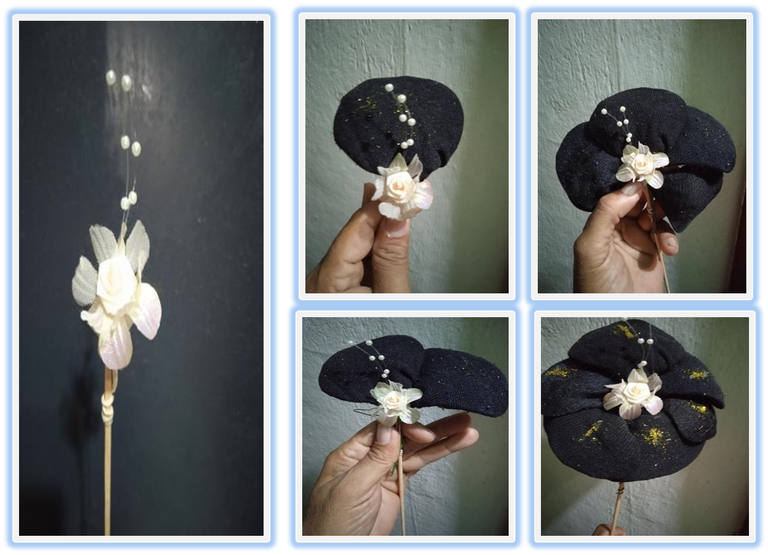
Luego, en el centro de la varilla de madera, coloco un adorno decorativo. Este adorno puede ser un botón, una perla o cualquier otro detalle que le dé un toque personal a la flor.
Por último, comienzo a colocar los pétalos en la varilla de madera. Para ello, los voy enrollando alrededor de la varilla, asegurándolos con alambre. Es importante colocar los pétalos de forma simétrica para que la flor quede bien proporcionada.
Once the wire is secured at the base of the flower, I begin to shape the petals with my fingertips. To do this, I bend them backwards, starting from the top, so that they are curved.
Then, in the center of the wooden rod, I place a decorative ornament. This ornament can be a button, a pearl or any other detail that gives a personal touch to the flower.
Finally, I begin to place the petals on the wooden rod. To do this, I roll them around the rod, securing them with wire. It is important to place the petals symmetrically so that the flower is well proportioned.
Una vez formada la flor, coloco una gota de silicón en cada pétalo para decorarla con escarche. Para ello, aplico el silicón de forma uniforme. Luego, utilizo el escarche sobre el silicón, presionando suavemente para que se adhiera.
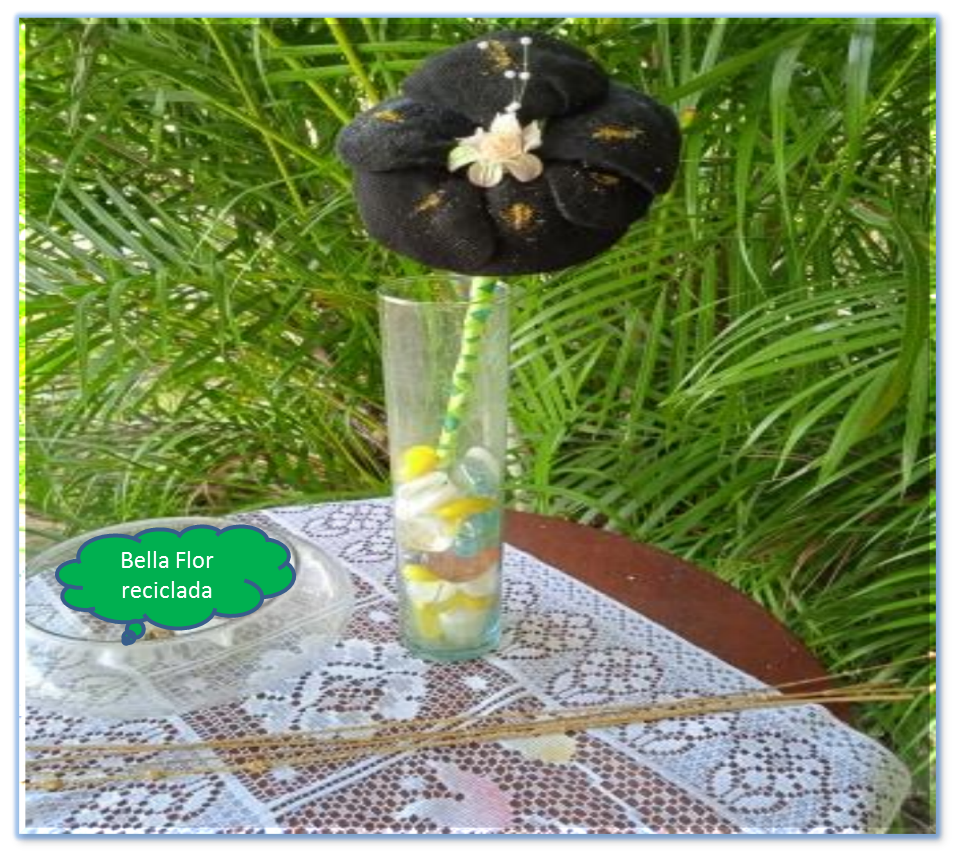
Una vez terminada la flor, cubro el tallo con un pedazo de tela verde. Para ello, envuelvo el tallo con la tela, asegurándolo con cinta. Acá les muestro el resultado final.
Once the flower is formed, I place a drop of silicone on each petal to decorate it with frosting. To do this, I apply the silicone evenly. Then, I use the frosting over the silicone, pressing gently so that it adheres.
Once the flower is finished, I cover the stem with a piece of green fabric. To do this, I wrap the stem with the fabric, securing it with tape. Here I show you the final result.
Espero que les haya gustado. Y disfrutemos de nuestra creatividad es una herramienta poderosa que nos permite dar nueva vida a objetos que ya no usamos, ejemplo: Esta linda y original flor creada con material de desecho.
Gracias por visitar mi post.
Espero que sea de su agrado mi presentación y regresen pronto.
¡Muchas gracias por leerme!
I hope you liked it. And let's enjoy our creativity is a powerful tool that allows us to give new life to objects that we no longer use, example: This cute and original flower created with waste material.
Thank you for visiting my post.
I hope you like my presentation and come back soon.
Thank you very much for reading me!

