Hola amigos💕 he estado un poco desaparecida lo sé, pero... Me alegra contarles que mis proyectos han avanzado un poco más y que lo que tanto les comentaba en mis post se ha cumplido paso a paso, Gracias a Dios y el universo pude concretar mi estudio. En un próximo post les comentaré de ello, hoy les explicaré como hice mi logo super economico pero que se ve costoso jajaja.
Hello friends💕 I've been a little missing I know, but.... I'm happy to tell you that my projects have advanced a little more and that what I told you so much in my posts has been fulfilled step by step, Thanks to God and the universe I was able to realize my study. In a next post I will tell you about it, today I will explain how I made my logo super economical but it looks expensive hahaha.
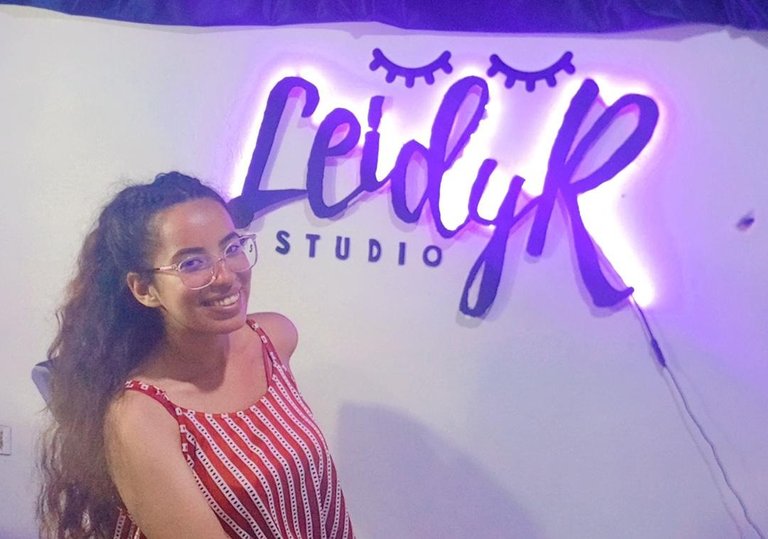
Déjenme decirles que en un inicio este logo lo iba a mandar hacer de manera profesional, pero no entraba en mi presupuesto y esto no iba a parar mi proyecto de que tuviera un lindo estudio antes de terminar el año. Así que si tú tienes tu emprendimiento y quieres que el lugar se vea más lindo aquí está el secreto 💕
Let me tell you that at first I was going to have this logo done professionally, but it was not within my budget and this was not going to stop my project to have a nice studio before the end of the year. So if you have your business and you want the place to look nicer here is the secret 💕.
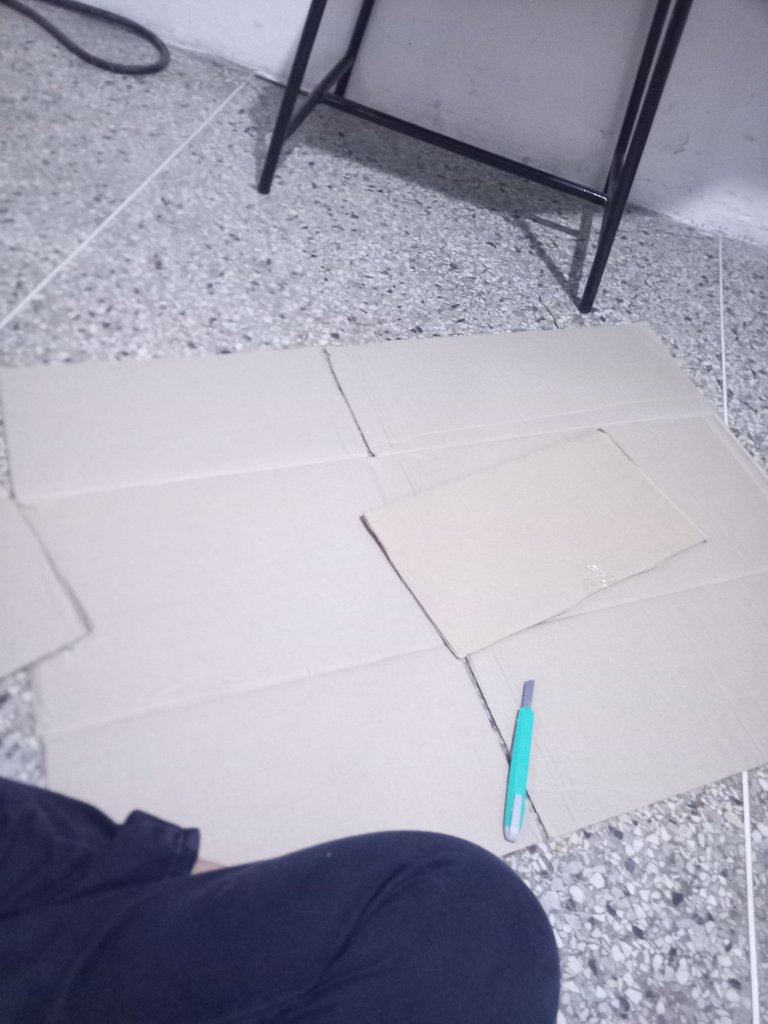
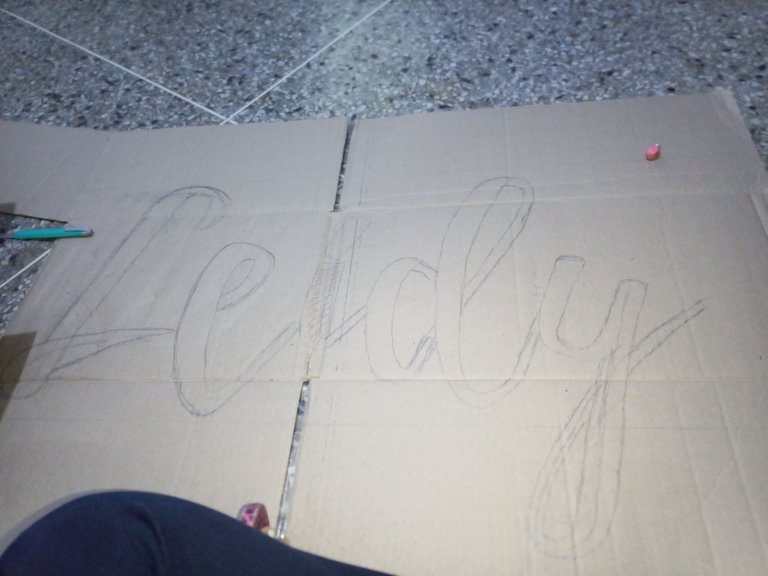
Paso a Paso | Step by Step
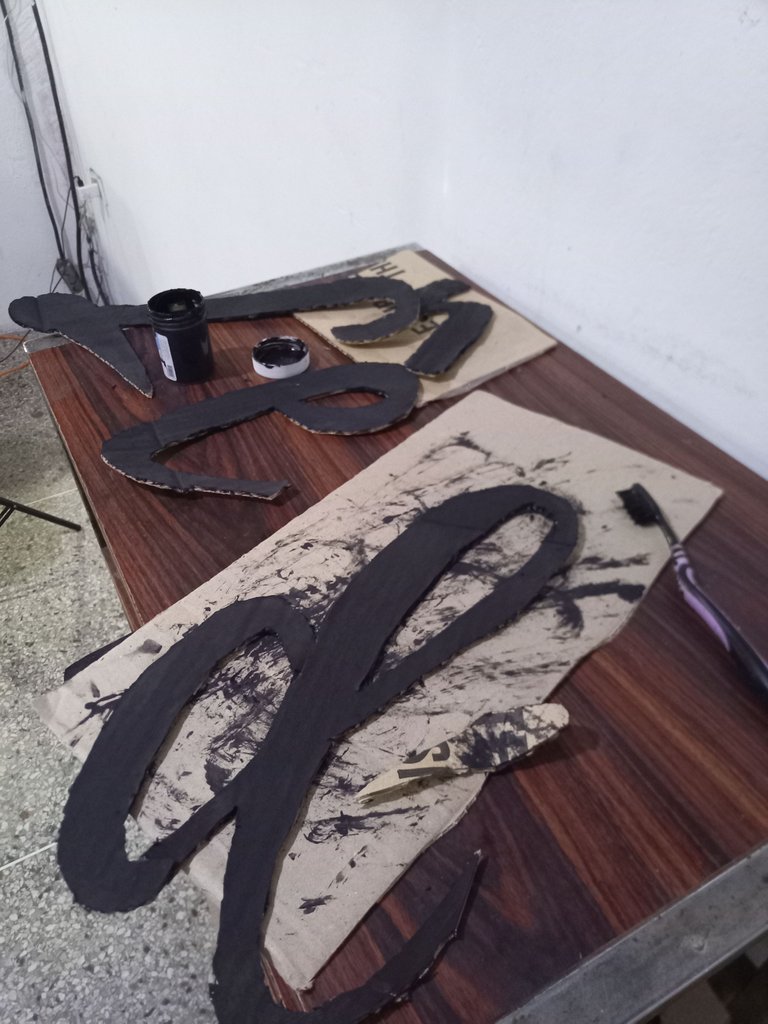
| 1.Necesitamos Cartón, 1 pintura color negro, pincel, cortador o tijeras, clavos, pegamento caliente y unas luces LED | We need cardboard, 1 black paint, paintbrush, cutter or scissors, nails, hot glue and LED lights. |
|---|
| 2. Dibujamos las letras con el estilo de tu preferencia sobre el cartón | We draw the letters in the style of your choice on the cardboard. |
|---|
| 3. Cortamos y pintamos. | We cut and paint |
|---|
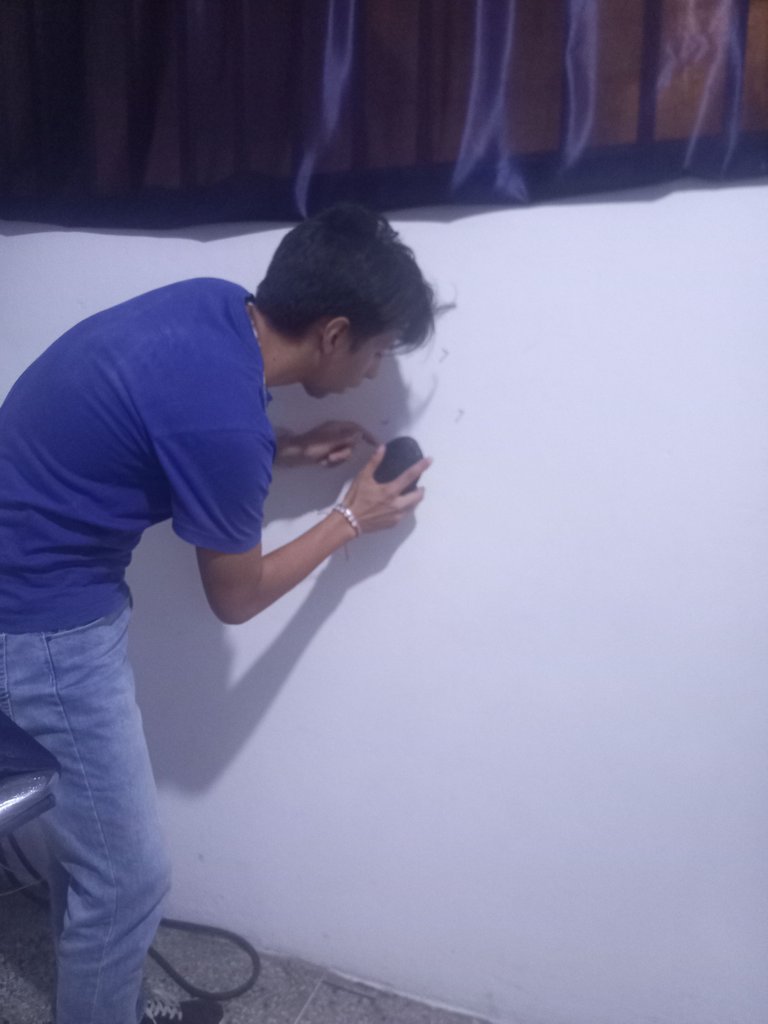
| 4. Luego colocamos los clavitos en la pared, aquí mi novio me está ayudando 🙈 | Then we put the little nails in the wall, here my boyfriend is helping me 🙈. |
|---|
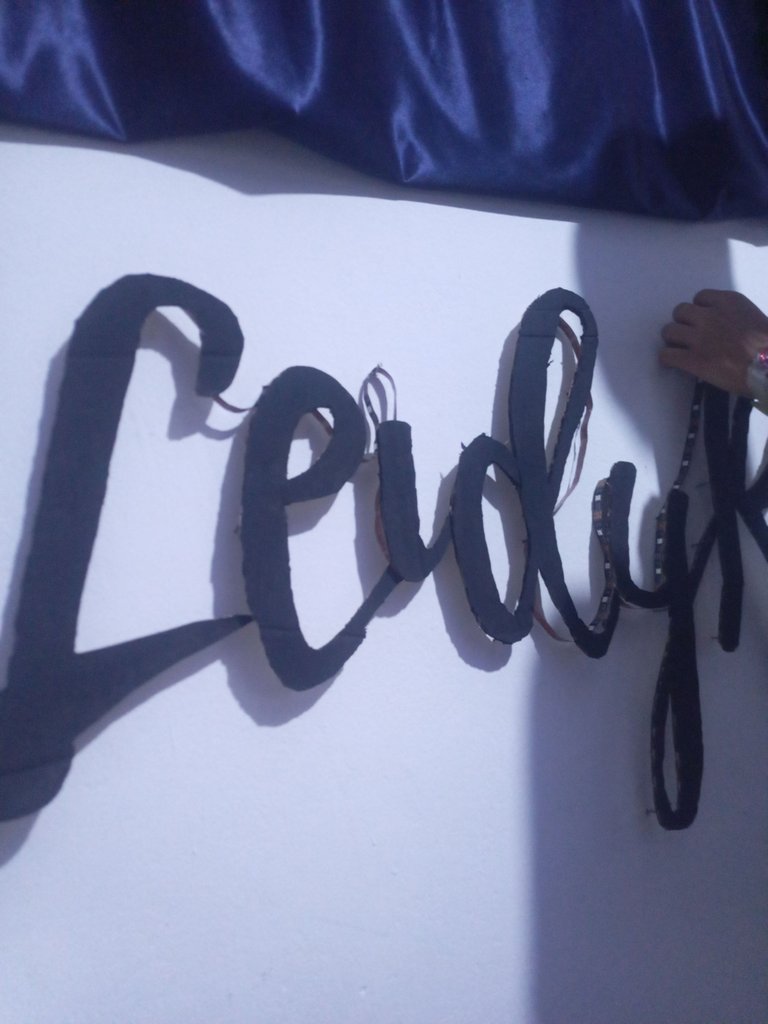
| 5. Colocamos un punto de pegamento caliente en cada clavo y encima colocamos la letra, así como se ve en la imagen | Place a dot of hot glue on each nail and place the letter on top, as shown in the image. |
|---|

| 6. Cómo último paso colocamos la cinta de luces del por detrás de las letras, encima de los clavitos con la finalidad de que las letras se ven iluminadas por la parte de atrás | As a last step we place the tape of lights behind the letters, on top of the nails in order to illuminate the letters from the back side. |
|---|
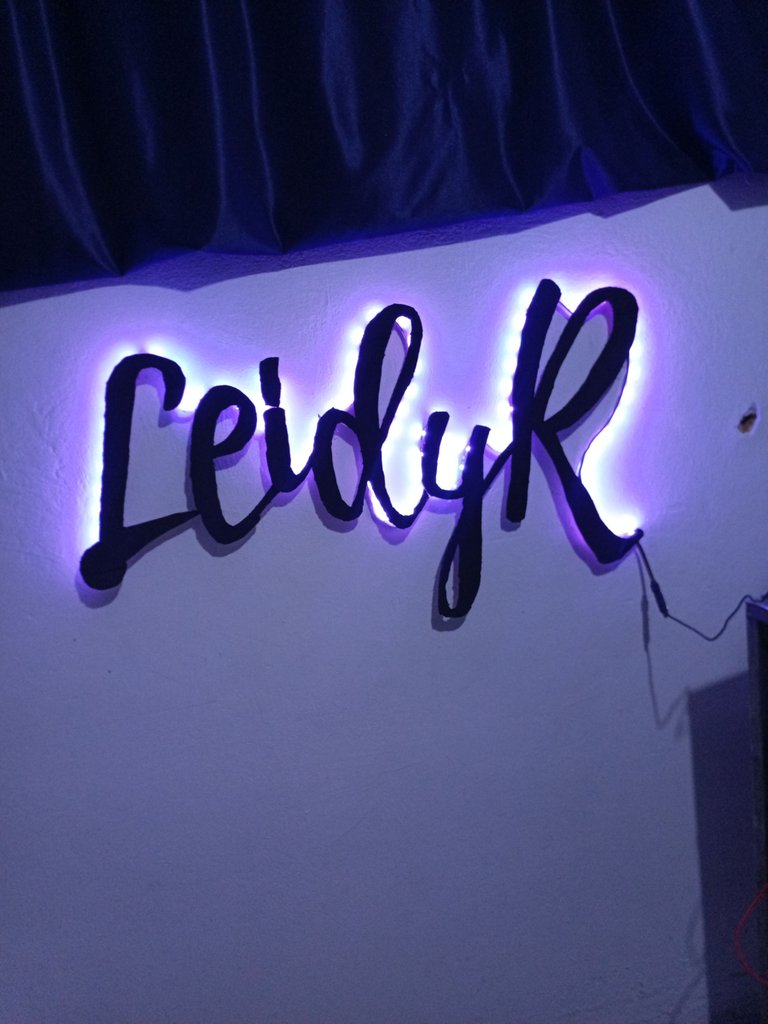
| Colocan detalles con alusión a la temática de su emprendimiento y listo✨ | Place details alluding to the theme of your venture and you are ready✨. |
|---|
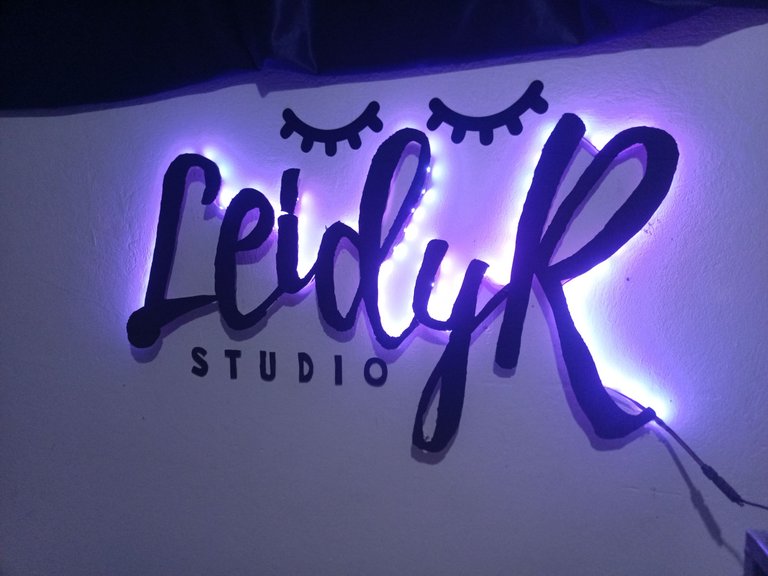
Recuerden que nada es imposible, los límites los colocas tu♥️ nos vemos en un próximo post
Mis Redes Sociales: | My Social Networks:
INSTAGRAM: https://www.instagram.com/makeup.byidy
FACEBOOK: https://www.facebook.com/makeup.byidy
BEAUTYBLOG: https://peakd.com/@makeup.byidy

Gifs made on Canva.com
translator DeepL.com
Photos of my property until proven otherwise.