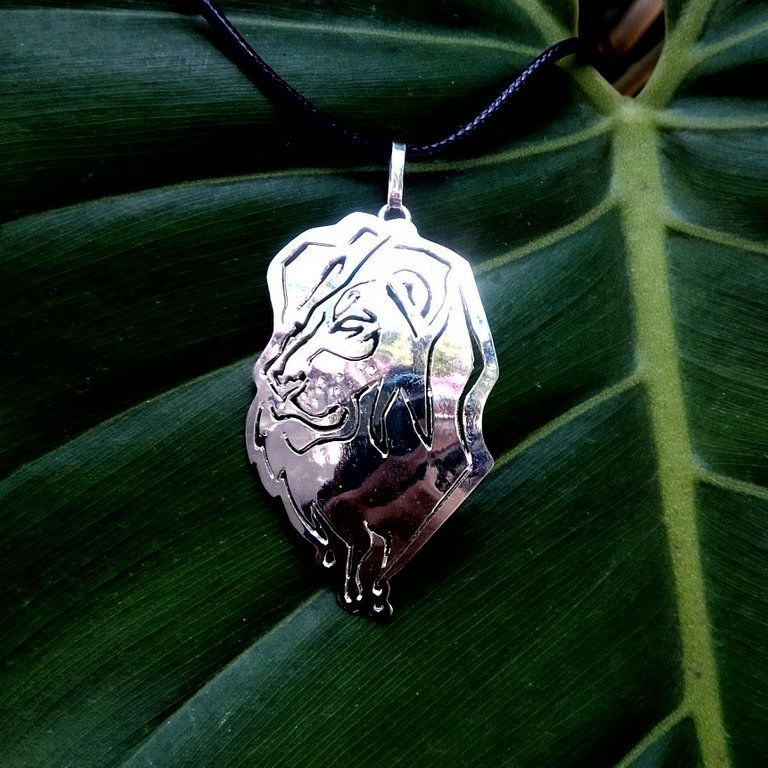
Amigos, les anuncio que esta vez voy a presentar la pieza y el proceso más como un relato para probar algo nuevo, así también ustedes podrán entender un poco más de como es que trabajo, sobre todo con una pieza que no pertenece al común de lo que realizo.

Foto de Anton de .Pexels:
Les cuento que hace casi 2 meses una amiga que era cliente de hace más de 10 años y no teníamos contacto comercial desde tal vez hace más de 4 años, me contacto por WHATSAPP, ella quería encargarme hacer un dije mediano de un león para un amigo que tatúa y me paso la imagen del diseño, diciéndome que le gustaría lo más idéntico posible, pero el dibujo del león estaba basado en líneas que se unen unas con otras, pero resulta que los trazos eran algo delgados, y se me dificultaba bastante por esto, debido a que la sierra de la segueta y los agujeros en el metal saldrían algo más gruesos a la hora de hacer los cortes con la segueta, a esta técnica de joyería se le llama calado.
Respire un rato y después de pensar un poco sobre este pedido me dije "si me mando a hacer esto es porque ve que tengo la capacidad de resolverlo”, a lo que le avise y le di un precio tentativo, en plata y con baño de plata, su decisión fue cobre bañado en plata.
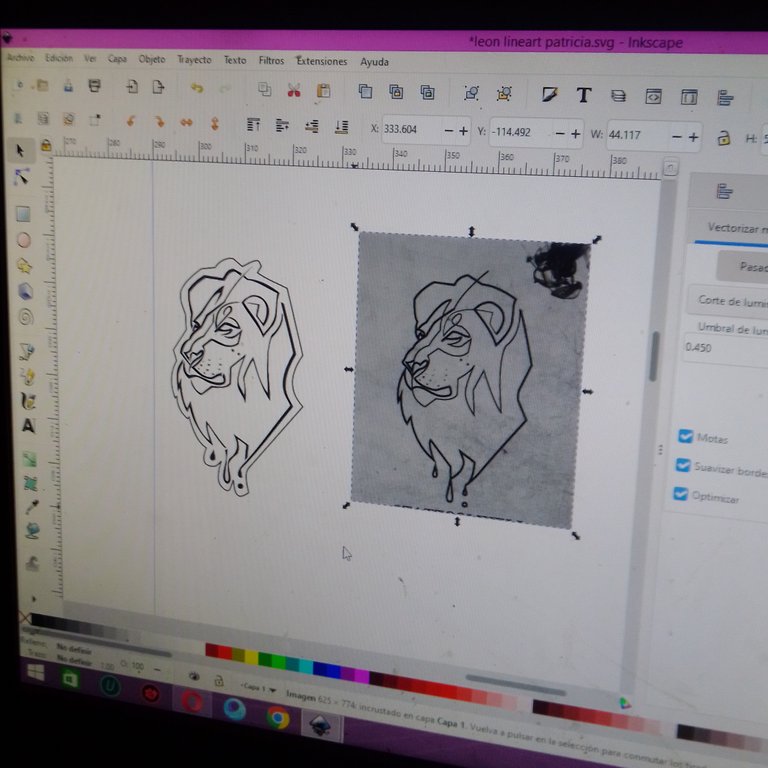
Lo primero que hice para sacar adelante el pedido fue pasar la imagen a mi programa de diseño favorito Inkscape y trazar las líneas para marcar donde iba a hacer los cortes, siluetear el borde exterior que el diseño original no tenía, mover algunas cosas para que se facilitara la labor.
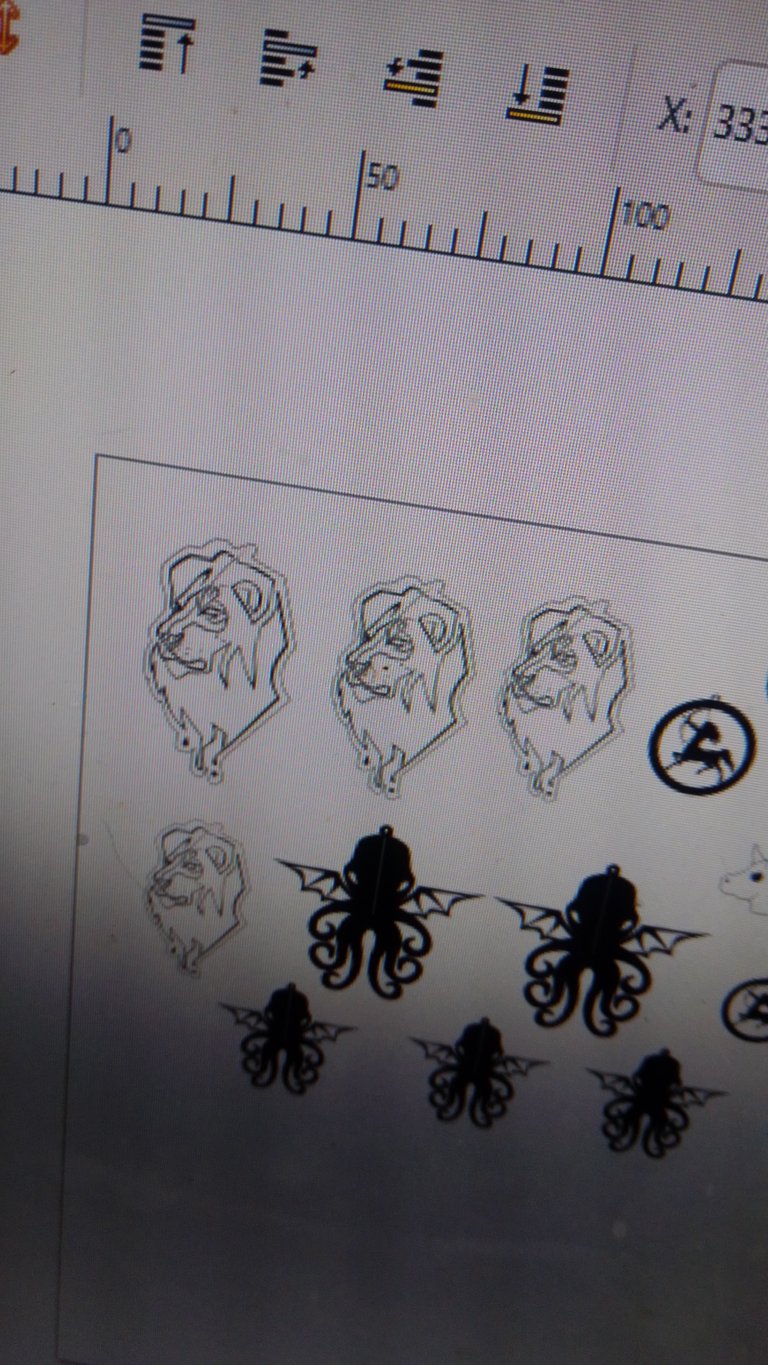
Por último, dentro de Inkscape configuré una hoja carta en la que tenía el león con varios tamaños a ver cuál funcionaba mejor.
En parte este proceso de diseño era como de planificación previa y un ejercicio para visualizar en mi mente como iba a quedar, reflexionar como lo haría, qué tantos huecos debía abrirle a la pieza, ya resuelto esto le paso la imagen al WHATSAPP y le comento como lo intentaré realizar.
Ya resuelto el tema del diseño, imprimo la hoja con las figuras y recorto la que considere que tenía un buen tamaño, por lo que recuerdo era como 4,5 cm de alto, selecciono una lámina de cobre de 0,6 mm, que es un poco delgada para lo que debería ser, pero esta me permitiría cortar con cierta comodidad, además si le daba un volumen cóncavo esto le aportaría algo de rigidez. Todos estos detalles darían al final un mejor precio para ofrecer y que el trabajo saliera lo más rapido. Yo recomiendo si los trabajos son para uno o una persona muy especial invertir en una pieza de plata ley, porque son casi que para toda la vida, pero si es para un regalo y no se cuenta con mucho presupuesto, la mejor opción es que la pieza sea de cobre o bronce con baño de plata.
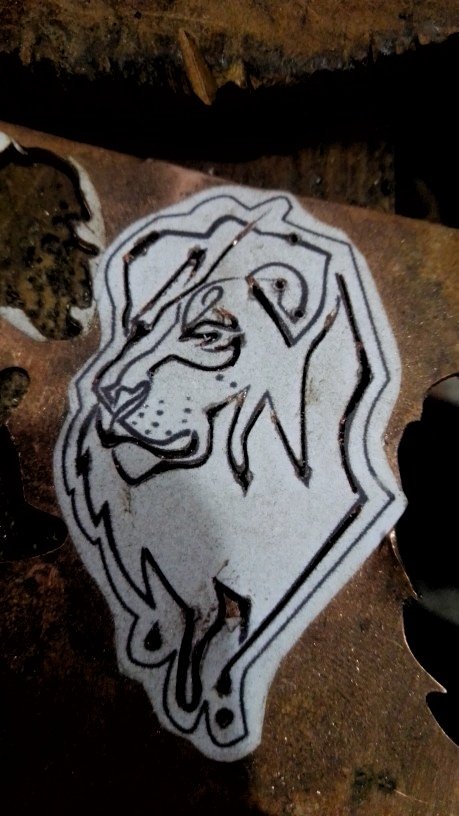
Pegue el dibujo en la lámina de cobre con la pega de barra de siempre y después reflexioné en que lugares debía abrir cada agujero para hacer los cortes internos, dentro de los criterios que tome en cuenta fueron:
- Que fueran la menor cantidad de agujeros posible.
- Ubicarlos en esquinas o en puntos donde la línea sería más gruesa, ya que la fresa de perforar es de 0.7 mm
- Visualizar en mi mente un esquema de como avanzaría en el corte y como resolvería las uniones de las líneas del dibujo.
Se me olvido tomarle foto al punto de inicio, aun así en la imagen de arriba se puede observar un poco de los puntos que escogí para los huecos y parte de como iniciaba el corte interno con el arco de segueta; intercalaba entre abrir los huecos y hacer los cortes, porque la figura para realizarla aún no estaba para mí de todo clara la ruta para avanzar, porque había muchos sitios donde si me descuidaba perdería todo el progreso, ya que se desprendería parte de alguna sección del león.
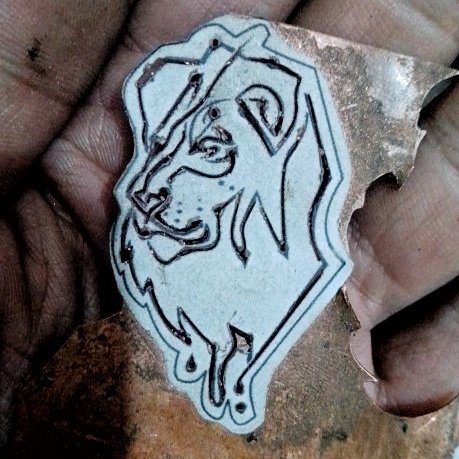
Arriba puedes ver que avance un poco más, las partes que más me preocupaban eran la nariz, los ojos y la oreja, porque las distancias y vueltas entre líneas que se llevan, toco tener paciencia, avanzar, pensar, descansar; fue un trabajo de horas, pero aun así fluía a buen ritmo, mucho mejor de lo esperado, mientras trabajaba me acompañaba con alguna música o video programa de YouTube.
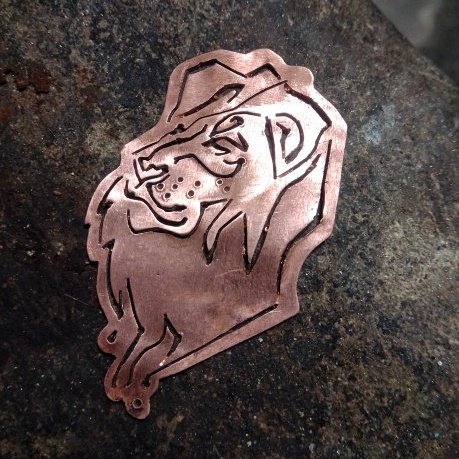
Una vez hechos los cortes internos fui terminado de cortar la silueta, con la misma fresa que use para abrir los huecos, hice los puntos del bigote del león sin perforar, mientras que con la segueta en las secciones donde deben unirse las líneas, incline la sierra e hice cortes superficiales, con la idea era que se viera la continuidad de las líneas manteniendo toda la estructura unida, algo similar a como se hacen los esténciles, pero aplicado a un trabajo de joyería...
La fotografía muestra buena parte del avance, pero aún le faltaba, en este punto le mandé la foto a la amiga, para que esté aliviada de que el trabajo si va a salir con éxito, en este momento exacto es cuando mis dudas se fueron, sintiéndome más seguro; continúe corrigiendo y tratando de simular la unión de las líneas lo más parecido al diseño original.
Por cuantificar el proceso del corte creo fue toda una tarde con sus interrupciones, ya que por alguna razón se me cansan los ojos y hago esfuerzos en algunas partes del cuerpo de forma involuntaria y siento la necesidad de parar un rato a descansar, pero aun así todo fluyo a buen ritmo.
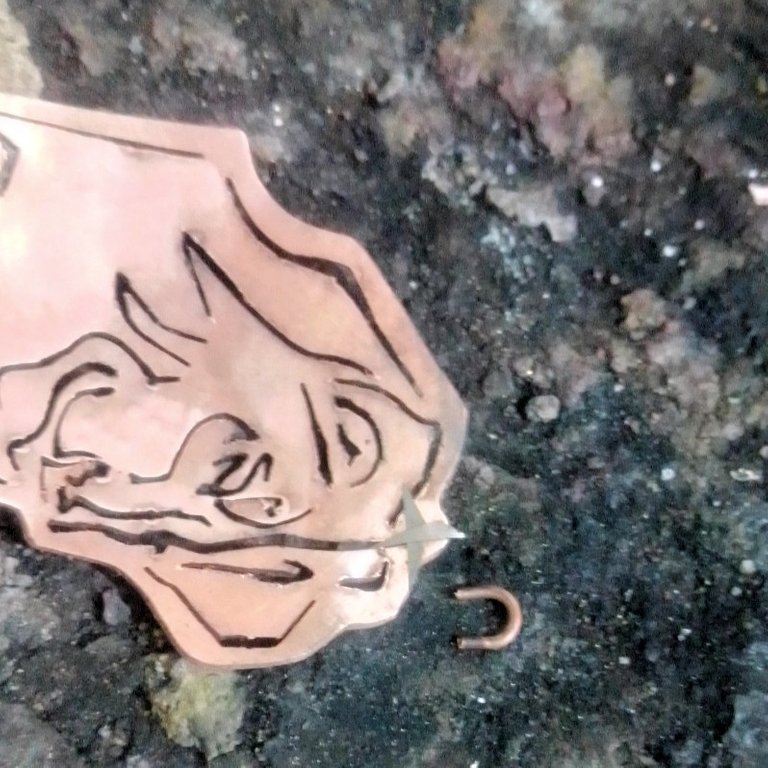
Al día siguiente me tocaba progresar y concluir la pieza, empece poniendo la pieza sobre una estructura levemente curva de acero y a darle algunos golpes con una madera para moldear el león y así darle una superficie curva.
Después mi dispuse a soldar lo que será donde pasara la argolla del collar, utilice soldadura de plata en lámina para no hacer desastres, recorte dos pedazos pequeños de soldadura y coloque en la parte de atrás del dije... con alambre de cobre hice una especie de "u" que sería la pieza a soldar....
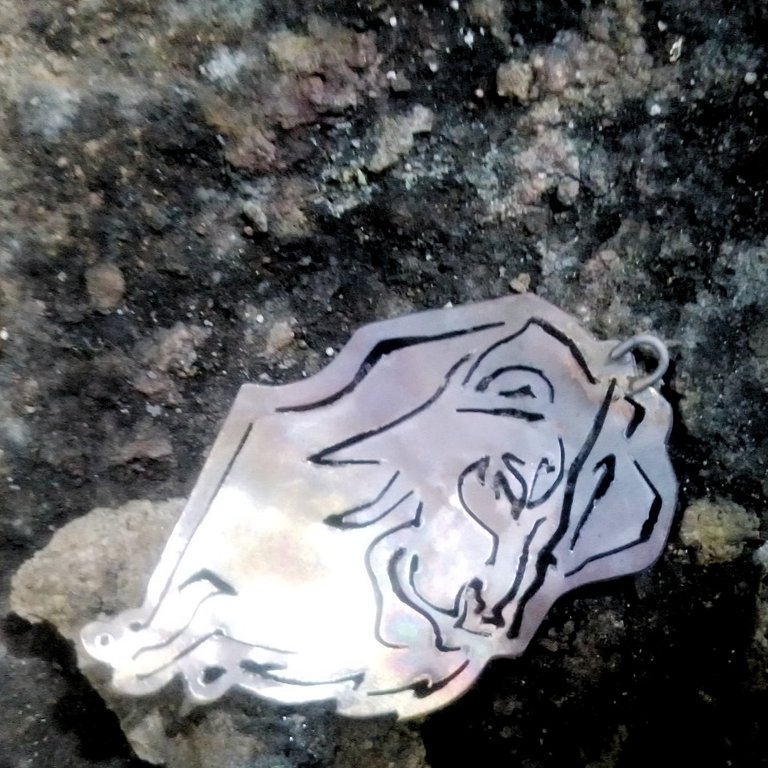
Monte la "u" sobre la soldadura, aplique bórax que es un fundente y le di fuego con el soplete, se soldó sin dificultad, después de esto lo deje en el proceso de decapado, es decir metí la pieza en el agua con ácido para que se le quitara el chamuscado del fuego...
Ya podría decir que lo más complicado paso; solo quedaba hacerle el aro por donde va el collar y este lo hice con un alambre de cobre que aplane con una laminadora pequeña que tengo en casa, le di forma con una pinza redonda, corte con la segueta, introduje por el espacio para este aro y soldé para que no corriera el riesgo de abrirse.
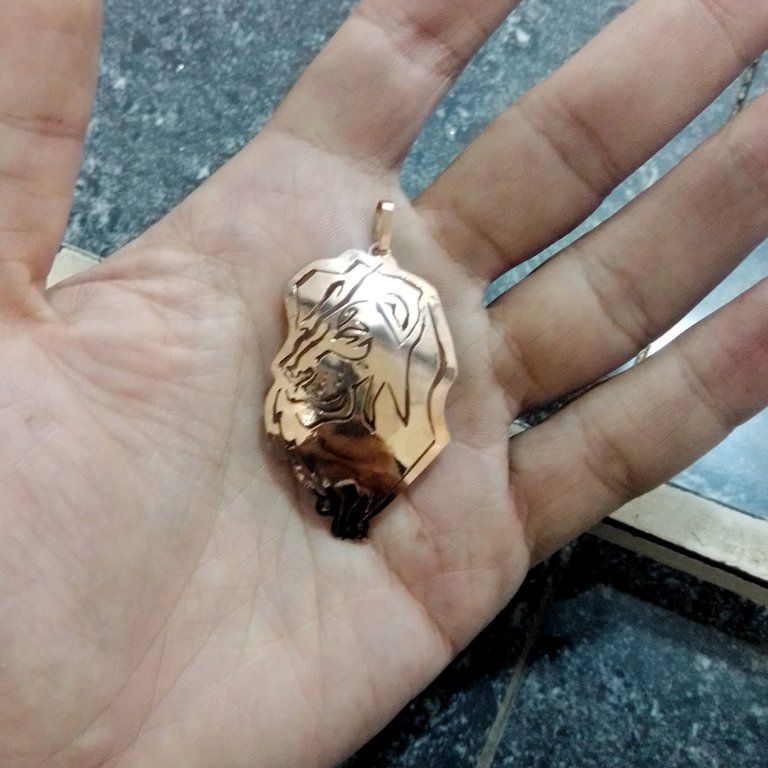
Ya montada y resulta toda la estructura, le toco el proceso de lijado, pero antes con una piedra que es para limar que trae el Dremel, le pase por la parte de atrás y los bordes con cuidado, después de allí le di lija a toda la pieza pasando por este orden de lija de 220, 360 y 400, por supuesto todo usando el Dremel para que fuera más rápido. El toque final vino con la pulida, me dispuse con el motor de banco, la mopa de tela de algodón de dureza media y la cera de pulir, con mucho cuidado fui dando el brillo, para aguantar la pieza como soporte utilice un cuero.
Ya lista la pieza, la limpié con agua, jabón desengrasante y un cepillo de diente para quitar los residuos de cera, seque y sali al sitio donde mando a bañar en plata....
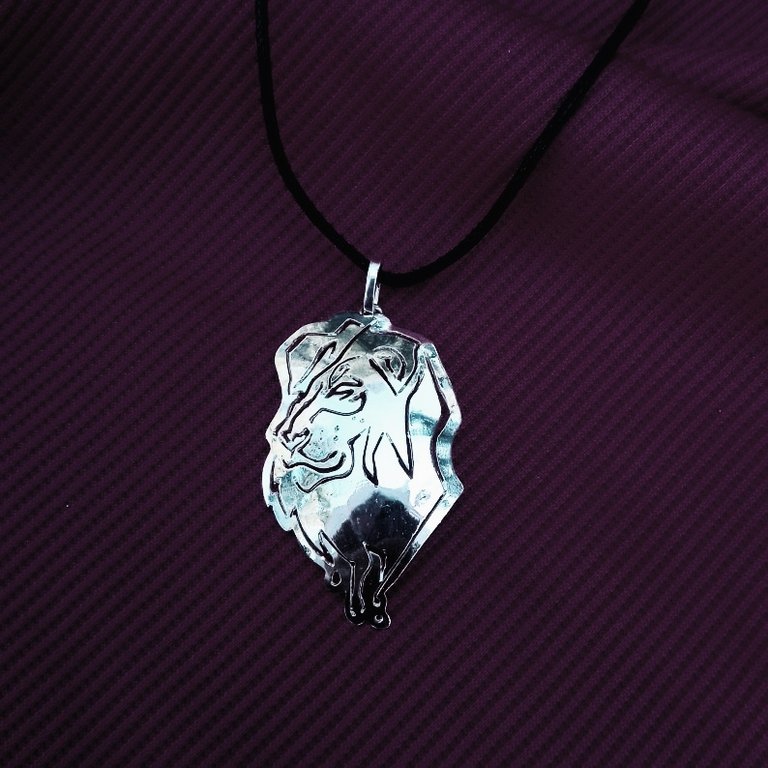
Retire y el resultado es el que vez en la imagen de arriba, para mí un trabajo bastante bueno y satisfactorio, a la amiga le gusto también, aunque no pudo retirar la pieza personalmente.
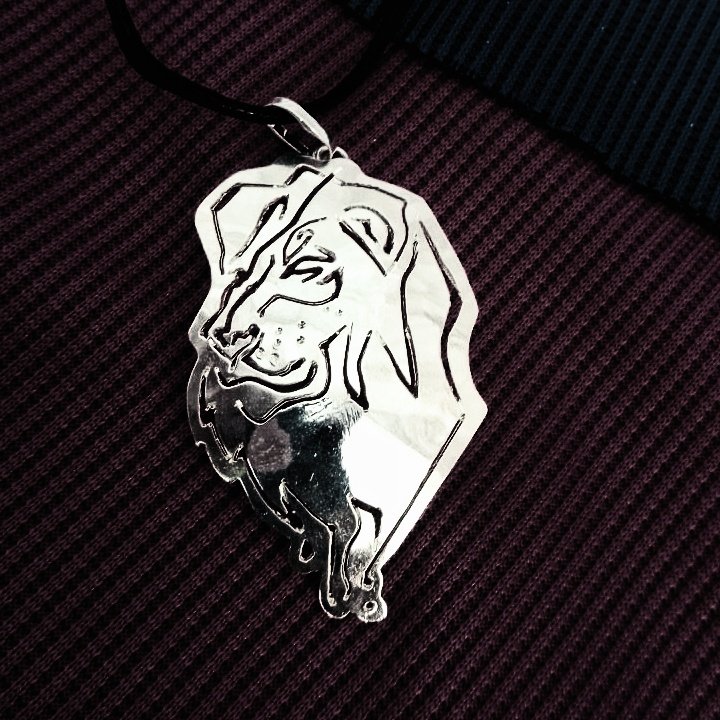
Espero les haya gustado la pieza que hice en un estilo algo nuevo para mí, como podrán notar la creación de una pieza hecha a mano lleva un trabajo más allá de la técnica y la creatividad, se involucran también la lógica, razonamientos y que también la experiencia ayuda un poco. Creo que algo de aprendizaje se llevaron de esta publicación o conocieron alguna novedad.
Gracias por el apoyo y puedes conocer o ver más de mi trabajo en Instagram.
https://www.instagram.com/m16ueljoyas/
////////////////////////////////
ENGLISH - translated with Google
///////////////////////////////

Friends, I announce that this time I am going to present the piece and the process more like a story to try something new, so you can also understand a little more about how I work, especially with a piece that does not belong to the common What do I do?

Photo by Anton from .Pexels:
I tell you that almost 2 months ago a friend who was a client for more than 10 years and we had no commercial contact for perhaps more than 4 years, contacted me through WHATSAPP, she wanted to commission me to make a medium pendant of a lion for a friend who tattoos and passed me the image of the design, telling me that he would like it as identical as possible, but the drawing of the lion was based on lines that join each other, but it turns out that the strokes were somewhat thin, and it was quite difficult for me because This, due to the fact that the hacksaw saw and the holes in the metal would come out somewhat thicker when making the cuts with the hacksaw, this jewelry technique is called fretwork.
I breathed for a while and after thinking a bit about this request I said to myself "if you order me to do this, it's because you see that I have the capacity to solve it", to which I told him and gave him a tentative price, in silver and silver plated. silver, his choice was silver plated copper.

The first thing I did to carry out the request was to transfer the image to my favorite design program Inkscape and draw the lines to mark where I was going to make the cuts, outline the outer edge that the original design did not have, move some things so that they were will make the job easier.

Finally, inside Inkscape I configured a letter sheet in which I had the lion with various sizes to see which one worked best.
In part, this design process was like prior planning and an exercise to visualize in my mind how it was going to look, reflect how I would do it, how many holes I should open in the piece, once this was resolved, I pass the image to WHATSAPP and I comment How will I try to do it
Once the design issue is resolved, I print the sheet with the figures and cut out the one that I consider to be a good size, from what I remember it was about 4.5 cm high, I select a 0.6 mm copper sheet, which is a little thin for what it should be, but this would allow me to cut with some comfort, also if it gave it a concave volume this would give it some rigidity. All these details would give in the end a better price to offer and that the work would come out as quickly as possible. I recommend if the works are for one or a very special person to invest in a piece of sterling silver, because they are almost for life, but if it is for a gift and you do not have a large budget, the best option is that the piece is made of copper or bronze with silver plating.

I glued the drawing on the copper sheet with the usual bar glue and then I reflected on where I should open each hole to make the internal cuts, within the criteria that I took into account were:
- That there were as few holes as possible.
- Place them in corners or at points where the line would be thicker, since the drill bit is 0.7 mm
- Visualize in my mind a scheme of how I would advance in the cut and how I would solve the unions of the lines of the drawing.
I forgot to take a photo of the starting point, even so in the image above you can see a little of the points I chose for the holes and part of how I started the internal cut with the hacksaw bow; I interspersed between opening the holes and making the cuts, because the figure to carry it out was not yet completely clear to me, the route to advance, because there were many places where if I was careless I would lose all the progress, since part of some section of the Lion.

Above you can see that I advanced a little more, the parts that worried me the most were the nose, the eyes and the ear, because the distances and turns between lines that are carried, I have to be patient, move forward, think, rest; It was a work of hours, but even so it flowed at a good pace, much better than expected, while I worked he accompanied me with some music or video program from YouTube.

Once the internal cuts were made, I finished cutting the silhouette, with the same cutter that I used to open the holes, I made the points of the lion's mustache without drilling, while with the saw in the sections where the lines should join, tilt the Saw and made superficial cuts, with the idea was that the continuity of the lines could be seen keeping the whole structure together, something similar to how stencils are made, but applied to a jewelry work...
The photograph shows a good part of the progress, but it was still missing, at this point I sent the photo to the friend, so that she is relieved that the work is going to be successful, at this exact moment is when my doubts went away, feeling more secure; continue correcting and trying to simulate the union of the lines as close as possible to the original design.
To quantify the cutting process, I think it was an entire afternoon with its interruptions, since for some reason my eyes get tired and I make efforts in some parts of the body involuntarily and I feel the need to stop for a while to rest, but even so everything flowed at a good pace.

The next day it was my turn to progress and finish the piece, I began by placing the piece on a slightly curved steel structure and hitting it a few times with a piece of wood to mold the lion and thus give it a curved surface.
Then I set out to solder what will be where the ring of the necklace will go, I used sheet silver solder to avoid disasters, cut two small pieces of solder and place it on the back of the pendant... with copper wire I made a kind of "u" that would be the part to be welded....

Assemble the "u" on the solder, apply borax, which is a flux, and set it on fire with the torch, it soldered without difficulty, after this I left it in the pickling process, that is, I put the piece in the water with acid to to remove the scorched from the fire...
I could already say that the most complicated thing happened; It only remained to make the ring where the necklace goes and I made this with a copper wire that I flattened with a small laminator that I have at home, I shaped it with a round pliers, cut with the hacksaw, I inserted it through the space for this ring and I welded so that it would not run the risk of opening.

Already assembled and the whole structure turns out, I touch the sanding process, but first with a stone that is for filing that the Dremel brings, I carefully pass it through the back and the edges, after that I sandpapered the whole the piece going through this order of 220, 360 and 400 sandpaper, of course all using the Dremel to make it faster. The final touch came with the polishing, I got ready with the bench motor, the cotton cloth mop of medium hardness and the polishing wax, with great care I was giving the shine, to hold the piece as a support I used a leather.
Once the piece was ready, I cleaned it with water, degreasing soap and a toothbrush to remove the wax residue, dry it and go to the place where I ordered it to be silver plated....

Remove and the result is what you see in the image above, for me a fairly good and satisfactory job, the friend liked it too, although she could not remove the piece personally.

I hope you liked the piece that I made in a somewhat new style for me, as you can see the creation of a handmade piece takes work beyond technique and creativity, logic, reasoning and also creativity are also involved. experience helps a bit. I think they learned something from this publication or learned something new.
Thanks for the support and you can learn or see more of my work on Instagram.
