Saludos gente maravillosa de Hive y familia @hivediy, estoy gozosa de encontrarme nuevamente con ustedes. Espero que todos estén sanos y felices disfrutando, de un exitoso y bendecido fin de semana.
Hoy les compartiré una idea super económica y sencilla para renovar nuestros posa tazas, vasos y hasta ollas en la cocina. En nuestros hogares, solemos tener superficies bien delicadas, que con el mínimo contactó con el calor o frío intenso se pueden dañar y obviamente esto no es lo que queremos. Digame si es en una superficie de vidrio, donde suelen quedar marcadas las desagradables marcas de los vasos de agua, me parece horrible ver una mesas de vidrio llena de círculos de agua seca. Por esta razón contar con estos utensilios nunca está demás.
También nos ayudarán a mejorar en la limpieza de ciertas superficie en nuestras casas.
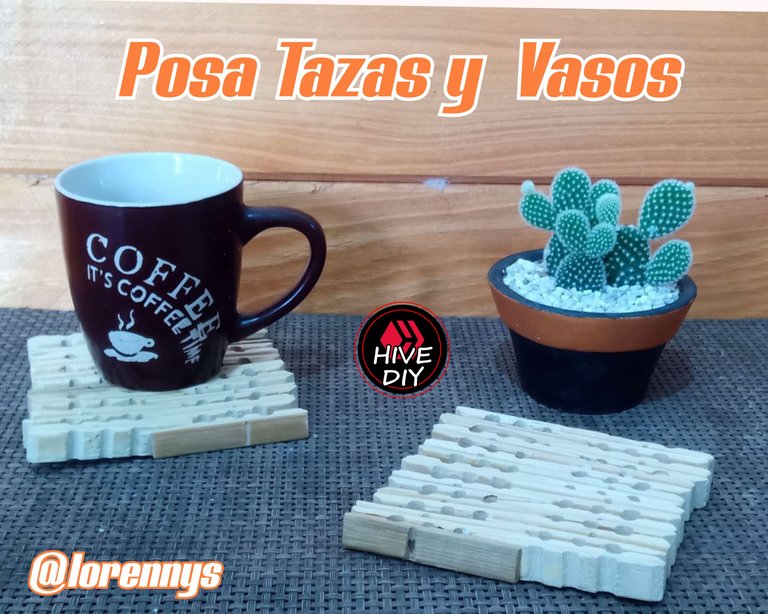
Se pueden elaborar de diferentes materiales como tela, tejido, foami, corcho y muchos más. Los que yo te compartiré hoy los realicé con los ganchos de madera para colgar ropa que venden en las quincallas, la verdad me encantato cómo quedaron , quédate conmigo hasta el final y verás que fácil de elaborar son.
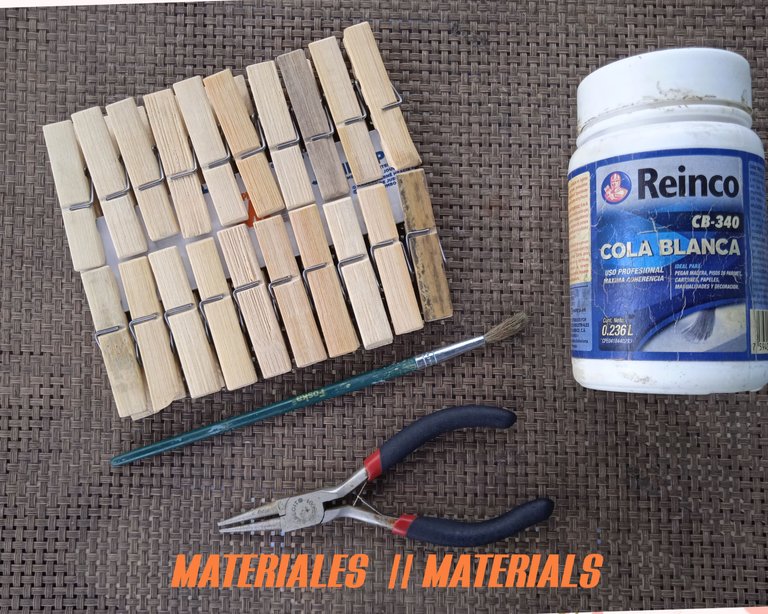
LOS MATERIALES QUE UTILICÉ PARA MI TAREA CREATIVA DE HOY SON
✓Ganchos de colgar ropa de madera.
✓Pinza
✓Pincel
✓Pega
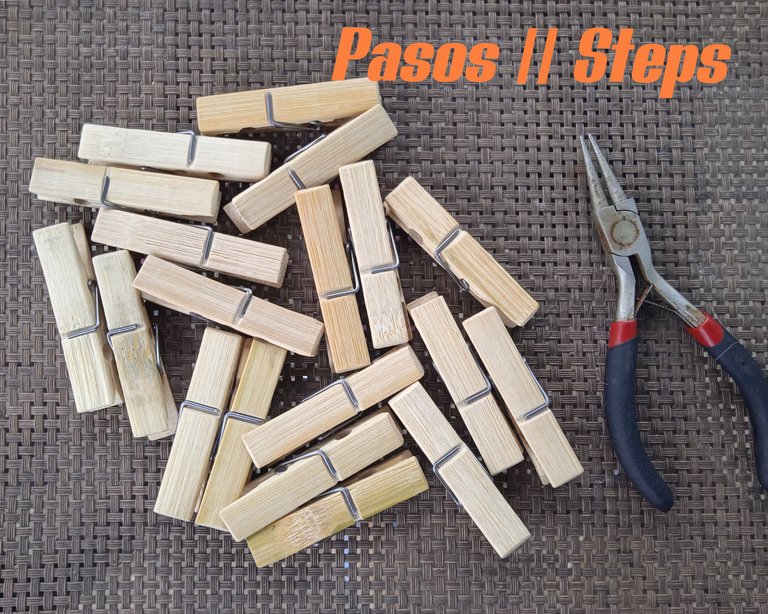
PASOS QUE REALICÉ PARA ELABORAR ESTE PROYECTO
PASO UNO:
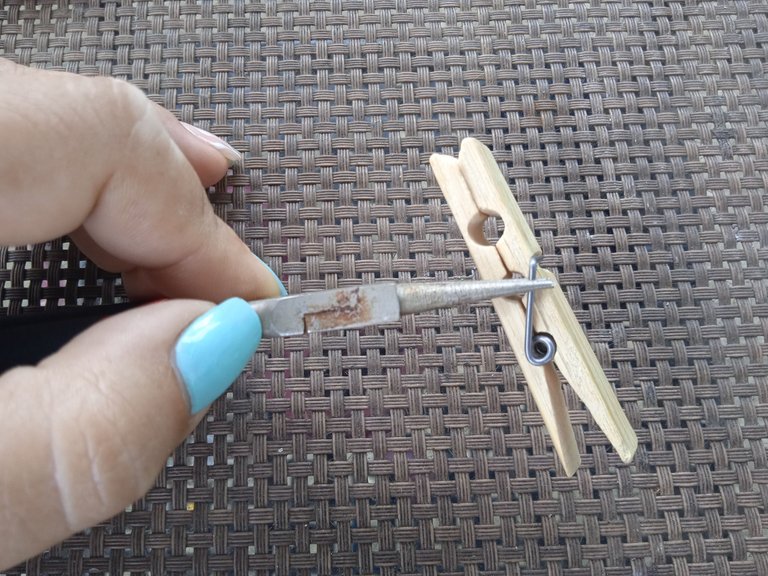
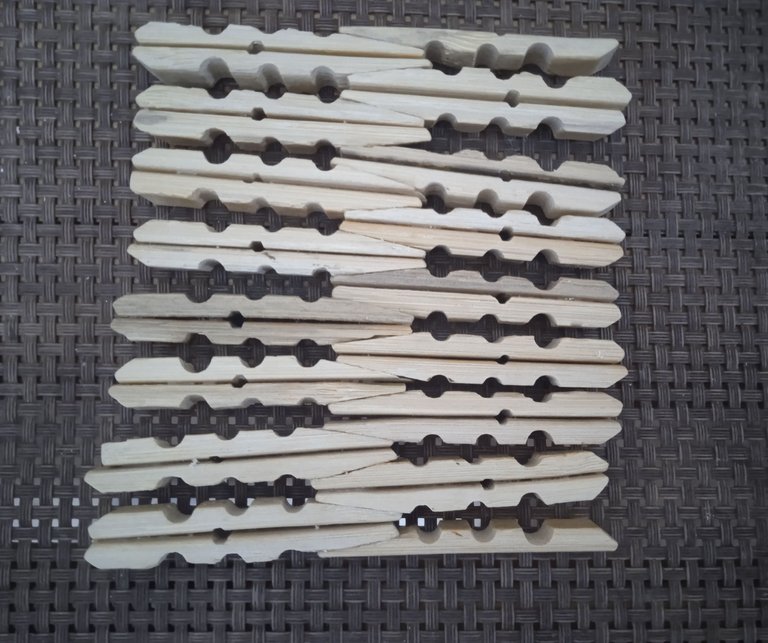
Saco del paquete las pinzas y cola pinzas los despegué retirando el alambre que los une.
PASO DOS:
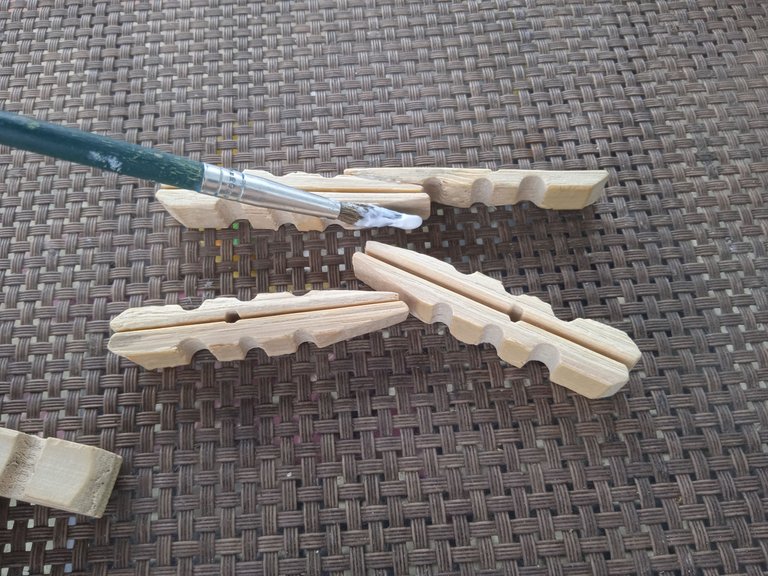
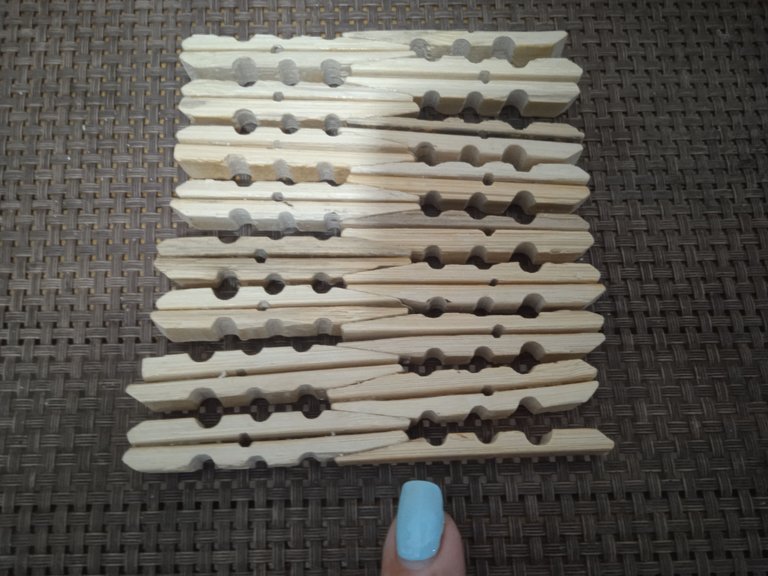
En este paso les muestro cómo quedó cada gancho separado para luego darle la vuelta en inversa a su forma original para comenzar a pegar.

PASO TRES:
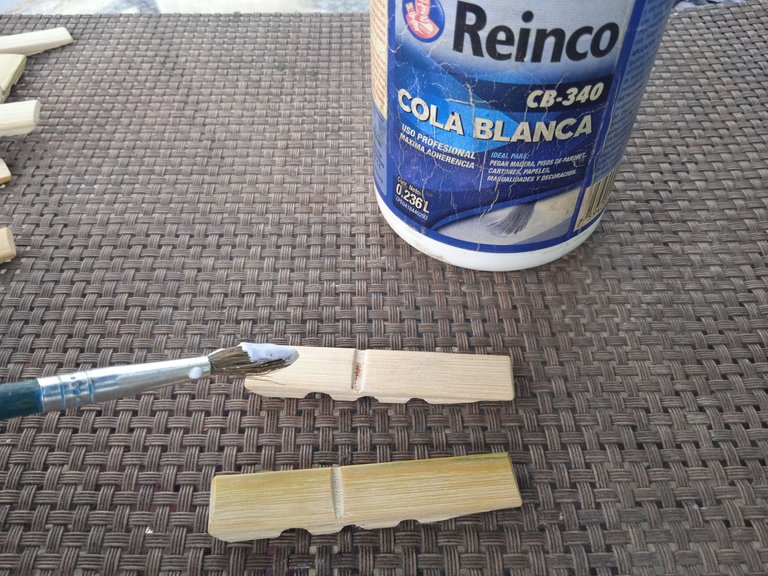
En el siguiente paso comencé a pegar los gancho en la forma deseada utilizando el pincel y el pegamento cómo se los muestro en la imagen.
PASO CUATRO:
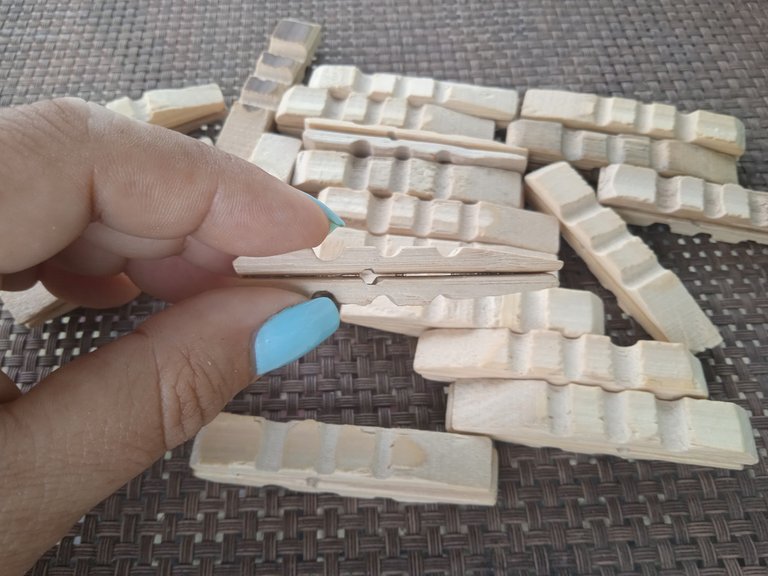
Deje secar los ganchos aproximadamente 30 minutos, está pega que utilicé es muy buena y estuvieron listos rápidamente.
PASO CINCO:
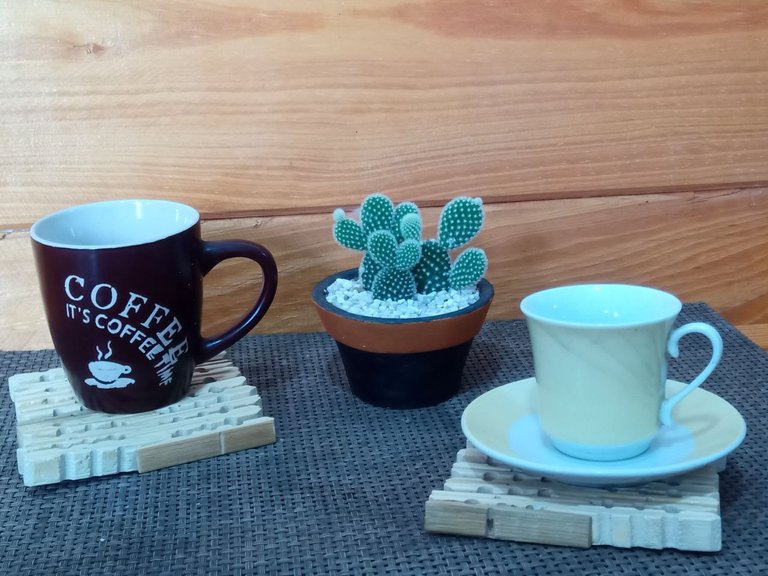
Aqui he llegado al momento final, donde comienzo a darle forma al proyecto y pegar cada gancho como corresponde, uno para arriba y otro para abajo, para formar el posa taza en general se hace con los ganchos doble. Mientras que el inicio y final es con gan ganchos individuales.
Así ya estoy en el final de los posa tazas, en casa hemos estado cambiando el estilo de la decoración, primero todo era con una estilo minimalista elegante, ahora voy por un estilo minimalista más campestre. Así que que las cosas en madera, piedra etc, son parte de nuestro nuevo estilo. Esto es debido a que mi emprendimiento verde 🌿 y decorativo por ahora funciona en casa, cómo vivimos en una zona rural estoy acomodando todo para parecer una verdadera Señora de las plantas.
Espero que se animen a realizar unos para ustedes en el material de su preferencia y den a sus espacios un toque nuevo en la decoración.
Todas las fotografías son de mi propiedad ,capturadas con mi Redmi A9.
Deelptraductor fue utilizado para esta publicación.
Éxitos y bendiciones para todos 🙏🏻 hasta las próxima publicación.
¡Tengan un feliz día!
¡Gracias por detenerte a leer!

TEXTO TRADUCIDO
Greetings wonderful people of Hive and family @hivediy, I am happy to meet you again. I hope you are all healthy and happy enjoying a successful and blessed weekend.
Today I will share with you a super economical and simple idea to renew our cup holders, glasses and even pots in the kitchen. In our homes, we usually have very delicate surfaces, that with the slightest contact with heat or intense cold can be damaged and obviously this is not what we want. Tell me if it is on a glass surface, where the unpleasant marks of the glasses of water are usually marked, I find it horrible to see a glass table full of circles of dry water. For this reason, having these utensils is never a bad thing.
They will also help us to improve the cleanliness of certain surfaces in our homes.
They can be made of different materials such as fabric, fabric, foami, cork and many more. The ones that I will share with you today I made them with the wooden hooks for hanging clothes that are sold in the quincallas, the truth is that I love how they turned out, stay with me until the end and you will see how easy they are to make.
THE MATERIALS I USED FOR MY CREATIVE ASSIGNMENT TODAY ARE.
✓Wooden clothes hangers.
✓Pincer
✓Brush
✓Paste
STEPS I TOOK TO MAKE THIS PROJECT.
STEP ONE:
I took the tweezers and tweezer glue out of the package and peeled them off by removing the wire that binds them together.
STEP TWO:
In this step I show you how each hook was separated to then flip it in reverse to its original shape to begin gluing.
STEP THREE:
In the next step I started gluing the hooks in the desired shape using the brush and glue as shown in the image.
STEP FOUR:
Let the hooks dry for about 30 minutes, this glue I used is very good and they were ready quickly.
STEP FIVE:
Here I have reached the final moment, where I begin to shape the project and glue each hook accordingly, one for the top and one for the bottom, to form the cup holder in general is done with double hooks. While the beginning and end is with single hooks.
So I'm already at the end of the cup holders, at home we have been changing the style of decoration, first everything was with an elegant minimalist style, now I'm going for a more country minimalist style. So things in wood, stone etc, are part of our new style. This is because my green 🌿 and decorative venture for now works at home, how we live in a rural area I am arranging everything to look like a real Lady of the plants.
I hope you are encouraged to make some for you in the material of your preference and give your spaces a new touch in decoration.
All photos are my property ,captured with my Redmi A9.
Deelptraductor was used for this publication.
Success and blessings to all 🙏🏻 until next posts.
Have a happy day!
Thanks for stopping by to read!