Made with canva
Hello, Fam! Today, I want to share with you about using the Javascript Fetch API to make asynchronous HTTP requests. I am not a pro in Javascript, but I believe that sharing my knowledge will motivate others to learn or at least let people who are not into coding know what is going on under the hood.
First, let's define what asynchronous HTTP requests mean. Simply put, it is a way of sending and receiving data from a server without stopping the page from loading. This means that even if a request takes a long time to process, the user can still interact with the page while waiting for the response.
Now, let's talk about the Fetch API. It is a modern way of making HTTP requests in JavaScript. It allows you to send and receive data from a server using a simple syntax. Here's an example of how to use the Fetch API. In the example, I want to demonstrate how you use the FETCH API to fetch random advice from a public advice generator API. I will do this with a single web page. In the web page, a user can click on a button to get a random advice from the API.
Step 1. Creating an HTML file named
index.htmlwith a button and a div element where the advice will be displayed.
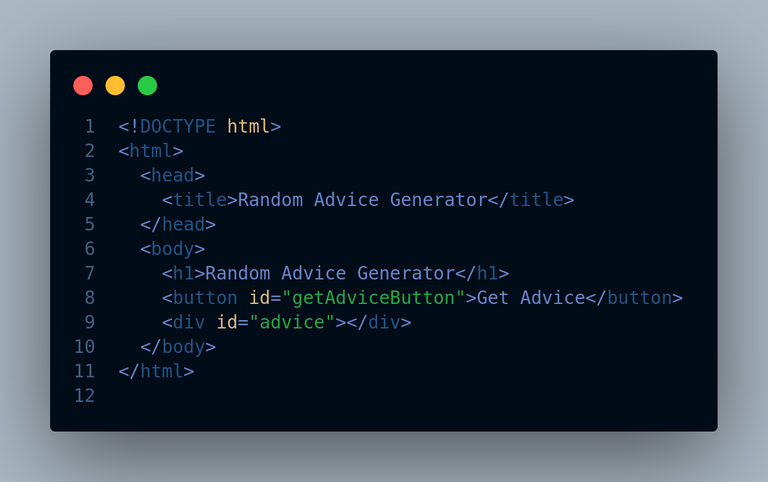
In the code snipped above, I made a simple web page with html and it contains the div that shows the advice when a user click on the button

Step 2. Creating a JavaScript named
app.jsfile and add code to handle the button click and fetch the API data.
The HTML codes alone just creates a static web page. I am creating this javascript file to add interactivity to the web page. This is where we are utilizing the fetch API. Consider the code snippet below.
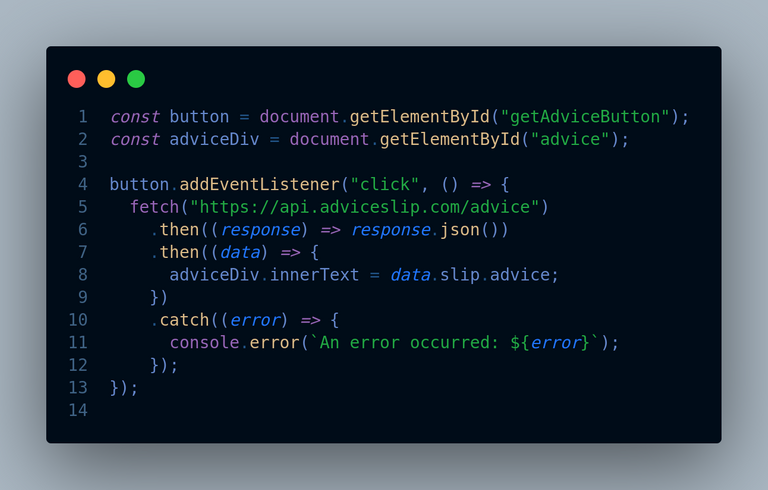
In the example above, we are making a GET request to the advice generator API to get a random advice. The fetch() function returns a promise that resolves to the response object. We then use the json() method to parse the response body and return another promise that resolves to the data object. Finally, we use the then() method to send the fetched advice to the adviceDiv in the web page.
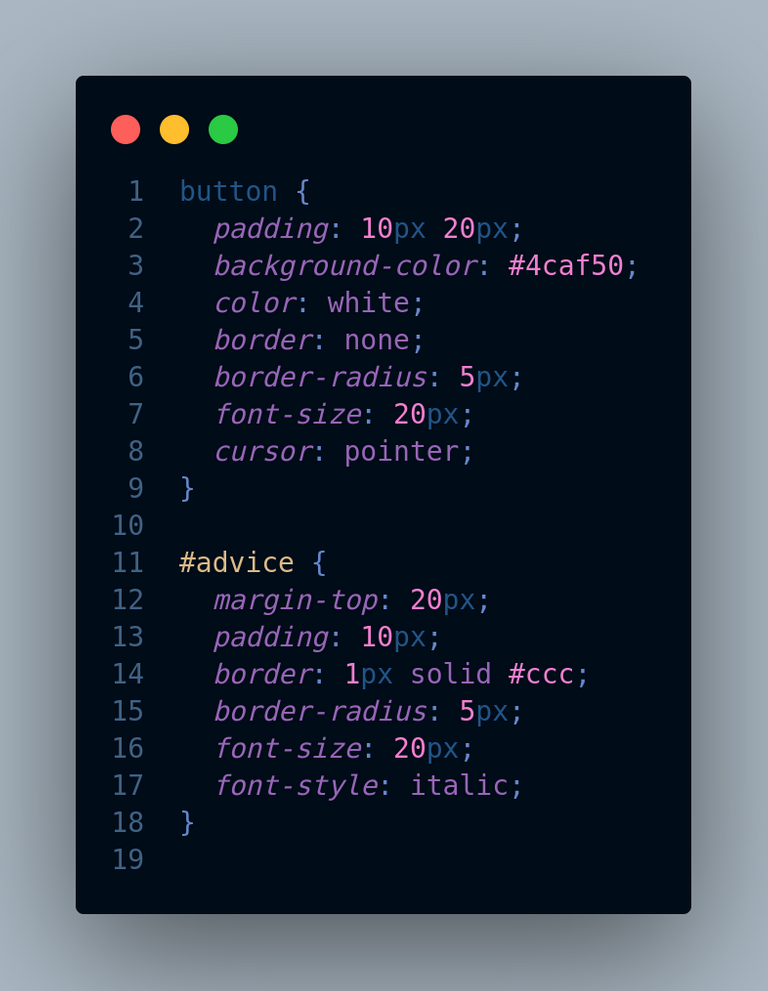
Step 3. Creating a CSS file named,
style.cssto style the Div.
The purpose of CSS is to add styling to our web page. The code below add some styling to the adviceDiv section on the web page.
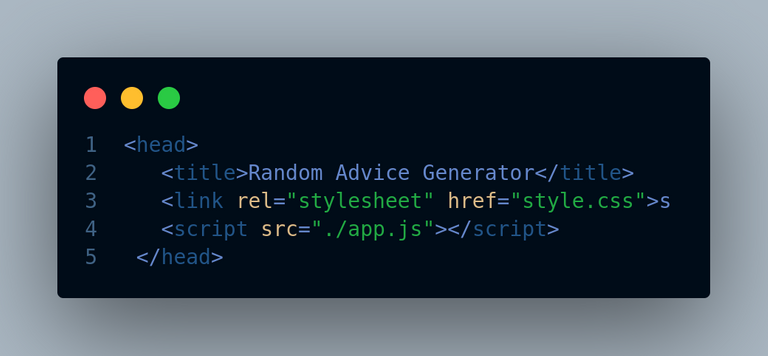
Step 4. Linking the CSS and JavaScript files to the html.
Without linking the files, they can't communicate with one another. So let's add the styles and the fetch functionalities to make our web page complete. Consider the screenshot below
Finally, our advice generator is ready, let's test it by simply opening our html file on a live server. See below:

One cool thing about the Fetch API is that it supports other HTTP methods such as POST, PUT, DELETE, etc. You can also set headers, add query parameters, and handle errors using the Fetch API. Here's an example of how to make a POST request:
fetch('https://jsonplaceholder.typicode.com/posts', {
  method: 'POST',
  headers: {
    'Content-Type': 'application/json'
  },
  body: JSON.stringify({
    title: 'Using the fetch API',
    body: 'The Fetch API is a useful tool for getting data from external sources',
    userId: 1
  })
})
  .then(response => response.json())
  .then(data => console.log(data));
In the example above, we are making a POST request to the JSONPlaceholder API to create a new post. We set the method to 'POST' and the headers to indicate that we are sending JSON data. We then set the body to a JSON string that contains the title, body, and userId of the post. Finally, we use the then() method to log the response data to the console.
The Fetch API is a nice tool for making asynchronous HTTP requests in Javascript. It is easy to use and supports various HTTP methods and headers. I hope this article has been helpful in understanding how to use the Fetch API. Happy coding!
All screenshots used in this post are from my Laptop
I hope you found this useful. I am Abdul-Salam Issahaku, from Ghana. I am a student web developer and a blockchain enthusiast. I blog about technology, life and investments. You can follow me to be part of my Hive family. Thank you for your time.