Hola mis nietecitos de
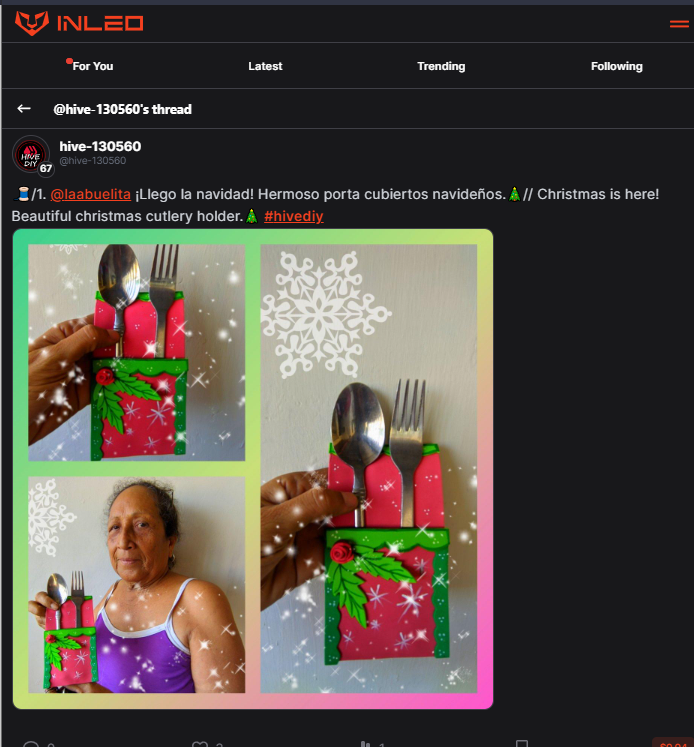
#hive como se encuentran, yo feliz porque nos encontramos ya en temporada navideña, que es una de las mejores épocas del año, y como les dije en el post anterior yo ya inicie los preparativos para que mi hogar se vista de gala, por eso hoy les traigo un pequeño tutorial para elaborar un lindo porta cubiertos.
Para nosotros uno de los eventos más importantes en navidad es la cena por lo que quiero que este año todo los elementos que vamos a utilizar en ella sean elaborados por mi, es por eso que quiero que vean lo fácil y económico que es traer a nuestra mesa detalles que engalanan la cena navideña, pero no hablemos más, aquí les dejo la lista de materiales, el paso a paso y por supuesto las fotos finales para que vean como quedan.
🎄 Materiales 🎄
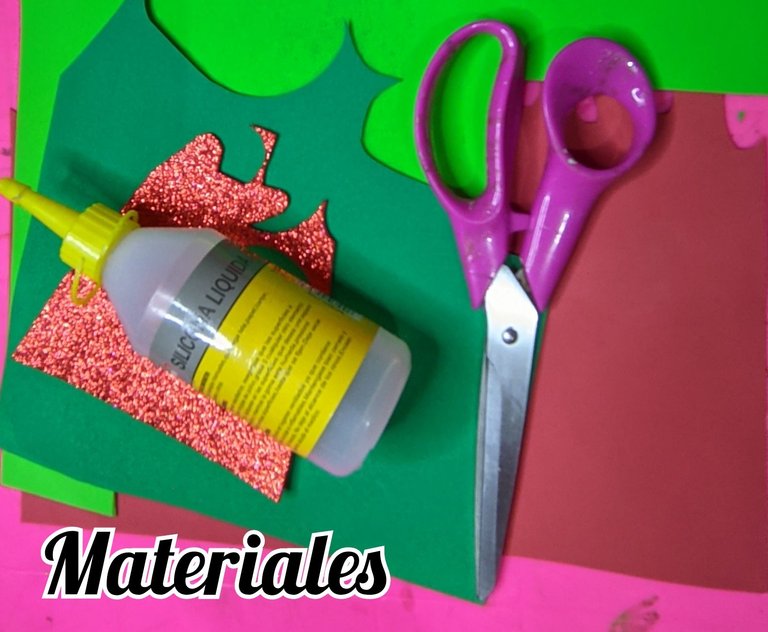
🎄 Foami de rojo
🎄 Foami rojo escarchado.
🎄 Foami verde manzana.
🎄 Foami verde navidad.
🎄 Silicón líquido.
🎄 Pintura la frío blanca
🎄 Pintura verde oscuro.
🎄 Tijera.
🎄 Regla.
🎄 Pincel fino.
🎄 Lápiz.
🎄Paso a paso🎄
🎄 Paso 1:
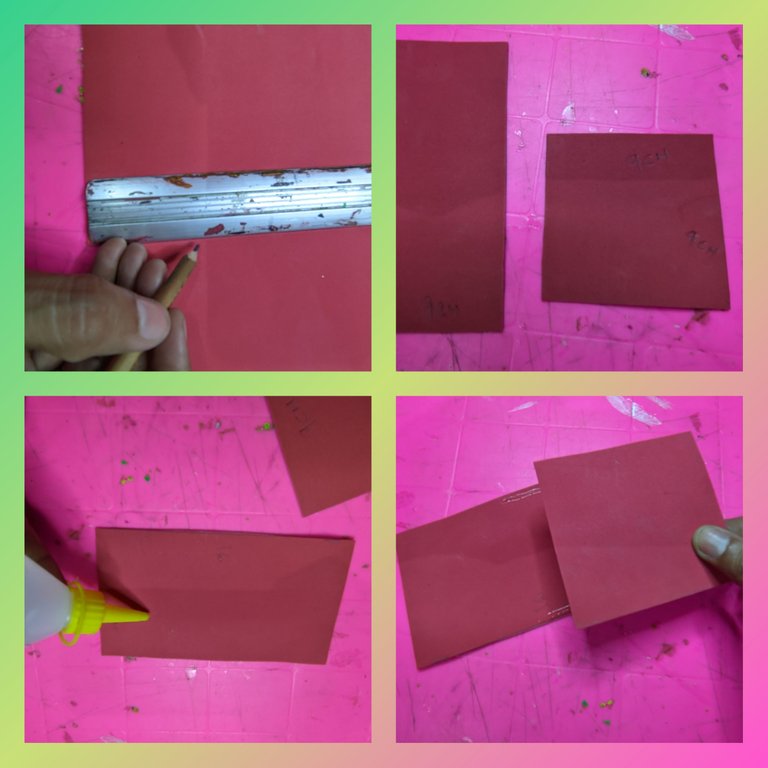
Tome el foami rojo y dibujamos un rectángulo de 16 cm de largo x 9 cm de ancho, además dibuje un cuadrado de 9x9 cm luego recorté ambos, luego le aplique silicón líquido en el cuadrado y pegamos el rectángulo y dejamos secar.
🎄 Paso 2:
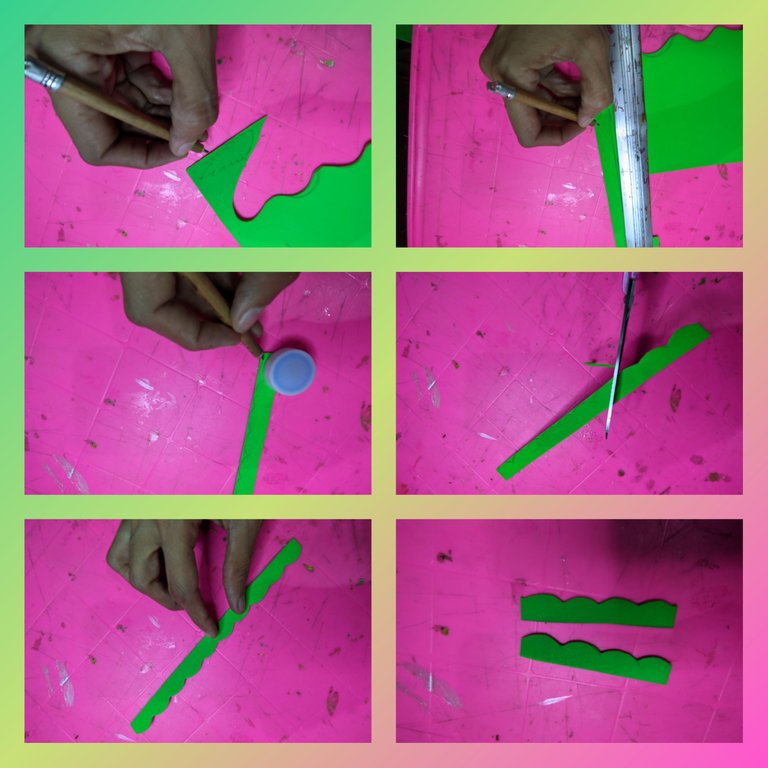
También marque y recorte en el foami verde manzana una tira de 16 cm de largo x 2 cm de ancho, luego esa tira la picamos en dos.
🎄 Paso 3:
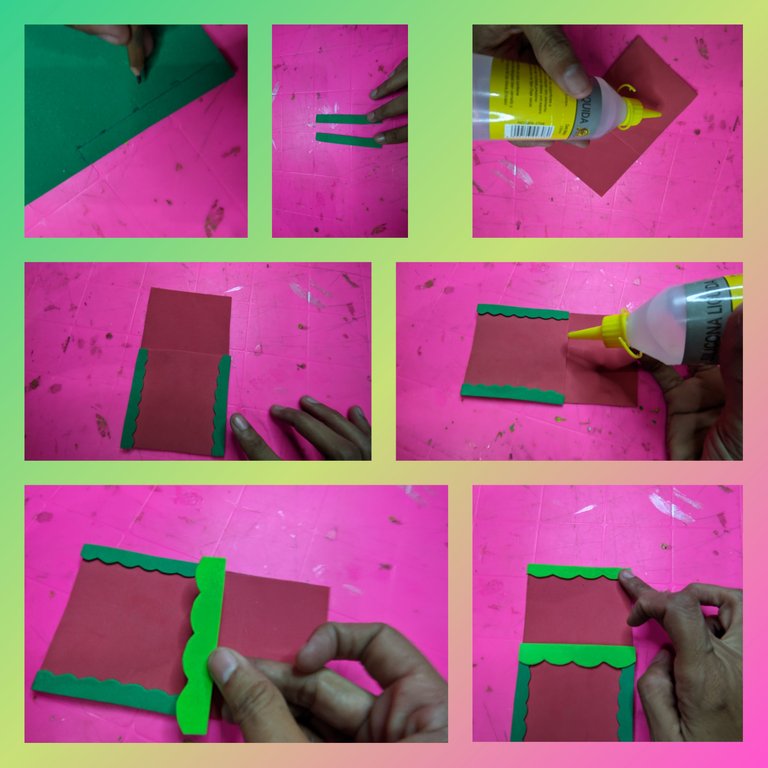
Ahora en el foami verde oscuro dibujamos y recortamos una tira de 9 cm de largo x 2 cm de ancho, después tomé el silicón líquido y pegamos todas las tiras que recortamos.
🎄 Paso 4:
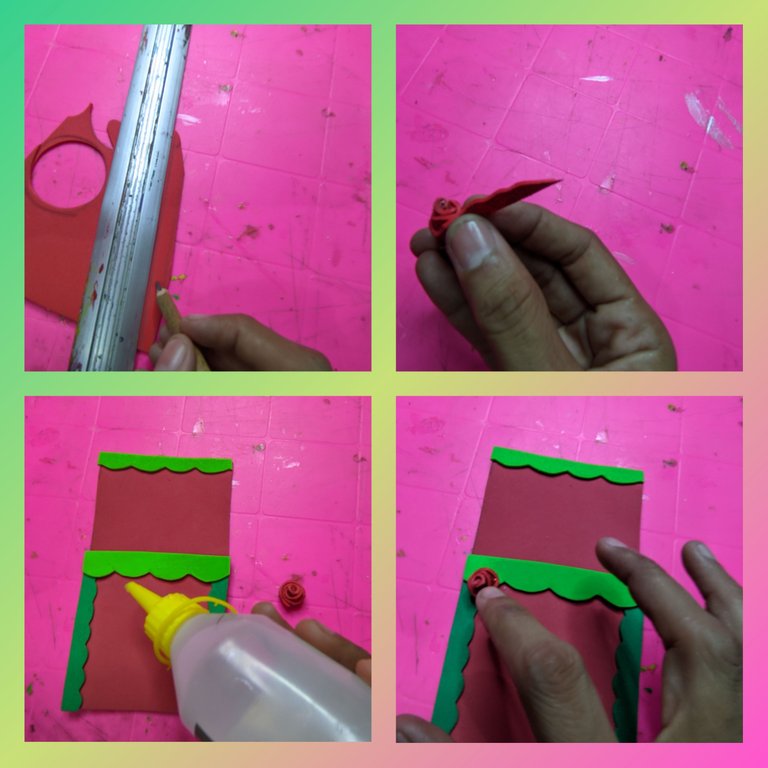
Ahora en el foami rojo escarchado recortamos una tira delgada, luego aplicamos silicón líquido y enrollamos hasta formar una linda rosa, a la que luego le colocamos silicón líquido y pagamos.
🎄 Paso 5:
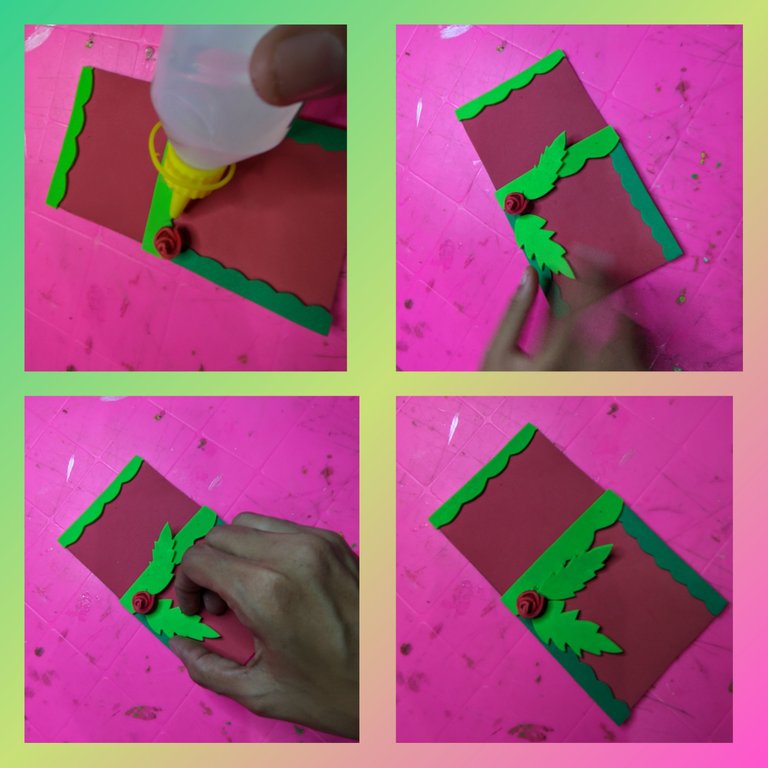
Del foami verde manzana dibujé y recorté unas hojitas de navidad y pagamos a los lados de la flor.
🎄 Paso 6:
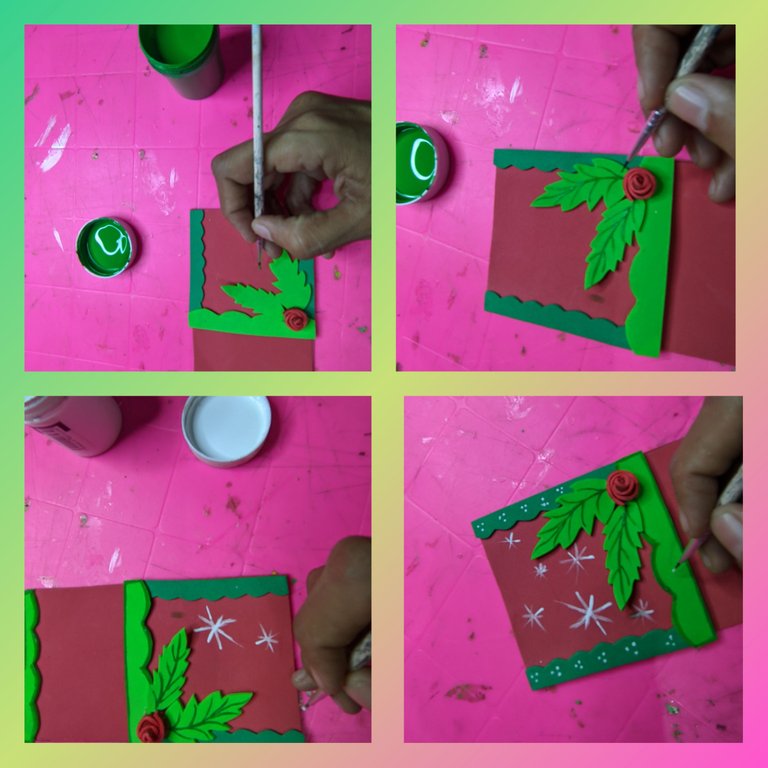
Ya casi terminamos, solo nos resta darle los toques finales y para eso tomo el pincel fino y la pintura verde oscuro y debutamos las hojas, después tomamos la pintura blanca y dibujamos destellos y listo hemos terminado.
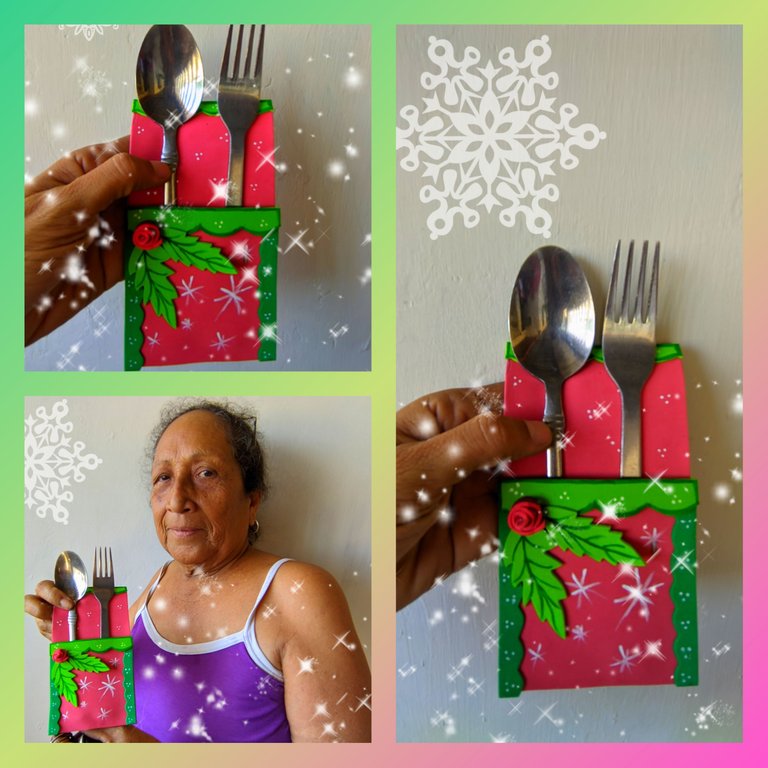
🎄Fotos finales 🎄
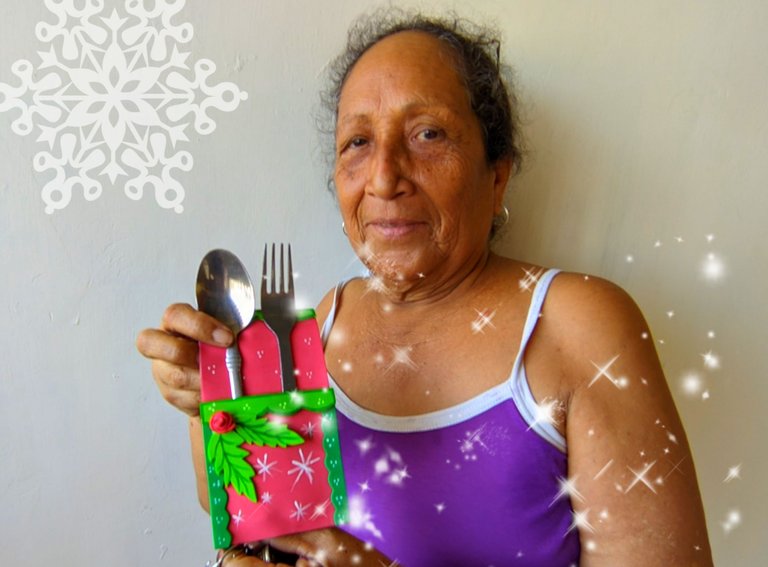
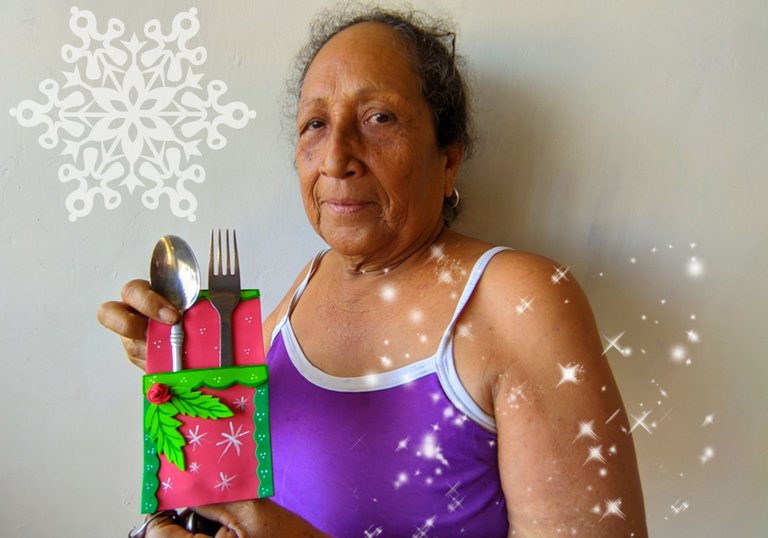
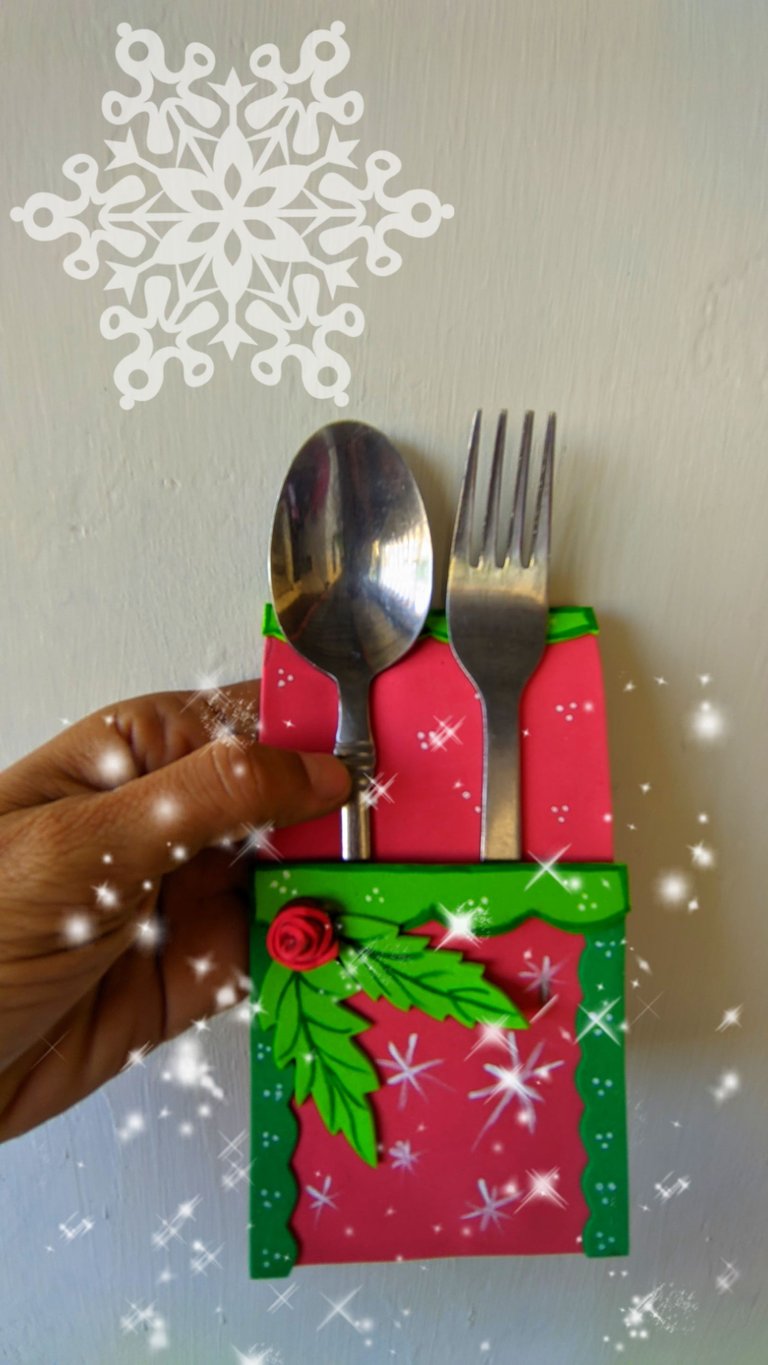
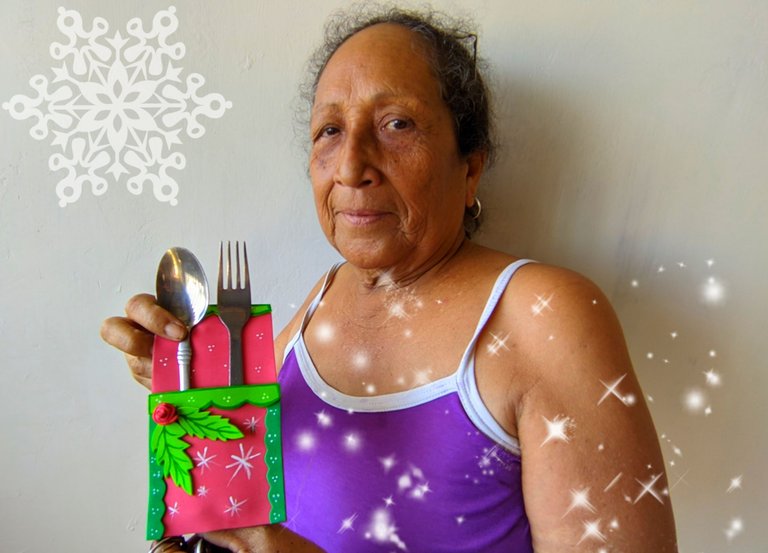

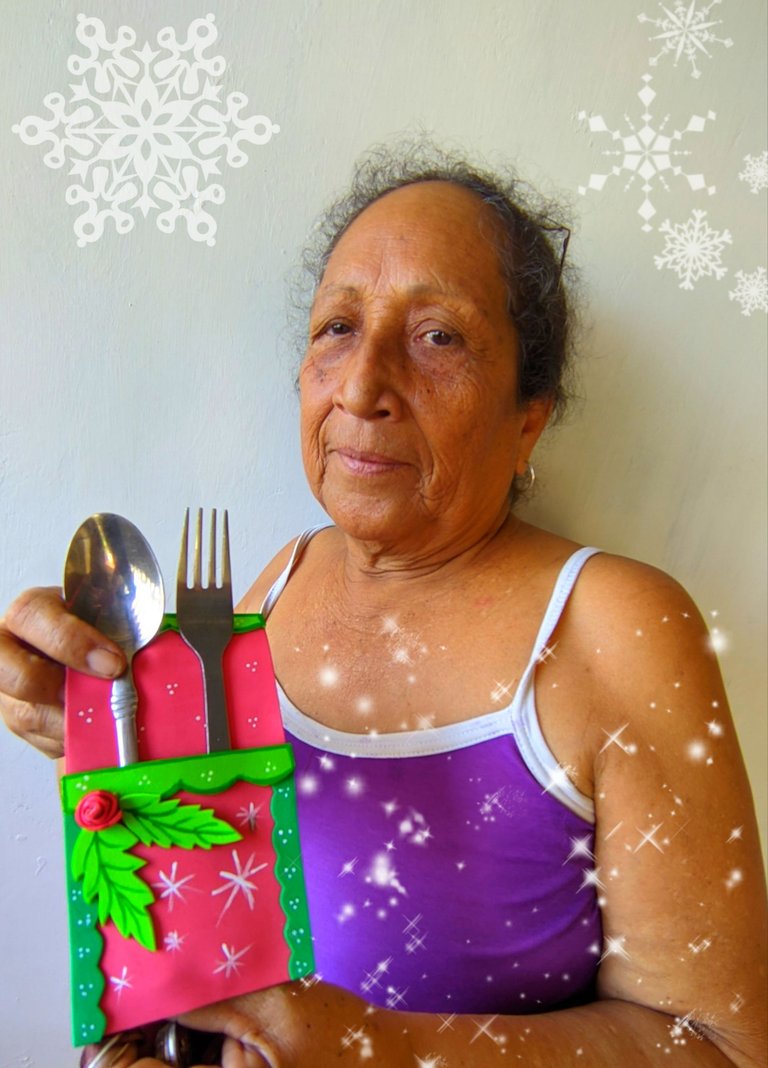
¿Qué les pareció este trabajo del día de hoy, una belleza verdad?, un toque mágico para la cena de navidad, la invitación es para que la pongan en práctica y le den a sus mesas un detalle que marque la diferencia.
🎄Que Dios los bendiga y que viva la navidad🎄
🎄Para este post utilice el programa polish y el traductor deepl versión gratis.


🎄 ENGLISH 🎄
Hello my
#hive grandchildren how are you, I am happy because we are already in the Christmas season, which is one of the best times of the year, and as I said in the previous post I already started the preparations for my home to dress up, so today I bring you a small tutorial to develop a nice cutlery holder.
For us one of the most important events at Christmas is the dinner so I want this year all the elements that we will use in it are made by me, that's why I want you to see how easy and economical it is to bring to our table details that adorn the Christmas dinner, but let's not talk more, here I leave the list of materials, the step by step and of course the final photos to see how they look.
🎄 Materials 🎄
🎄 Red foami
🎄 Red frosted foami.
🎄 Apple green foami.
🎄 Christmas green foami.
🎄 Liquid silicone.
🎄 White cold paint
🎄 Dark green paint.
🎄 Scissors.
🎄 Ruler.
🎄 Fine brush.
🎄 Pencil.
🎄Step by step🎄
🎄 Step 1:
Take the red foami and draw a 16 cm long x 9 cm wide rectangle, then draw a 9x9 cm square and cut out both, then apply liquid silicone on the square and stick the rectangle and let it dry.
🎄 Step 2:
Also mark and cut a 16 cm long x 2 cm wide strip out of the apple green foami, then cut that strip in two.
🎄 Step 3:
Now on the dark green foami we draw and cut out a 9 cm long x 2 cm wide strip, then I took the liquid silicone and glued all the strips we cut out.
🎄 Step 4:
Now on the frosted red foami we cut out a thin strip, then apply liquid silicone and roll it up to form a pretty rose, which we then apply liquid silicone to and pay for.
🎄 Step 5:
From the apple green foami I drew and cut out some little Christmas leaves and paid for the sides of the flower.
🎄 Step 6:
We are almost done, we just need to put the finishing touches and for that I take the fine brush and the dark green paint and we debut the leaves, then we take the white paint and draw sparkles and we are done.
🎄 Final photos 🎄
What do you think of today's work, a beauty isn't it, a magical touch for Christmas dinner, the invitation is for you to put it into practice and give your tables a detail that makes a difference.
🎄God bless you and long live Christmas🎄
🎄For this post I used polish and deepl translator free version.