Español
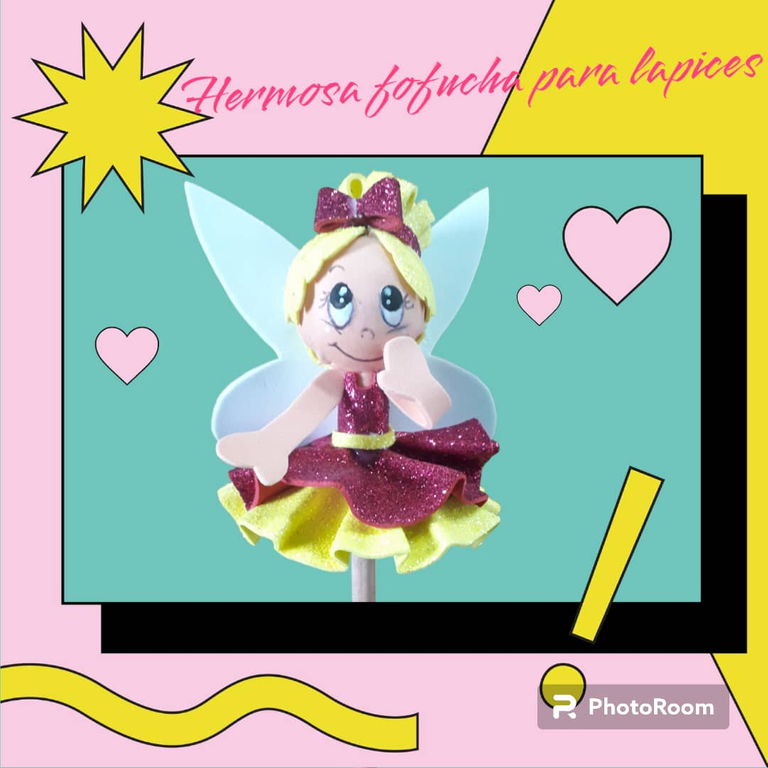
Hola mis amigos he hive Diy, hoy quiero compartirles esta linda creación elaborada de foami, esta bella muñeca la elaboré pensando en mi niña, ella es muy coqueta de verdad no se imaginan cuánto y le encanta mucho que le decore sus útiles escolares. Jajaja… es la que me anima e inspira para hacer estas cosas.
Esta creación puedes hacerla para obsequiar a niños y también a adultos porque no, ya que puedes elaborarla del motivo que desees, por ejemplo: una maestra, un chef, una abogada, de acuerdo a una profesión o también a un súper héroe un graduando. Existen muchas ideas para hacerlas y regalar. Por ejemplo ahora que estamos terminando el año escolar en mi país Venezuela los maestros pueden dar estos hermosos detalles a sus estudiantes salen muy económicos y quedan súper bien.
También puede servir de estímulo para el nuevo año escolar con el personaje favorito de sus hijos o hijas.
Para su elaboración necesitaremos los siguientes materiales:

Materiales:
- 1 foami color carne.
- 1 foami escarchado color vino.
- 1 foami escarchado amarillo.
- 1 foami color blanco
- Una pistola de silicón
- Una plancha de cabellos (o de ropa)
- Tijera
- Lápiz
- 1 bolita o esfera de anime n° 3
- Una regla
- 1 compas
- Pinturas blanca y negra
- 1 pincel delgado.
A continuación les muestro el paso a paso para su elaboración:
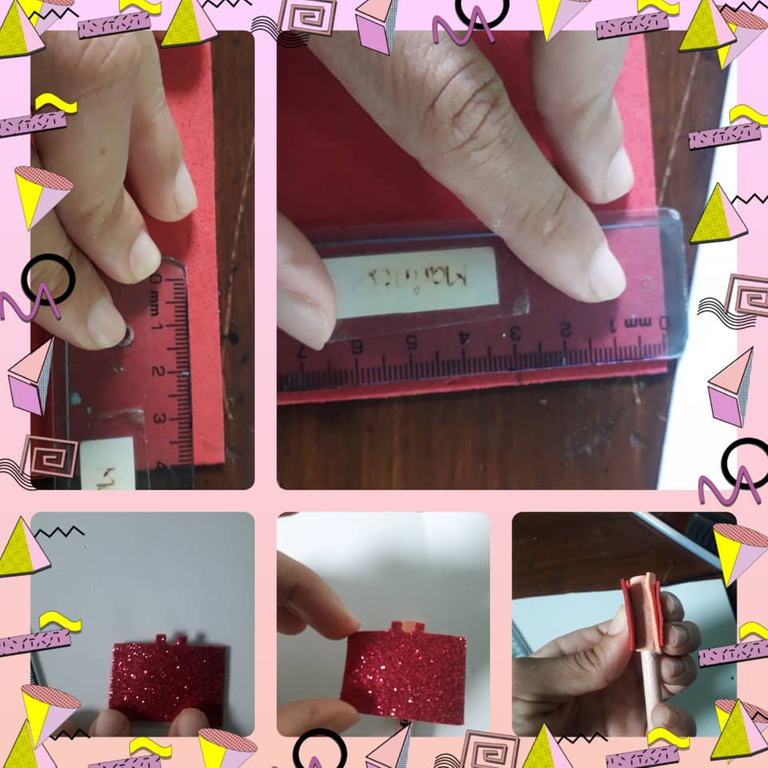
Paso 1:
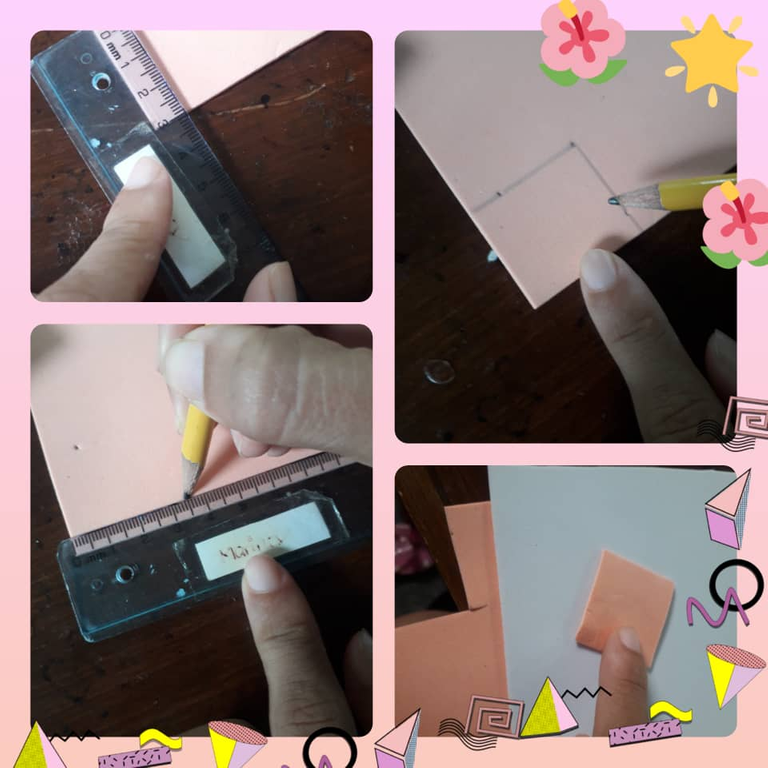
Tomamos una regla y el foami color carne, hacemos un cuadritos con las siguientes medidas 3cm x 3.5cm y recortamos.
Paso 2:
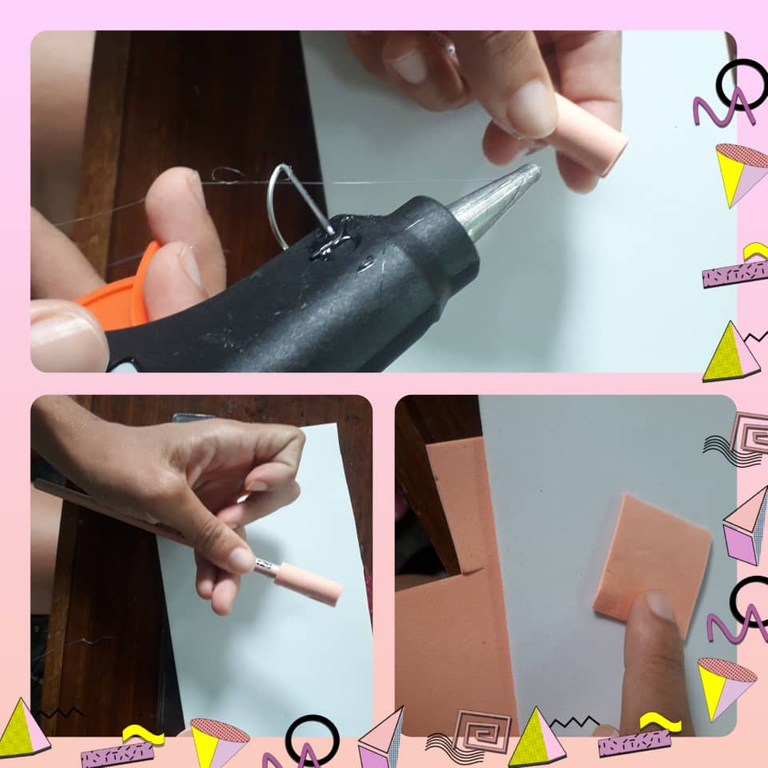
Tomamos el lápiz y lo rodeamos con el cuadrito de foami pegando de esta forma con silicón.
Paso 3:
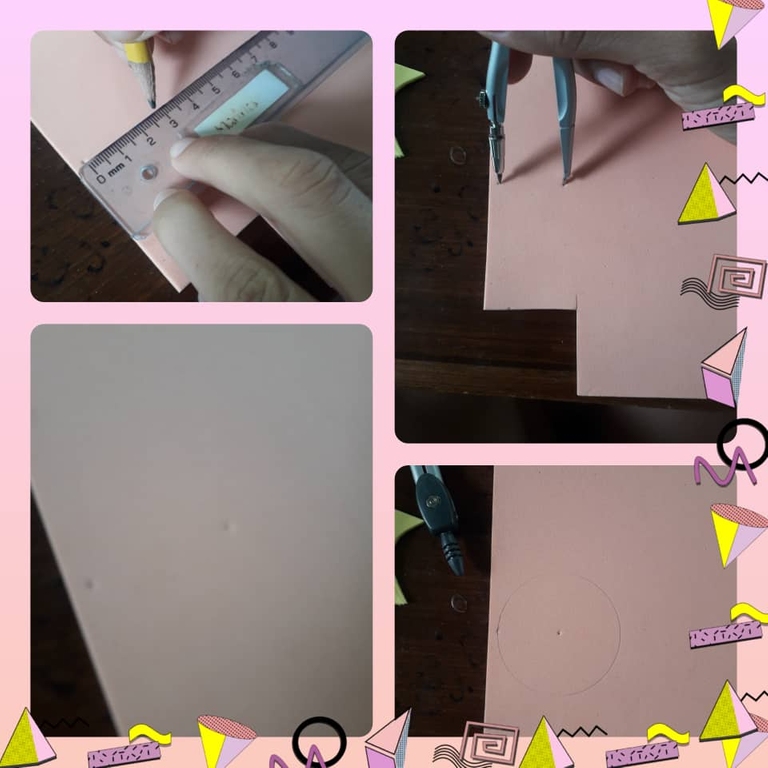
En el foami color carne medimos un diámetro de 2,5cm y con el compás trazamos un círculo y procedemos a recortar.
Paso 4:
Con la plancha calentamos el circulo de foami y procedemos a pegarlo en la bolita de anime de esta forma.
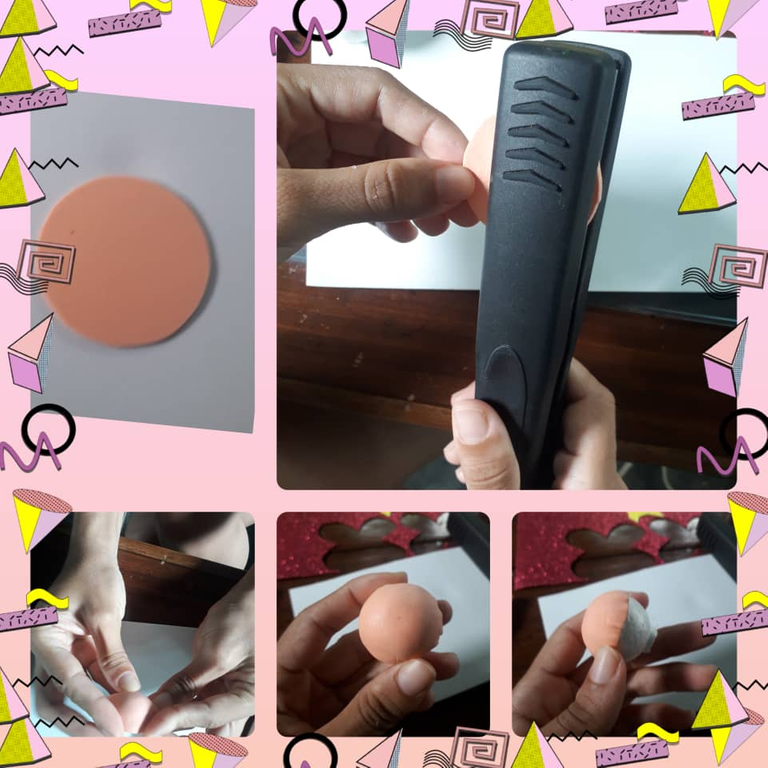
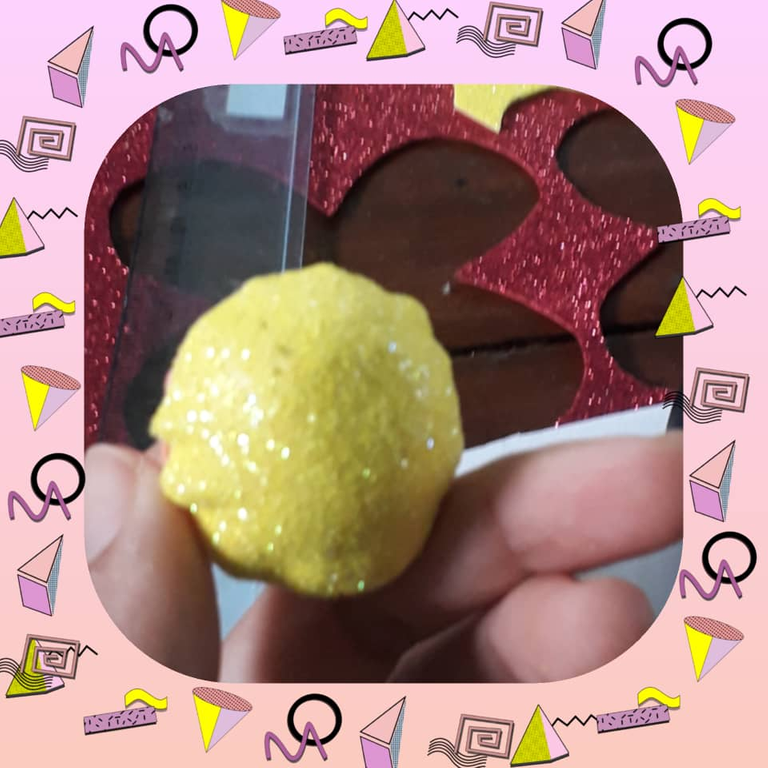
Paso 5:
Hacemos lo mismo con el foami amarillo y pegamos del lado opuesto de la bolita de anime.
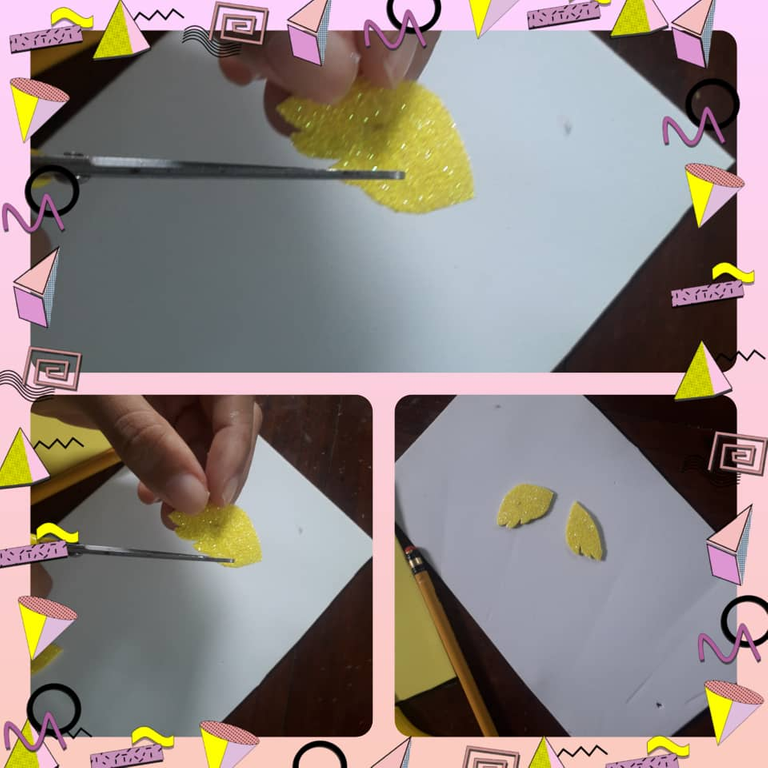
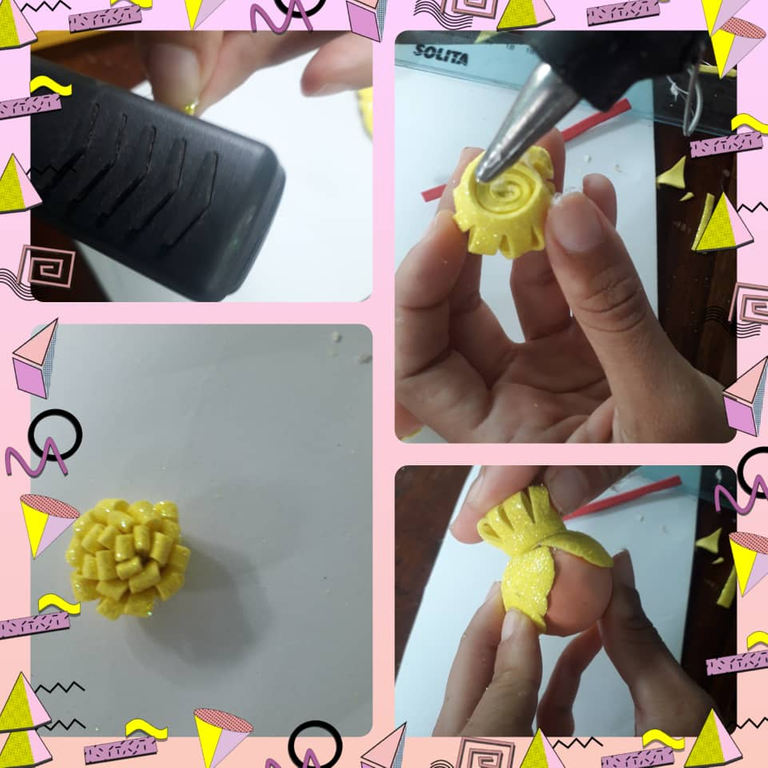
Paso 6:
Con el foami amarillo hacemos unas hojitas y recortamos de esta forma para hacer la pollina de nuestra muñeca.
Paso 7:
Hacemos un rectángulo con las medidas 2,5cm x 11cm; doblamos y cortamos con la tijeta de esta forma, pegamos el doblé con silicón y procedemos a enrollar para hacer el moño de la muñeca.
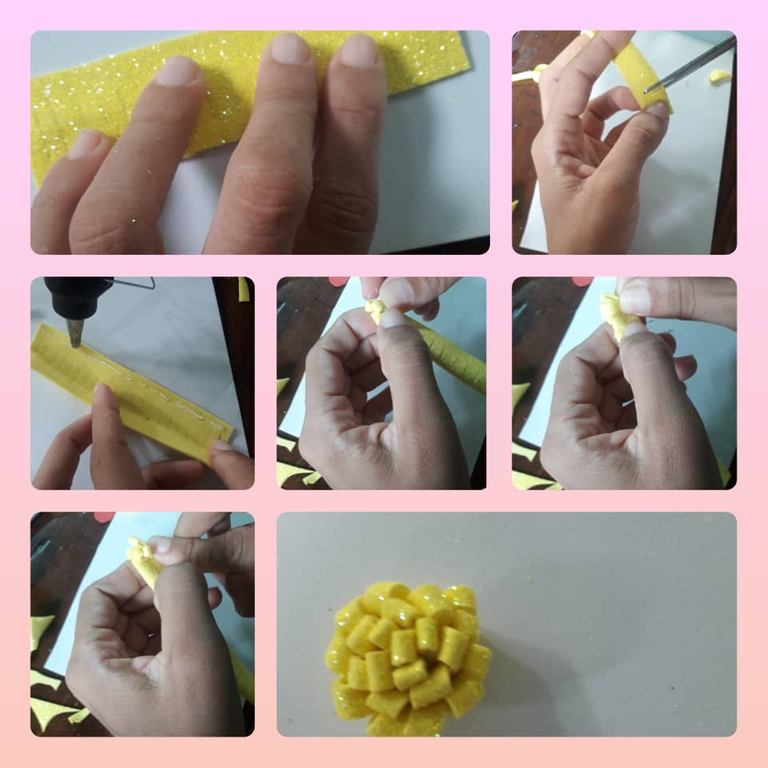
Paso 8:
Tomamos la pollina ya cortada la pasamos por la plancha para que cuando peguemos se moldee mejor a la bolita pegamos y luego pegamos el moño quedando de esta forma.
Paso 9:
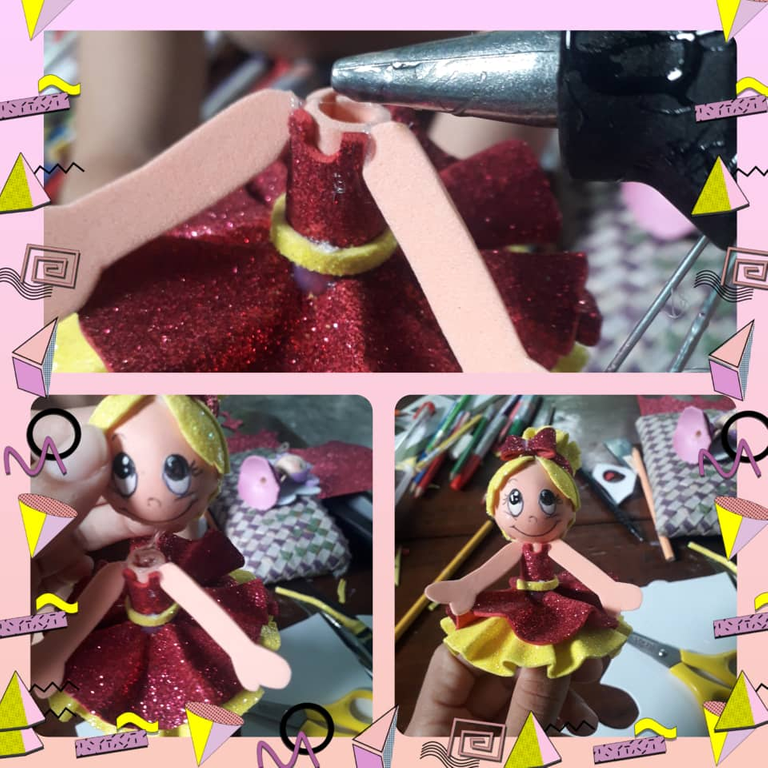
Con el foami vino escarchado medimos con la regla un cuadro de 3cm x 4cm y recortamos para luego hacer en el centro un corte de esta forma y pegamos en el cilindro de foami color carne que rodea el lápiz.
Paso 10:
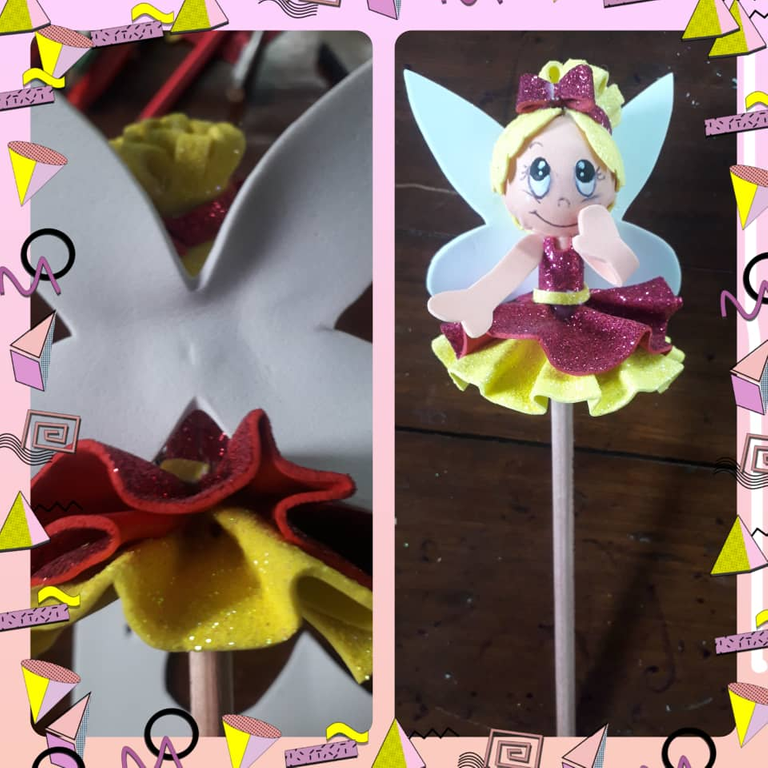
Tomamos el foami vino escarchado y hacemos un diámetro de 0,7 cm con el compas hacemos un pequeño circulo; desde ese mismo punto hacemos otro circulo con un diámetro de 3,5cm y recortamos quedando de esta manera. Luego con la plancha calentamos y vamos doblando de esta forma para moldear la falda.
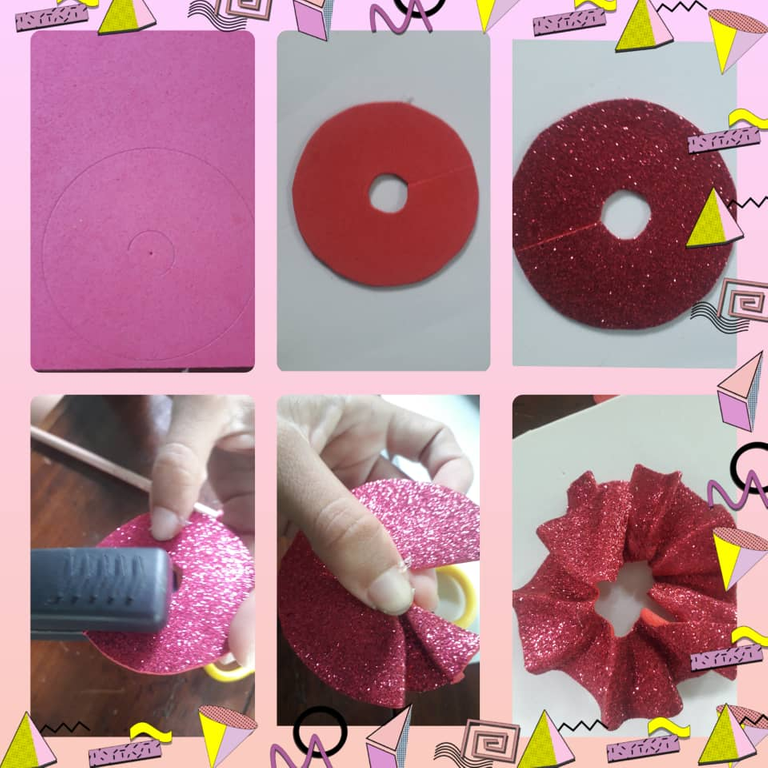
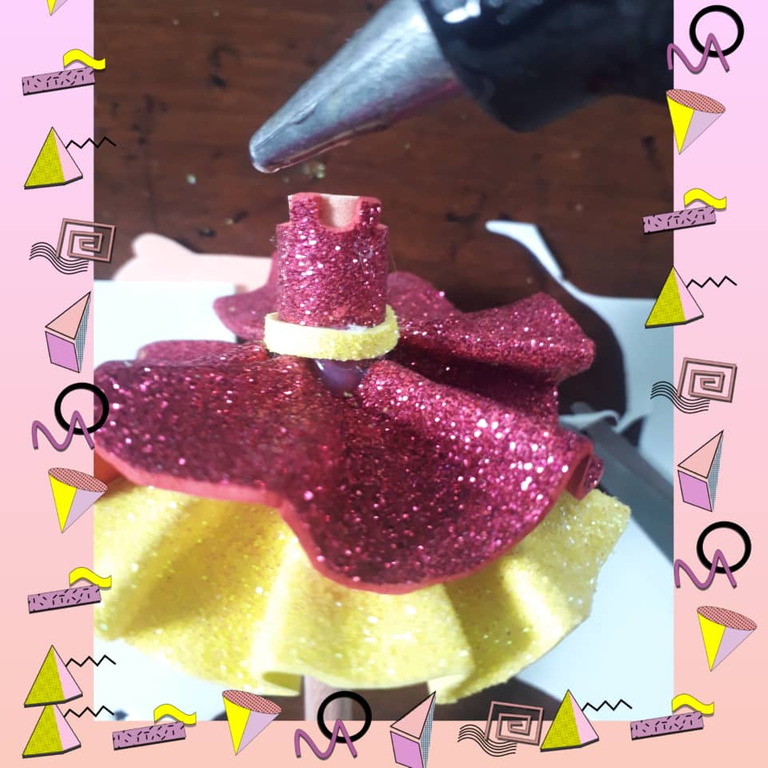
Paso 11:
Procedemos a pegar la falda; de la misma forma que hicimos con la falda vino hacemos la amarilla y pegamos en la parte inferior de la falda vino.
Paso 12:
Con una tira de foami amarillo muy delgada hacemos el cinturón de la muñeca y pegamos.
Paso 13:
Hacemos un lacito muy pequeño para pegar en el moño de la muñeca.
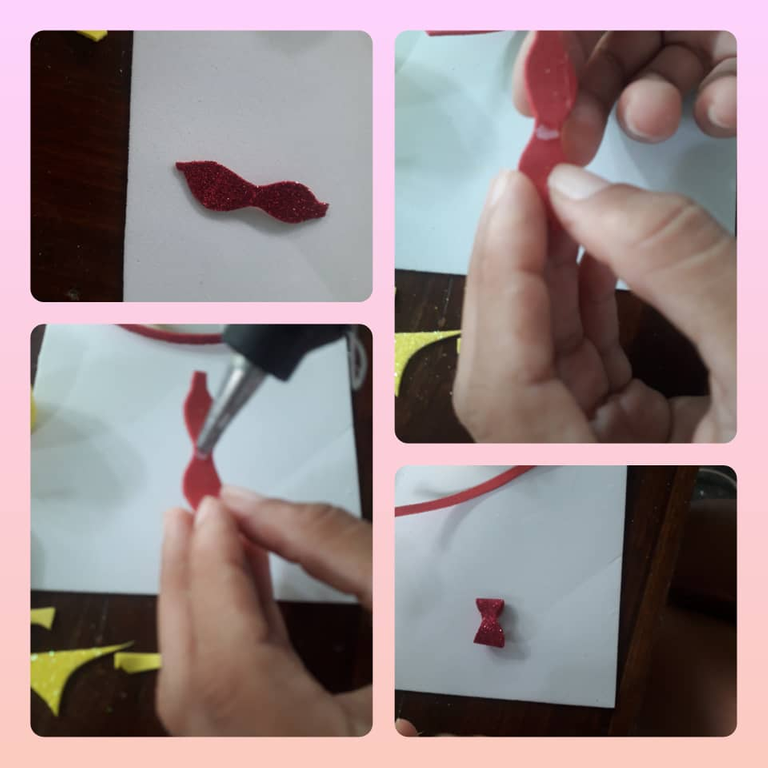
Paso 14:
Procedemos a pegar el lazo al moño de la muñeca de esta forma.
Paso 15:
Pintamos la carita de la muñeca esto la pueden pintar como usted desee.
Paso 16:
Hacemos los bracitos y procedemos a pegarlos.

Paso 17:
Con el foami blanco pintamos la mitad de las alas de esta forma y doblamos a la mitad para cortar y que quede igual en ambos lados.
Paso 18:
Pegamos la cabeza al cuerpo.
Paso 19:
Finalmente pegamos las alas y así nos queda esta hermosa muñeca.
Espero les haya gustado mi creación anímense a hacerla los materiales son muy económicos y a sus niños les encantará.

Bueno mis amigos espero les sea de mucha utilidad mi post Dios me los bendiga hasta otra oportunidad.

Las fotos son de mi propiedad tomada con mi teléfono SAMSUNG J6, modificando las fotos con el programa Foto Collage Grid Art y photo room, traducido con el programa Deelp traductor versión gratis.
English
Hello my friends I have hive Diy, today I want to share with you this cute creation made of foami, I made this beautiful doll thinking of my little girl, she is very flirtatious and you can't imagine how much she loves me to decorate her school supplies. Hahaha... she is the one who encourages me and inspires me to do these things.
You can make this creation as a gift for children and also for adults, because you can make it with the motif you want, for example: a teacher, a chef, a lawyer, according to a profession or even a super hero or a graduate. There are many ideas to make them and give them as gifts. For example, now that we are finishing the school year in my country Venezuela, teachers can give these beautiful gifts to their students, they are very economical and look great.
They can also serve as a stimulus for the new school year with the favorite character of your sons or daughters.
For its elaboration we will need the following materials:
Materials:
- 1 flesh-colored foami.
- 1 wine colored frosted foami.
- 1 yellow frosted foami.
- 1 white foami
- A silicone gun
- A hair iron (or clothes iron).
- Scissors
- Pencil
- 1 anime ball or sphere No. 3
- A ruler
- 1 compass
- Black and white paints
- 1 thin brush.
Here is the step-by-step instructions for making it:
Step 1:
We take a ruler and the flesh colored foami, we make a squares with the following measures 3cm x 3.5cm and cut out.
Step 2:
We take the pencil and surround it with the square of foami sticking in this way with silicone.
Step 3:
On the flesh-colored foami we measure a diameter of 2.5cm and with the compass we trace a circle and proceed to cut out.
Step 4:
With the iron we heat the foami circle and proceed to glue it on the anime ball in this way.
Step 5:
We do the same with the yellow foami and glue on the opposite side of the anime ball.
Step 6:
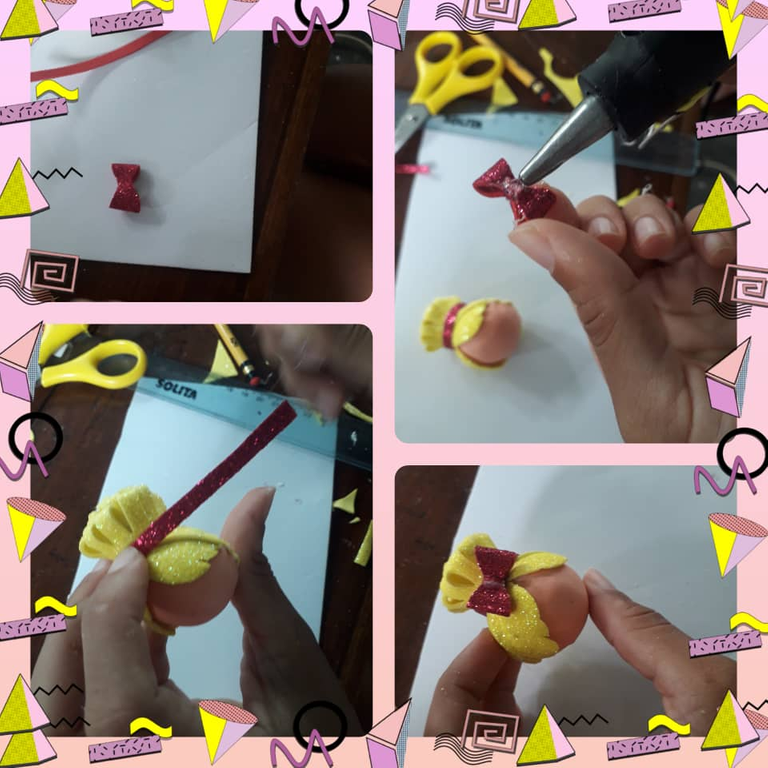
With the yellow foami we make some little leaves and cut out in this shape to make our doll's pollina.
Step 7:
We make a rectangle with the measures 2,5cm x 11cm; we fold and cut with the card in this way, we glue the fold with silicone and proceed to roll to make the bow of the doll.
Step 8:
We take the already cut pollina we pass it through the iron so that when we glue it molds better to the ball we glue and then we glue the bow remaining in this way.
Step 9:
With the frosted wine foami we measure with the ruler a square of 3cm x 4cm and cut out and then make a cut in the center of this shape and glue on the cylinder of flesh-colored foami that surrounds the pencil.
Step 10:
We take the frosted wine foami and make a diameter of 0.7 cm with the compass we make a small circle; from that same point we make another circle with a diameter of 3.5cm and cut out remaining in this way. Then with the iron we heat and fold in this way to shape the skirt.
Step 11:
We proceed to glue the skirt; in the same way we did with the wine skirt we make the yellow one and glue on the bottom of the wine skirt.
Step 12:
With a strip of very thin yellow foami we make the doll's belt and glue.
Step 13:
We make a very small bow to glue on the doll's bow.
Step 14:
We proceed to glue the bow to the doll's bow like this.
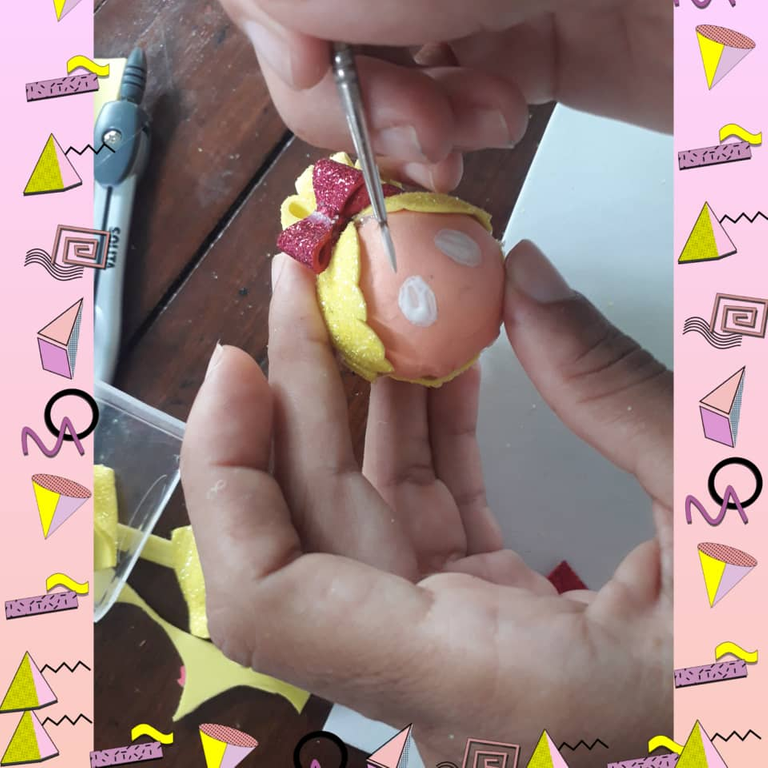
Step 15:
We paint the doll's little face this you can paint it as you wish.
Step 16:
We make the little arms and proceed to glue them.
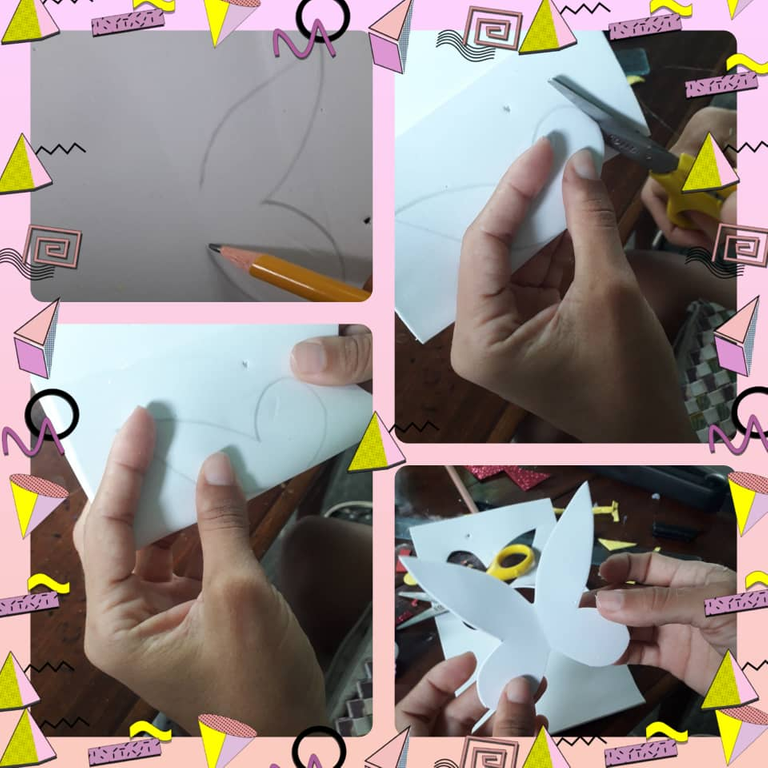
Step 17:
With the white foami we paint half of the wings in this shape and fold in half to cut so that it is the same on both sides.
Step 18:
We glue the head to the body.
Step 19:
Finally we glue the wings and we are left with this beautiful doll.
I hope you liked my creation encourage you to make it the materials are very inexpensive and your children will love it.
Well my friends I hope you find my post very useful God bless me until another opportunity.
The photos are my own taken with my phone SAMSUNG J6, modifying the photos with the program Foto Collage Grid Art and photo room, translated with the program Deelp translator free version.