ESPAÑOL
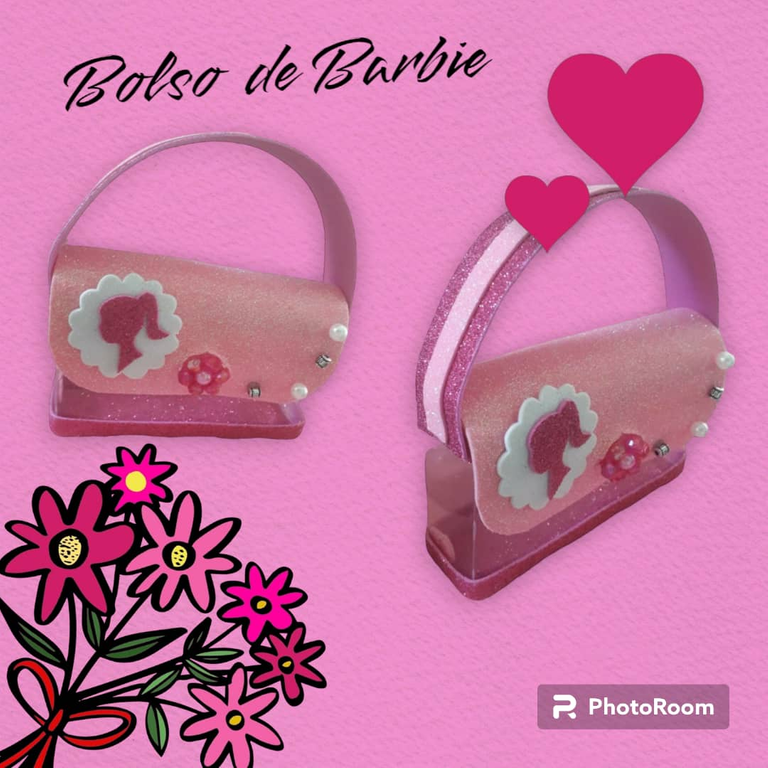
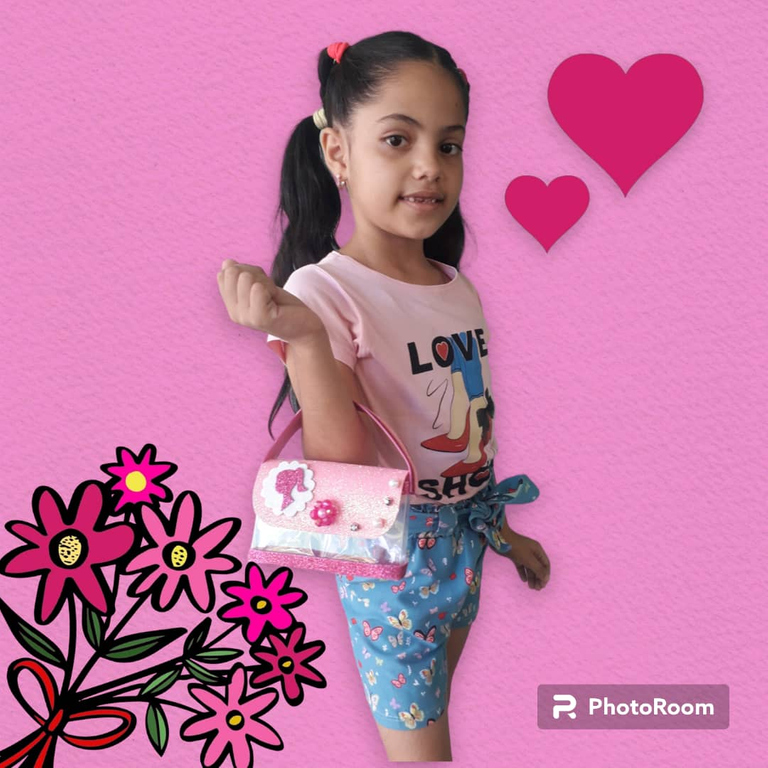
Hola mis amigos de #hivediy hoy les traigo esta hermosa creación elaborada con una botella reciclada y foami, quiero comentarles que como hoy en día en todo el mundo es tendencia el tema de BARBIE quise hacer este bolsito con esta temática, mi niña le gusta mucho esta temática y lo elabore para ella ya que es mi pequeña musa, quedo maravillada con su bolsito aunque no lo crean me da ideas cuando estoy creando siempre está allí conmigo viendo mi trabajo.
Este bolsito puedes hacerlo como cotillón para cumpleaños, es muy práctico y queda como un hermoso detalle para tus invitados, es muy económico y sencillo de elaborar.
Para esta creación necesitaremos los siguientes materiales:
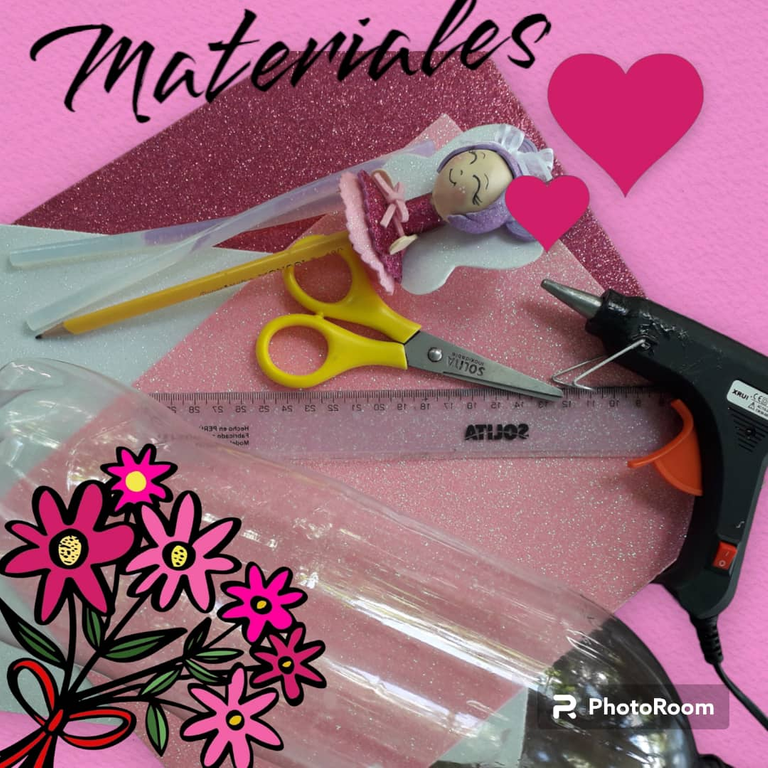
Materiales:
- Una botella de refresco de 2lts
- Foami escarchado blanco, rosa y fucsia
- Una barra de silicón
- Pistola de silicón
- Tijera
- Regla
- Lápiz
Bueno mis amigos una vez tengamos todos estos materiales iniciamos con el paso a paso de esta hermosa creación:
Paso 1:
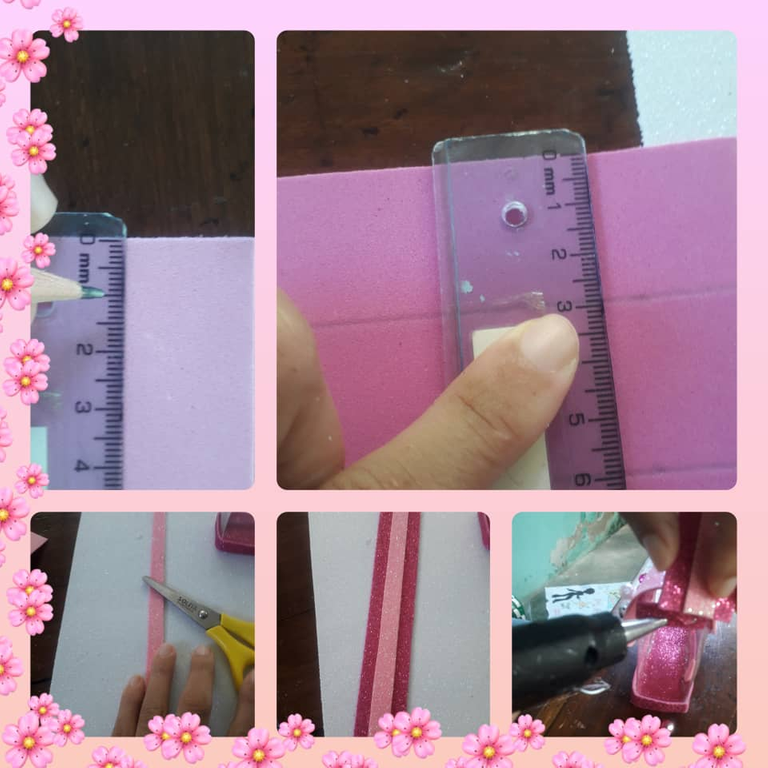
Tomamos la botella cortamos con una tijera la parte por donde va pegada la etiqueta por allí están unas marquitas que te orientarán para recortar el área deseada.
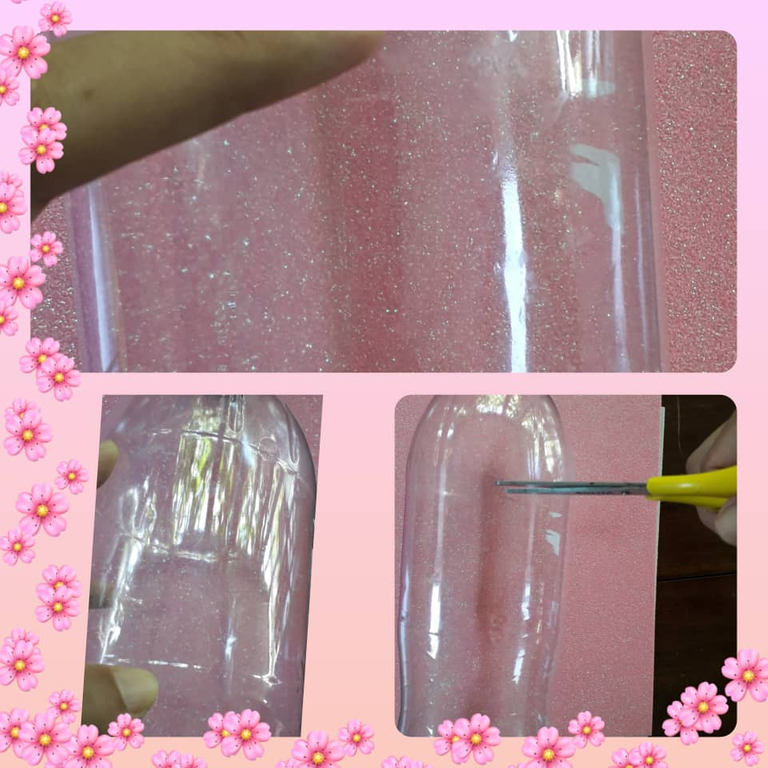
Paso2:
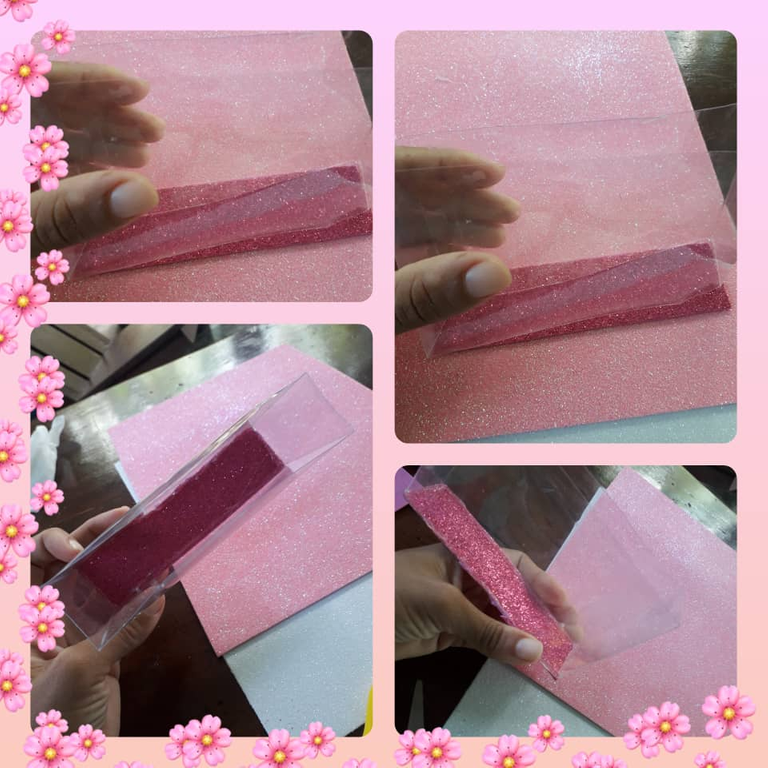
Lo que cortamos de la botella lo tomamos, doblamos y presionamos cada extremo.

Paso 3:
En uno de los extremos que doblamos medimos 3cm partiendo desde allí marcamos y doblamos nuevamente y hacemos lo mismo con el otro extremo quedando de esta forma.
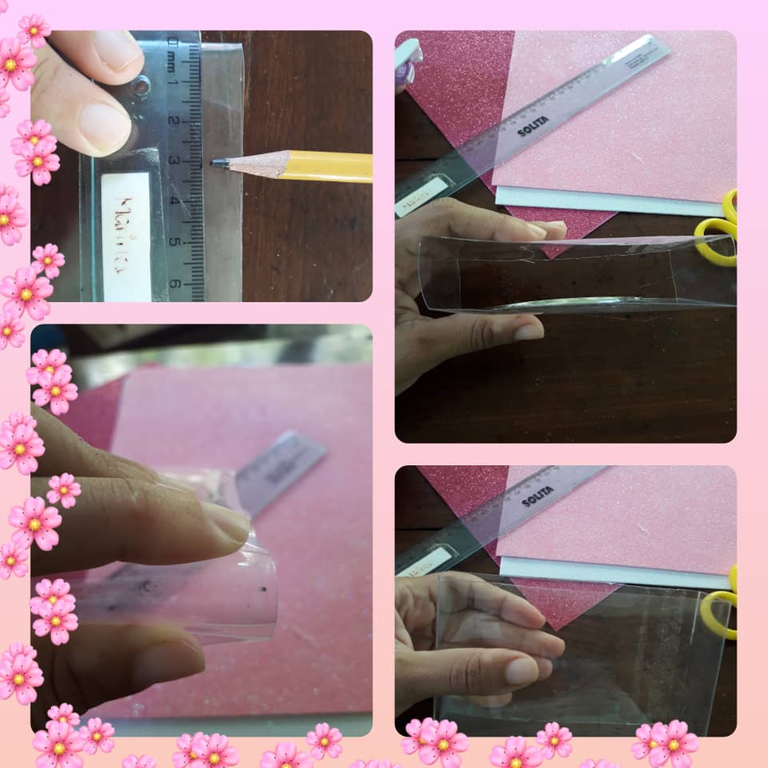
Paso 4:
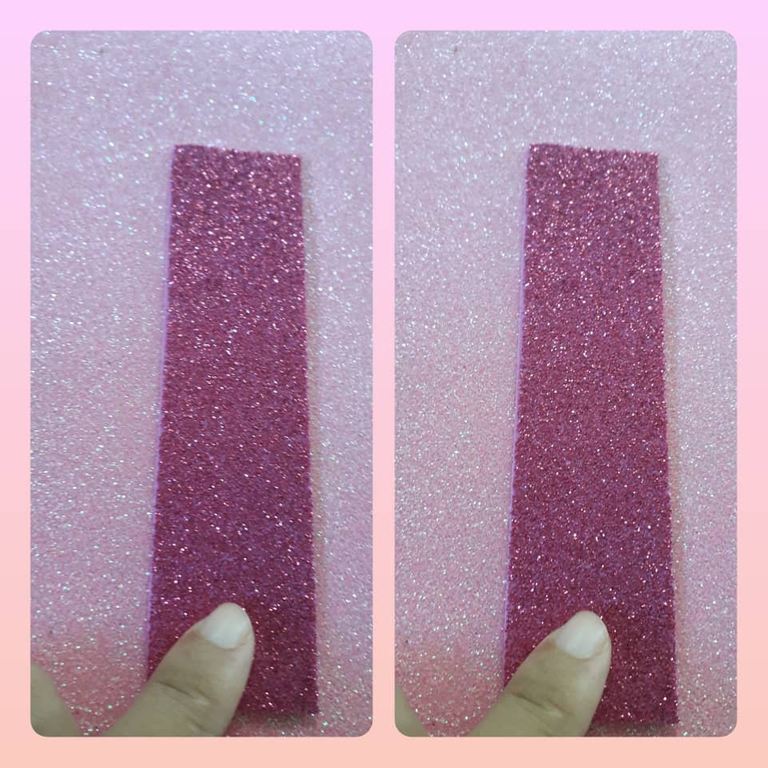
Tomamos el foami escarchado fucsia y medimos con la regla un rectángulo de 13,5cm por 3,5cm y recortamos.
Paso 5:
Con el rectángulo que cortamos pegamos lo que habíamos hecho anteriormente con la botella, quedando de esta forma.
Paso 6:
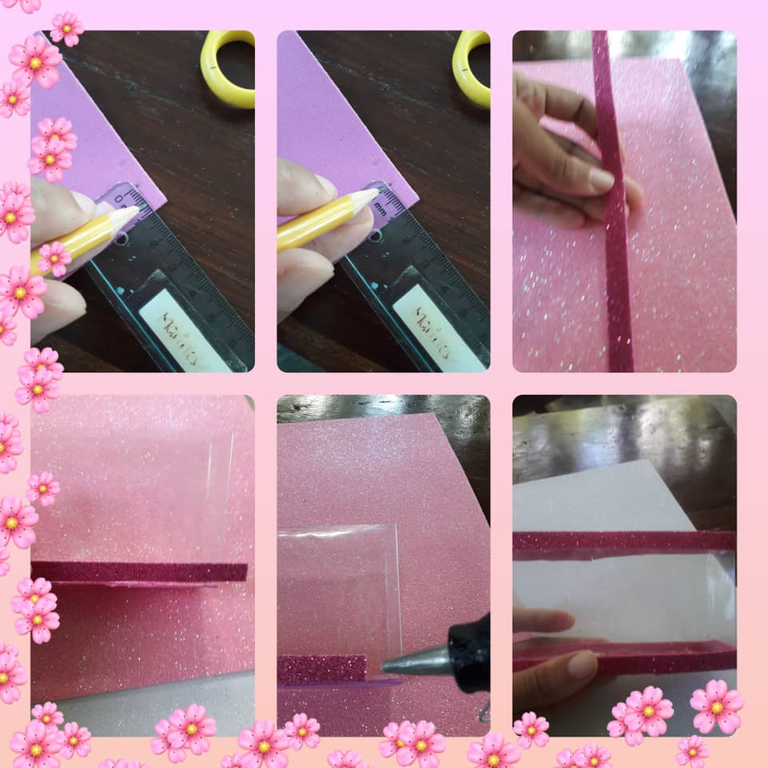
Nuevamente tomamos el foami fucsia y cortamos tiras largas de 1cm de ancho y la pegamos por la parte superior e inferior del bolsito.
Paso 7:
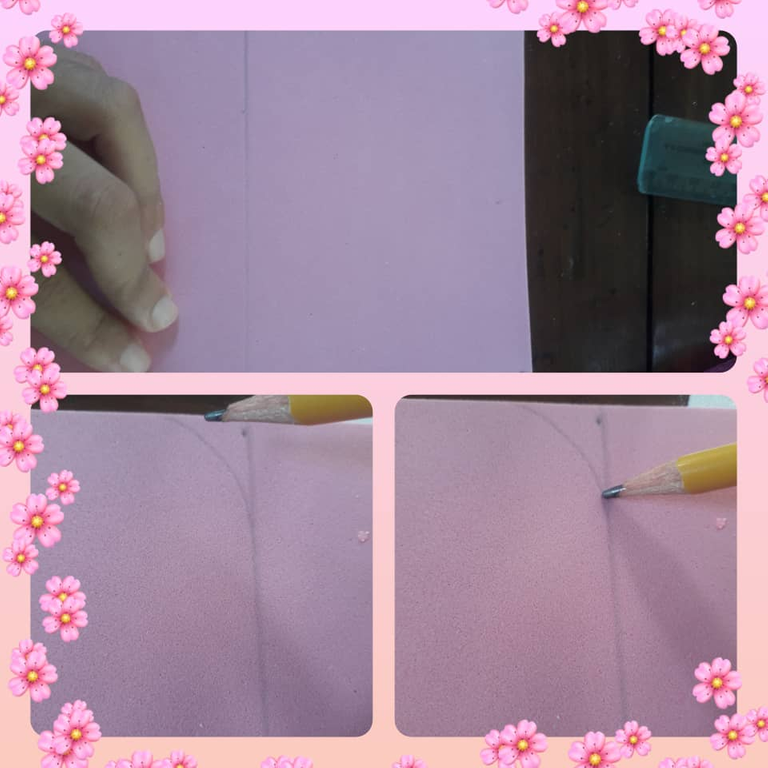
Una vez teniendo ese resultado tomamos el foami rosa y medimos un rectángulo de 13cm por 10cm y en las esquinas hacemos unas curvas con el lápiz de esta forma, recortamos y de esta forma nos queda la tapa del bolsito.
Paso 8:
Procedemos a pegar la tapa del bolsito con silicón caliente en la parte trasera superior del bolso y para colgar el bolso hacemos unas tiras de foami de 3cm por 28cm y procedemos a pegarlas en cada extremo del bolso.
Paso 9:
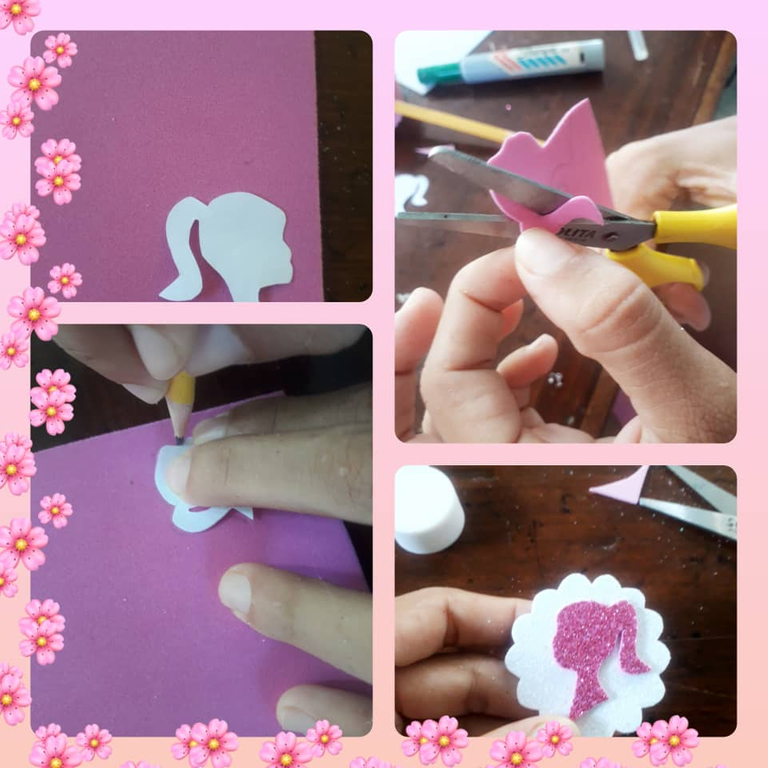
Con un molde de la silueta Barbie marcamos en el foami fucsia y cortamos; luego en el blanco hacemos una especia de nube y pegamos la Barbie.
Paso 10:
Decoramos el bolso de acuerdo a la temática de su preferencia y con los adornos que desee en este caso decoramos de Barbie, todo queda a su imaginación. Para finalizar hice un broche pegando en un círculo de foami unas piedritas en forma de flor y en la tapa hice un pequeño orifico para cerrarlo de esta manera.
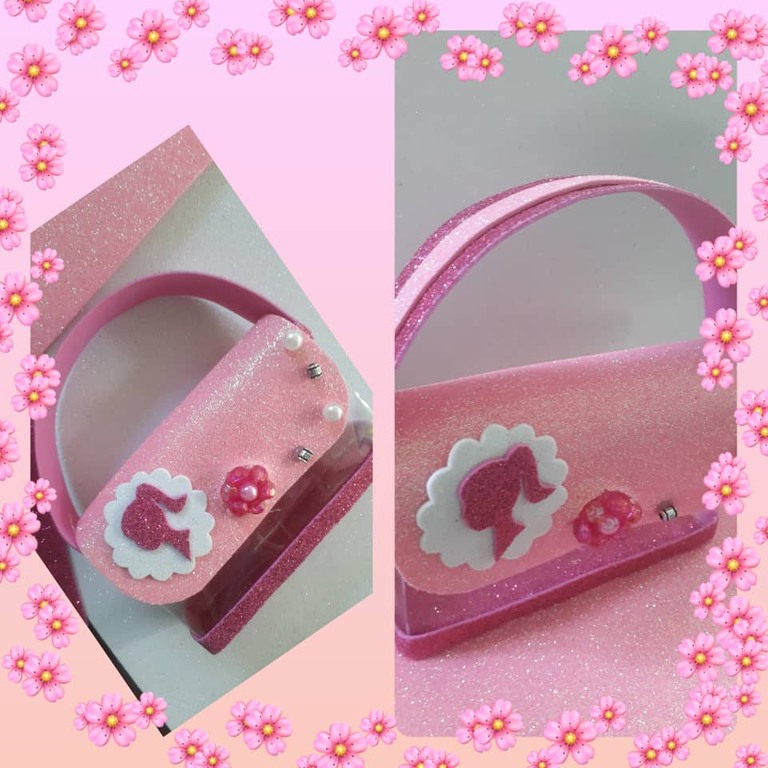
Y así amigos nos quedó este pequeño bolsito para las consentidas de la casa pueden decorarlo como ustedes lo deseen, y de igual forma pueden hacerlo del color favorito de sus princesas es muy sencillo de crear y hagan que vuele su imaginación en cuanto a la decoración ustedes conocen a sus niñas, ellas pueden también participar en la decoración porque no involúcrenlas, verán que así será más valioso para ellas.
Hasta otra oportunidad amigos espero les sea de mucha utilidad mi post; Dios los bendiga, se les quiere.
Las fotos son de mi propiedad tomada con mi teléfono SAMSUNG J6, modificando las fotos con el programa Foto Collage Grid Art y photo room, traducido con el programa Deelp traductor versión gratis.
ENGLISH
Hello my friends of #hivediy today I bring you this beautiful creation made with a recycled bottle and foami, I want to tell you that today is a trend around the world BARBIE theme I wanted to make this bag with this theme, my girl loves this theme and I made it for her because she is my little muse, she was amazed with her bag believe it or not she gives me ideas when I'm creating she is always there with me watching my work.
This bag can be used as a cotillion for birthdays, it is very practical and it is a beautiful detail for your guests, it is very economical and easy to make.
For this creation we will need the following materials:
Materials:
- A 2lts soda bottle.
- White, pink and fuchsia frosted Foami
- One silicone stick
- Silicone gun
- Scissors
- Ruler
- Pencil
Well my friends once we have all these materials we start with the step by step of this beautiful creation:
Step 1:
We take the bottle we cut with a scissors the part where the label is glued by there are some little marks that will guide you to cut out the desired area.
Step 2:
What we cut out of the bottle we take, fold and press each end.
Step 3:
In one of the ends that we folded we measure 3cm starting from there we mark and fold again and do the same with the other end remaining in this way.
Step 4:
We take the fuchsia frosted foami and measure with the ruler a rectangle of 13,5cm by 3,5cm and cut out.
Step 5:
With the rectangle that we cut we glue what we had previously done with the bottle, looking like this.
Step 6:
Again we take the fuchsia foami and cut long strips of 1cm wide and glue it on the top and bottom of the little bag.
Step 7:
Once we have this result we take the pink foami and measure a rectangle of 13cm by 10cm and in the corners we make some curves with the pencil in this way, we cut and in this way we have the lid of the bag.
Step 8:
We proceed to glue the lid of the bag with hot silicone on the top back of the bag and to hang the bag we make some foami strips of 3cm by 28cm and proceed to glue them at each end of the bag.
Step 9:
With a mold of the Barbie silhouette we mark on the fuchsia foami and cut; then on the white one we make a sort of cloud and glue the Barbie.
Step 10:
We decorate the bag according to the theme of your choice and with the decorations you want in this case we decorate Barbie, everything is up to your imagination. To finish I made a brooch by gluing in a circle of foami some pebbles in the shape of a flower and in the lid I made a small hole to close it in this way.
And so friends we had this little bag for the spoiled of the house can decorate it as you wish, and likewise can make it the favorite color of your princesses is very simple to create and make your imagination fly in terms of decoration you know your girls, they can also participate in the decoration because not involve them, you will see that it will be more valuable to them.
Until another opportunity friends I hope you find my post very useful; God bless you, you are loved.
The photos are my own taken with my phone SAMSUNG J6, modifying the photos with the program Foto Collage Grid Art and photo room, translated with the program Deelp translator free version.