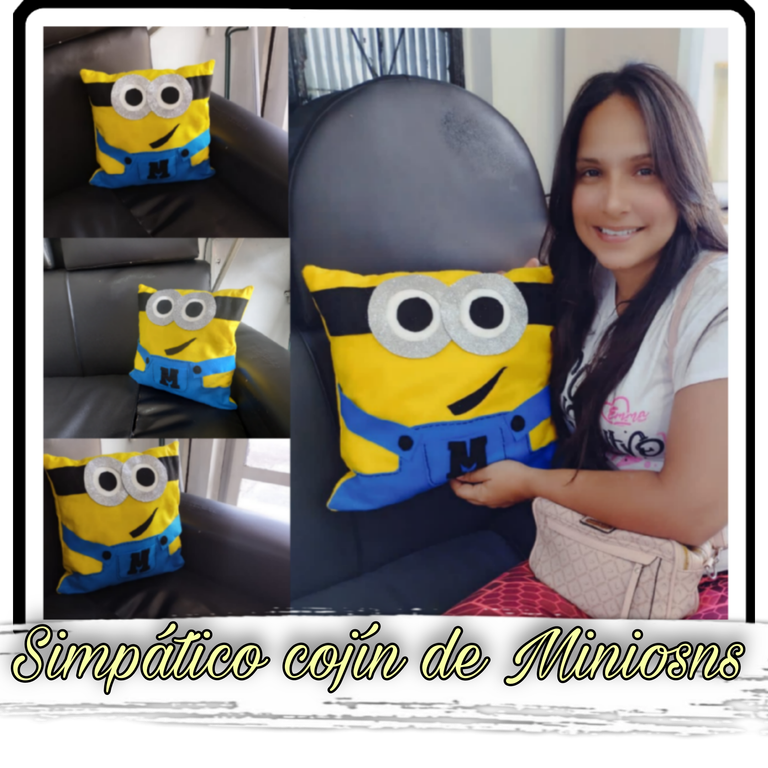
Hola, hola apreciada colmena de #Needleworkmonday, espero estén pasando un grandioso día, les saluda su amiga @kathelopez77, trayéndoles un nuevo tutorial de costura. En ésta oportunidad quiero compartir con ustedes un proyecto que quería realizar algún tiempo atrás y no lo había hecho porque siempre le daba prioridad a las prendas de vestir y a los accesorios en tela, se trata de un Simpático Cojín de Miniosns, personajes que forman parte de una de mis películas favoritas que es "Mi villano Favorito" y luego sacaron la película de ellos, "Los Minions", aún mejor; Así que, en vista de que no tengo actualmente mi máquina de coser, porque como les comenté, me mudé a otro país, dije: voy a realizar este cojín, ya que, lo que necesita es una costura que queda por dentro y puntos de bordados sencillos, que me permiten hacer algo bonito, con un buen acabado y de forma manual. Espero les guste. ¡Manos a la obra!.
Hello, hello dear #Needleworkmonday hive, I hope you are having a great day, greetings from your friend @kathelopez77, bringing you a new sewing tutorial. This time I want to share with you a project that I wanted to do some time ago and I had not done it because I always gave priority to clothing and fabric accessories, it is a Sympathetic Miniosns Cushion, characters that are part of one of my favorite movies which is "My Favorite Villain " and then they released the movie of them, "The Minions ", even better; So, in view that I do not currently have my sewing machine, because as I told you, I moved to another country, I said: I'm going to make this cushion, since, what it needs is a seam that is left inside and simple embroidery stitches, which allow me to make something nice, with a good finish and in a manual way. I hope you like it, let's get to work!.

- Fieltro, azul, negro y amarillo.
- Pintura blanca para tela.
- Pincel.
- Foamy plateado.
- Relleno.
- Moldes.
- Hilo negro y amarillo.
- Aguja.
- Cinta métrica.
- Tijeras
- Felt, blue, black and yellow.
- White paint for fabric.
- Paintbrush.
- Silver foamy.
- Filling.
- Molds.
- Black and yellow thread.
- Needle.
- Measuring tape.
- Scissors.


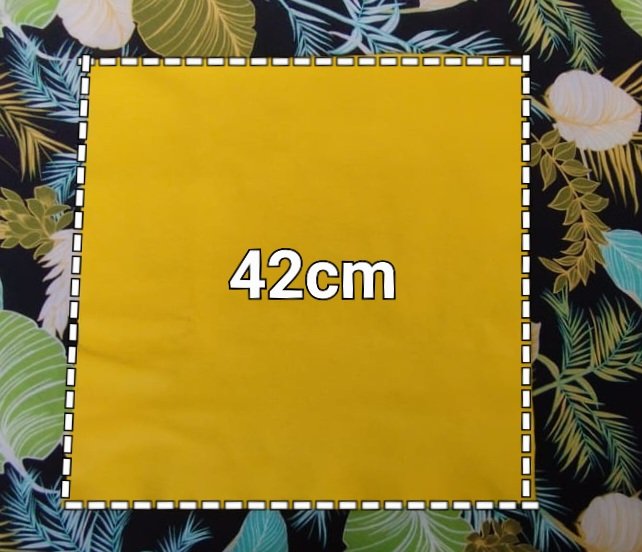
Para comenzar, corté 2 cuadrados de fieltro amarillo de 42 cm por sus cuato lados.
To begin, I cut 2 yellow felt squares of 42 cm on all four sides.
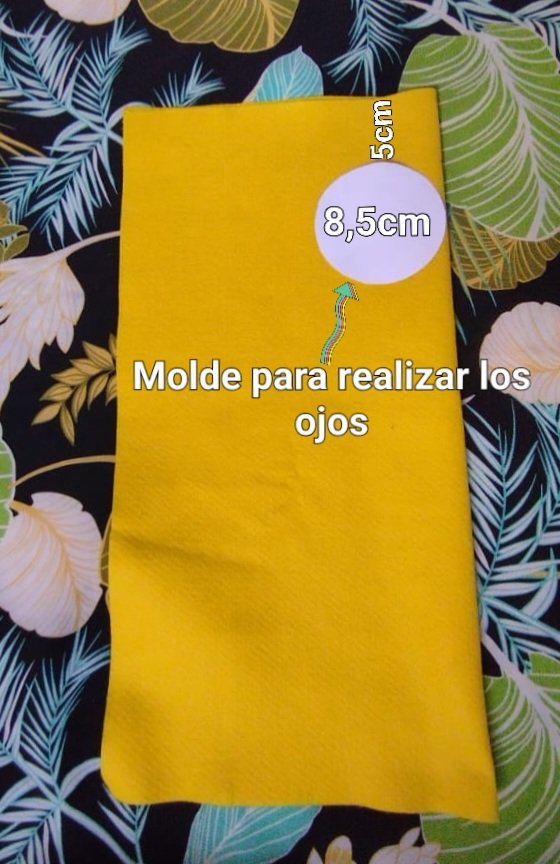
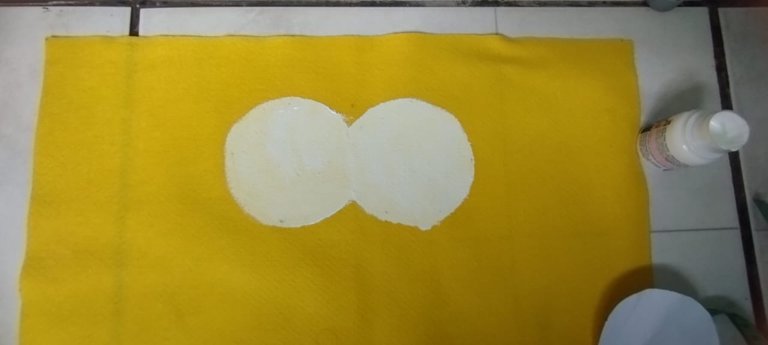
Tomé uno de los cuadrados y lo doblé por la mitad para marcar el centro y coloqué sobre éste, un círculo de 8,5 cm de diámetro a una distancia de la orilla superior de 5 cm, para hacer los ojos 👀.
I took one of the squares and folded it in half to mark the center and placed on it, a circle of 8.5 cm in diameter at a distance from the top edge of 5 cm, to make the eyes 👀.
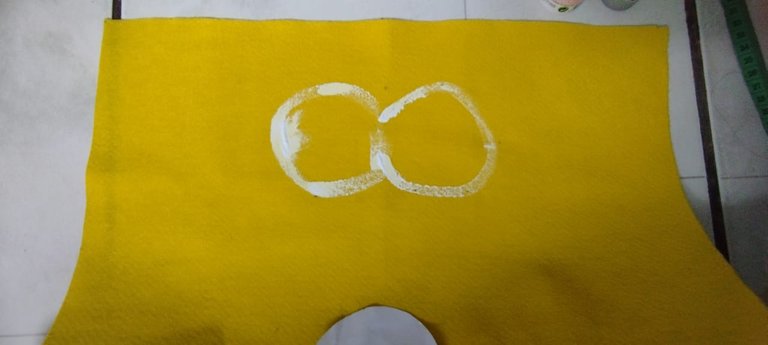
Una vez que terminé de marcar con algunos puntos el molde para los ojos, procedí a aplicar pintura blanca de tela siguiendo el tamaño marcado.
Once I finished marking with some dots the mold for the eyes, I proceeded to apply white fabric paint following the marked size.
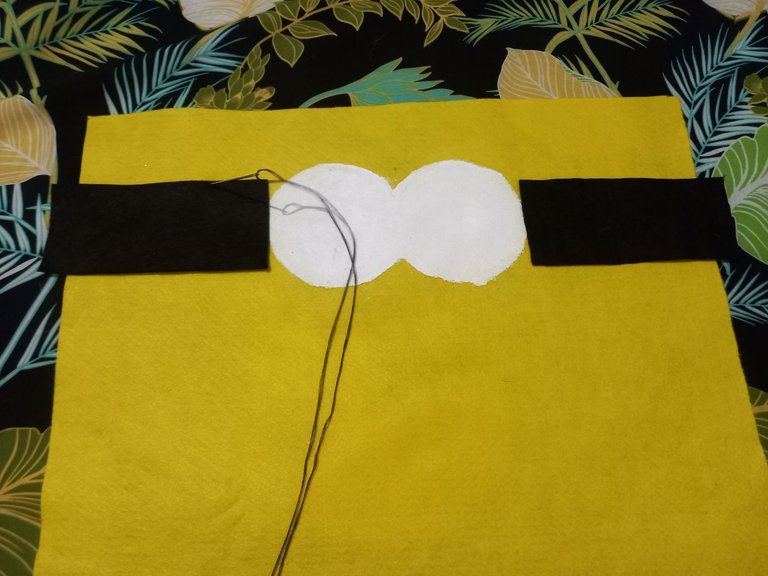
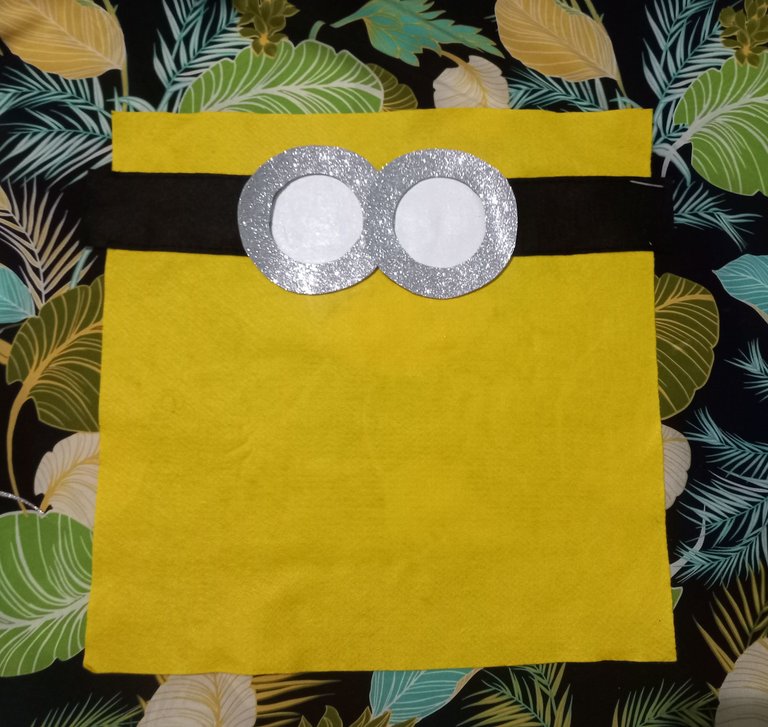
Luego recorté dos trozos de fieltro de 14 cm de largo y 5 cm de ancho, para hacer la cinta de los lentes. Éstos dos trozos los cosí una en cada lateral de los ojos, con una puntada de pespunte.
Then I cut out two pieces of felt, 14 cm long and 5 cm wide, to make the ribbon for the glasses. These two pieces I sewed one on each side of the eyes, with a backstitch.
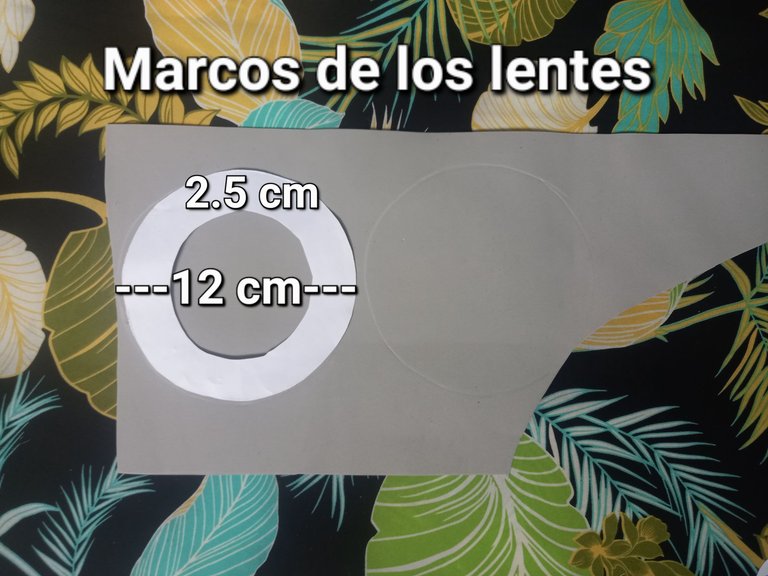
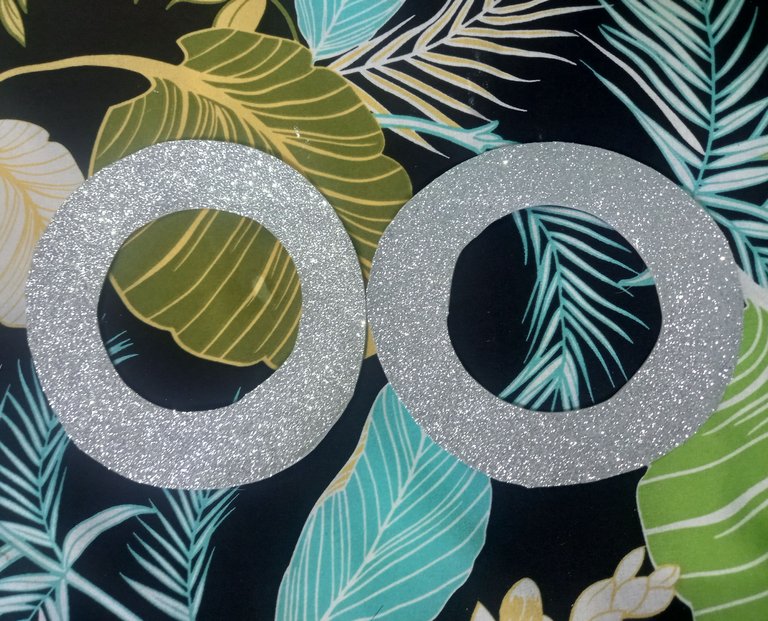
Después corté dos círculos de foamy plateado, de 12 cm de diámetro, al cual le hice un agujero en el centro para dejar un marco circular de 2.5 de ancho. Éstos marcis los pegué encima de los ojos.
Then I cut two circles of silver foamy, 12 cm in diameter, to which I made a hole in the center to leave a circular frame 2.5 cm wide. I glued these marcis above the eyes.
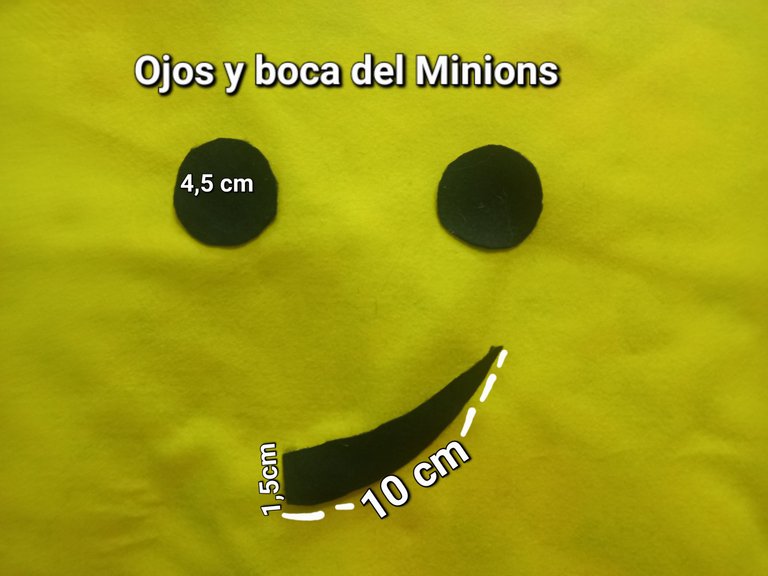
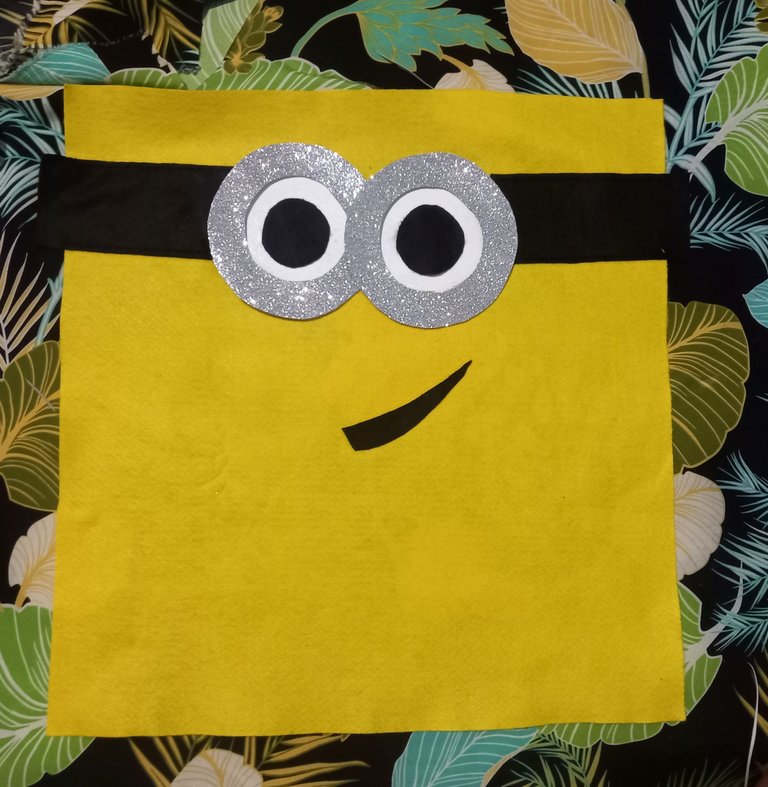
Posteriormente corté dos círculos de fieltro negro de 4.5 cm de diámetro para hacer los ojos y un trozo del mismo color de fieltro en forma de una risa semi abierta de lado, o con forma de una ceja. El ojo lo pegué con silicón sobre la zona blanca que corresponde al mismo y la boca la cosí con puntada en pespunte.
Then I cut two circles of black felt 4.5 cm in diameter to make the eyes and a piece of the same color felt in the shape of a half-open sideways laugh, or in the shape of an eyebrow. I glued the eye with silicone on the white area that corresponds to it and the mouth I sewed with backstitch.
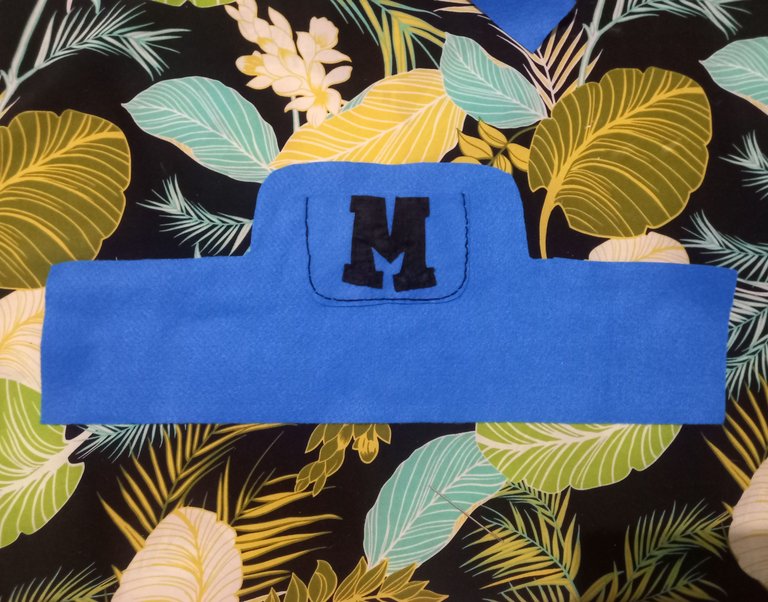
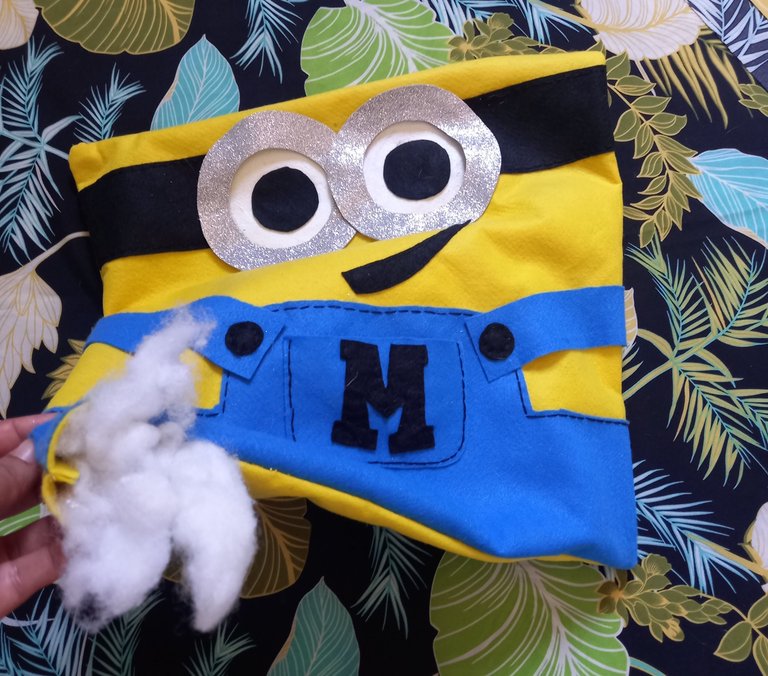
Luego realicé la braguita o el jamper del Minion; para ésto, recorté una pieza de fieltro azul con una forma parecida a la de la señal de transito, del reductor de velocidad, con un largo de 46 cm y un alto en la parte más pronunciada de 18 cm de alto y 19 de ancho, así como se observa en la imagen. Además recorté dos tiras de 16 cm de largo y 4 cm de ancho para hacer los tirantes.
Then I made the Minion jamper; for this, I cut a piece of blue felt with a shape similar to that of the traffic sign of the speed reducer, with a length of 46 cm and a height in the most pronounced part of 18 cm high and 19 cm wide, as shown in the image. I also cut two strips of 16 cm long and 4 cm wide to make the straps.
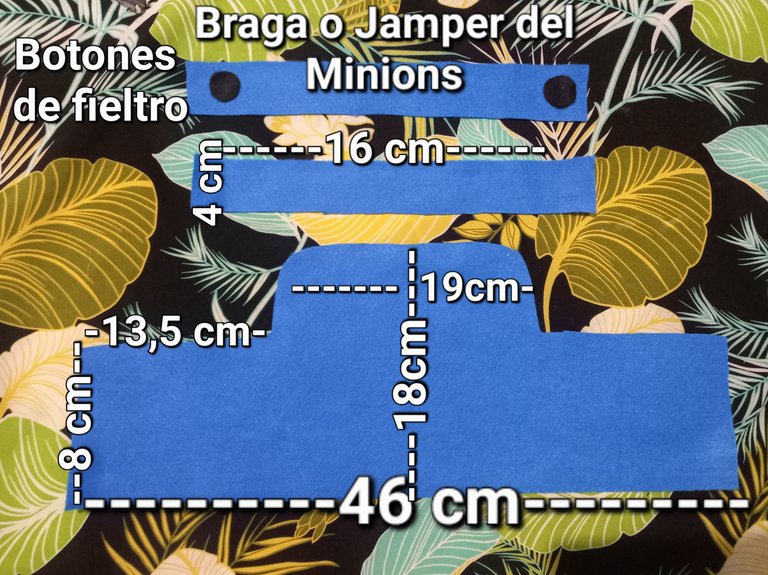
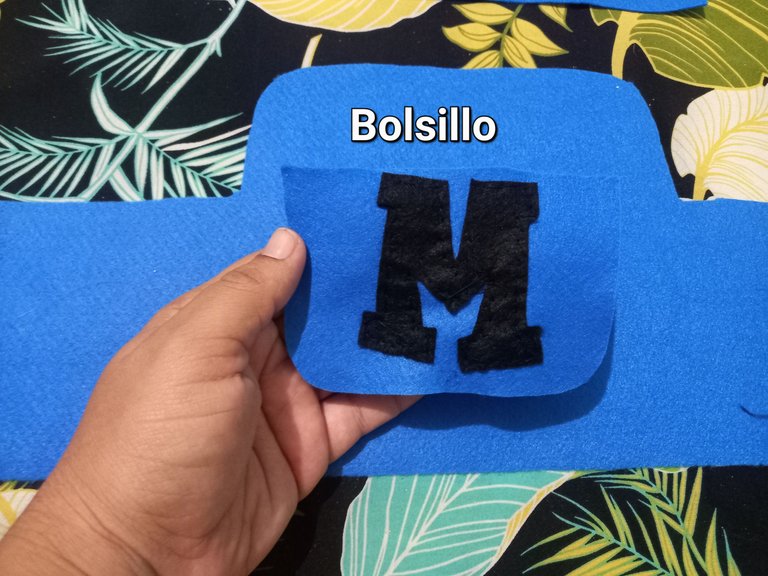
Para agregarle un detalle más bonito a la braga, recorté la forma de un bolsillo pequeño y bordé sobre éste, una "M" en fieltro negro; cuando termine de bordar, cosí el bolsillo sobre la parte de ariiba de la braga.
To add a nice detail to the panty, I cut out the shape of a small pocket and embroidered an "M" on it in black felt; when I finished embroidering, I sewed the pocket on the top of the panty.
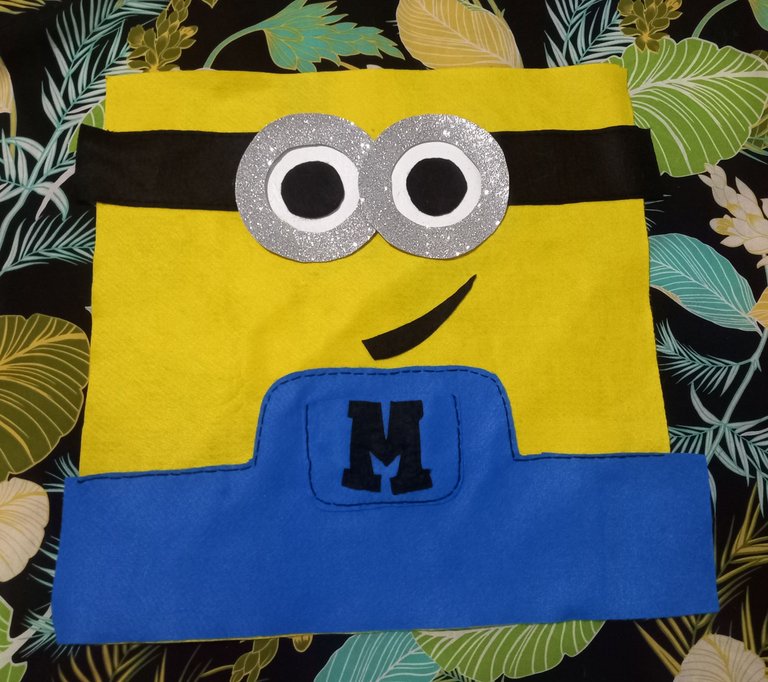
Una vez que terminé de pegar el bolsillo, procedí a coser con puntada en pespunte todas las orillas superiores, sobre la parte de abajo del cuadrado, es decir, lo que va a ser el cuerpo del Minion.
Once I finished gluing the pocket, I proceeded to stitch all the upper edges with backstitch, on the bottom of the square, that is, what is going to be the body of the Minion.
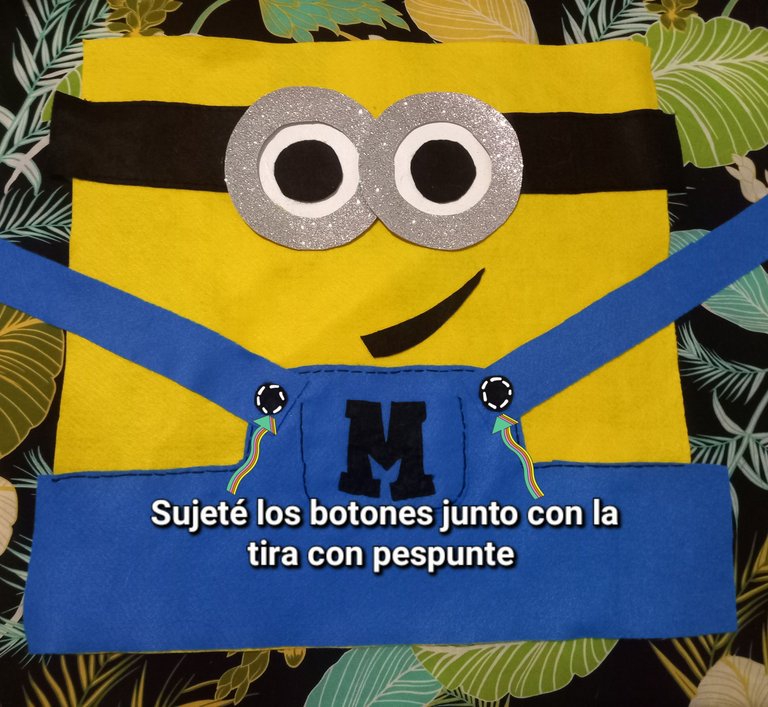
Después cosí los tirantes colocando el botón sobre éste de una vez, para hacer una sola costura.
Then I sewed the shoulder straps by placing the button on it all at once, to make a single seam.
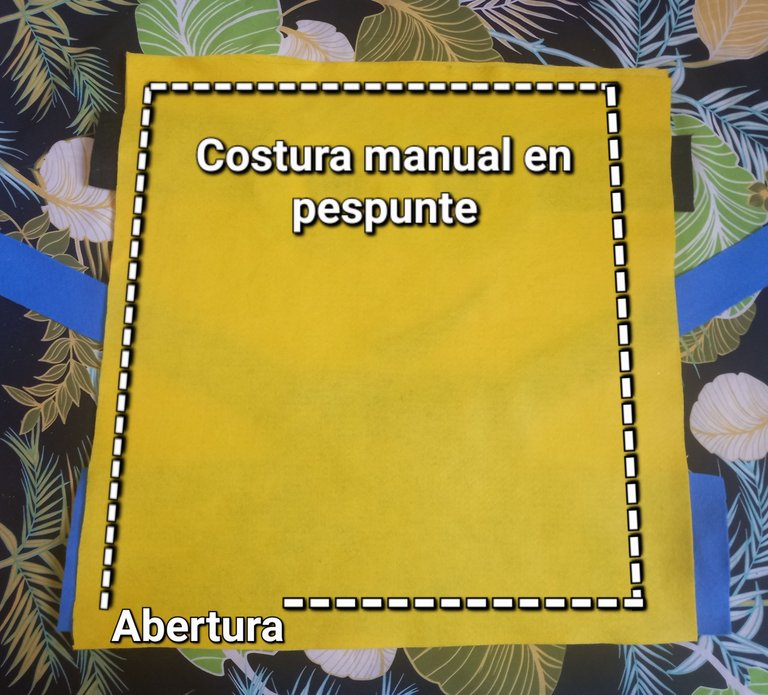
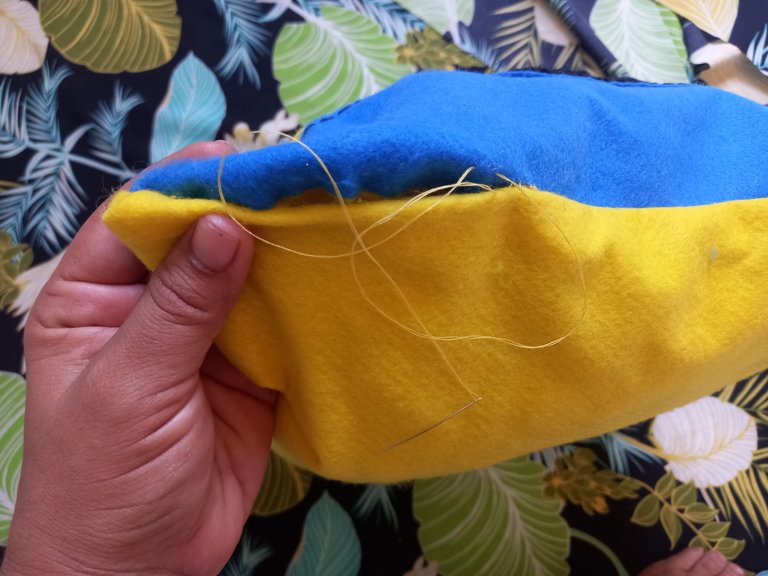
Cuando terminé de pegar todo el traje, coloqué el otro cuadro sobre el cuerpo del Minion, y pasé costura por los bordes, dejando solo un pequeño espacio de 6 cm para desdoblar y meter el relleno por allí.
When I finished gluing the whole costume, I placed the other square on the Minion body, and sewed around the edges leaving only a small space of 6 cm to unfold and put the stuffing through there.


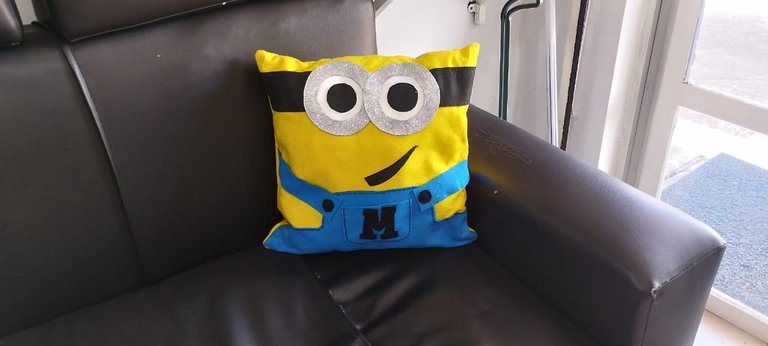
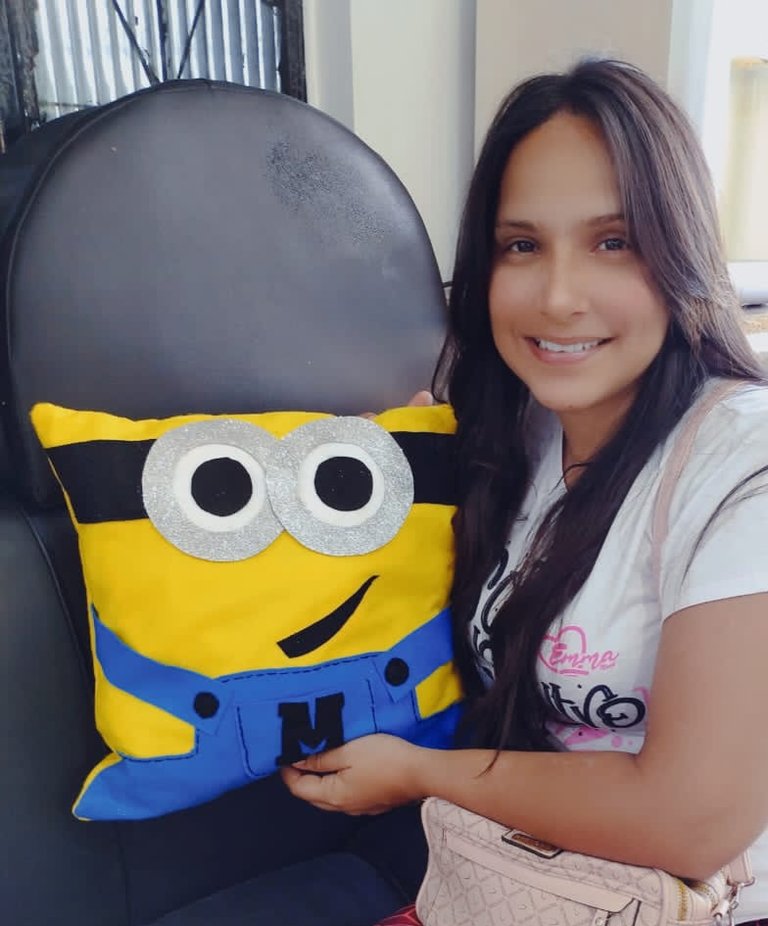
Así luce éste simpático cojín de Miniosns, espero te haya gustado el resultado y el paso a paso. Hasta otra oportunidad amigos 😊.
This is how this cute Miniosns cushion looks like, I hope you liked the result and the step by step. Until another time friends 😊.