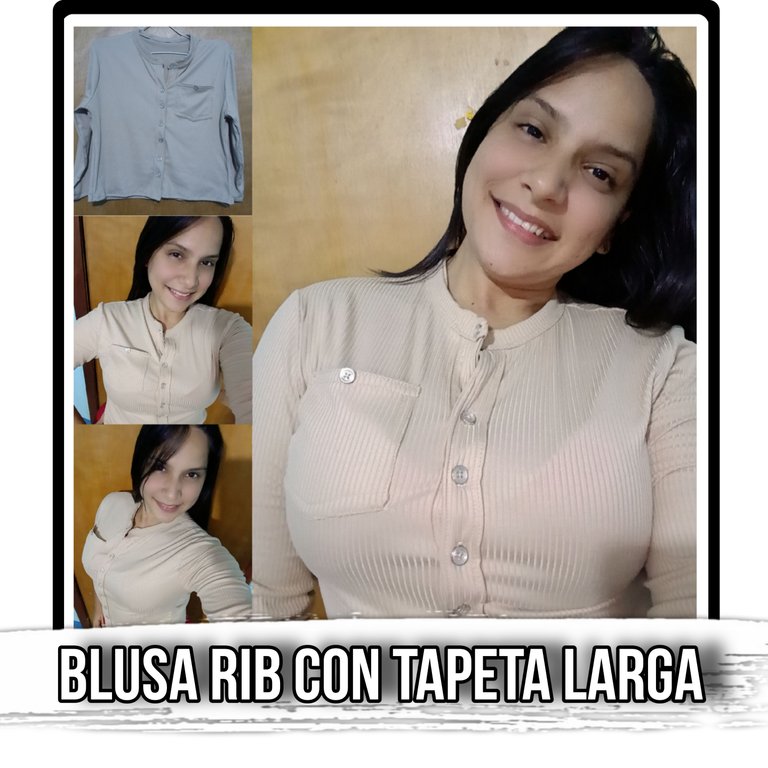
Hola, hola apreciada colmena de #Needleworkmonday, es para mi un gusto poder saludarlos y desearles un gran día lleno de éxitos. La tela rib o acanalada, sigue siendo tendencia en éste tiempo, y es por eso que hoy quise traerles un tutorial de una de las variadas prendas que podemos confeccionar con ella, en ésta oportunidad, la confección de una blusa rib con tapeta larga en el frente; éste tipo de blusa son bastante cómodas y la podemos usar con pantalones o shor, nos brinda las opciones de usarlas para el trabajo en oficina, colegio y/o para una salida entre amigos; no es calurosa y se adapta muy bien al cuerpo. Te muestro comonla hice.
Hello, hello dear #Needleworkmonday hive, it is a pleasure for me to greet you and wish you a great day full of success. The ribbed fabric continues to be a trend at this time, and that is why today I wanted to bring you a tutorial of one of the many garments that we can make with it, this time, making a rib blouse with long placket on the front; this type of blouse are quite comfortable and can be used with pants or shor, gives us the options to use them for work in office, school and / or for an outing with friends; it is not hot and adapts very well to the body. I show you how I made it.

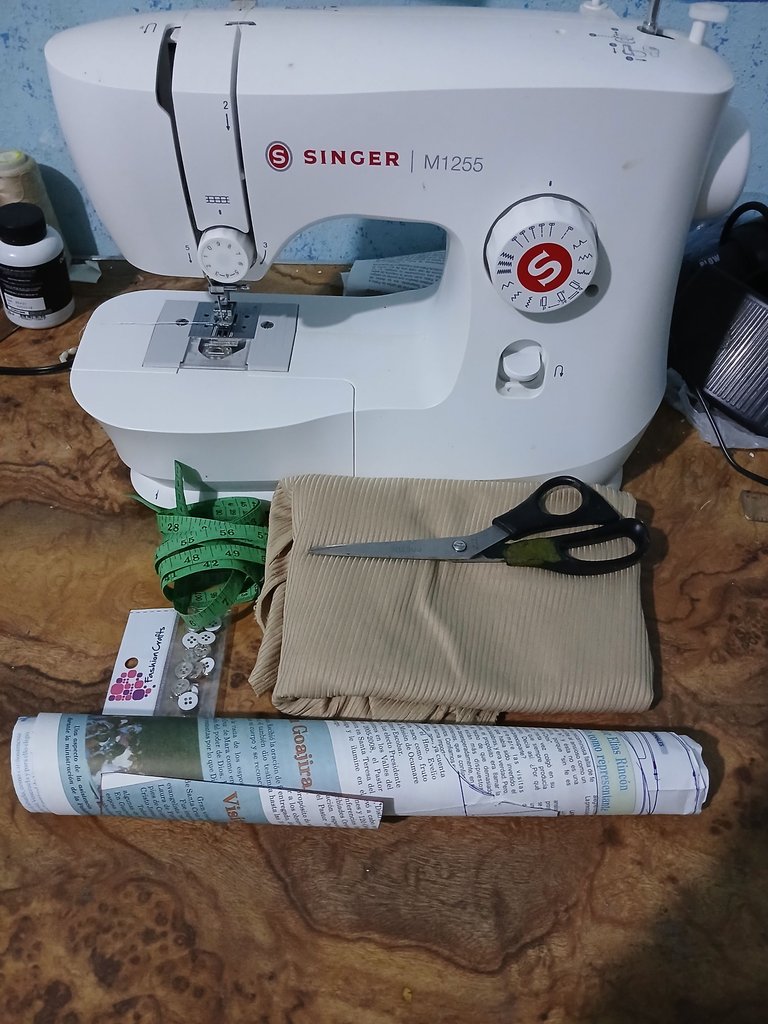
- 1 metro de tela rib 4×2 color crema.
- Botones de 18mm
- Patrones.
- Cinta métrica.
- Máquina de cocer.
- Tijeras.
- 1 meter of rib fabric 4×2 cream color.
- 18mm buttons
- Patterns.
- Measuring tape.
- Baking machine.
- Scissors.

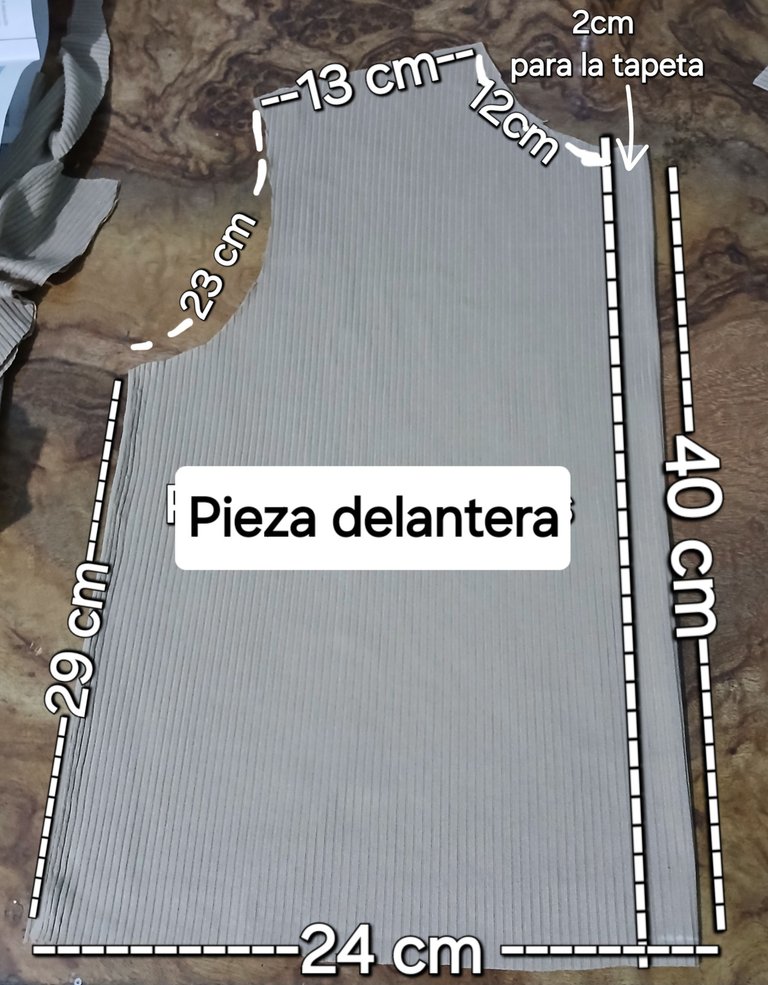
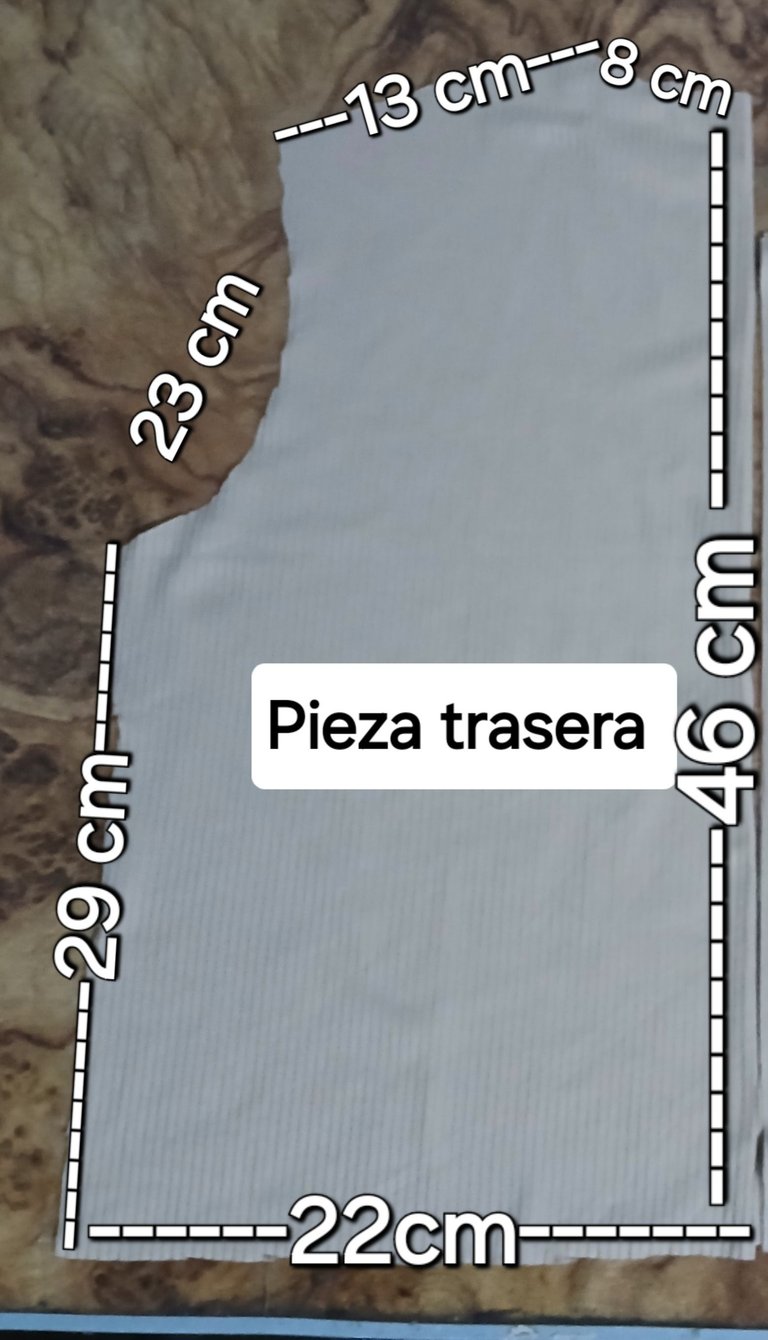
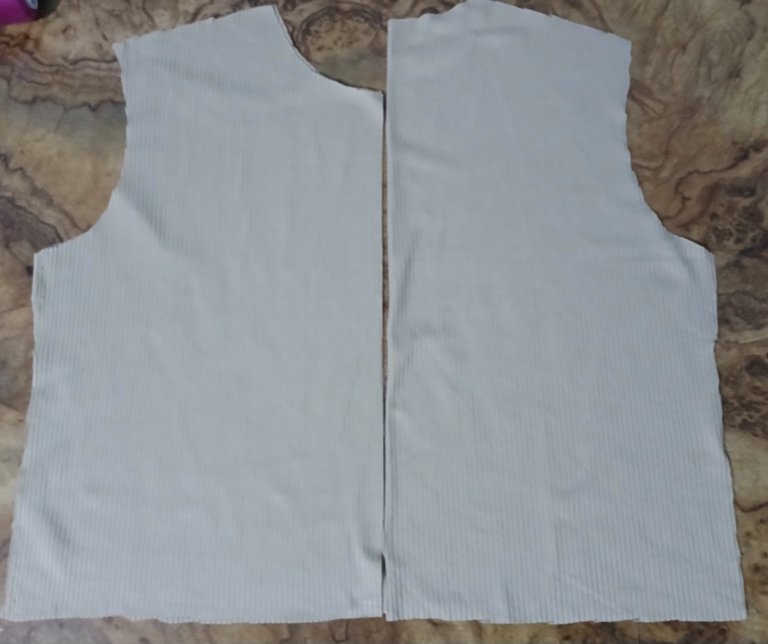
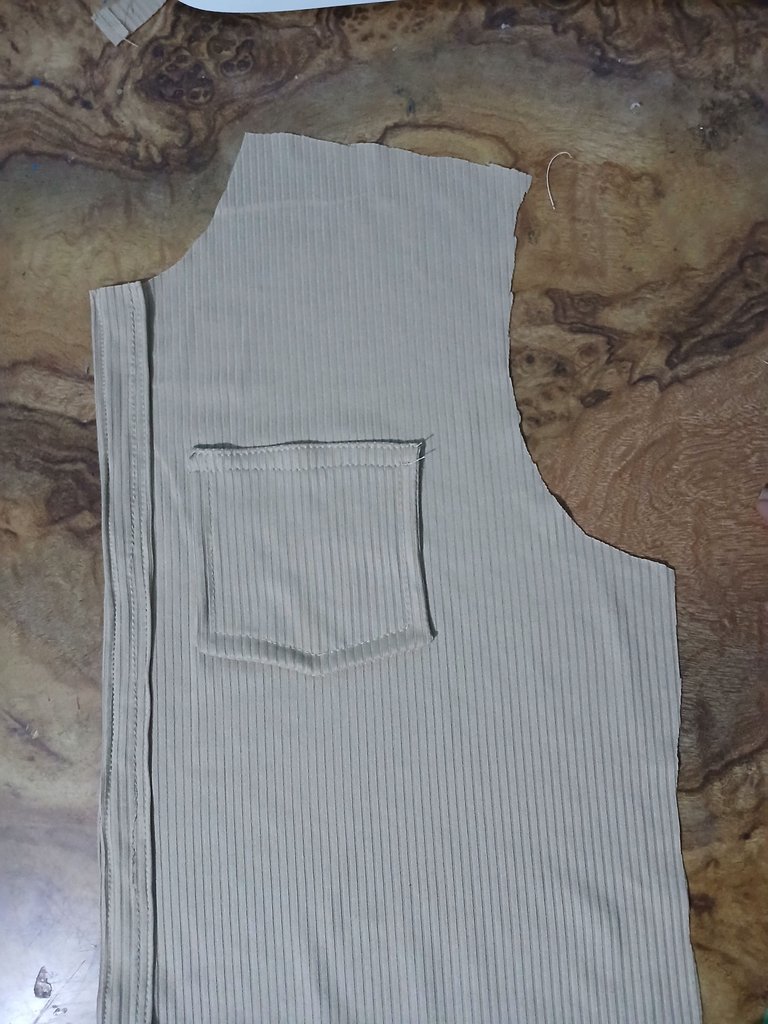
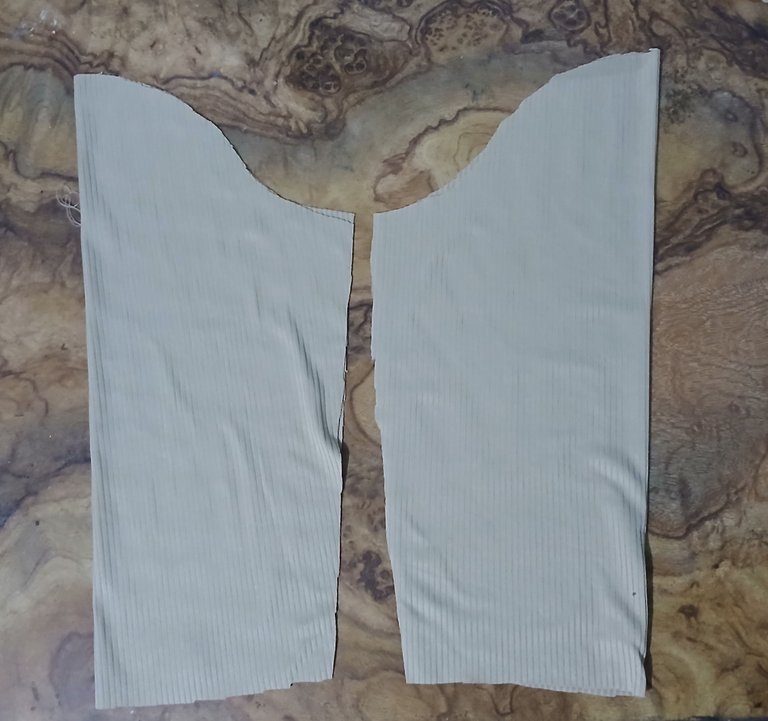
Para comenzar con la confección de esta blusa Rib, lo primero que hice fue sacar mis patrones tanto las piezas delanteras como las piezas traseras, para esto, como siempre coloqué mi tela doblada a la mitad para sacar la pieza completa. En este caso, cómo mi blusa va a llevar tapeta larga enfrente corté en dos la parte delantera, dejando 2 cm hacia afuera para poder colocar la tapeta.
To start with the making of this Rib blouse, the first thing I did was to take out my patterns for both the front and the back pieces, for this, as always I placed my fabric folded in half to get the whole piece. In this case, as my blouse is going to have a long front placket, I cut the front part in two, leaving 2 cm out to be able to place the placket.
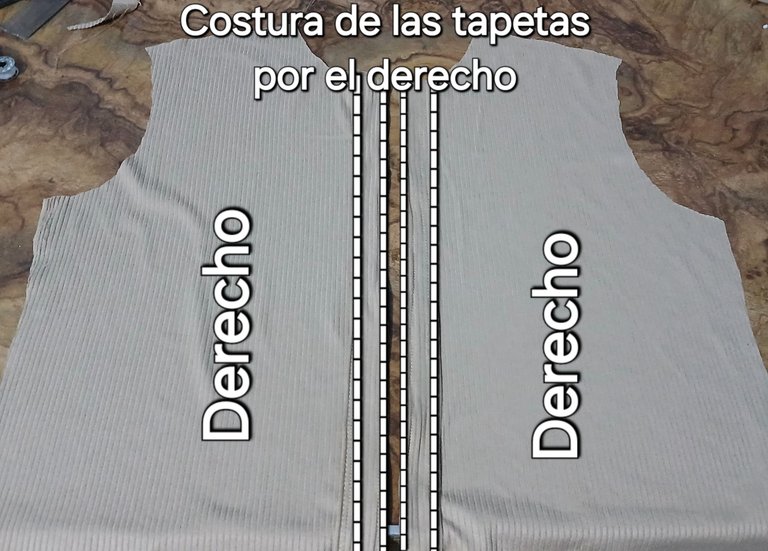
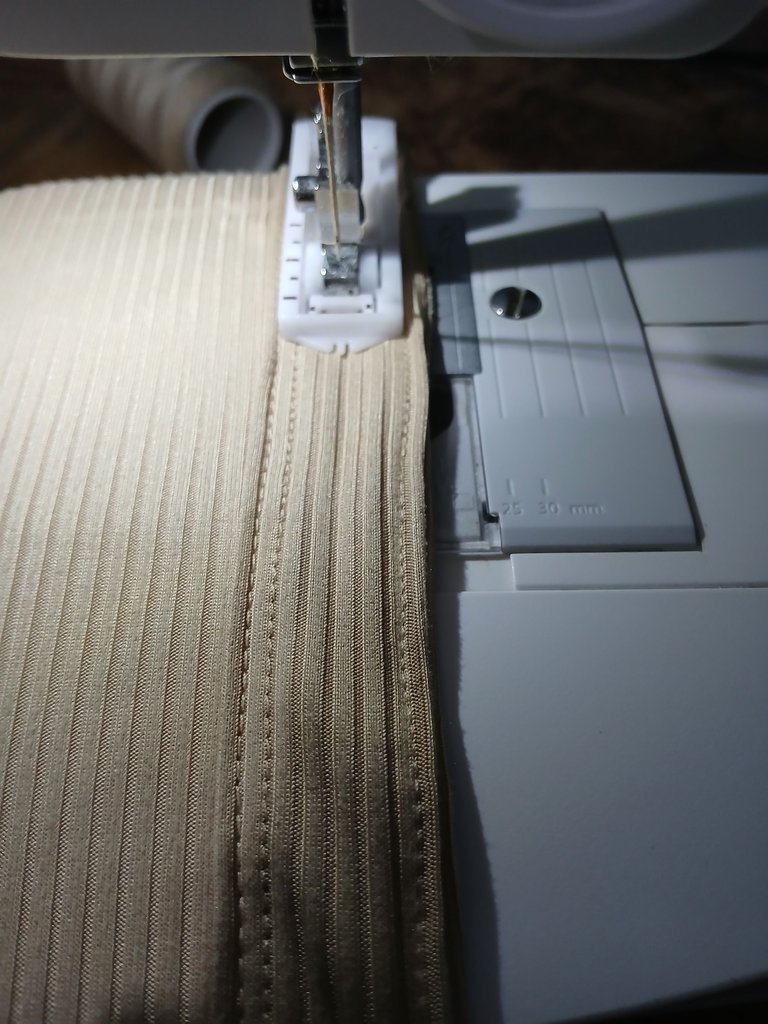
Luego corté 2 tiras de la misma tela de 5 cm de ancho Y 56 cm de largo, estas tiras son para realizar las tapetas en donde irán los ojales y los botones. Para realizar la tapeta,coloqué la tira por la orilla vertical de la pieza delantera de la blusa, haciendo coincidir la cara del derecho de la tira con el revés de la blusa y después llevé esa misma tira hacia la parte del derecho y cosí.
Then I cut 2 strips of the same fabric 5 cm wide and 56 cm long, these strips are to make the covers where the buttonholes and buttons will go. To make the placket, I placed the strip along the vertical edge of the front piece of the blouse, matching the right side of the strip with the back of the blouse and then I took that same strip to the right side and sewed.

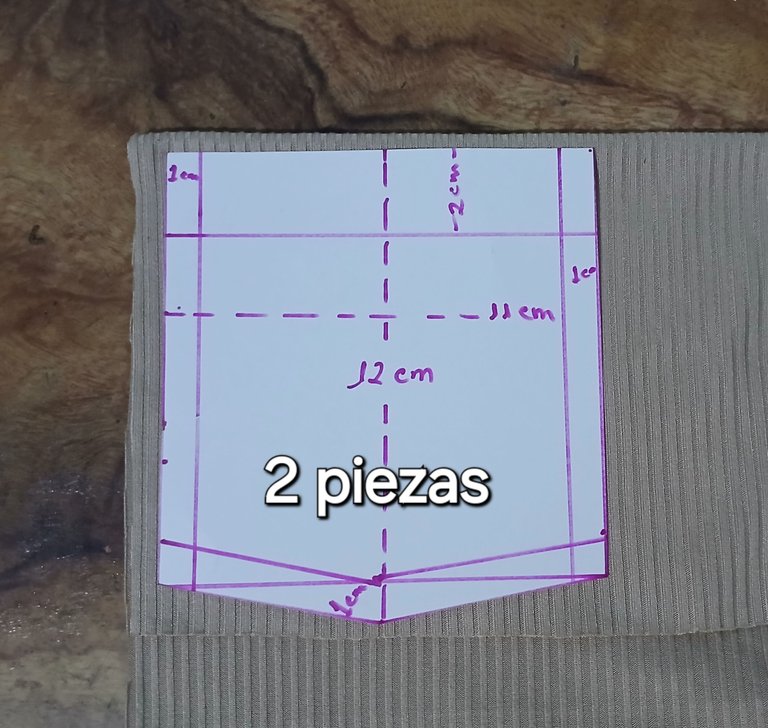
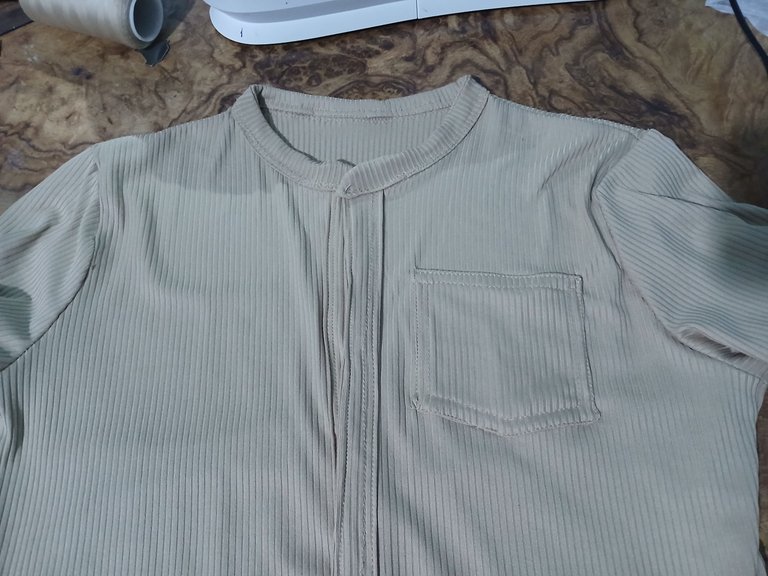
Después de haber hecho las tapetas procedí a realizar un pequeño bolsillo que Irán en el lado Izquierdo de la parte delantera de la blusa.
After having made the caps, I proceeded to make a small pocket that will go on the left side of the front of the blouse.
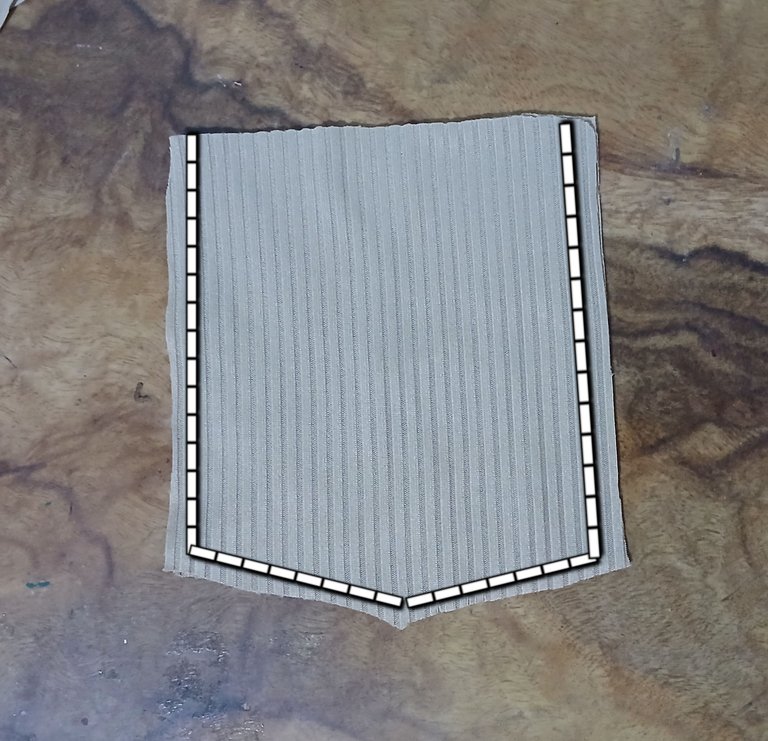
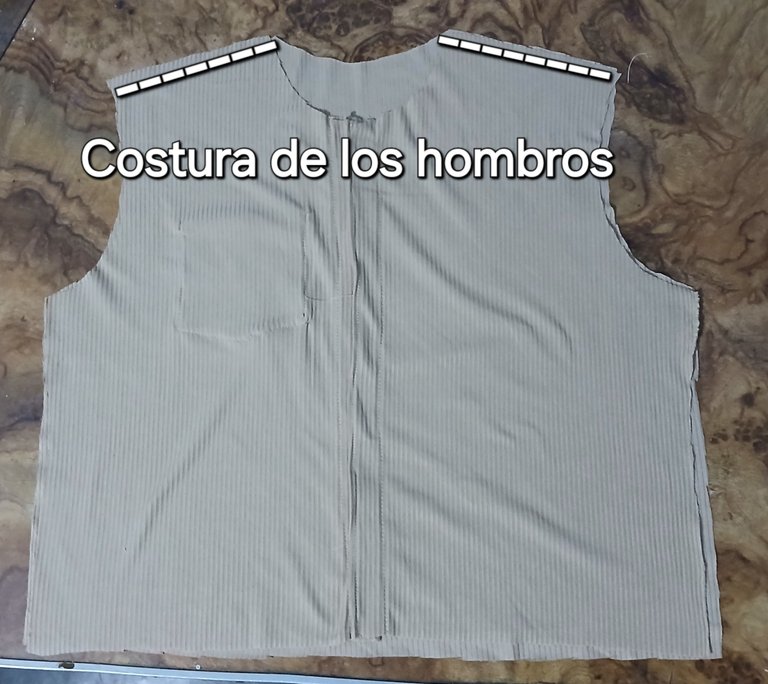
Cuando terminé de hacer el bolsillo y pegarlo, procedí luego, a unir las piezas delantera con la pieza trasera; ésta unión la realicé primeramente por sus hombros y como siempre haciendo coincidir los derechos.
When I finished making the pocket and gluing it, I then proceeded to join the front pieces with the back piece; this union was made first by its shoulders and as always matching the right sides.
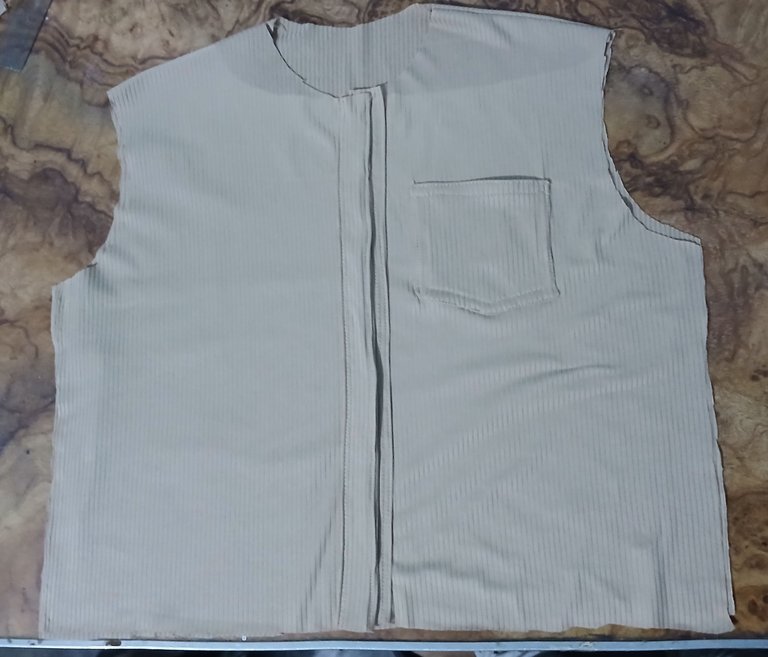
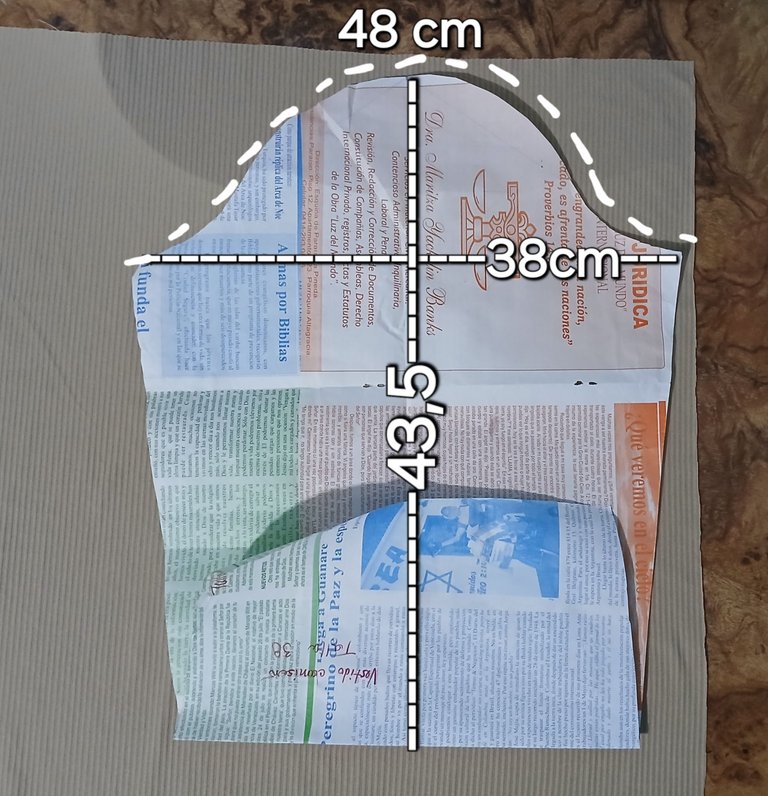
Posteriormente Saqué el patrón de las mangas, las cuales cosí por todo el contorno del área de la sisa, sin unir los laterales.
Then I took out the pattern for the sleeves, which I sewed all around the armhole area, without joining the sides.
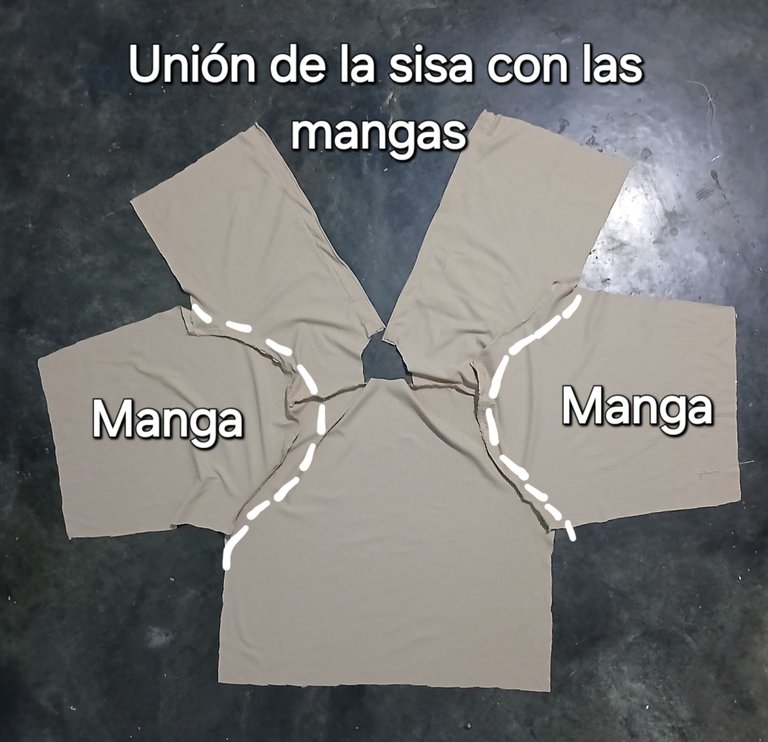
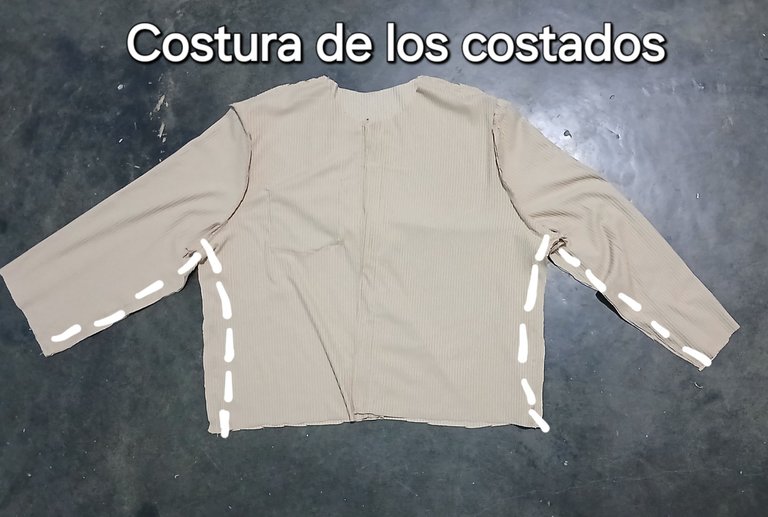
Luego de haber cocido las mangas, procedí a hacer la unión de los laterales, juntamente con las mangas.
After sewing the sleeves, I proceeded to join the sides together with the sleeves.

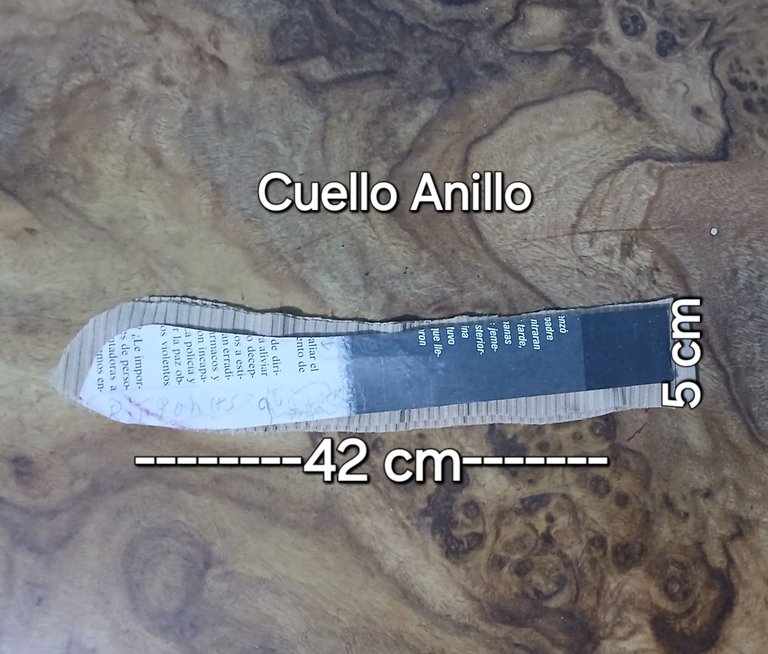
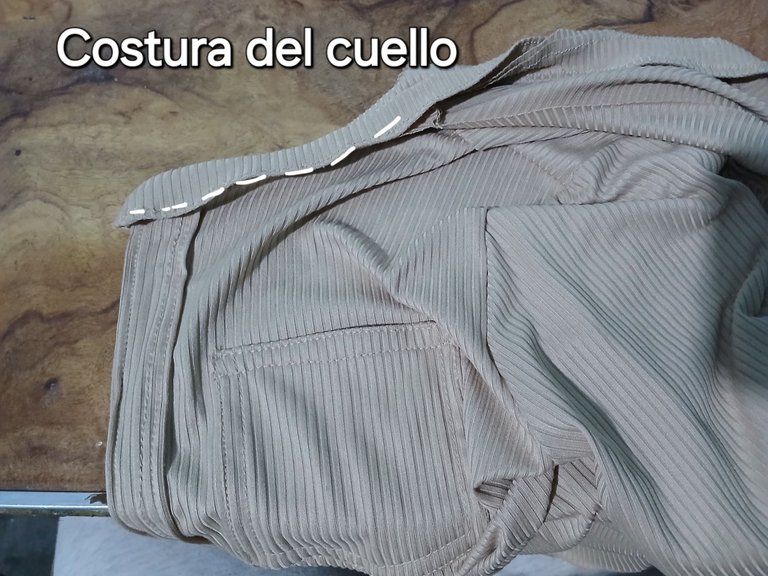
Para el contorno del cuello éste lo hice en "Cuello Anillado".
For the outline of the neck I did this one in "Ring Neck".
Después de haber pegado el cuello, procedí a hacer los ojales y a pegar los botones.
After gluing the collar, I proceeded to make the buttonholes and glue the buttons.
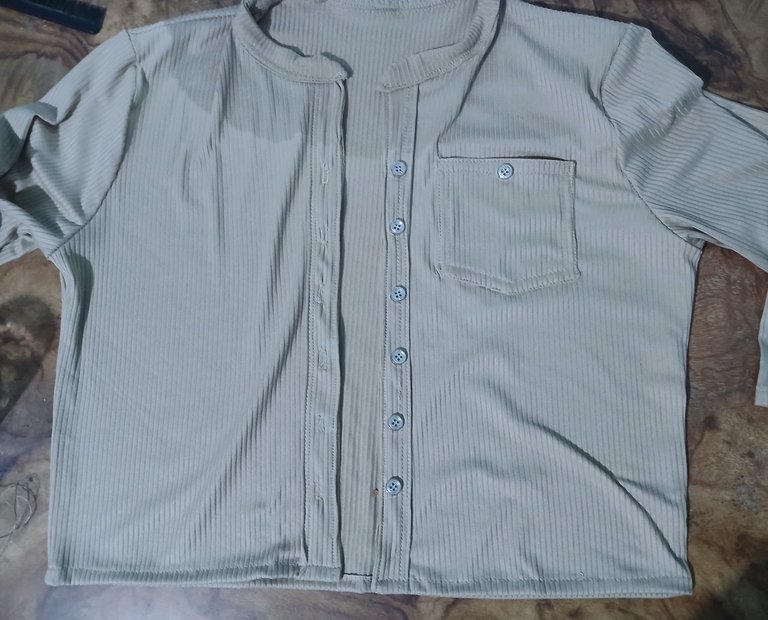

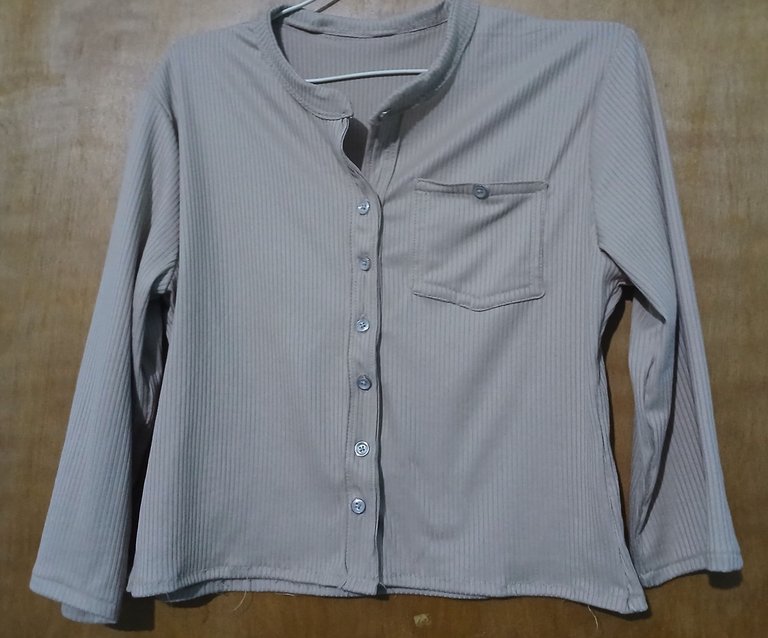

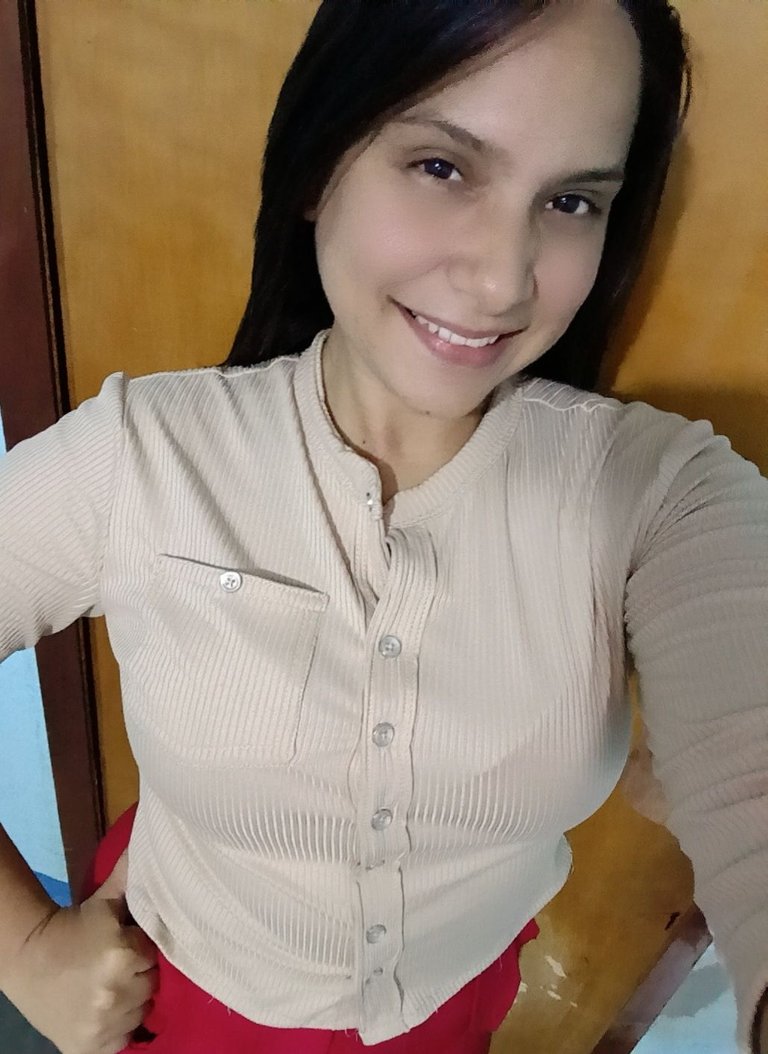
Éste ha sido el resultado, una hermosa blusa que aporta estilo y elegancia, espero te haya gustado el resultado y el tutorial les sea de gran utilidad. Abrazos amigos 🤗💗
This has been the result, a beautiful blouse that brings style and elegance, I hope you liked the result and the tutorial will be very useful. Hugs friends 🤗💗.
