¡Bienvenidos a mi blog!
Welcome to my blog!
Hola a todos mis queridos amigos de esta linda comunidad #diyhub, nuevamente por aquí haciendo lo que me gusta , me desestresa y me hace sentir bien, Dios les bendiga a todos, espero que hayan tenido un lindo día.
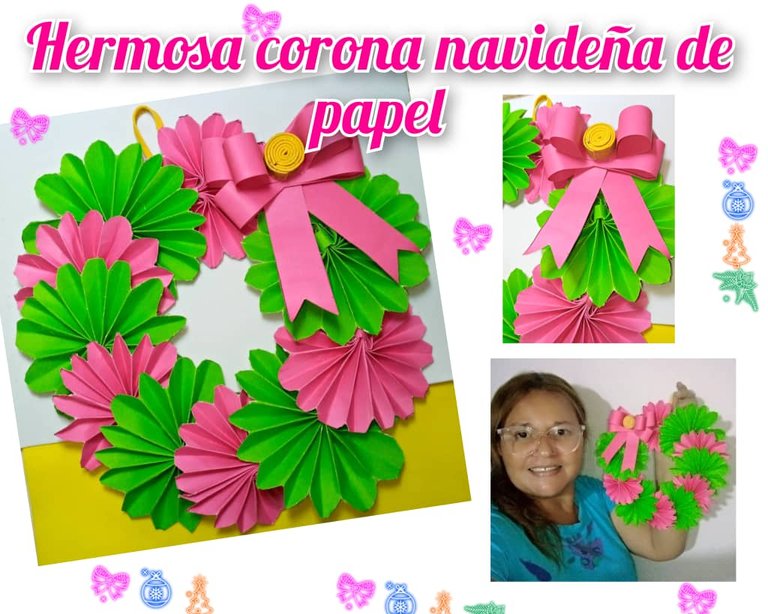
Hoy quiero mostrar como realizar mi primer motivo de navidad : Una hermosa corona o guirnalda de Navidad , fácil de hacer.
Hello to all my dear friends of this beautiful community #diyhub, here again doing what I like, it de-stresses me and makes me feel good, God bless you all, I hope you had a nice day.
Today I want to show you how to make my first Christmas motif: A beautiful Christmas wreath or garland, easy to make.
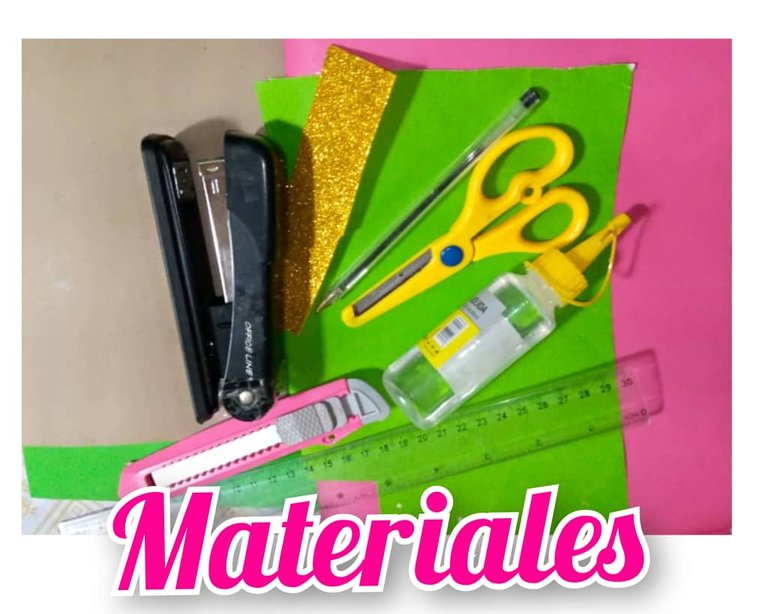
Materiales para la realización de la corona de navidad, son los siguientes:
- Cartulina de papel , colores: rosado y verde.
- Pedazo de foami amarillo escarchado.
- Tijera.
- Silicona líquida.
- Regla.
- Exacto o cortador.
- Engrapadora.
- Lapicero.
- Pedazo de cartón de 21 x 21 centímetros.
Materials for the realization of the Christmas wreath, are the following:
- Cardboard paper, colors: pink and green.
- Piece of frosted yellow foami.
- Scissors.
- Liquid silicone.
- Ruler.
- Exact or cutter.
- Stapler.
- Pencil.
- Piece of cardboard 21 x 21 centimeters.
Realización de la corona de navidad:
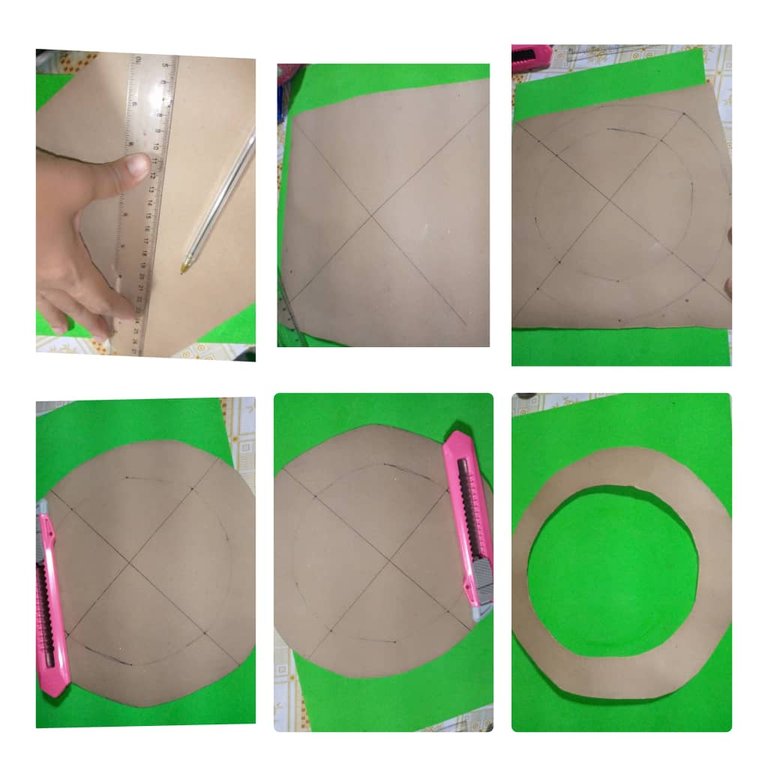
- Tomamos el pedazo de cartón de 21 x 21 centímetros, con la regla hacemos una raya ens dos puntas del cartón , luego hacemos otra raya de las otras dos puntas del cartón, esto es para sacar con precisión el redondo. Lo hice de esta manera ya que no tengo compás, con el compás se hace más fácil.
Making the Christmas wreath:
- We take the piece of cardboard 21 x 21 centimeters, with the ruler we make a stripe on two ends of the cardboard , then we make another stripe of the other two ends of the cardboard, this is to accurately draw the round. I did it this way since I don't have a compass, with the compass it is easier.

- Ahora del punto del medio dejo 10 centímetros hacia cada lado y luego del punto del medio dejó 7 centímetros hacia cada lado , Voy formando el redondo , recorto con el exacto. Ya tenemos esto listo.
- Now from the middle stitch I leave 10 centimeters to each side and then from the middle stitch I leave 7 centimeters to each side, I am forming the round, I cut with the exact one. Now we have this ready.
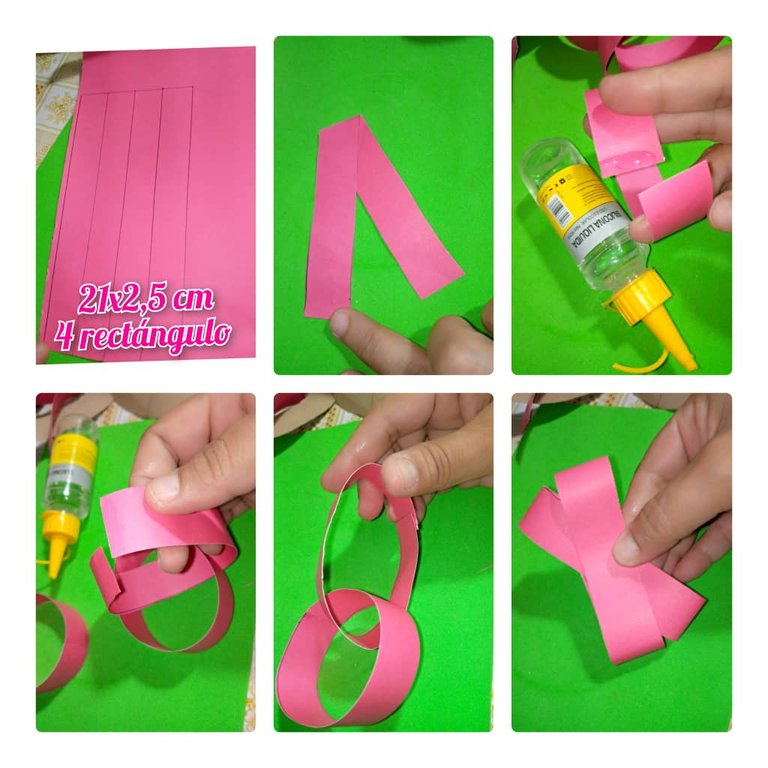
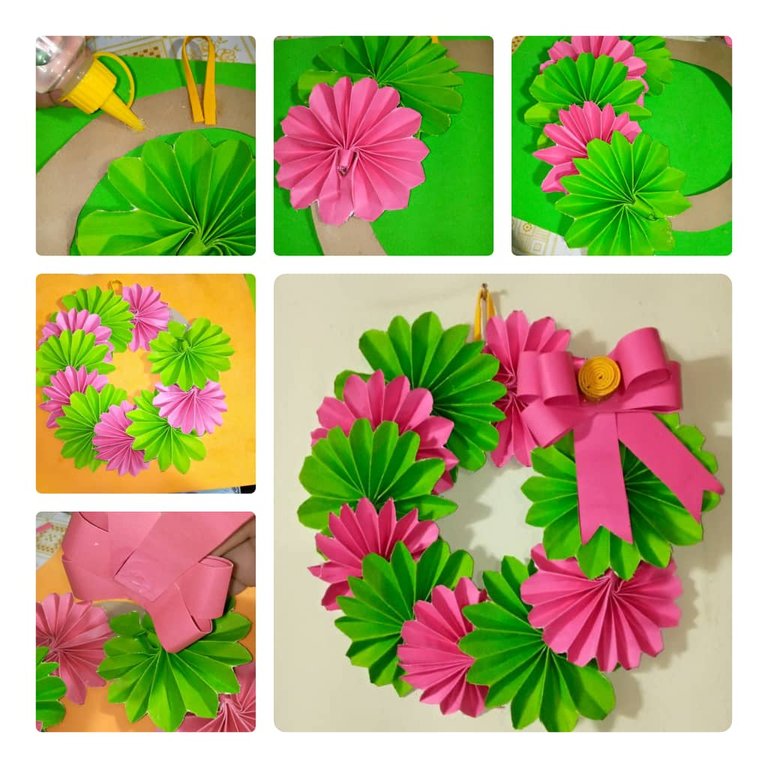
- Continuando con la realización de la corona, vamos a realizar el lazo de la siguiente forma, marcamos con la regla 4 rectángulo de 21 x 2,5 centímetros, luego recortamos con las tijeras.
- Ahora doblamos un rectángulo por la mitad , asi como muestra la imagen.
- Los otros tres hacemos un redondo lo pegamos en la punta con silicona y dentro de ese metemos el otro y lo pegamos con silicona, luego con la engrapadora le ponemos una grapa por todo el medio , así vamos a hacer con la otra tira que queda.
- Continuing with the making of the wreath, we are going to make the bow in the following way, we mark with the ruler 4 rectangle of 21 x 2.5 centimeters, then we cut with the scissors.
- Now fold one rectangle in half, as shown in the picture.
- The other three we make a round, we glue it at the tip with silicone and inside that we put the other one and glue it with silicone, then with the stapler we put a staple around the middle, so we are going to do with the other remaining strip.
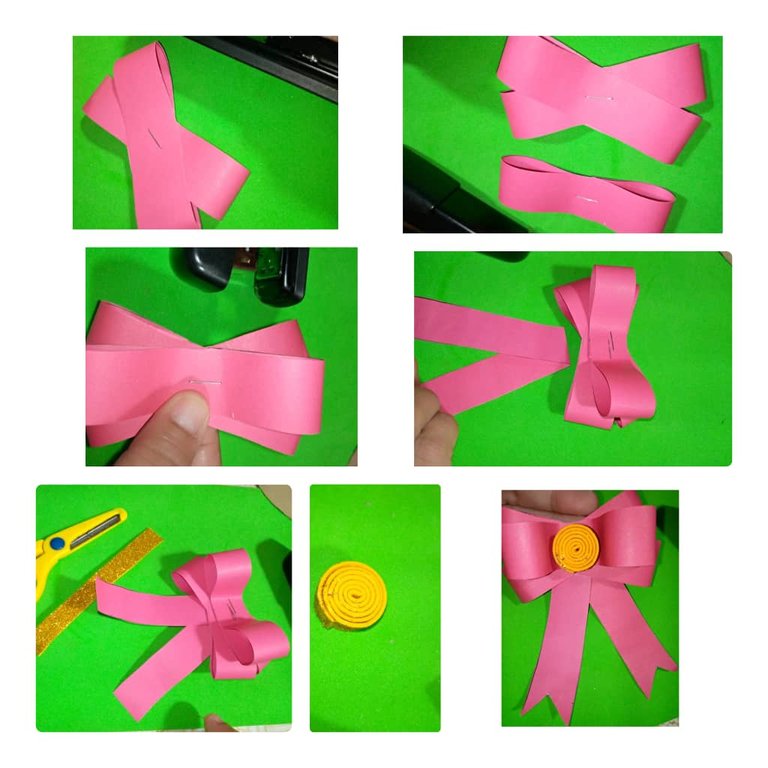
- Teniendo las 4 tiras listas , procedemos a pegar el lazo, colocamos una parte sobre la otra y la parte que guinda del lazo tambien lo colocamos para pegarle grapa y ya dejarlo listo.
- Con el pedazo de foami amarillo escarchado , lo enrollamos , pegamos con silicona en el lazo.Vieron lo hermoso que quedó .
- Having the 4 strips ready, we proceed to glue the ribbon, we place one part on top of the other and the part of the ribbon that has a cherry color, we also place it to glue it with staples and leave it ready.
- With the piece of frosted yellow foami, we roll it up and glue it with silicone on the ribbon.
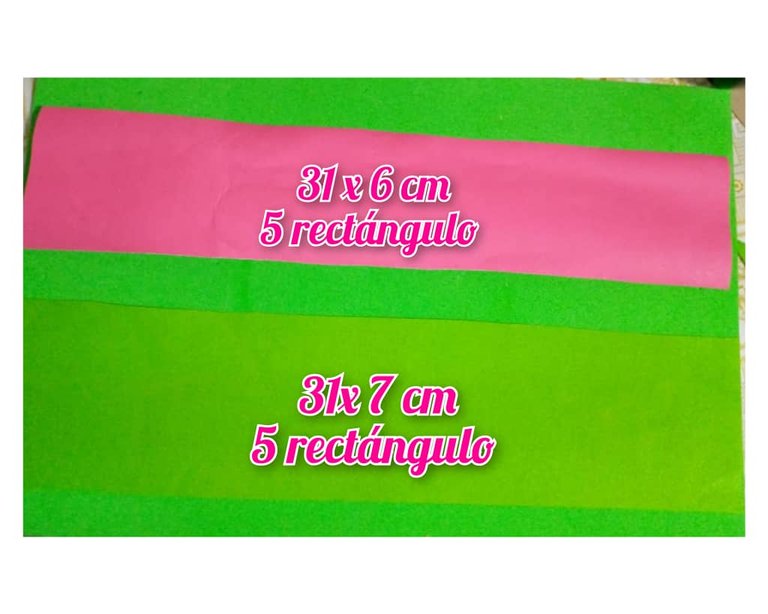
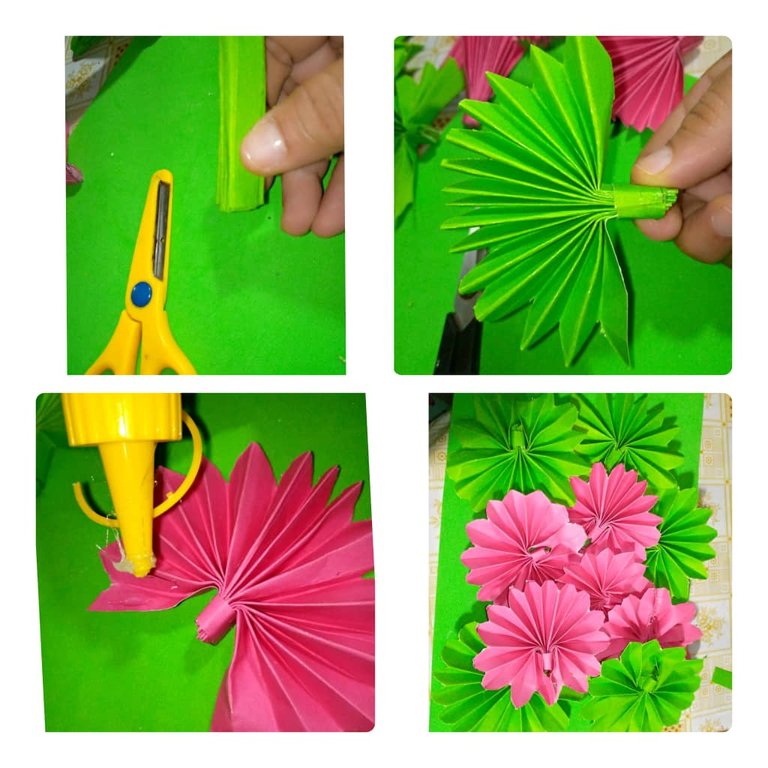
- Continuamos haciendo las flores para la corona , recortamos 5 pedazos de cartulina rosada (31 x 6 cm) y 5 pedazos de cartulina verde (31 x 7 cm)
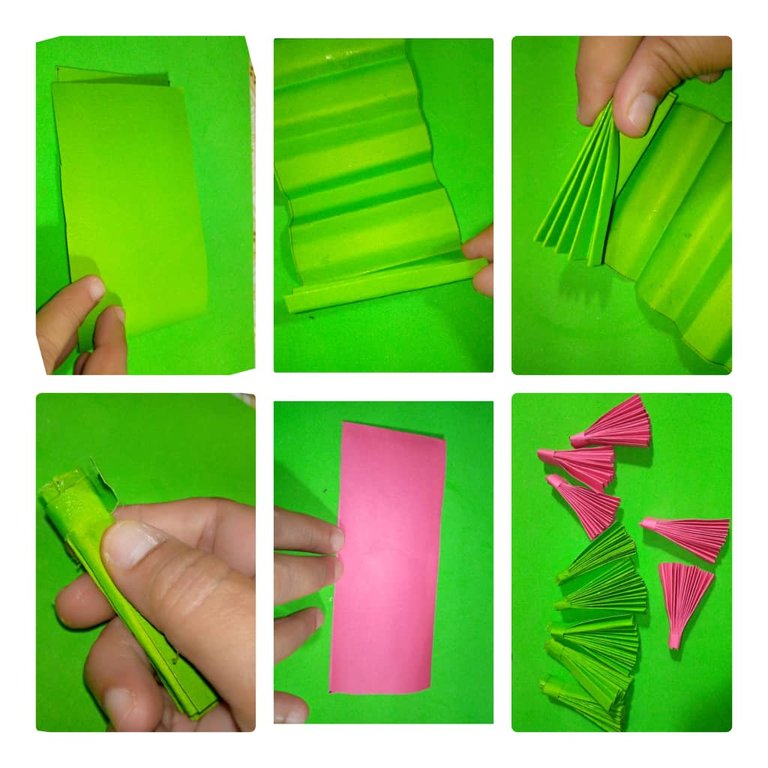
- Doblamos en pedazos pequeños, com se muestra en la imagen.
- We continue making the flowers for the wreath, cut out 5 pieces of pink cardboard (31 x 6 cm) and 5 pieces of green cardboard (31 x 7 cm).
- Fold into small pieces, as shown in the picture.
- Después que doblemos todas , tanto las rosadas como las verdes, en la punta echamos silicona y pegamos un poco de papel.
- Ya aquí tenemos todos los pedazos de cartulina listos para hacer las flores y formar la corona.
- After folding all of them, both the pink and the green ones, we put silicone on the tip and glue a little bit of paper.
- Here we have all the pieces of cardboard ready to make the flowers and form the wreath.
- Luego con las tijeras se cortan las puntas como en forma de hojas o de pétalos y con silicona se pegan en la punta.
- Then with scissors cut the tips into leaves or petals and glue them to the tip with silicone.
- Vamos pegando una flor sobre otra con silicona líquida, hasta pegar todas y por último colocar el lazo en una de las flores.Ya tenemos la corona de navidad , vieron lo hermosa que se vé.
- We glue one flower on top of the other with liquid silicone, until we glue them all and finally place the ribbon on one of the flowers, and we have the Christmas wreath, they saw how beautiful it looks.
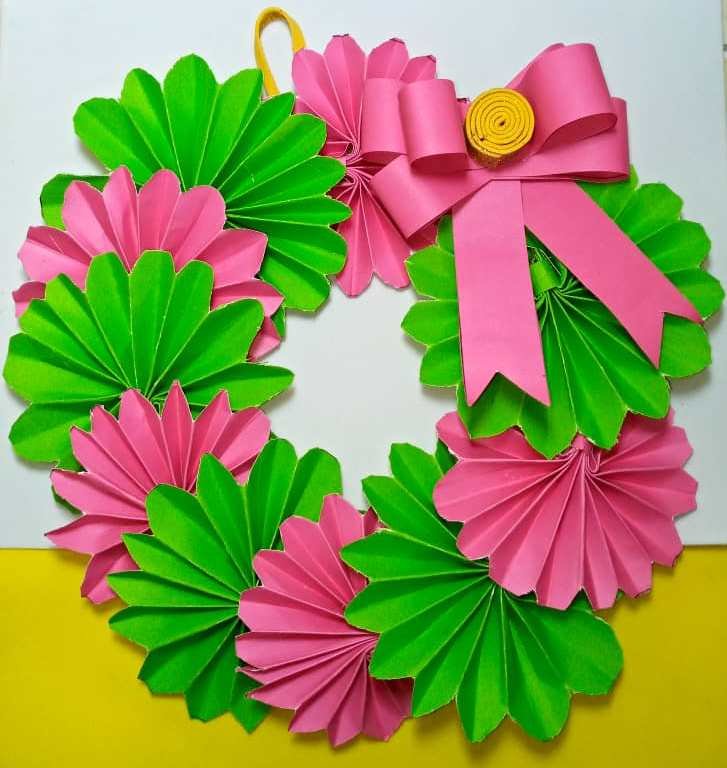
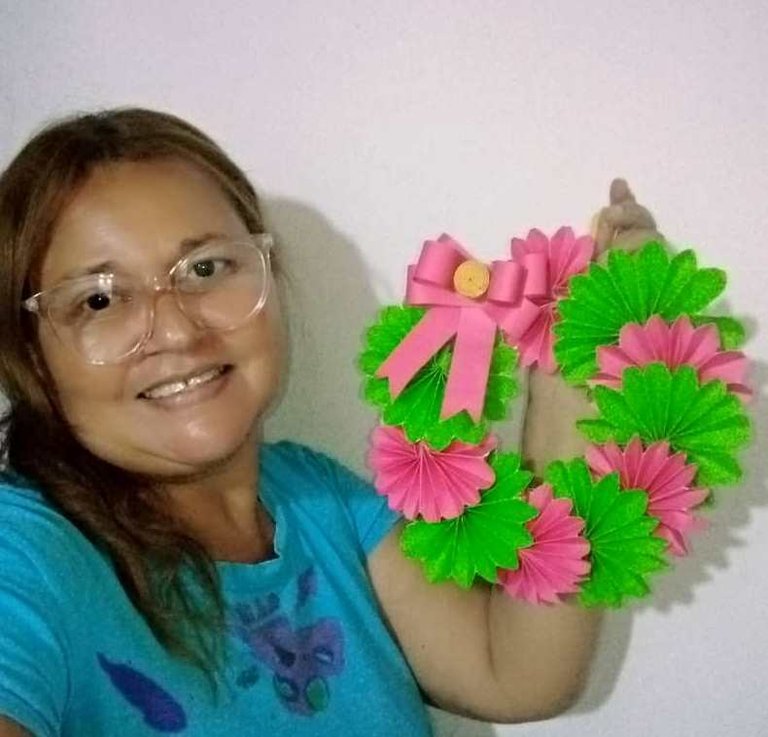
Aquí el resultado final de la hermosa corona navideña.
Here is the final result of the beautiful Christmas wreath.
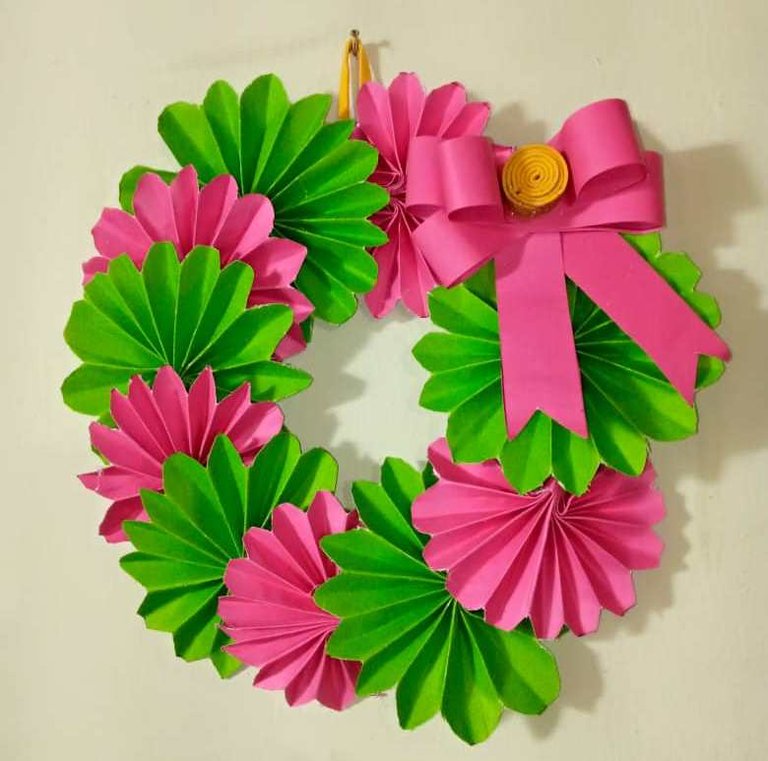
Para que la observen mejor, cambié el fondo , Aunque las dos se ven muy linda.
For a better look, I changed the background, although they both look very nice.
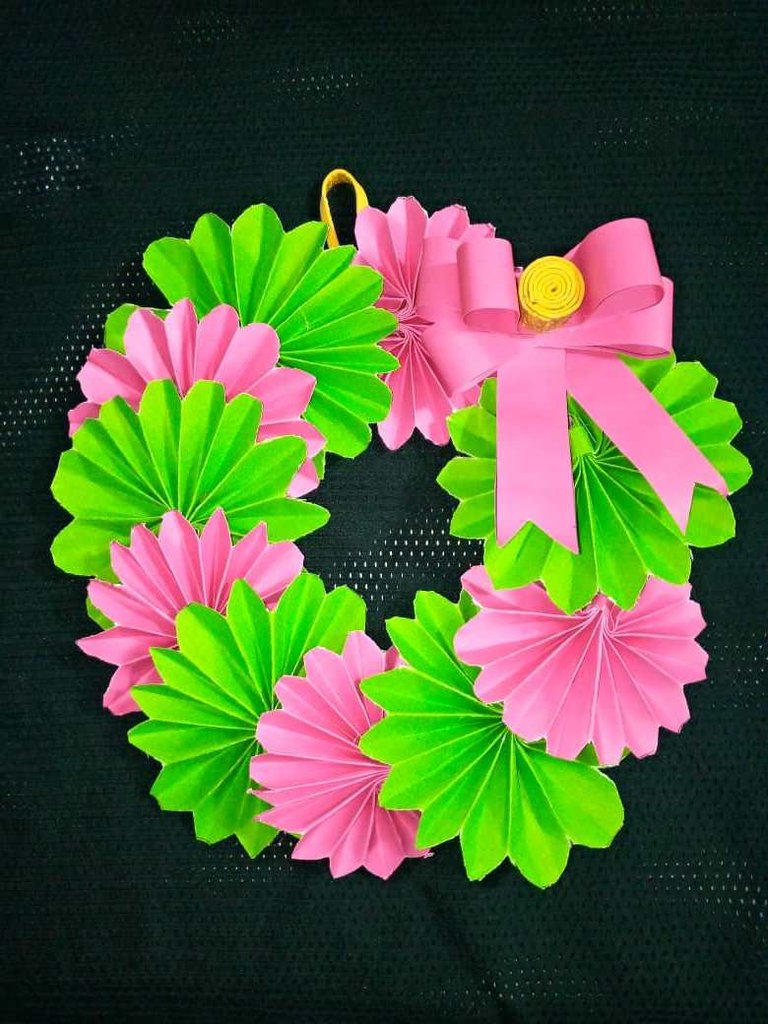
Mi primera corona navideña.
My first Christmas wreath.
Gracias por leer mi post, espero que le gusten, muchas bendiciones , hasta la próxima.Dios les bendiga.
Las fotos son mías , tomadas con telefono Infinix, editadas con incollage y traducidas con DEEPL.
Thank you for reading my post, I hope you like it, many blessings, until next time, God bless you.
The photos are mine, taken with Infinix phone, edited with incollage and translated with DEEPL.