It has been a while since I posted my DIY crafts here. Today, I will be sharing my process of making waterproof stickers. I am really fond of accumulating stickers because I found them aesthetically cute! Perhaps I watched too many Tiktok videos of stickers, lol.
My goal for this article is to show you the steps to making my art into stickers. Some materials are not necessary so, you can just skip those.
Materials:
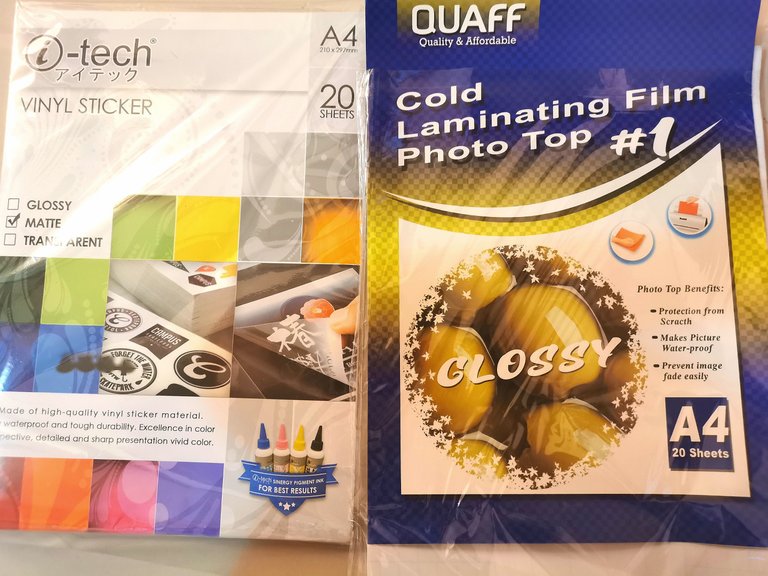
Laminating film
A4 Vinyl sticker paper (I prefer matte)
Scissors or/and craft knife
Printer
Laminating machine
Your design
A lot of patience in cutting your stickers!
Lay out your design
Prior to printing the stickers, I already have some of my art ready. I chose some of the art from my NFT collection called Grumpea. I also included my chibis!
I used Canva for choosing more designs. I am using their free version, by the way. Place the stickers strategically to cover the paper.
For the other designs such as the flowers and clouds, I opted to the Element tab on the left side. I just searched keywords such as "heart", "flower", etc. Be creative in mixing and match different designs. It would be much more pleasing if the colors and the shapes go well together.
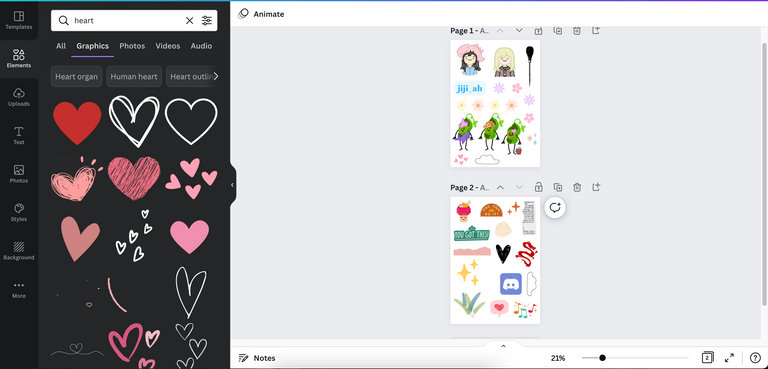
Save the file in PNG so that the design are crispy clear.
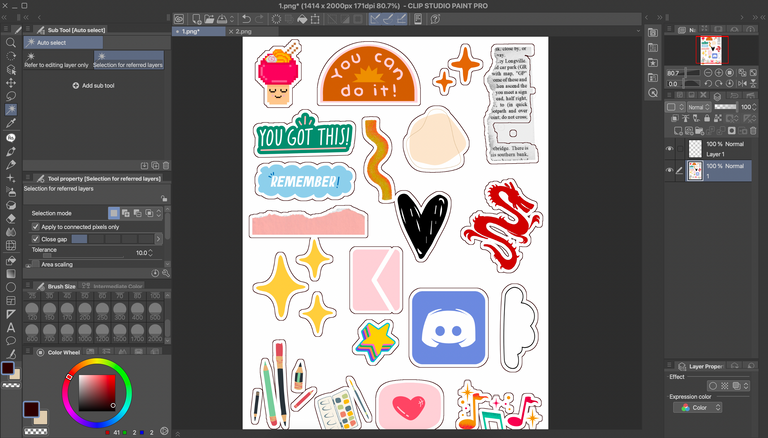
I opened the files in Clip Studio Paint Pro application to add the borders of the stickers. The borders are my guide in cutting the stickers later. If you are using Clip Studio, follow these steps to make a border.
- Select "Auto select" on the tabs.
- Click on the white space between the file.
- Click on "Edit", on the drop-down menu, select "Outline selection".
- Choose "Draw outside" and set the length width. I put 10.
Now, you have created your sticker borders! Save the file in PNG again.
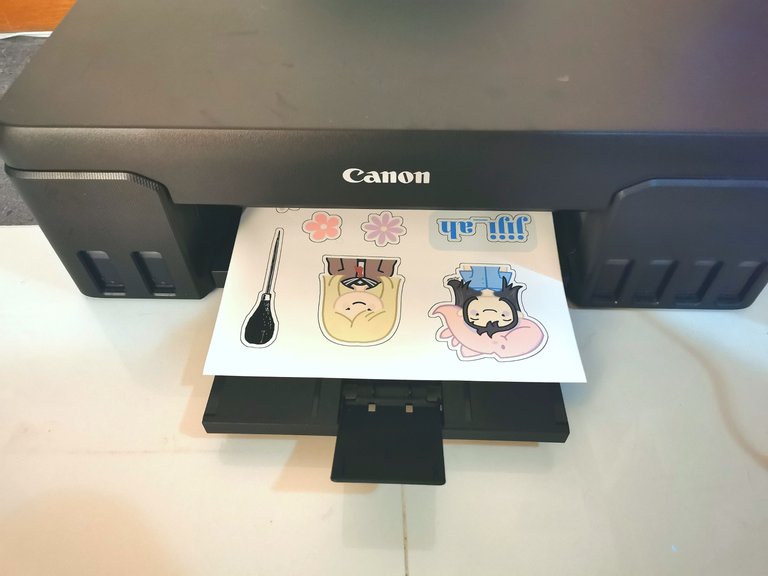
We are ready to print!
I am using the Canon G500 series. I chose the highest quality of print on the print option. I put the vinyl matte sticker paper carefully so that it will not jam the printer.
After printing, time to put the top coat to make the stickers waterproof.
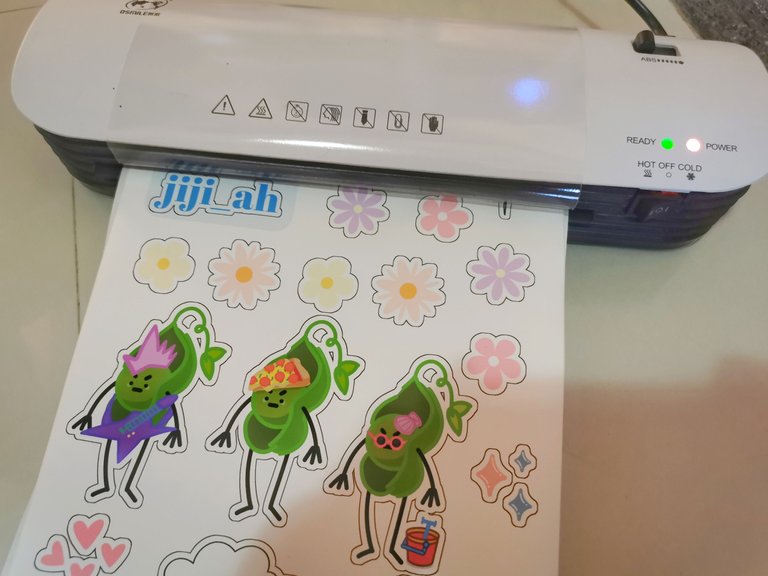
Using the laminating film, I placed them careful on the top. I made sure that all of the paper was covered. To make the laminating film and vinyl sticker paper ahere to each other, I used the laminating machine. This machine can also be used for laminating IDs, documents, important papers, so that it will not be easily damaged by physical forces such as the water and mold. For this process, I use the cold lamination process.
Ready to cut!
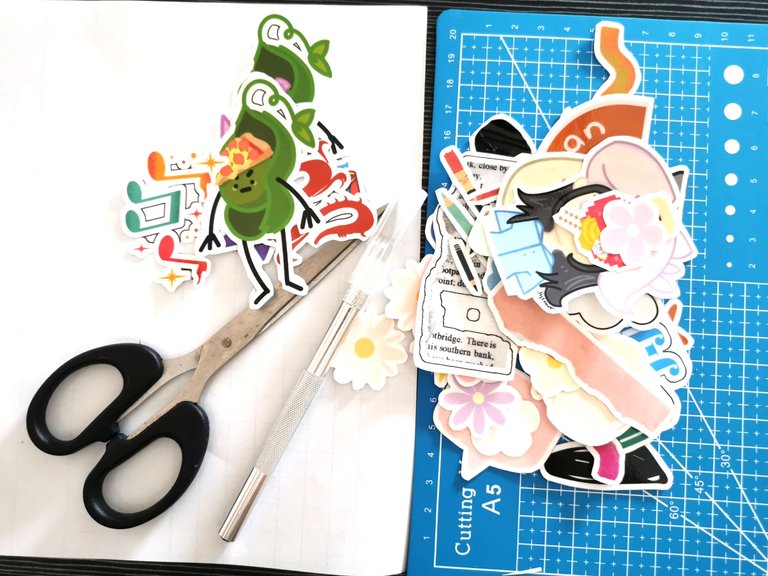
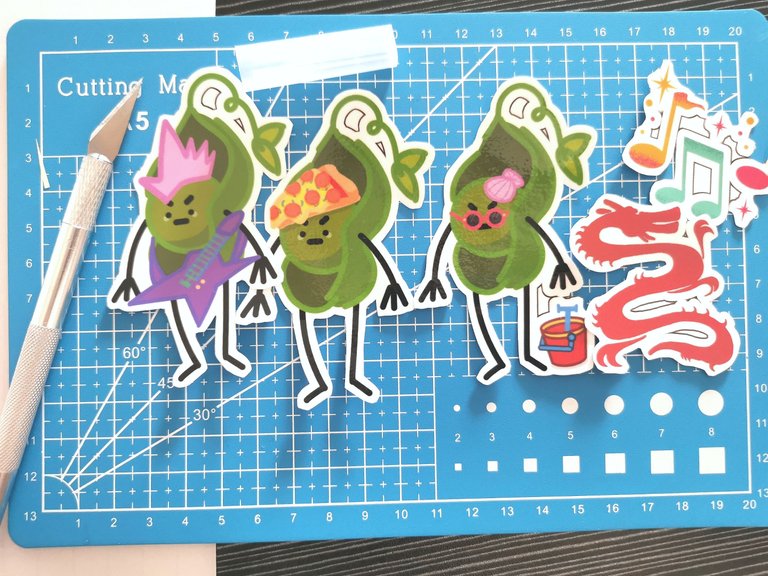
It was the most tedious part of the process. I first cut them into small pieces, just ignoring the borders. It is easier and faster to cut these stickers in that way. I used the craft knife for borders that were placed in the centered. For extra care, I used cutting mat so not to damage the table.
Time for sticker collage!
This time around, I want to decorate my tumbler and black notebook. before sticking them, I made sure that I had the concept already in my mind. It is better to know where to place the stickers on the surface. Tip, do not put small stickers in one place but instead, use smaller stickers to fill the spaces. Scatter the big stickers on the corners or edges.
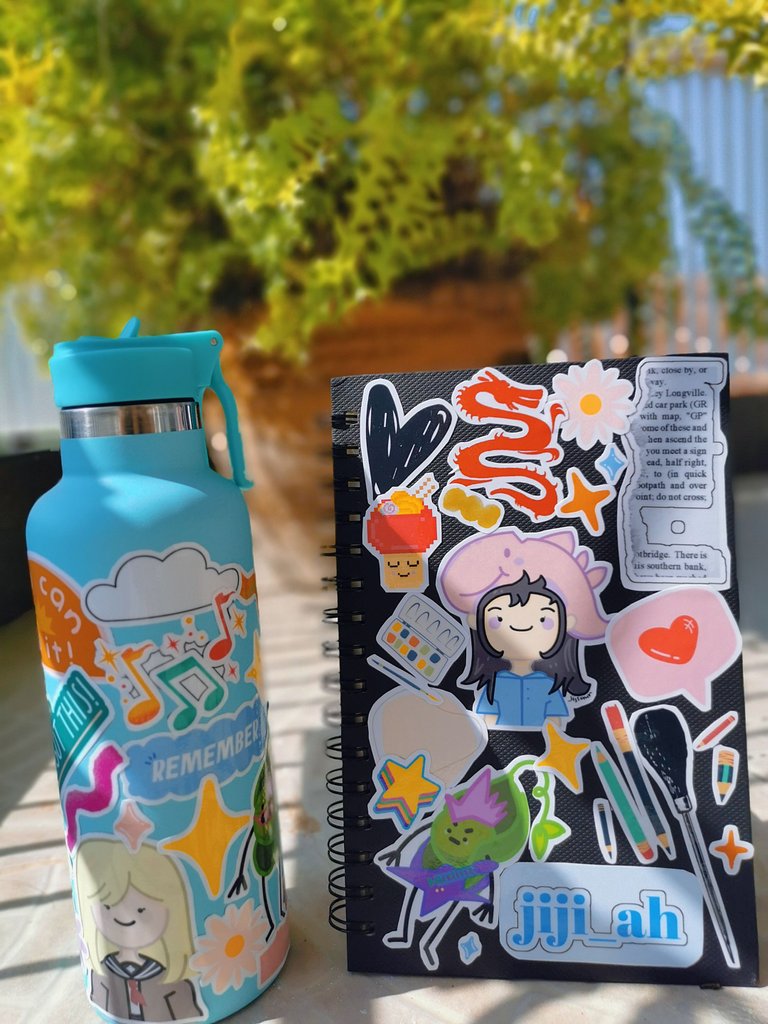
I only did half of the tumbler because I ran out of stickers. What a bummer!
Waterproof and glossy!

I can wash my tumbler without worrying about tearing or wetting the stickers!
Some materials that I used might not be available to others but these are skippable materials. You can make your own sticker by hand-drawing on the matte sticker paper.
I am really happy with how this DIY sticker-making turned out. It turned my plain tumbler and notebook into more aesthetic and fun! Also, I am able to take a glimpse at my art, hehe!
My Grumpea collection: https://opensea.io/collection/grumpea 💚🎶
Laminating machine: Click here
That is it for this article. I will see you at the next one!
📸 All photos are owned and taken by me, otherwise credited. ©️jijisaurart


