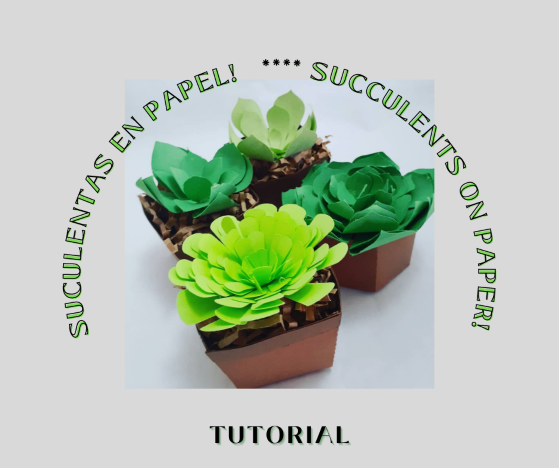


Hola amigos de #HIVEDIY!, espero que todos estén muy bien. Les doy la bienvenida a mi blog. En esta ocasión me gustaría compartirles este tutorial donde te enseño como hacer una suculenta en papel.
Ahorita están muy de moda estas matitas ellas forman parte de la familia de los cactus y se llaman suculentas. Existe una infinidad de variedades de este genero el cual se caracteriza por el poco regado, la resistencia al sol y su durabilidad.
Y si son de las que están enamoradas de estas plantitas y en casa no se les da, que mejor regalo de mi para ustedes que enseñarlas a armar esta linda matita duradera, ya que es en papel.
Ya verás, que los pasos son super fáciles y los materiales, estoy segura los tienes en casa. Además, quedan bellísimas, sirven para decorar cualquier ambiente y las puedes hacer de diferentes tamaños.
Sin más, vamos… manos a la obra.

Hello #HIVEDIY friends, I hope everyone is doing great. I welcome you to my blog. This time I would like to share with you this tutorial where I show you how to make a paper succulent.
Right now these little plants are very fashionable, they are part of the cactus family and they are called succulents. There is an infinity of varieties of this genus which is characterized by the little watering, the resistance to the sun and its durability.
And if you are in love with these little plants and you don't have them at home, what better gift from me for you than to teach you how to make this beautiful and durable potted plant, since it is made of paper.
You'll see, the steps are super easy and the materials, I'm sure you have them at home. Besides, they look beautiful, they can be used to decorate any environment and you can make them in different sizes.
Without further ado, let's get to work!

- Plantilla suculenta No.1.
- Plantilla Matero No. 2.
- Cartulina de color verde.
- Cartulina marrón, gris, blanco.
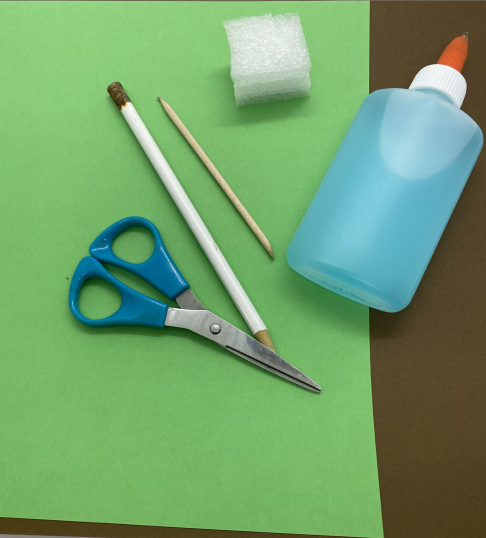
- Tijeras.
- Punzón o palito de naranja.
- Trozo de anime, tecnopor etc.
- Lápiz y regla.
- Pegamento blanco para papel, pegamento de barrita o pegamento caliente de silicona, el que tengas disponible.

- Succulent template No.1.
- Matero template No. 2 .
- Green cardboard, Brown, gray, white cardboard.
- Scissors.
- Punch or orange stick.
- Piece of anime, tecnopor, etc.
- Pencil and ruler.
- White paper glue, glue stick or silicone hot glue, whichever you have available.

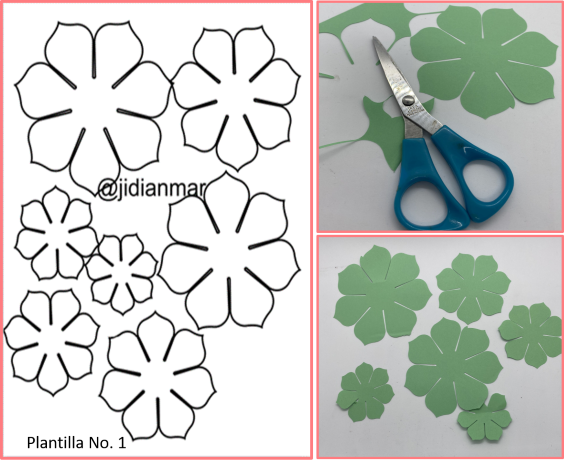
HOJAS:
Comenzaremos transfiriendo la Plantilla No.1, en la cartulina verde , la cual utilizaremos para las hojas, que en esta ocasión serán 7 (también pueden imprimirlo directamente a la cartulina que hayan elegido, esto les hará ahorrar tiempo a la hora de armarlo). Recortamos cada hojita.
LEAVES:
We will begin by transferring Template No.1, on the green cardboard , which we will use for the leaves, which on this occasion will be 7 (you can also print it directly to the cardboard you have chosen, this will save you time when assembling it). Cut out each leaf.
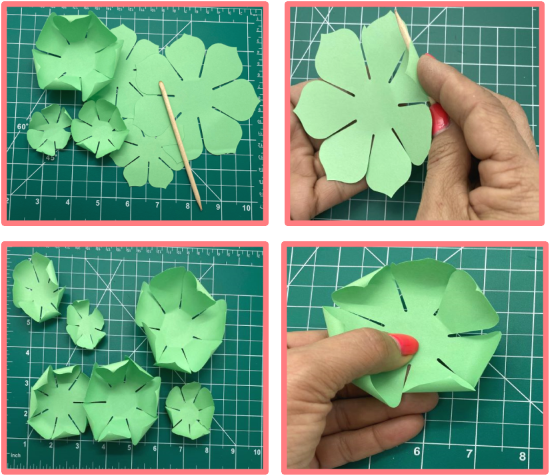
Una vez recortadas, vamos a enrrollar las hojitas por las orillas y punta, con el palito de naranja, eso se hace hoja por hoja, para de darle movimiento y volumen a estas.
Once cut out, we will roll the leaves along the edges and tip, with the orange stick, this is done leaf by leaf, to give movement and volume to these.
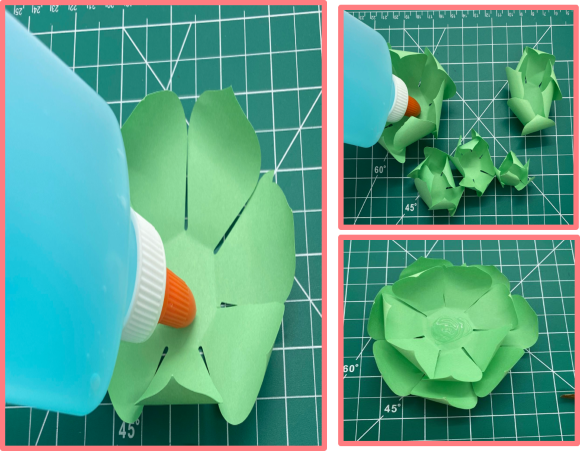
Luego de haber dado volumen a las hojas, las pegaremos de mayor a menor y una sobre la otra, con una gotita de pegamento en el centro.
After having given volume to the leaves, we will glue them from larger to smaller and one on top of the other, with a drop of glue in the center.
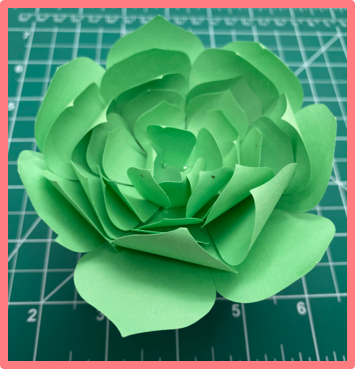
Despues de pegar, los 7 petalos, ya tenemos lista la parte de arriba!!
After gluing the 7 petals, we have the top part ready!
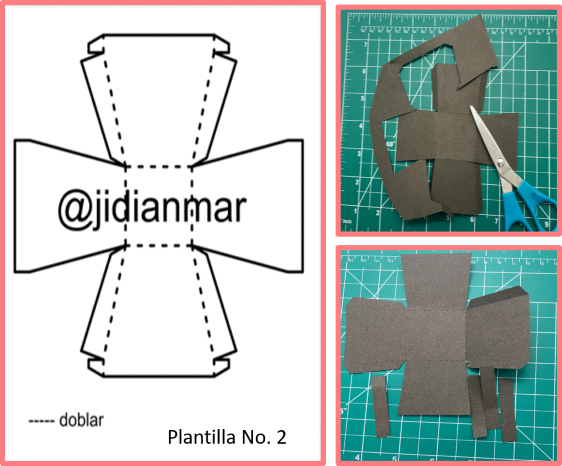
Una vez realizada la suculenta procederemos con el matero, para ello utilizamos la Plantilla Matero No. 2, lo traspasamos a la cartulina color marrón o el color de tu preferencia. Recortamos y doblamos por la línea punteada y en las orejitas colocamos el pegamentouniendo todas las partes entre si.
Once the succulent is made, we will proceed with the matero, for this we use the Matero Template No. 2, we transfer it to the brown cardboard or the color of your choice. Cut out and fold along the dotted line and place the glue on the ears joining all the parts together.
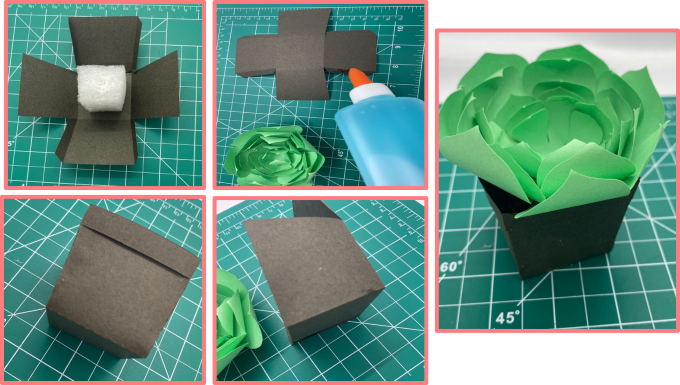
Una vez ensamblado, colocaremos dentro del matero la pieza de anime y le colocamos pegamento en los dos extremos, encima colocaremos la plantita para que se peque al pedacito de anime. También puede sustituir la maceta de papel, con macetitas de arcilla, latas o recipientes decorados por ustedes para colocar su cactus.
Once assembled, place the piece of anime inside the pot and place glue on both ends, place the plant on top so that it will stick to the piece of anime.
You can also replace the paper pot, with clay pots, cans or containers decorated by you to place your cactus.

Muchas gracias por visitar mi blog @jidianmar. Les envió muchas bendiciones, que tengan un excelente día, cuídense y pásenla bien.
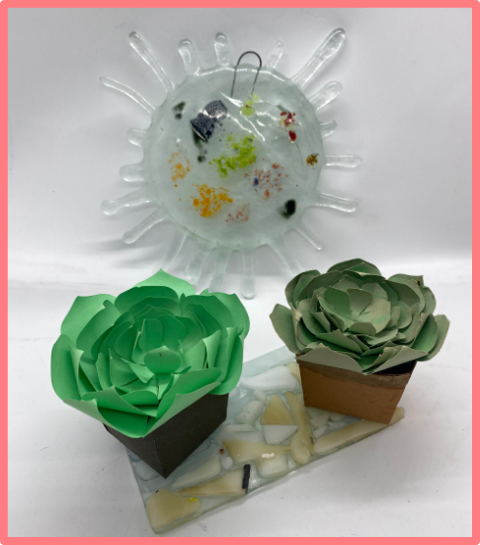
And now you have your first paper succulent, ready to be part of your decoration.
Dear friends, I hope you liked this beautiful project and that you put it into practice. Thank you very much for visiting my blog @jidianmar. I send you many blessings, have a great day, take care and have a good time.
Fotos editadas con Canva
Fotos de mi autoría Derechos de autor reservados
Cámara: iphone11
Traducido con www.DeepL.com/Translator (versión gratuita)
Photos edited with Canva
Photos by me Author's rights reserved
Camera: iphone11
Translated with www.DeepL.com/Translator (free version)