Los patrones son instrumentos valiosos al momento de realizar cualquier actividad manual, ya que permiten guiar el proceso de manera de obtener un gran resultado.
Como les comenté en un post anterior, me estoy incursionando en el mundo de intarsia crochet, para conocer en qué consiste la técnica, Ver publicación.
Cuando comienzo a aprender una técnica, me gusta comprender cada uno de los elementos involucrados en el proceso para lograr un gran resultado.
He comenzado por analizar los patrones, para ello he decidido hacer uno bien sencillo, con este patrón estaré tejiendo mi primer proyecto en intarsia crochet.
Patterns are valuable tools when performing any manual activity, since they allow guiding the process in order to obtain a great result.
As I mentioned in a previous post, I am getting into the world of intarsia crochet, to learn what the technique consists of, See publication.
When I start learning a technique, I like to understand each of the elements involved in the process to achieve a great result.
I have started by analyzing the patterns, for this I have decided to make a very simple one, with this pattern I will be knitting my first project in intarsia crochet.
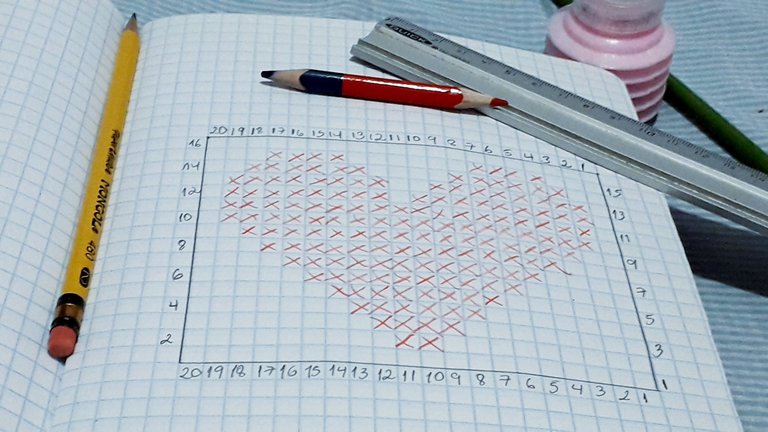
Soy pro tecnología, he podido hacer este patrón usando alguna herramienta tecnológica, pero no quise, preferí hacerlo manualmente, básicamente para que aquellas personas que no tengan acceso a una de esas herramientas tecnológicas pueda hacer su patrón sin ningún inconveniente.
Para realizar este patrón, se necesita una hoja cuadriculada, regla, lápiz grafito y colores. Ideal que los colores sean similares al los hilos con los que se va tejer.
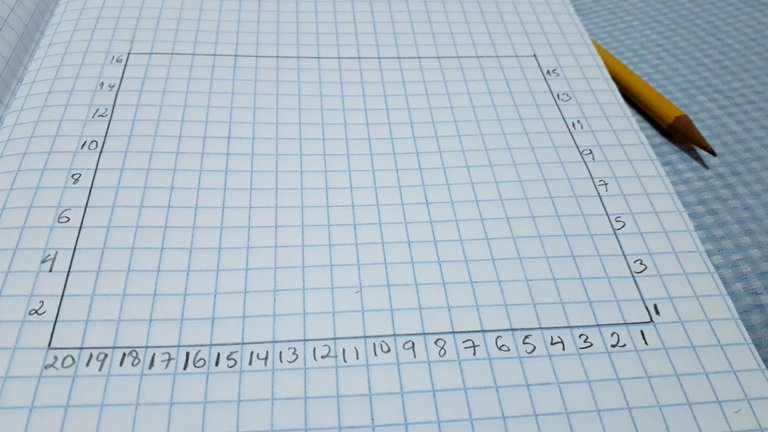
Comencé colocando números del 1 al 20, dichos números los he colocado de izquierda a derecha, esos números van a representar la cantidad de cadenetas que se deberán tejer para iniciar el proyecto. Este patrón me está indicando que debo tejer 20 cadenetas.
I am pro technology, I could have made this pattern using some technological tool, but I did not want to, I preferred to do it manually, basically so that those who do not have access to one of these technological tools can make their pattern without any inconvenience.
To make this pattern, you need a grid sheet, ruler, graphite pencil and colors. Ideally, the colors should be similar to the yarns with which you are going to weave.
To make this pattern, you need a grid sheet, ruler, graphite pencil and colors. Ideally, the colors should be similar to the yarns with which you are going to weave.
I started by placing numbers from 1 to 20, these numbers have been placed from left to right, these numbers will represent the number of chains that must be knitted to start the project. This pattern is telling me that I have to knit 20 chains.
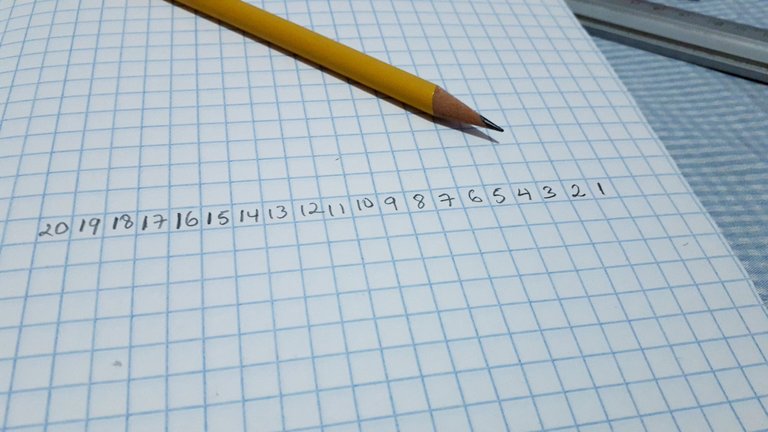
A continuación, coloqué los números impares dejando un espacio en blanco, estos números impares van a representas las filas impares de la labor, también van a representar el lado derecho.
Next I placed the odd numbers leaving a blank space, these odd numbers will represent the odd rows of the work, they will also represent the right side.
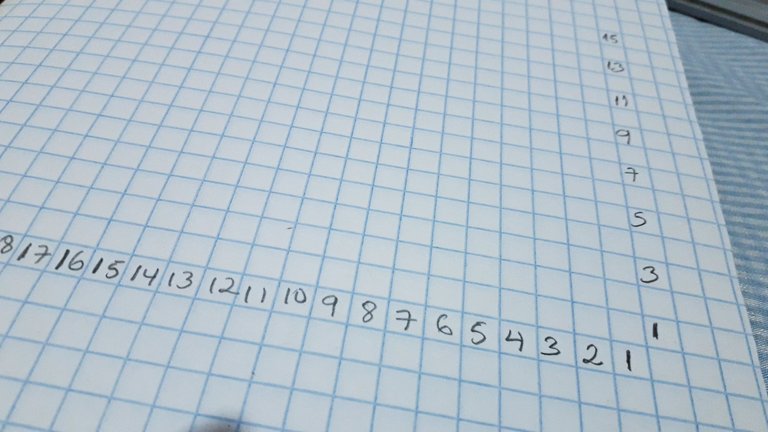
Para continuar con el patrón, coloqué los números pares, estos números van a representar las filas pares.
To continue with the pattern, I placed the even numbers, these numbers will represent the even rows.
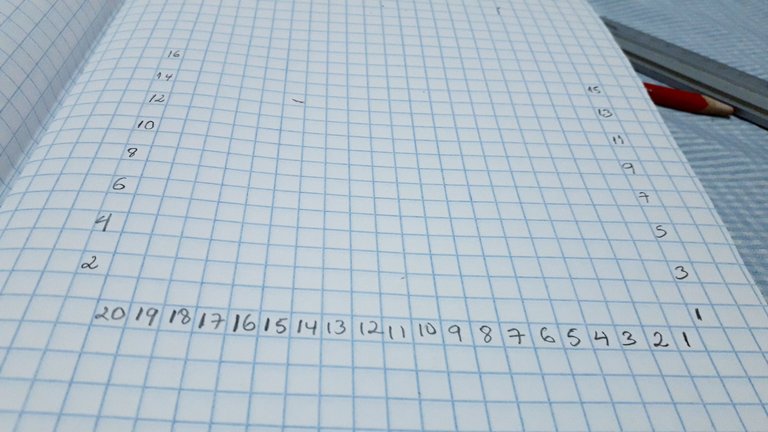
A continuación, con un lápiz realicé rectas usando una regla, de manera delimitar el patrón.
Then, with a pencil, I made straight lines using a ruler, in order to delimit the pattern.
Llegó el momento divertido del patrón, comenzar a realizar la figura, en este caso seleccioné un corazón, ubiqué el centro en la fila 2 para dar inicio al dibujo.
Es importante mencionar, cada cuadrito va representar un punto bajo al momento de tejer.
The fun moment of the pattern has arrived, start making the figure, in this case I selected a heart, I placed the center in row 2 to start the drawing.
It is important to mention that each square will represent a single crochet stitch when knitting.
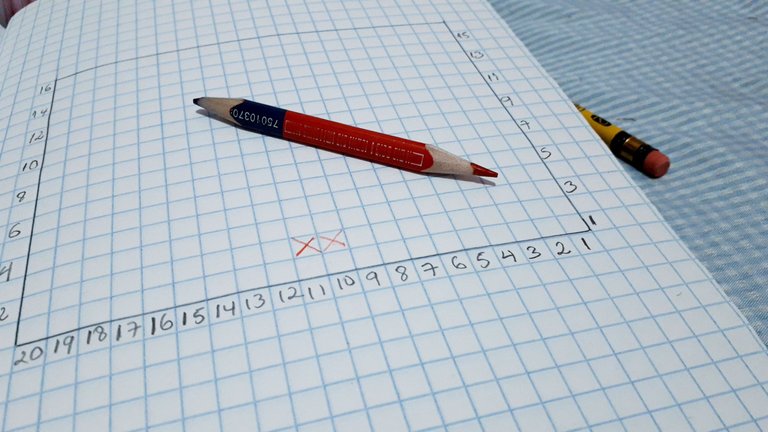
Continué avanzando en el patrón, imaginando el corazón, fui agregando más puntos en cada fila.
I continued to move forward in the pattern, imagining the heart, adding more stitches in each row.
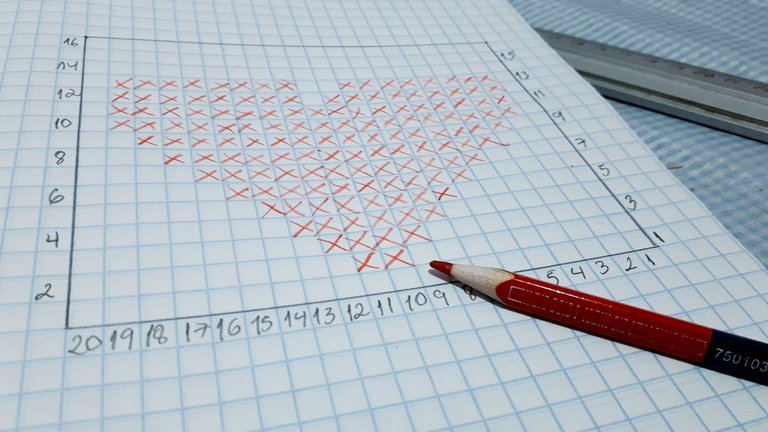
Algunos de los tejidos, tienen un comportamiento de aumentos en puntos, luego se mantienen la misma cantidad de puntos por varias vueltas y luego vienen las vueltas de disminuciones de los puntos. En la imagen continuación, se podrá observar que la cantidad de puntos en los extremos dan la impresión que se mantienen, solo que en centro del patrón comencé a formar el centro del corazón.
Some of the fabrics, have a behavior of increases in stitches, then the same amount of stitches are maintained for several rounds and then come the rounds of decreases of the stitches. In the image below, you can see that the number of stitches at the ends give the impression that they are maintained, only that in the center of the pattern I began to form the center of the heart.
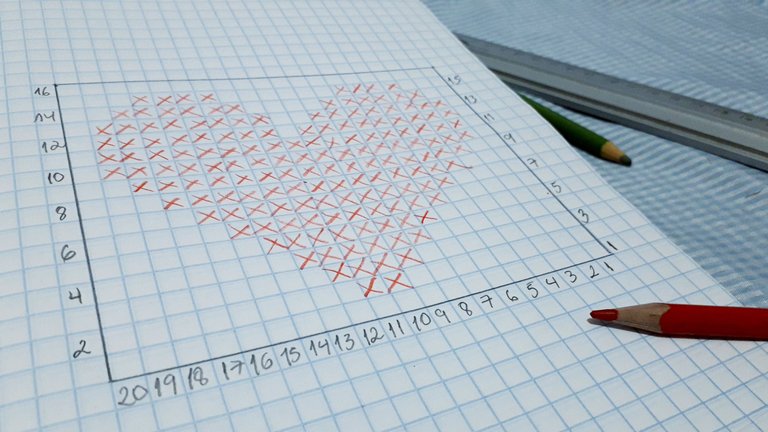
Finalmente, coloqué en la parte superior los números el 1 al 20 de izquierda a derecha, esto con el fin de que cuando esté avanzada, se haga más fácil de seguir los puntos por columna.
Por otro lado, comentarles para esta labor usaré dos colores, aún no he decidido los colores de fondo y el del corazón, lo que no tiene color rojo en el diagrama representa el fondo y lo que está en rojo el corazón.
Lo maravilloso de este patrón, es que se puede usar para tejer en las técnicas intarsia, wayuu y taspetry. También para bordar en punto de cruz.
Finally, I placed at the top the numbers 1 to 20 from left to right, this so that when it is advanced, it will be easier to follow the stitches per column.
On the other hand, I will use two colors for this work, I have not yet decided the background and heart colors, what is not red in the diagram represents the background and what is in red represents the heart.
The wonderful thing about this pattern is that it can be used for weaving in intarsia, wayuu and taspetry techniques. It can also be used for cross stitch embroidery.

Gracias por dedicar un espacio de su tiempo para leer la publicación. Si hay alguna pregunta, por favor pregúntame en la sección de comentarios a continuación.
Thank you for taking the time to read this publication. If there are any questions, please ask me in the comments section below.
Texto e imágenes: Por @jicrochet
Text and images: By @jicrochet
Translated with www.DeepL.com/Translator (free version)