Hello to all members of this lovely community!!
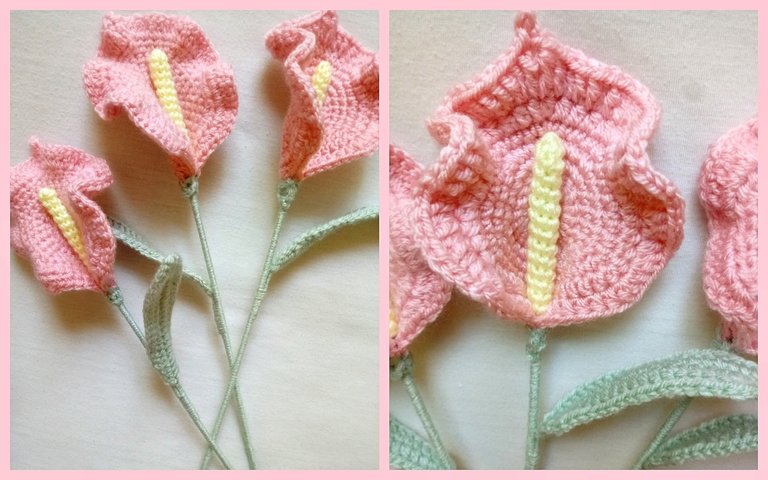
I've been taking advantage of the last few days to make some progress with my crochet flower learning. This time I want to show you these calla lilies that I made a few days ago. I remember when I was a child we had one of these plants in our yard and my mother loved them. I knew them in white, but I saw that they were also available in other colours and I decided to make them pink for a change, as I have some white daisies.
Hola a todos los miembro de esta bonita comunidad!!
Yo estos últimos días estuve aprovechando para avanzar con mi aprendizaje de flores a crochet. En esta oportunidad les quiero mostrar estas calas que hice hace unos días. Recuerdo que cuando era niña teníamos una de estas plantas en nuestro patio y a mi madre le encantaba. Yo las conocía en color blanco, pero vi que también había de otros colores y decidí hacerlas rosa para variar más, ya que tengo unas margaritas blancas.

This time I chose to finish the smallest parts first, which are the leaves and the centre, so that I can assemble the stem and when I finish the other part I have it ready. I also use liquid silicone, which takes longer to dry and in that time I continue crocheting the petal.
Esta vez elegí terminar primero las partes más pequeñas que son las hojas y el centro, para poder armar el tallo y así cuando termino la otra parte ya tengo lo tengo listo. Además yo uso silicona líquida, que demora más en secarse y en ese tiempo sigo tejiendo el pétalo.


The flower is crocheted in circular. There are 7 rows in total and different basic stitches are used. I was pretty confident that it would be easy because of the way it looks, but sometimes I got lost because the increases are different in the same row, for example in one row you can have increases every 2 stitches, then every 4 and then every 2 again. But it was quite enjoyable to do that part.
La flor se teje todo en circular. Son 7 vueltas en total y se usan diferentes de puntos básicos. Yo estaba bastante confiada en que sería sencillo por la forma en que se ve, pero a veces me perdía porque los aumentos son diferentes en la misma vuelta, por ejemplo en una mosma vuelta puedes tener aumentos cada 2 puntos, luego cada 4 y de nuevo cada 2. Pero fue bastante entretenido hacer esa parte.


Now all that needs to be done is to glue the flower to the stem. I think it is glued on the back side because it is the part where it takes the best shape, but I didn't realise and glued one on the right side and I think you can see the difference because the others " bend" backwards and this one forwards.
In the next pictures I show you the result and I hope you like it.
Ahora sólo resta pegar la flor al tallo. Creo que se pega del lado revés porque es de la parte en la que toma mejor forma, pero yo no me di cuenta y pegué una del lado derecho y creo que se puede ver la diferencia porque las otras se "doblan" hacia atrás y esta hacia delante.
En las siguientes fotos les muestro el resultado.


I hope you liked the result. I've been looking at what other flower I can make but I can't decide yet, but I have some ideas, especially with the colours I would like to use.
Espero que les haya gustado el resultado. Estos últimos estuve mirando cuál otra flor puedo hacer pero no pude decidirme aún, pero tengo algunas ideas, sobre todo con los colores que me gustaría usar.

💕Thank you very much for reading my post and have a nice day💕
💕Muchas gracias por leer mi post y que tengan un bonito día💕

