

Some time ago a friend told me, the best way to learn to design is to create Photomontages, so you learn to create a different image, starting from several.
At the beginning I did not pay much attention to him, I saw it really complicated, I started to see the different photomontages that they created, I thought how they do it so that they look like this, so real.
Sometimes you are afraid to do certain things, thinking that it will look bad, that it won't be as spectacular as the others, but not if you don't dare, if you don't even try, how will you know how to do it.
At that time I dared to do some, in fact, I showed them to my friend, he is a graphic designer, so he gave me his opinion, some did not like them, he told me, something was missing, he discouraged me, the truth, he never liked it at all.
I did not continue, I left it there, I focused on other things, simpler, well, I thought so, but the world of design is something really complicated in every way, you do not need to be an expert, but you need to know how to use each tool.
My sister is a graphic designer, I used to see her designs and I used to say wow, they look great, I couldn't do something like that, the truth is, she has seen very few of my designs, well I haven't done many of them either.
However, I want to learn and improve, I want to say that I can do a little bit of everything, maybe this will be useful in the future, it is never too much to learn something new every day.
Design a Photomontage
In this opportunity I share with you this little Photomontage that I made, I explain, this is a technique where they join one or more images to form one, where a new image composition is created.
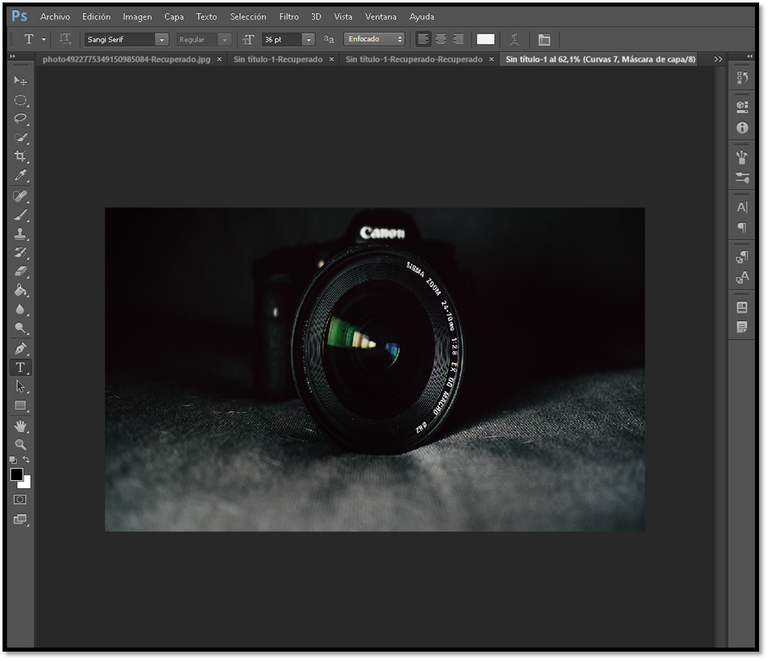
The program I used to make this design is Photoshop, with it I have been doing all my designs, whether banner, covers for my blog, logos, in short, is a great working tool, where we can create great things.
It should be noted that, with this program, to make these effects work with different layers, each one has its function, we can give brightness, opacity, color, in short, a little bit of everything.
Now let's see how I made this design, first I will show you the images that I used to create this photomontage, as you will see each one is different, the idea is to join them, combine them, and finish creating a single one.
 |  |
|---|
 |  |
|---|
Step by Step
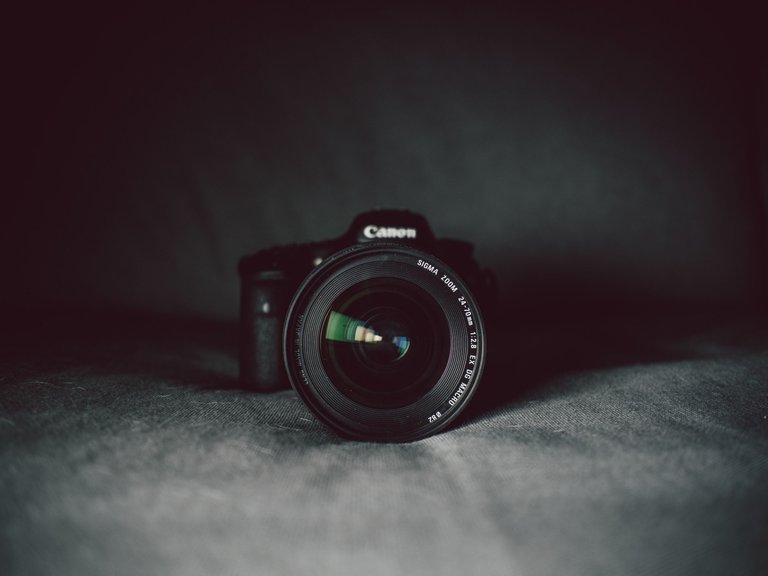
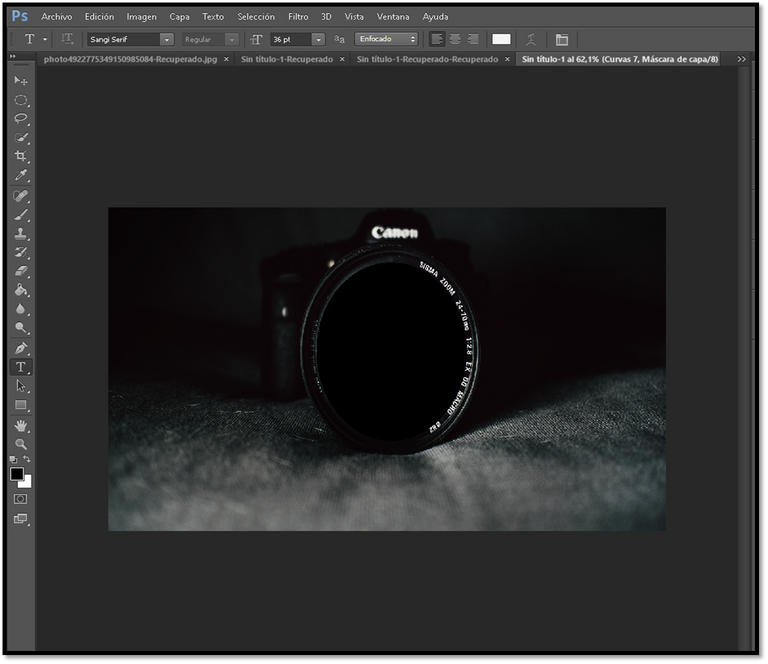
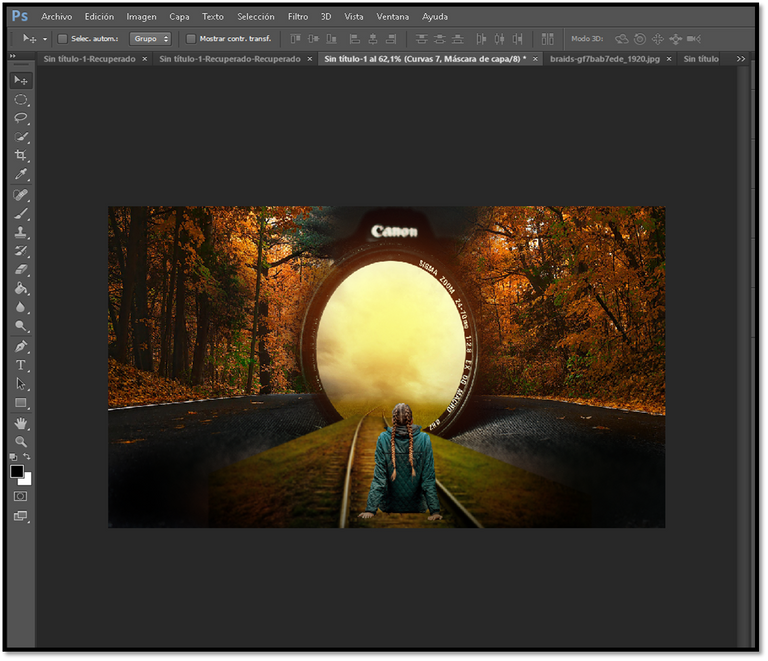
Let's start with the first image, it is of a photographic camera, we will lower the opacity, darkening it a little, with the curve effect, at the same time subtracting brightness.
In the middle of the camera, we will create a small circle, and we will take the following image, which we will duplicate, being that with the first one we will make a clipping mask effect, leaving a part of the image in the circle.
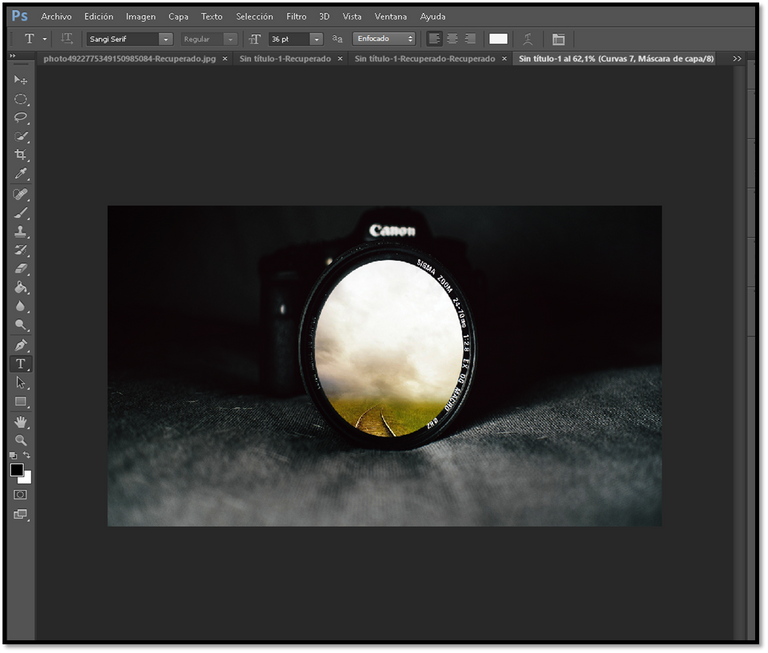
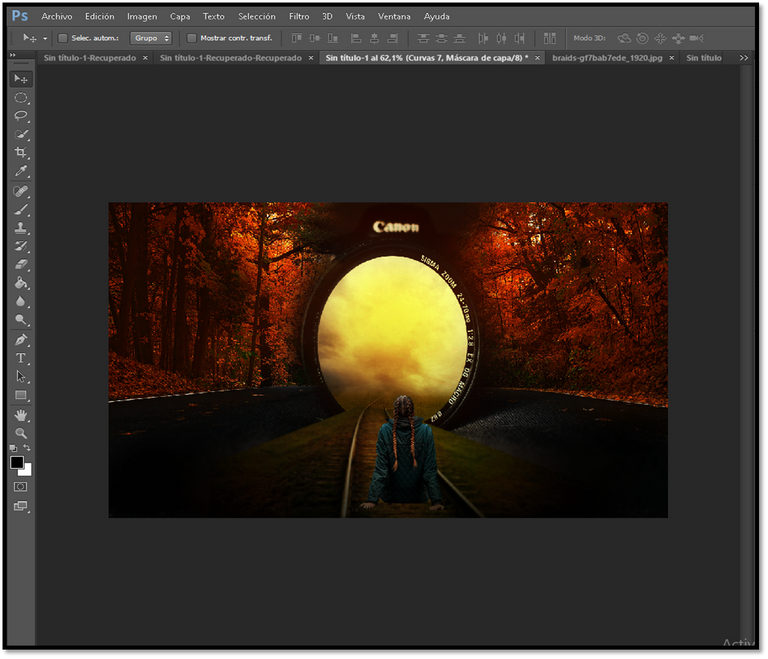
Next, with the duplicated image we will crop it a little, so that it is in correlation with the previous cropped image, to this image we will use the brush and we will make an effect, covering some parts of it.


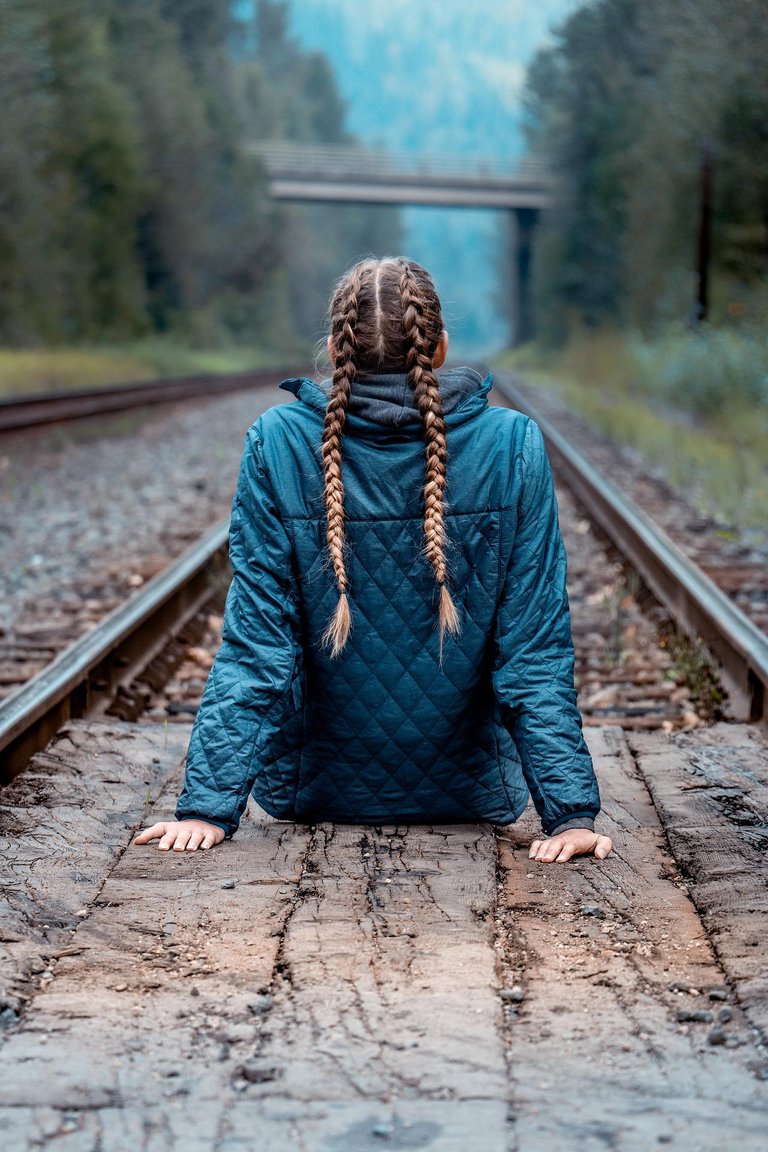
Now we will insert the third image, here we will only take the girl who is sitting, so we will make a separate effect, to remove the background, leaving only the girl.

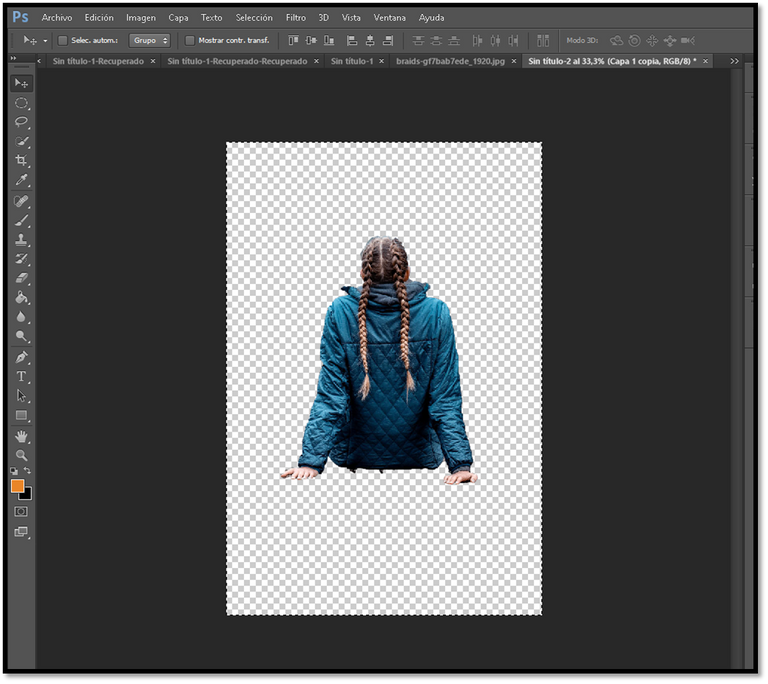
Once this is done, we will add it to our original image.
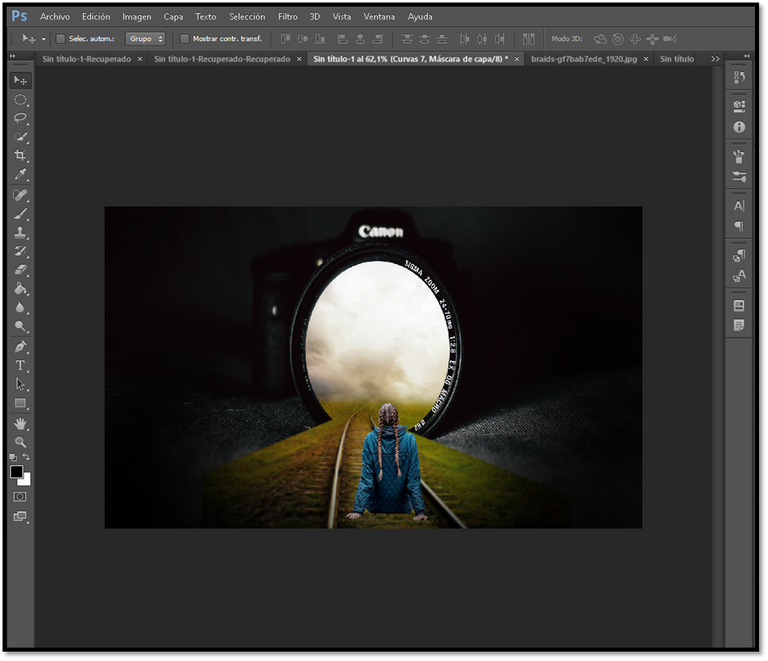
As I said with this program we can make a light effect, that is why with the brush tool, we will proceed to perform such effects.

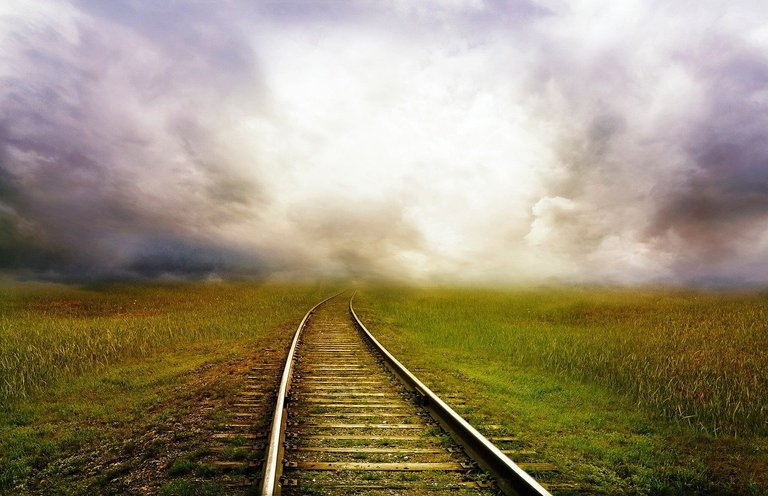
Finally, we have the other image, which we will place as background, here we will also use the brush with the layer mask, to cover and remove some parts, leaving only the one we want to show.
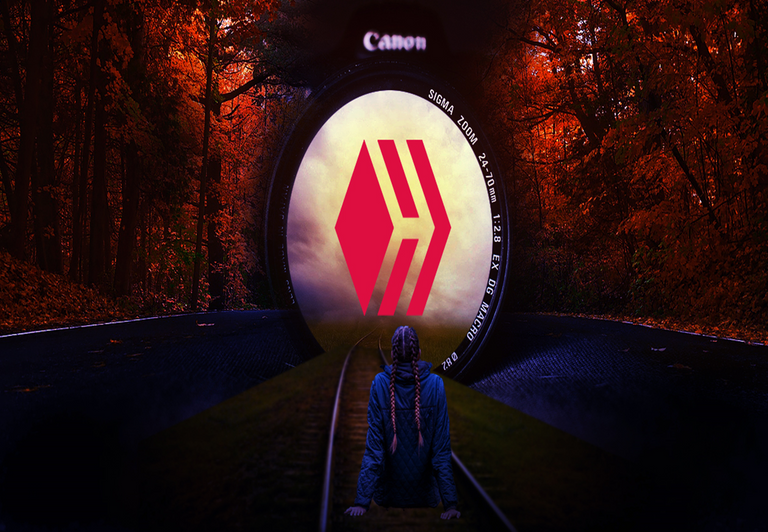
But that's not all, to finish we will give another touch with the curve tool, we will change a little the tonality, giving it a little more highlight with a blue tone, and as this is an exclusive image for Hive, what if we add the logo, leaving our photomontage like this.
I must confess that I am happy to have made this design, maybe for some people it is not a big deal, but for me it is, this is the first of many to come, I hope so.
Thanks for reading, if you like it let me know, leaving a nice comment, until next time.
Hace un tiempo un amigo me dijo, la mejor forma de aprender a diseñar es crear Fotomontajes, así vas aprendiendo a crear una imagen diferente, partiendo de varias.
Al principio no le hice mucho caso, lo veía realmente complicado, me ponía a ver los distintos fotomontajes que creaban, pensaba como lo hacen para que queden así, tan reales.
Uno a veces se cohíbe en hacer ciertas cosas, pensando que va a quedar mal, que no quedara tan espectacular como a los demás, pero no si no te atreves, si ni siquiera lo intentas como lo sabrás.
En aquel entonces me atreví hacer algunos, es más, se los mostré a mi amigo, él es diseñador gráfico, por lo que me daba su opinión, algunos no les gustaron, me decía, le falta algo, me desanimaba, la verdad, nunca le gustaba del todo.
No seguí, lo dejé hasta allí, me enfoqué en otras cosas, más sencillas, bueno, eso creía yo, pero es que el mundo del diseño es algo realmente complicado en todos los sentidos, no necesitas ser un experto, pero si conocer el manejo de cada herramienta.
Mi hermana es diseñadora gráfica, yo veía sus diseños y decía valla le quedan muy bien, yo no podría hacer algo así, la verdad, ella muy poco ha visto mis diseños, bueno tampoco es que he hecho muchos.
Sin embargo, quiero aprender y mejorar, decir que puedo hacer de todo un poco, quizás esto en algún futuro me sirva de algo, nunca está demás aprender algo nuevo todos los días.
Diseña un Fotomontaje
En esta oportunidad les comparto este pequeño Fotomontaje que realice, les explico, esto se trata de una técnica donde unen una o varias imágenes para formar una sola, donde se crea una nueva composición de imagen.
El programa que utilice para hacer este diseño es Photoshop, con el mismo he venido haciendo todos mis diseños, ya sea banner, portadas para mi blog, logos, en fin, es una gran herramienta de trabajo, donde podemos crear grandes cosas.
Cabe destacar que, con este programa, para realizar estos efectos se trabajan con distintas capas, cada una tiene su función, podemos darle brillo, opacidad, color, en fin, de todo un poco.
Ahora veamos como hice este diseño, primero les mostraré las imágenes que utilice para crear este fotomontaje, como verán cada una es distinta, la idea es unirlas, combinarlas, y finalizar creando una sola.
| |
|---|
| |
|---|
Paso a Paso
Empecemos con la primera imagen, es de una cámara fotográfica, a la misma le bajaremos la opacidad, oscureciéndola un poco, con el efecto curva, a su vez restándole brillo.
En el medio de la cámara, crearemos un pequeño círculo, y tomaremos la siguiente imagen, la cual duplicaremos, siendo que con la primera realizamos un efecto con máscara de recorte, quedando una parte de la imagen en el círculo.
Seguidamente, con la imagen duplicada la recortaremos un poco, cuestión de que quede en correlación con la anterior imagen recortada, a esta imagen usaremos el pincel y le haremos un efecto, tapando unas partes en la misma.
Ahora insertaremos la tercera imagen, aquí solo tomaremos a la chica que está sentada, por ello haremos un efecto aparte, para quitar el fondo, dejando de esta manera solo a la chica.
Una vez realizado esto, la agregaremos a nuestra imagen original.
Como dije con este programa podemos hacer un efecto de luz, es por esto que con la herramienta pincel, procederemos a realizar dichos efectos.
Por último, tenemos la otra imagen, la cual la colocaremos como fondo, aquí también usaremos el pincel con la máscara de capa, para cubrir y eliminar unas partes, dejando solo la que queremos mostrar.
Pero eso no es todo, para finalizar le daremos otro toque con la herramienta curva, le cambiaremos un poco la tonalidad, dándole un poco más de resalte con un tono azul, y como esta es una imagen exclusiva para Hive, que tal si le agregamos el logo, quedando nuestro fotomontaje de esta manera.
Debo confesar que me siento feliz de haber hecho este diseño, quizás para algunos no sean gran cosa, pero para mí si lo es, este es el primero de muchos que vendrán, espero así sea.
Gracias por leerme, si les gusto déjenme saberlo, dejando un lindo comentario, hasta la próxima.
Resources used
Cover and Banner edited with Photoshop
railroad / girl / photographic camera /fall
Capture images from my PC
video editor climpchamp/ App gif giphy


