✨¡Hola gente bella! ✨
Qué gusto poder saludarles nuevamente, espero que estén teniendo una excelente semana junto a sus pequeños, ahora que están en esta temporada de vacaciones 😉
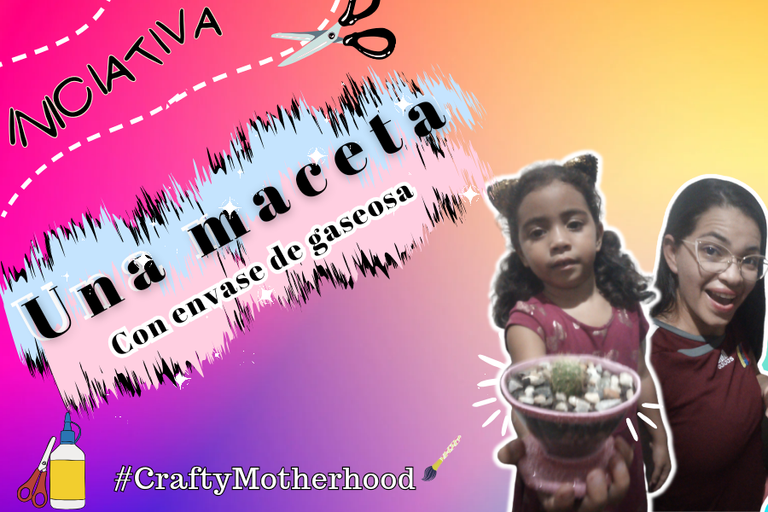
Y hablando de vacaciones 🤔yo les quiero compartir a todos ustedes una increíble manualidad qué hice junto a mi hija, esto con motivo a la iniciativa #craftyMotherhood, sino te has enterado aún sobre esto, aquí te dejo el enlace para que te sumes a esta bonita inic1iativa y nos compartas esos momentos creativos con tus pequeños 🔜 Iniciativa
✨Hello beautiful people! ✨
What a pleasure to be able to greet you again, I hope you are having a great week together with your little ones, now that you are in this vacation season 😉.
And speaking of vacations 🤔I want to share with you all an amazing craft what I did with my daughter, this on the occasion of the #craftyMotherhood initiative, if you haven't heard about it yet, here is the link so you can join this beautiful initiative and share with us those creative moments with your little ones 🔜 Iniciativa

Volviendo al tema mis madres bonitas, 🤭 les cuento que en esta ocasión quise hacer con mi hija Esther una pequeña maceta porque nos regalaron un bonito cactus 🌵 y el envase en el que lo teníamos no le hacía justicia a lo bonito de la planta así que me puse manos a la obra e hicimos esta bonita maceta, qué en realidad esta taza puede ser utilizada de muchas maneras a mí me pareció genial usarla como maceta, pero queda linda como un detalle para alguna actividad, rellenarlas de golosinas, semillas, caramelos, u otras cosas sería genial poder ver sus diferentes usos... 🤔
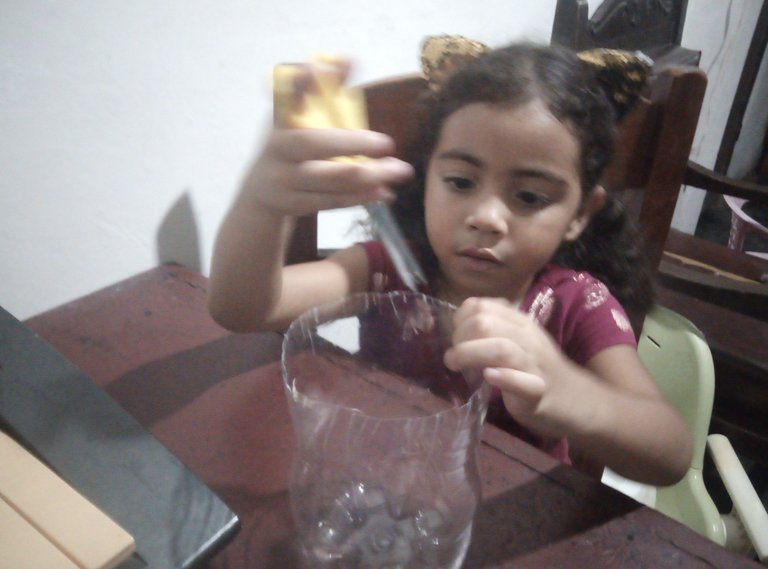
Esther siempre es una buena compañía mientras realizamos estas manualidades para todos ustedes, es muy creativa y participativa, tanto que ella quería hacer una maceta enorme jajaja así que tuve que hacerla cambiar de opinión🙈
Quise continuar con la misma temática del uso de reciclaje y utilizar estos envases de gaseosa qué de verdad ¡son bastante prácticos! , ¡tienen mil usos! ✌🏻así que no los desechen si les gustan las manualidades, tienen miles de formas para reciclarlos, puedes ayudar al planeta y también enseñar y divertirte con tus hijos mientras crean cosas bonitas.
Back to the topic my beautiful mothers, 🤭 I tell you that this time I wanted to make with my daughter Esther a small pot because we were given a beautiful cactus 🌵 and the container in which we had it did not do justice to the beauty of the plant so I got down to work and we made this pretty pot, I thought it was great to use it as a flower pot, but it looks nice as a detail for some activity, fill it with candy, seeds, seeds, candy, or other things, it would be great to see its different uses. .. 🤔
Esther is always a good company while we make these crafts for all of you, she is very creative and participative, so much that she wanted to make a huge pot hahaha so I had to make her change her mind🙈.
I wanted to continue with the same theme of using recycling and use these soda containers which really are quite practical! they have a thousand uses! ✌🏻así don't throw them away if you like crafts, you have thousands of ways to recycle them, you can help the planet and also teach and have fun with your kids while creating beautiful things.
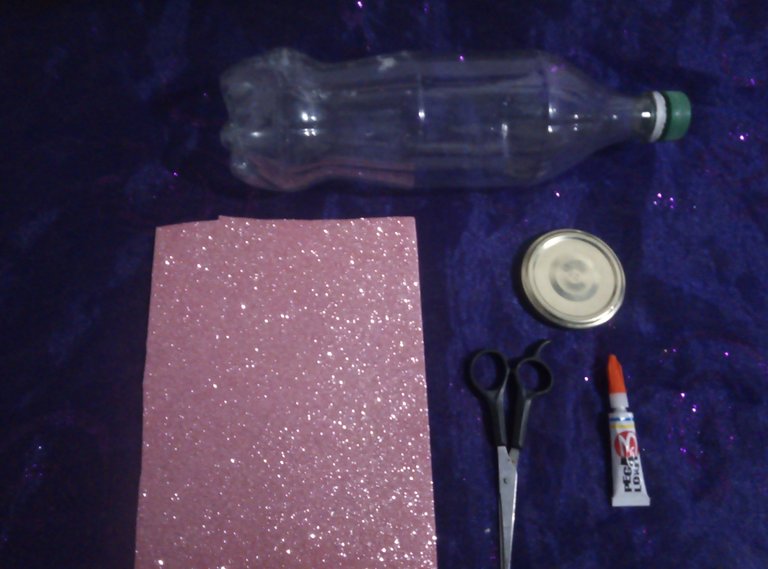
✂️Estos son los materiales que utilizamos:
| Envase plástico de gaseosa | |
|---|---|
| Pega instantánea | |
| Tijeras | |
| Tapa | |
| Foami escarchado |
✂️are the materials we use:
| Plastic soda container | |
|---|---|
| Instant glue | |
| Scissors | |
| Lid | |
| Frosted Foami |

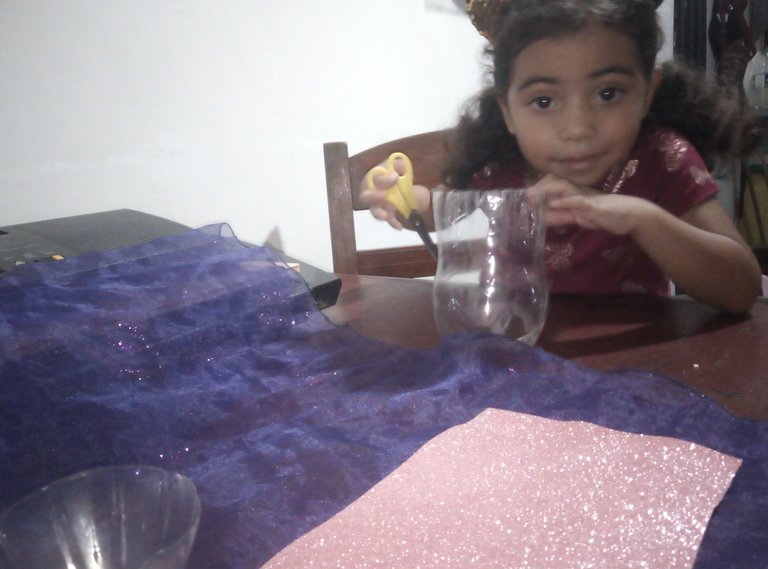
¡OK mamitas lindas!, lo primero que vamos a realizar es definir el tamaño de nuestra maceta, yo no quiero algo tan grande porque la plantita qué vamos a sembrar allí es un cactus muy pequeño 🌵así que en esta ocasión utilice un envase de 1 litro porque la parte superior me parece que da con el tamaño que estoy buscando.
A diferencia de Esther, ella quería realizar una maceta enorme con una jarra de 2 litros, lo cual no está mala la idea, pero no es el tamaño adecuado para esta delicada plantita, quizás la hagamos para regalársela a la abuela, ya qué ella tiene más variedad de plantas que nosotras, y seguro le funcionará muy bien.
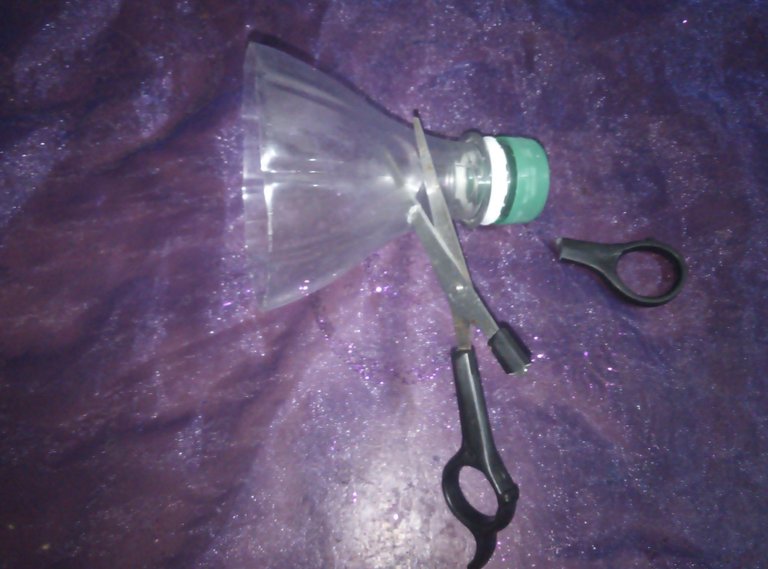
Vamos a recortar esta parte del envase, ese qué les muestro allí en la imagen, nos ayudamos con la punta de nuestra tijera y cortamos todo el borde de la botella, luego que la tengamos lista, podemos ir perfeccionando los detalles para que quede más bonito.
OK, the first thing we are going to do is to define the size of our pot, I don't want something so big because the little plant we are going to plant there is a very small cactus 🌵 so this time I used a 1 liter container because the top part seems to me to be the size I am looking for.
Unlike Esther, she wanted to make a huge pot with a 2 liter jar, which is not a bad idea, but it is not the right size for this delicate little plant, maybe we will make it as a gift for grandma, since she has more variety of plants than we do, and it will surely work very well for her.
We are going to cut this part of the container, the one I show you there in the image, we help ourselves with the tip of our scissors and cut the whole edge of the bottle, after we have it ready, we can go on perfecting the details to make it more beautiful.
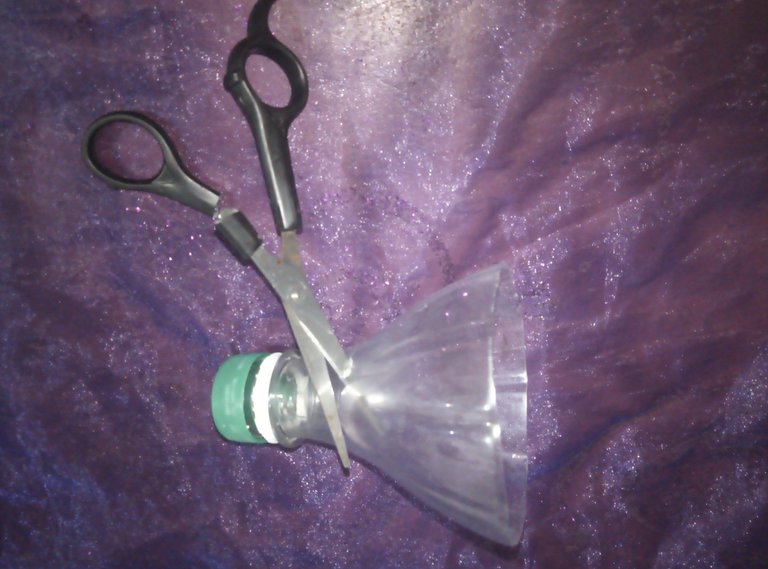
Ahora... lo que vamos a realizar es cortar esta parte que se ve en la foto, y es en donde está la sección más angosta de la botella, por ende es la más dura, a mí me sucedió qué se me rompió la tijera por lo duro del envase, así que como recomendación les digo que pueden abrir algún agujero con algo duro y proceder a cortar, para que no le pase lo mismo que a mí 😉
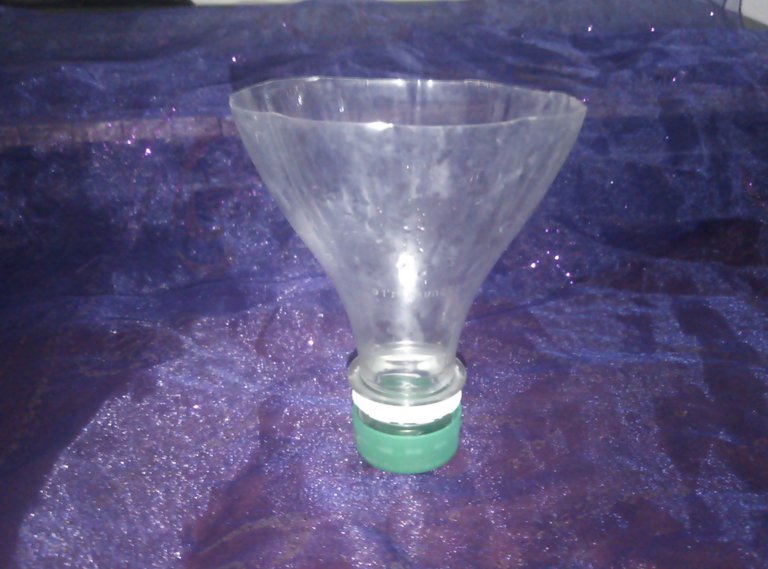
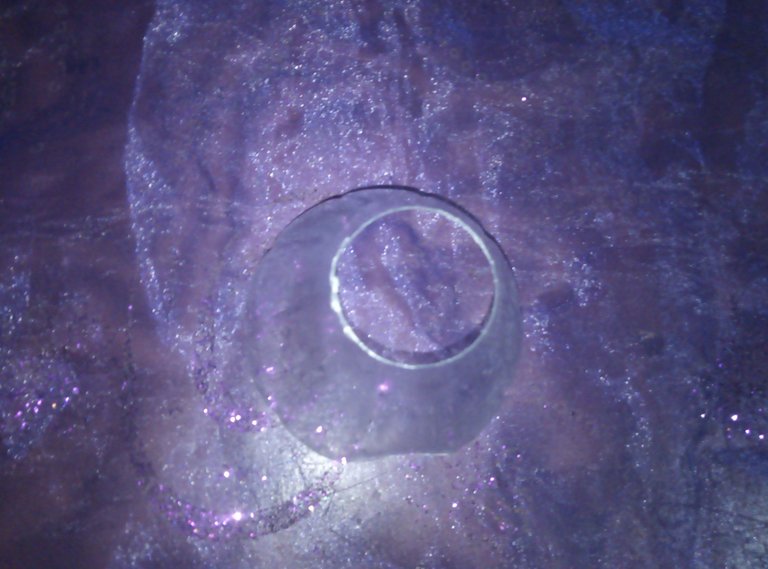
Luego que hagamos todo ese proceso obtendremos una pieza como la que tenemos en la foto, aún no tiene mucha forma, pero créeme que quedara ¡hermosa!
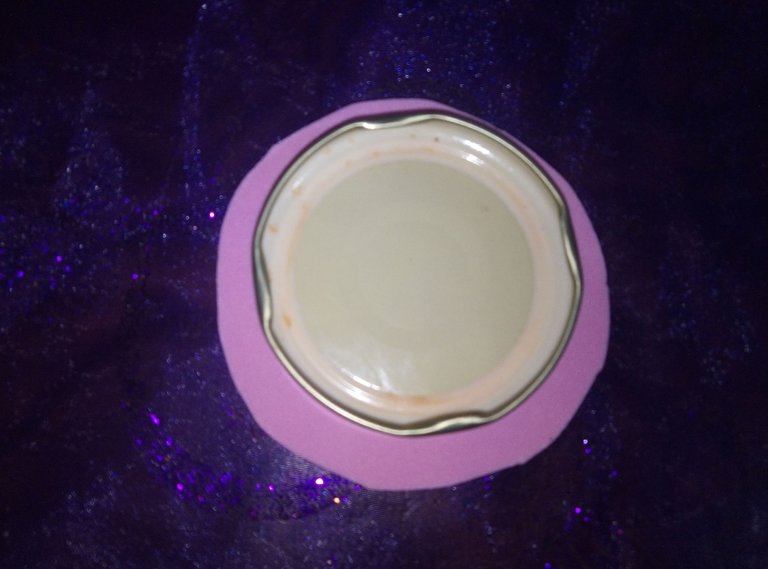
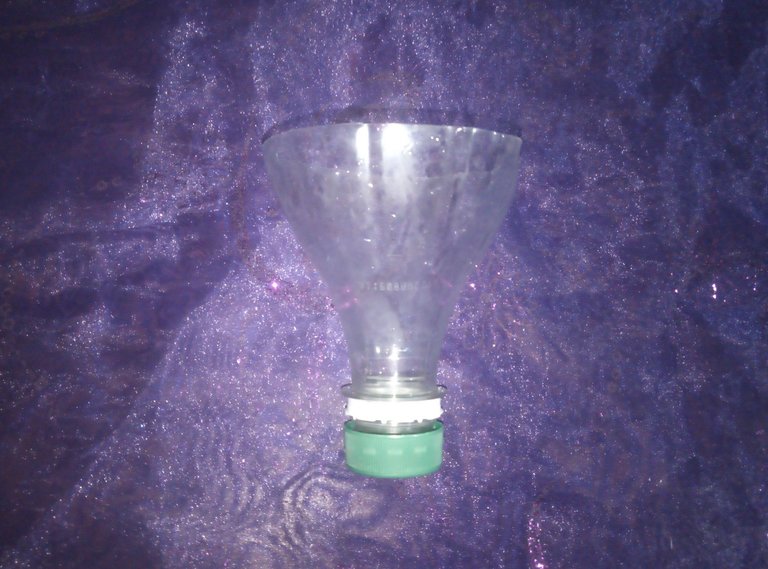
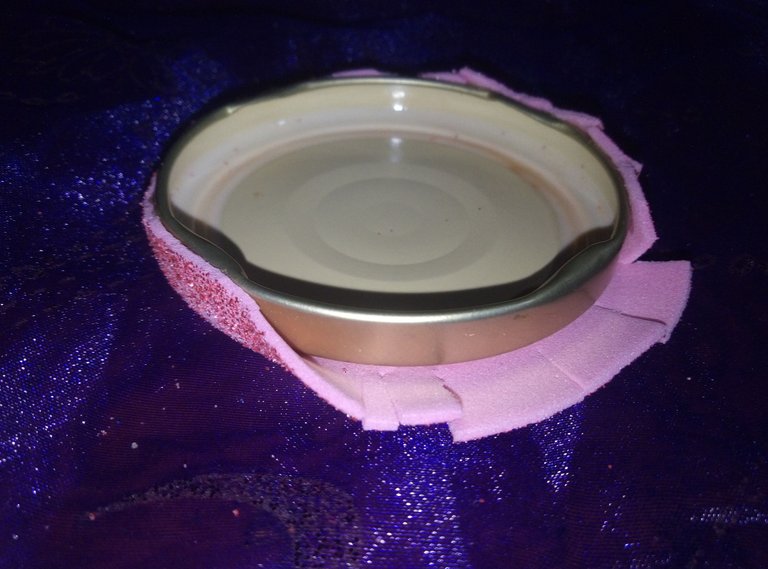
Vamos ahora a forrar lo que será la base de esta taza, se podría decir que simulara el platillo donde se sostiene la taza, yo utilice esta tapa de aluminio porque le da más resistencia a la maceta y el efecto acolchado qué se logra es hermoso.
Now... what we are going to do is to cut this part that you can see in the photo, and it is where the narrowest section of the bottle is, therefore it is the hardest, it happened to me that the scissors broke because of the hardness of the container, so as a recommendation I tell you that you can open a hole with something hard and proceed to cut, so that it does not happen to you the same thing that happened to me 😉
After we do all this process we will get a piece like the one we have in the picture, it still does not have much shape, but believe me it will be beautiful!.
We are now going to line what will be the base of this cup, you could say that it will simulate the saucer where the cup is held, I used this aluminum lid because it gives more resistance to the pot and the quilted effect that is achieved is beautiful.
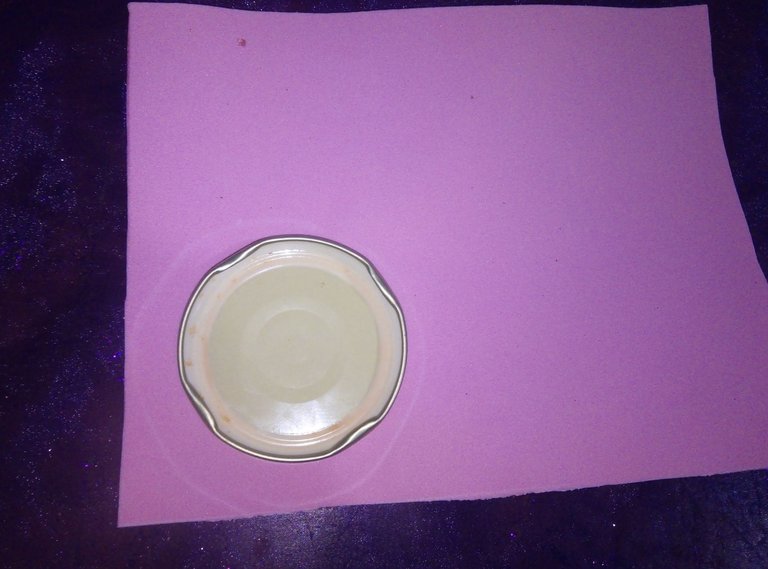
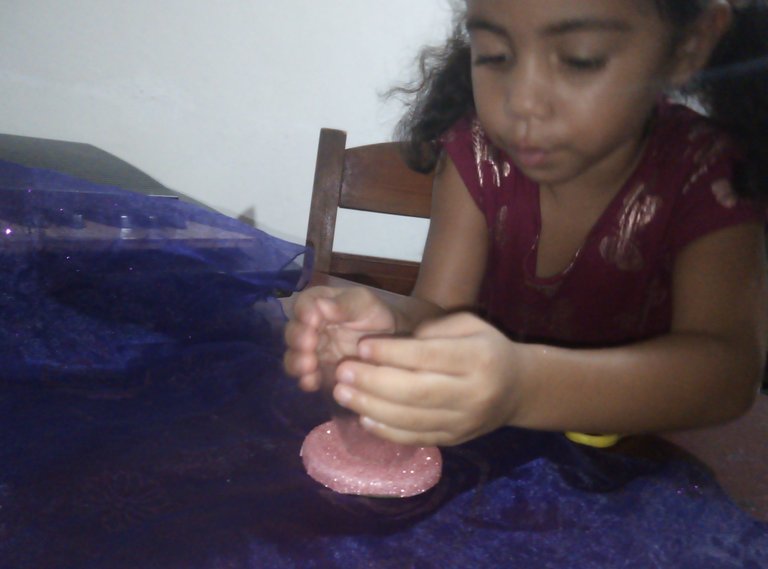
Yo utilicé Foami escarchado, ya ustedes saben que tengo cierta debilidad por los brillos 🙈 (lo siento) pero pueden usar el color que quieran, incluso se me ocurre que pueden usar también retazo de tela, creo que quedaría bonito.
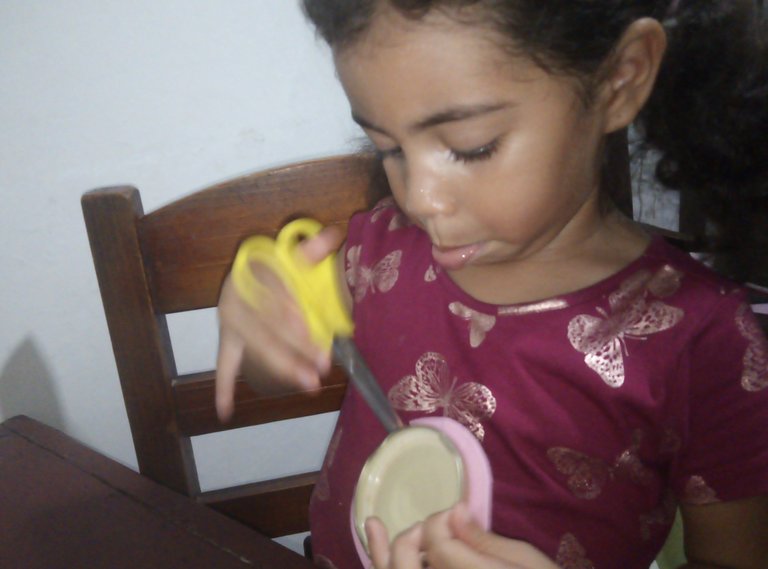
Lo que estoy haciendo es marcando un borde de la tapa para poderla forrar muy bien, corte, y pegue con la pega instantánea, pueden notar que queda un borde qué sobresale, Esther me ayuda a hacerle unos cortes al Foami para doblarlos y pegar bien, para que quede bien forradita nuestra tapa.
Esther cuando agarra una tijera se vuelve un peligro, todo lo quiere recortar, así que tuve que vigilarla muy bien mientras realizaba estos cortes.
I used frosted Foami, you know I have a weakness for glitter 🙈 (sorry) but you can use any color you want, I even think you can also use fabric scraps, I think it would look nice.
What I'm doing is marking an edge of the cover to be able to line it very well, cut, and glue with the instant glue, you can notice that there is an edge that protrudes, Esther helps me to make some cuts to the Foami to fold them and glue them well, so that our cover is well lined.
Esther when she grabs a scissors becomes a danger, she wants to cut everything, so I had to watch her very well while she was making these cuts.
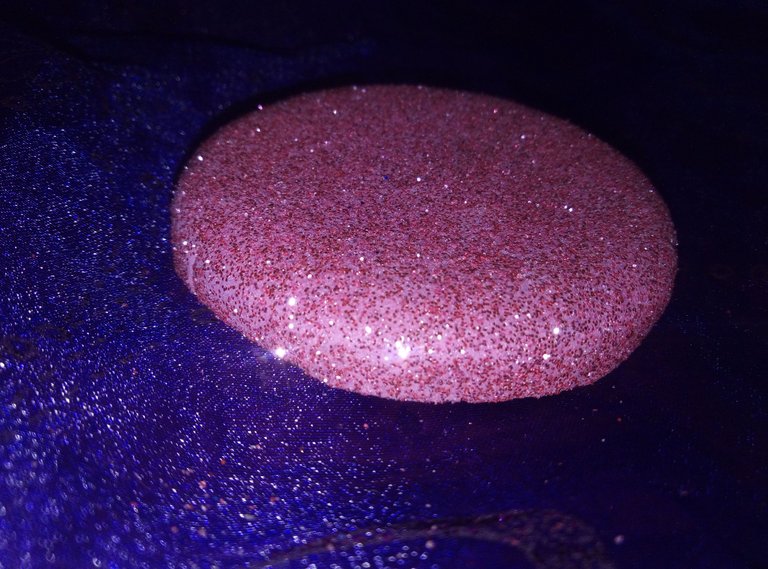
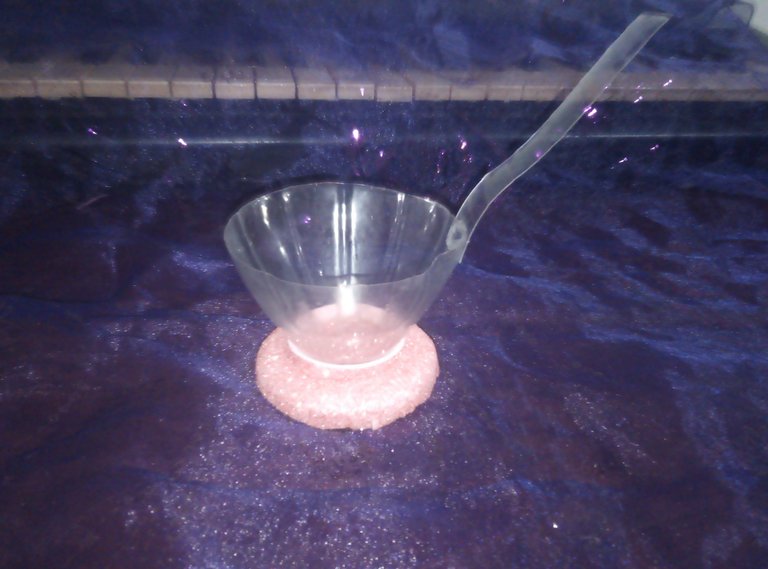
¡Miren qué bonito quedo el platillo de la taza!, Esther me preguntaba a cada rato: ¿mami qué estamos haciendo? 🧘🏻♀️ Jajaja y por más que le decía no entendía y es que ya está a punto de empezar a tomar forma nuestra bonita tacita de maceta.
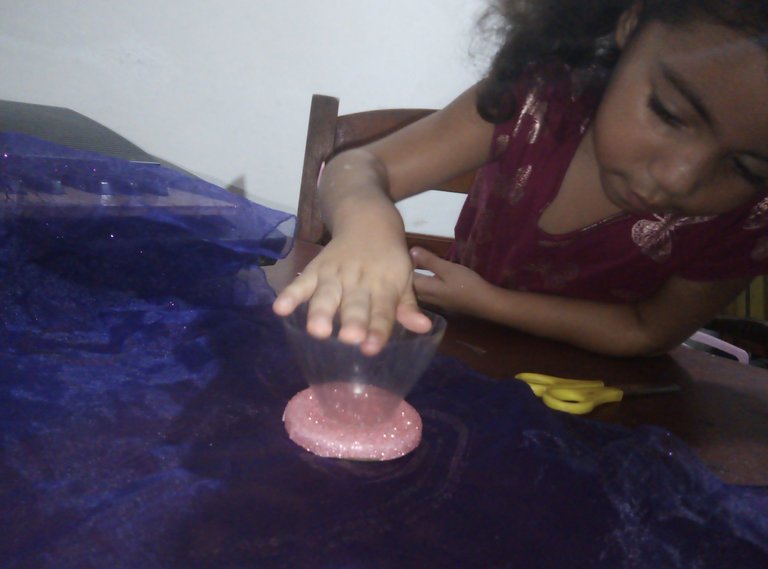
Lo que vamos a hacer es unir estas dos piezas, la base qué sería el platillo y el acetato lo vamos a pegar por el lado más angosto para generar esa forma de taza qué estamos buscando. Esther me ayudo a soplar y mantener unidas las dos piezas mientras se pegaban🍃
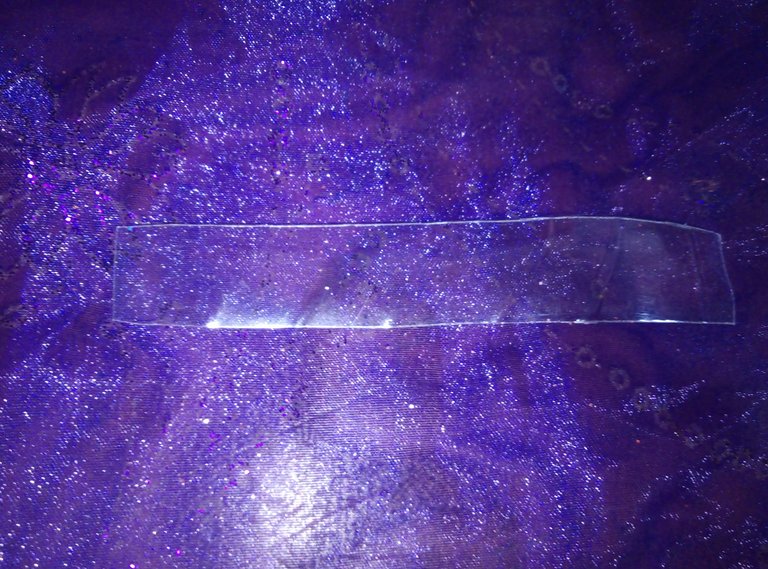
Vamos a recortar una tira de acetato del mismo envase de gaseosa, aproximadamente 1.5 cm de ancho y 11 cm de largo, esta tira la vamos a utilizar para elaborar el asa de la taza, también recortamos una tira de 0.4 mm el cual usaremos para cubrir la base de la taza, para tapar las uniones y también el borde de la taza.
Look how pretty the saucer in the cup is! Esther kept asking me: Mommy what are we doing? 🧘🏻♀️ Hahaha and no matter how much I told her I didn't understand and she was about to start shaping our pretty little pot cup.
What we are going to do is to join these two pieces, the base which would be the saucer and the acetate we are going to glue it on the narrower side to generate that cup shape we are looking for. Esther helped me to blow and hold the two pieces together while they were glued🍃

We are going to cut a strip of acetate from the same soda container, approximately 1.5 cm wide and 11 cm long, we are going to use this strip to make the handle of the cup, we also cut a 0.4 mm strip which we will use to cover the base of the cup, to cover the joints and also the rim of the cup.
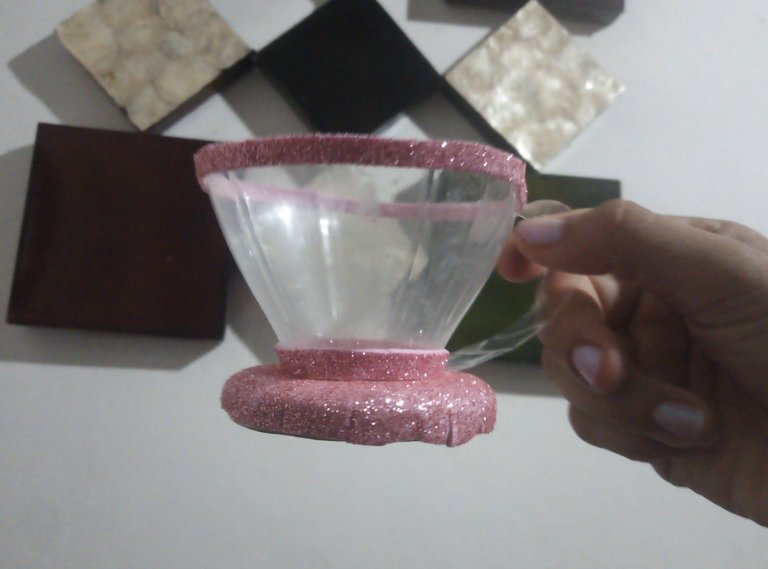
Pegamos nuestra asa, con el pegamento instantáneo funciona muy bien, pega super rápido y le da un acabado más limpio, no debemos colocar mucho porque si no se nos gotea por el envase y limpiarlo es difícil. Le vamos a ir dando forma al asa para que quede bien definida☕
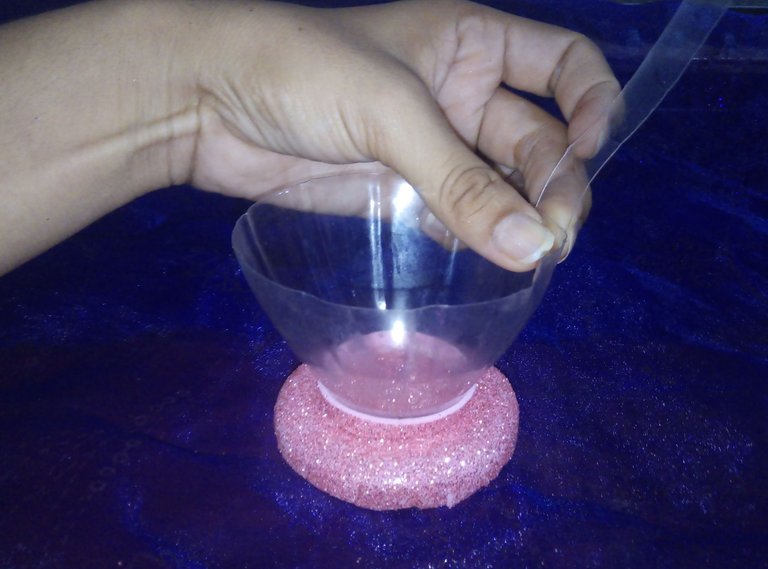
Una vez listo esto, procedemos a recubrir los bordes con el Foami, ustedes pueden omitir este paso si así lo desean, pero me gusta más esta forma de terminar la maceta, pienso que le da un acabado más bonito.
We glue our handle, with the instant glue it works very well, it sticks super fast and gives a cleaner finish, we should not put too much because otherwise it drips down the container and cleaning it is difficult. We are going to go shaping the handle so that it is well defined☕
Once this is ready, we proceed to cover the edges with the Foami, you can omit this step if you wish, but I like this way of finishing the pot, I think it gives it a nicer finish.
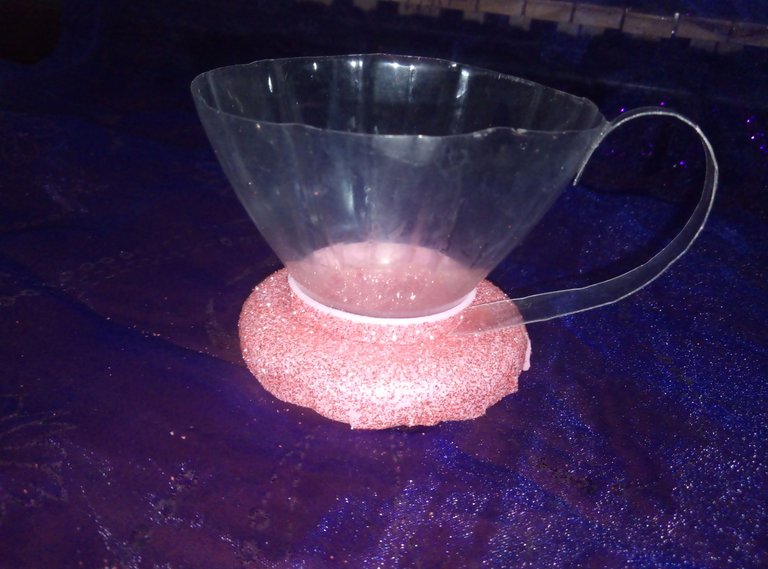
💕 ¡Miren, qué bonita quedó! 💕
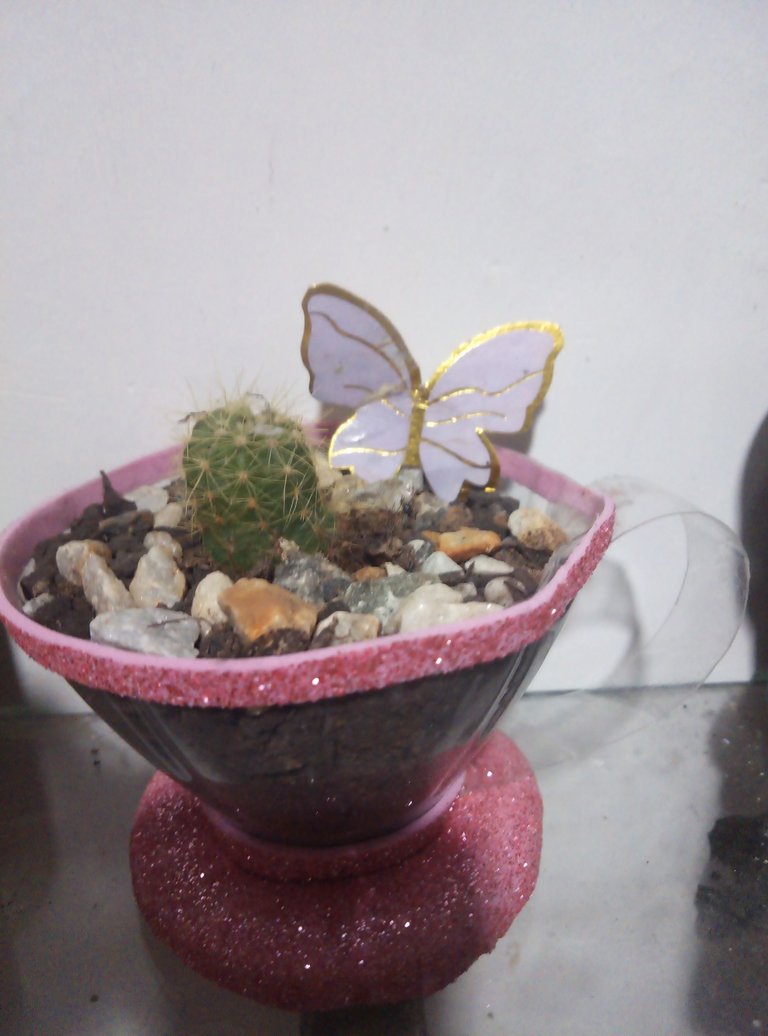
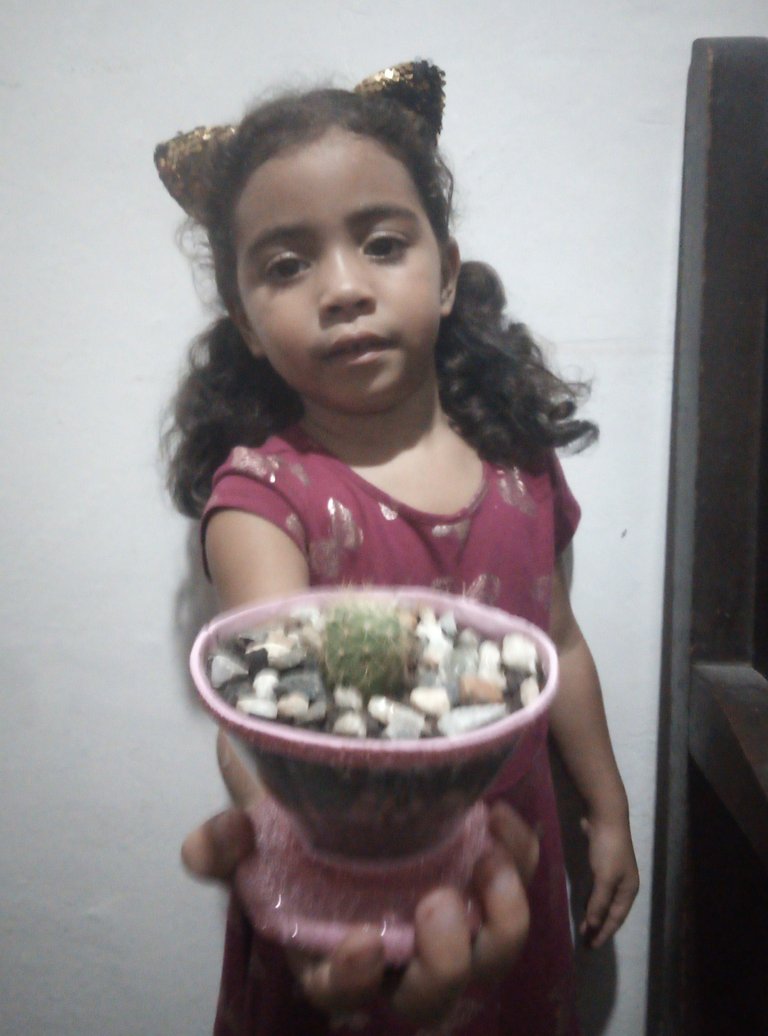
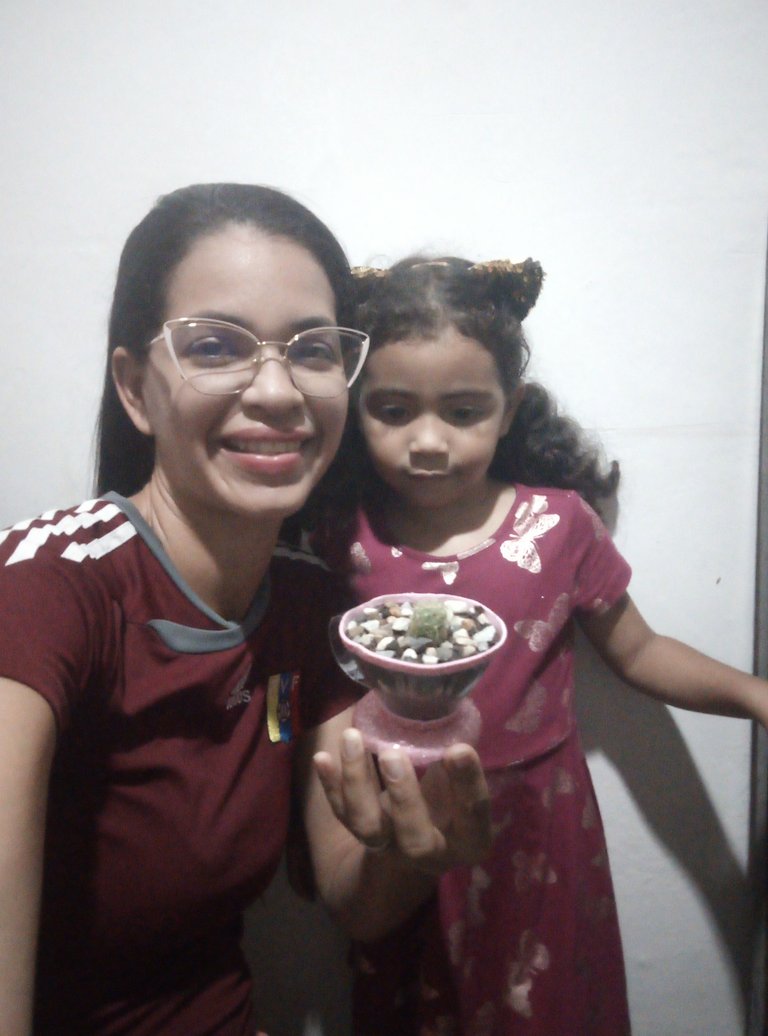
Llenamos de tierra, y colocamos nuestro cactus, 🌵qué está bien gordito y con muchas espinas, Esther se encargó de decorar la base del cactus con piedras muy bonitas y llamativas, hacen un contraste de colores muy bonito, le quedo genial.
Y así de preciosa😍 ha quedado esta maceta en forma de tacita, muy delicada y que queda bonita donde la coloques en este caso la dejamos en la vidriera de la casa para lucirla con mucho orgullo.
Me la imagino en un escritorio de la oficina, o en el escritorio de alguna maestra quedaría muy bonita, y como dije anteriormente esta tacita puede servir para muchísimas cosas, solo basta dejar volar la imaginación.
💕 Look, how beautiful it turned out!
We filled with soil, and placed our cactus, 🌵which is very fat and with many thorns, Esther was responsible for decorating the base of the cactus with very nice and striking stones, they make a very nice contrast of colors, it looked great.
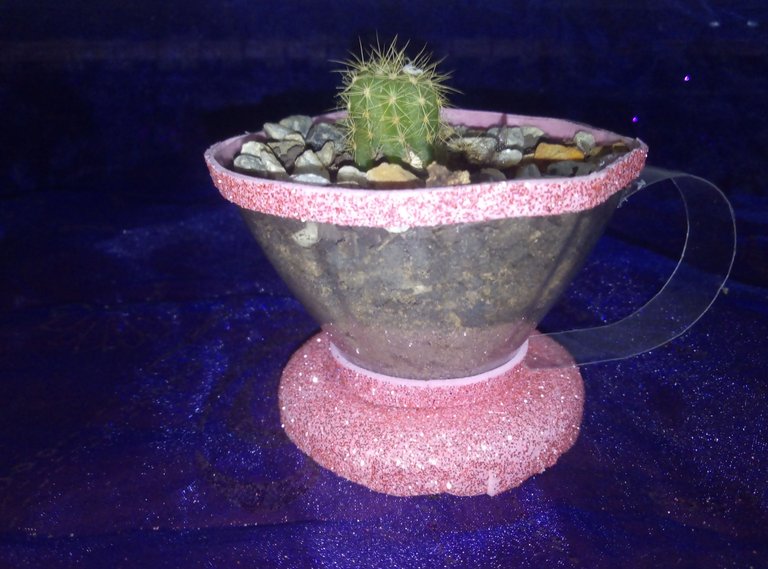
And this is how beautiful😍 has been this pot in the shape of a little cup, very delicate and beautiful wherever you place it, in this case we left it in the window of the house to show it off with pride.
I imagine it on a desk in the office, or on the desk of a teacher it would be very nice, and as I said before this cup can be used for many things, just let your imagination run wild.
Como iniciativa quiero invitarte a que nos compartas tus momentos de creatividad durante todo el mes de agosto, realizando manualidades con tus hijos en esta temporada vacacional, para ello hemos creado la siguiente etiqueta #CraftyMotherhood que usaremos para clasificar tus post y también pueden compartir en la publicación original su enlace para así leerlos y ubicar su post mucho más fácil.
¡Queremos que compartas con toda la comunidad de #motherhood esas ideas de manualidades con los niños y que sirvan para ayudar a esas madres, que tenemos pequeñines en casa y que buscamos maneras fáciles de mantenerlos entretenidos y sin complicación!
! [English] As an initiative I want to invite you to share with us your moments of creativity throughout the month of August, making crafts with your children during this holiday season, for this we have created the following tag #CraftyMotherhood that we will use to classify your posts and you can also share in the original publication your link to read them and locate your post much easier.
We want you to share with the whole #motherhood community these craft ideas with the kids and help those moms, who have little ones at home and are looking for easy ways to keep them entertained and uncomplicated!
✨ Thank you so much to everyone who joins this initiative, we look forward to reading them! ✨.
✨ ¡Muchas gracias a cada uno de los que se suman a esta iniciativa, estamos ansiosos por leerles! ✨

✂️Imagen principal y separadores editados en Canva
📸Las fotografías son propias capturadas con mi teléfono honor 7S
✂️Imagen main and dividers edited in Canva.
📸Photos are my own captured with my honor 7S phone.