Greetings to all my dear Hive family, every day we have a new opportunity to grow spiritually and temporarily, we have been endowed with gifts and talents that we do not know we have and many times we simply block ourselves before the challenges, without giving us the permission to move forward.
Saludos a toda mi querida familia Hive, cada día tenemos una nueva oportunidad de crecer espiritual y temporalmente, hemos sido dotados con dones y talentos que no sabemos que tenemos y muchas sabes simplemente nos bloqueamos antes los desafíos, sin darnos el permiso de poder avanzar.
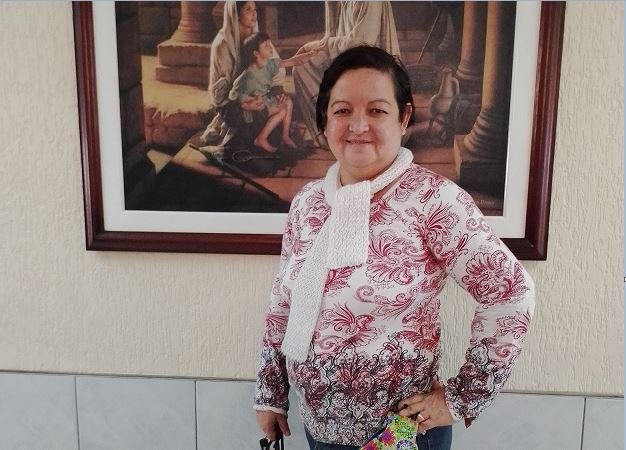
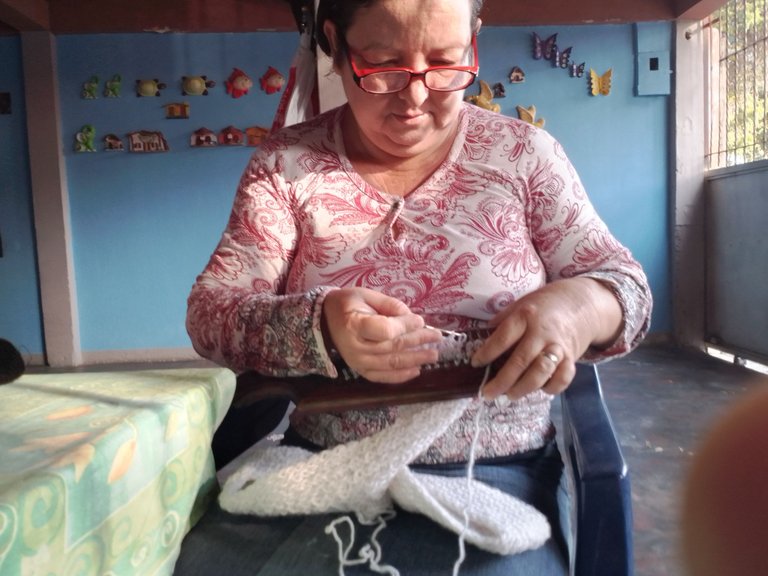
A few weeks ago I published a blog (https://peakd.com/hive-130560/@gladymar1973/haciendo-mi-propio-telar-facil-y-divertido-making-my-own-loom-easy-and-fun-esp-eng), in which I challenged myself to make my loom, after having it now I just had to learn to weave on it, after a brief lesson from a friend, I got down to work and made my first creation which at the same time is necessary to protect me from the evening breezes that lately are affecting me.
Hace unas semanas atrás publique un blog (https://peakd.com/hive-130560/@gladymar1973/haciendo-mi-propio-telar-facil-y-divertido-making-my-own-loom-easy-and-fun-esp-eng), en el cual me desafié a mi misma a realizar mi telar, luego de tenerlo ahora solo me quedaba aprender a tejer en el, luego de una breve lección de una amiga, puse manos a la obra y realicé mi primera creación la cual a la vez es necesaria para protegerme de las brisas vespertinas que últimamente me están afectando.
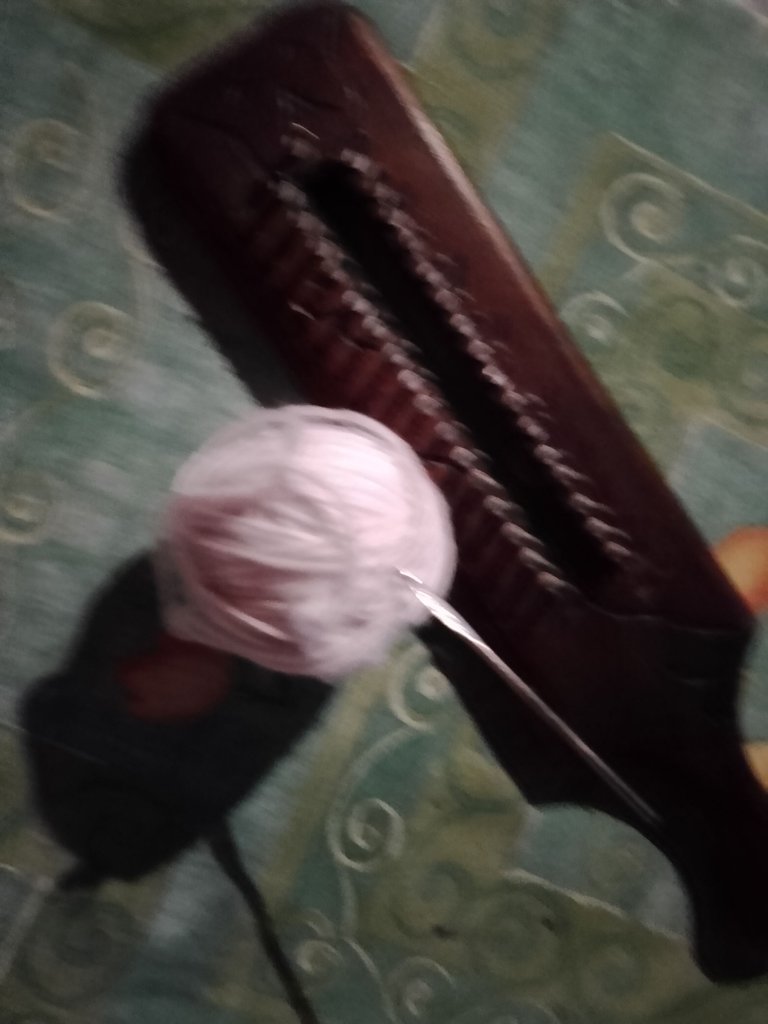
To knit the scarf I used: 120 grams of white wool, crochet hook #2 and my loom.
Para tejer la bufanda usé: 120 gramos de lana blanca, ganchillo # 2 y mi telar.
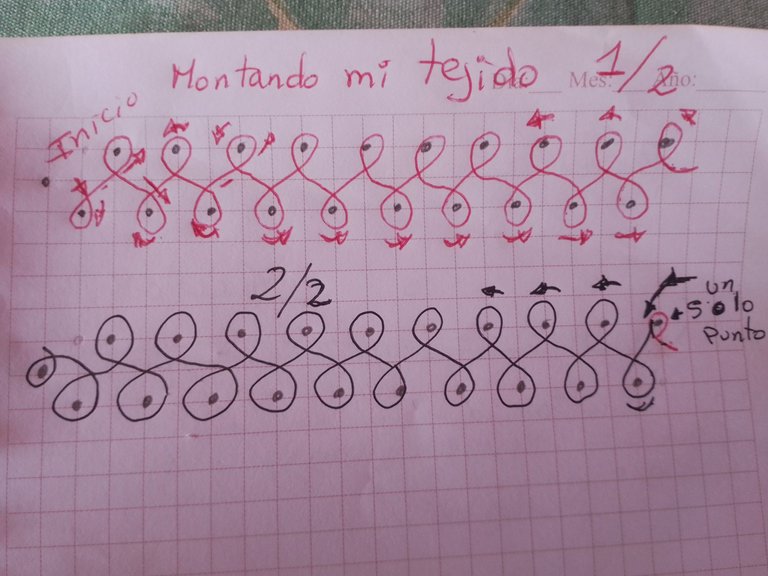
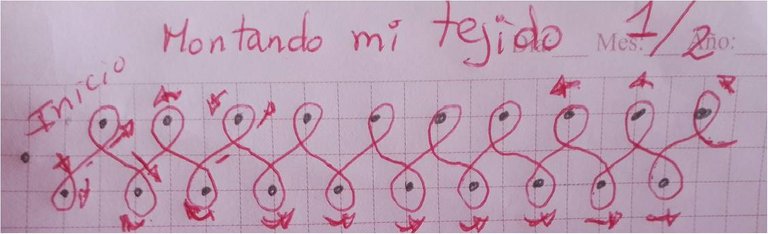
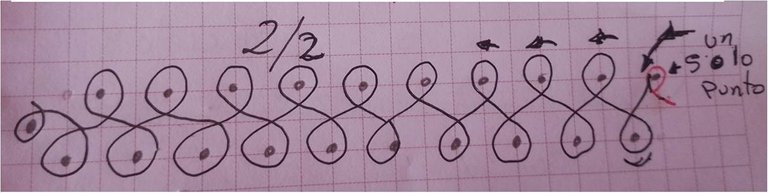
Before starting my knitting I made the diagram of the wool mounting on the loom in English stitch or in 8 as I was also told that this stitch is called because of its shape at the time of mounting the wool.
Antes de comenzar mi tejido hice el diagrama del montado de la lana en el telar en puntada ingles o en 8 como también me dijeron que se le dice a este punto por su forma a la hora de montar la lana.
So, already having the material to make my scarf, I got down to work.
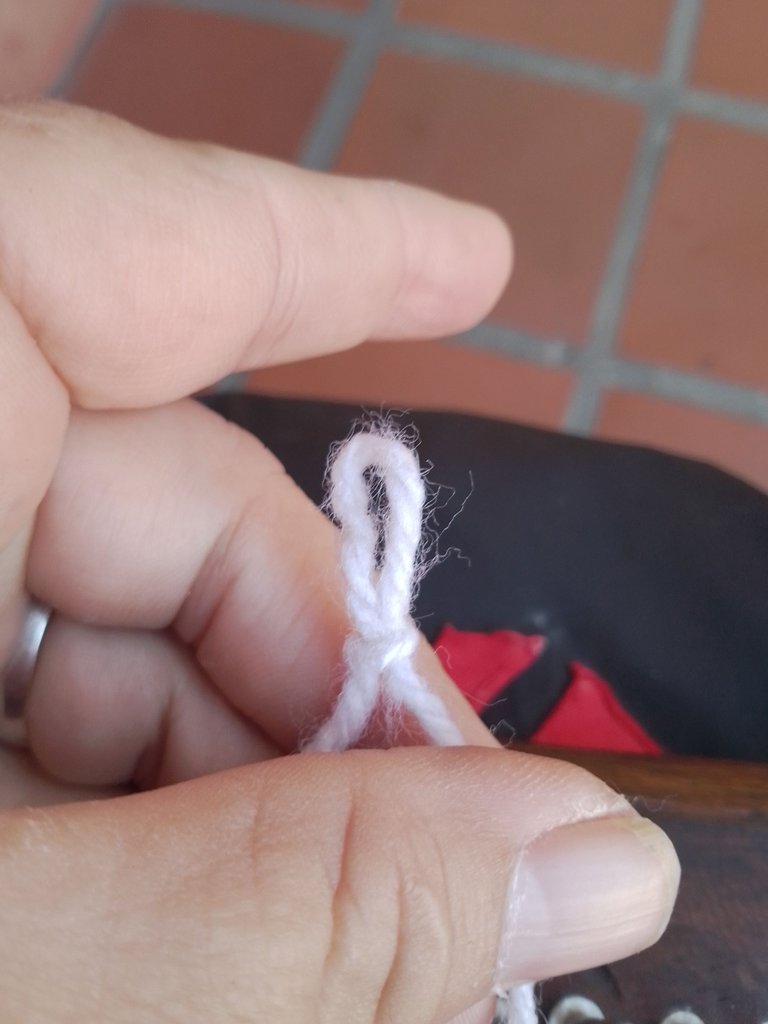
To start we do it with a slip knot which we mount on the first stitch of the loom, from the top or bottom that depends on the comfort of the person.
Así que ya teniendo el material para realizar mi bufanda puse manos a la obra.
Para comenzar lo hacemos con un nudo corredizo el cual montamos en el primer punto del telar, de la parte arriba o abajo eso depende de la comodidad de la persona.
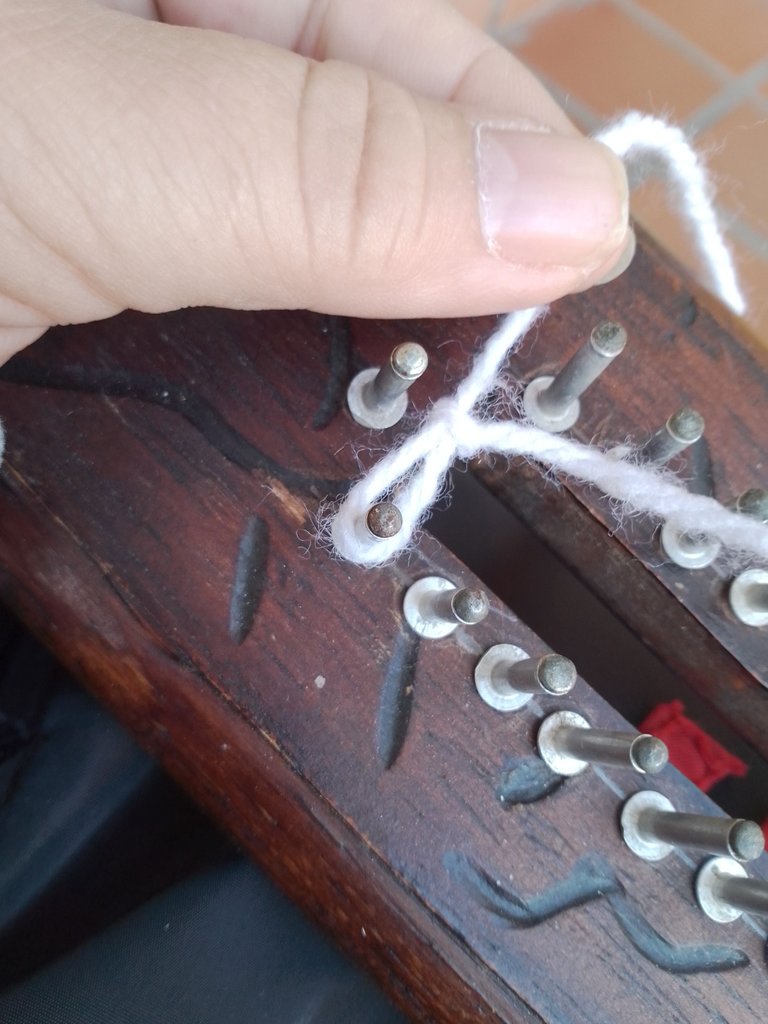
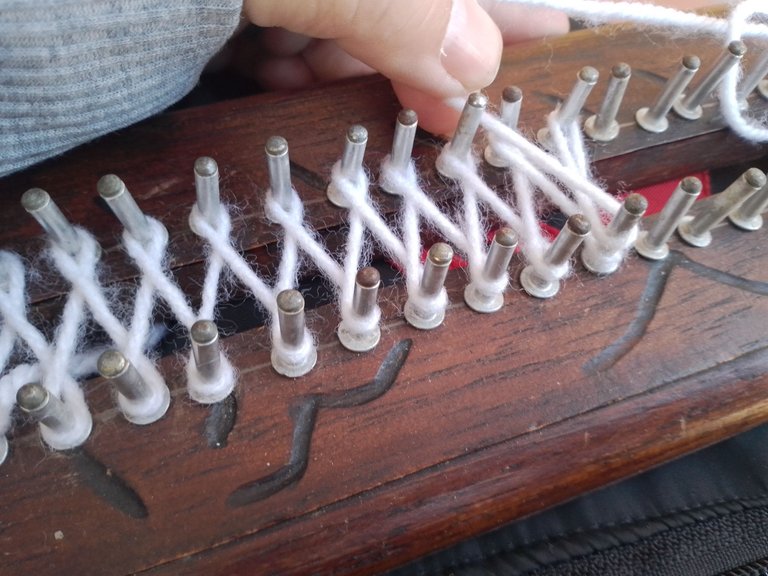
Then we start mounting our yarn making 8 from my starting point to the point in front of it,
Luego comenzamos montando nuestra lana haciendo 8 desde mi punto de inicio hacia el punto al frente de este,
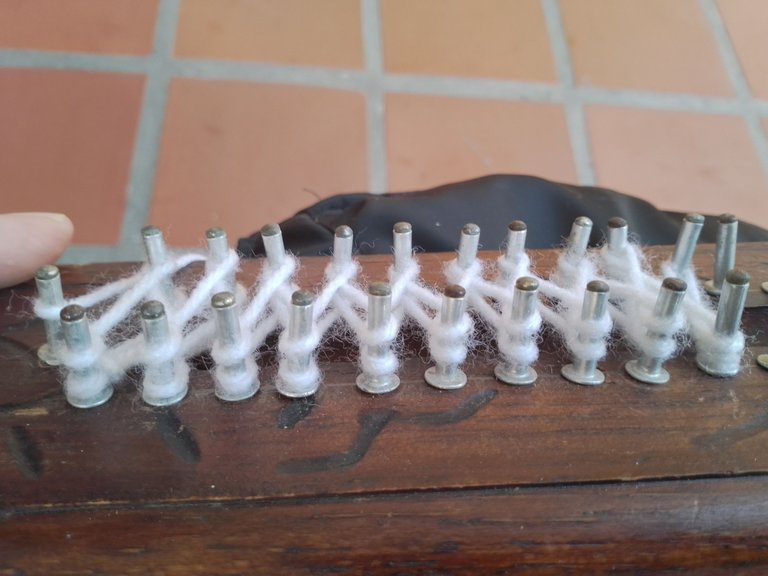
Step 1: We continue making 8 until the last stitch, depending on the width that we want to give to our fabric, in this opportunity I did 10 stitches approximately 10 cm wide. Marked in red.
Paso 2: Seguimos haciendo 8 hasta el último punto, dependiendo del ancho que queremos darle a nuestro tejido yo en esta oportunidad lo hice de 10 puntos aproximadamente serian 10 cm de ancho. Marcado en rojo.
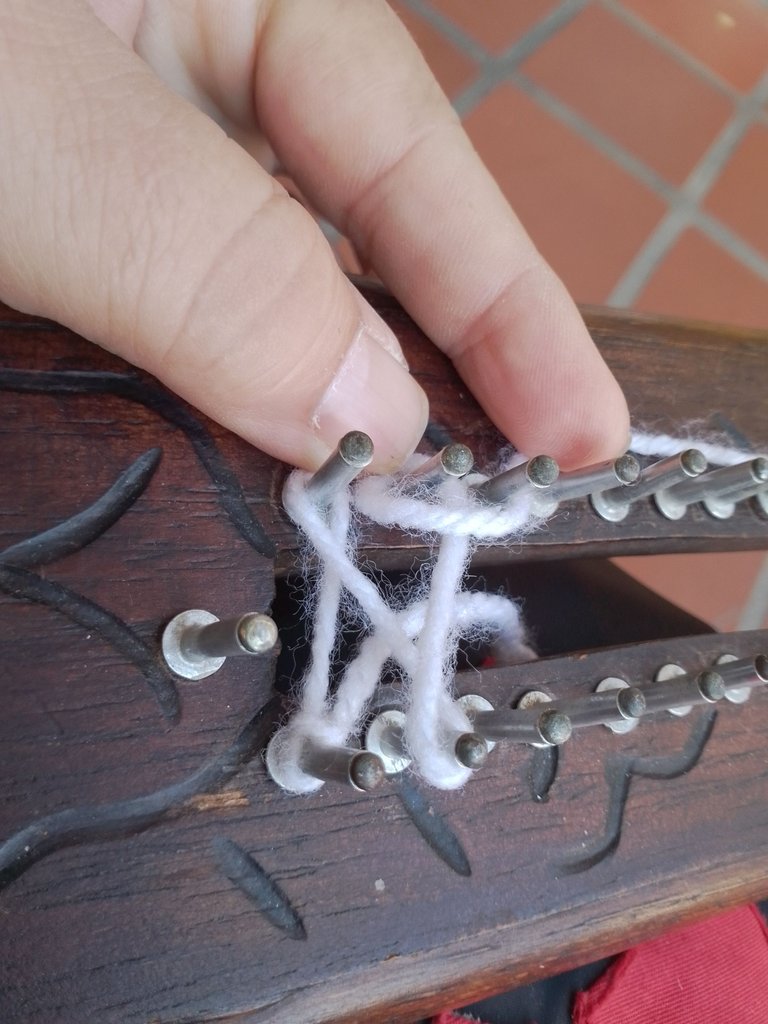
When I reach the point marked for the width of the scarf I return again to the point in front; remaining in the last stitch of the previous round a single strand of wool in it.
Al llegar al punto marcado para el ancho de la bufanda me regreso nuevamente al punto de enfrente; quedando en el último punto de la vuelta anterior una sola hebra de lana en él.
Step 2: And we return again making 8 this time in the reverse way to the previous one. Marked in black.
Paso 2: Y nos regresamos nuevamente haciendo 8 esta vez de la manera invertida a la anterior. Marcado en negro.
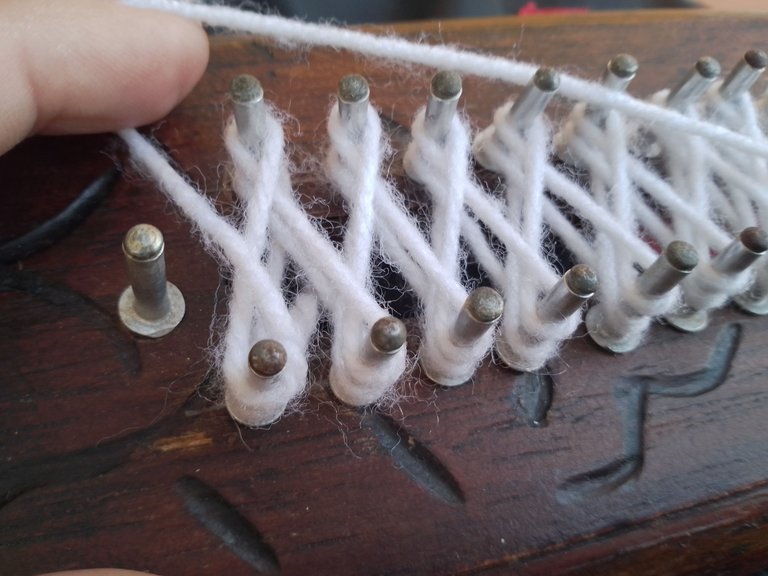
When we reach the starting point we go around the point that is at the tip of the loom, we adjust it to prevent the wool from coming loose.
Al llegar al punto de inicio lo rodeamos en el punto que está en la punta del telar ajustamos para evitar que se nos suelte la lana.

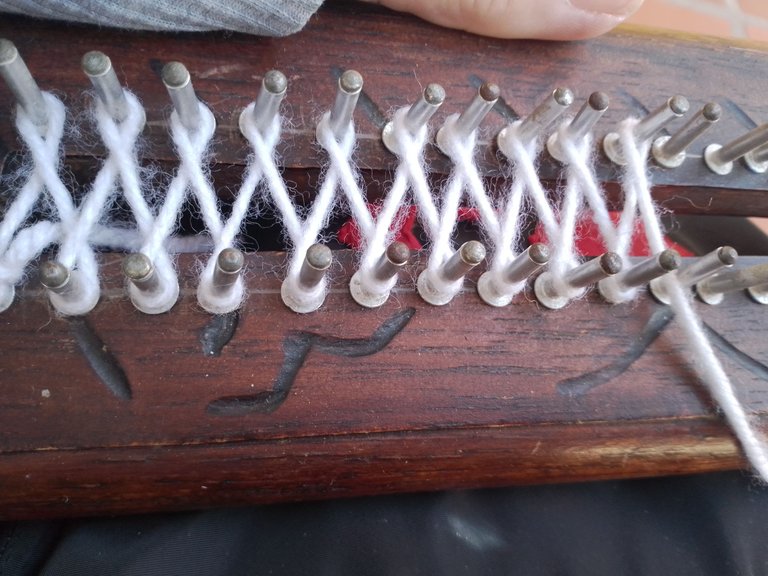
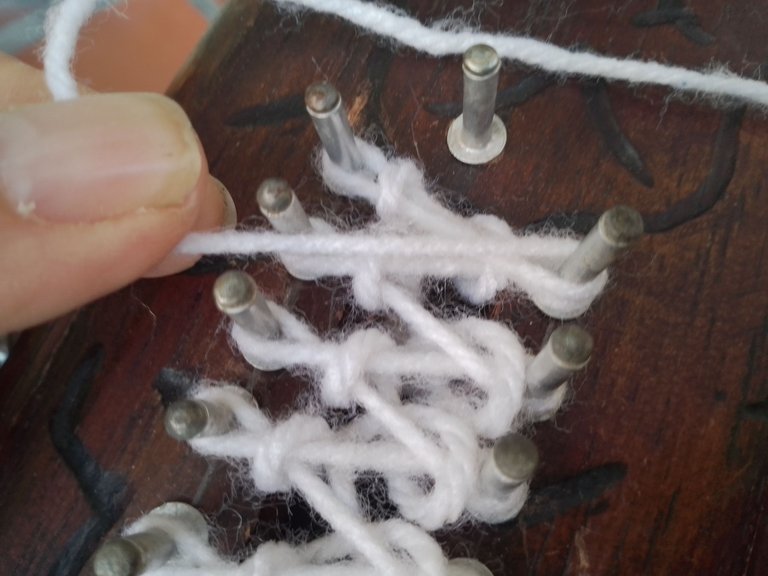
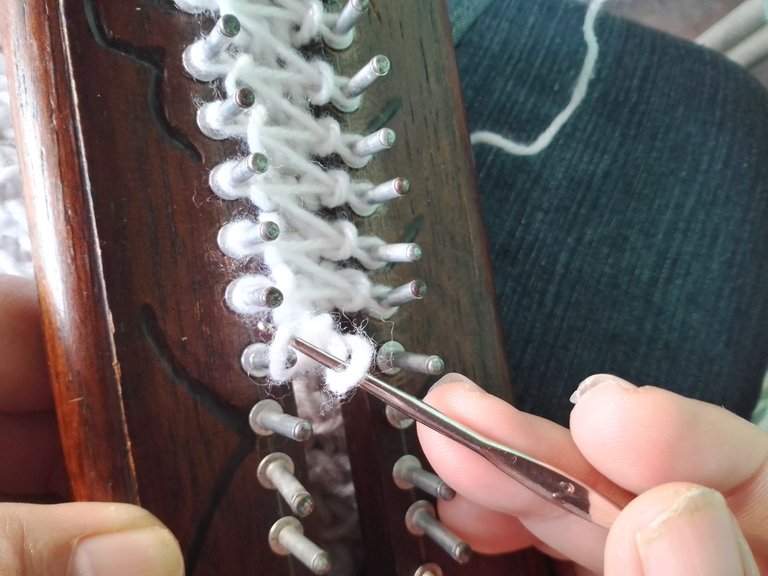
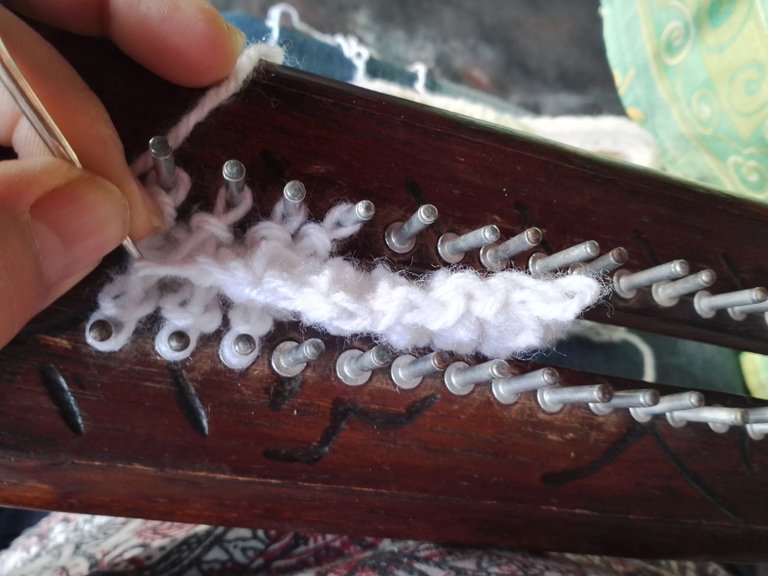
Step 3: Here begins our weaving with the help of a crochet hook we pass the first strand of wool that we mount on each point and pass it over it,
Paso 3: Aquí comienza nuestro tejido con la ayuda de un ganchillo pasamos la primera hebra de lana que montamos en cada punto y la pasamos por encima del mismo,

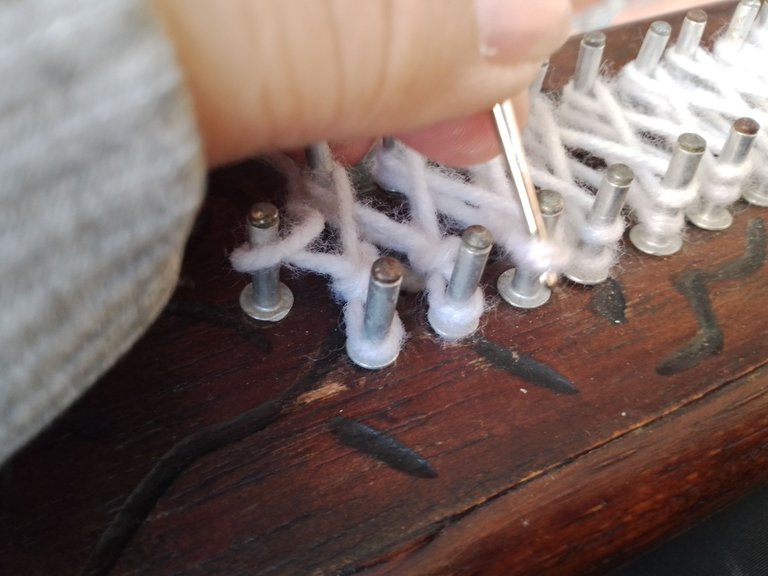

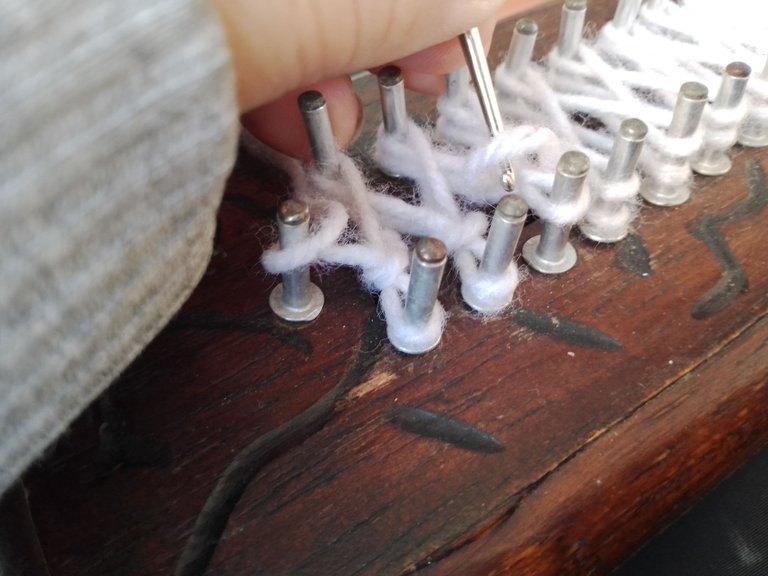
We repeat the same process until the final stitch on both sides of the loom, thus weaving what will be our first loop.
Repetimos el mismo proceso hasta el punto final de ambos lados del telar, tejiendo así lo que será nuestra primera vuelta.
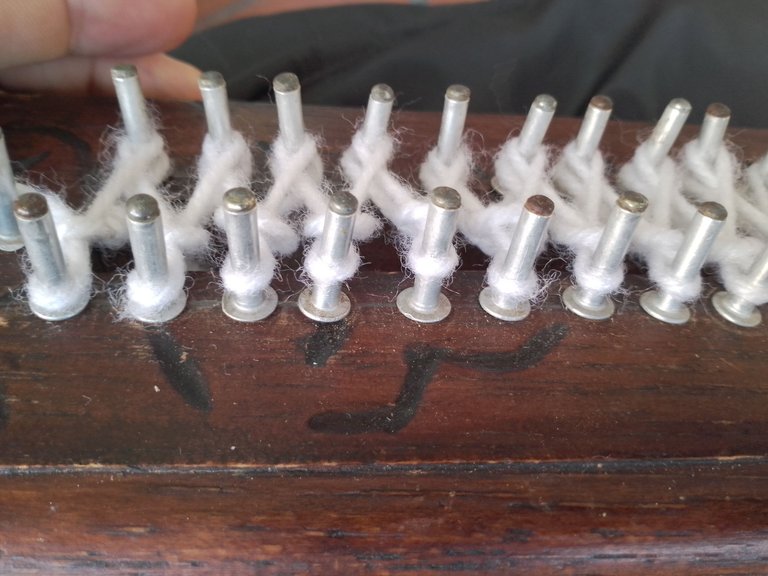
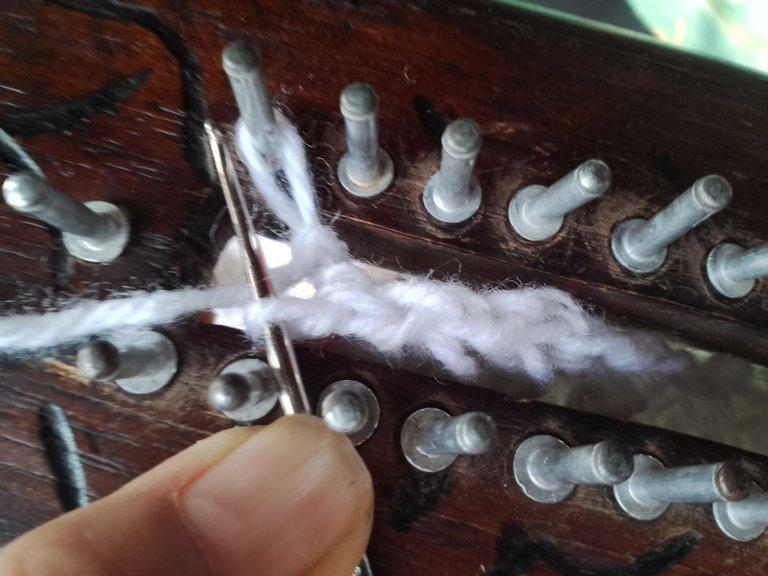
In the next row we repeat step 1; keeping in mind that when we start each row the last stitch of the previous row we will have only one strand left; then we repeat step 3.
En la siguiente vuelta repetimos el paso 1; teniendo en cuenta que al iniciar cada vuelta el último punto de la vuelta anterior nos quedará una sola hebra; luego repetimos el paso 3.
Then in the next row we repeat step 2 and step 3.
Luego en la siguiente repetimos el paso 2 y el paso 3.
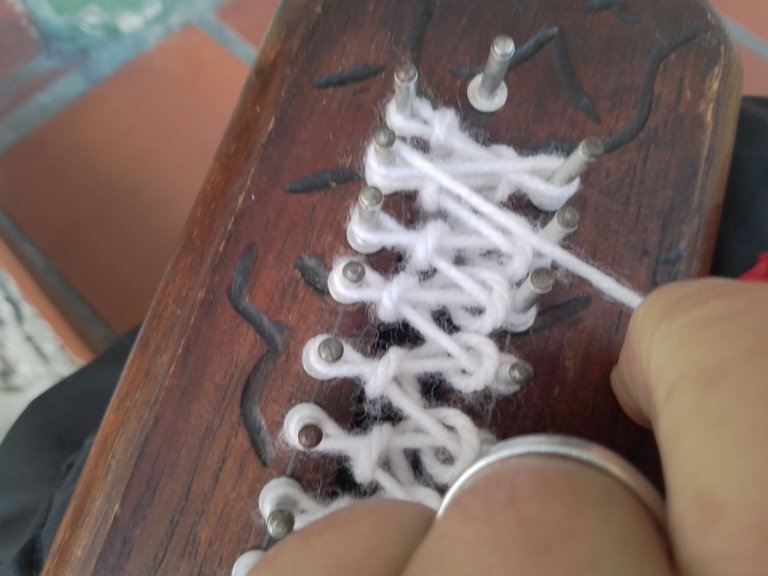
As we are making our turns we will see how the fabric is coming out of the bottom of the loom.
A medida que vamos haciendo nuestras vueltas vamos viendo como por la parte inferior del telar va saliendo el tejido.
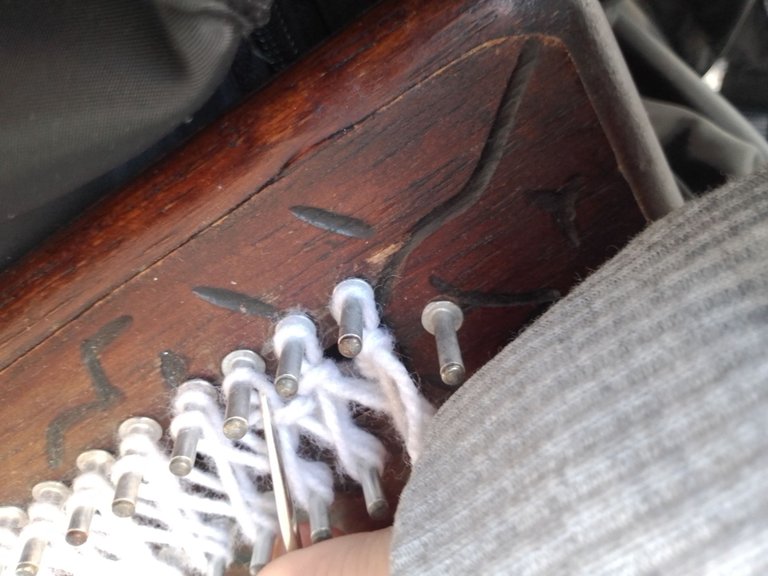
We keep repeating this procedure until we obtain the desired length.
Seguimos repitiendo este procedimiento hasta obtener el largo deseado.

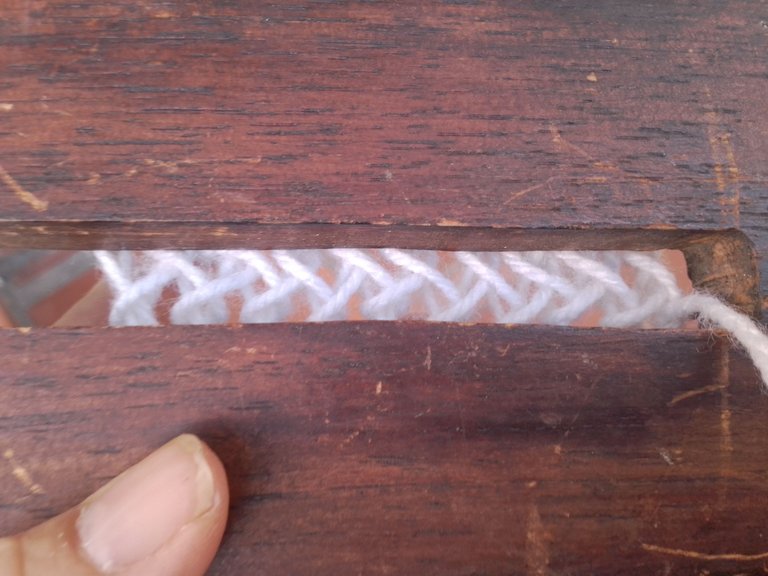
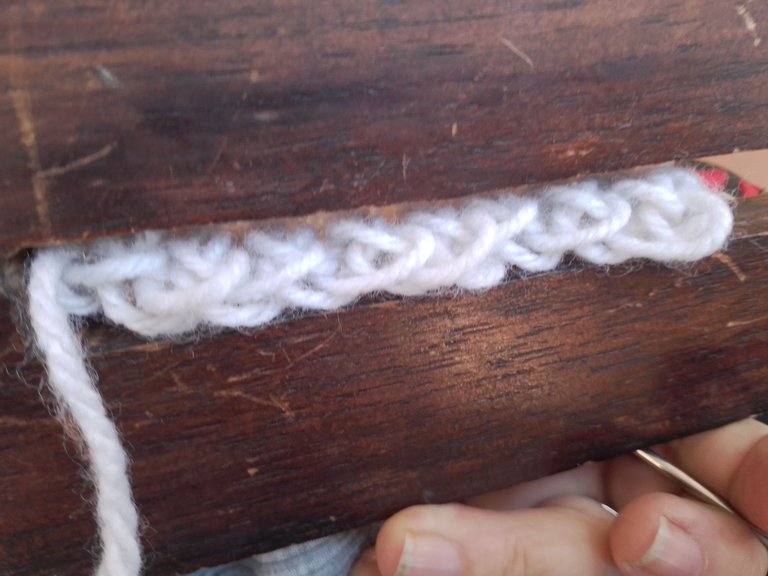
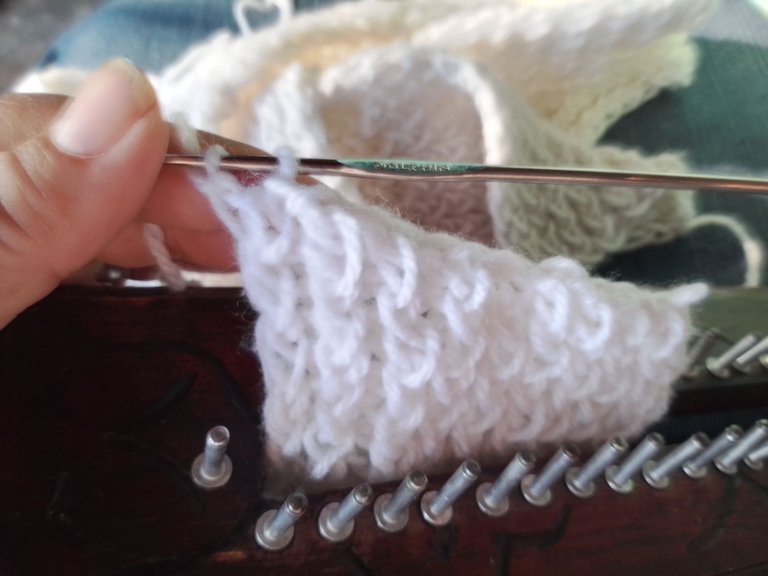
Once we have the desired length we begin to dismantle our fabric, we do it in the following way, as indicated in our diagram
Al tener el largo deseado comenzamos a desmontar nuestro tejido, lo hacemos de la siguiente manera, según indica nuestro diagrama
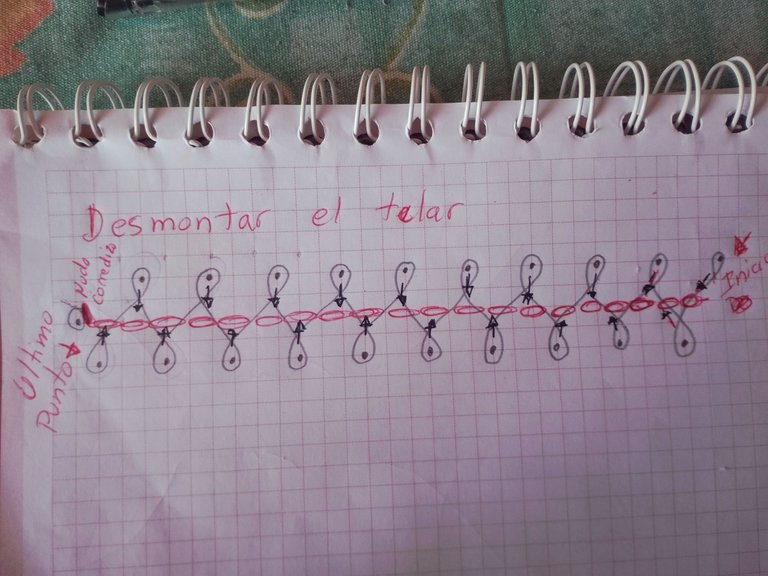
With the help of the crochet hook we are going to take the loop of the first stitch of the final row on the opposite side from where the end of the yarn was left.
Con la ayuda del ganchillo vamos a tomar la lazada del primer punto de la vuelta final del lado contrario de donde nos quedó la punta de la lana.

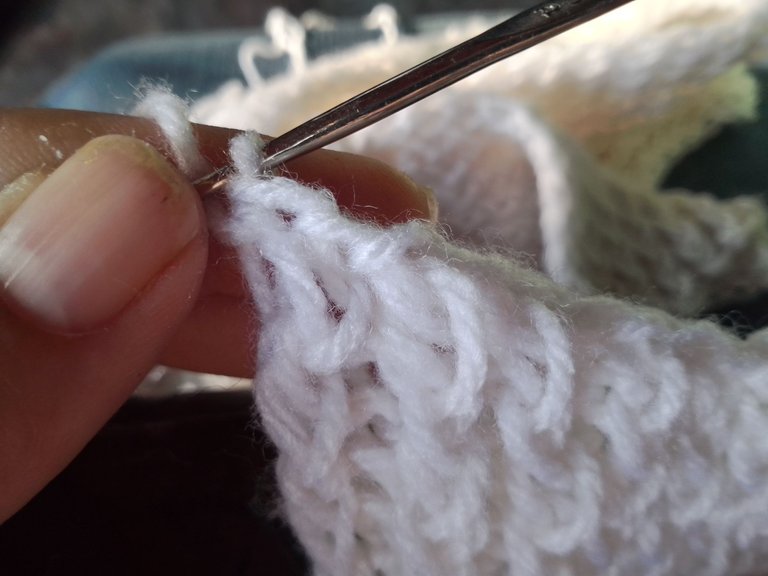
We take the loop that is in that stitch on the crochet hook and then we take the loop of the stitch in front of us and slip it into the loop of the previous stitch,
Tomamos la lazada que está en ese punto en el ganchillo y luego tomamos la lazada del punto de enfrente y lo deslizamos en la lazada del punto anterior,
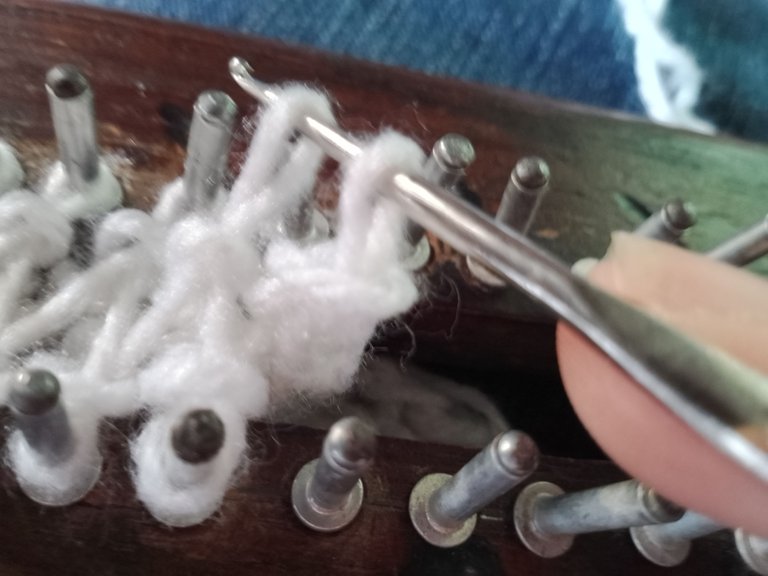
We follow this procedure until we finish at the point where the end of the yarn is and we close our knitting with a slip knot and cut.
Seguimos este procedimiento hasta terminar en el punto donde está la punta de la lana y cerramos nuestro tejido con un nudo corredizo y cortamos.
Ready we have our loom woven scarf, thank you for allowing me to share with you, for your support and comments.
Listo ya tenemos nuestra bufanda tejida en telar, gracias por permitirme compartir con ustedes, por su apoyo y comentarios.

The photos were taken by my cell phone Moto E6I, with the help of my husband and friend @motica29, the translation was through the translator Deepl.
Las fotos fueron tomadas por mi celular Moto E6I, con la ayuda de mi esposo y amiga @motica29, la traducción fue a través del traductor Deepl.