
Saludos hivers creativos, como saben, soy amante del papel y los colores, aunque debo confesar que no soy buena coloreando; sin embargo, hago mi mejor esfuerzo cuando me toca. En mis últimas presentaciones de origami 3D he tomado la iniciativa de colorear las hojas de papel blanco para así obtener hojas de colores y poder crear mis piezas; lo mismo estoy haciendo con el origami tradicional y es que elaborar este tipo de manualidades nos genera infinidades de beneficios para la salud, así que olvídense de la idea de que el origami es solo para los más pequeños, porque nosotros los adultos podemos realizar lo que más nos guste y la cantidad que deseemos; lo mejor es que al final sentiremos satisfacción tanto por la creación como por el efecto que causa poner en práctica en nosotros.
Hoy les comparto un pequeño trabajo con esta linda técnica de doblar el papel y obtener una figura, así que esta vez realice unos lindos peces boca abierta que son muy sencillos de trabajar; espero les agrade mi propuesta.
Greetings creative hivers, as you know, I am a lover of paper and colors, although I must confess that I am not good at coloring; however, I do my best when it is my turn. In my last 3D origami presentations I have taken the initiative to color the sheets of white paper in order to obtain colored sheets and create my pieces; I am doing the same with traditional origami and the fact is that making this type of crafts generates infinite health benefits, so forget the idea that origami is only for children, because we adults can make whatever we like and the amount we want; the best thing is that in the end we will feel satisfaction both for the creation and for the effect it causes to put into practice in us.
Today I share with you a little work with this nice technique of folding the paper and get a figure, so this time I made some cute open mouth fish that are very easy to work with; I hope you like my proposal.
Materiales:
Hoja de papel de colores
Creyon negro
Pega en barra
Tijera
Materials:
Sheet of colored paper
Black creyon
Glue stick
Scissors
Pasos/Steps

Vamos a tomar la hoja de papel y de allí sacamos un cuadrado de 14 centímetros para realizar un pez; luego doblamos la hoja de manera que nos queden tres rectángulos iguales para marcar las dos líneas que se muestran en la foto.
We are going to take the sheet of paper and from there we take a square of 14 centimeters to make a fish; then we fold the sheet so that we have three equal rectangles to mark the two lines shown in the photo.


Luego doblamos de manera diagonal para formar un triángulo el cual marcara una línea en el centro del papel, seguidamente colocamos la hoja para que nos quede como un rombo y guiados por las líneas trazadas, tomamos una punta para doblarla hasta el rombo central que quedo marcado con los dobleces anteriormente realizados.
Then we fold diagonally to form a triangle which will mark a line in the center of the paper, then we place the sheet so that it looks like a rhombus and guided by the lines drawn, we take a tip to fold it to the central rhombus that was marked with the folds previously made.
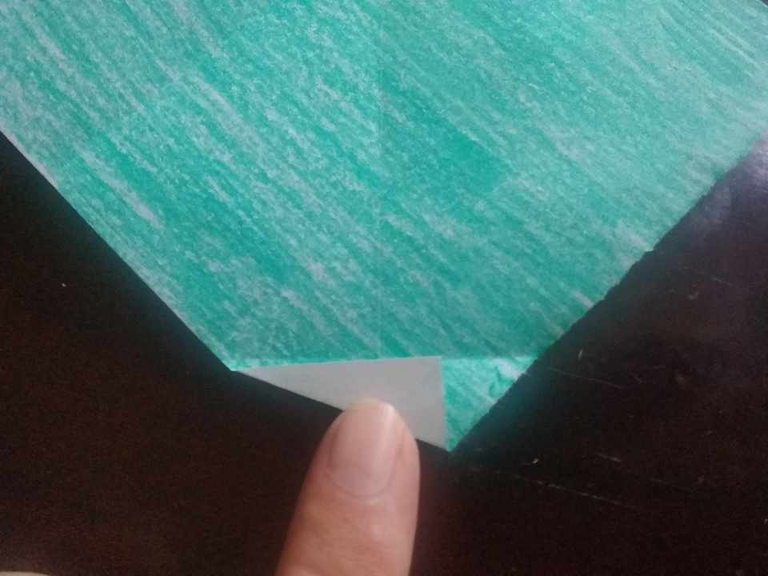
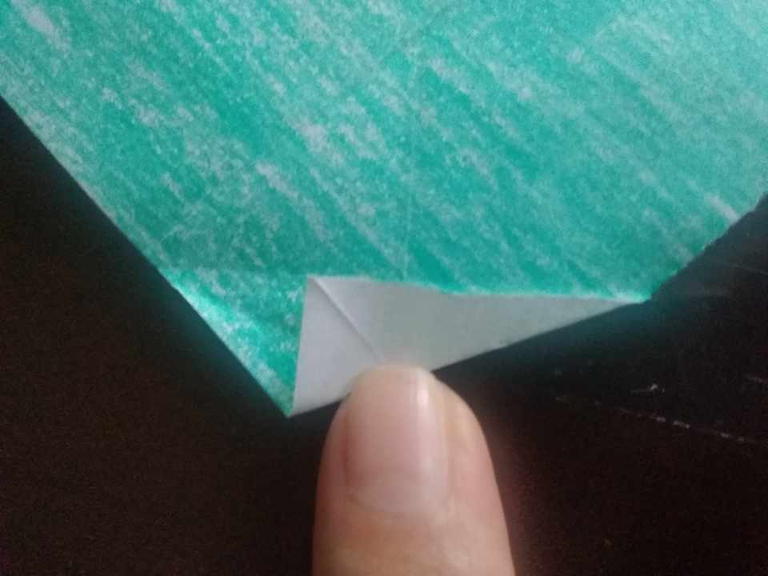
Trabajando en ese mismo espacio, llevamos la punta del papel hacia la izquierda, fijándonos que esta quede justo en la marca que hicimos en el paso anterior, luego desdoblamos y doblamos hacia la derecha.
Working in the same space, we bring the tip of the paper to the left, making sure that it is right on the mark we made in the previous step, then unfold and fold to the right.
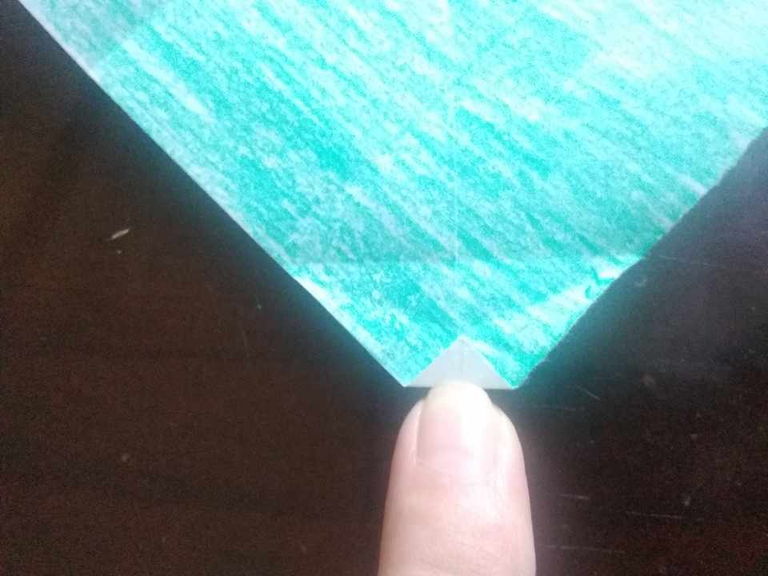
Continuamos trabajando en la misma zona, pero esta vez para hacer un pequeño doblez en la punta del papel, este debe quedar justo en la marca que realizamos en el paso anterior.
We continue working in the same area, but this time to make a small fold at the tip of the paper, this should be right at the mark we made in the previous step.
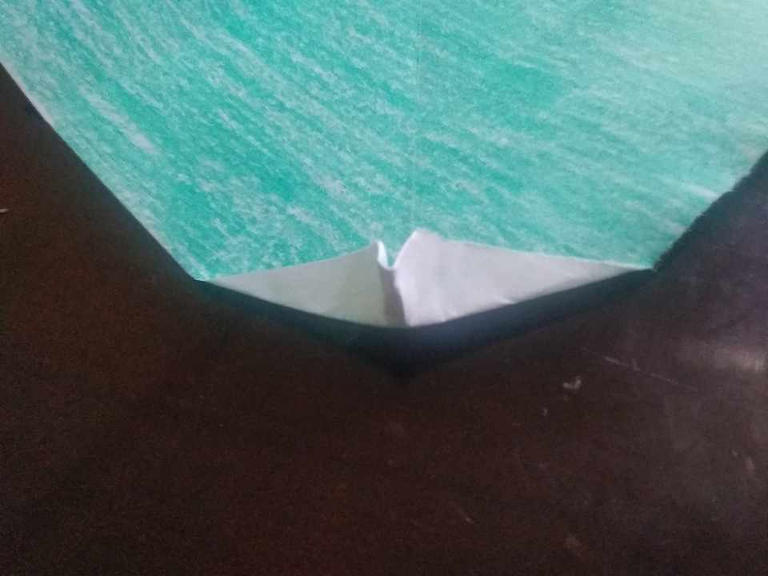
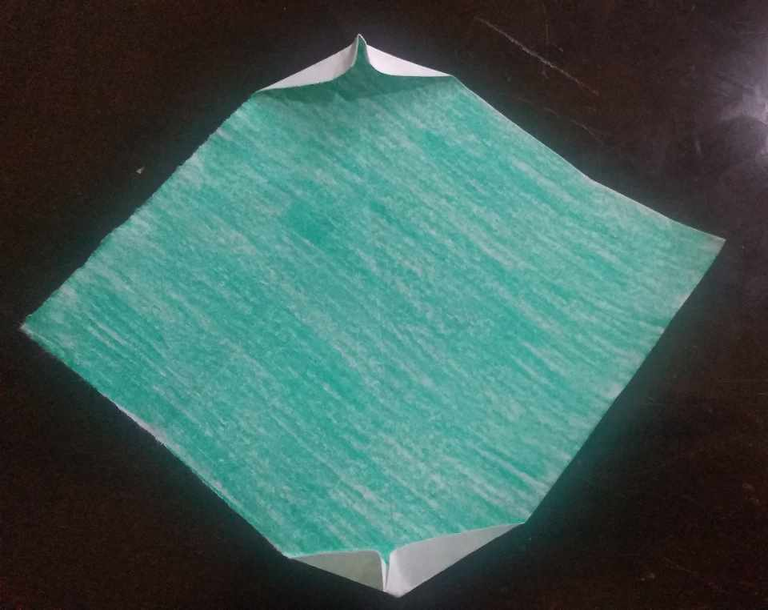
Con la punta de los dedos índice y pulgar, tomamos el papel para realizar este doblez que se muestra en la primera imagen, guiados por las líneas que quedaron de los dobleces que hicimos hacia la izquierda y derecha, este procedimiento lo repetimos en la punta que superior del rombo.
With the tip of the index finger and thumb, we take the paper to make this fold shown in the first image, guided by the lines that remained from the folds we made to the left and right, this procedure is repeated at the top of the rhombus.
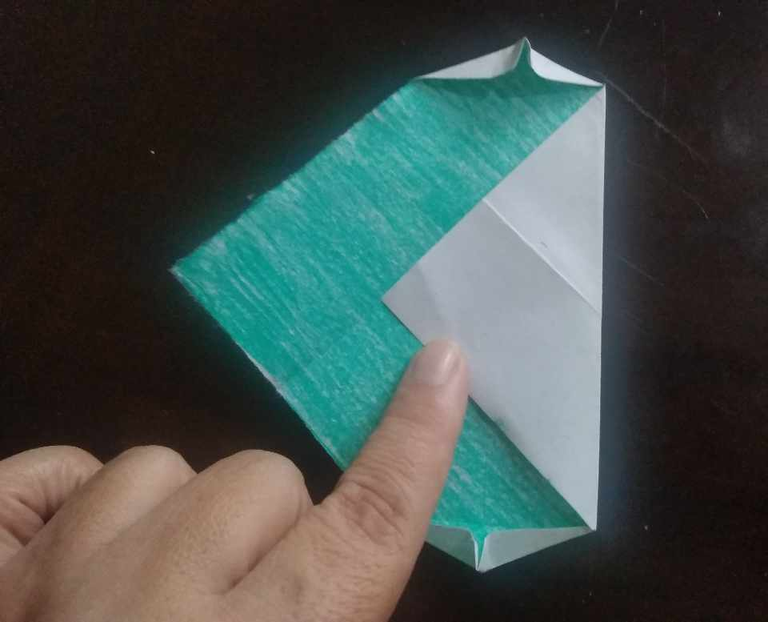

Lo siguiente será tomar una punta para llevarla hasta el rombo que está formado por dobleces en la punta lateral, marcamos bien la línea, desdoblamos y repetimos con el otro lado para que queden las líneas que se muestran en la segunda imagen.
The next step is to take a point and bring it to the rhombus that is formed by folds in the side point, mark the line well, unfold it and repeat with the other side so that the lines shown in the second image remain.

Acá tomamos las líneas laterales para doblar hacia abajo, también las líneas superior e inferior para que nos quede acentuado el rombo central.
Here we take the lateral lines to fold downwards, also the upper and lower lines to accentuate the central rhombus.


Llevamos el rombo hacia abajo, como si lo estamos guardando, como muestra la primera foto; al quedar guardado podemos llevar una punta hacia la izquierda y la otra a la derecha, para que quede como en la segunda foto.
We take the rhombus downwards, as if we were keeping it, as shown in the first photo; when it is kept we can take one point to the left and the other to the right, so that it looks like in the second photo.


Para formar la cola, tomamos las puntas que quedaron y las doblamos para que ambas se junten en el centro y se inicie la cola.
To form the tail, we take the remaining ends and bend them so that both meet in the center and the tail begins.


Justo donde tenemos la cola, abrimos para doblar esa punta hacia abajo, repetir con la otra punta; juntar nuevamente y nos quedara completada la cola de nuestro pez.
Just where we have the tail, we open to bend that tip down, repeat with the other tip; join again and we will have completed the tail of our fish.

Recortamos dos círculos para colorear otro círculo más pequeño dentro de ese con crayón negro y formar los ojos del pez, colocamos la pega en barra y pegamos en la cara.
We cut out two circles to color another smaller circle inside it with black crayon and form the eyes of the fish, place the glue stick and glue on the face.

Cuidadosamente, metemos los dedos en la boca del pez para darle forma a los cachetes y abrir mejor la boca de este.
Carefully, we put our fingers in the fish's mouth to shape the cheeks and open the fish's mouth better.


