ESPAÑOL.
Hola gente bonita de esta maravillosa comunidad que ha causado revuelo e impacto en las redes sociales, por los buenos resultados y positivismo en cada una de las personas que son parte del mismo, a través de eso aportan su granito de arena y sus ganas de progresar,tener alto crecimiento, capacitación,conocimientos y obtener los frutos de cada cosecha que realizan.
La manualidad no es solo crear y listo, NOo; esté tiene un sin fin de técnicas y cuidado a la hora de poner manos a la obra,para así tener un acabado limpio y resultado final impecable;es por eso que las creaciones tienen costos justo,por qué tiene un proceso que van integrado en la valoración que se llama TIEMPO y muchas personas no lo ven desde ese punto de vista pero es así, y a parte de eso es un trabajo de concentración y dedicación para obtener un resultado admirable,mágico y que el cliente quedé satisfecho siempre del trabajo realizado.
Cartulina 2 en Kg
Cartulina bi tono doble fast azul Marino
Regla
Lápiz
Tijera
silicon frío
Pistola de silicón
Cintas decorativa en tono azul y dorado Marabú blanco
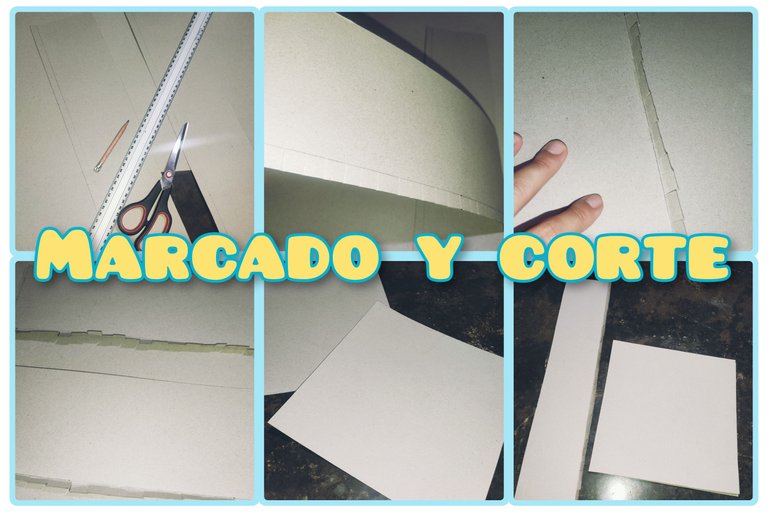
1- Marcar 54cm de largo ,10cm de alto y 2cm de pestañas en la cartulina,las medidas del gorro va a depender del tamaño de la cabeza de cada persona;en este sentido el largo que al pegar los extremos se forma el círculo.
2- Recortar la tira marcada,los 2 cm de pestañas van hacer un doble con ayuda de la regla y van hacer cortados a cada 4cm.
3- Marcar 27x27 cm en la cartulina esto enfoca largo por ancho para sacar el cuadro de la tapa de arriba del birrete.
4- Recortar el cuadro marcado para ser el armado del mismo,es decir a la tira se le va dando forma circular con la ayuda de un vaso angosto o con las manos de manera cuidadosa,evitando que la cartulina se doble.
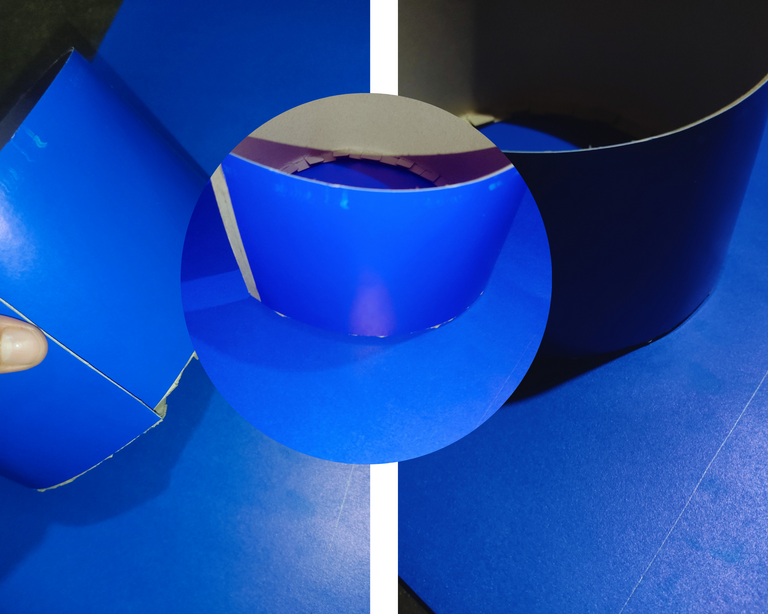
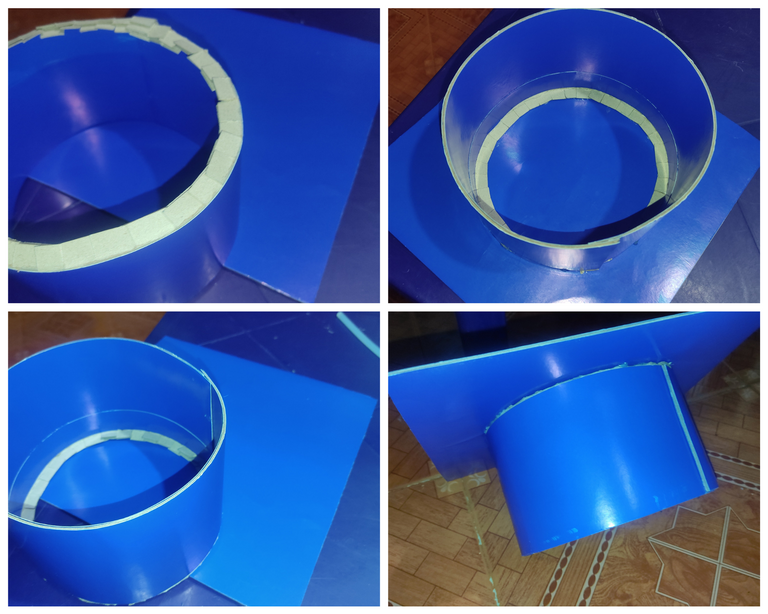
5- Pegar con caliente o grapas la tira en la medida que corresponde,las pestañas se colocan de forma interna,en ese proceso se agrega pega con caliente para sellar la tapa y así hacer un armado fuerte y sostenible.
6- Luego del armado,se procede al paso decorativo para darle elegancia y versatilidad al mismo,se cortan las cintas en el tamaño o la medida que corresponde.
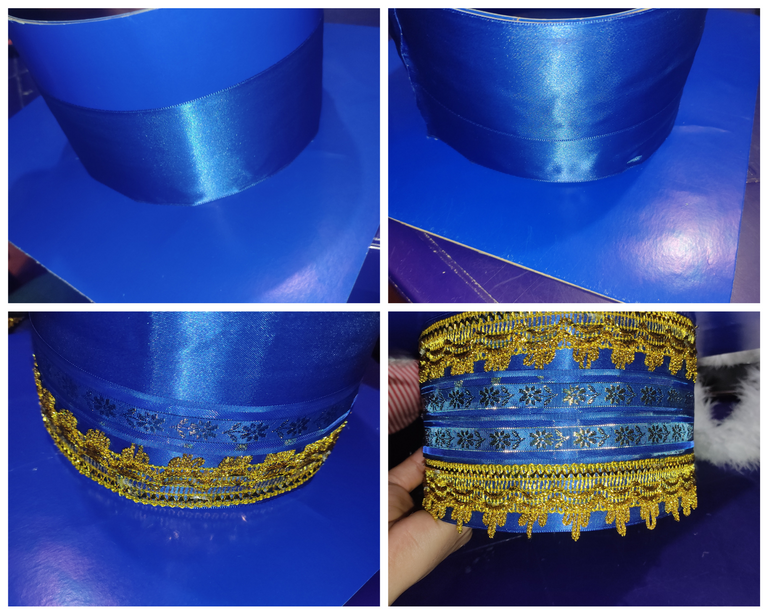
7- Para la parte decorativa se trabaja con 2 tipos de pegas,frío y caliente para evitar grumos de la caliente en el centro de las cintas,al momento de aplicar la pega con la pistola se manipula de manera cuidadosa para que tenga un acabado limpio y un resultado de calidad como es y Siempre debe ser.
8- Aplicada las cintas decorativas,se retiran los hilos que deja las pegas para así entregar un trabajo impecable y maravilloso.
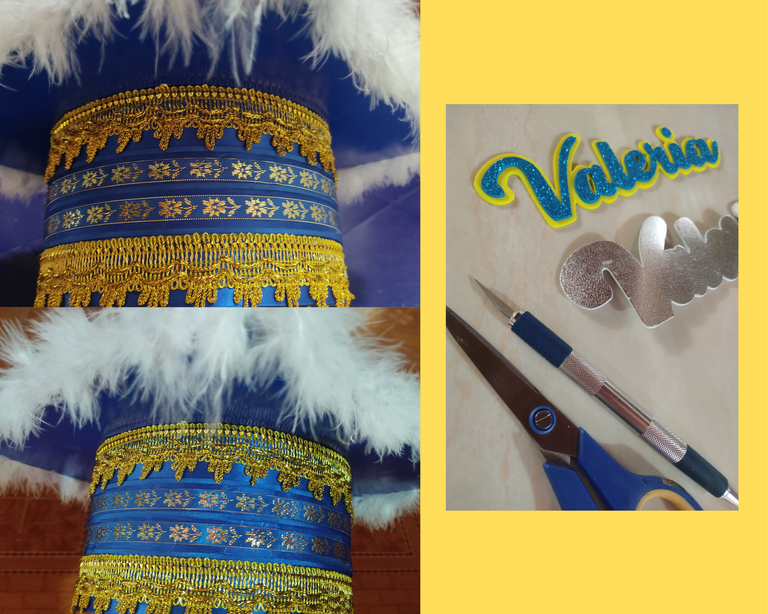
9- Visualiza el trabajo por si tiene algún detalle que afinar o limpiar, siempre es necesario hacerlo por qué algunas veces ocurre cualquier percance.
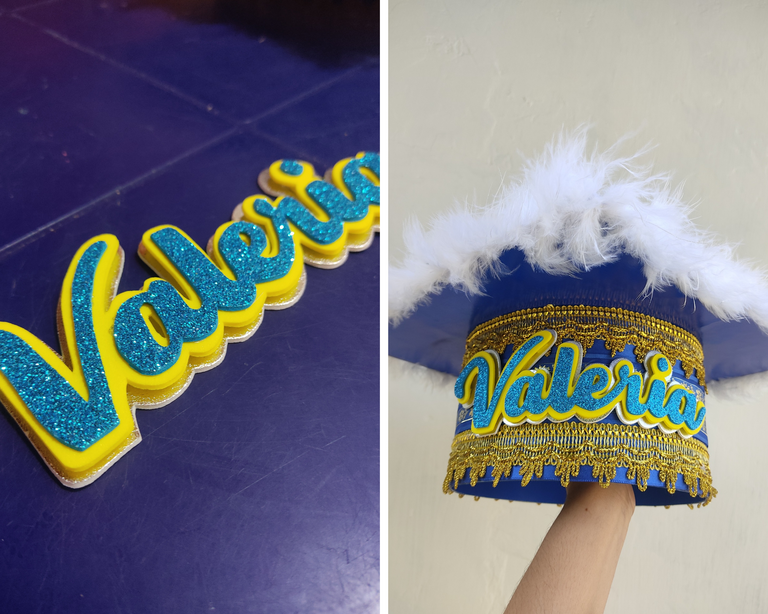
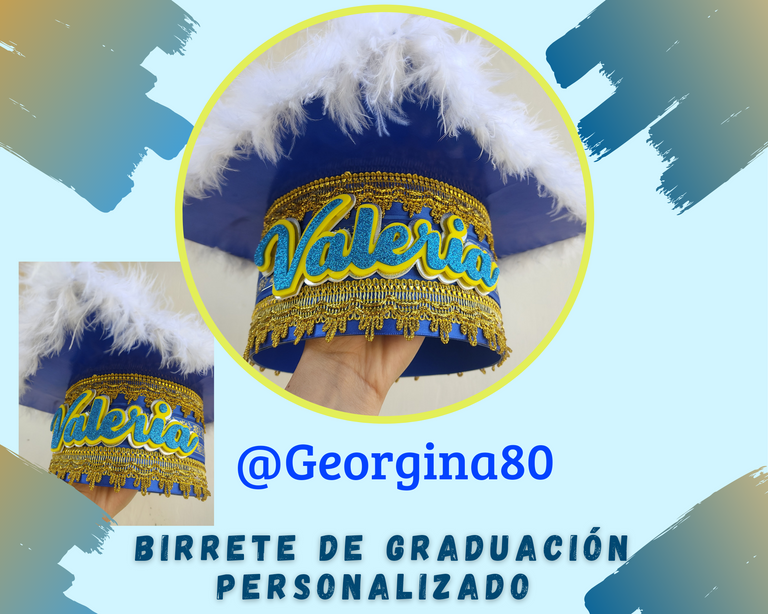
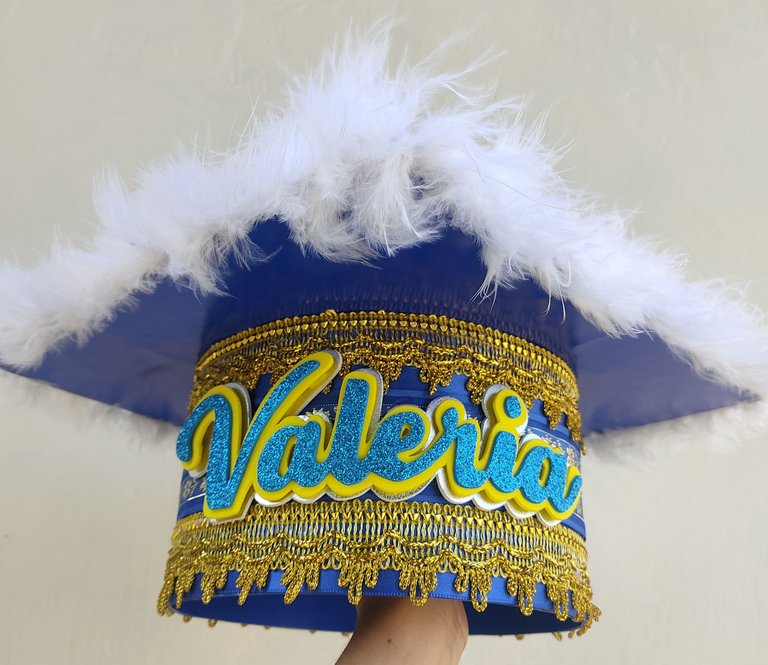
10- Gorro listo y finalizado, se procede el pegado del nombre,se elaboró con goma Eva "Foami" en tonos azul escarchado,amarillo y plateado en metalizado Con técnicas de cortes y herramientas adecuadas, se formaron capas para darle altura y listo, resultado soñado.!
Imágenes tomadas de mi propia autoría.
Edición y collage por canva.
Traductor de Deepl.
ENGLISH.
💋🐝❤️
Hello beautiful people of this wonderful community that has caused a stir and impact on social networks, for the good results and positivism in each of the people who are part of it, through that contribute their bit and their desire to progress, have high growth, training, knowledge and get the fruits of each harvest they make.
The craft is not just create and ready, NOo; it has endless techniques and care when putting hands to work, in order to have a clean finish and impeccable end result; that's why the creations have fair costs, because it has a process that are integrated into the assessment that is called TIME and many people do not see it from that point of view but it is so, and besides that is a work of concentration and dedication to obtain an admirable result, magic and that the customer is always satisfied with the work done.
Cardboard 2 in Kg
Bi-tone cardboard double fast fast navy blue
Ruler
Pencil
Scissors
cold silicone
Silicone gun
Decorative ribbons in blue and gold
Marabu white tone.
1- Mark 54cm of length, 10cm of height and 2cm of tabs on the cardboard, the measures of the cap will depend on the size of the head of each person; in this sense the length that when gluing the ends the circle is formed.
2- Cut the marked strip, the 2 cm of tabs will make a double with the help of the ruler and will be cut every 4 cm.
3- Mark 27x27 cm on the cardboard, this is the length by width to draw the square of the top cap of the cap.
4- Cut out the marked box to be the assembly of the same, that is to say to the strip is giving circular form with the help of a narrow glass or with the hands in a careful way, avoiding that the cardboard is folded.
5- Glue with hot glue or staples the strip in the corresponding measure, the tabs are placed internally, in this process hot glue is added to seal the lid and thus make a strong and sustainable assembly.
6- After the assembly, we proceed to the decorative step to give elegance and versatility to it, the ribbons are cut in the size or measure that corresponds.
7- For the decorative part we work with 2 types of glue, cold and hot to avoid lumps of the hot in the center of the ribbons, at the time of applying the glue with the gun is handled carefully to have a clean finish and a quality result as it is and always should be.
8- Once the decorative tapes are applied, the threads left by the glue are removed in order to deliver an impeccable and wonderful job.
9- Visualize the work in case you have any detail to refine or clean, it is always necessary to do so because sometimes any mishap occurs.
10- Cap ready and finished, we proceed to the gluing of the name, it was made with eva rubber "Foami" in shades of blue frost, yellow and silver in metallic. With cutting techniques and appropriate tools, layers were formed to give height and ready, dreamed result!
Images taken from my own authorship.
Editing and collage by canva.
Translator by Deepl.


