¡Hola, comunidad! Estaba revisando mi guardarropa y da la casualidad de que tenía está prenda pero por lo viejita contaba con varias manchas. Pensé entonces en hacerle unos dibujos con pinturas de tela para ocultarlas.
Materials you need / Materiales que necesitas
Fabric paints in black, white, pear green, fluorescent magenta and fluorescent passion fruit. 2 brushes, one with a thick tip and the other with a thin tip. A pencil to draw the sketch, water and a tissue to dry the brushes.
Pinturas de tela color negro, blanco, verde pera, magenta fluorescente y maracuyá fluorescente. 2 pinceles, uno de punta grueso y otro fino. Un lápiz para dibujar el boceto, agua y un pañito para secar los pinceles.
Let's start! / ¡Empecemos!
The first thing I did was to look for reference images of what I wanted to paint on the garment. I opted for some cosmos flowers in shades of orange with pink. Then I made a sketch to know more or less the space it would occupy, I started with a base coat of paint and with a second one I gave contrast and more depth to the flowers.
Lo primero que hice fue buscar imágenes de referencia sobre lo que quería pintar en la prenda. Opté por unas flores del cosmos en tonos naranjas con rosita. Luego realicé un boceto para saber más o menos el espacio que ocuparía, empecé con una capa de pintura base y con una segunda le dí contraste y más profundidad a las flores.
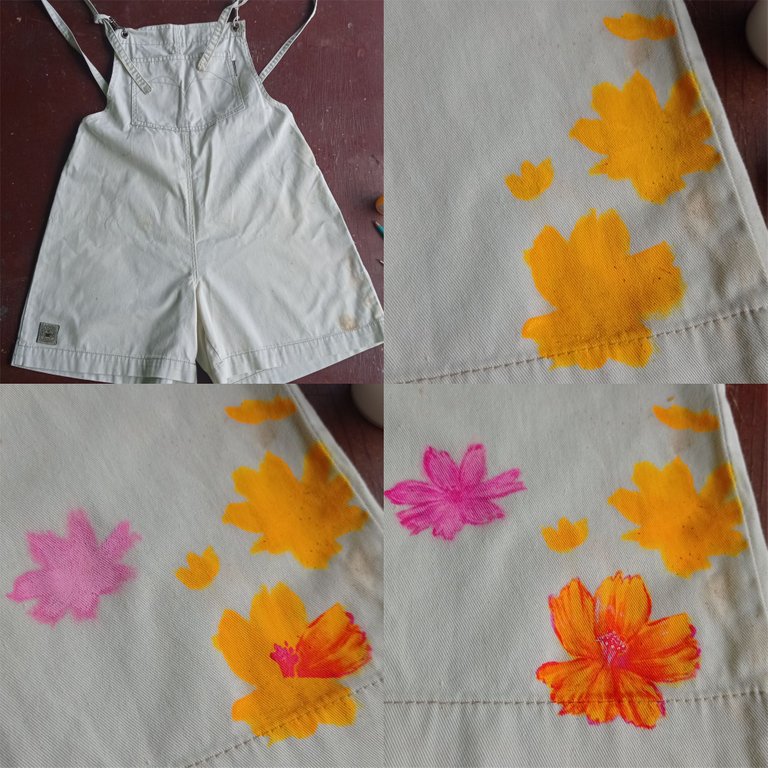
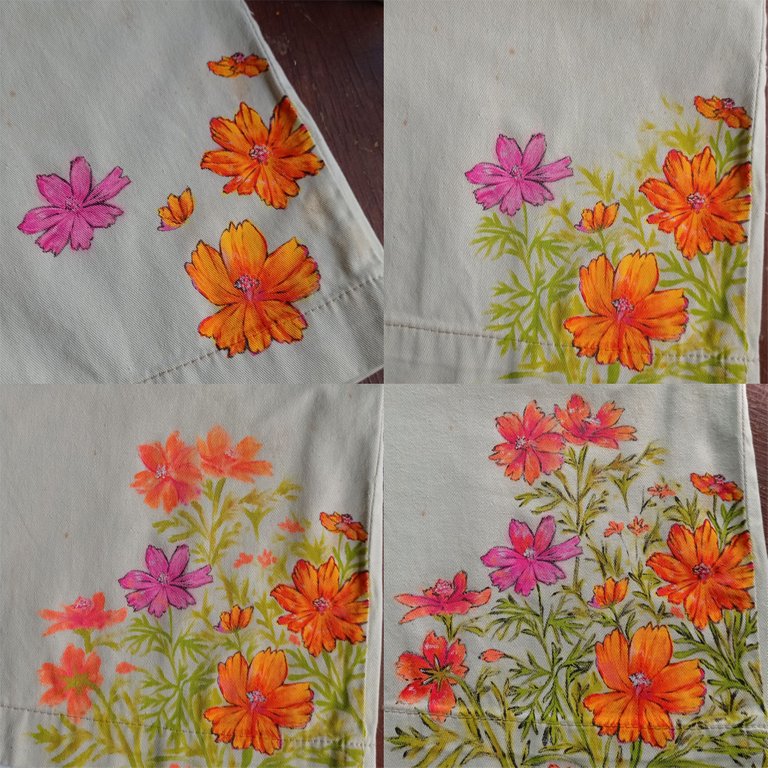
Then I went on to outline the edges with black paint, the finer and more detailed the better. In the end I just painted the leaves in two shades of green and repeated the process of outlining with black.
Seguidamente pasé a delinear los bordes con pintura negra, mientras más fino y detallado sea, mejor. Al final solo quedó pintar las hojitas en dos tonos de verde y repetir el proceso de delinear con negro.
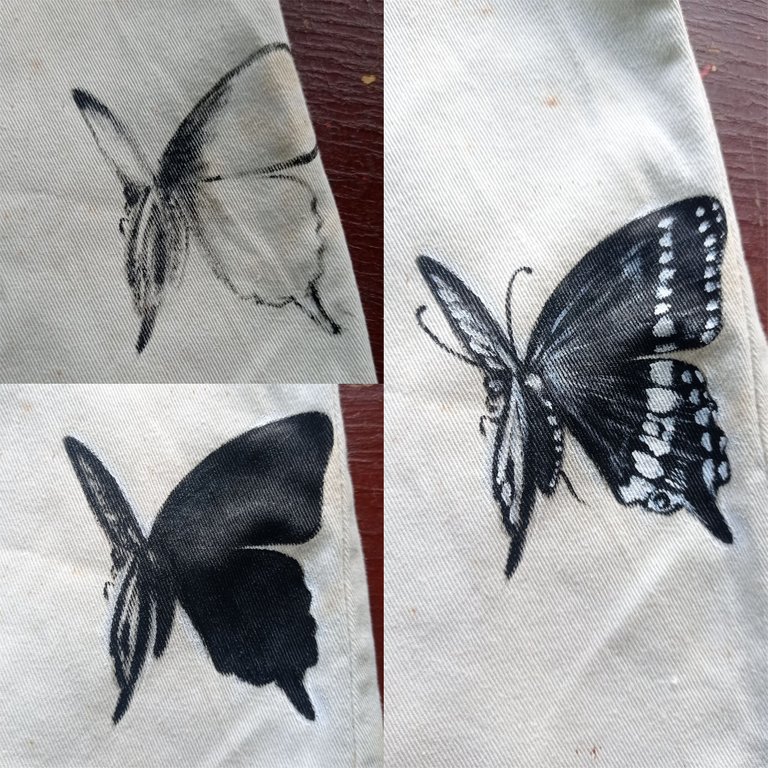
Since I still had a lot of space left and other more obvious stains, I looked for a butterfly and moth to paint them. In the case of the butterfly, again I started by making a sketch, calculating the space and direction of the wings. Then I filled the drawing with black paint and painted the details in white. In this case I covered some imperfections with black as well.
Como aún me quedaba mucho espacio y otras manchas más evidentes, busqué una mariposa y polilla para pintarlas. En el caso de la mariposa, nuevamente inicié haciendo un boceto, calculé el espacio y dirección de las alas. A continuación rellené el dibujo con pintura negra para seguidamente pintarle los detalles en blanco. En este caso tapé una imperfecciones con negro también.
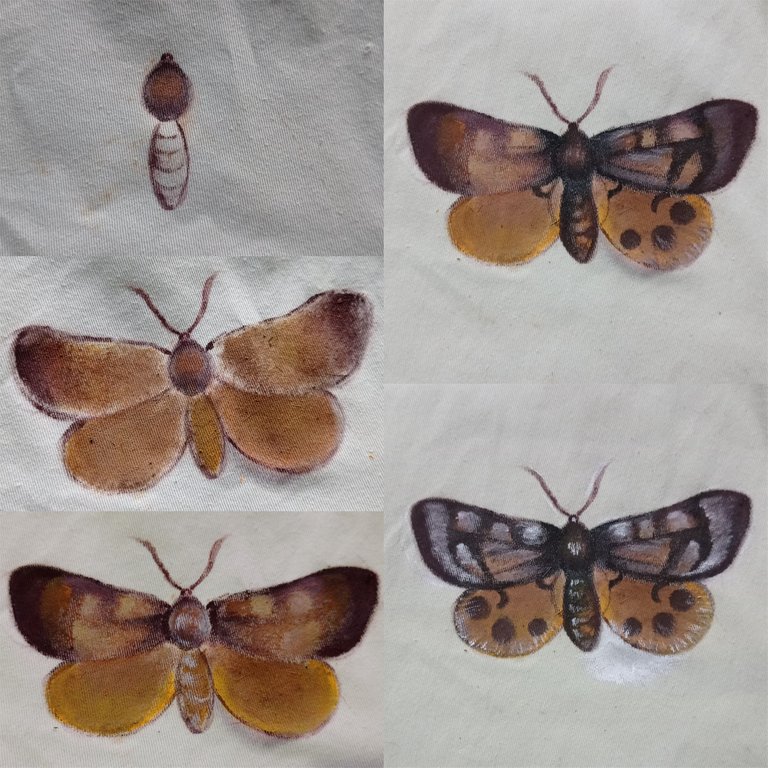
For the moth I started by making the torso of the moth and also its little head. I continued with the wings and mixed a chocolate brown for the base, I think this painting was a little more complicated because the wings had several shades of brown. I painted the details and gradients, always trying to make one wing look like the other. To finish I did the outline with black paint and made the details in white to give some light to the moth. Remember to use a brush with a very thin tip for these details, so it will look more stylized.
Para la polilla comencé haciendo el torso de la misma y también su cabecita. Seguí con las alas y mezclé un marrón chocolatoso para la base, creo que esta pintura fue un poco más complicada porque las alas tenían varios tonos de marrón. Fui pintando los detalles y degradados, siempre tratando de que una ala se pareciera a la otra. Para culminar hice el delineado con pintura negra y realicé los detalles en blanco para darle algo de luz a la polilla. Recuerden ocupar un pincel con una punta muy delgadita para estos detalles, así se verá más estilizado.
