
 |  |
💜💜💜💜💜❤️💜💜💜💜💜
💜💜💜❤️💜💜💜
💜❤️💜
❤️
[Esp]
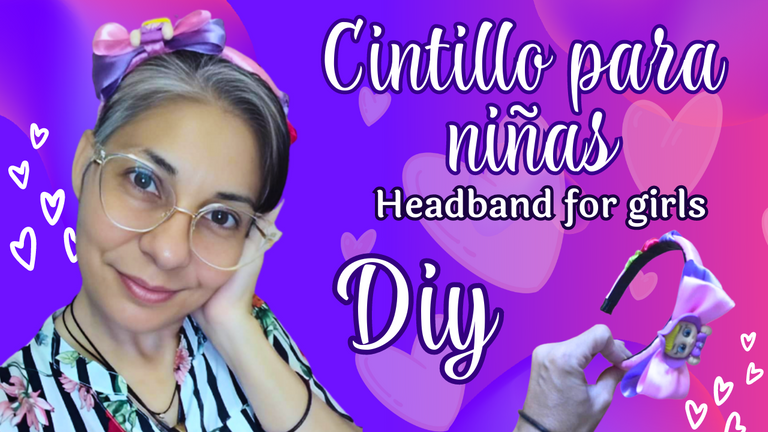
¡Hola comunidad! Les envío mis saludos llenos de mucho amor y energías positivas.
Hoy traigo una linda idea que puede servir de emprendimiento, estuve considerando los gastos, para ver su rentabilidad.
¿Recuerdan aquella vez que les comenté que había comprando un metro de cinta N°9 en casi 1$? Hacía mucho tiempo que no compraba cosas para manualidades, en esta zona todo es muy escaso, cuando fui a la ciudad, llegué tan tarde que de las dos tiendas de bisutería que aun existen, solo a la que entré estaba abierta, nunca fue de mi agrado comprar ahí, porque no tienen variedad, la atención siempre ha sido pésima, pero yo quería hacer aquella manualidad que presenté.
Ciertamente me sentí triste por ver todo muy costoso, pensé que no podría compartir mas manualidades o iba a ser muy esporádico. En mi residencia actual, muy cerca, abrió un lugar que vende cosas de bisutería, entré por curiosidad a ver los precios, con lo que gasté en aquel lugar comprando un metro de cinta N°9 en 1$, en este lugar nuevo pude comprar 3,5 metros con el mismo gasto. Pude confirmar además que esos si son los precios justos. Esta nueva tienda me agrada, porque tiene mucha variedad de materiales para manualidades y bisutería, compré muchas cosas entre ellas la aplicación del cintillo de hoy, las cintas y más.
No gasté casi nada de materiales para hacer este cintillo que les presento hoy, por lo que si fuera a venderlo tendría un costo de 3 a 4$, comparando precios de otros productos artesanales que he visto, aun está al costo y económico para quien lo compre.
Algunos tips, si tu idea es emprender:
✅ Anota siempre el costo de tus materiales.
✅ Divide ese costo entre lo que gastastes, eso te dará el costo de unidad estimada en cuanto a gastos.
✅ A ello le agregas tu mano de obra, que puede ser entre un 10 a un 30% sobre el costo, con ello tendrás el costo de unidad por producción.
El costo de la cinta N°9 fue de 0.3 $ de ella solo gasté 30 centímetros aprox, del resto de las cintas a penas unos cuadritos.
El costo de la decoración central 0.5 $
El cintillo 0.3 $
Por lo tanto con el hilo, la pega y lo demás que vienen de viejas manualidades, son gastos fijos que ni se perciben mucho. Al venderlo en 3$ aun tiene su ganancia.
¿Qué les pareció?
Las invito a recrearlas, bien sea para emprender, regalar o para sus hijas.
! [Scroll down to read the English version]
[Eng]
Hello community! I send you my greetings full of love and positive energies.
Today I bring you a nice idea that can serve as an enterprise, I was considering the costs, to see its profitability.
Remember the time I told you that I bought a meter of No. 9 tape for almost $1? It had been a long time since I bought things for crafts, in this area everything is very scarce, when I went to the city, I arrived so late that of the two jewelry stores that still exist, only the one I entered was open, it was never my pleasure to buy there, because they have no variety, the attention has always been lousy, but I wanted to make that craft that I presented.
I certainly felt sad to see everything very expensive, I thought I could not share more crafts or it was going to be very sporadic. In my current residence, very close, opened a place that sells costume jewelry, I went in out of curiosity to see the prices, with what I spent in that place buying a meter of ribbon N°9 in 1$, in this new place I could buy 3.5 meters with the same expense. I was also able to confirm that these are fair prices. I like this new store, because it has a lot of variety of materials for crafts and jewelry, I bought many things including the application of today's headband, ribbons and much more.
I did not spend almost nothing of materials to make this headband that I present today, so if I were to sell it would have a cost of 3 to 4$, comparing prices of other handmade products that I have seen, it is still at cost and economical for whoever buys it.
Some tips, If your idea is to start a business:
✅Always write down the cost of your materials.
✅Divide that cost by what you spent, that will give you the estimated unit cost in terms of expenses.
✅Add your labor, which can be between 10 to 30% of the cost, and you will have the unit cost per production.
The cost of the ribbon N°9 was 0.3 $ of it I only spent 30 centimeters approx, of the rest of the ribbons just a few squares.
The cost of the central decoration was 0.5 $.
The headband 0.3 $
So with the thread, the glue and the rest that come from old crafts, are fixed costs that are not even perceived much. By selling it for 3$ you still have a profit.
What did you think?
I invite you to recreate them, either to start a business, to give as a gift or for your daughters.

💜💜💜💜💜❤️💜💜💜💜💜
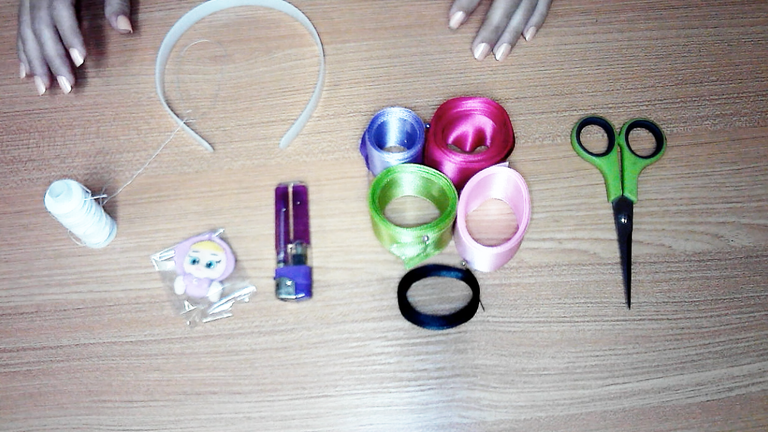
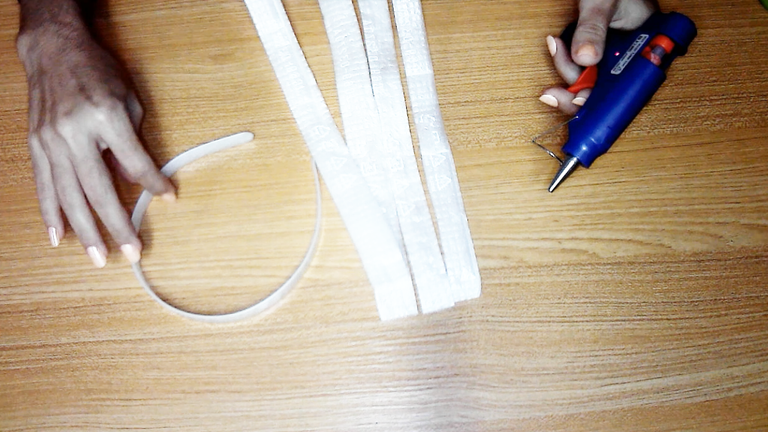
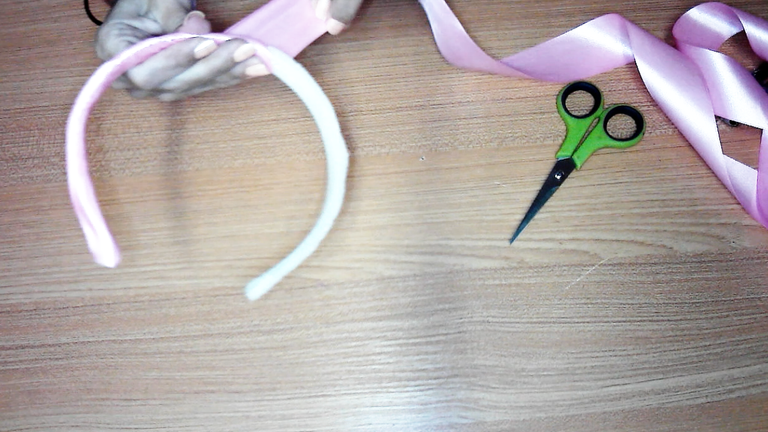
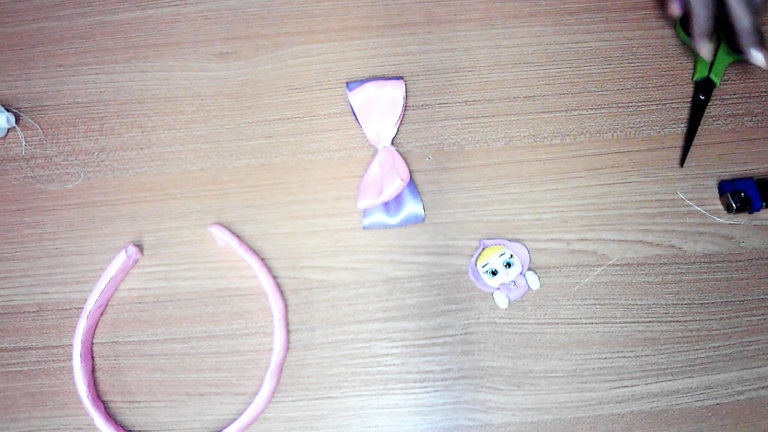
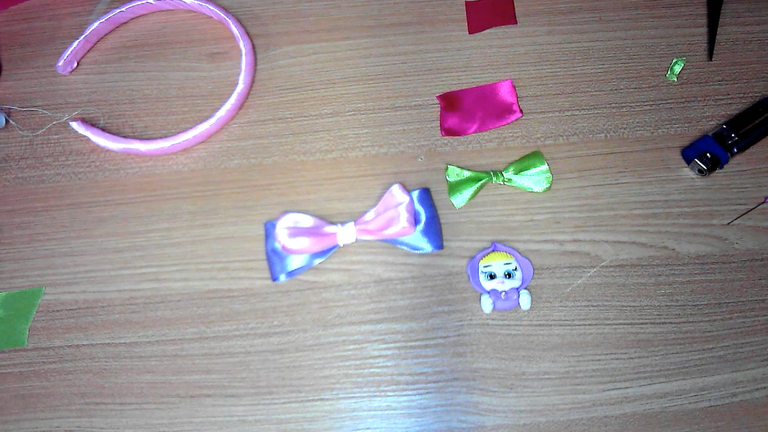
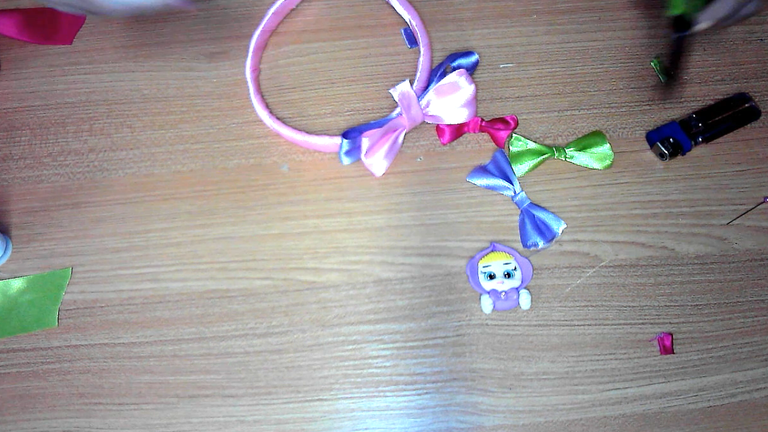
Materials / Materiales
💜💜💜💜💜❤️💜💜💜💜💜
 |  |
[Esp]
💜 Pistola de silicón caliente, tijeras.
💜 Cinta organza N°9 de satén colores varios y N° 2 color negro.
💜 Hilo de coser, aguja.
💜 Cintillo.
💜 Adorno para decoración central, yesquero.
💜 Goma espuma.
! [Scroll down to read the English version]
[Eng]
💜 Hot silicone gun, scissors.
💜 Organza ribbon N°9 satin various colors and N° 2 black color.
💜 Sewing thread, needle.
💜 Headband.
💜 Embellishment for central decoration, tinder.
💜 Foam rubber.
💜💜💜💜💜❤️💜💜💜💜💜
Step by Step / Paso a Paso
💜💜💜💜💜❤️💜💜💜💜💜
Step 1️⃣/ Paso 1️⃣
 |  |
 |  |

[Esp]
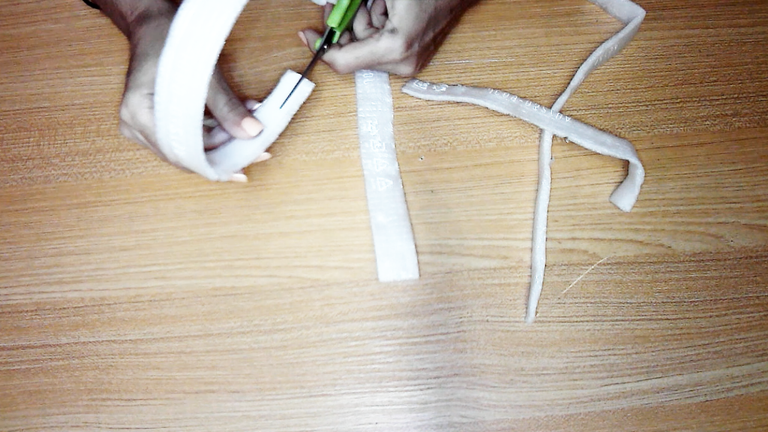
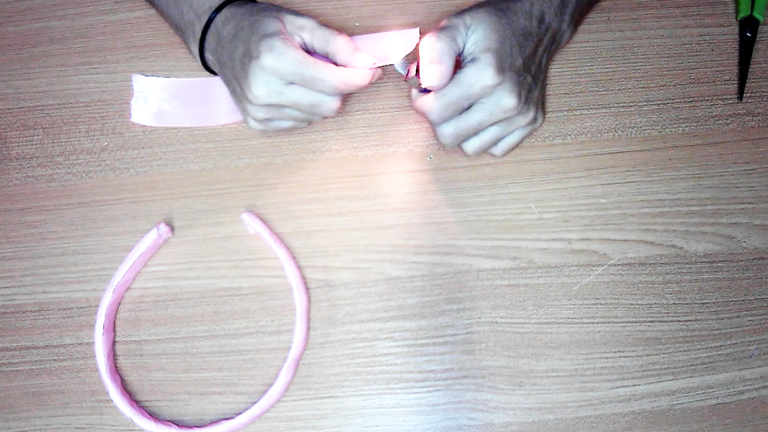
Forrando el cintillo:
Pega la goma espuma a la parte de arriba del cintillo, usa el silicón caliente.
Coloca la cinta de raso N°9 diagonal al cintillo y ve forrando al mismo tiempo que colocando pegamento en la parte interna del mismo.
Une bien las puntas.
! [Scroll down to read the English version]
[Eng]
Lining the headband:
Glue the foam rubber to the top of the headband, using hot silicone.
Place the satin ribbon N°9 diagonally to the headband and line the headband while placing glue on the inside of the headband.
Tie the ends together.
💜💜💜💜💜❤️💜💜💜💜💜
Step 2️⃣/ paso 2️⃣
 |  |  |
 |  |  |
💜💜💜💜💜❤️💜💜💜💜💜
 |  |  |
 |  |  |
💜💜💜💜💜❤️💜💜💜💜💜
 |  |  |
 |  |  |
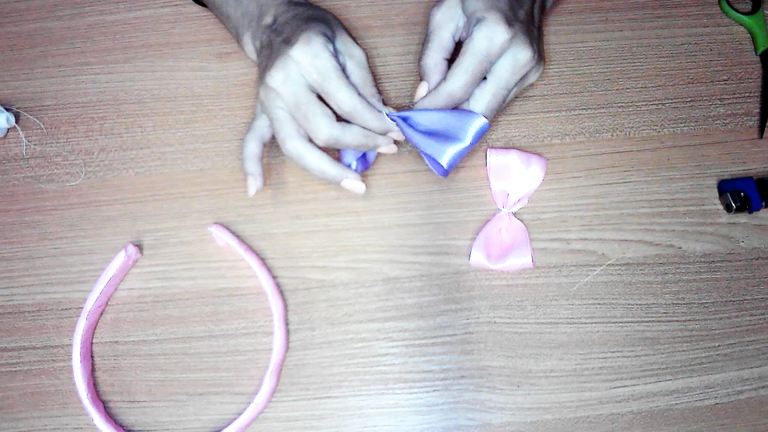
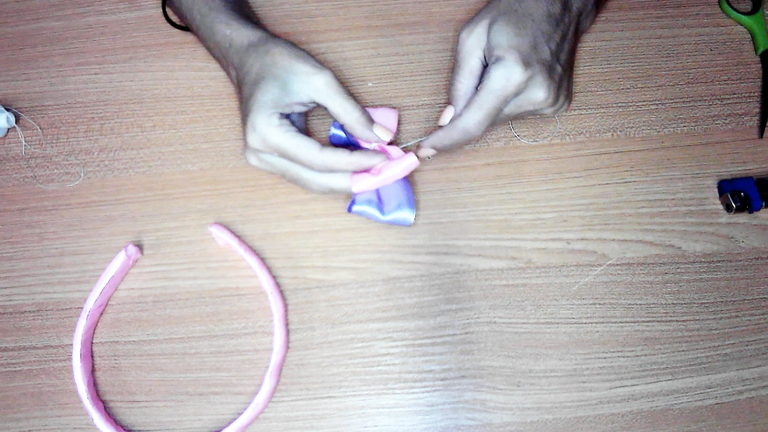
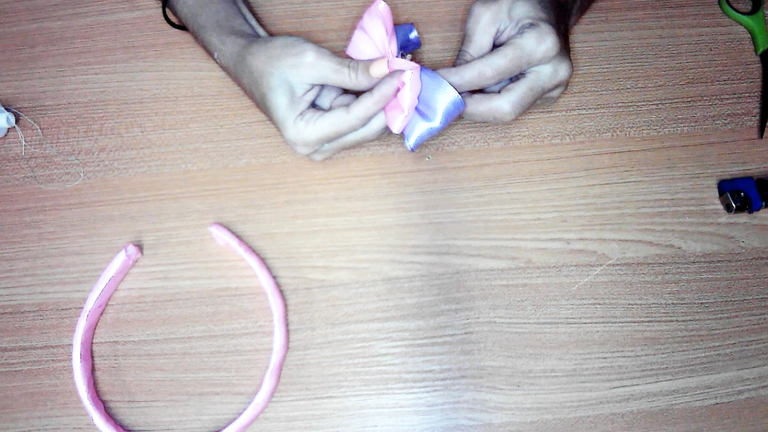
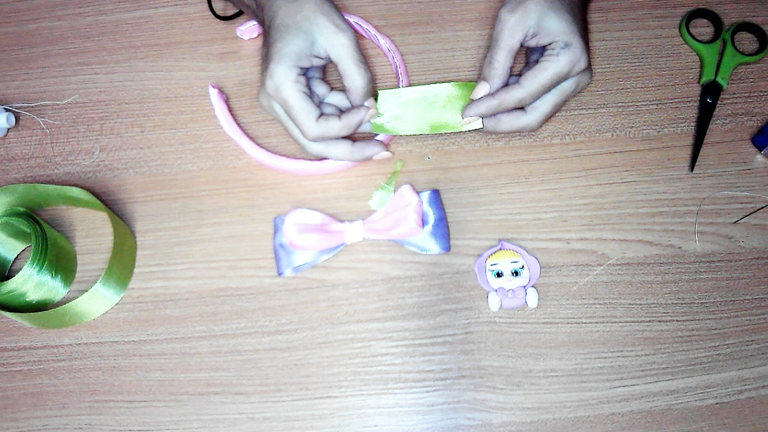
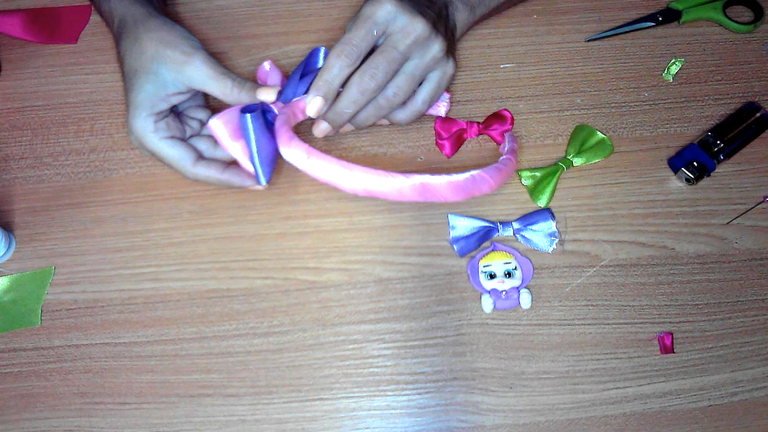
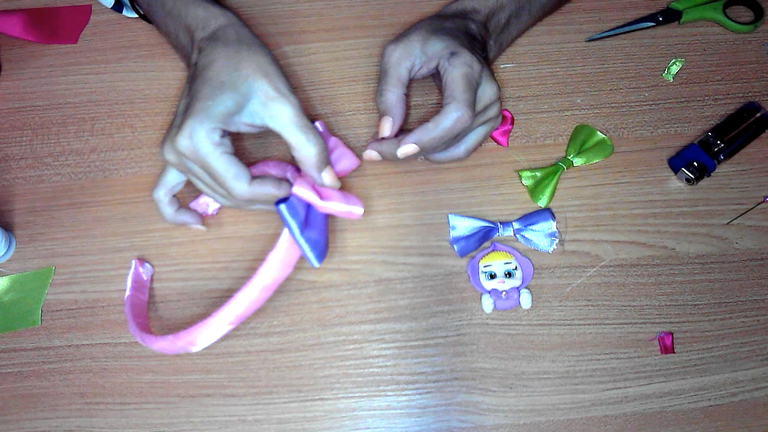
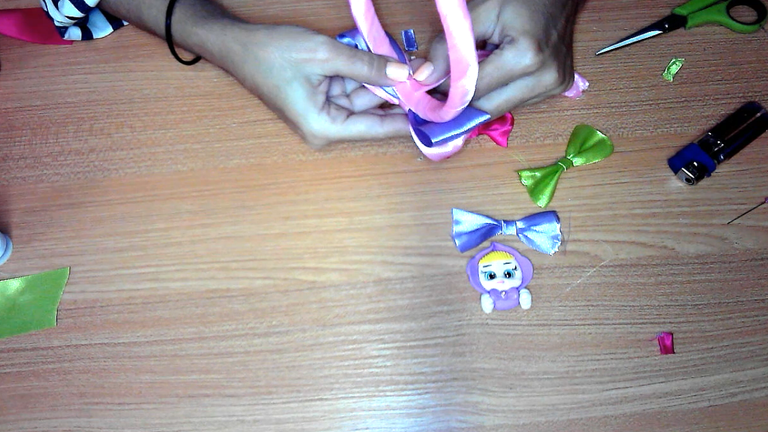
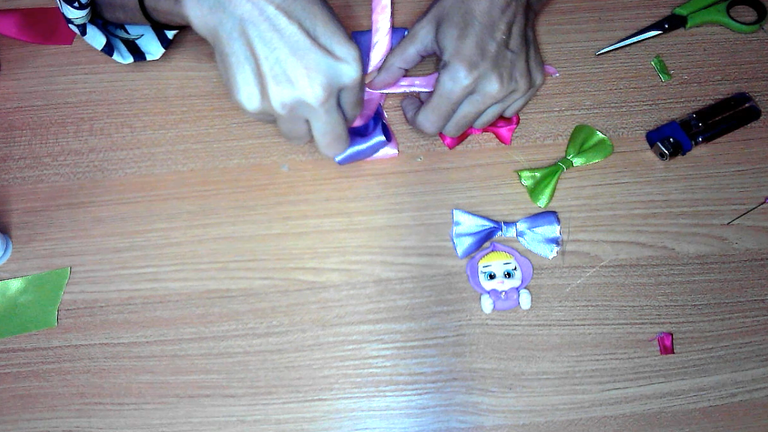
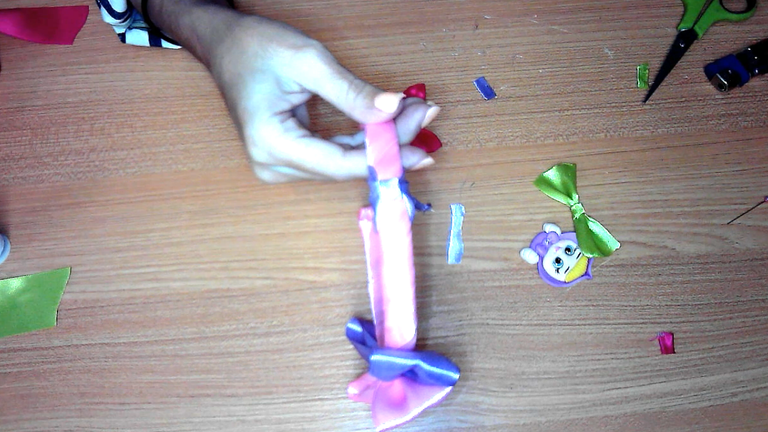
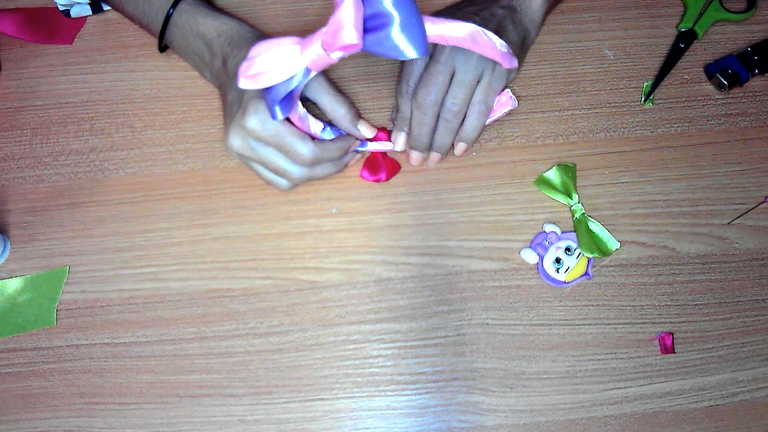
[Esp]
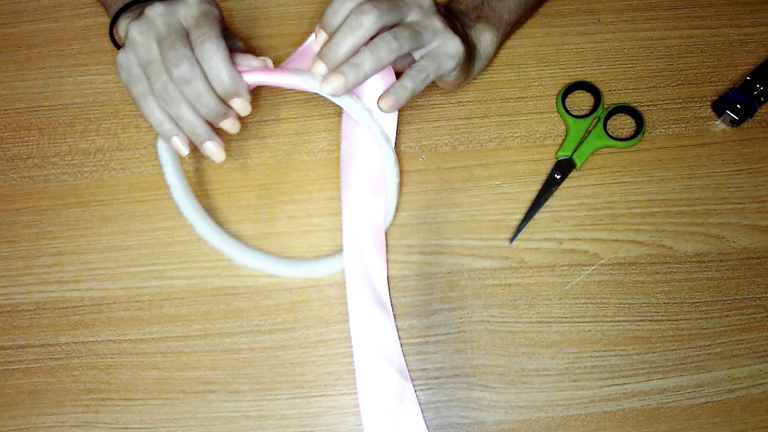
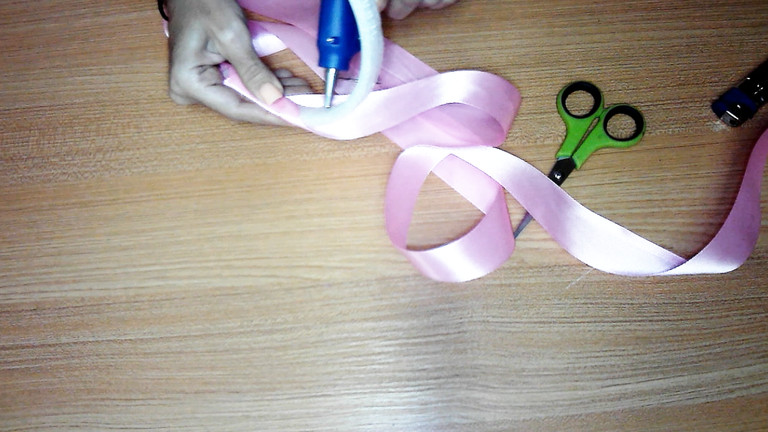
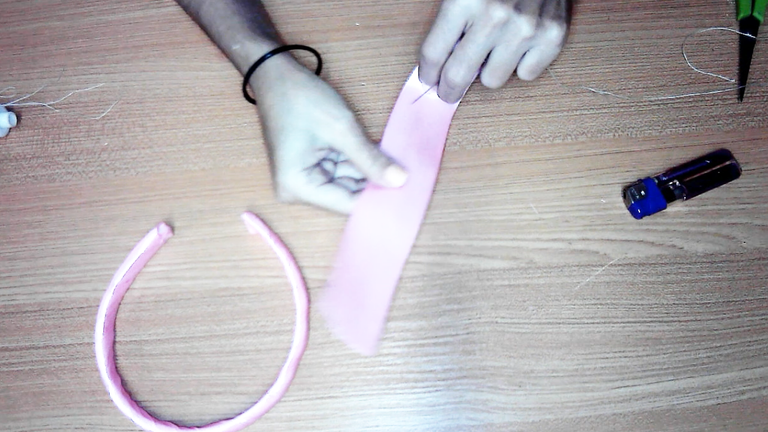
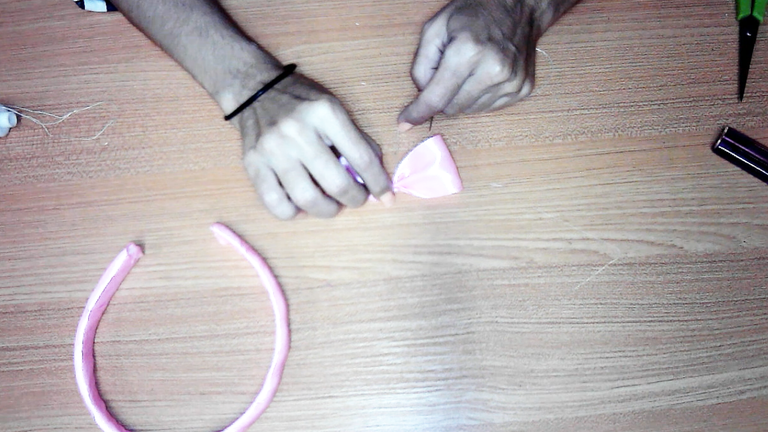
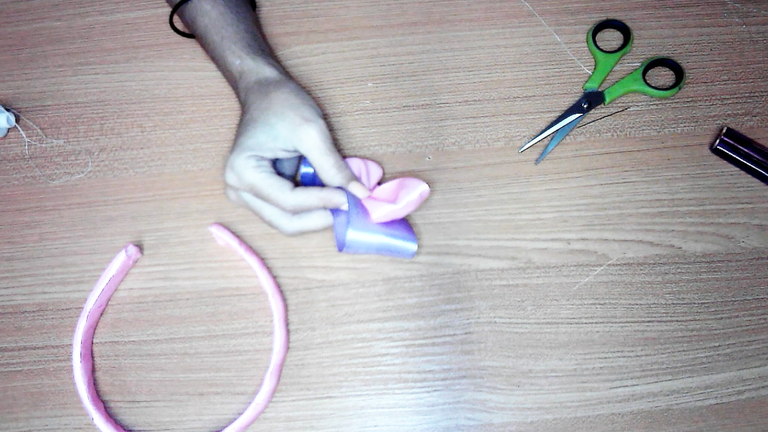
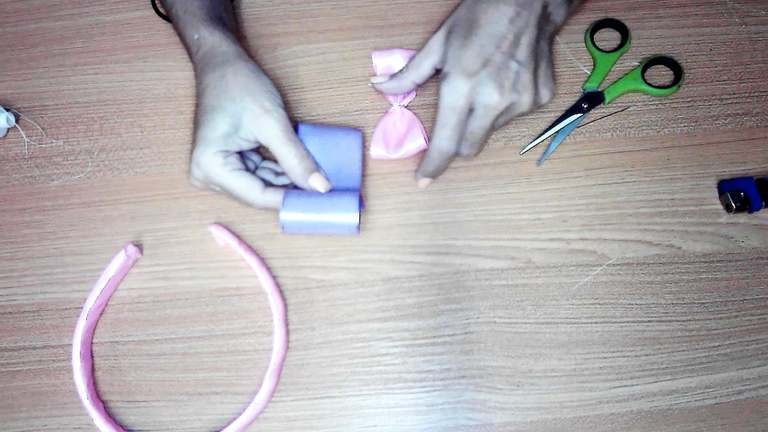
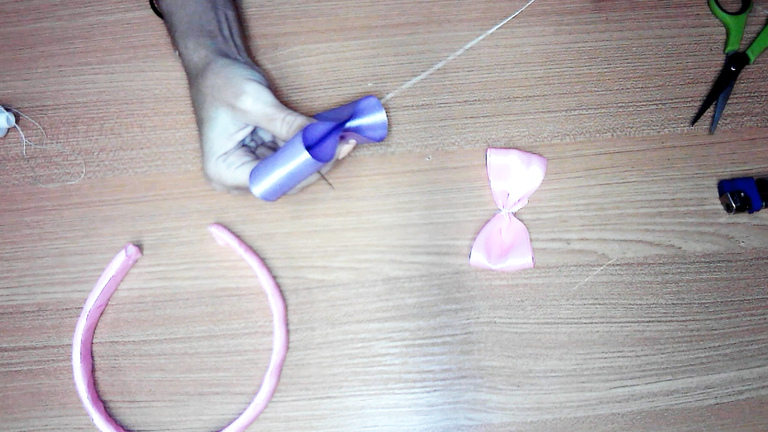
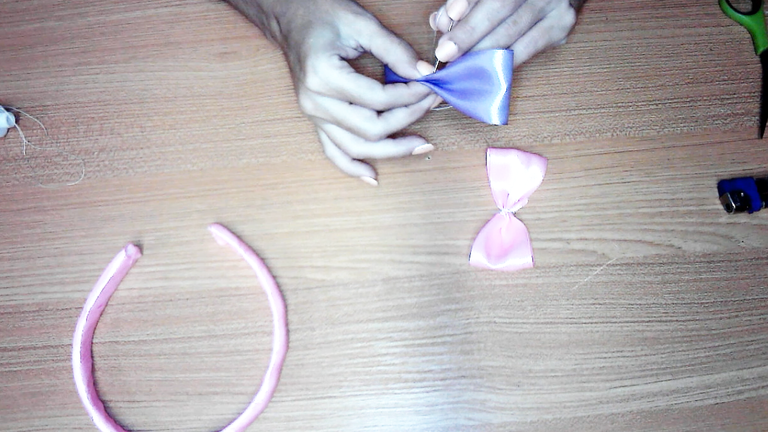
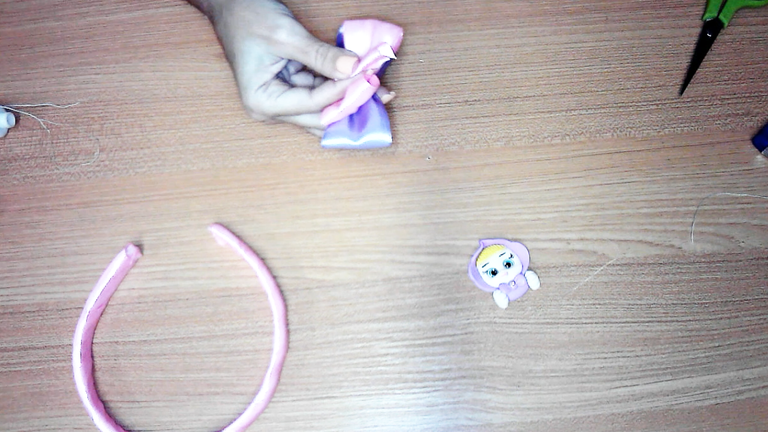
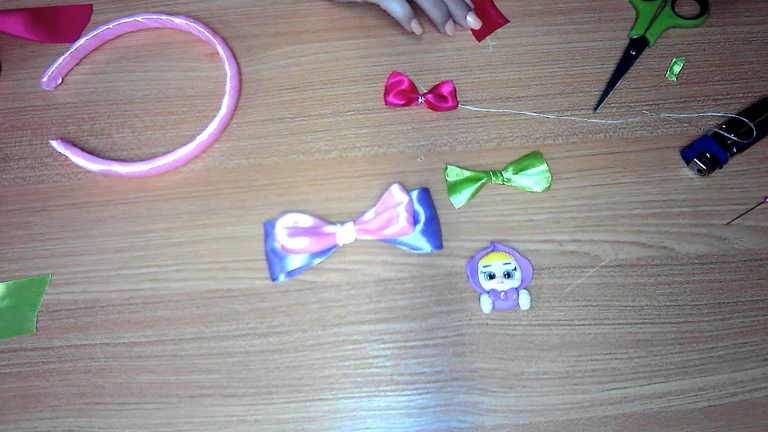
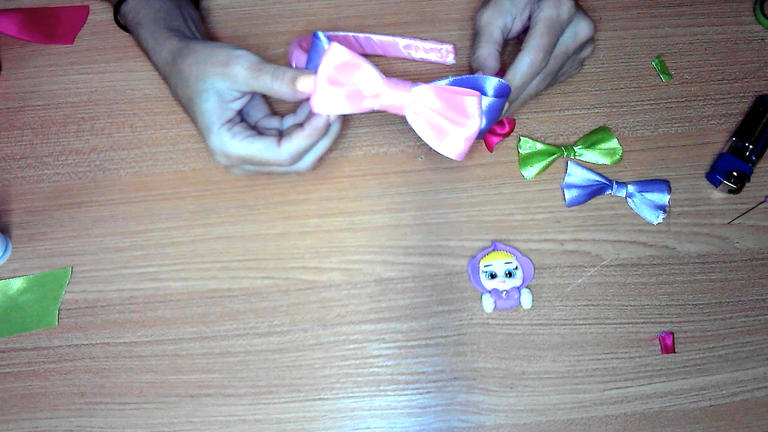
Haciendo el lazo grande:
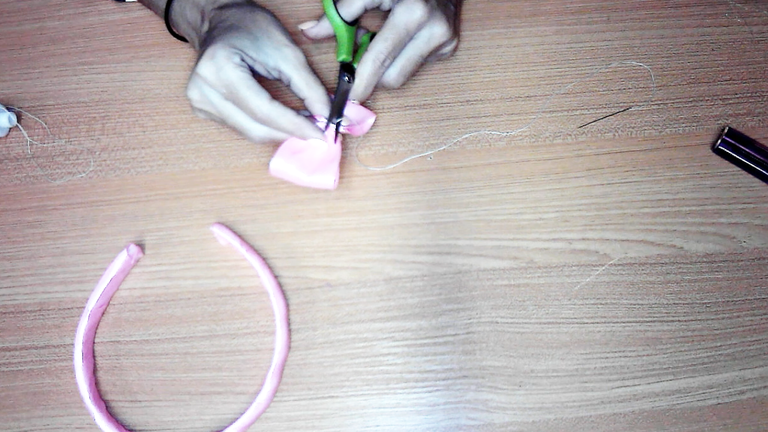
Como pueden ir viendo en estos tres bloques de imágenes. Se hará el lazo más grande, el lazo central, consta de dos cintas una más grande que la otra en dos tonos. Recuerda quemar un poco cada extremo de la cinta con el yesquero, para evitar que se desilache.
Dependiendo del ancho de tu cintillo, será el largo de tu lazo, en mi caso, para el lazo más pequeño usé una cinta de 10 centímetros color rosa.
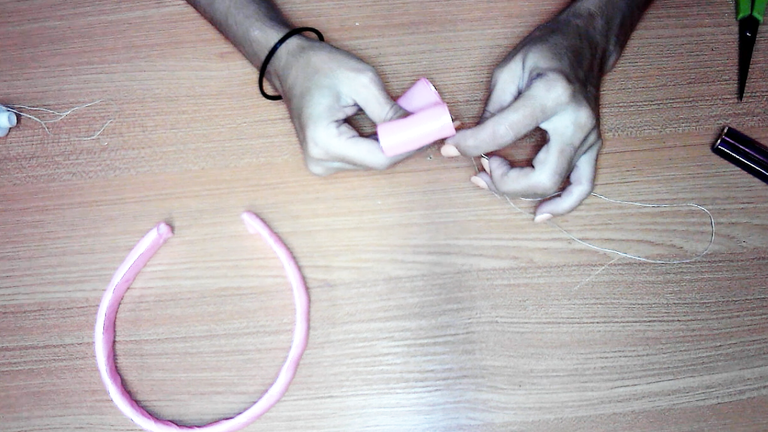
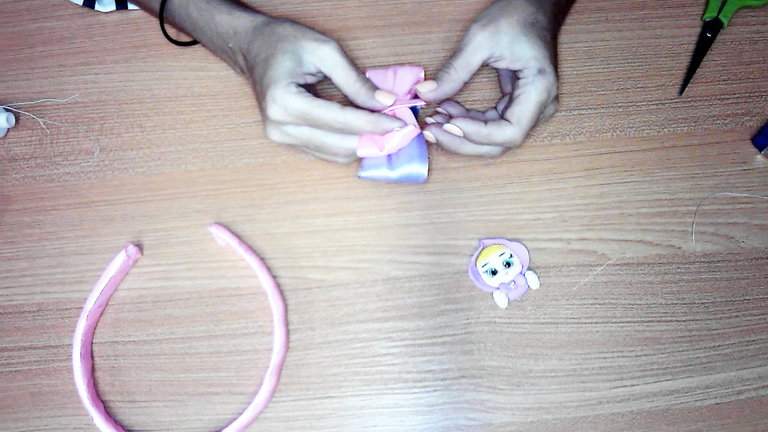
Armamos el primer lacito, lo cosemos y ajustamos.
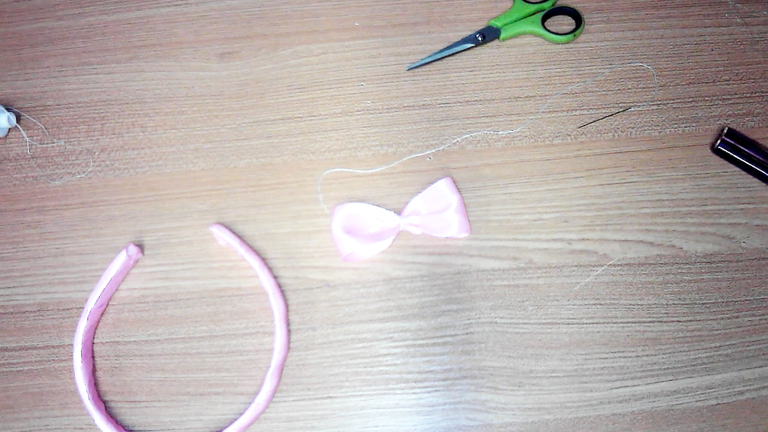
Medimos el tamaño de la cinta, he cortado una de color morado de 18 centímetros aproximadamente y repetí el paso anterior.
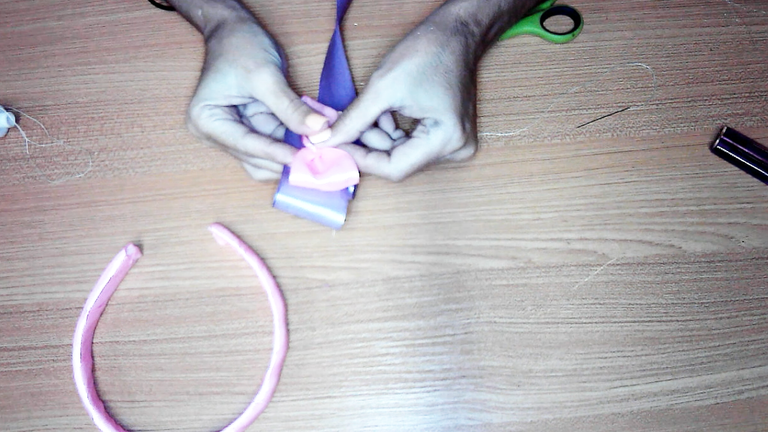
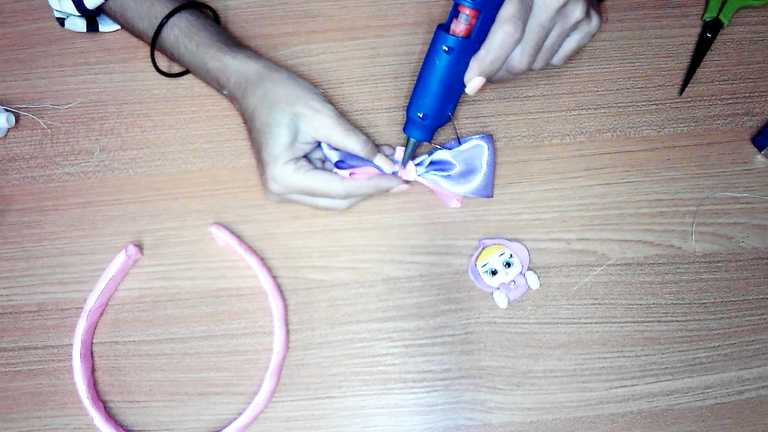
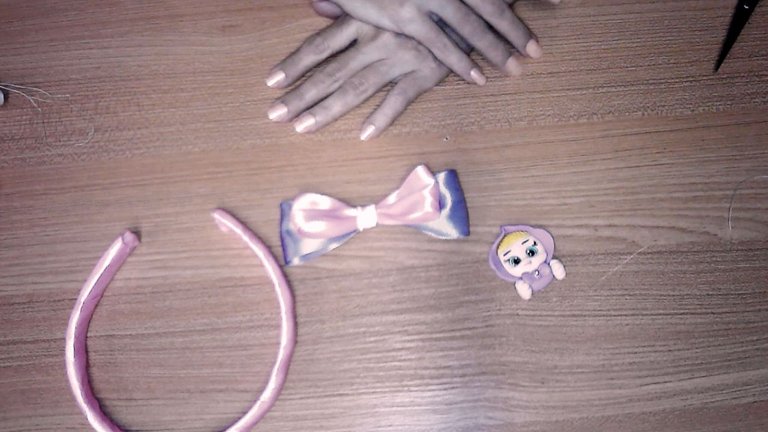
Luego uní los dos lazos, los cosí a mano para que queden mejor sujetos, puedes usar el silicón para este paso.
Pasa una cinta doblada por el centro del lazo para que quede mejor acabado.
! [Scroll down to read the English version]
[Eng]
Making the big loop:
As you can go seeing in these three blocks of images. You will make the largest loop, the central loop, consisting of two ribbons, one larger than the other in two tones. Remember to burn a little each end of the ribbon with the tinder to avoid fraying.
Depending on the width of your headband, will be the length of your bow, in my case, for the smaller bow I used a ribbon of 10 centimeters pink.
Assemble the first bow, sew it and adjust it.
Measure the size of the ribbon, I cut a purple ribbon of approximately 18 centimeters and repeated the previous step.
Then I joined the two ribbons together, I sewed them by hand so that they are better fastened, you can use silicone for this step.
Pass a folded ribbon through the center of the bow for a better finish.
💜💜💜💜💜❤️💜💜💜💜💜
Step 3️⃣/ paso 3️⃣
 |  |  |
 |  |  |
 |  |
[Esp]
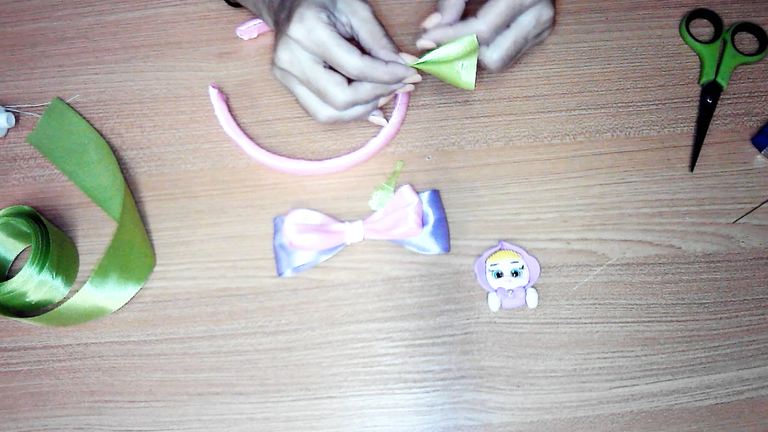
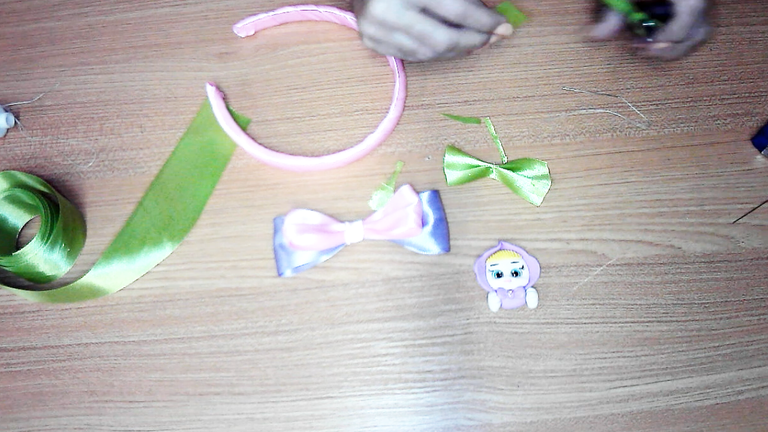
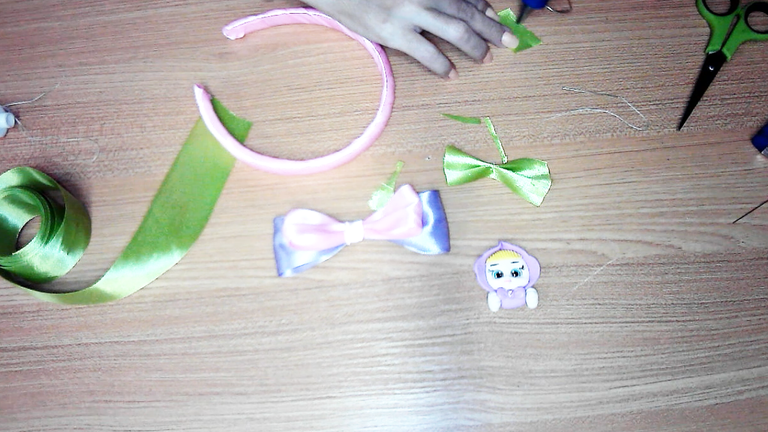
Haciendo los lazos más pequeños:
Recorta un trozo de cinta de aproximadamente 4 Centímetros de largo para elaborar los lazos pequeños, este procedimiento lo repetirás con el resto de las cintas, recuerda quemar los extremos de la cinta con el yesquero.
Dobla en el centro y cose, para ajustar el lazo. con ello ya he armado el primer lazo de color verde.
Repitiendo el mismo paso anterior, se hace el lazo de color fuccia.
Nos resta hacer el último lazo de color morado, con ello tenemos nuestro juego de tres lazos para decorar nuestro cintillo.
! [Scroll down to read the English version]
[Eng]
Making the smaller ribbons:
Cut a piece of ribbon about 4 Centimeters long to make the small bows, you will repeat this procedure with the rest of the ribbons, remember to burn the ends of the ribbon with the tinder.
Fold in the center and sew, to adjust the ribbon. With this I have already assembled the first green ribbon.
Repeating the same step above, make the fuchsia loop.
Now we have the last purple ribbon, with this we have our set of three ribbons to decorate our headband.
💜💜💜💜💜❤️💜💜💜💜💜
Step 4️⃣/ paso 4️⃣
 |  |  |
 |  |

💜💜💜💜💜❤️💜💜💜💜💜
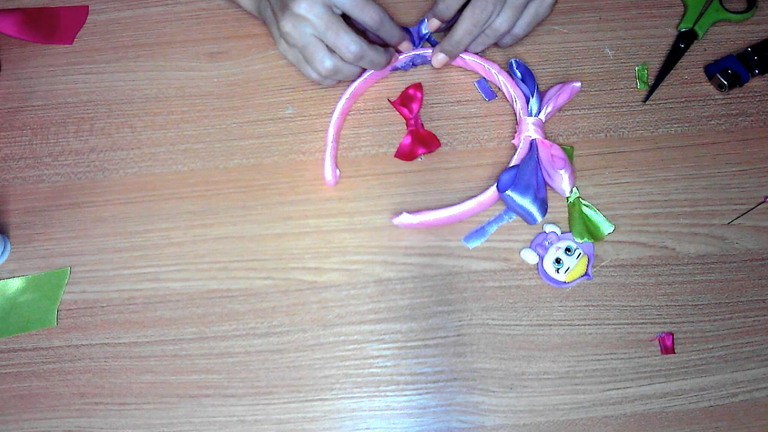
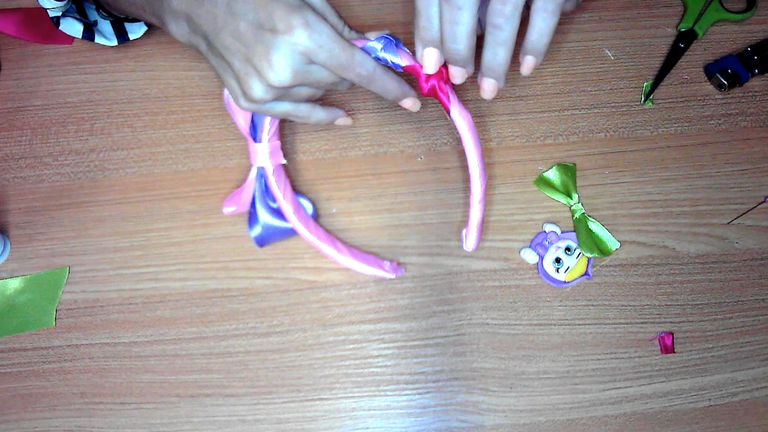
[Esp]
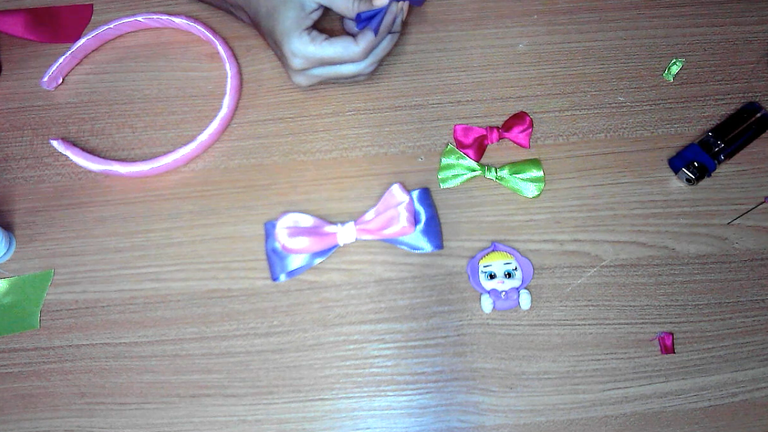
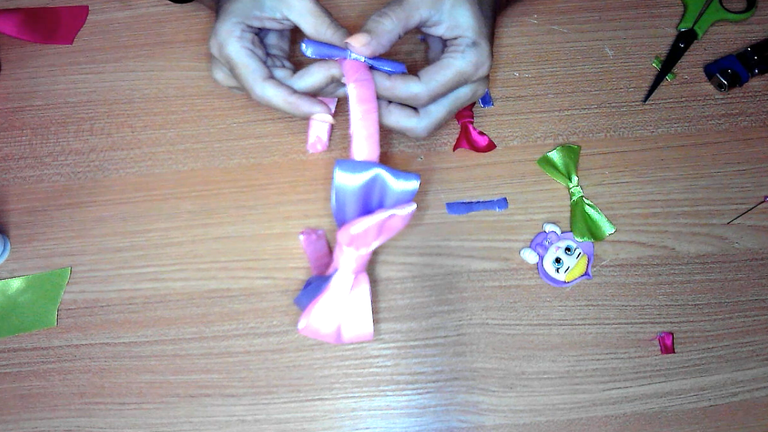
En este paso pegamos el lazo grande al cintillo.
Luego recorta una pequeña cinta, le haces un dobladillo y lo pegas el lazo junto con el cintillo, de esta manera quedará bien sujeto u no se caerá, sabemos que las niñas pueden ser algo inquietas y no queremos se caiga nuestro gran lazo mientras juegan.
! [Scroll down to read the English version]
[Eng]
In this step we glue the big bow to the headband.
Then cut a small ribbon, hem it and glue the bow together with the headband, this way it will be well secured and will not fall off, we know that girls can be a little restless and we do not want our big bow to fall off while they play.
 |  |
💜💜💜💜💜❤️💜💜💜💜💜
 |  |  |
 |  |  |
💜💜💜💜💜❤️💜💜💜💜💜
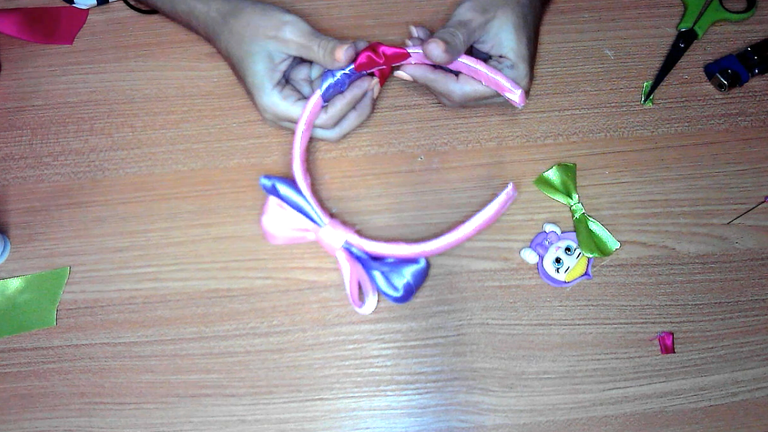
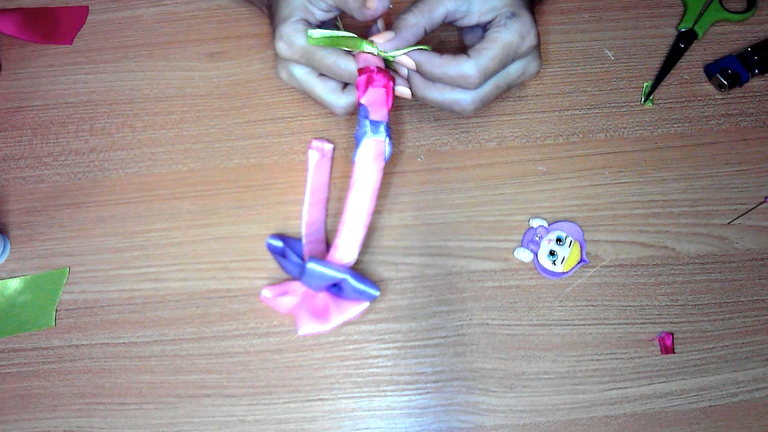
[Esp]
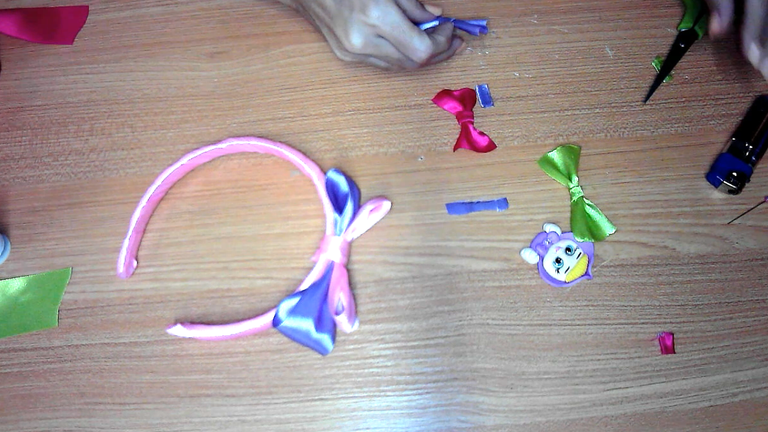
Comenzamos a pegar los lazos más pequeños al cintillo.
Pegamos el morado primero, para mantener la armonía del color. Luego doblamos el sobrante a la parte interna y pegamos.
Repetimos este paso con el lazo fucsia.
Por último pegamos el lazo verde, repetimos los pasos anteriores.
! [Scroll down to read the English version]
[Eng]
We start gluing the smaller loops to the headband.
We glue the purple one first, to keep the color harmony. Then we fold the excess to the inside and glue.
Repeat this step with the fuchsia bow.
Finally we glue the green bow, repeating the previous steps.
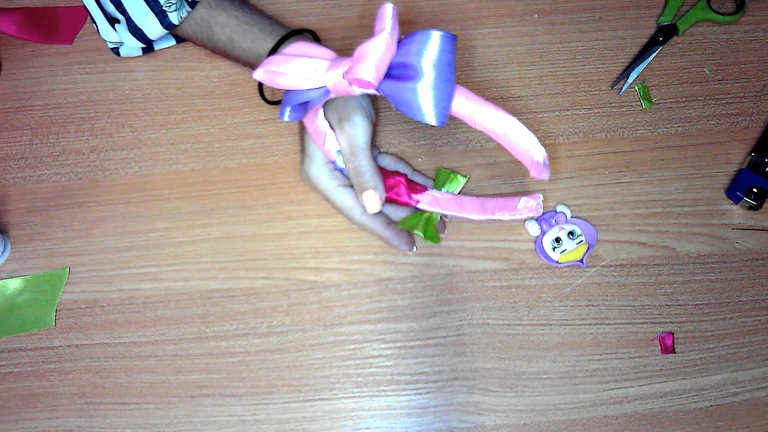
[Esp]
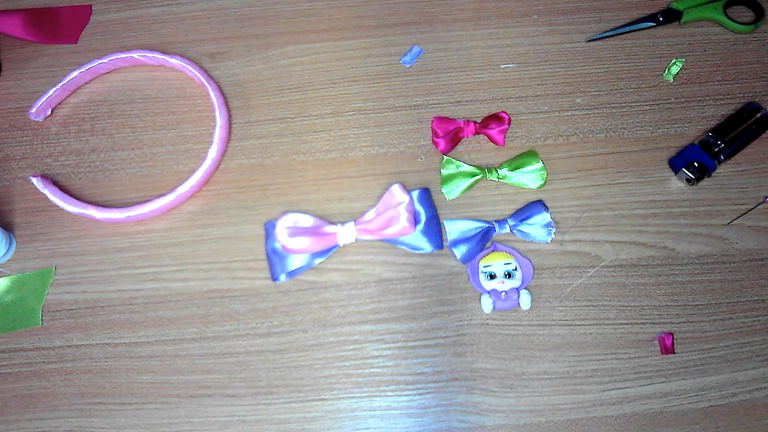
Los lazos queda pegados justo de la forma que ves en la imagen.
! [Scroll down to read the English version]
[Eng]
The ribbons are glued just the way you see in the picture.
💜💜💜💜💜❤️💜💜💜💜💜
Step 5️⃣/ paso 5️⃣
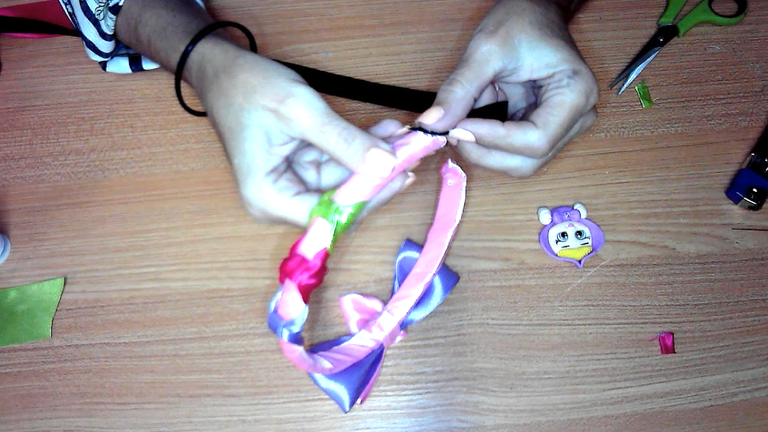
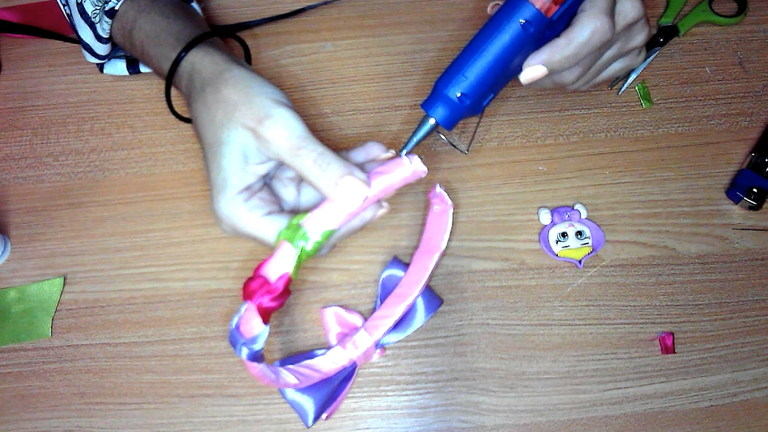 | 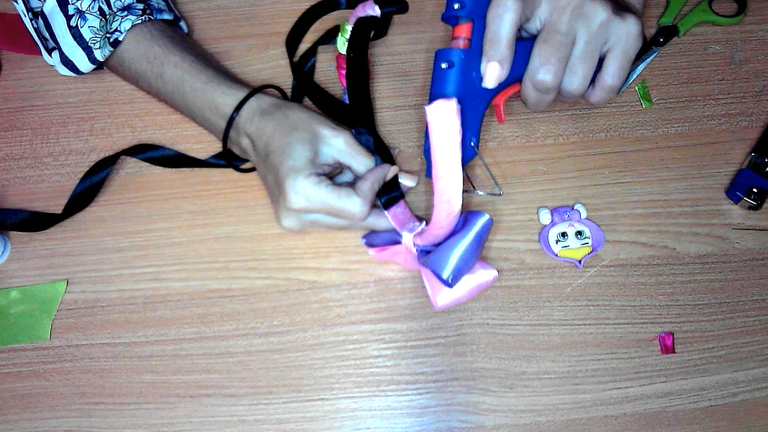 |
 |  |
 |  |
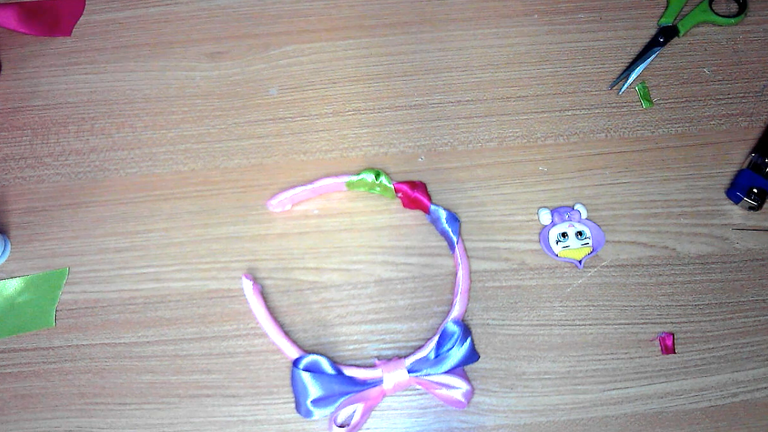
[Esp]
Últimos detalles:
Siempre debemos procurar tener un buen acabado en todo lo que hacemos, es por ello usaremos la cinta negra para cubrir las costuras y doblados, así como imperfecciones.
Esta cinta negra tiene doble función, la primera la dije anteriormente, la segunda es evitar que se ensucie con el cabello y el sudor.
Es necesario pegar la cinta negra a lo largo del cintillo por la parte de adentro y luego las dos partes de afuera.
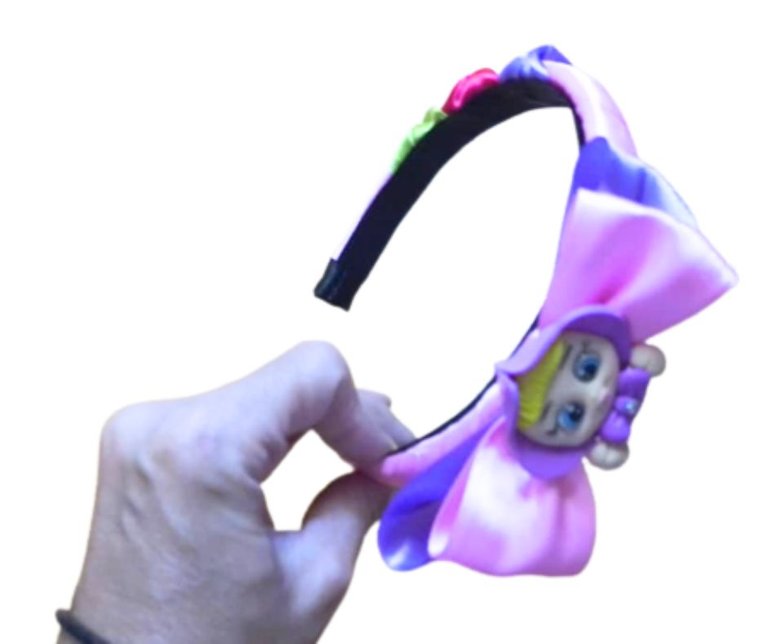
Ahora sí, dejé de último pegar el adorno, esto es para evitar golpearlo durante el proceso de elaboración.
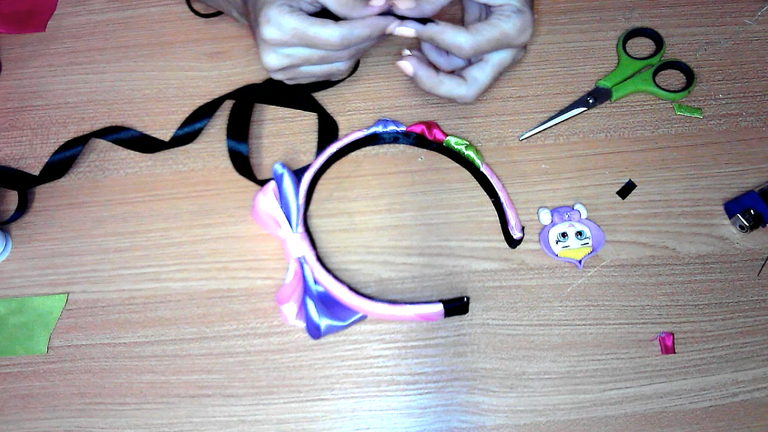
Es el momento de pegar el adorno y disfrutar de tu obra realizada.
Ahora puedes lucirla, obsequiarla o hacerlo un emprendimiento donde puedes general dinero con ello.
Para mí fue un placer mostrarte cómo hacer esta manualidad, te invito a recrearla a tu estilo y con los materiales que dispongas.
Muchas bendiciones para ti, gracias infinitas.
! [Scroll down to read the English version]
[Eng]
Last details:
We should always try to have a good finish in everything we do, that is why we will use the black tape to cover the seams and folds, as well as imperfections.
This black tape has a double function, the first one I mentioned before, the second one is to avoid getting dirty with hair and sweat.
It is necessary to glue the black tape along the headband on the inside and then the two outside parts.
Now I left the last part to glue the ornament, this is to avoid hitting it during the elaboration process.
Now it's time to glue the ornament and enjoy your work.
Now you can show it off, give it as a gift or make it a business venture where you can make money with it.
For me it was a pleasure to show you how to make this craft, I invite you to recreate it in your own style and with the materials you have.
Many blessings to you, thank you infinite.
💜💜💜💜💜❤️💜💜💜💜💜
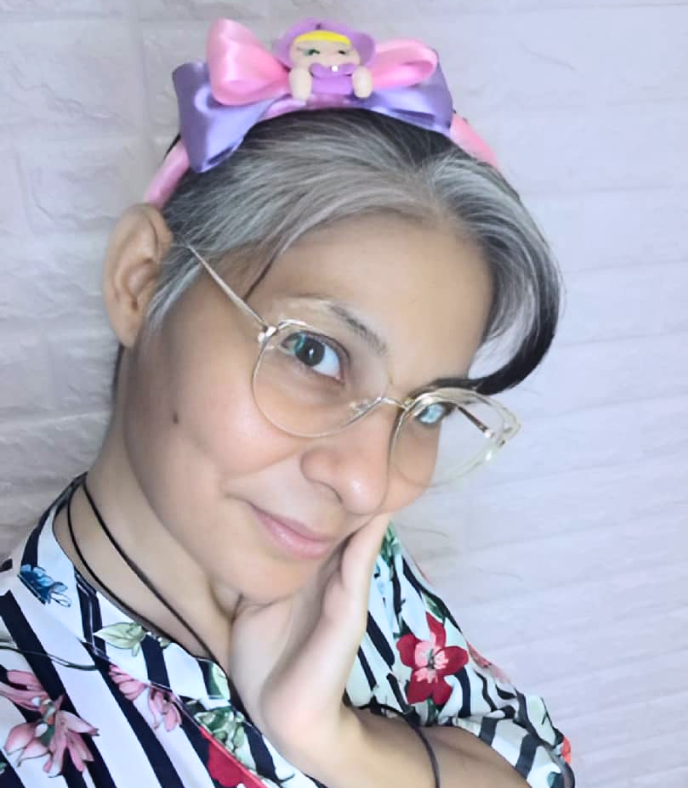
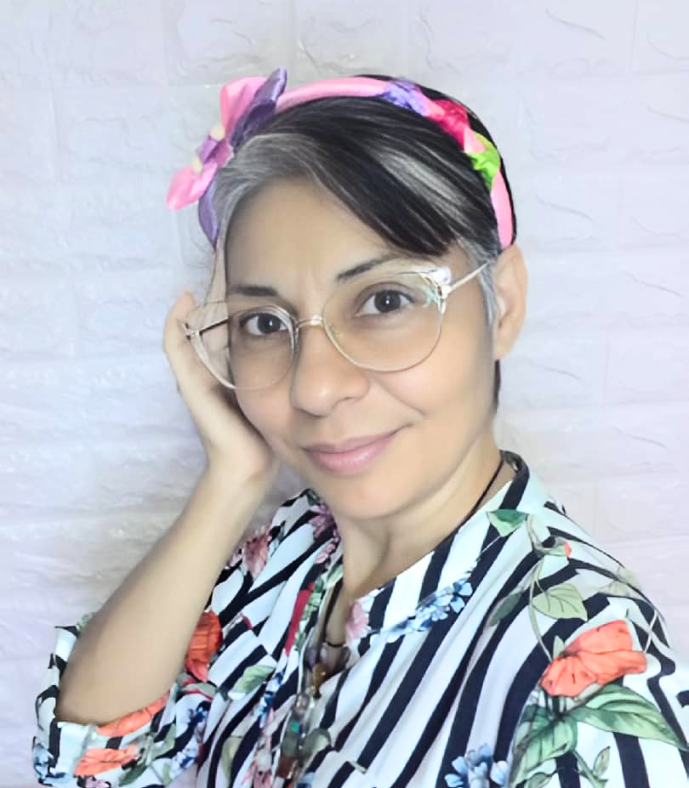
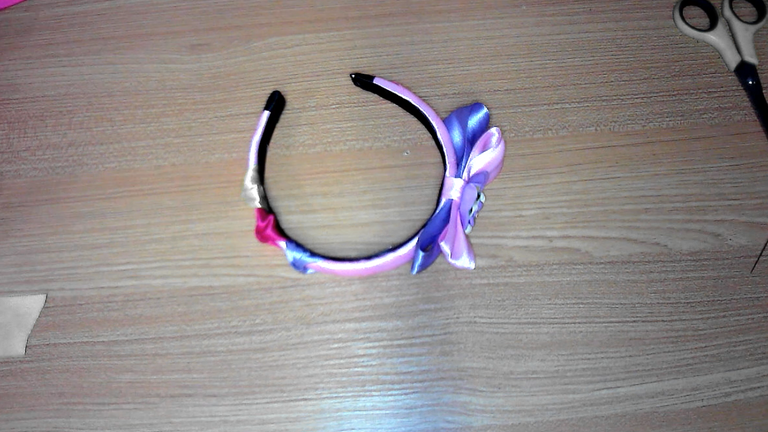
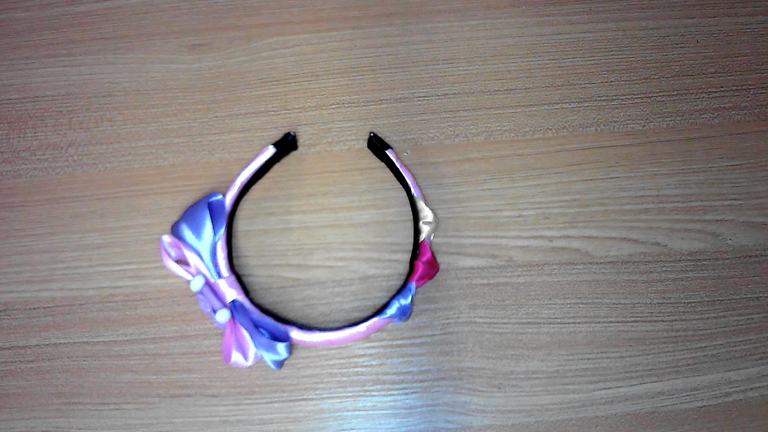
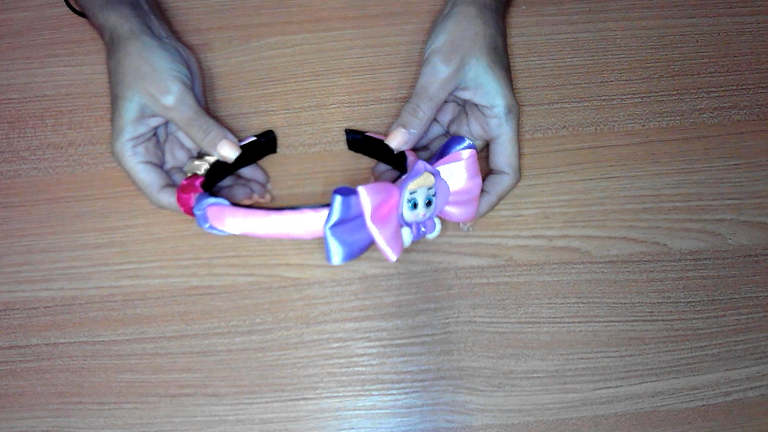
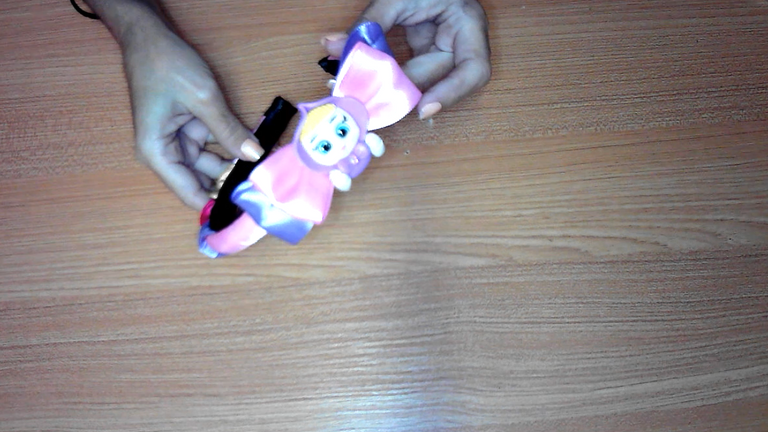
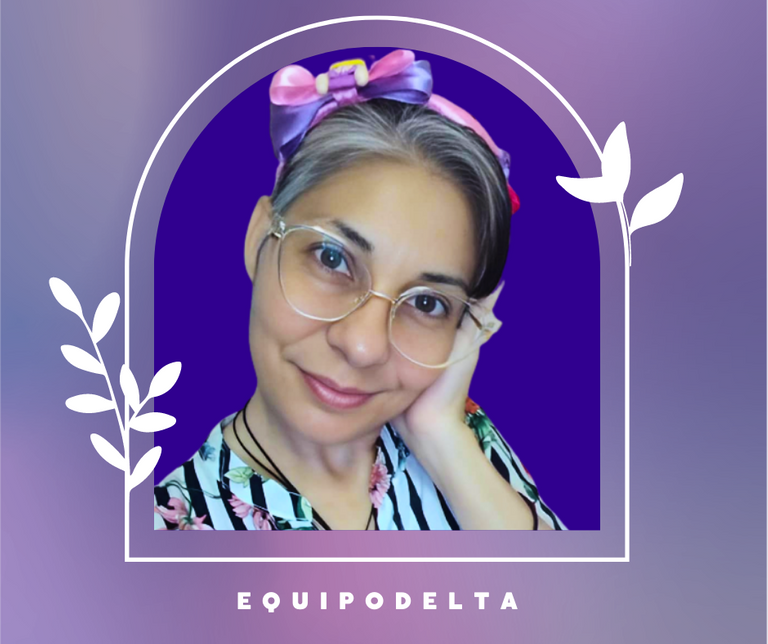
Presentation of the finished project
/ Presentación del proyecto terminado
💜💜💜💜💜❤️💜💜💜💜💜
Credits / Créditos.
💜💜💜💜💜❤️💜💜💜💜💜
💜💜💜
All copyrights reserved / Reservados todos mis derechos
💜💜💜

Vote la-colmena for witness
By @ylich
Hacks, DIY, Crafts, handmade arts Community

![]() 👉
👉 ![]() 👉
👉 ![]() 👉
👉  👉
👉 ![]()